Deb's Kitchen - Farm, Food, Wine & Lifestyle Adventures
  • Facebook
  • Google
  • Twitter
  • Instagram
  • Pinterest
  • Email
Menu
Skip to content
  • Home
  • Blog
  • Events
    • Classes
    • Tours & Adventures
  • Edible Gardening
  • Preserving
  • Recipes
    • Appetizers
    • Soups and Salads
    • Main Dishes
    • Side Dishes
    • Desserts
  • About
    • Whats In Your Pantry
    • Ask Debbi
    • Deb’s Kitchen Botanicals
    • Press
  • Contact

Category Archives: Blog

How to Build a Cheeseboard

11 / 26 / 19

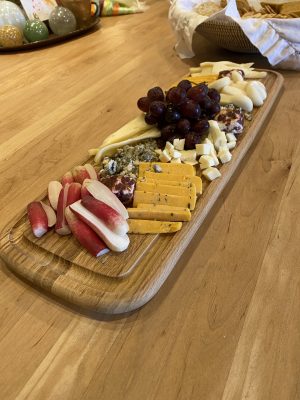
How to Build a Cheese or Charcuterie Board
 

  • Start by choosing ingredients
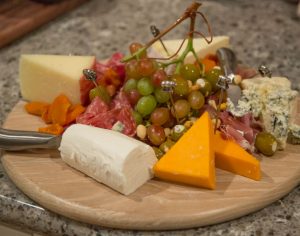
  • Choose cheese first – Use a mixture of cow, goat, sheep milk. Choose a hard cheese (Cave Aged Gruyere, Aged Gouda), a soft cheese (chèvre, brie, burrata) and maybe a crumbly cheese (blue, Parmigiana Reggiano). You want a variety of flavors and choose an odd number of cheese as it is more pleasing to the eye.
  • Serve approximately 2 – 4 oz. of cheese per person. If it needs to be sliced, do so while it’s cold. Let all cheese come to room temperature before serving.
  • Some of my favorite cheese mixes are:
  • Havarti, Aged Gouda, Aged Blue Cheese
  • Sharp Cheddar, Creamy Chèvre, Parmigiana Reggiano
  • Feta, Burrata, Gorgonzola or Fresh Blue Cheese (Pt. Reyes Blue)
  • Camembert or Brie, Drunken Goat (or Wine Infused hard cheese)
  • Bocconcini with herbed olive oil drizzle, Boursin, Manchego
  • Cave Aged Gruyere, Fontina, San Andreas
  • Next choose some charcuterie and pâtés, if serving.
  • Again serve 2-4 oz. per person and slice the meat/sausage while cold and allow to come to room temperature before serving.
  • Some selections might be:
  • Choose a variety of hard salami, soft meat such as prosciutto or Jambon Iberico, some smoked sausage, kielbasa, soppresseta, Serrano ham and a selection of pate and/or rillettes. Pair the flavor of the meat (soft to intensive) to the flavor of the cheese (soft to intensive).
  • Next choose a serving board, plate or platter that will accommodate your above choices. Remember you’re going to be adding more ingredients. You could choose a rectangular serving platter, cutting board, slate tile, pizza wheel or the like.
  • Additions to the meat and cheese might be:
  • A selection of jams or preserves such as fig, peach or other fruit jam, or chutneys and honey.
  • Grainy or stoned mustard, olive spread, bean dips and antipasto spreads such as muffuletta.
  • Next something briny, caper berries, cornichon pickles, pickled vegetables such as a mixed Giardiniera or caponata.
  • Add some salty components, roasted nuts, Marcona almonds or toasted pumpkin seeds.
  • Crackers, bread sticks, toasted baguette slices, pita bread or pretzels.
  • Dried Fruit are great especially for a winter board, apricots, figs, cranberries or raisins.
  • Seasonal fruits and vegetables pair well with most meat and cheese, grapes, fresh apricots, apples, pears, cucumbers, carrots, pea pods any kind of berry, artichoke hearts, marinated mushrooms and roasted red peppers.
  • Herbs and Edible flowers are a nice addition and brighten up the board as well. Make sure that none have been sprayed with pesticides. Use a variety in season, pansies, chive, sage or nasturtium blossoms. Lavender, borage blossoms (taste faintly of cucumber), dill, cornflowers, Johnny jump ups, bee balm and zucchini blossoms.

Tips:

Try serving some of the jams, preserves, mustard, spreads or chutneys in small bowls. Anything that has a brine or is juicy should also go into a bowl such as olives and pickled vegetables. This will also give some height to the board, serve breadsticks in a jar or glass as well.

Serve each cheese and meat with its own cheese fork or utensil and picks for the olives or vegetables, spoons, cheese knives and mini tongs for the meat.

Try arranging the board where it will be served so as not to knock anything off while you are moving it. Make ahead and cover with a tea towel to keep out any pests.

Leave a comment
Share
  • Pin it
  • Share
  • Tweet
  • Share
  • Email

What’s In Your Fall Pantry

10 / 4 / 19


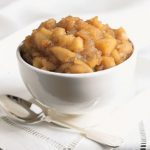
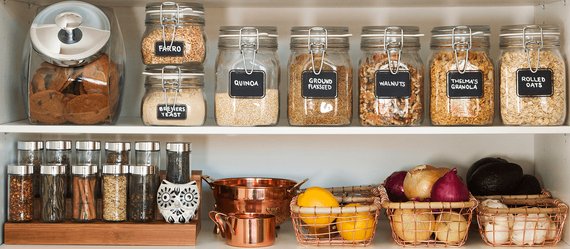
This is but a small list of fall pantry items that I like to keep for fall. With these on hand you can make breakfast, lunch, dinner and dessert without stress. There are even some items to have on hand for those friends who like to drop in for a visit. Throw the artichoke hearts in a food processor, add some spices and a little yogurt, cream cheese or mayo and bake for 20 minutes. Or drain and throw the roasted red peppers into a food processor, add a little leftover bread, walnuts, tomato paste with a little olive oil, salt and Aleppo pepper for a tasty dip for bread or crackers. Add things that your family likes to eat in the fall, for all the upcoming holidays and special events. Here’s a great fresh, homemade applesauce recipes, serve along side pork chops or bake into an applesauce cake for a warm, spiced dessert or breakfast snack. Happy Fall!


Beverages

Cocoa

Tea

Mulled Cider

 Fruit

Apples (do not store with other fruit or vegetables-apples give off ethylene gas which will hasten the ripening of other fruits and vegetables)

Applesauce

Dried fruit

Pears

Pomegranates

Citrus

 Vegetables

Potatoes

Carrots

Onions

Canned

Dried fruit (cranberries, apricots, blueberries etc.)

Canned pumpkin

Canned and dried beans (for soups, stews, chili)

Canned Tomatoes

Tomato sauce

Tomato Paste

Garlic

Onions

Pickles

Roasted Red Peppers, in water

Grains

Oatmeal (rolled oats & steel cut)

Alternative grains

Breadcrumbs

Rice

Soup

 Pasta

Mac & Cheese Pasta

Lasagna noodles

Flour

 Dairy

yogurt

cheese

Condensed milk

Unsalted butter

Variety of cheeses

 Staples

Artichoke Hearts, canned in water

Breadcrumbs

Chicken, Vegetable, Beef Stock

Crackers

Honey

Maple Syrup

Molasses

Sugar, white, brown, dk. Brown

White vinegar (for pickling)

Apple Cider Vinegar

Balsamic Vinegar

Spices

Aleppo Pepper

Sea salt

Baking Spices

Cinnamon sticks

Nuts

Pickling spice

Peppercorns

Yeast

Simple Homemade Applesauce

Save
Print
  • 3 pounds organic apples, Fuji, Gala, Honeycrisp or Jonagold
  • 2/3 cup apple juice, orange juice or water
  • 8 tablespoons sugar, optional
  • 3 teaspoons cinnamon
  • 1/4 teaspoon nutmeg

Core, peel and cut the apples into medium sized pieces. Place all ingredients into a saucepan with lid and simmer over low heat until apples are very tender, about 45 minutes. Put through a food mill to create a soft creamy applesauce or use a potato masher and serve chunky.

Pressure cooker or Instant-pot:

Combine all the ingredients in the container, cover and lock into place. Press manual button and set timer for 4 min. Let the closed pressure cooker rest for about 10 minutes, release any pressure that’s left.

Carefully open lid, angling it away from you to avoid getting burned by the steam. Use a potato masher to crush with a slightly chunky consistency or put through a food mill for a smoother one.


Leave a comment
Share
  • Pin it
  • Share
  • Tweet
  • Share
  • Email

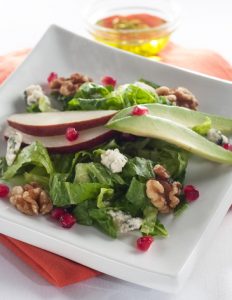
Cranberry-Apple Salad with Walnuts

9 / 26 / 19

Winter Green Salad with Apples, Cranberries & Walnuts With French Vinaigrette

Save
Print

Fresh Autumn-Winter Salad with seasonal fruit, walnuts and feta cheese.

Serves: 4-6

  • Vinaigrette
  • ¼ cup pomegranate vinegar, any vinegar can be
  • 1 tablespoon Dijon mustard
  • 1 small shallot, minced
  • 1 sprig Italian parsley, chopped
  • 1 teaspoon thyme, chopped
  • ¾ cup vegetable, olive or canola oil, approximately
  • salt and pepper, to taste
  • Salad
  • 6 cups mixed greens
  • 2 organic apples*
  • 1 cup toasted walnuts, roughly chopped
  • ⅓ cup crumbled feta cheese
  • ⅓ cup dried cranberries

In a medium bowl make the vinaigrette by whisking together all the ingredients except the oil. While constantly whisking, drizzle in some of the oil, stopping to taste occasionally. Season to taste with salt and pepper.

Can be made in advance and stored in the refrigerator.

Bring to room temperature before serving.

For a creamier dressing add 1 Tb. mayonnaise

Core and chop apples (thin slices or 1 inch chunks). Toss lettuce, apples, walnuts, feta, and cranberries together in a large bowl. Add a little dressing and toss, taste for seasoning and adjust.

*If conventional apples are used, peel first.

Leave a comment
Share
  • Pin it
  • Share
  • Tweet
  • Share
  • Email

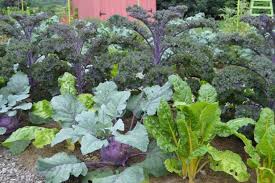
Fall/Winter Vegetable Gardening

9 / 26 / 19

Vegetables to plant in our

So. California gardens now


Beets

Be sure to thin plants to about 3″ apart and harvest when they are small for a sweet flavor. Leaves and stems are edible, steam lightly or add to a salad.
To cook, place in a piece of foil, drizzle with olive oil and salt and pepper. Roast in a 450° oven for about 10-15 min. or until tender. Rub skin off with a towel

 Broccoli/Cauliflower

Buy transplants in the fall and bury the stem up above second row of leaves. Try roasting these vegetables in a 450° oven. Place cut up pieces on a parchment lined baking sheet, toss with a little olive oil, salt and pepper and any other seasoning you may like (red pepper flakes, garlic powder, lemon juice. Roast for 10 -15 minutes or until tender.

Cabbage

Cabbage is in the same family as broccoli and cauliflower. Homemade sauerkraut is the best! Cut out the fore of the cabbage and thinly slice the leaves into shreds. Place in a large bowl, add 1 1/2 Tb. kosher or canning salt and knead or massage the salt into the cabbage until it releases it’s liquid. Pack into a quart jar with a wide mouth and pour all liquid over the cabbage. Make a brine of 1 cup water and 1 Tb. kosher salt, stir to dissolve salt and then pour it all into a quart freezer bag, place this on top on the cabbage and place a piece of cheesecloth over the mouth of the jar, tie down with string or a rubber band and place in a cool, dark place on your counter. The second day, remove bag and press down on the cabbage to see if it will release more moisture. It should ideally cover the cabbage, if it doesn’t add more brine by either adding the ingredients in the freezer bag or make a new brine by stirring together 1 cup water and 1 tea. kosher salt. cover the cabbage and let stand for 3 -10 days. Begin tasting sauerkraut on the 3rd day, when it reaches the flavor you want, place a cap on the jar and store in your refrigerator.

Carrots

Make sure you have nice loose soil so the carrots can grow long and deep. Thin them when they sprout to give them room to grow, add the thinnings to your salad, soup or stew. Slow roast carrots as you would the broccoli or cauliflower. Drizzle with honey after roasting.

Leafy Greens

Lettuces, spinach, chard, mustard and kale all grow very well over the winter but plant at 2 -3 week intervals for a staggered supply of greens instead of harvesting all at once. Many greens can be lightly sautéed or eaten raw.

Onions & Garlic

Plant onions from ‘starts’ rather than from seeds. Pick short day varieties for best harvest. Scallions that are succession planted can be harvested over the winter/spring season.
Plant garlic from bulbs, plant pointed end up and cut off any green that is sprouting from the top.

Peas

Fall & Spring harvested peas are sweet and easy to grow. Plant a variety from English peas or shelling peas to sugar snap peas. Give them a trellis or cage to grown on and harvest daily for a continued harvest.
Peas and pea pods are lovely lightly steamed or even raw.

You can still plant sweet peas this month for spring flowering

Leave a comment
Share
  • Pin it
  • Share
  • Tweet
  • Share
  • Email

Holiday Entertaining

9 / 21 / 199 / 21 / 19

Winter Cooking Demo

Thur. Dec. 5th    

6:30 – 9:30, approximately

$65.00

Sold Out

This class is sold out but if you’d like to get on a wait list, send me a note

Wait List, click here


Charcuterie & Vegetable Platter

Tuscan White Bean Soup

Sun Dried Cranberry Salad with Orange Vinaigrette

Herb-Mustard Crusted Rack of Pork

Mascarpone Mashed Potatoes with Chives

Chocolate Raspberry Linzertorte


The class is in a private home,

Location is N. Seal Beach

Address will be given upon Registration

(562) 243-3926; If you’d like to send a check call for address please

Leave a comment
Share
  • Pin it
  • Share
  • Tweet
  • Share
  • Email

Hands On Fun at Rancho los Alamitos

9 / 11 / 199 / 11 / 19

Food Crafting with Chef Debbi

& Debs Kitchen


Saturday, Oct 12th

10:00 am– 12:30

Adults $75.00

Children* ages 10-14 $35.00

*Children must be accompanied by an adult.


By reservation only

Click below for reservations or call or email

Reserve my spot

562-431-3541 or [email protected]

Reservations close Mon. Oct 7th


Enjoy a fun-filled autumn morning with family at the beautiful

Rancho Los Alamitos Historic Ranch & Gardens.

Learn together to make (& take)

Gifts from the Garden.

For the adults to make and take:

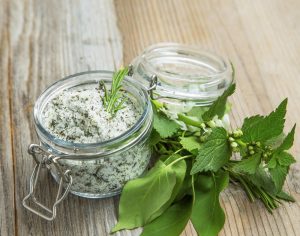
Herbal Salt Tin

Cranberry Vinegar

Meyer Lemon Infused Olive Oil

Peppermint-Lavender Room Spray

Holiday Stovetop Potpourri

For the Kids to make and take:

Peppermint Biscotti in a Jar

Strawberry Mint Mojito Mocktail

A seasonal salad will be served with a

Cranberry-Lemon Vinaigrette prepared by Chef Debbi.

Special thanks to Melissa’s Produce for donating event supplies.

Leave a comment
Share
  • Pin it
  • Share
  • Tweet
  • Share
  • Email

Farm, Food & Wine Tour 2017

9 / 8 / 199 / 8 / 19

Highlights from our annual Farm, Food & Wine Tour from 2017. Thanks everyone for joining us! We’re sold out for this year but save the date for Oct 23-25, 2020.

Leave a comment
Share
  • Pin it
  • Share
  • Tweet
  • Share
  • Email

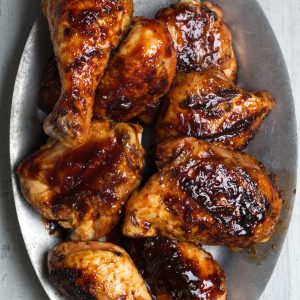
BBQ Grilled Chicken

8 / 9 / 19


BBQ Grilled Chicken

Save
Print
  • 4 pounds organic chicken pieces on the bone with skin
  • 1 tablespoon sea salt or more
  • fresh ground pepper
  • 1 sprig thyme, remove leaves
  • ¼ cup chopped sage
  • 1 lemon zested and juiced

If you can’t find chicken pieces on the bone now is a great time to learn how to cut up a chicken. An organic chicken is likely to be somewhat smaller than a regular supermarket chicken, but it will have more flavor and cook more evenly. Most chicken sold in supermarkets are pumped with saline water to make them look bigger and heavier, but they’ll come out bland even when you brine it.

Brining isn't necessary but I thought I'd include the recipe for you.

I rinse my chicken pieces in some cool water and dry well. Mix together the salt, a little pepper, the herbs, the lemon zest and juice; rub it onto the chicken pieces generously and place the chicken in a shallow pan, cover loosely and brine in the refrigerator for up to 3 days. One day does the job but 3 days will make the skin crispier and the meat more tender.

When ready to grill rub the salt, pepper and herbs off the chicken, you can rinse it off if you like but make sure to dry the chicken well.

Heat a gas or charcoal grill to medium (about 350°F to 450°F), brush the cooking grates clean and rub with a towel dipped in oil.

Grill the chicken pieces, skin side down first, over indirect medium heat, with the lid closed, for about 5-6 minutes. Turn the pieces and grill another 5-6 minutes.

Brush with BBQ sauce, close the lid and cook for about 10 minutes, turn and cook another 10 minutes or until a thermometer reads 165°. The chicken may take longer to cook depending on the size of the piece. When you test the temperature be sure to stay away from the bone for an accurate read. Let the pieces rest off heat for about 5 minutes before serving. The breasts and wing pieces could take 30 to 40 minutes and the whole legs will take 40 to 50 minutes. During the last 5 minutes of grilling time, move the chicken over direct heat and cook until well browned all over, turning once or twice. Serve warm.

Grilling chicken isn’t always the easiest thing to do. Many times the chicken burns long before the inside is done. Here’s a great way to grill that chicken to perfection.


Leave a comment
Share
  • Pin it
  • Share
  • Tweet
  • Share
  • Email

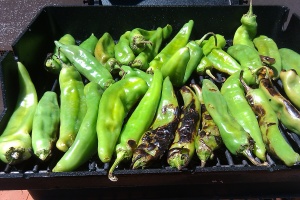
Hatch Chile Time is Here!

8 / 9 / 19

Corn, Cherry Tomato Salad with Hatch Chili Vinaigrette

Save
Print

Serves 4-6

  • 6 ears of corn, husk and silk removed
  • 2 tablespoons melted butter
  • 2 tablespoons freshly squeezed lime juice
  • ½ teaspoon chili powder
  • 1 tablespoon chopped cilantro
  • 2 tablespoons Hatch Chile Vinegar
  • ¼ cup olive oil
  • 1 pint cherry tomatoes, sliced in half
  • ½ cup crumbled queso fresco, (Mexican cheese) or you could use Monterey Jack
  • Sea salt, to taste

Microwave the corn with the husk on for 10 minutes;

Or

Boil the corn for about 3 -4 minutes with a little salt added to the water or grill lightly for a roasted flavor.

Let the corn cool until you can handle them and cut the kernels off the cob into a large bowl.

In a small bowl make the vinaigrette by whisking together butter, lime juice, chili powder, and chopped cilantro. Add the vinegar and whisk in the olive oil until emulsified to taste.

Pour the vinaigrette over the corn and mix to coat.

Add the tomatoes and crumbled queso fresco or grated Jack cheese and stir. Season with salt to taste.

Serve at room temperature. Refrigerate leftovers.

www.debskitchen.com

[email protected]

©Debs Kitchen

Leave a comment
Share
  • Pin it
  • Share
  • Tweet
  • Share
  • Email

A Simple Meal

7 / 9 / 19

Grilled Prime Ribeye Steak

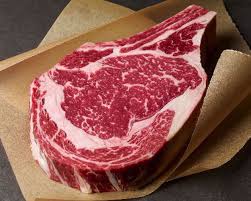
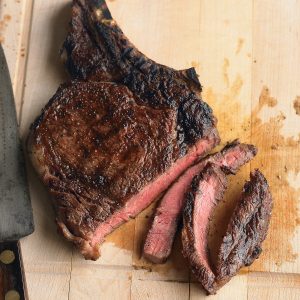
Last week we had friends over and grilled a Prime Ribeye steak that I had cut off a bone in prime rib roast, the steak was about 3 lbs. and 4″ thick. I had just attended a book signing/demo at Melissa’s Produce with Jamie Purviance and his new book, Weber’s Ultimate Grilling and was eager to try some of his fabulous recipes.

When I brought this book home my husband, Frank,  promptly stole it and put it on his side of the table. After several readings he was excited to try some new ideas that he picked up from the book. He decided to set up our Weber with a ‘hot’ side and a ‘cool’ side and he also wanted to get a little smoke on the steak so to get the ‘smoke’ he placed a chunk of hardwood into a pan, filled it with water and let it soak for an hour or so. Then he placed it on the hot side of the bbq, closed the lid and let it heat up to a smoke point.

I made sure the meat was nice and dry, seasoned it with Himalayan Pink Sea Salt and freshly ground pepper. We grilled it on the hot side of the bbq for about 3 minutes, turning it a quarter turn before flipping it over to the other side and repeating the process. Frank then moved the steak to the cool side and covered the Weber with the lid; we let it smoke until the steak was about 125°, removed it and let it rest for about 10 minutes before slicing it. This ensures the meat will be rare to medium rare when we do cut it; the steak will continue to cook after it’s removed from the heat and it needs the off heat time to let the juices settle back into the meat.

We added some grilled corn and a garden fresh salad with just picked tomatoes, cucumbers & mixed greens. The prime rib was tender, juicy with just a little hint of smoke, a success all around. We’ll definitely be using this method in the future for all cuts of meat and poultry. Thanks for the informative and thoughtful book Jamie!

Leave a comment
Share
  • Pin it
  • Share
  • Tweet
  • Share
  • Email

Memorial Day 2019

5 / 23 / 19

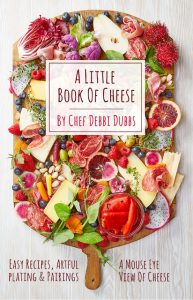
Summer is almost here! Not that you would know that by the weather we’re having. The rain is nice and it makes the garden grow but my other half is craving those warm summer days. Even though here in Southern California we grill all year long, Memorial Day is the official start of grilling season. Whether you grill on gas, charcoal or wood these recipes are easy do ahead recipes for cooking outdoors and picnics. So clean up that grill and set the table because dinner is served! Check out this simple cheese platter, get A Little Book of Cheese to learn all about cheese and how to make a platter!

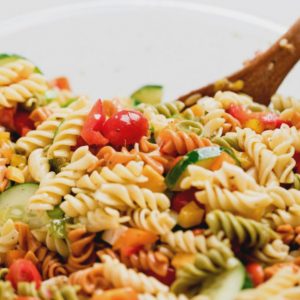
Summer Pasta Salad

Save
Print

Make this light summer pasta salad recipe a day ahead of time so that it can soak up all the bright, tangy dressing.

  • 1/4 cup red wine vinegar
  • 1 teaspoon Dijon mustard
  • 1/2 cup olive oil, approximately
  • Salt and pepper
  • 1 teaspoon garlic powder
  • 2 teaspoon fresh basil, torn
  • 1/2 cup diced cucumber
  • 1 pint cherry tomatoes, halved or quartered
  • 1/2 cup diced red bell pepper
  • 1/3 cup thinly sliced green onions
  • 1/4 cup sliced black olives
  • 1/2 cup crumbled or diced cheese, mozzarella, chedderella, goat cheese or any you prefer
  • 1 ½ cup cooked pasta, cooked and chilled*

For dressing, mix together vinegar, Dijon, salt, pepper, and garlic powder and whisk until it comes together. While continually whisking slowly add olive oil to taste. Set aside.

Mix together remaining ingredients and toss with dressing. Serve cold.

*Boil the pasta according to package directions, drain and rinse with cold water. When pasta has cooled down a bit, shake off excess water (dry with a towel, if necessary) and toss lightly with olive oil to keep from it sticking together. Refrigerate until ready to toss with dressing. Be sure to cool your pasta before adding the dressing otherwise the pasta will soak it all up.


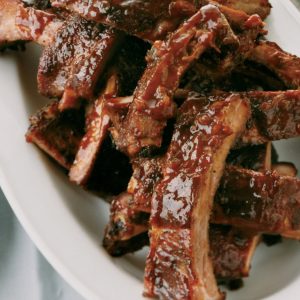
BBQ Baby Back Ribs

Save
Print

This is quick and easy do ahead baby back ribs. By using your Instant Pot or pressure cooker your ribs will come out nice and tender. Finish off on the grill with your favorite BBQ sauce.

  • 1 slab Baby Back Pork Ribs
  • Sea salt and pepper
  • 1 small yellow onion, roughly chopped
  • 1 celery stalk, large diced, roughly chopped
  • 1 carrot, roughly chopped
  • 1 cup beer (or water)
  • 1 cup BBQ sauce or more

Cut the racks of ribs in to sections that will fit in the pressure cooker and rub with salt and pepper.

Place onion, celery, carrot and beer in the pressure cooking pot. If you’re going to make sauce from the juices in the pressure cooker you can place the ribs directly in the liquid or put the ribs on the rack if you’re going to finish the ribs on the grill or under the broiler with another sauce.

Close and lock the lid of the pressure cooker. Select High Pressure and set the timer for 12 minutes. Press start.

When beep sounds, turn off pressure cooker and use a natural pressure release for 10 minutes and then do a quick pressure release to release any remaining pressure. When valve drops carefully remove lid.

Remove the ribs and cool to room temperature. Once cool, refrigerate until ready to serve.

To finish the ribs:

Preheat the BBQ grill to a medium high heat. Coat one side of the ribs with BBQ sauce and grill 3 minutes. Coat the other side with BBQ sauce flip and grill an additional 3 minutes. Slather on additional BBQ sauce and grill each side for an additional 3 minutes.

You could do the same as above by broiling them until just how you like them.

Serve immediately.

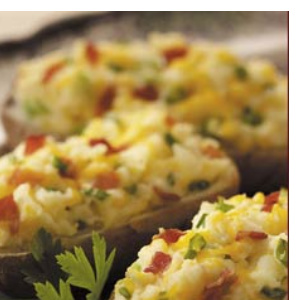
Stuffed Baked Potatoes

Save
Print

The perfect BBQ side dish as they can be made in advance, wrapped in foil and heated on the grill before serving.

  • 2 medium to large russet potatoes, rinsed, dried
  • 1/4 cup sour cream
  • 1/4 cup cheddar cheese, grated
  • 1/4 cup butter, (1/2 stick) room temperature
  • 2 green onions or chives, chopped
  • Sea salt and pepper, to taste
  • 4 tablespoons cooked bacon, crumbled, optional

Preheat oven to 450°. Pierce potatoes with fork. Lightly oil potatoes and

place on oven rack. Bake until cooked through, about 1 hour. If potatoes

starts to crisp and brown up, turn the oven down to 400. Transfer to baking

sheet; cool 5 minutes. Cut potato in half lengthwise. Carefully scoop meat

from the shell and mix with remaining ingredients, mashing lightly as you go. Season and taste before scooping mixture into potato shell.

Can be prepared 1 day ahead, covered and refrigerated. Bring to room temperature before the final cooking stage.

Preheat oven to 400°. Bake potatoes on baking sheet until heated through

and beginning to brown, about 25 minutes. For the grill, wrap each ½ in heavy duty foil, heat on the indirect side of the grill for about 20 minutes or until hot. Garnish with finely minced green onions, chives or crumbled bacon.

Leave a comment
Share
  • Pin it
  • Share
  • Tweet
  • Share
  • Email

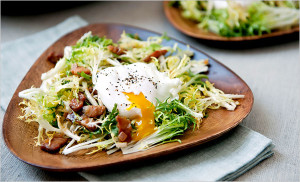
Salad Lyonnaise

5 / 8 / 19

A fresh and light French Salad for spring and summer.

Look for a trick to cook perfect poached eggs!

Salad Lyonnaise

Save
Print
  • 4 cups friseé lettuce (about 4 ounces), torn into large bite-size pieces
  • 2 pieces regular sliced bacon, sliced into strips
  • 1 tablespoon white vinegar
  • 2 large eggs
  • 1 medium shallot, finely minced
  • ¼ cup red wine vinegar
  • ½ teaspoon Dijon mustard
  • ½ cup grapeseed oil, or less to taste
  • Sea Salt and pepper, to taste

Place the friseé into a large mixing bowl.

Cook the bacon over medium heat until crisp, place on paper towels to drain.

Keep the pan and it's rendered fat.

To poach the eggs, fill a saucepan with 4 inches of water and add the white vinegar. Bring the mixture to a gentle simmer. Break each egg into small bowl, With the egg still in the strainer, carefully lower it into the hot water so that the egg is completely submerged. Gently shake and swirl the strainer and use a slotted spoon to shape the egg. When the edges of the egg white start to turn opaque (30 to 60 seconds), use the slotted spoon to carefully release it from the strainer into the water.

Cook the egg, flipping it occasionally with the spoon, until the white is opaque, and firm and the yolk is plump and jiggles slightly to the touch, 3 to 3 1/2 minutes. As the first egg is cooking, repeat steps to cook additional eggs, but keep an eye on which egg went in first. Use a timer to avoid overcooking.

When the egg is done, use the slotted spoon to carefully remove it from the hot water. To serve immediately, place a paper towel under the spoon and shake gently to remove some of the excess water.

Reheat the skillet with the rendered bacon fat over medium heat. Add the shallots and cook, stirring, for 30 seconds. Drain on paper towels briefly and set aside. In a medium bowl add the red wine vinegar and mustard and whisk to combine. Add the bacon pieces and shallots, slowly whisk in the oil and season with sea salt and pepper. Toss the friseé with the dressing and divide the salad on two plates topping with one egg, Don’t forget to season with sea salt and pepper to the top of the egg as well.


Related Posts Plugin for WordPress, Blogger...
Leave a comment
Share
  • Pin it
  • Share
  • Tweet
  • Share
  • Email

Posts navigation

Previous Page 1 2 3 4 5 6 7 … 21 22 Next Page
Deb

Meet Chef Debbi

READ BIO

Join-Us Sign up for our newsletter to receive exclusive tips 'n tricks, and special offers on classes, tours, and more!

Recent Posts

  • New E-Book!
  • From the Pantry
  • Spaghettini at Home
  • Growing Corn
  • Spring IS Coming!

Categories

BookCUT

What's in Your Pantry?

How to stock your pantry to create delicious dishes.

Learn Chef Debbi's pantry essentials and how to substitute ingredients for pantry staples in her basic recipes for quick and easy meals.
BUY BOOK>

FacebookTwitterInstagramGooglepinterest


© 2014, DEB'S KITCHEN
Angie Makes Feminine WordPress Themes