Deb's Kitchen - Farm, Food, Wine & Lifestyle Adventures
  • Facebook
  • Google
  • Twitter
  • Instagram
  • Pinterest
  • Email
Menu
Skip to content
  • Home
  • Blog
  • Events
    • Classes
    • Tours & Adventures
  • Edible Gardening
  • Preserving
  • Recipes
    • Appetizers
    • Soups and Salads
    • Main Dishes
    • Side Dishes
    • Desserts
  • About
    • Whats In Your Pantry
    • Ask Debbi
    • Deb’s Kitchen Botanicals
    • Press
  • Contact

Category Archives: Gardening

Square Foot Gardening

5 / 12 / 16

When I got my first community garden, the city had to run an ad to get people interested in gardening. That was 20 yrs ago, today we have a 3 year waiting list for available plots.

The first thing I did was research, which I love to do, on the best way to grow organic vegetables. The one book I kept going back to was ‘Square Foot Gardening’ by Mel Bartholomew, an engineer who redesigned the backyard garden in order to grow more vegetables in a smaller space. We all learned to garden from books and farmers who grew in large spaces on large farms, we don’t need to use their methods in our little backyards.

Photo:http://simplysquarefootgardening.blogspot.com/

Mel’s design was basic, a 4 x 4’ raised bed with 6” sides (or taller) set upon landscape fabric to prevent weed or grass growth, other materials could also be used, then filled with equal portions of vermiculite, peat moss and compost and then divided into 16 one foot spaces. In each space Mel created a planting guide depending on the recommended space for each seed. Such as corn gets 1’ space to itself and so do tomatoes because they are large plants, smaller veggies can be planted 4, 16 or 18 to a square. We can help you understand that, we’ll be talking about Square Foot Gardening this Sat, May 14 at 10 a.m. at The Plant Stand in Costa Mesa.

You can also check out Mel’s book and website,

http://www.melbartholomew.com/what-is-square-foot-gardening/

Or

http://squarefootgardening.org/square-foot-gardening-method


the plant stand logo

2972-A Century Place
(In the back)
Costa Mesa, Ca

(714) 966-0797

1 Comment
Share
  • Pin it
  • Share
  • Tweet
  • Share
  • Email

Herbal Gardening Tips

4 / 28 / 16

Tips from Chef Debbi’s presentation at The South Coast Plaza Garden Show

From Your Herbal Garden

Companion Planting

General Guideline for Growing Herbs

Most herbs like well-drained soil let slightly dry out except drought tolerant plants (lavender, rosemary) let those dry out a little bit more. Scratch down and inch or two in the pot and if it’s dry water.

Full Sun

Basil – Chives – Dill – Fennel – -Oregano – Rosemary – Tarragon – Thyme – Lemon Verbena

Partial Sun

Chervil – Cilantro (cool season herbs) – Lemon Balm – Mint

Pick before they flower or when they have buds on them

Never harvest more than 1/3 plant, it may not recover

Deadhead some; let others go to seed & flower to attract beneficial insects, butterflies & bees

Annual Herbs such as basil, cilantro, dill, nasturtium that grow and die in a year’s cycle.

Biennial Herbs such as sage and parsley will grow one year and bloom/set seed the next.

Perennial Herbs such as bay (which can be grown in a large container), tarragon, lavender, lemon balm, oregano can grow 3 years or longer.
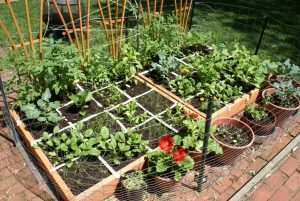
Container Growing

Some larger herbs, rosemary for one, are better grown in the ground. Good for containers, Ca. bay, thyme, lemon balm (mint), parsley

Using a container, choose an appropriate size

Use an organic potting soil

Check for water needs frequently and fertilize with fish emulsion once a month

Herbs for Tea

Bee Balm, Bergamot, German Chamomile a 2’ annual, Mint

Fennel, leaves & seeds, Lemon Balm (mint family), Lemon Verbena, Mint, Rose Hips (seeds cases)

Pick leaves in the morning, when they have the most oil in the leaves/flowers

1 cup tea=1/4 cup of leaves and/or flowers, steep 5 minutes
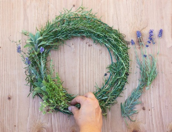
Herbs for Potpourri

Lavender, lemon balm, rose, mint, thyme, calendula, bee balm, sweet woodruff

Cooking with Herbs

Keep herbs in a vase with fresh water; remove any leaves from the bottom of the stem that might be submerged. Do not wash until ready to use. Dry in a rolled up paper towel.

Herbs to Use With Food

Chicken: thyme, rosemary, parsley, tarragon

Pork: sage, rosemary, thyme

Fish: lemon verbena or lemon balm, chives, tarragon, dill, cilantro

Beef: rosemary, thyme, parsley

Lamb: rosemary, thyme, mint

Vegetables: thyme, oregano, lemon verbena

Add dried herbs at the beginning of preparing a dish, crush in the palm of your hand or in a mortar and pestle.

Fresh herbs should be added at the end of cooking.

If using fresh in place of dried use 1 – 2 times as many herbs as the recipe calls for

Herb Butters or Cheese

Drain plain yogurt overnight in cheesecloth

Mix with fresh chopped herbs for a cheese dip

Or

Add chopped herbs to room temperature butter,

Roll up in plastic wrap into a cylinder, freeze and slice off a piece to add to fish, steak or chicken.

Herbal Vinegar

Flavor vinegar for use in cooking and in vinaigrettes.

Bruise one cup of leaves for every 2 cups of white wine or delicate vinegar. Allow to steep for two weeks.

Bath Salts

You can use your favorite essential oil or blend. Mix with Epsom salt, essential oil and a little food dye. Let the mixture dry, place in a jar or muslin bag.

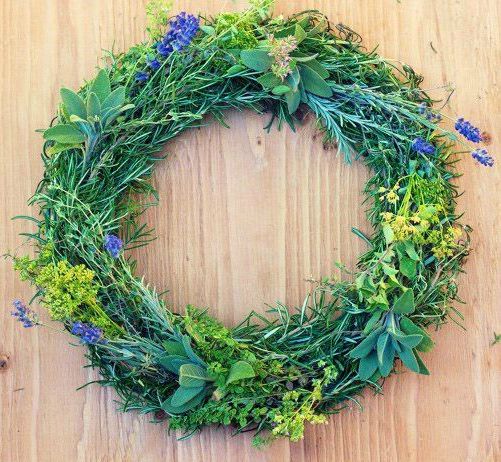
Rosemary Lavender Soap Recipe

3          cups glycerin soap base*

1/4      cup infusion of lavender flowers and rosemary leaves

1 1/2   teaspoon, lavender oil

1/2      teaspoon rosemary oil

1          pulverized dried rosemary

Combine melted base and herbal ingredients, stir until blended, then pour into molds and cool.

* Craft Stores, Michaels


Lip Balm

1 Tb. + 1 tea. Beeswax, chopped

1 Tb. Shea Butter

3 Tb. Almond, Coconut or Olive Oil

15 drops organic essential oil

Melt everything together over low heat except essential oil. Remove from heat and stir in essential oil. Pour into tubes or tins and let cool.


Leave a comment
Share
  • Pin it
  • Share
  • Tweet
  • Share
  • Email

South Coast Plaza Garden Show

3 / 18 / 16

The Southern California Spring Garden Show

The Southern California Spring Garden Show

From Your Herbal Garden Seminars

potted herbs

Thurs. April 28th 2 p.m.

Sun. May 1st 11:30 a.m.

Free

Leave a comment
Share
  • Pin it
  • Share
  • Tweet
  • Share
  • Email

Microgreens & Sprouts

3 / 17 / 163 / 18 / 16


the plant stand logo

Sat. March 19th

10 – 11 a.m. Free

We’ll be exploring the world of

Microgreens & Sprouts

Moved to Sat. March 19th 10 – 11

Microgreen-Earthwise Gardening

Join us for some conversation and a tasty bite!

The Plant Stand
2972-A Century Place
(In the back)
Costa Mesa, Ca

(714) 966-0797

Photo from Earthwise Gardening

Leave a comment
Share
  • Pin it
  • Share
  • Tweet
  • Share
  • Email

Making an Herbal Wreath

9 / 25 / 15

herb wreath, garden therapy

Herb Wreath Directions

Save
Print
  • Supplies Needed:
  • Wreath frame
  • Floral wire
  • Rubber bands
  • Twist ties
  • Herb stems, leaves and flowers

Gather your supplies and choose an herb to become the base of your wreath. I chose rosemary. Using twist ties and/or floral wire begin covering your wreath base. Be patient with this process. It takes longer to do than one would think.

Here are a few different techniques. Select 2-3 different herbs and create small bunches using rubber bands. Then add each bunch to the wreath, using floral wire to secure it. Or, simply poke individual sprigs into the wreath and securing them again with floral wire.

Directions and photo’s edited from Garden Therapy

Herb wreath #1Herb Wreath #2

Leave a comment
Share
  • Pin it
  • Share
  • Tweet
  • Share
  • Email

What to do in your Spring Garden

3 / 31 / 15

April in the Garden

Coming Soon....

Chef Debbi will be presenting a seminar, ‘Al Fresco Mothers Day Brunch’, at the South Coast Plaza Garden Show on Sat. April 25th, 12:30 in the Mitchell Gold & Bob Williams home store. Chef will be talking about spring vegetables, edible flowers and demonstrating a ‘Microgreen and Baby Lettuce Salad with Spring Vegetables, Edible Flowers and a Pomegranate Vinaigrette’ and serving that along with a Seasonal Asparagus and Goat Cheese Tart

The seminar is free but seating is limited.

What To Do in The Spring Garden in So. California

Last Chances:

You can get another crop of spring vegetables, peas (in cooler climates), asparagus, spinach, lettuce and last chance to plant artichokes from seedlings.

Spring Potatoes
Plant from certified organic ‘seeds’.

Spring and Early Summer

Tomatoes
Plant early season, cherry, heirloom & indeterminate varieties
Choose plants that are stocky with a thick stem, about the size of a pencil. Don’t choose plants with flowers or fruit on it, your tomato plant needs to develop strong, deep roots before starting to flower. Remove lower leaves and plant the seedling up to the first two set of leaves. All those furry little things on the side of the stem will turn into roots for you.
Companion plants to tomatoes are carrots, basil, lettuce and parsley.

Beans
All kinds of beans! Bush, pole and dried beans for winter soups and stews.
Companion plants to beans are corn, potatoes, radish and carrots.
Corn
Plant pole beans at the base of the corn and squash around the beans.

Beets, Turnips, Carrots and Radish
All grow underground in loose soil and can be grown in less sunny areas of the garden.

Peppers
All kinds of peppers can go in the ground, planting companions are spinach, basil and tomatoes.

Zucchini
Early squash can be planted but hold off on pumpkins until June if you want them for the fall holidays.

Herbs
Cilantro, Basil, Thyme, Dill, Fennel, Chives and most herbs will do well now.

Watch out for runners and re-seeders such as mint, oregano, borage, lemon verbena and pineapple sage for a few.

Now is a good time to amend your soil for the long summer growing season.

Bon Appetit!

Seminar is sponsored by 1logo 2004
Leave a comment
Share
  • Pin it
  • Share
  • Tweet
  • Share
  • Email

Companion Planting

3 / 21 / 153 / 28 / 15

What is Companion Planting


Two or more plant types as to be beneficial to each other. Companion planting will help with pest control, higher yields, healthier soil and to keep weeds away.

Some flowers (marigolds, nasturtiums) can act as trap crops to attract insects away from vegetable crops. Aromatic herbs (basil, rosemary, lavender, sage) repel many insects away from more susceptible plants (tomatoes)

Umbel flowers, dill, fennel, parsley attract beneficial insects to the garden. The large flower heads provide a place where they beneficials can land and rest while they feed. Be sure to plant extra around the garden and let them go to seed. You may get some volunteers the next year (from all the seed flying around) but you can just dig those up and transplant them, free plants!

companion-plants-2Here are some classic combinations.

3 sisters, corn, beans, squash.  Plant corn and beans first, squash a couple of weeks later; beans feed nitrogen into the soil for both corn and squash, the squash leaves will protect the shallow roots of the corn and beans will grow up the corn stalks.

Basil and tomatoes are a classic example of companion planting. Plant carrots around the base of the tomatoes, they’ll be ready for harvest before the tomato plants go wild. No brassicas (cauliflower, broccoli, brussels sprouts) with tomatoes. No peppers or eggplant near or within the last year in the same spot. They are in the same family and can transfer soil born diseases.

Plant some of the umbel plants near tomatoes for help with hornworm which helps attract parasitic wasps and their larvae will feed on the hornworms.

Beans and potatoes.

While these grow together well don’t plant the beans near the corn as we talked about before. Another row of beans never hurt to have around so plant away from the squash and plant with potatoes. Potato doesn’t like squash, cucumbers or sunflowers.

Lettuce and radish

Both with tolerate less sun than 6 hrs. and the radish will be ready to harvest before lettuce starts getting big, neither one likes the heat.

Sunflowers & Pumpkins

A natural combination that get along well

Leave a comment
Share
  • Pin it
  • Share
  • Tweet
  • Share
  • Email

Why You Should Grow Your Own Organic Potatoes

2 / 17 / 15

The Potato: One of EWG’s Dirty Dozen

russet potatoes

By: Connie Rosemont (Only Organic)

The potato is a great food – calorie-dense and rich in nutrients like vitamin B6, vitamin C, potassium and manganese. It is America’s largest vegetable crop: the average American consumes 29 pounds of French fries a year and 142 pounds of potatoes overall.

Alas, the conventional potato tests positive for 35 different pesticides — more pesticides by weight than any other vegetable, according to EWG’s 2014 Dirty Dozen List. Some of these pesticides remain even after peeling and washing. Pesticides found on potatoes by the U.S. Department of Agriculture Pesticide Data Program include:

— Six known or probable carcinogens

— 12 suspected hormone disruptors

— Seven neurotoxins

— Six developmental or reproductive toxins

— Nine honeybee toxins

More potatoes aren’t organic because of production challenges, says Nate Lewis, Crop and Livestock specialist with the Organic Trade Association.

Farmers who raise conventional potatoes take a “kill-down” step just before harvest, spraying their potato fields with an herbicide that kills all the green leafy vegetation. With the leaves gone, the potato goes into a finishing-off process that thickens the skin, rendering it less susceptible to injury and blemishes.

After farmers harvest conventional potatoes, they warehouse them for up to nine months and ship them, as retailers and processing centers need them. Conventional producers apply post-harvest fungicides and sprouting inhibitors during storage to retard the spread of small blemishes and bad spots from one potato. Not surprisingly, these pesticides applied during storage show up most frequently on residue tests.

Organic standards enforced by the USDA bar organic farmers from using most field and storage pesticides. Organic farmers must work harder to store their potatoes for months without fungicides and sprout inhibitors. As a result, they face significantly larger hurdles than conventional producers in large-scale potato farming.

The hurdles of raising storage crops organically on a large scale might consign organic potatoes always to a small niche market. However, buying organic potatoes means that those farmers who decide to try organic potatoes will find a market for their efforts.


Leave a comment
Share
  • Pin it
  • Share
  • Tweet
  • Share
  • Email

Growing Potatoes in Your Edible Garden

2 / 17 / 152 / 17 / 15

How To Grow Potatoes:
by Dan Lake, Peaceful Valley employee

potato-blossom-470x419

Since I was 12 years old, my family has grown about 4 or 5 different varieties of potatoes in our garden at home every year.  I would love to brag about my tater planting abilities, and with all of that experience one would think that I was a spud-growing expert, but after reflecting on what I knew, I came to a different conclusion: I devoted most of my time to harvesting and eating the delicious potatoes and have a lot to learn about the process of planting them!

Now that I have my own garden, I’ve done some research, talked to a friend who happens to be a farmer, and compiled some good tips below.

Crop Rotation: When planting potatoes from season to season, they should be kept on a 3-year rotating cycle in terms of location in your garden. This means,  3-4 suitable sites are needed if you want to grow potatoes every year, rotating the site where you plant every season.

Soil & Sun: When it comes to soil, potatoes are not picky. They are adaptable and will usually produce a decent crop even when the soil conditions are less than perfect. What they do require, however, is as much sun as possible because of how aggressive their root systems are, so keep that in mind when picking your spot(s) to plant.

Preparing Seed Potatoes: When you have your seed potatoes (potatoes certified for growing), set them somewhere where they will be exposed to light and warmth (between 60 and 70F). This will help them to start sprouting. A day or two before planting, use a clean knife to slice the larger potatoes into smaller pieces that contain at least 1 or 2 “eyes” or buds. Each seed should be approximately 1 1/2-2 inches square, and the smaller potatoes may be planted whole. In the next day or so, your seed potato pieces will form thick calluses over the cuts, to help prevent it from rotting once planted.

Planting Seed Potatoes: After you have trenched a 4’” deep furrow, plant the seed potato pieces or small potatoes 4” deep in the furrow about 12” apart and cover lightly with soil. The soil should be evenly moist, but not wet or soggy. If the soil is water logged when you dig, your seed potatoes will probably rot before they even get started. Depending on how cold it gets in your area, it might be a good idea to put a layer of mulch or straw on top of the furrow for a little extra frost protection. Two to four months later, I hope you will be enjoying some of the most delicious potatoes ever!

You can also reference our Potato Planting & Growing Guide online.

Leave a comment
Share
  • Pin it
  • Share
  • Tweet
  • Share
  • Email

Growing An Herb Garden

12 / 3 / 1412 / 18 / 14

potted herbs
An herb garden doesn’t have to be big so you don’t need much space to grow one. You can even start a potted herb garden on your windowsill! This way you’ll have the aroma of fresh herbs right inside your kitchen or on your patio.

When growing herbs, location is key. Some like it sunny and dry, while others prefer filtered sunlight and moist soil. Regardless, make sure to use well-drained fertile soil. Most herbs will survive in poor sandy soil, but few will tolerate wet clay soil. If your yard is all sun, try planting shade-loving plants east of taller varieties like sunflowers. The tall plants will generate shade for the smaller ones.

Basil, Chives, Dill, Oregano, Rosemary, Tarragon, and Thyme prefer full sun, while Chervil, Lemon Balm, and Mint prefer partial shade in your herb garden.

Water newly planted herbs regularly but once they are established, most are naturally drought resistant. Watering and drainage goes hand in hand. Rather give your herbs too little than too much water. After a good soaking, allow the water to drain away and the soil to dry out slightly. Water again when the top 1″ or so of soil is dry to the touch.

During the growing season fertilize about once a month with a weak solution of fish emulsion. Compost 4 times a year (at the beginning of each season, will also provide the plants with the nutrients they need. Don’t fertilize dormant plants, such as tarragon, some thyme and sometimes chives, just add a little compost around them and wait for them to wake up in the spring.

If you over feed your herbs and make them happy and beautiful they may lack some flavor. Hold back a little water and a little fertilizer to help concentrate the oils in the leaves thus increasing their flavor, aroma and medicinal value.

Pruning is essential to encourage healthy, bushy growth. Remove dead leaves and flowers on a regular basis. Should you frequently use your herbs, pruning may not be necessary, as you would be pruning automatically.

Be sure to let some of your herbs flower and ‘go to seed’, it will encourage good bugs, butterflies and hummingbirds into the garden.


Leave a comment
Share
  • Pin it
  • Share
  • Tweet
  • Share
  • Email

7 Crops to Kick Off Your Spring Garden

12 / 2 / 1412 / 2 / 14

Is your green thumb itching to get gardening again? These cold-loving crops will help you get the growing season started.

spring-crops_800 (1)

Most of us gardeners eagerly anticipate getting our hands in the dirt after a long winter indoors. To get a jump on the spring growing season requires a bit of planning, as well as knowledge of cold-tolerant vegetables and season extension techniques.

A key is to prepare the soil in the fall, so you can begin planting seeds in the spring as soon as the soil has completely thawed and warmed to the seed variety’s minimum temperature for germination. Keep in mind that heavy soils, such as clay, compact when worked while wet, preventing drainage. Allow them to dry out adequately before working them, especially if you didn’t prepare them in the fall.

Growing crops that germinate at cooler soil temperatures also helps you get an early start. (It also helps if they can withstand unexpected late frosts, though isn’t necessary if you use row covers or cold frames when the temperature is expected to dip below freezing.) To determine the soil temperature, stick a soil thermometer about 1 inch deep into the soil and allow it to stabilize. If it’s at the minimum recommended temperature, it’s time to kick off planting your spring garden. Here are seven crops to try.

1. Beets (Beta vulgaris subsp. vulgaris)

Some beet varieties, like heirloom Chioggia, mature in as little as 45 days, making them ideal for an early crop. When soil has warmed to 40 degrees F, plant seeds 3/4 inch deep, 1 inch apart, in rows spaced 12 to 18 inches apart. When seedlings are 4 inches tall, thin them to 4 to 6 inches apart by cutting off the tops. Don’t pull seedlings, as this might uproot nearby plants you want to keep.

Beets tolerate soil low in nutrients but need even water to prevent becoming bitter, so keep soil moist, but not soggy, throughout the growing season.

Begin harvesting beets when they reach 1 inch in diameter, or if you want larger crops, wait until they reach 3 inches in size. Larger beets can become pithy. Beets can withstand light frost, but should be harvested before the heat of summer, which slows sugar production, making them less palatable.

2. Spinach (Spinacia oleracea)

Spinach likes it cold, making it an ideal spring crop. Seeds germinate as low as 40 degrees F, and young seedlings can withstand temperatures down to 15 degrees F if frost occurs. Sow seeds 1/2 inch deep, 1 inch apart, in rows 12 to 18 inches apart. As an alternative, broadcast seeds and thin seedlings to 4 inches apart to prevent bolting. Keep the soil evenly moist throughout the growing season.

You can begin harvesting spinach when leaves are young, or wait for them to grow larger. Harvest outer leaves first. Spinach bolts when the air temperature warms, so plan to harvest plants before bolting occurs. Some spinach varieties, such as Razzle Dazzle, reach maturity in 30 days.

3. Spring Radish (Raphanus sativus)

Radish likes cool, wet weather, and you can be eating most varieties within three weeks of sowing seeds. Plant seeds four to five weeks before the last spring frost. Sow them 1/2 inch deep and 1 inch apart, in rows 12 inches apart. When seedlings emerge, thin plants to 2 inches apart; enjoy the thinned seedlings in salads or other dishes. Keep the soil evenly moist throughout the growing season to prevent cracking.

Harvest radishes when 1/2 to 1½ inches in diameter. Spring radishes come in many colors, shapes and sizes. Champion is round, bright red and matures within 20 days. The tapered April Cross is snowy white, grows up to 16 inches long, and is ready for harvest in 60 days. To avoid pithiness, harvest radishes before the heat of summer. For small gardens, save space by growing radishes between rows of larger, slower growing crops.

4. Pak Choy (Brassica rapa var. chinensis)

When the nighttime air temperature and the soil temperature have risen to 50 degrees F, consistently, sow pak choy seeds 1/4 to 1/2 inch deep and 1 inch apart in rows spaced 20 to 30 inches apart. When seedlings emerge, thin dwarf varieties to 6 inches apart and taller varieties to 12 inches apart. Thinned seedlings can be added to salads. Maintain plenty of water in the soil, without making it soggy, to prevent bolting and poor flavor.

If you harvest pak choy by cutting it about 2 inches above the soil level, a new plant regrows for continued harvest. The variety Autumn Poem can be sown in spring and harvested about 35 days later; many varieties can be harvested in less than 50 days.

5. Loose-leaf lettuce (Lactuca sativa var. crispa)

Lettuce thrives in cool weather and cool soil. When the soil has warmed to 40 degrees F, sow seeds 1/8 inch deep and 1 inch apart in rows 12 inches apart. When seedlings have two to three true leaves, thin plants to 6 inches part. Water regularly, keeping soil moist with 1 inch of water per week. Lettuce has shallow roots and cannot tolerate long dry spells.

You can begin harvesting young leaves when 2 inches long, about four weeks after sowing seeds. Harvest them by picking the outer leaves first so plants continue to produce. For the crispest lettuce, pick leaves during cool, early morning hours. Most varieties take 45 to 60 days to mature.

6. Peas (Pisum sativum)

Whether you grow snap, shell or snow varieties, peas are an excellent spring crop because seeds can be sown at 40 degrees F, and if seedling suffer frost damage, the plant responds by producing more fruit. Sow seeds 1 inch deep, 2 to 4 inches apart, in 18-inch rows. Vining types will need to be trellised. Spring rains should keep soil adequately moist, but if not, water enough to keep the top 1 inch of the soil wet without becoming waterlogged. Do not overwater, especially during flowering. This can reduce pollination and setting of pods.

Harvest peas in the early morning for crispness. The more you harvest the more the plant will produce. Pick snap and shelling varieties when peas round out pods, are light green and before pods yellow and become tough. Harvest snow varieties when pods have reached mature length and are still flat. Two fast-growing varieties to try are Sugar Sprint, a snap pea that is ready to harvest in 58 days, and Sugar Marvel, a shelling pea that grows 18-inch vines.

7. Spring Onions

Onion sets can be planted in the garden up to four weeks before the last spring frost and harvested in less than 60 days, making them ideal for spring. Plant onion sets that are 1/2 to 3/4 inch in diameter 1 inch deep, with the pointy, root side down. Space small varieties 2 inches apart and large varieties 4 inches apart. Keep onions sets evenly watered, and don’t allow them to dry out. A 2-inch layer of mulch can help retain moisture and suppress weeds.

Harvest bulbing onions when half of the tops have fallen over. Allow them to dry for about three to four weeks in a well-ventilated area then cut off the tops and trim the roots before storing them.

About the Author: Diana K. Williams is a certified master gardener and holds a Bachelor of Science in environmental studies and biology. She is presently serving on a committee that is designing community gardens for a local municipality. She writes from her home in Florida.


Leave a comment
Share
  • Pin it
  • Share
  • Tweet
  • Share
  • Email

Bulb Basics

9 / 22 / 1412 / 3 / 14

Jonquils02_aug_2007

As we prepare for fall planting season, we’re going back to bulb school. Follow these
tips from the experts to ensure successful planting and bulb longevity!

  • Always plant bulbs pointed side up.
  • Do not use strong commercial fertilizer or fresh manure when planting.
  • Label bulbs as you plant them to prevent accidentally digging up bulbs out of
    season. Use labels that are large enough so that 2-3″ of the label is below soil level.
  • Let the foliage die back on its own before trimming it back, and take as little foliage
    as possible when harvesting cut flowers. The leaves and foliage are essential for storing
    food for next year.
  • Never store bulbs in the sun or in an airtight container. A dry, shady, well-ventilated
    area will prevent mold and mildew.
  • Do not grow bulbs year after year in the same place. This could invite fire blight, a fungal
    disease that affects both the flowers and the foliage.

Thanks to K. Van Bourgondien & Sons, Inc. and Gardens Alive! for timely bulb help!


Related Posts Plugin for WordPress, Blogger...
Leave a comment
Share
  • Pin it
  • Share
  • Tweet
  • Share
  • Email

Posts navigation

Previous Page 1 2 3
Deb

Meet Chef Debbi

READ BIO

Join-Us Sign up for our newsletter to receive exclusive tips 'n tricks, and special offers on classes, tours, and more!

Recent Posts

  • New E-Book!
  • From the Pantry
  • Spaghettini at Home
  • Growing Corn
  • Spring IS Coming!

Categories

BookCUT

What's in Your Pantry?

How to stock your pantry to create delicious dishes.

Learn Chef Debbi's pantry essentials and how to substitute ingredients for pantry staples in her basic recipes for quick and easy meals.
BUY BOOK>

FacebookTwitterInstagramGooglepinterest


© 2014, DEB'S KITCHEN
Angie Makes Feminine WordPress Themes