Deb's Kitchen - Farm, Food, Wine & Lifestyle Adventures
  • Facebook
  • Google
  • Twitter
  • Instagram
  • Pinterest
  • Email
Menu
Skip to content
  • Home
  • Blog
  • Events
    • Classes
    • Tours & Adventures
  • Edible Gardening
  • Preserving
  • Recipes
    • Appetizers
    • Soups and Salads
    • Main Dishes
    • Side Dishes
    • Desserts
  • About
    • Whats In Your Pantry
    • Ask Debbi
    • Deb’s Kitchen Botanicals
    • Press
  • Contact

Category Archives: General Info (Gardening)

Growing An Herb Garden

12 / 3 / 1412 / 18 / 14

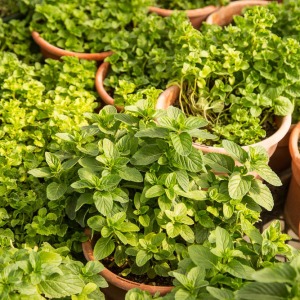
potted herbs
An herb garden doesn’t have to be big so you don’t need much space to grow one. You can even start a potted herb garden on your windowsill! This way you’ll have the aroma of fresh herbs right inside your kitchen or on your patio.

When growing herbs, location is key. Some like it sunny and dry, while others prefer filtered sunlight and moist soil. Regardless, make sure to use well-drained fertile soil. Most herbs will survive in poor sandy soil, but few will tolerate wet clay soil. If your yard is all sun, try planting shade-loving plants east of taller varieties like sunflowers. The tall plants will generate shade for the smaller ones.

Basil, Chives, Dill, Oregano, Rosemary, Tarragon, and Thyme prefer full sun, while Chervil, Lemon Balm, and Mint prefer partial shade in your herb garden.

Water newly planted herbs regularly but once they are established, most are naturally drought resistant. Watering and drainage goes hand in hand. Rather give your herbs too little than too much water. After a good soaking, allow the water to drain away and the soil to dry out slightly. Water again when the top 1″ or so of soil is dry to the touch.

During the growing season fertilize about once a month with a weak solution of fish emulsion. Compost 4 times a year (at the beginning of each season, will also provide the plants with the nutrients they need. Don’t fertilize dormant plants, such as tarragon, some thyme and sometimes chives, just add a little compost around them and wait for them to wake up in the spring.

If you over feed your herbs and make them happy and beautiful they may lack some flavor. Hold back a little water and a little fertilizer to help concentrate the oils in the leaves thus increasing their flavor, aroma and medicinal value.

Pruning is essential to encourage healthy, bushy growth. Remove dead leaves and flowers on a regular basis. Should you frequently use your herbs, pruning may not be necessary, as you would be pruning automatically.

Be sure to let some of your herbs flower and ‘go to seed’, it will encourage good bugs, butterflies and hummingbirds into the garden.


Leave a comment
Share
  • Pin it
  • Share
  • Tweet
  • Share
  • Email

Growing Asparagus

1 / 14 / 1412 / 14 / 14

Coming Soon....
Growing Asparagus

Asparagus is a very hardy, cool-season perennial vegetable, which can produce a spring harvest for 10-20 years! Therefore, it must be planted in a “dedicated bed”. It can be grown from seed, but most often is grown from 1-2 year old “crowns” (rhizomes), which is offered in January.

For 6 crowns, you will need a dedicated area measuring 6’ wide x 6’ long.
For 13 crowns, you will need a dedicated area measuring 6’ wide x 10’ long.

Crowns are dormant and must be planted within one week; you may keep them in the refrigerator, so they don’t break dormancy, until you can plant out.

Asparagus requires rich, fertile, well-drained soil, with a pH of 7.0 – 7.2.
Mix in lots of compost. If gophers are a problem for you, install wire barriers down in the bed before planting. Be sure the bed is as weed-free as possible. They prefer full sun.

Be sure the soil is at least 50 degrees. Dig a trench 12-15” deep (roughly twice the length of the roots), and allow 3-4’ between rows. Mound up soil inside the trench to create a cone 6” tall; cones should be 1’ apart. If you are trenching down into regular soil, prepare the bed by the “double dig” method, adding in compost to assure a well-draining soil.

Over each cone, drape the roots of one asparagus crown. Begin filling the trench with soil, up to just 1” above the crowns, to start. Firm the plants in well. As the plants grow and shoots emerge, begin covering the crowns with more soil until the trench becomes level with the soil surface. Water well each time.

asparagus bed planting


Asparagus takes a few years to fully mature. Do not harvest any shoots the first year; after they emerge, let them leaf out so the foliage can nourish the growing roots and rhizome for future production. Remember that good things come to those who wait!

You can begin to harvest lightly the shoots in the second year for about a month. The fleshy roots still need to develop and support perennial growth in future seasons. Plants that are harvested too much, too soon will become spindly and weak, and perhaps not recover. To harvest, simply cut or snap the spears 1-2” below the soil and at least 2” above the crown.

Subsequent harvests generally last for 8-12 weeks. Be sure to harvest daily during the season; either use or refrigerate immediately in a plastic bag. 6-8” is the optimum size. Don’t leave them to become tall and woody.

If you want blanched asparagus, which is a gourmet treat, mound soil around them (or otherwise exclude light from them so they do not form chlorophyll.)

At the end of the harvest, let the spears leaf out and become ferny. It can make a nice tall border. When the foliage yellows, cut it down to 2” stubs and add a 4-6” mulch of compost or leaves, which will help control weeds and feed the soil with organic matter and nutrients. If you live in an area with lots of frost, you can help protect your plants (which are hardy down to zone 4) by adding a thick layer of compost and straw to the bed.

Next Spring, be sure to weed the bed thoroughly, but pull the weeds instead of hoeing them to prevent damaging the plants, which are spreading out underground. The 6 or 13 plants you’ve planted will eventually fill out the entire bed, and you will enjoy this fantastic veggie for many, many years!

Written by Jo Ann Trigo of Two Dog Nursery. Jo Ann and Alex have many other growing guides on their site under Helpful Guides, visit them soon.

Related Posts Plugin for WordPress, Blogger...
Leave a comment
Share
  • Pin it
  • Share
  • Tweet
  • Share
  • Email

Posts navigation

Previous Page 1 2
Deb

Meet Chef Debbi

READ BIO

Join-Us Sign up for our newsletter to receive exclusive tips 'n tricks, and special offers on classes, tours, and more!

Recent Posts

  • New E-Book!
  • From the Pantry
  • Spaghettini at Home
  • Growing Corn
  • Spring IS Coming!

Categories

BookCUT

What's in Your Pantry?

How to stock your pantry to create delicious dishes.

Learn Chef Debbi's pantry essentials and how to substitute ingredients for pantry staples in her basic recipes for quick and easy meals.
BUY BOOK>

FacebookTwitterInstagramGooglepinterest


© 2014, DEB'S KITCHEN
Angie Makes Feminine WordPress Themes