Deb's Kitchen - Farm, Food, Wine & Lifestyle Adventures
  • Facebook
  • Google
  • Twitter
  • Instagram
  • Pinterest
  • Email
Menu
Skip to content
  • Home
  • Blog
  • Events
    • Classes
    • Tours & Adventures
  • Edible Gardening
  • Preserving
  • Recipes
    • Appetizers
    • Soups and Salads
    • Main Dishes
    • Side Dishes
    • Desserts
  • About
    • Whats In Your Pantry
    • Ask Debbi
    • Deb’s Kitchen Botanicals
    • Press
  • Contact

Category Archives: Herbs

Summer Recipes with Herbs

8 / 4 / 20

Try these recipes using fresh herbs from your garden! Don’t have an herbs garden? I can teach you, more to come next week!
 

French Herbed Omelet

Save
Print

A classic French Herb Omelet. If you don’t have all the herbs, use what you have or whatever combination pleases you.

  • 3 large eggs
  • Sea salt and fresh ground pepper
  • 2 teaspoons finely chopped Italian parsley, chives, watercress, plus more to garnish
  • 1½ tablespoons unsalted butter

Whisk eggs in a bowl until the whites are completely mixed in. Add some sea salt and fresh ground pepper. Stir in the herbs.

In a small nonstick skillet (8”), melt the butter over medium heat and immediately add the eggs. Stir the eggs with a heatproof rubber spatula and slightly move the skillet around while stirring. Bring the sides over the middle so the edges don’t overcook and get crispy.

Roll the omelet from one side to the middle and while holding the pan at an angle, slide the bottom part of the omelet onto a plate and fold the rest of the omelet on top on that. You’ll have a nice little 3 fold omelet. Garnish with a few more finely chopped chives and serve.

Tomato and Goat Cheese Tart

Save
Print
  • Tart Dough
  • Makes 1-9” crust or 6 mini crusts
  • 1 ½ cups flour
  • pinch of salt, I use sea salt
  • 10 tablespoons butter cold unsalted
  • 2-4 tablespoons cold water
  • Tart
  • 6 ounces goat cheese
  • 2 tablespoons heavy cream
  • 1 tablespoon snipped fresh chives
  • 1 tablespoon minced basil
  • 3 large heirloom tomatoes or a large handful of cherry tomatoes

Combine the flour and salt in a food processor and pulse several times. Add butter and pulse until the mixture begins to look like little peas.

Transfer the mixture to a lightly floured surface and gather it into a ball with your hands. Gently flatten the ball into a smooth disk about 1-1/2 inches thick and wrap it in plastic. Refrigerate until firm enough to roll, at least 1 hour.

Heat the oven to 350°.

Roll the dough on a lightly floured surface into a round, about 1/8 inch thick. Roll the dough over your rolling pin and lift it over the tart pan. Unroll it loosely over the tart pan and gently press the dough into the pan without stretching it. Fold a bit of the excess dough inward to form a lip. Roll the rolling pin back and forth over the pan.

Dock the bottom of the dough by pricking with fork tines. Butter the dull side of a piece of foil and place butter side down over the dough. Fill with pie weights or dried beans.

Bake for 25 minutes until golden brown, rotate the tart pan halfway through the baking time.

Remove the crust from the oven, remove the foil and let the crust cool completely.

Preheat oven to 425°.

Mix goat cheese with just enough cream to make it spreadable. Mix in herbs and spread over the bottom of the cooled pie crust. Top with sliced tomatoes and bake until the tarts begin to bubble, and the crusts are golden brown, about 45-50 minutes. If the edges of the crust are getting too brown, cover with pieces of foil. Let cool on a rack for 15 minutes before serving.

*Can also be made into individual tart pans makes 6.

Filet of Sole with Fresh Herbs in Butter Sauce (Beurre Blanc)

Save
Print

Serves 4

  • 3 pounds sole or other white fish
  • Sea salt and fresh ground pepper
  • Old Bay seasoning, optional
  • 6 tablespoons Wondra flour approximately, white flour will do
  • Olive oil, or sunflower, safflower or peanut
  • Lemon wedges, for serving, optional
  • Beurre Blanc
  • 1/2 cup dry white wine
  • ¼ cup white wine vinegar
  • ½ tablespoon shallot (finely chopped)
  • ½ pound unsalted butter (cold)
  • Sea salt
  • ½ tablespoon finely chopped parsley
  • 1 teaspoon minced chives
  • 1 teaspoon minced thyme

Heat oven to 200°.

Dry the fish with paper towels, season lightly with salt, pepper and Old Bay if using. Dredge lightly with Wondra flour.

Add enough oil to coat the bottom of the pan and brown on both sides. Remove to an oven proof plate, place in the oven while you make the sauce.

Sauce:

Cut the butter into medium (1/2-inch) cubes and return the butter cubes to the refrigerator to keep them cold, which is very important.

Heat the wine, vinegar, and shallots in a saucepan until the liquid boils, then lower the heat a bit and continue simmering until the liquid has reduced down to about 2 tablespoons.

Once the wine-vinegar mixture has reduced to 2 tablespoons, reduce the heat to low, take the cubes of butter out of the fridge and start adding the cubes, one or two at a time, to the reduction, while you whisk rapidly with a whisk.

As the butter melts and incorporates, add more butter and keep whisking. Continue until you only have 2 to 3 cubes remaining. Remove from heat while whisking in the last few cubes and whisk for a moment or two more. The finished sauce should be thick and smooth.

Season to taste with sea salt, add herbs and serve over fish with lemon wedges, if using.

Focaccia with Fresh Herbs

Save
Print
  • 1 1/8 teaspoons active dry yeast
  • 1 cup warm water, not hot
  • Pinch of sugar
  • 2 cups all-purpose flour
  • 1 teaspoons sea salt
  • 2 tablespoons fresh herbs, thyme, sage, basil, rosemary-your choice
  • 2 tablespoons olive oil

Add yeast to the warm water then stir in sugar with a wooden spoon. Let stand until foamy.

Add flour, salt and herbs and stir well. Add the warm water and mix until the flour is well incorporated. Cover the bowl with plastic wrap and let rise for 2 hours or refrigerate for at least 7 hours and up to 24 hours.

Lightly coat one 9” pan with olive oil or butter then line the pan with parchment paper. Pour one tablespoon olive oil into the center of the pan. Roll the dough into a tight ball and place in the middle of the pan. Cover with plastic wrap and let rise another 2 hours. The dough should fill most of the pan when properly risen.

Preheat oven to 450°. Drizzle a little olive oil over the dough. Using your fingers press dimples all around the dough. Sprinkle with herbs and salt.

Place the pan into the oven and turn the temperature down to 425°. Bake for 30 minutes or until golden. Remove to a cooling rack.

Leave a comment
Share
  • Pin it
  • Share
  • Tweet
  • Share
  • Email

Mothers Day Menu

5 / 8 / 20

Here’s a special Mother’s Day menu that I love. It’s a throw \back from the 70’s when Veal Oscar was on every fine dining menu. I love it still but with a thick filet mignon. It may seem like a lot of work (but mom’s worth it, right?). It’s not difficult but it will take some organization. Be sure to read through the recipe before you begin and make sure that you have all the ingredients.

A couple of tricks for you begin with what you can do ahead of time. You can ‘poach’ the potatoes the day before then let come to room temperature before roasting. Brown the steaks ahead of time and refrigerate, let come to room temperature also before placing into the oven. If you brown the steaks at the last minute, put the potatoes on the sheet tray and begin roasting, when the steaks are browned place alongside the potatoes in the oven to finish at the same time.

Make the strawberry sauce ahead of time and keep refrigerated. You can even make the whipped cream ahead of time as well. It will hold for a long time.

And last but definitely not least is the Bearnaise Sauce, I’ll forgive you if you decide to use the package mix but it’s really a sad imitation of a real Bearnaise sauce. Try making it on your own, you can even make it an hour ahead of time. Again, it’s important to read through the entire recipe before you start. Be adventurous! Happy Mother’s Day!

Stonyriver Steakhouse

Menu

Filet Oscar

Oven Roasted Baby Potatoes

Strawberry Shortcake

Filet Oscar

Save
Print
  • 2 (2-inch-thick) filets mignons
  • 2 tablespoons olive oil
  • ½ lb. thin fresh asparagus
  • 6 ounces fresh crab meat, room temperature

Preheat the oven to 400°.

Bring steaks to room temperature for about 30 minutes.

Heat a large skillet.

Dry the filets with a paper towel.

Brush the filets lightly all over with the oil. Season both side wells with sea salt and pepper.

When the pan is hot, add the steaks and sear evenly on all sides for about 2 minutes per side or until well browned. If the steaks won’t release from the pan, wait another minute or so and it will release when browned.

Arrange the steaks on a parchment lined baking sheet and place into the oven and cook until 120°, about 10 minutes. Remove from oven and let rest for 5 minutes.

Asparagus and Crab

While the steaks are cooking you can lightly steam the asparagus or cook it in the still hot pan that you cooked the steaks in.

Cut the stems from the asparagus so the spears are all the same length. Lightly toss with a little olive oil and season with salt and pepper. Cook until you can pierce with a knife, about 5 minutes. Let rest until you’re ready to assemble the dish.

Warm the crab in a steamer basket over simmering water for about 5 minutes.

Make the bearnaise sauce. I’ll let you cheat here and use the package sauce from Knorr. If you can’t find bearnaise sauce use the hollandaise sauce and add with a little fresh chopped tarragon.

If you want to make the sauce yourself the recipe follows.

Assembly:

Place the steaks on two plates, top with asparagus spears, then add the crab and drizzle with sauce.

Blender Bearnaise Sauce

Save
Print
  • 2 tablespoons Champagne or white wine vinegar
  • 2 tablespoons good white wine
  • 1 tablespoon minced shallot
  • 2 tablespoons chopped fresh tarragon leaves, divided
  • Sea salt and fresh ground pepper
  • 3 large egg yolks
  • ¾ lb. unsalted butter, melted

Yield 1 cup

In a small saucepan, add vinegar, wine, shallots and 1 TB. tarragon leaves with a little sea salt and pepper. Bring to a boil and simmer over medium heat until liquid is reduced to about a tablespoon. Cool slightly.

Transfer the cooled mixture with the egg yolks into a blender. Blend 30 seconds.

With the blender on, slowly pour the hot butter through the opening in the lid. Add the remaining tablespoon of tarragon leaves and blend for only a second.

If the sauce is too thick, add a tablespoon of white wine to thin.

Note: To make the sauce in advance, prepare an hour before serving and allow it

to sit in the blender. Before serving, add 1 tablespoon of the hottest tap water

and blend for a few seconds.

Adapted from Ina Garten

Oven Roasted Baby Potatoes

Save
Print
  • 1 lb. baby yellow (or red) potatoes
  • 1 tablespoon olive oil
  • Sea salt and fresh ground pepper

Serves 2

Preheat oven to 400°. Line a small baking sheet with a piece of parchment paper.

Cut potatoes in half unless really tiny.

Place them in a large pot covered with cool water. Bring potatoes to a boil, add a heaping tablespoon of salt and cook for 7-9 minutes or until you can pierce them with a knife, they won’t be fully cooked. Drain and arrange on baking sheet. Toss with olive oil, sea salt and pepper and cook for about 20 minutes or until lightly browned.

Strawberry Shortcake

Save
Print
  • 2 cups strawberries (hulled and sliced)
  • 2 tablespoons sugar
  • 1 tablespoon Grand Marnier
  • 1 tablespoon minced mint leaves, optional
  • 1 ½ tablespoons powdered sugar
  • 1 teaspoon vanilla
  • 1 frozen pound cake (thawed)
  • ½ cup heavy cream

Mash half of the strawberries in a large bowl. Add the sliced strawberries, sugar, Grand Marnier and mint and chill.

Beat the heavy cream into soft peaks, add the vanilla and sprinkle in the powdered sugar while mixing just a little more until you have stiff peaks but don't over beat it. If you over beat it (where is looks separated) you need to start over.

Slice the pound cake and place on plates, top with strawberries and whipped cream.


Leave a comment
Share
  • Pin it
  • Share
  • Tweet
  • Share
  • Email

Fall/Winter Vegetable Gardening

9 / 26 / 19

Vegetables to plant in our

So. California gardens now


Beets

Be sure to thin plants to about 3″ apart and harvest when they are small for a sweet flavor. Leaves and stems are edible, steam lightly or add to a salad.
To cook, place in a piece of foil, drizzle with olive oil and salt and pepper. Roast in a 450° oven for about 10-15 min. or until tender. Rub skin off with a towel

 Broccoli/Cauliflower

Buy transplants in the fall and bury the stem up above second row of leaves. Try roasting these vegetables in a 450° oven. Place cut up pieces on a parchment lined baking sheet, toss with a little olive oil, salt and pepper and any other seasoning you may like (red pepper flakes, garlic powder, lemon juice. Roast for 10 -15 minutes or until tender.

Cabbage

Cabbage is in the same family as broccoli and cauliflower. Homemade sauerkraut is the best! Cut out the fore of the cabbage and thinly slice the leaves into shreds. Place in a large bowl, add 1 1/2 Tb. kosher or canning salt and knead or massage the salt into the cabbage until it releases it’s liquid. Pack into a quart jar with a wide mouth and pour all liquid over the cabbage. Make a brine of 1 cup water and 1 Tb. kosher salt, stir to dissolve salt and then pour it all into a quart freezer bag, place this on top on the cabbage and place a piece of cheesecloth over the mouth of the jar, tie down with string or a rubber band and place in a cool, dark place on your counter. The second day, remove bag and press down on the cabbage to see if it will release more moisture. It should ideally cover the cabbage, if it doesn’t add more brine by either adding the ingredients in the freezer bag or make a new brine by stirring together 1 cup water and 1 tea. kosher salt. cover the cabbage and let stand for 3 -10 days. Begin tasting sauerkraut on the 3rd day, when it reaches the flavor you want, place a cap on the jar and store in your refrigerator.

Carrots

Make sure you have nice loose soil so the carrots can grow long and deep. Thin them when they sprout to give them room to grow, add the thinnings to your salad, soup or stew. Slow roast carrots as you would the broccoli or cauliflower. Drizzle with honey after roasting.

Leafy Greens

Lettuces, spinach, chard, mustard and kale all grow very well over the winter but plant at 2 -3 week intervals for a staggered supply of greens instead of harvesting all at once. Many greens can be lightly sautéed or eaten raw.

Onions & Garlic

Plant onions from ‘starts’ rather than from seeds. Pick short day varieties for best harvest. Scallions that are succession planted can be harvested over the winter/spring season.
Plant garlic from bulbs, plant pointed end up and cut off any green that is sprouting from the top.

Peas

Fall & Spring harvested peas are sweet and easy to grow. Plant a variety from English peas or shelling peas to sugar snap peas. Give them a trellis or cage to grown on and harvest daily for a continued harvest.
Peas and pea pods are lovely lightly steamed or even raw.

You can still plant sweet peas this month for spring flowering

Leave a comment
Share
  • Pin it
  • Share
  • Tweet
  • Share
  • Email

Herb Roasted Turkey

11 / 16 / 18

From my book, What’s In Your Pantry. Buy the book here


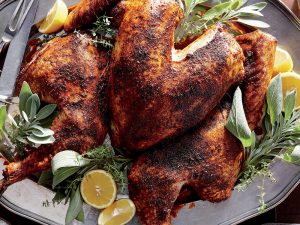
Herb Roasted Turkey

Save
Print

I no longer stuff my turkey; it takes too long to cook the stuffing to 165°, the recommended temperature to kill any bacteria; by that time the turkey itself is overcooked. I can also make the dressing the day before, bake it and heat it while I’m making the gravy.
Try serving with Duchess Potatoes instead of the traditional mashed.

  • 12-14 lb. free range or organic turkey, room temperature
  • 2 medium onion, quartered with skin on
  • 4 carrots, peeled and rough chopped
  • 3 celery stalks, rough chopped
  • 1 bay leaf
  • 1 bunch Italian flat leaf parsley
  • 1 bunch fresh sage
  • 1 bunch fresh thyme
  • ¼ cup butter, room temperature
  • salt and pepper
  • 1 lemon, Meyer lemon is preferred
  • 1 cup white wine
  • 1 cup turkey stock, see recipe in Basics chapter
  • Gravy
  • ¼ cup dry white wine
  • 8 tablespoons unsalted butter
  • ½ cup flour
  • 7 cups turkey stock, approximately
  • salt and pepper

Preheat oven to 425°.

Wash and dry turkey inside and out; dry well.

Choose a roasting pan that will fit the turkey with no more than 2” of space on any side, otherwise the juices that accumulate in the bottom of the pan may burn.

Place ¾ of the onion, carrots and celery plus bay leaf, ½ of the bunch of parsley, sage and thyme into the bottom of a baking pan that will fit the turkey, don’t let the turkey hang over the edge and make sure there is no more than 2” open on each side of the bird. (The turkey will sit on this bed of vegetables instead of a rack).

Pat the turkey dry and rub the turkey with butter, season with salt and pepper. Squeeze lemon over turkey and tuck rind under the bird. Insert an oven-proof probe thermometer into thick part of the thigh and set for 165°.

Pour wine and turkey stock in the bottom of the pan and place uncovered in hot oven. (The total cooking time will be approximately 1 – 1 ½ hours).

Baste after ½ hour; if you don't have enough juice in pan use some extra stock. Do not cover bird until browned and then loosely place foil over breast. If wings start to brown too early, wrap with foil. Baste every ½ hour until the turkey is done. Remove from the oven, place turkey on a cutting board or platter, and tent lightly with foil, do not remove probe thermometer until you’re ready to carve the turkey. Let the turkey rest for 20 minutes before carving.

Remove the vegetables and herbs from the roasting pan; place the roasting pan on two burners, add the wine, and turn the heat to medium, bring to a boil and scrape the bits (fond) from the bottom of the pan. Strain this liquid into a large measuring cup, through a cheesecloth lined sieve before continuing, add turkey stock to equal 8 cups.

Make a roux for the gravy:

Add ½ cup of butter to the hot roasting pan and, when melted, add flour and whisk until roux is light brown.

Whisk pan the reserved pan drippings and stock into the roux, pouring in a steady stream until desired consistency is reached. Season with salt and pepper, keep warm.

Makes approximately 8 cups.

Turkey will serve 8-10

Leave a comment
Share
  • Pin it
  • Share
  • Tweet
  • Share
  • Email

Tomato Confit

6 / 11 / 166 / 12 / 16

Is your garden overflowing with tomatoes? I always grow too many and one of my favorite ways to make them go a little farther is to oven dry them. Much like sun dried, these concentrated gems pack a powerful punch and can be used in any dish where you’d use tomatoes. Especially nice on a cheese plate with some creamy goat cheese nearby.

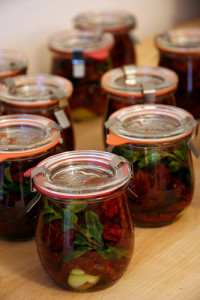
tomatoconfit-chez pim 2006


To preserve them I turn them into a tomato confit and keep in my ‘pantry’ refrigerator. They can’t be water bath canned because of the oil, but they will keep for about 6 months in the refrigerator, if they last that long. The refrigeration will also help to preserve the oil and keep it from going rancid quicker. Use only fresh organic herbs and make sure you wash and dry them very well, you don’t want any water going into your beautiful confit.

Mangia (Eat!)

Save
Print
  • 1 pound tomatoes, cut in half lengthwise
  • Sea salt and freshly ground black pepper
  • 1/4 cup olive oil, approximately
  • 1 tablespoon basil, chiffonade
  • 2 teaspoon fresh thyme
  • 1 clove garlic -- minced

Preheat the oven to 350°.

Arrange the tomato halves cut side up and close together on a baking sheet, season with salt and pepper.

In a bowl, combine olive oil, garlic, and herbs. Drizzle over tomatoes and bake until the tomatoes are soft and shriveled but still retain some moisture, 1-2 hours or more.

Let cool completely. Tomatoes can be stored in a glass jar, cover tomatoes with olive oil, add a fresh sprig of thyme, seal and refrigerate.

Photo: Chez Pim

Leave a comment
Share
  • Pin it
  • Share
  • Tweet
  • Share
  • Email

Herbal Gardening Tips

4 / 28 / 16

Tips from Chef Debbi’s presentation at The South Coast Plaza Garden Show

From Your Herbal Garden

Companion Planting

General Guideline for Growing Herbs

Most herbs like well-drained soil let slightly dry out except drought tolerant plants (lavender, rosemary) let those dry out a little bit more. Scratch down and inch or two in the pot and if it’s dry water.

Full Sun

Basil – Chives – Dill – Fennel – -Oregano – Rosemary – Tarragon – Thyme – Lemon Verbena

Partial Sun

Chervil – Cilantro (cool season herbs) – Lemon Balm – Mint

Pick before they flower or when they have buds on them

Never harvest more than 1/3 plant, it may not recover

Deadhead some; let others go to seed & flower to attract beneficial insects, butterflies & bees

Annual Herbs such as basil, cilantro, dill, nasturtium that grow and die in a year’s cycle.

Biennial Herbs such as sage and parsley will grow one year and bloom/set seed the next.

Perennial Herbs such as bay (which can be grown in a large container), tarragon, lavender, lemon balm, oregano can grow 3 years or longer.

Container Growing

Some larger herbs, rosemary for one, are better grown in the ground. Good for containers, Ca. bay, thyme, lemon balm (mint), parsley

Using a container, choose an appropriate size

Use an organic potting soil

Check for water needs frequently and fertilize with fish emulsion once a month

Herbs for Tea

Bee Balm, Bergamot, German Chamomile a 2’ annual, Mint

Fennel, leaves & seeds, Lemon Balm (mint family), Lemon Verbena, Mint, Rose Hips (seeds cases)

Pick leaves in the morning, when they have the most oil in the leaves/flowers

1 cup tea=1/4 cup of leaves and/or flowers, steep 5 minutes

Herbs for Potpourri

Lavender, lemon balm, rose, mint, thyme, calendula, bee balm, sweet woodruff

Cooking with Herbs

Keep herbs in a vase with fresh water; remove any leaves from the bottom of the stem that might be submerged. Do not wash until ready to use. Dry in a rolled up paper towel.

Herbs to Use With Food

Chicken: thyme, rosemary, parsley, tarragon

Pork: sage, rosemary, thyme

Fish: lemon verbena or lemon balm, chives, tarragon, dill, cilantro

Beef: rosemary, thyme, parsley

Lamb: rosemary, thyme, mint

Vegetables: thyme, oregano, lemon verbena

Add dried herbs at the beginning of preparing a dish, crush in the palm of your hand or in a mortar and pestle.

Fresh herbs should be added at the end of cooking.

If using fresh in place of dried use 1 – 2 times as many herbs as the recipe calls for

Herb Butters or Cheese

Drain plain yogurt overnight in cheesecloth

Mix with fresh chopped herbs for a cheese dip

Or

Add chopped herbs to room temperature butter,

Roll up in plastic wrap into a cylinder, freeze and slice off a piece to add to fish, steak or chicken.

Herbal Vinegar

Flavor vinegar for use in cooking and in vinaigrettes.

Bruise one cup of leaves for every 2 cups of white wine or delicate vinegar. Allow to steep for two weeks.

Bath Salts

You can use your favorite essential oil or blend. Mix with Epsom salt, essential oil and a little food dye. Let the mixture dry, place in a jar or muslin bag.

Rosemary Lavender Soap Recipe

3          cups glycerin soap base*

1/4      cup infusion of lavender flowers and rosemary leaves

1 1/2   teaspoon, lavender oil

1/2      teaspoon rosemary oil

1          pulverized dried rosemary

Combine melted base and herbal ingredients, stir until blended, then pour into molds and cool.

* Craft Stores, Michaels


Lip Balm

1 Tb. + 1 tea. Beeswax, chopped

1 Tb. Shea Butter

3 Tb. Almond, Coconut or Olive Oil

15 drops organic essential oil

Melt everything together over low heat except essential oil. Remove from heat and stir in essential oil. Pour into tubes or tins and let cool.


Leave a comment
Share
  • Pin it
  • Share
  • Tweet
  • Share
  • Email

Making an Herbal Wreath

9 / 25 / 15

herb wreath, garden therapy

Herb Wreath Directions

Save
Print
  • Supplies Needed:
  • Wreath frame
  • Floral wire
  • Rubber bands
  • Twist ties
  • Herb stems, leaves and flowers

Gather your supplies and choose an herb to become the base of your wreath. I chose rosemary. Using twist ties and/or floral wire begin covering your wreath base. Be patient with this process. It takes longer to do than one would think.

Here are a few different techniques. Select 2-3 different herbs and create small bunches using rubber bands. Then add each bunch to the wreath, using floral wire to secure it. Or, simply poke individual sprigs into the wreath and securing them again with floral wire.

Directions and photo’s edited from Garden Therapy

Herb wreath #1Herb Wreath #2

Related Posts Plugin for WordPress, Blogger...
Leave a comment
Share
  • Pin it
  • Share
  • Tweet
  • Share
  • Email
Deb

Meet Chef Debbi

READ BIO

Join-Us Sign up for our newsletter to receive exclusive tips 'n tricks, and special offers on classes, tours, and more!

Recent Posts

  • New E-Book!
  • From the Pantry
  • Spaghettini at Home
  • Growing Corn
  • Spring IS Coming!

Categories

BookCUT

What's in Your Pantry?

How to stock your pantry to create delicious dishes.

Learn Chef Debbi's pantry essentials and how to substitute ingredients for pantry staples in her basic recipes for quick and easy meals.
BUY BOOK>

FacebookTwitterInstagramGooglepinterest


© 2014, DEB'S KITCHEN
Angie Makes Feminine WordPress Themes