Deb's Kitchen - Farm, Food, Wine & Lifestyle Adventures
  • Facebook
  • Google
  • Twitter
  • Instagram
  • Pinterest
  • Email
Menu
Skip to content
  • Home
  • Blog
  • Events
    • Classes
    • Tours & Adventures
  • Edible Gardening
  • Preserving
  • Recipes
    • Appetizers
    • Soups and Salads
    • Main Dishes
    • Side Dishes
    • Desserts
  • About
    • Whats In Your Pantry
    • Ask Debbi
    • Deb’s Kitchen Botanicals
    • Press
  • Contact

Tag Archives: cooking

Cast Iron Skillet Rib Eye

6 / 20 / 206 / 21 / 20


Cast Iron Skillet Rib Eye

Save
Print
  • 1 16- ounce ribeye steak, 1 1/2 inch thick
  • 2 tablespoons unsalted butter
  • 1 tablespoon peanut or sunflower oil

Preheat oven to 500°.

Season the steak on both sides with sea salt and fresh ground pepper.

Heat a cast iron skillet large enough to fit the steak snugly.

Add the butter and oil to skillet and when butter is melted add the seasoned steak and sear on each side, about 1 minute each.

Slide the pan into the oven for approximately 5 minutes, be sure to use a probe type thermometer. Cook the steak to 130° for medium rare and let rest for about 4 minutes before serving. Slice on the bias, against the grain and serve.

Leave a comment
Share
  • Pin it
  • Share
  • Tweet
  • Share
  • Email

Summer Pantry

5 / 20 / 20

Summer Pantry

 25 Must Haves for Your Summer Pantry

  1. Anchovies or anchovy paste
  2. BBQ sauce
  3. Canned lump crab meat
  4. Canned Tomatoes, Plum, chopped and Sun Dried
  5. Capers
  6. Chickpeas
  7. Corn and pickle relish
  8. Crackers
  9. Dried or canned beans
  10. A variety of Italian Cured Meats, Prosciutto, Salami etc. (for Sandwiches, Salads, Pizza)
  11. Italian Tuna in olive oil
  12. Marinated Artichoke hearts
  13. Nuts, sunflower seeds (keep in refrigerator-they’ll last longer
  14. Extra Virgin Olive Oil
  15. Oil, Safflower, Sunflower or Peanut
  16. A variety of olives, pitted & not
  17. Pasta and Pizza sauce
  18. Pasta, spaghetti, shells, noodles, orzo
  19. Pickles and Pickled Vegetables
  20. Real Parmigiano Reggiano (wedge)
  21. Roasted Peppers in a jar
  22. Rice, Jasmine, Arborio, Bomba or Iberia (both Spanish rice for Paella)
  23. Salsa
  24. Sardines, in olive oil, mustard or tomato sauce
  25. Variety of vinegars, Rice, Apple Cider (for pickling), balsamic, red wine

It’s hard to narrow down a list to 25 items you must have (or at least these are must’s for me). You can find a full list of pantry must haves including herbs, spices and more in my book ‘What’s In Your Pantry’ available on my site, Debs Kitchen.

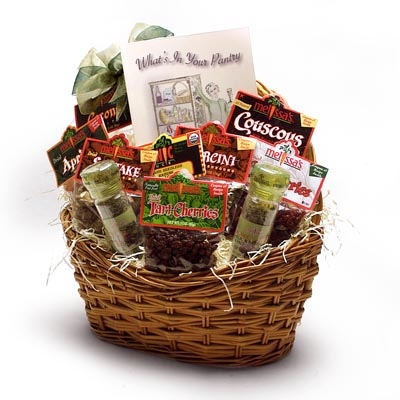
Here’s a gift basket that I designed with Melissa’s Produce full of dried pantry items, fruit, seasonings, mushrooms and more. It also comes with a signed copy of my book, What’s In Your Pantry! Get it here, click on Melissas’s.


Summer Menu

Crab Cakes
(Serve with Roasted Red Pepper Dip
or Tomato Bacon Jam)

Summer Greens with Goat Cheese & Pickled Beets

Orzo Salad with Shrimp

BBQ Chicken Thighs

Mini Crab Cakes

Save
Print

Makes 24 small crab cakes

  • 1 pound lump crab meat 

  • 4 green onions, thinly sliced 

  • 2/3 cup whole wheat bread crumbs 

  • 1 1/2 teaspoons Old Bay seafood seasoning 

  • 1/4 teaspoon ground black pepper 

  • 1 tablespoon Dijon mustard 

  • 1 egg 

  • 2 tablespoons mayonnaise, divided 

  • 1 ½ teaspoons lemon zest
  • 1/4 cup chopped jarred roasted red bell pepper 

  • 2 teaspoons hot sauce 

  • 1 1/2 teaspoons grated lemon zest 

  • 1 tablespoon oil, more if needed

Place crab meat in a large bowl and use your fingers to gently feel for and remove any pieces of shell or cartilage. Add green onions, bread crumbs, seafood seasoning and pepper and toss to combine.

In a small bowl, whisk together mustard, eggs, mayonnaise and lemon zest, pour over the crab mixture. Toss until combined, cover and refrigerate 30 minutes. 


Form the crab mixture into 24 small cakes, each about 1 1/2 inches in diameter. Heat oil in a large nonstick skillet over medium heat. Working in batches, fry cakes until nicely browned and cooked through, about 3 minutes per side. Drain briefly on a paper-towel lined plate and serve.

These freeze well also, freeze in a single layer on a sheet pan and when frozen toss into a freezer bag.


Tomato and Bacon Jam

Save
Print
  • ½ pound bacon
  • 2 pounds tomatoes, chopped
  • 1 yellow sweet onion, diced
  • 1 cup sugar
  • 2 ½ tablespoons apple cider vinegar
  • 1 ½ teaspoon kosher salt
  • ¼ teaspoon pepper
  • 1 dash hot pepper sauce

Render the bacon until browned, place on paper towel lined paper plate.

In a medium saucepan bring to a boil the tomatoes, onion, sugar, vinegar, salt, pepper and splash of hot sauce. Stir occasionally until the sugar dissolved. Using a stick blender, crush the tomato ingredients until chunky. Chop the bacon and add to the tomato mixture, cook over medium heat until thick, about an hour. Taste and adjust seasoning.

Cool before storing in a 1 pint jar. Refrigerate up to a week or freeze up to 2 months.


Roasted Red Bell Pepper Sauce

Save
Print

An easy roasted red pepper dip for any occasion. Quick and easy to prepare; serve with pita bread, cocktail bread or any cracker. Also a great dip for crab cakes

Serving Size: 6

Pomegranate Molasses can be found at Middle Eastern markets. You can omit it if you like, the flavor will be good, just not as rounded.

  • 1 cup walnuts -- toasted
  • 1 slice Italian bread -- torn into pieces
  • 1 cup red peppers -- roasted
  • 2 tablespoons extra virgin olive oil
  • 2 tablespoons pomegranate molasses
  • 1 tablespoon tomato paste
  • 1 teaspoon kosher salt
  • 1 teaspoon ground cumin
  • 1/2 teaspoon Aleppo pepper -- ground or Hungarian paprika
  • 1/2 teaspoon sugar -- optional
  • pita bread -- sliced into wedges

Place all ingredients into a food processor or blender and puree into a

smooth paste, stopping occasionally to scrape down the sides. Refrigerate

if not serving immediately. Let come to room temperature before serving.

Serve with pita wedges.


Pickled Beet, Walnut & Goat Cheese Salad

Save
Print

Servings: 4

  • 4 cups mixed summer greens
  • ½ cup goat cheese, crumbled
  • 1 cup toasted walnuts, broken in pieces
  • 1 recipe Apple Vinaigrette
  • Pickled Beet slices

Toss summer greens with a little of the dressing, just enough to coat. Place onto individual plates and lay beets onto greens, sprinkle the beets with a little dressing and top with crumbled goat cheese and toasted nuts.


Pickled Beets

Save
Print

Makes 1 qt. jar

  • 1 pounds bunched small beets, tops removed*
  • 1 teaspoon whole mustard seeds, divided
  • 1 medium orange slice
  • 1 cup apple vinegar
  • 1 cup water
  • 1 tablespoon kosher salt
  • 1 qt jar with lid, washed and dried

Preheat oven to 400°. Rinse and dry the beets, place in a piece of foil and drizzle with oil. Wrap up and place on a baking sheet. Cook for 30 min. to an hour depending on the size of the beets, or until you can easily pierce them with a paring knife. * Steamed and peeled beets are available usually at Trader Joe’s or always at Melissas.com

Put mustard seeds into the bottom of the jar and add an orange.

Let the beets cool after roasting until you can handle them in your hand. Rub the skin off the beets with a paper towel, remove root and cut the top off.

You can cut the beets however you like, into wedges, slices or half slices, then place into the jar.

Place the vinegar, water, and salt in a large measuring cup or bowl and stir to dissolve the salt. Pour over the beets, leaving a 1/2” space at the top. Slide a table knife down the side of the beets to release any trapped air. Refrigerate for 24 to 48 hours

Storage: Since these beets are not canned, they must be stored in the refrigerator. Refrigerate pickled beets for up to 2 months, but if any off flavors or aromas develop or if fermentation begins, it is best to discard the remaining beets.


Apple Cider Vinaigrette

Save
Print

Serves 6

  • ¼ cup apple cider vinegar
  • 1 tablespoon shallot, finely minced
  • 1 teaspoon Dijon mustard
  • ½ cup olive oil, approximately
  • 1 pinch sugar
  • salt and pepper, to taste

In a medium bowl, whisk together vinegar, shallot and Dijon mustard. Slowly whisk in olive oil and season as needed with sugar, salt and pepper.


Orzo Pasta Salad

Save
Print

Serves 2

  • 1/4 cup vinegar, red wine, white wine or other flavor
  • 1 teaspoon Dijon mustard
  • 1/2 cup olive oil, approximately
  • Salt and pepper
  • 1 teaspoon garlic powder
  • 1/2 cup diced cucumber
  • 1 pint cherry tomatoes, halved or quartered
  • 1/4 cup sliced black olives
  • 1/2 cup crumbled feta, optional
  • 1 1/2cup cooked orzo pasta
  • 1 pound medium cooked shrimp, chilled

For dressing, mix together vinegar, Dijon, salt, pepper, and garlic powder and whisk until it comes together. While continually whisking slowly add olive oil to taste. Set aside.

Mix together remaining ingredients and toss with dressing. Serve cold.


BBQ Chicken Thighs

Save
Print
  • 4-10 small or medium chicken thighs, bone-in, skin-on
  • 2 Tb. oil or as needed
  • 1/2 – 1 cup barbecue sauce

Preheat your gas grill to 400° with the lid closed. When you’re ready to grill, turn grill down to 350°.

Rub the chicken lightly with oil and place skin side down on the grates. Close the lid and cook for about 5 minutes. If the thighs are on the larger side, grill for 7-8 minutes. Do not crowd the chicken on the grate. If you try to turn the chicken and the skin is sticking to the grate, let the chicken cook until it releases. Turn and cook the other side for the same amount of time.

Once preheated, lower the temperature to 350°F. Place

chicken on the grates and close the lid. Grill on one side

for about 7 minutes or until the chicken naturally

releases from the grill.

Move all the pieces to one side of the grill and turn off the burner under the chicken. Brush the skin lightly with BBQ sauce and let cook a further 7-10 minutes with the lid closed. Check with a meat thermometer, you want to cook the chicken until it reaches 165°. Brush chicken with BBQ sauce several times and you can turn the chicken to add BBQ sauce to the other side.

Leave a comment
Share
  • Pin it
  • Share
  • Tweet
  • Share
  • Email

Mothers Day Menu

5 / 8 / 20

Here’s a special Mother’s Day menu that I love. It’s a throw \back from the 70’s when Veal Oscar was on every fine dining menu. I love it still but with a thick filet mignon. It may seem like a lot of work (but mom’s worth it, right?). It’s not difficult but it will take some organization. Be sure to read through the recipe before you begin and make sure that you have all the ingredients.

A couple of tricks for you begin with what you can do ahead of time. You can ‘poach’ the potatoes the day before then let come to room temperature before roasting. Brown the steaks ahead of time and refrigerate, let come to room temperature also before placing into the oven. If you brown the steaks at the last minute, put the potatoes on the sheet tray and begin roasting, when the steaks are browned place alongside the potatoes in the oven to finish at the same time.

Make the strawberry sauce ahead of time and keep refrigerated. You can even make the whipped cream ahead of time as well. It will hold for a long time.

And last but definitely not least is the Bearnaise Sauce, I’ll forgive you if you decide to use the package mix but it’s really a sad imitation of a real Bearnaise sauce. Try making it on your own, you can even make it an hour ahead of time. Again, it’s important to read through the entire recipe before you start. Be adventurous! Happy Mother’s Day!

Stonyriver Steakhouse

Menu

Filet Oscar

Oven Roasted Baby Potatoes

Strawberry Shortcake

Filet Oscar

Save
Print
  • 2 (2-inch-thick) filets mignons
  • 2 tablespoons olive oil
  • ½ lb. thin fresh asparagus
  • 6 ounces fresh crab meat, room temperature

Preheat the oven to 400°.

Bring steaks to room temperature for about 30 minutes.

Heat a large skillet.

Dry the filets with a paper towel.

Brush the filets lightly all over with the oil. Season both side wells with sea salt and pepper.

When the pan is hot, add the steaks and sear evenly on all sides for about 2 minutes per side or until well browned. If the steaks won’t release from the pan, wait another minute or so and it will release when browned.

Arrange the steaks on a parchment lined baking sheet and place into the oven and cook until 120°, about 10 minutes. Remove from oven and let rest for 5 minutes.

Asparagus and Crab

While the steaks are cooking you can lightly steam the asparagus or cook it in the still hot pan that you cooked the steaks in.

Cut the stems from the asparagus so the spears are all the same length. Lightly toss with a little olive oil and season with salt and pepper. Cook until you can pierce with a knife, about 5 minutes. Let rest until you’re ready to assemble the dish.

Warm the crab in a steamer basket over simmering water for about 5 minutes.

Make the bearnaise sauce. I’ll let you cheat here and use the package sauce from Knorr. If you can’t find bearnaise sauce use the hollandaise sauce and add with a little fresh chopped tarragon.

If you want to make the sauce yourself the recipe follows.

Assembly:

Place the steaks on two plates, top with asparagus spears, then add the crab and drizzle with sauce.

Blender Bearnaise Sauce

Save
Print
  • 2 tablespoons Champagne or white wine vinegar
  • 2 tablespoons good white wine
  • 1 tablespoon minced shallot
  • 2 tablespoons chopped fresh tarragon leaves, divided
  • Sea salt and fresh ground pepper
  • 3 large egg yolks
  • ¾ lb. unsalted butter, melted

Yield 1 cup

In a small saucepan, add vinegar, wine, shallots and 1 TB. tarragon leaves with a little sea salt and pepper. Bring to a boil and simmer over medium heat until liquid is reduced to about a tablespoon. Cool slightly.

Transfer the cooled mixture with the egg yolks into a blender. Blend 30 seconds.

With the blender on, slowly pour the hot butter through the opening in the lid. Add the remaining tablespoon of tarragon leaves and blend for only a second.

If the sauce is too thick, add a tablespoon of white wine to thin.

Note: To make the sauce in advance, prepare an hour before serving and allow it

to sit in the blender. Before serving, add 1 tablespoon of the hottest tap water

and blend for a few seconds.

Adapted from Ina Garten

Oven Roasted Baby Potatoes

Save
Print
  • 1 lb. baby yellow (or red) potatoes
  • 1 tablespoon olive oil
  • Sea salt and fresh ground pepper

Serves 2

Preheat oven to 400°. Line a small baking sheet with a piece of parchment paper.

Cut potatoes in half unless really tiny.

Place them in a large pot covered with cool water. Bring potatoes to a boil, add a heaping tablespoon of salt and cook for 7-9 minutes or until you can pierce them with a knife, they won’t be fully cooked. Drain and arrange on baking sheet. Toss with olive oil, sea salt and pepper and cook for about 20 minutes or until lightly browned.

Strawberry Shortcake

Save
Print
  • 2 cups strawberries (hulled and sliced)
  • 2 tablespoons sugar
  • 1 tablespoon Grand Marnier
  • 1 tablespoon minced mint leaves, optional
  • 1 ½ tablespoons powdered sugar
  • 1 teaspoon vanilla
  • 1 frozen pound cake (thawed)
  • ½ cup heavy cream

Mash half of the strawberries in a large bowl. Add the sliced strawberries, sugar, Grand Marnier and mint and chill.

Beat the heavy cream into soft peaks, add the vanilla and sprinkle in the powdered sugar while mixing just a little more until you have stiff peaks but don't over beat it. If you over beat it (where is looks separated) you need to start over.

Slice the pound cake and place on plates, top with strawberries and whipped cream.


Leave a comment
Share
  • Pin it
  • Share
  • Tweet
  • Share
  • Email

Easter Preview

4 / 6 / 20


Easter was always a time spent with lots of family,  lots of food and other things. This year will be hard on most people, not being able to get together, search for colored eggs or we always loved to play croquet in the big backyard. Whatever you do I’ve added some of my favorite recipes for you to enjoy.

Deviled Eggs

Save
Print
  • 1 dozen large eggs, two weeks old
  • 1/3 cup mayonnaise, approximately
  • 1-2 teaspoon yellow mustard
  • 2 teaspoon red wine or sherry vinegar
  • ½ teaspoon finely chopped shallots
  • ½ teaspoon finely snipped chives, reserve some for the garnish
  • Sea salt and freshly ground pepper
  • Paprika or Smoked Pimenton (Spanish Paprika), optional

The shell of fresh eggs is tightly attached to the egg itself whereas older eggs the white inside has started to pull away from the shell, making them easier to peel. When peeling begin at the large end; with an older egg there will be a little air pocket there making it easier to get away from the white.

To hard boil, arrange eggs into a saucepan and cover with cool water. Over high heat bring to a boil and immediately turn the heat off and cover the eggs for 15 minutes.

Prepare an ice bath, a large bowl that will hold all the eggs, fill with ice and when eggs have finished cooking drain off the hot water and place eggs into the ice, cracking a bit of the shell as you do. Cover with cool water and let stand until completely cooled, 20 minutes or so. This step can be done a day ahead of time, after eggs have cooled refrigerate until ready to use.

Cut eggs in half lengthwise with a chef’s knife, not a serrated knife. Pop out the yolks into a mixing bowl. If you don’t have a plate for deviled eggs you can shred some radicchio or dark red lettuce onto a serving plate. If using the lettuce, slice a tiny piece from the round end of the egg so it doesn’t roll. Arrange egg whites cut side up on the lettuce.

Mash yolks with fork then stir in mayonnaise, mustard, and vinegar. Mix ingredients together well. Add sea salt and pepper, to taste. If the yolks aren’t creamy enough add a little more mayonnaise. You can also adjust the mustard and vinegar to taste.

Place the mixture into a pastry bag or a plastic storage bag, snip a diagonal piece from the bottom corner of the storage bag and use as a piping bag. Pipe the yolk mixture or spoon into each egg white half, dividing evenly as possible between the eggs.

Sprinkle eggs with paprika and/or minced chives if desired. Serve immediately or refrigerate until ready to serve. If refrigerating, you’ll want to cover with plastic wrap; place toothpicks into egg whites around the outer edge of the plate and in the center to make a ‘tent’ with the plastic wrap so it doesn’t touch the egg yolks.


Oven Roasted Dijon Chicken

Save
Print

4 servings

  • 2 teaspoons plus 3 tablespoons unsalted butter, at room temperature
  • ¼ cup panko
  • ½ cup toasted breadcrumbs
  • ½ cup Dijon mustard
  • 8 bone-in, skin-on chicken thighs
  • Sea salt and freshly ground black pepper

Preheat the oven to 425 ° and line a sheet pan, that will hold all the chicken pieces without touching each other, with aluminum foil.

Melt the 2 teaspoons of butter in a small skillet over medium heat. Stir in the panko and breadcrumbs, toast for a few minutes, stirring occasionally, until golden brown. Remove from the heat.

Mash in the remaining 3 tablespoons of butter into the mixture.

Season the chicken lightly with salt and pepper, then brush or slather the mustard mixture all over, then roll the entire piece of chicken into the breadcrumb mixture. Place the chicken on the baking sheet.

Roast for 25 minutes, or until the chicken is cooked through; an instant-read thermometer inserted into the thickest part of the chicken should register 165 degrees. Depending on the size of the chicken pieces it may take less or more time to cook.


Honey Baked Ham

Save
Print
  • 1 cup honey
  • ½ cup packed brown sugar
  • ½ cup apricot preserves
  • ¼ cup apple cider vinegar
  • 2 tablespoons Dijon mustard
  • 1 ½ tablespoon allspice
  • ½ teaspoon ground ginger
  • ½ teaspoon onion powder
  • 8-10 pound bone-in spiral cut ham fully cooked

Remove ham from refrigerator and let sit at room temperature for 2-3 hours.

Preheat oven to 325°.

Adjust oven rack to lowest position.

Whisk together honey, brown sugar, apricot preserves, apple dicer vinegar, mustard and spices in a medium saucepan. Bring to a simmer, stirring often, for about 1-2 minutes. Set aside.

Cut 2 pieces of foil that will wrap around the ham, Lay them in a baking pan crossing in the middle, one lengthwise and one crosswise, like a cross. Place ham on foil and brush ham all over with approximately 1/3 of the glaze, including in between slices. Tightly wrap ham and bake ham for approximately 10-13 minutes per pound.

Remove ham from oven and increase oven temperature to 400°.

Carefully unwrap ham from foil and spoon any juices from the bottom of the pan into the saucepan with the glaze, rewarm over low to medium heat then brush ham all over and in between slices with 1/3 glaze.

Leave ham uncovered and bake until the ham reaches an internal temperature of around 130°, approximately 10-20 minutes, spooning juices over ham every 10 minutes.

Remove ham from oven and spoon juices from bottom of pan again all over ham and brush with the last of the glaze, including in between slices.

Remove ham and loosely cover with foil. Let rest for 15 minutes before serving. Serve warm or at room temperature.


Potato Gratin

Save
Print

This rich, creamy gratin gets a note of smokiness from the bacon between the layers of tender potatoes.
by Molly Stevens from Fine Cooking
Serves 8

  • 2-1/2 lb. Yukon Gold potatoes, peeled & sliced into 1/8-inch thick rounds
  • 2-1/2 cups heavy or light cream
  • Sea salt & fresh ground pepper, to taste
  • 4 oz. bacon
  • 3 medium leeks, white and light-green parts only, thinly sliced
  • 6 oz. grated Gruyère
  • 2 to 3 tsp. chopped fresh thyme
  • 1/4 tsp. freshly grated nutmeg
  • 1/2 cup fresh breadcrumbs
  • 1/4 cup finely grated Parmigiano-Reggiano
  • 2 tablespoons unsalted butter, melted

Position a rack in the center of the oven and heat the oven to 400°F. Butter or oil a 3-quart gratin dish; set aside.

Put the potatoes, cream , 1/2 tsp. salt, and a few grinds of pepper in a 12-inch skillet. Simmer, partially covered, over medium to medium-low heat, stirring occasionally and gently with a rubber spatula until the potatoes are barely tender when pierced with a fork or skewer, 8 to 12 minutes.

In a medium skillet, cook the bacon until browned and fully cooked. Set aside to cool, reserving 2 tablespoons of the fat in the skillet. Heat the reserved fat over medium-high heat and sauté leeks until tender, fragrant, and lightly browned. Season to taste with salt and pepper. When the bacon is cool, crumble it into small pieces.

Using a slotted spoon, transfer half the potatoes to the prepared gratin dish, spreading them evenly. Layer on the leeks, bacon, Gruyère, thyme, and nutmeg. Top with the remaining potatoes spreading them evenly, and pour over any liquid remaining in the pan.

In a small bowl, combine the breadcrumbs, Parmigiano-Reggiano, and melted butter.

Evenly scatter the topping mixture over the potatoes. Bake the gratin until it’s bubbly, the top is brown, and the potatoes are completely tender when poked with a fork or a skewer, 25 to 30 minutes. Let the gratin sit for at least 10 and up to 30 minutes before serving so the liquid is fully absorbed and the layers are cohesive.


French Apple Cake

Save
Print

With chunks of sweet apples nestled in a tender and buttery rum cake, this French apple cake is the essence of simplicity.

Jenn Segal, Once Upon a Chef
Servings: 6-8

  • 1 cup all-purpose flour, spooned into measuring cup and leveled-off
  • 1 teaspoon baking powder
  • 1/4 teaspoon salt
  • 1 stick (1/2 cup) unsalted butter, at room temperature
  • 2/3 cup granulated sugar, plus more for sprinkling over cake
  • 2 large eggs
  • 1 teaspoon vanilla extract
  • 3 tablespoons dark rum
  • 2 baking apples, peeled, cored and cut into 1/2-inch cubes (I like Honeycrisp, Fuji or Granny Smith)
  • Confectioners' sugar (optional), for decorating cake

Preheat the oven to 350°F. Grease a 9-inch springform or regular cake pan with butter or nonstick cooking spray. If using a regular cake pan, line the bottom of the pan with parchment paper and grease again.

In a small bowl, whisk together the flour, baking powder and salt.

Using a handheld mixer with beaters or a stand mixer with the paddle attachment, cream the butter and granulated sugar until light and fluffy, about 3 minutes. Add the eggs, one at a time, beating well and scraping down the sides of the bowl after each addition. Beat in the vanilla and rum. Don't worry if the batter looks grainy at this point; that's okay.

Add the flour mixture and mix on low speed until just combined. Using a rubber spatula, fold in the chopped apples.

Scrape the batter into the prepared pan and even the top. Sprinkle evenly with 1 tablespoon of granulated sugar. Bake for about 40 minutes, or until the cake is golden and a toothpick inserted into the center comes out clean. Allow the cake to cool on a rack. Run a blunt knife around the edges of the cake.

If using a springform pan, remove the sides. If using a regular cake pan, carefully invert the cake onto the rack, remove the parchment paper, then gently flip the cake over and place right-side-up on a platter. Using a fine sieve, dust with Confectioners' sugar (if using). Cake can be served warm or room temperature, plain or with lightly sweetened whipped cream or vanilla ice cream.

Freezer Friendly Instructions: The cake can be frozen for up to 3 months. After it is completely cooled, cover it tightly with aluminum foil or freezer wrap. Thaw overnight on the countertop before serving.


Leave a comment
Share
  • Pin it
  • Share
  • Tweet
  • Share
  • Email

Tuscan Bean Soup

3 / 29 / 20

So have you been baking all that bread? Well, now you need something to go with it. Here’s my recipe for Tuscan Bean Soup using pantry items from my first book ‘What’s In Your Pantry’.

Tuscan Bean Soup

Save
Print

There are as many recipes for Tuscan Bean Soup as there are Italians, everyone makes their soup slightly different. Sometimes I like to use an immersion blender and mash some of the soup when it’s finished. Serve with lots of crusty bread and fresh butter.

  • 2 tablespoons olive oil
  • 1 onion, minced
  • 1 clove garlic
  • ¼ lb. pancetta, chopped
  • 1 stalk celery, minced
  • 1 carrot, minced
  • 1 tablespoon tomato paste
  • 1 qt. chicken or vegetable stock
  • 2 cans cooked cannelini beans, white kidney beans will do
  • 1 small can chopped plum tomatoes
  • 1 leftover rind of Parmigiano-Reggiano
  • 2 tablespoons Italian seasoning, ground or crushed
  • ½ bunch fresh sage, chopped
  • 2 sprigs Italian parsley, chopped

Heat a Dutch oven over a medium high heat, add oil and when hot, sauté onions until lightly translucent. Turn down the heat to medium; add garlic and pancetta, stir to cook but do not brown the garlic.

Stir in the celery and carrot, season with a pinch or two of salt and pepper; cook, stirring occasionally until the vegetables are soft. Add the tomato paste and stir until the vegetables are well coated.

Add the stock, beans, tomatoes, cheese rind and seasonings. Bring to a boil, turn down to a simmer and let the soup simmer for at least 30 minutes. The cheese rind should have melted into the soup, but, if there is still a hard piece left, remove it and season to taste with salt and pepper.

Serves 4.

Leave a comment
Share
  • Pin it
  • Share
  • Tweet
  • Share
  • Email

Pantry Cooking

3 / 23 / 20

Here are a few Cooking From The Pantry recipes for you to enjoy. For more ideas on how to stock your pantry and learn new ways to cook, check out my first book, ‘What’s In Your Pantry’. Available below

No-Knead Cranberry Nut Bread

Save
Print
  • 3 cups + 2 Tablespoons all-purpose flour, plus more for hands
  • 2 teaspoons coarse sea salt
  • ½ teaspoon yeast
  • ¾ cup chopped walnuts
  • ¾ cup dried cranberries
  • 1 tablespoon honey
  • 1 ½ cups warm water

Stir the first 6 ingredients together in a large bowl. Stir in the warm water. The dough will be sticky. Gently shape into a ball as best you can. Cover tightly with plastic wrap or aluminum foil. Set on the counter at room temperature and allow to rise for 12-18 hours. The dough will double in size, stick to the sides of the bowl, and be covered in air bubbles.

Turn the dough out onto a lightly floured work surface and, using lightly floured hands, shape into a ball as best you can. Doesn't have to be perfect! Transfer dough to a large piece of parchment paper.

Using a very sharp knife, gently score an X into the top. Cover dough lightly with plastic wrap and leave alone for 30 minutes.

Preheat the oven to 475°. Place your Dutch oven (with the lid) inside for 30 minutes so that it's extremely hot before the dough is placed inside. After 30 minutes, remove the Dutch oven from the oven and carefully place the dough inside by lifting it up with the parchment paper and sticking it all-- the parchment paper included-- inside the pot. Cover with the lid.

Bake for 25 minutes with the lid on. Carefully remove the lid and continue baking for 8-10 more minutes until the bread is golden brown. Remove pot from the oven, carefully remove the bread from the pot, and allow to cool on the counter for 30

minutes before breaking/slicing/serving.

Cover and store leftover bread at room temperature for 1 week.

Adapted from Sally’s Baking Addiction

Oatmeal Fruit Bars

Save
Print
  • 2 sticks unsalted, cold butter, cut into cubes
  • 1 ½ cup flour
  • 1 cup packed brown sugar
  • 2 cup oats
  • ¼ teaspoon salt
  • teaspoon baking powder
  • 1 8 oz. jar fruit spread

Preheat oven to 350°. Butter a 9x 13” baking dish and line the bottom with parchment paper.

In a medium size bowl, mix together the flour, baking powder, salt, oats and brown sugar. Stir together to mix the dry ingredients. Using a pastry blender or your fingers, mix the butter into the dry mix. If using your fingers pinch the butter into the dry mix to distribute the butter into small pieces about the size of a pea.

Press half of the mixture into the prepared pan. Spread the jar of jam or fruit spread evenly on top of the crust. Sprinkle the other half of the oat mixture on top of the fruit spread. Bake in your oven for 30 – 40 minutes. Cool completely in the pan. Cut into squares.

Recipe adapted from Just Jans

Chicken Parmigiana

Save
Print
  • 2 boneless skinless chicken breasts, cut in half side to side (butterflied)
  • Sea salt and pepper
  • ¼ cup flour, approximately
  • 1 teaspoon garlic powder
  • 1 teaspoon ground Italian spices
  • 2 eggs, lightly whisked
  • 1 cup panko breadcrumbs
  • ½ cup parmesan cheese, grated
  • 2 tablespoons olive oil
  • 1 cup marinara sauce
  • ½ cup mozzarella cheese, shredded

Place chicken into a freezer type bag and pound until about ½” thick. Pound each piece until ½ inch thick. Sprinkle with salt and pepper.

Set up a dredging station, place each of the following next to each other beginning with the flour.

Mix flour with garlic powder and Italian spices, place on a plate or shallow dish for dredging.

Place whisked egg into a shallow bowl and set next to flour.

Mix breadcrumbs and Parmesan cheese and place into another shallow dish or plate next to the egg.

Serves 4

Dip the chicken pieces, one at a time into the flour, then egg and then the Parmesan breadcrumb mixture.

Heat a pan large enough to hold all the chicken pieces so they don’t touch, add olive oil and then the chicken, don’t overcrowd the pan or the pieces won’t brown. Cook until lightly browned then set aside, if needed, and cook remaining pieces.

When finished browning the chicken you can add them back to the pan or place on a sheet pan and top with a little marinara sauce and mozzarella cheese, broil until cheese has melted.

Serve immediately.

Fettuccini Alfredo

Save
Print
  • 1 pound fettuccini
  • 2 cups heavy cream
  • ¾ cup grated Parmesan cheese
  • 3 tablespoons butter
  • 1 pinch ground nutmeg
  • ground black pepper to taste

Serves 4

Cook pasta according to directions on package. Drain and set aside.

In a medium saucepan over low heat, heat cream and butter, stirring

constantly. When cream begins to simmer mix in a small amounts of Parmesan

cheese, stirring constantly, until all cheese is added, and sauce has

reduced. It should be thick and easily cover the back of a spoon.

Stir in nutmeg and black pepper. Toss with warm fettuccini and serve.

Meyer Lemon and Blood Orange Cannoli’s

Save
Print
  • 1 15 oz. container of whole milk ricotta cheese
  • 1/2 cup confectioners sugar
  • 2 tablespoons white sugar
  • 1 teaspoon vanilla
  • 1 Meyer lemons, zested and juiced
  • 1 Blood orange, zested
  • Prepared Cannoli shells

Prepare the filling by combining all the ingredients in a bowl and mixing with an electric mixer until well-combined. Refrigerate for at least an hour and up to 2 days.

Fill a plastic zip bag with the ricotta mixture, snip off a corner of the bag, and pipe the mixture into the shells. Serve and enjoy!


Leave a comment
Share
  • Pin it
  • Share
  • Tweet
  • Share
  • Email

San Diego County Farm Tour

2 / 21 / 202 / 27 / 20
San Diego County Farm Tour
Sat, April 18th
10:30-4
$125.00
Hosted by Chefs Secrets which is a new collaboration between
Debs Kitchen
&
California Greek Girl
Meet up at
Mountain Meadow Mushroom Farm, Escondido


Farm Tour!
Do you know how mushrooms grow? You’ll learn everything about mushrooms that you need to know! Did you know that mushrooms are a nutrient dense food? Good for you!

Here’s a link to their website for more info
Mountain Meadow Mushroom Farm
Here’s a blog post about the farm & yummy Mushroom Risotto recipe from Mary at California Greek Girl
Mushroom Risotto


Next we’ll head over to
North County Olive Oil Co. and meet Sue Rober at her Sunshine Gardens location where we will taste and experience their True California Olive Oils with style.

Their vision is to share with you their experience in the California olive oil industry. They have selected a portfolio of top producers who make both extra virgin olive oils and vinegars from California olives and grapes. They represent a variety of regions which offer unique styles from many varietals and cultivars of local California olives. We look for producers that promote sustainable practices in the grove and throughout their day to day practices.

Our Olive Oil Tastings offer a unique experience created around a variety of artisan producers of California extra virgin oil, wine and specialty artisan products.

A cooking demo & lunch will be served by
Chef Debbi & Chef Mary

Menu*

Cheese Platter with Seasonal Vegetables & Fruit
Winter Salad with Pixie Tangerines
Mushroom Risotto
Road Home Brownies

*Menu subject to availability
One glass of wine will be served with lunch.
Lemonade & Spring Water will be available.

Don’t miss the great swag bags that you’ll get to take home!

We encourage car pooling, need a ride or want to provide a ride?
Get in touch with Chef Debbi here
[email protected]

Now taking reservations

# in Party


Sponsored by Melissa’s Produce

Leave a comment
Share
  • Pin it
  • Share
  • Tweet
  • Share
  • Email

Happy Valentines Day

2 / 12 / 20

Here are several recipes for Valentines Day, cook a restaurant style meal and relax in front of the fire!

White Wine Braised Artichoke Hearts

Save
Print

Serve with some toasty slices of artisan bread.

  • ¼ cup chicken or vegetable stock
  • ¼ cup white wine
  • 1 clove garlic, minced
  • 1 lemon, zested and juiced
  • 2 packages Melissa’s Steamed Artichoke Hearts*
  • 2 tablespoons lemon olive oil, or regular olive oil
  • 2 tablespoons Italian parsley

Add stock, white wine, garlic and lemon juice to a deep sauté pan then add the artichoke hearts. Simmer until most of the liquid has been reduced then toss with lemon zest, olive oil and Italian parsley.

Melissa's Artichoke Hearts can be found at many markets, Gelsons, Lazy Acres, Bristol Farms and Trader Joe's

Shrimp Salad with Avocado

Save
Print
  • 1 pound medium shrimp, cooked (frozen), defrosted
  • 1/4 cup diced celery
  • 2 tablespoons chopped red bell pepper
  • 1 tablespoon fresh lemon juice
  • 3 tablespoons mayonnaise, or to taste
  • 1/4 cup mixed salad greens
  • 1 handful cherry tomatoes, sliced in half
  • 1 lg. avocado, halved
  • Sea Salt and fresh ground pepper
  • 1 tablespoon fresh dill, chives or cilantro, minced, optional

Defrost the shrimp and dry with a paper towel, chop coarsely.

Mix the chopped shrimp with the celery, bell pepper, lemon juice, and mayonnaise.

Add salt and pepper to taste. Taste and adjust the mayonnaise and seasonings, as desired.

Place half the lettuce in a bowl, add one half of the avocado, season with a pinch of salt and pepper. Scoop the shrimp salad into the cavity of the avocado and garnish with cherry tomato halves and herb(s), if using.


Filet Mignon for Two

Save
Print
  • 2 pounds beef tenderloin*
  • Sea salt and fresh ground pepper
  • 2 tablespoons unsalted butter, plus 2 for the sauce
  • 2 tablespoons olive oil, plus more for the sauce
  • 4 ounces sliced crimini mushrooms
  • 1 small shallot, minced
  • 3 tablespoons flour
  • 1 ½ cups dry red wine
  • 2 ½ cups beef broth
  • 1 tablespoon demi-glace*

Preheat your oven to 400°. Line a small baking sheet with parchment paper (or foil) and set aside.

Dry the roast with paper towels and sprinkle with sea salt and fresh ground pepper.

Heat a sauté pan and add butter with a splash of olive oil, when melted and hot add the roast and brown on both sides. Set onto prepared baking sheet with parchment, roast for approximately 30 min. Use a meat thermometer to accurately gauge cooking time & temperature. Remove the roast from the oven when the temperature reaches 130°, loosely tent with foil while you make the sauce.

Add the pan drippings, splash of olive oil, mushrooms, chopped shallot to the pan drippings and sauté until translucent.

Stir in flour until well blended; add the red wine, broth and demi-glace.

Simmer until reduced by about by half. Add 2 tablespoons unsalted butter and season with salt and pepper to taste. Pour the sauce into a serving dish such as a gravy boat.

Slice the tenderloin after it has rested for at least five minutes.

This cut of meat can be called a filet mignon roast or chateaubriand

Demi-glace can be found at Gelson's, Lazy Ares and Bristol Farms


Molten Chocolate Lava Cakes for Two

Save
Print
  • 2 ounces unsalted butter
  • 3 ounces dark chocolate, chopped
  • 1 teaspoon espresso powder
  • 1/4 cup light brown sugar, packed
  • 1/4 cup confectioners' sugar
  • 1 large egg, room temperature
  • 1 egg yolk, room temperature
  • 1/2 teaspoon vanilla extract
  • 1/4 cup flour
  • 1/8 teaspoon salt
  • Raspberries, for garnish

Preheat oven to 450°F.

Generously grease two 6-ounce ramekins with butter and place on a baking sheet and set aside until needed.

Add the butter and chocolate to a large, microwave safe bowl and microwave in 20 second increments, making sure to stir well after each increment, until chocolate is completely melted. Remove from the microwave and whisk smooth. Whisk in the espresso powder. Then whisk in both sugars, stirring until well combined. Add in the egg, egg yolk, and vanilla and mix until well combined.

Toss in the flour and salt and mix until just combined, being sure not to over mix the batter.

Evenly divide the batter among the prepared ramekins and place them back on the baking sheet.

Bake for 11 to 12 minutes, or until the tops have puffed up and the edges are firm, but the center is still slightly jiggly.

Remove from the oven and cool for exactly 1 minute. Using a tea towel to protect your hands, carefully invert each ramekin onto a small plate. Top with chocolate shavings and berries, if using. Serve at once and enjoy!

Avocado with Shrimp Salad photo by Food 52

Chocolate Lava Cake photo, Ghirardelli

White Wine Braised Artichoke Hearts

Save
Print

Serve with some toasty slices of artisan bread.

  • ¼ cup chicken or vegetable stock
  • ¼ cup white wine
  • 1 clove garlic, minced
  • 1 lemon, zested and juiced
  • 2 packages Melissa’s Steamed Artichoke Hearts*
  • 2 tablespoons lemon olive oil, or regular olive oil
  • 2 tablespoons Italian parsley

Add stock, white wine, garlic and lemon juice to a deep sauté pan then add the artichoke hearts. Simmer until most of the liquid has been reduced then toss with lemon zest, olive oil and Italian parsley.

Melissa's Artichoke Hearts can be found at many markets, Gelsons, Lazy Acres, Bristol Farms and Trader Joe's

Leave a comment
Share
  • Pin it
  • Share
  • Tweet
  • Share
  • Email

What’s In Season Now

1 / 27 / 20

Straight from your local farmers market you should start to see some of this produce available.

Asparagus
Avocados
Beets
Broccoli
Brussels Sprouts
Cabbage
Carrots
Cauliflower
Celery
Chard
Citrus:
Blood Orange
Grapefruit
Lemons
Navel Oranges
Tangelos/Tangerines
Lettuce
Mushroom
Mustard
Onion, Green
Passion Fruit
Peas, Snow & Sugar Snap
Spinach
Strawberries
Turnips

Leave a comment
Share
  • Pin it
  • Share
  • Tweet
  • Share
  • Email

How to Build a Cheeseboard

11 / 26 / 19

How to Build a Cheese or Charcuterie Board


  • Start by choosing ingredients
  • Choose cheese first – Use a mixture of cow, goat, sheep milk. Choose a hard cheese (Cave Aged Gruyere, Aged Gouda), a soft cheese (chèvre, brie, burrata) and maybe a crumbly cheese (blue, Parmigiana Reggiano). You want a variety of flavors and choose an odd number of cheese as it is more pleasing to the eye.
  • Serve approximately 2 – 4 oz. of cheese per person. If it needs to be sliced, do so while it’s cold. Let all cheese come to room temperature before serving.
  • Some of my favorite cheese mixes are:
  • Havarti, Aged Gouda, Aged Blue Cheese
  • Sharp Cheddar, Creamy Chèvre, Parmigiana Reggiano
  • Feta, Burrata, Gorgonzola or Fresh Blue Cheese (Pt. Reyes Blue)
  • Camembert or Brie, Drunken Goat (or Wine Infused hard cheese)
  • Bocconcini with herbed olive oil drizzle, Boursin, Manchego
  • Cave Aged Gruyere, Fontina, San Andreas
  • Next choose some charcuterie and pâtés, if serving.
  • Again serve 2-4 oz. per person and slice the meat/sausage while cold and allow to come to room temperature before serving.
  • Some selections might be:
  • Choose a variety of hard salami, soft meat such as prosciutto or Jambon Iberico, some smoked sausage, kielbasa, soppresseta, Serrano ham and a selection of pate and/or rillettes. Pair the flavor of the meat (soft to intensive) to the flavor of the cheese (soft to intensive).
  • Next choose a serving board, plate or platter that will accommodate your above choices. Remember you’re going to be adding more ingredients. You could choose a rectangular serving platter, cutting board, slate tile, pizza wheel or the like.
  • Additions to the meat and cheese might be:
  • A selection of jams or preserves such as fig, peach or other fruit jam, or chutneys and honey.
  • Grainy or stoned mustard, olive spread, bean dips and antipasto spreads such as muffuletta.
  • Next something briny, caper berries, cornichon pickles, pickled vegetables such as a mixed Giardiniera or caponata.
  • Add some salty components, roasted nuts, Marcona almonds or toasted pumpkin seeds.
  • Crackers, bread sticks, toasted baguette slices, pita bread or pretzels.
  • Dried Fruit are great especially for a winter board, apricots, figs, cranberries or raisins.
  • Seasonal fruits and vegetables pair well with most meat and cheese, grapes, fresh apricots, apples, pears, cucumbers, carrots, pea pods any kind of berry, artichoke hearts, marinated mushrooms and roasted red peppers.
  • Herbs and Edible flowers are a nice addition and brighten up the board as well. Make sure that none have been sprayed with pesticides. Use a variety in season, pansies, chive, sage or nasturtium blossoms. Lavender, borage blossoms (taste faintly of cucumber), dill, cornflowers, Johnny jump ups, bee balm and zucchini blossoms.

Tips:

Try serving some of the jams, preserves, mustard, spreads or chutneys in small bowls. Anything that has a brine or is juicy should also go into a bowl such as olives and pickled vegetables. This will also give some height to the board, serve breadsticks in a jar or glass as well.

Serve each cheese and meat with its own cheese fork or utensil and picks for the olives or vegetables, spoons, cheese knives and mini tongs for the meat.

Try arranging the board where it will be served so as not to knock anything off while you are moving it. Make ahead and cover with a tea towel to keep out any pests.

Leave a comment
Share
  • Pin it
  • Share
  • Tweet
  • Share
  • Email

What’s In Your Fall Pantry

10 / 4 / 19


This is but a small list of fall pantry items that I like to keep for fall. With these on hand you can make breakfast, lunch, dinner and dessert without stress. There are even some items to have on hand for those friends who like to drop in for a visit. Throw the artichoke hearts in a food processor, add some spices and a little yogurt, cream cheese or mayo and bake for 20 minutes. Or drain and throw the roasted red peppers into a food processor, add a little leftover bread, walnuts, tomato paste with a little olive oil, salt and Aleppo pepper for a tasty dip for bread or crackers. Add things that your family likes to eat in the fall, for all the upcoming holidays and special events. Here’s a great fresh, homemade applesauce recipes, serve along side pork chops or bake into an applesauce cake for a warm, spiced dessert or breakfast snack. Happy Fall!


Beverages

Cocoa

Tea

Mulled Cider

 Fruit

Apples (do not store with other fruit or vegetables-apples give off ethylene gas which will hasten the ripening of other fruits and vegetables)

Applesauce

Dried fruit

Pears

Pomegranates

Citrus

 Vegetables

Potatoes

Carrots

Onions

Canned

Dried fruit (cranberries, apricots, blueberries etc.)

Canned pumpkin

Canned and dried beans (for soups, stews, chili)

Canned Tomatoes

Tomato sauce

Tomato Paste

Garlic

Onions

Pickles

Roasted Red Peppers, in water

Grains

Oatmeal (rolled oats & steel cut)

Alternative grains

Breadcrumbs

Rice

Soup

 Pasta

Mac & Cheese Pasta

Lasagna noodles

Flour

 Dairy

yogurt

cheese

Condensed milk

Unsalted butter

Variety of cheeses

 Staples

Artichoke Hearts, canned in water

Breadcrumbs

Chicken, Vegetable, Beef Stock

Crackers

Honey

Maple Syrup

Molasses

Sugar, white, brown, dk. Brown

White vinegar (for pickling)

Apple Cider Vinegar

Balsamic Vinegar

Spices

Aleppo Pepper

Sea salt

Baking Spices

Cinnamon sticks

Nuts

Pickling spice

Peppercorns

Yeast

Simple Homemade Applesauce

Save
Print
  • 3 pounds organic apples, Fuji, Gala, Honeycrisp or Jonagold
  • 2/3 cup apple juice, orange juice or water
  • 8 tablespoons sugar, optional
  • 3 teaspoons cinnamon
  • 1/4 teaspoon nutmeg

Core, peel and cut the apples into medium sized pieces. Place all ingredients into a saucepan with lid and simmer over low heat until apples are very tender, about 45 minutes. Put through a food mill to create a soft creamy applesauce or use a potato masher and serve chunky.

Pressure cooker or Instant-pot:

Combine all the ingredients in the container, cover and lock into place. Press manual button and set timer for 4 min. Let the closed pressure cooker rest for about 10 minutes, release any pressure that’s left.

Carefully open lid, angling it away from you to avoid getting burned by the steam. Use a potato masher to crush with a slightly chunky consistency or put through a food mill for a smoother one.


Leave a comment
Share
  • Pin it
  • Share
  • Tweet
  • Share
  • Email

Fall/Winter Vegetable Gardening

9 / 26 / 19

Vegetables to plant in our

So. California gardens now


Beets

Be sure to thin plants to about 3″ apart and harvest when they are small for a sweet flavor. Leaves and stems are edible, steam lightly or add to a salad.
To cook, place in a piece of foil, drizzle with olive oil and salt and pepper. Roast in a 450° oven for about 10-15 min. or until tender. Rub skin off with a towel

 Broccoli/Cauliflower

Buy transplants in the fall and bury the stem up above second row of leaves. Try roasting these vegetables in a 450° oven. Place cut up pieces on a parchment lined baking sheet, toss with a little olive oil, salt and pepper and any other seasoning you may like (red pepper flakes, garlic powder, lemon juice. Roast for 10 -15 minutes or until tender.

Cabbage

Cabbage is in the same family as broccoli and cauliflower. Homemade sauerkraut is the best! Cut out the fore of the cabbage and thinly slice the leaves into shreds. Place in a large bowl, add 1 1/2 Tb. kosher or canning salt and knead or massage the salt into the cabbage until it releases it’s liquid. Pack into a quart jar with a wide mouth and pour all liquid over the cabbage. Make a brine of 1 cup water and 1 Tb. kosher salt, stir to dissolve salt and then pour it all into a quart freezer bag, place this on top on the cabbage and place a piece of cheesecloth over the mouth of the jar, tie down with string or a rubber band and place in a cool, dark place on your counter. The second day, remove bag and press down on the cabbage to see if it will release more moisture. It should ideally cover the cabbage, if it doesn’t add more brine by either adding the ingredients in the freezer bag or make a new brine by stirring together 1 cup water and 1 tea. kosher salt. cover the cabbage and let stand for 3 -10 days. Begin tasting sauerkraut on the 3rd day, when it reaches the flavor you want, place a cap on the jar and store in your refrigerator.

Carrots

Make sure you have nice loose soil so the carrots can grow long and deep. Thin them when they sprout to give them room to grow, add the thinnings to your salad, soup or stew. Slow roast carrots as you would the broccoli or cauliflower. Drizzle with honey after roasting.

Leafy Greens

Lettuces, spinach, chard, mustard and kale all grow very well over the winter but plant at 2 -3 week intervals for a staggered supply of greens instead of harvesting all at once. Many greens can be lightly sautéed or eaten raw.

Onions & Garlic

Plant onions from ‘starts’ rather than from seeds. Pick short day varieties for best harvest. Scallions that are succession planted can be harvested over the winter/spring season.
Plant garlic from bulbs, plant pointed end up and cut off any green that is sprouting from the top.

Peas

Fall & Spring harvested peas are sweet and easy to grow. Plant a variety from English peas or shelling peas to sugar snap peas. Give them a trellis or cage to grown on and harvest daily for a continued harvest.
Peas and pea pods are lovely lightly steamed or even raw.

You can still plant sweet peas this month for spring flowering

Related Posts Plugin for WordPress, Blogger...
Leave a comment
Share
  • Pin it
  • Share
  • Tweet
  • Share
  • Email

Posts navigation

Previous Page 1 2 3 4 … 12 13 Next Page
Deb

Meet Chef Debbi

READ BIO

Join-Us Sign up for our newsletter to receive exclusive tips 'n tricks, and special offers on classes, tours, and more!

Recent Posts

  • New E-Book!
  • From the Pantry
  • Spaghettini at Home
  • Growing Corn
  • Spring IS Coming!

Categories

BookCUT

What's in Your Pantry?

How to stock your pantry to create delicious dishes.

Learn Chef Debbi's pantry essentials and how to substitute ingredients for pantry staples in her basic recipes for quick and easy meals.
BUY BOOK>

FacebookTwitterInstagramGooglepinterest


© 2014, DEB'S KITCHEN
Angie Makes Feminine WordPress Themes