Deb's Kitchen - Farm, Food, Wine & Lifestyle Adventures
  • Facebook
  • Google
  • Twitter
  • Instagram
  • Pinterest
  • Email
Menu
Skip to content
  • Home
  • Blog
  • Events
    • Classes
    • Tours & Adventures
  • Edible Gardening
  • Preserving
  • Recipes
    • Appetizers
    • Soups and Salads
    • Main Dishes
    • Side Dishes
    • Desserts
  • About
    • Whats In Your Pantry
    • Ask Debbi
    • Deb’s Kitchen Botanicals
    • Press
  • Contact

Tag Archives: farmers market

Growing Corn

5 / 26 / 23

It’s time to start late spring and summer flowers & veggie’s


Photo: Farmers Almanac


Corn can be fickle, it likes warm weather and the bugs and four-legged critters may eat all of yours before you can get to it. Native Americans planted corn with beans and once the beans sprout they planted squash at the base of the corn. The beans will use the corn stalk as a trellis and the squash leaves will protect the base of the corn which grows very shallow. This is called The Three Sisters or Companion Planting.
Plant corn directly in the garden where it will receive at least 6 hours of sun, water well and help the pollen to reach the tassels. Each tassel that gets pollinated turns into a kernel. To make sure the plant is getting pollinated, shake the tassels so the pollen falls onto them, nature will take it from there. 
The ears are ready to harvest when the silks turn from light yellow to dark brown.

To cook, grill, steam or pop in the microwave. Leave the husk on the corn if you microwave and cook on high for 3 minutes (for two ears), add an extra minute with more ears. Let them slightly cool and peel the husk and silk off the corn.

NOW Booking for Vegetable & Flower Garden consult & Design

[email protected]
Leave a comment
Share
  • Pin it
  • Share
  • Tweet
  • Share
  • Email

Spring IS Coming!

3 / 7 / 23

It’s time to start late winter/early spring flowers & veggie’s

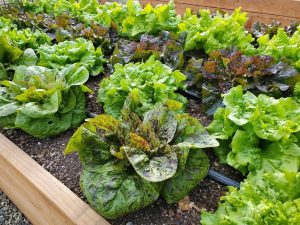
You still have time in zones 9/10 to get another round of onions, carrots, potatoes, beets, turnips, and radish in. Don’t forget to plant more lettuce, kale etc. Need a salad garden design? Email me

[email protected]

Plant your early spring flowering seeds and bulbs, Dahlias (tubers or seeds), sweet peas, tulips, narcissus, & ranunculus,
visit the bulb shop at your local nursery.

Even though you can pick up some tomato plants I’m waiting a week or two to start mine, it’s pretty cold out there right now, even if they go in later this month or next they’ll easily catch up to plants that go in now.

When the soil is too cool the roots just sit there until they get warmer weather.

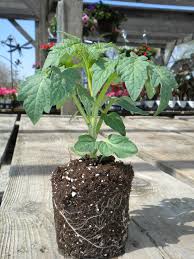
If you’re shopping for tomato plants remember to choose plants that have thick stalks (like the size of a pencil) with no fruit or flowers. When you first plant them you want the roots to grow and grow to get big & strong to support heavy loads of super juicy fruit! Be sure to stake or tie up early.

More Organic Edible Gardening & Flower Classes coming in 2023
Starting tomatoes from seed soon

For vegetables and fruits to plant now and mid-month visit

Debs Kitchen
and for more reading click below
Edible Gardening

NOW Booking for Vegetable & Flower Garden consult & Design

[email protected]

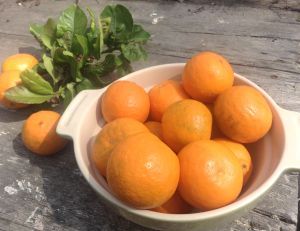
Ojai Pixie Tangerines

For now,  citrus picking has been going strong when it dries out for a little while. They won’t pick when the trees are wet and can’t get into the muddy fields. Our tangerine  favorites this time of year are the Ojai Pixie tangerines and the trees are loaded with fruit & should be readily available at your supermarket or from Melissa’s Produce! New crop just picked.

Leave a comment
Share
  • Pin it
  • Share
  • Tweet
  • Share
  • Email

Farm, Food & Wine Tour 2023

2 / 10 / 232 / 28 / 23

Farm, Food & Wine Tours are Back!!


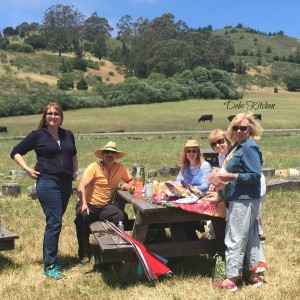
Join us for a long weekend of farm tours, wine tasting, vinegar tasting, a guided tour of olive oils and more.

Fri, Oct 27 – Sun, Oct 29

Stay at the beautiful Cambria Pines Lodge

Friday Night Dinner Party with Chef Debbi & The Debettes

Sat. travel with Coy from

The Wine Wrangler to Hambley Farms Lavender Fields,

Owner led farm tour, lavender picking (if lavender is still in bloom)

Picnic lunch.

Next we’ll visit a bio-dynamic farm and winery,
AmByth Winery 
Owner led vineyard, winery tour & tasting

Sunday

We’ll visit the lovely ladies at

The Groves on 41

for an olive oil immersion from education to tasting, with a walk in the groves

Picnic Lunch

Sponsored by

Melissa’s Produce


Limited Reservations  (12 people)

Full Price $949.00

Deposit $400

Final Payment due Aug 1 $549.00


Tour


/p>

Leave a comment
Share
  • Pin it
  • Share
  • Tweet
  • Share
  • Email

What to Plan/Plant for Your Fall Garden

8 / 2 / 21

Fall into Winter Gardens

Remove any summer crops that are starting to fade and prepare soil with mulch, mycorrhiza, compost.  Re-plant with fall/winter crops or cover crops.

Plant last round of heat loving crops

(early) tomatoes with harvest dates within 50-60 day range

Summer/winter squash (same requirements)

Peppers

Mid-season planting in August

Basil

Beans

Beets

Broccoli

Brussels sprouts

Cabbage

Carrots

Cauliflower

Chives

Cilantro

Cucumber

Dill

Lettuce

Kale

Mustard Greens

Onion, Shallots, Green onions

Radish

Peas, plant 2 rounds, August and again in Sept for fall/spring harvest

Spinach

Turnips, baby white turnips & regular

Late summer (end of Sept) plant cover crops for any areas where you won’t be planting any winter crops.


Some cool season vegetables should probably be protected from the hot months of Sept into Oct. But by planting these vegetables/fruits now they will benefit from the warmth of the soil and the longer days. If you wait too long, late Oct, the soil is already cooling down and the sun is leaning towards winter, the days growing shorter.

Need more help? Send me an email with questions. I have video’s available for guidance, contact me, [email protected]


Leave a comment
Share
  • Pin it
  • Share
  • Tweet
  • Share
  • Email

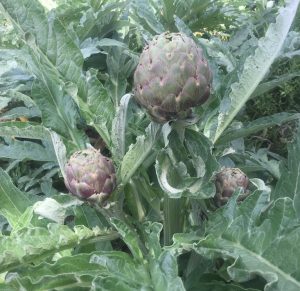
It’s Asparagus & Artichoke Season

4 / 24 / 21


A few things to know about asparagus now that it’s in season. Buy organic, fresh, California grown asparagus for the most nutritious and best tasting.

Asparagus is dioecious, meaning that it has separate male and female plants. The female plants make berries, containing seeds. The male plants just make flowers, containing pollen. But both of them produce spears.

Scott Walker, president of the world’s biggest asparagus seed company (Walker Brothers, of Pittsgrove, N.J.), says that he’s heard that on really hot days, asparagus can grow an inch per hour. But he’s never actually measured them. During harvest season, farmers struggle to stay ahead of the growing spears. Each field has to be harvested every day, and sometimes even twice a day.

After about six or eight weeks, farmers stop harvesting and let them grow wild. The plant needs to grow into a fern to capture energy from the sun and store it in the root for the next growing season.

After harvest, asparagus loses quality very rapidly––the sugar content declines and the amount of fibrous material increases. Use spears with compact heads; those with loose heads are fibrous and do not keep well.

There are 3 types of asparagus, green, white (which is blanched by covering the stalks with straw or mulch to keep it from turning green) and there is a purple variety.

Green asparagus is a bit grassy in flavor, while white asparagus is mild and slightly bitter. Purple asparagus is a bit nuttier and sweeter because it has about 20 percent more sugar in its stalks. Purple asparagus is a bit nuttier and sweeter because it has about 20 percent more sugar in its stalks. While the stalks are purple on the outside, the interior is the same green spear. The outside may appear a little purple-greenish when cooked. Blanch this and use it in salads.

How to buy asparagus; look for bright, green, evenly colored spears with tight buds. You can store asparagus standing up in a glass with a little water in the refrigerator, I like to use them within a few days. If the stalks are a little thick you might want to peel them down up a bit so they’re not so fibrous.

Cook asparagus by blanching, steaming, roasting or grilling. Here are a few of my favorite ways to serve asparagus.

Asparagus Casear Salad recipe

Asparagus Gratin recipe

Spring Artichokes

Read all about artichokes, how to choose and store them.

Artichoke Info & Recipes, click here


Leave a comment
Share
  • Pin it
  • Share
  • Tweet
  • Share
  • Email

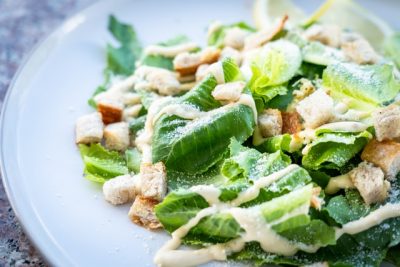
Caesar Salad with Spring Asparagus

4 / 23 / 21


Caesar Salad with Spring Asparagus

Save
Print
  • 2 bunches pencil-thin asparagus, trimmed and chopped into 1/2-inch pieces
  • 1 tablespoon mayonnaise
  • 1 ½ tablespoons red wine vinegar
  • 2 tablespoons freshly squeezed lemon juice
  • 1 garlic clove, minced
  • 1 teaspoon Dijon mustard
  • 1 teaspoon Worcestershire sauce
  • 1 teaspoon anchovy paste (or 1 anchovy filet)
  • 6 tablespoons extra virgin olive oil
  • Sea salt and freshly ground black pepper
  • 1/2 cup freshly grated Parmigiano-Reggiano
  • 1 head romaine hearts, chopped

Prepare a large bowl with ice and cold water, set aside to blanch the asparagus.

Bring a saucepan big enough to hold the asparagus to a boil, add a heaping tablespoon of salt and plunge the asparagus into the water, boil for 2 minutes. Drain the asparagus and put into the water bath until cooled, drain and set aside on a baking sheet covered with paper towels.

Combine mayonnaise, vinegar, lemon juice, garlic, Dijon mustard, Worcestershire sauce, and anchovy paste in a medium bowl and whisk until combined. While whisking constantly, add the olive oil in a thin, steady stream until incorporated. Season to taste with salt and pepper.

Toss the romaine with a little of the dressing. Transfer to a serving platter and top with asparagus and the grated Parmigiano-Reggiano. Serve extra dressing on the side.

Leave a comment
Share
  • Pin it
  • Share
  • Tweet
  • Share
  • Email

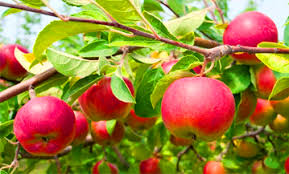
Apples

10 / 27 / 20


Apples are the ultimate fruit, low in calories with no fat, sodium or cholesterol. The pectin in apples actually helps to dissolve the cholesterol in one’s blood stream. High in fiber, anti-oxidants, potassium, niacin and a variety of vitamins, apples are a near perfect fruit. To get the most of the nutrition from an apple, eat organic apples with the peel on, most of the pectin lies just below the skin.

How to choose and store your apples…..

Choose organic apples as apples have topped the Environmental Working Groups ‘Dirty Dozen’ list, which identifies the most pest laden fruit and vegetables. You’ll want to eat the skin of the apple as disease-fighting pectin (fiber) lies directly under the skin

Select firm fruit with no bruises or scars and treat them gently.

Don’t wash your apples until you’re ready to use them.

Keep them in a cool place, your fruit drawer of the refrigerator is fine but don’t store with other fruit. Apples give off a gas, ethylene, which will ripen your other fruit faster. Some apples will keep weeks in the refrigerator. They will keep a few days on the counter.

How to choose which to use for baking or eating? Here’s a quick list:

Cooking

Ambrosia

Braeburn

Cameo

Golden Delicious

Honeycrisp

Jazz

Jonagold

Jonalicious

Jonathon

McIntosh

Pink Lady

Red Delicious

Fresh Eating

Ambrosia

Envy

Fuji

Gala

Golden Delicious

Honeycrisp

Jazz

Opal

Pink Lady

Sweetie


Oven Roasted Pork Chops

Save
Print

Serves 2 to 4

  • For the brine (optional)
  • 3 cups cold water, divided
  • 3 tablespoons kosher salt
  • 1 smashed garlic clove, 1/2 teaspoon black peppercorns, 1 bay leaf
  • For the chops:
  • 2-4 center cut, bone-in pork chops, 1-inch thick or more
  • Olive oil
  • Sea salt and fresh ground pepper
  • Fresh applesauce, optional as a side

Brine the pork chops if you have time, brining the pork makes it more tender and juicier.

Bring 1 cup of the water to a boil, add the salt, garlic, peppercorns and bay leaf to the water, and stir to dissolve the salt. Add 2 more cups of cold water to bring the temperature of the brine down to room temperature. Place the pork chops in a shallow dish and with the brine, if the chops aren’t covered add additional water and salt (1 cup water to 1 tablespoon salt) until the chops are submerged. Cover the dish and refrigerate for 30 minutes or up to 4 hours.

Heat the oven to 400°. Put a skillet that can hold the chops into the oven while it heats.

If you brined the chops remove and dry both sides, rub with olive oil and season with salt and pepper.

When the oven is preheated remove the skillet and set over a medium high heat on the stove. Sear the chops on both sides quickly, if they brown quickly turn the heat down slightly. You might want to open your windows and turn on a fan, the chops may smoke when you add them to the pan. When browned slide a probe thermometer into the middle of the chop without touching the bone and set to 140°, place the pan in the oven and cook until the thermometer’s alarm goes off. Remove the chops to a plate and let rest about 5 min. They will cook fast, 5-10 min. DO NOT OVERCOOK.

Serve with homemade applesauce and oven roasted potatoes.

Herb Roasted Potatoes

Save
Print
  • 1 pound Dutch Yellow Potatoes*, Yukon Gold or fingerling potatoes, cut in half lengthwise
  • salt and pepper
  • olive oil, as needed
  • 1 shallot, chopped
  • 1 tablespoon Italian parsley, minced
  • 1/2 tablespoon chives, minced
  • 2 tablespoons butter or olive oil

Preheat oven to 400°.

Place potatoes on foil lined baking sheet; season with salt and pepper and toss with just enough oil to lightly coat potatoes.

Bake for approximately 35 minutes. The last 10 minutes add shallots and herbs.

Toss with butter or olive oil.

*Dutch Yellow Potatoes are available from Melissas Produce

Order potatoes from Melissas Produce, click here

Applesauce Cake

Save
Print
  • Cake:
  • 2 cups all-purpose flour
  • 2 teaspoons baking powder
  • ½ teaspoon baking soda
  • ½ teaspoon salt
  • 1 teaspoon cinnamon
  • ½ teaspoon ground ginger
  • 1 stick unsalted butter, softened
  • 1 cup packed light brown sugar
  • 1 teaspoon pure vanilla extract
  • 2 large eggs
  • 1 ½ cups cinnamon applesauce
  • ½ cup walnuts chopped walnuts
  • Frosting:
  • 5 oz cream cheese softened
  • 3 tablespoons unsalted butter, softened
  • ¼ teaspoon pure vanilla extract
  • 1 cup confectioners sugar
  • ½ teaspoon cinnamon

Preheat oven to 350°F with rack in middle. Butter a baking dish.

Cake:

Whisk together flour, baking powder, baking soda, salt, and spices.

Beat butter, brown sugar, and vanilla with an electric mixer at high speed until pale and fluffy, 2 to 3 minutes. Add eggs 1 at a time, beating well after each addition, then beat in applesauce. At low speed, mix in flour mixture until just combined, then stir in walnuts.

Spread batter evenly in pan and bake until golden-brown and a wooden pick inserted into center comes out clean, 40 to 45 minutes. Cool in pan 15 minutes. Run a knife around edge of cake to loosen, then invert onto a plate. Reinvert cake onto a rack to cool completely.

Frosting:

Beat cream cheese, butter, and vanilla with an electric mixer at high speed until fluffy. Sift confectioners sugar and cinnamon over cream cheese mixture, then beat at medium speed until incorporated.

Spread frosting over top of cooled cake.

Easy Applesauce

Save
Print
  • 3 pounds organic apples, Fuji, Gala, Honeycrisp or Jonagold
  • 2/3 cup apple juice, orange juice or water
  • 8 tablespoons sugar
  • 3 teaspoons cinnamon
  • 1/4 teaspoon nutmeg

Core, peel and cut the apples into medium sized pieces. Place all ingredients into a saucepan with lid and simmer over low heat until apples are very tender, about 45 minutes. Put through a food mill to create a soft creamy applesauce or use a potato masher and serve chunky.

Pressure cooker or Instant pot:

Combine all the ingredients in the container, cover and lock into place. Press manual button and set timer for 4 min. Let the closed pressure cooker rest for about 10 minutes, release any pressure that’s left.

Carefully open lid, angling it away from you to avoid getting burned by the steam. Use a potato masher to crush with a slightly chunky consistency or put through a food mill for a smoother one.

Get one now!


Leave a comment
Share
  • Pin it
  • Share
  • Tweet
  • Share
  • Email

Late Summer/Early Fall Menu’s

9 / 21 / 20

While it’s still pretty hot out in So. California it’s hard to go into the kitchen to cook. Here are some light recipes that are quick and easy to prepare. Mangia!

Spinach Salad, Traditional

Save
Print

Serves 2

  • 6 ounces baby spinach, washed and dried well
  • 1/4 small or medium shallot, minced
  • 2 pieces thick-sliced bacon, finely diced
  • ¼ cup Champagne Vinegar, or Red Wine Vinegar
  • 1/2 teaspoon smooth Dijon mustard
  • Sea salt and freshly ground black pepper, to taste
  • 4 large white mushrooms, thinly sliced
  • 2 large egg, hard-boiled, chilled, peeled and thinly sliced

Remove any stems from the spinach and place in a salad serving bowl.

In a heated sauté pan add bacon and cook until crisp, drain on paper towels. Remove all but 2 Tb. of bacon grease and add vinegar, whisk in Dijon mustard and taste for seasoning. Pour over salad and toss quickly, scatter with mushrooms and eggs.

Serve while still warm.

Roasted Tomato & Goat Cheese Flatbread with Artichoke Pesto

Save
Print
  • 1 jar artichoke hearts, 12 oz., drained
  • 1 cup walnuts, toasted
  • 1/4 cup grated Parmesan cheese
  • 2 cloves garlic, peeled
  • 1/3 cup lemon juice, to taste
  • 1/2 cup olive oil, to taste
  • 1/4 cup minced fresh parsley
  • Salt and pepper, to taste
  • 1 pizza dough
  • 1 large heirloom tomatoes or ½ basket cherry tomatoes, cut in half
  • 4 ounces soft goat cheese

Drain the artichoke hearts. If they are marinated in oil, you can omit draining the hearts and adjust the oil measure downwards appropriately.

Add the artichoke to the food processor with the nuts, cheese, and garlic and pulse until you have a paste. Add in the lemon juice and with the motor running, drizzle in the olive oil. Scrape down the sides of the processor as needed and pulse until you have a uniform paste-like consistency.

Taste and season with salt, pepper, oil, and lemon juice to taste.

Heat oven to 450°. Roll pizza dough out to desired shape, place onto parchment lined baking pan. Brush 1” of the edge of the pizza dough with olive oil, spoon on the artichoke dip to the remaining dough, top with tomatoes, goat cheese and bake for 12 – 15 minutes.

Spinach Bacon Cheese Puffs

Save
Print

Baked pastry puffs stuffed with a cream cheese, feta, bacon and spinach filling. These are great appetizers that you can put together ahead of time and bake off as needed.

Yield: 10 puffs

  • 4 ounces cream cheese, softened
  • 1 large egg
  • 1 tablespoon olive oil
  • 1/2 teaspoon dried dill
  • 2 packed cups chopped fresh spinach
  • 3/4 cup crumbled feta
  • 3 slices crispy cooked bacon, crumbled
  • Sea salt and fresh ground black pepper
  • 1 sheet frozen puff pastry, thawed and cut into 10 squares (cut on a floured board), Keep the pastry cold until ready to use.
  • 1 tablespoon butter, melted

Preheat oven to 400°. Grease round or square muffin pan.

Place the cream cheese into a food processor, add egg, oil and dill and pulse until combined.

In a separate bowl mix the spinach, feta and bacon. Pour the cream cheese mixture over top, season it with salt and pepper and stir until combined.

Line the muffin pan with the pastry squares, stretching them out a little if needed; press them into the bottom of the cups. Divide the spinach among the cups as evenly as possible. Bring the 4 points together over the filling and press them together.

Lightly brush with the melted butter.

Bake about 25 minute until golden brown and puffy. Allow to cool in pan on wire rack 10 minutes then run a knife around the edges to loosen them and help pop them out.

Bird's Nest Pesto With Stuffed Tomatoes

Save
Print
  • Pesto
  • 1/2 cup pine nut -- lightly toasted; plus, some for garnish
  • 1 clove garlic -- peeled
  • 2 cups basil leaf -- loosely packed
  • 1/2 cup Parmesan cheese -- grated
  • Salt and pepper
  • Tomatoes
  • 11 ounces goat cheese -- room temperature
  • 1/4 cup heavy cream
  • Salt and pepper
  • 6 small tomatoes -- plum
  • Olive oil
  • 1 pound spaghetti -- or angel hair pasta

Pesto

In a food processor, rough chop pine nuts and garlic. Add basil and process using pulse until the leaves start to break down. Add the cheese and blend until you have a rough paste. With machine running add olive oil to emulsify. Season with salt and pepper.

Preheat oven to 425° and put a pot of water on to boil for the pasta.

Mix the goat and Boursin cheese with enough cream to make it soft and spreadable. Season with salt and pepper.

Cut the tops off of the tomatoes and scoop out the insides. Lightly salt and place, cut side down, on paper towels to drain for 20 min. Spread a little pesto on the inside of the tomato and fill to the top with the goat cheese mixture. Place in a lightly oiled baking dish. Drizzle a little olive oil over each one and bake until they start to shrivel, and the cheese is lightly browned, about 20 min.

Cook the pasta until al dente, reserving about 1 cup of the cooking water.

Transfer to a large serving bowl and toss with the pesto, adding a bit of the pasta water if necessary, to loosen the pesto. Plate the pasta and add a tomato in the center. Top with a sprinkling of toasted pine nuts.

Sea Bass Provençal

Save
Print
  • Olive oil
  • 1 small leek, cut in half and then into half moons
  • 1 clove garlic
  • 1 small can whole tomatoes, drained and chopped or 2 large fresh garden tomatoes
  • ¼ cup dry white wine
  • 2 teaspoons fresh thyme
  • ¼ cup Greek olives, halved
  • 1 teaspoon capers, drained
  • 4 4 ounce Sea Bass fillets, or any white fish

Heat a medium sauté or saucepan. Add enough oil to coat the bottom of the pan, add onion and sauté until lightly translucent. Add garlic and stir for about a minute. Crush or squish tomatoes and add tomatoes and remaining ingredients except the fish then simmer about 10 minutes. Set aside and keep warm.

Heat a large sauté pan over medium heat; add enough oil to coat the bottom of the pan. When oil is hot carefully place dried fish fillets into oil, it should start to simmer right away. Cook about 3-4 minutes and turn carefully for another 4 minutes.

Serve with sauce.

French Apple Cake

Save
Print
  • 1 cup all-purpose flour, spooned into measuring cup and leveled-off
  • 1 teaspoon baking powder
  • 1/4 teaspoon salt
  • 1 stick (1/2 cup) unsalted butter, at room temperature
  • 2/3 cup granulated sugar, plus more for sprinkling over cake
  • 2 large eggs
  • 1 teaspoon vanilla extract
  • 3 tablespoons dark rum
  • 2 baking apples, peeled, cored and cut into 1/2-inch cubes (I like Honeycrisp, Fuji or Granny Smith)
  • Confectioners' sugar (optional), for decorating cake

Preheat the oven to 350°F. Grease a 9-inch springform or regular cake pan with butter or nonstick cooking spray. If using a regular cake pan, line the bottom of the pan with parchment paper and grease again.

In a small bowl, whisk together the flour, baking powder and salt.

Using a handheld mixer with beaters or a stand mixer with the paddle attachment, cream the butter and granulated sugar until light and fluffy, about 3 minutes. Add the eggs, one at a time, beating well and scraping down the sides of the bowl after each addition. Beat in the vanilla and rum. Don't worry if the batter looks grainy at this point; that's okay. Add the flour mixture and mix on low speed until just combined. Using a rubber spatula, fold in the chopped apples.

Scrape the batter into the prepared pan and even the top. Sprinkle evenly with 1 tablespoon of granulated sugar. Bake for about 40 minutes, or until the cake is golden and a toothpick inserted into the center comes out clean. Allow the cake to cool on a rack. Run a blunt knife around the edges of the cake. If using a springform pan, remove the sides. If using a regular cake pan, carefully invert the cake onto the rack, remove the parchment paper, then gently flip the cake over and place right-side-up on a platter. Using a fine sieve, dust with Confectioners' sugar (if using). Cake can be served warm or room temperature, plain or with lightly sweetened whipped cream or vanilla ice cream.

Freezer Friendly Instructions: The cake can be frozen for up to 3 months. After it is completely cooled, cover it tightly with aluminum foil or freezer wrap. Thaw overnight on the countertop before serving.


Leave a comment
Share
  • Pin it
  • Share
  • Tweet
  • Share
  • Email

Fall Gardening & Cooking

9 / 18 / 20


Even though it still feels like summer (technically it is) fall will be upon us soon. Fall is the best gardening season in Southern California; the ground is still warm enough to germinate seeds quickly yet cool enough at night as not to kill the delicate plants. If you want to start a small kitchen garden now is the time. Here are some easy plants to grow with a little information on how to get them started. If you’d like more information just send me an email, [email protected] 

Vegetables for  Fall into Winter & Spring

Carrots and Radish
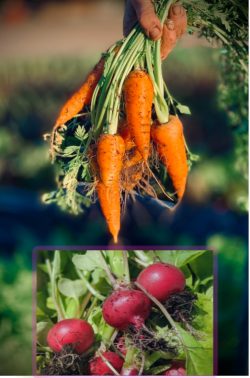
Grow carrots and radish in cool weather, that means fall through spring in Southern California. Succession plant carrots and radish every couple of weeks for continual harvest. They both like full sun to light shade and very, very loose soil. Rocks and clumps will cause the carrot to deform.

Carrots and radish grow well in containers as well. The seeds are very small, plant them about one-quarter inch deep. Carrots do best if direct seeded in the garden, but I’ve grown them in peat pots that you can just plop right into the garden after they sprout. This gives me more control to germinate the seeds which like to be moist, (not wet) and it’ll take up to 15 days for them to sprout.

After you’ve planted the carrots, plant the radish see directly around the carrot. The radish will help keep the soil loose around the top part of the carrot. Radishes grow quickly and will sprout in about 3 or 4 days and can be pulled in about 4 weeks.

Thinning: If too many plants come up in the planting bed don’t pull out the extra, cut it off so as not to disturb the plant next to it. If starting in pots to transfer to the garden be sure to break off the bottom of the pot so the carrot can grow straight otherwise when the root hits the bottom on the peat pot it may become deformed.

Beets
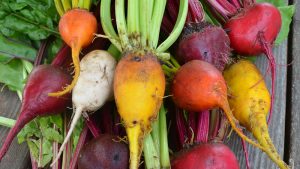
 

Beets are one of the easiest vegetables to grow. They’re almost never troubled by pests or disease. They don’t need staking, pruning or fussing. Just sow the seeds and you’ll have beets in about 6-8 weeks.

Plant seeds directly into the garden with loose friable soil. Each beet seed is actually a cluster of several seeds so you may need to thin the plants so as not to crowd each other out in the bed. To thin them just cut the top off of the weakest seedling and move on.Keep the soil moist until the beets germinate and plant in full sun. Beets will actually grow veery well over winter, they don’t mind the cold.

Harvest beets when they are small for the sweetest flavor, baby beets should be about 2” in diameter. You can let them continue to grow if you prefer bigger ones. There are many different kinds and colors of beets so try something unusual this year. Don’t forget the tops are edible as well! Salads and stir fried are just a couple of ways to prepare them. Treat them like you would cook or prepare spinach.

Peas
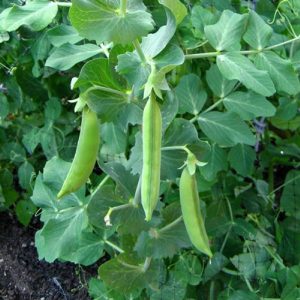
Snap peas are eaten whole, and both the crunchy pod and the peas inside taste sweet. Snap peas yield more food per square foot than the other types.

Snow peas produce tender, flat pods that are eaten whole. Snow peas also produce the most tender vine tips for adding to salads or stir-fries.

Shell peas are often called English peas, because many varieties were developed in Great Britain in the 18th century. Sweet green peas are shelled from tough, inedible pods.

Pre-soak seeds overnight in warm water to soften the seed coat. Peas like moist but not wet soil. I like to start them in Sept. and then plant out in the beds when it’s a little cooler, about the end of Oct. I succession plant them by starting new seeds mid Nov. and then again early spring, this means I’ll have peas all the way up to early summer next year.

Provide a trellis for your peas, check your seed package to determine the height that they will grow. Some are actually ‘bush’ type peas. Peas can be grown in containers, but your yield may be little smaller.

Spinach
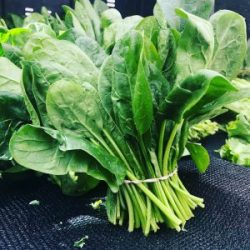
 

 Spinach is easy to grow during the cooler months of the year; it doesn’t like hot weather so you can enjoy it from fall to early summer in most parts of Southern California.

Spinach prefers a well-drained loose soil and plenty of nitrogen.

Start spinach indoors or direct seed in the garden as soon as the weather cools down. Start seeds early Oct and in about 3 weeks the transplants will be ready for the garden. If you direct seed wait till mid Oct. to plant unless you’re on the coast, then plant around the first of Oct.

Spinach will grow quickly and can be harvested at almost any stage. Succession plant it every 3 weeks for a continual harvest through early summer. You can harvest it when they leaves are the size you like. You can harvest it in the ‘cut and come again’ method, meaning pick the older, outer leaves first and let the inside grow a little more. You can try cutting the entire top off and it may re sprout with new baby leaves. Spinach is veery easy to grow and full of vitamins.

Do you need help with your garden? Virtual consultations are available, get in touch!

Ask Debbi


Leave a comment
Share
  • Pin it
  • Share
  • Tweet
  • Share
  • Email

San Diego County Farm Tour

2 / 21 / 202 / 27 / 20
San Diego County Farm Tour
Sat, April 18th
10:30-4
$125.00
Hosted by Chefs Secrets which is a new collaboration between
Debs Kitchen
&
California Greek Girl
Meet up at
Mountain Meadow Mushroom Farm, Escondido


Farm Tour!
Do you know how mushrooms grow? You’ll learn everything about mushrooms that you need to know! Did you know that mushrooms are a nutrient dense food? Good for you!

Here’s a link to their website for more info
Mountain Meadow Mushroom Farm
Here’s a blog post about the farm & yummy Mushroom Risotto recipe from Mary at California Greek Girl
Mushroom Risotto


Next we’ll head over to
North County Olive Oil Co. and meet Sue Rober at her Sunshine Gardens location where we will taste and experience their True California Olive Oils with style.

Their vision is to share with you their experience in the California olive oil industry. They have selected a portfolio of top producers who make both extra virgin olive oils and vinegars from California olives and grapes. They represent a variety of regions which offer unique styles from many varietals and cultivars of local California olives. We look for producers that promote sustainable practices in the grove and throughout their day to day practices.

Our Olive Oil Tastings offer a unique experience created around a variety of artisan producers of California extra virgin oil, wine and specialty artisan products.

A cooking demo & lunch will be served by
Chef Debbi & Chef Mary

Menu*

Cheese Platter with Seasonal Vegetables & Fruit
Winter Salad with Pixie Tangerines
Mushroom Risotto
Road Home Brownies

*Menu subject to availability
One glass of wine will be served with lunch.
Lemonade & Spring Water will be available.

Don’t miss the great swag bags that you’ll get to take home!

We encourage car pooling, need a ride or want to provide a ride?
Get in touch with Chef Debbi here
[email protected]

Now taking reservations

# in Party


Sponsored by Melissa’s Produce

Leave a comment
Share
  • Pin it
  • Share
  • Tweet
  • Share
  • Email

What’s In Season Now

1 / 27 / 20

Straight from your local farmers market you should start to see some of this produce available.

Asparagus
Avocados
Beets
Broccoli
Brussels Sprouts
Cabbage
Carrots
Cauliflower
Celery
Chard
Citrus:
Blood Orange
Grapefruit
Lemons
Navel Oranges
Tangelos/Tangerines
Lettuce
Mushroom
Mustard
Onion, Green
Passion Fruit
Peas, Snow & Sugar Snap
Spinach
Strawberries
Turnips

Leave a comment
Share
  • Pin it
  • Share
  • Tweet
  • Share
  • Email

Farm, Food & Wine Tour 2017

9 / 8 / 199 / 8 / 19

Highlights from our annual Farm, Food & Wine Tour from 2017. Thanks everyone for joining us! We’re sold out for this year but save the date for Oct 23-25, 2020.

Related Posts Plugin for WordPress, Blogger...
Leave a comment
Share
  • Pin it
  • Share
  • Tweet
  • Share
  • Email

Posts navigation

1 2 3 Next Page
Deb

Meet Chef Debbi

READ BIO

Join-Us Sign up for our newsletter to receive exclusive tips 'n tricks, and special offers on classes, tours, and more!

Recent Posts

  • New E-Book!
  • From the Pantry
  • Spaghettini at Home
  • Growing Corn
  • Spring IS Coming!

Categories

BookCUT

What's in Your Pantry?

How to stock your pantry to create delicious dishes.

Learn Chef Debbi's pantry essentials and how to substitute ingredients for pantry staples in her basic recipes for quick and easy meals.
BUY BOOK>

FacebookTwitterInstagramGooglepinterest


© 2014, DEB'S KITCHEN
Angie Makes Feminine WordPress Themes