These are my family favorites for the Thanksgiving Holiday, these recipes will serve 6-8 people. Many of the recipes can be made ahead of time making it easier to pull together the entire meal on one day. Make ahead the stock, gravy (add pan drippings later), mashed potatoes, dressing (I don’t stuff my turkey any longer and because I don’t I can cook a large bird in about 2 hours), green beans and of course the apple pie! I hope you enjoy and have a safe and tasty holiday!
Debbi & The Debettes (Sue & Barbara)
Watch my YouTube videos with Christina Peters on making Turkey/Chicken Stock and how to make successful gravy! Click here to watch!

Both recipes can also be found in my book, ‘What’s In Your Pantry’ pages 43, 44 and in the video’s.
Order my book here, next day shipping!

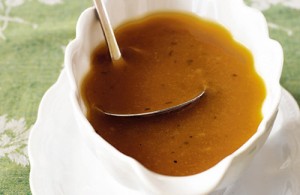
Citrus Cranberry Sauce, Instant Pot
- 2 (12-ounce) packages fresh cranberries
- 1/2 cup sugar
- 1/2 cup brown sugar
- 1 medium orange, zester and juiced
- 1 small cinnamon stick
Place cranberries, sugars, orange juice, orange zest, cinnamon and cloves into a 6-qt Instant Pot®. Stir until well combined.
Select manual setting; adjust pressure to high, and set time for 4 minutes. When finished cooking, naturally release pressure according to manufacturer’s directions, about 20-30 minutes.
Remove orange zest and cinnamon. Using a potato masher, mash cranberry mixture until desired consistency is reached.
Let cool completely.
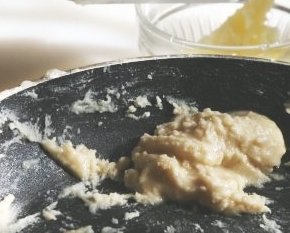
My Best Dressing for Thanksgiving
Old fashioned stuffing recipe but I cook it as a ‘dressing’ rather than stuffing a turkey. For one reason it’s safer (temperature-wise) and the turkey cooks faster if it’s not stuffed. If you stuff a turkey the stuffing needs to reach 165° to kill any bacteria, but that means the turkey is well past 185°, overcooked and dry. The spice that makes this dressing the bomb is Penzy’s Poultry seasoning, penzys.com, it’s definitely my go to herb blend!
- 1 loaf (1 pound) day-old crusty sourdough bread
- 1 ½ sticks unsalted butter
- 2 leeks, halved, thinly sliced, and rinsed well
- 1 small shallot, finely minced
- 4 celery stalks, diced (I like to use the celery hearts for this)
- ¾ teaspoon sea salt
- ½ teaspoon freshly ground black pepper
- 1 ½ Tablespoons poultry seasoning
- ¼ cup chopped parsley
- 1½ chicken stock, maybe up to 2 cups
- 2 eggs, lightly beaten
The day before you make the dressing tear the bread into 1-inch pieces and place on a baking sheet, set atop your stove for the bread to dry out slightly.
Preheat the oven to 350°F and grease a 9x13-inch baking dish.
Melt the butter in a large skillet over medium heat. Add the leeks, shallots, celery, salt, and pepper, and sauté until tender and translucent.
Place the bread into a large bowl and pour the vegetable mixture onto the bread cubes, add the poultry seasoning and parsley and toss lightly until coated. Add 1 cup of the chicken stock & toss again, the bread cubes should be fairly wet, if not add more stock and mix well until it is wet.
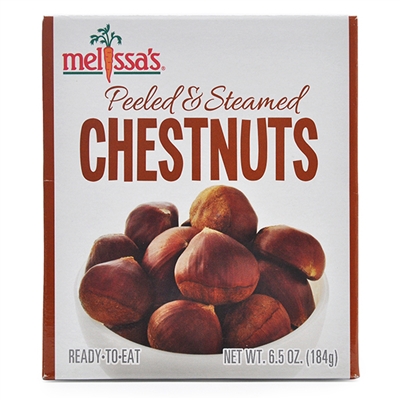
Before you add the eggs, taste the dressing, and adjust any seasoning. Then add the eggs and mix in well. *For a heartier dressing add Melissa's Steamed and Peeled Chestnuts (chop them into bite sized pieces and mix in). See link below.
Transfer to the prepared baking dish and bake, covered, for 30 minutes, uncover the dish and bake for 5 to 10 more minutes to crisp the top a bit.
Dried Herbs or ‘Poultry Seasoning’ from Penzy’s Spices
Melissa’s Steamed & Peeled Chestnuts
*Recipe for Chestnut Dressing can be found on page 120 in ‘What’s In Your Pantry’
Green Beans with Smoked Bacon & Caramelized Shallots
These are similar to my Grandmother’s Famous Green Beans but I replace her garlic with Caramelized Shallots.
- 2 pounds haricots verts (thin green beans), trimmed, blanched and dried well*
- ½ pound applewood smoked bacon
- 3 large shallots, quartered
- 2 tablespoon olive oil
- 2 tablespoons red wine or balsamic vinegar
- Sea salt & freshly ground black pepper
Cook bacon until crisp. Remove with a slotted spoon, and drain on paper towels, reserving 2 Tbsp. drippings in skillet.
Add olive oil to the pan with the bacon drippings then add the quartered shallots and sauté until browned. Add the vinegar, stir well, then add the green beans and toss until coated with oil, cook for another minute then season with salt and pepper and toss with bacon, serve hot.
To blanch green beans: Fill a large bowl with ice and cold water leaving room for green beans. Bring a large saucepan full of water to a boil and add green beans and a good helping of salt, cook for 1-2 minutes, drain the beans and plunge them into the bowl of ice water. Let them cool, drain and dry well.
Do Ahead Mashed Potatoes
- 3 lb. medium Melissa’s Dutch Yellow Potato*, scrubbed and cut in half
- Kosher salt
- ½ cup heavy cream
- ½ cup whole milk
- 1 stick unsalted butter, cut into pieces, room temperature
- ¼ cup sour cream
- Sea salt and fresh ground pepper
Cut the potatoes into like sized pieces so they all cook at the same rate. Cook the potatoes in large pot of boiling salted water until they are tender, about 20 to 30 minutes.
Drain the potatoes and return to the dry pot. Shake over low heat for about 1 minute. This helps make the potatoes fluffy as it whisks off excess moisture.
Mash the potatoes until there are no lumps
Heat cream, milk and butter in a small saucepan over medium until just about to simmer. Reduce heat to low and keep warm until ready to add to potatoes.
(If you have a potato ricer or mill, pass the potatoes through into a bowl. If you don’t have a food mill you can mash the potatoes with a potato masher), slowly add cream mixture while tossing gently, season with sea salt and pepper and mix in sour cream.
Take the potatoes out of the refrigerator about 3 1/2 hours before serving time. Stir the potato mixture well. Remove the potatoes from the dish and place it in a 4- or 5-quart crockpot. Cover and cook on low heat for 3 to 4 hours, stirring once or twice.
add more melted butter, sour cream or milk if you want a softer consistency. The potatoes can be held in the slow cooker an additional 30 minutes or more on low. Or turn the crockpot to "keep warm" for another hour or two.
*Melissa’s Dutch Yellow Potatoes can be found at Gelsons, Bristol Farms and Lazy Acres or order from their website (link below).
Herb Roasted Turkey
- 10 -12pounds free range or organic turkey, Diestal is my favorite and available at Gelsons
- 2 medium onion, quartered with peel on
- 6 carrots, peeled and roughly chopped
- 6 celery stalks, roughly chopped
- 1 bunch Italian flat leaf parsley
- 1 bunch fresh sage
- 1 whole bay leaf
- ½ bunch fresh thyme
- 2 Meyer lemon
- ¼ cup butter, room temperature
- Sea salt and pepper
- 1 cup dry white wine, Sauvignon Blanc is my go to
- 1 cup chicken or turkey stock
Preheat oven to 425°
Remove turkey from refrigerator and let rest for 1 hour before cooking. Carefully rinse and dry turkey inside and out, dry well. Select a roasting pan where the turkey will fit snugly but doesn’t hang over the side. Place ½ of the herbs into the pan as a bed for the turkey, roughly chop the remainder of the herbs and stuff inside the turkey. Squeeze the lemons over the turkey and place the rinds into the pan with the herbs.
Place the turkey inside the pan and rub with butter, season with sea salt and pepper.
Insert probe thermometer and set for 165°. The turkey will cook for approximately 2 hours. Pour wine and chicken stock in the bottom of the pan and place, uncovered in hot oven.
Baste after 1/2 hour, if you don't have enough juice in pan use some stock. Do not cover bird until browned and then loosely place foil over breast. If wings start to brown to early wrap with foil. If the breast starts to brown too much, loosely cover with foil and turn oven down to 400°.
Let turkey rest for 15 minutes before carving.
*Pick up a probe digital thermometer here
To make sure your oven is the correct temperature use an oven thermometer
Dutch Apple Pie
- Pâte Brisée, (Pie Crust)
- 1 ¼ cups flour
- ½ teaspoon salt
- 1 stick cold butter, cut into pieces
- 2-4 tablespoons ice water
- 1 tablespoon sugar, optional (for Pâte Sucrée, sweet pie dough)
- For the Dutch Apple Pie:
- 1 pie crust
- 2 ¼ pounds of baking apples, about 6 medium
- 1 teaspoon cinnamon
- 8 tablespoons unsalted butter, 1 stick)
- 3 tablespoon flour
- 1/4 cup water
- 1 cup sugar
- For the Crumb Topping:
- 1 cup all-purpose flour
- 1/4 cup packed brown sugar
- 2 tablespoon sugar
- 1/4 teaspoon cinnamon*
- 1/4 teaspoon sea salt
- 8 tablespoon unsalted butter, room temperature
Add flour and salt (sugar also if making Pâte Sucrée) into the bowl of a food processor; pulse a few times to incorporate all the ingredients.
Add the butter and process until the mixture is crumbly and the butter is pea size.
Place the mixture into a wide bowl and add water 1 tablespoon at a time until the mixture comes together. Don’t overwork the dough or it will be tough, not flaky. Once the dough comes together in a ball flatten into a disk, wrap in plastic wrap and refrigerate for 30 minutes.
Dough can be wrapped well at this point and frozen for up to three months. Let the dough defrost overnight in the refrigerator before using.
Roll chilled disk out on a floured counter or rolling mat, lifting and moving the dough every few rolls to help prevent sticking. Add only enough flour to the counter to keep the dough from sticking.
Place your pan on top of the dough to make sure it is the correct size, it should be slightly larger than the pan, then roll the dough onto your rolling pin and unroll over your pan. Gently lift and lay the dough to fit the pan, never pull the dough to stretch it. Lightly press the dough into the pan, roll your rolling pin over the top edge of the tart or pie pan and remove excess pastry, or pinch the edges to your liking.
Cover and refrigerate for 30 minutes or while you prepare filling.
Your pie crust should be rolled out into the pie pan and be resting in the refrigerator.
Preheat oven to 375˚F. Place your rack in the center of the oven.
Peel, core, and thinly slice apples to about 1/4” thickness. You should have 7 cups of sliced apples. Place them in a mixing bowl and stir in 1 teaspoon cinnamon.
Melt butter in a medium saucepan over medium heat. Whisk in flour then simmer for 1 minute, whisking constantly. Whisk in water and sugar and bring to a boil. Reduce heat and continue simmering for 3 minutes, whisking frequently. Pour the sauce over the apples and stir to coat the apple slices. Pour apples over bottom crust.
To Make the Crumb Topping, stir together dry ingredients: flour, sugars, cinnamon, and salt. Add butter and work it into the mixture with our hands until pea-size crumbs form throughout the mixture. Spread the crumb topping evenly over your apples, place pie onto a baking sheet and bake uncovered for 50-60 minutes or until the center of the pie registers 175˚F. If topping is browning too much, cover with a sheet of foil. Remove from oven and cool 1 hour to allow the filling to set so it’s easier to slice.
*Cinnamon, I like using Penzey’s Spices ‘Baking Spices’ instead of just cinnamon.