Deb's Kitchen - Farm, Food, Wine & Lifestyle Adventures
  • Facebook
  • Google
  • Twitter
  • Instagram
  • Pinterest
  • Email
Menu
Skip to content
  • Home
  • Blog
  • Events
    • Classes
    • Tours & Adventures
  • Edible Gardening
  • Preserving
  • Recipes
    • Appetizers
    • Soups and Salads
    • Main Dishes
    • Side Dishes
    • Desserts
  • About
    • Whats In Your Pantry
    • Ask Debbi
    • Deb’s Kitchen Botanicals
    • Press
  • Contact

Tag Archives: turkey gravy

Herb Roasted Turkey

11 / 16 / 18

From my book, What’s In Your Pantry. Buy the book here


Herb Roasted Turkey

Save
Print

I no longer stuff my turkey; it takes too long to cook the stuffing to 165°, the recommended temperature to kill any bacteria; by that time the turkey itself is overcooked. I can also make the dressing the day before, bake it and heat it while I’m making the gravy.
Try serving with Duchess Potatoes instead of the traditional mashed.

  • 12-14 lb. free range or organic turkey, room temperature
  • 2 medium onion, quartered with skin on
  • 4 carrots, peeled and rough chopped
  • 3 celery stalks, rough chopped
  • 1 bay leaf
  • 1 bunch Italian flat leaf parsley
  • 1 bunch fresh sage
  • 1 bunch fresh thyme
  • ¼ cup butter, room temperature
  • salt and pepper
  • 1 lemon, Meyer lemon is preferred
  • 1 cup white wine
  • 1 cup turkey stock, see recipe in Basics chapter
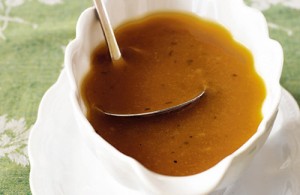
  • Gravy
  • ¼ cup dry white wine
  • 8 tablespoons unsalted butter
  • ½ cup flour
  • 7 cups turkey stock, approximately
  • salt and pepper

Preheat oven to 425°.

Wash and dry turkey inside and out; dry well.

Choose a roasting pan that will fit the turkey with no more than 2” of space on any side, otherwise the juices that accumulate in the bottom of the pan may burn.

Place ¾ of the onion, carrots and celery plus bay leaf, ½ of the bunch of parsley, sage and thyme into the bottom of a baking pan that will fit the turkey, don’t let the turkey hang over the edge and make sure there is no more than 2” open on each side of the bird. (The turkey will sit on this bed of vegetables instead of a rack).

Pat the turkey dry and rub the turkey with butter, season with salt and pepper. Squeeze lemon over turkey and tuck rind under the bird. Insert an oven-proof probe thermometer into thick part of the thigh and set for 165°.

Pour wine and turkey stock in the bottom of the pan and place uncovered in hot oven. (The total cooking time will be approximately 1 – 1 ½ hours).

Baste after ½ hour; if you don't have enough juice in pan use some extra stock. Do not cover bird until browned and then loosely place foil over breast. If wings start to brown too early, wrap with foil. Baste every ½ hour until the turkey is done. Remove from the oven, place turkey on a cutting board or platter, and tent lightly with foil, do not remove probe thermometer until you’re ready to carve the turkey. Let the turkey rest for 20 minutes before carving.

Remove the vegetables and herbs from the roasting pan; place the roasting pan on two burners, add the wine, and turn the heat to medium, bring to a boil and scrape the bits (fond) from the bottom of the pan. Strain this liquid into a large measuring cup, through a cheesecloth lined sieve before continuing, add turkey stock to equal 8 cups.

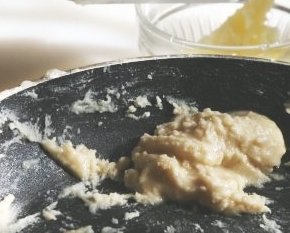
Make a roux for the gravy:

Add ½ cup of butter to the hot roasting pan and, when melted, add flour and whisk until roux is light brown.

Whisk pan the reserved pan drippings and stock into the roux, pouring in a steady stream until desired consistency is reached. Season with salt and pepper, keep warm.

Makes approximately 8 cups.

Turkey will serve 8-10

Leave a comment
Share
  • Pin it
  • Share
  • Tweet
  • Share
  • Email

Easy Thanksgiving Shortcuts

11 / 16 / 16

How to Make Stock & Gravy for the Holidays

These are two great project to make this weekend and freeze for your holiday next week. You don’t need to wait until the turkey is cooked before making your gravy. You can make the stock in a slow cooker, much hands off and you don’t need to precisely cut the vegetables since you will discard them after the stock is made. 
This time of year all grocery stores, especially the high end ones, Whole Foods, Gelsons, Lazy Acres, Bristol Farms will carry turkey and chicken pieces for your stock. You can mix chicken parts with the turkey and you won’t notice a difference.

Even if you say you don’t want ‘pre-made’ gravy and want to wait until your bird is done, make the roux (flour and fat which thickens the gravy) ahead of time and refrigerate. Cut up the vegetables for the stock, put them in a freezer bag and pop in the freezer until you make the actual stock. There’s enough to do at the last minute! I know many of you will balk at not stuffing your bird but it’s very dangerous and takes so much longer to cook that the turkey is usually overdone. If you insist that the dressing tastes better there are a couple of ways you can accomplish more ‘turkey’ flavor in the dressing. One, use turkey stock to make the dressing/stuffing and mince some turkey parts to mix in with the dressing. You can buy gizzards, hearts etc. and use them to make stock then mince and add to the dressing. Here’s a really great trick to cut down on time in the kitchen….Cut your turkey into pieces instead of cooking a huge unwieldy bird. Add the dressing to the pan with the turkey 30 minutes before it’s due to come out of the oven and you’ll have that ‘cooked in turkey’ taste. The turkey not only cooks faster, it’s easier to serve, easier to carve and the clean up is next to nothing. You won’t have that carcass that you try and cover and stick in the overcrowded refrigerator and you will have a perfectly cooked bird as you can now remove the breast pieces from the oven when they are done rather than take the chance the breast will be overdone before the legs/thighs are cooked. 

So those are my simple tricks to make Thanksgiving an easier meal to cook. Get started with these two short video’s and get cookin’ this weekend! 

Happy Thanksgiving to you all!

Here are a couple of video’s that I made with my friend, Christina Peters from
Food Photography Blog


Leave a comment
Share
  • Pin it
  • Share
  • Tweet
  • Share
  • Email

How to Make Mashed Potatoes

11 / 27 / 1311 / 5 / 14

How to Make  Mashed Potatoes!

 russet potatoes

 (Easy Peasy)

1 medium organic* russet potato person

1 tablespoon Kosher salt

1 -2 tablespoons butter, REAL BUTTER, unsalted

1/2 cup milk (cream if you want to be decadent, or mix the two)

Sea Salt and pepper

1 tablespoon sour cream, optional

1 teaspoon chives, optional

1 tablespoon grated cheese, optional


Wash potatoes and then cut into large chunks, place into a large saucepan and cover with cool water. Add a tablespoon of Kosher salt, bring to a boil and cook until fork tender, about 15 minutes. 

Heat the butter with the milk (I use the microwave). If you use the microwave wait to heat until the potatoes are cooked. Drain the potatoes and peel the skin off with tongs. For creamy soft mashed potatoes slip through a ricer into the still hot saucepan that you cooked them in (without any water!) If you don’t have a ricer just put the chunks back into the pan, place on the stove over low heat for a minute or two. This helps to dry them a little further so they absorb the butter and milk more evenly.mash


Add enough butter and milk (or cream) to the potatoes and lightly mashed with a potato masher, they should come together easily. Don’t overwork the potatoes or they can turn gummy. Season with sea salt and pepper to taste and add any optional ingredients, serve.

If you’re making potatoes for a crowd they can be made about 1 hour ahead of time and kept warm on low in a preheated slow cooker! (I don’t remember where I learned that trick but thank you to whoever it was that shared it)


*Organic potatoes, all kinds of pesticides and sprays are used on conventional potatoes to keep bugs from eating them while they grow. Then to harvest them and finally to keep them from sprouting in the store. Choose organic for your health.


2 Comments
Share
  • Pin it
  • Share
  • Tweet
  • Share
  • Email

How To Make Gravy

11 / 25 / 1311 / 5 / 14

How To Make  Gravy

turkey gravy

(Easy Peasy)


There are two methods to making a smooth and easy gravy. It’s much easier if you prepare or purchase a good turkey or chicken stock a few days ahead of time. Below you’ll find a recipe for home-made chicken/turkey stock if you prefer to make your own. Make it ahead of time, refrigerate for three days or freeze for up to three months. This will also make it easier to remove any fat that has congealed on the top.

The thickening agent in an easy gravy is flour, you could use cornstarch but if you cook it too long the cornstarch will start to break down. The two methods are Beurre Manie or Roux. Both can be made ahead of time and both can be refrigerated for weeks or frozen in to ‘logs’ and then you can cut off any amount you may need for your dish.

Both methods require equal amounts of fat and flour, usually butter. Use approximately 1 tablespoon of either mixture per cup of liquid/pan drippings. Any pan drippings should be added to the stock before adding the thickener. If you’d like to defat the pan drippings, pour off liquid and put into the freezer until it begins to harden, about 10 minutes, scrape the fat off the top of the drippings and add the liquid to any stock you are using. Bring to a boil and add thickener as described.


So on to the recipes!

Butter


Beurre Manie (Kneaded Butter)

In this case the thickener is added to the hot or boiling stock.

½         cup butter, unsalted and room temperature

½         cup flour


beurre manie 2

Place butter into a small bowl and mash flour into the butter with the back of a spoon until completely incorporated. Bring your stock to a boil and add Beurre Manie while whisking until thickened.

beurre manie 3

Roux

Also equal parts butter and flour but the stock or pan drippings are added to the hot melted roux.

Per cup of stock/pan drippings:
1 – 2    tablespoons butter
1 – 2    tablespoons flour

roux

Add butter to a sauté pan and when melted, whisk in flour at all once, keep whisking until thickened and the flour has a chance to cook a little, maybe 1 minute. Add hot liquid while whisking into the roux.

Neither of these methods will result in any clumping as the flour has already bonded with the fat and will melt smoothly into your sauce.

Here’s a good basic ‘Enhanced Chicken Stock’ recipe:


[amd-zlrecipe-recipe:12]

Related Posts Plugin for WordPress, Blogger...
2 Comments
Share
  • Pin it
  • Share
  • Tweet
  • Share
  • Email
Deb

Meet Chef Debbi

READ BIO

Join-Us Sign up for our newsletter to receive exclusive tips 'n tricks, and special offers on classes, tours, and more!

Recent Posts

  • New E-Book!
  • From the Pantry
  • Spaghettini at Home
  • Growing Corn
  • Spring IS Coming!

Categories

BookCUT

What's in Your Pantry?

How to stock your pantry to create delicious dishes.

Learn Chef Debbi's pantry essentials and how to substitute ingredients for pantry staples in her basic recipes for quick and easy meals.
BUY BOOK>

FacebookTwitterInstagramGooglepinterest


© 2014, DEB'S KITCHEN
Angie Makes Feminine WordPress Themes