Here are several recipes for Valentines Day, cook a restaurant style meal and relax in front of the fire!
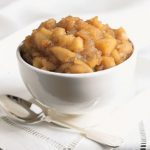
White Wine Braised Artichoke Hearts
Serve with some toasty slices of artisan bread.
- ¼ cup chicken or vegetable stock
- ¼ cup white wine
- 1 clove garlic, minced
- 1 lemon, zested and juiced
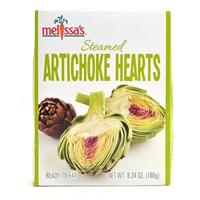
- 2 packages Melissa’s Steamed Artichoke Hearts*
- 2 tablespoons lemon olive oil, or regular olive oil
- 2 tablespoons Italian parsley
Add stock, white wine, garlic and lemon juice to a deep sauté pan then add the artichoke hearts. Simmer until most of the liquid has been reduced then toss with lemon zest, olive oil and Italian parsley.
Melissa's Artichoke Hearts can be found at many markets, Gelsons, Lazy Acres, Bristol Farms and Trader Joe's

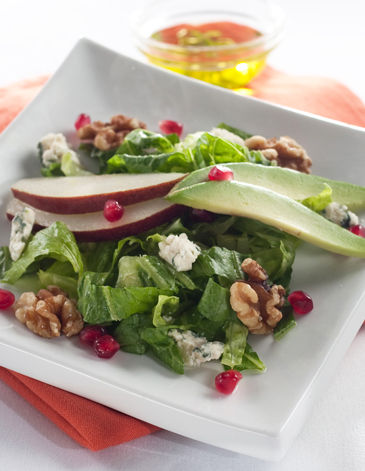
Shrimp Salad with Avocado
- 1 pound medium shrimp, cooked (frozen), defrosted
- 1/4 cup diced celery
- 2 tablespoons chopped red bell pepper
- 1 tablespoon fresh lemon juice
- 3 tablespoons mayonnaise, or to taste
- 1/4 cup mixed salad greens
- 1 handful cherry tomatoes, sliced in half
- 1 lg. avocado, halved
- Sea Salt and fresh ground pepper
- 1 tablespoon fresh dill, chives or cilantro, minced, optional
Defrost the shrimp and dry with a paper towel, chop coarsely.
Mix the chopped shrimp with the celery, bell pepper, lemon juice, and mayonnaise.
Add salt and pepper to taste. Taste and adjust the mayonnaise and seasonings, as desired.
Place half the lettuce in a bowl, add one half of the avocado, season with a pinch of salt and pepper. Scoop the shrimp salad into the cavity of the avocado and garnish with cherry tomato halves and herb(s), if using.
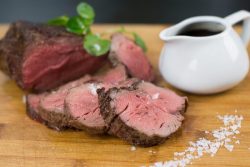
Filet Mignon for Two
- 2 pounds beef tenderloin*
- Sea salt and fresh ground pepper
- 2 tablespoons unsalted butter, plus 2 for the sauce
- 2 tablespoons olive oil, plus more for the sauce
- 4 ounces sliced crimini mushrooms
- 1 small shallot, minced
- 3 tablespoons flour
- 1 ½ cups dry red wine
- 2 ½ cups beef broth
- 1 tablespoon demi-glace*
Preheat your oven to 400°. Line a small baking sheet with parchment paper (or foil) and set aside.
Dry the roast with paper towels and sprinkle with sea salt and fresh ground pepper.
Heat a sauté pan and add butter with a splash of olive oil, when melted and hot add the roast and brown on both sides. Set onto prepared baking sheet with parchment, roast for approximately 30 min. Use a meat thermometer to accurately gauge cooking time & temperature. Remove the roast from the oven when the temperature reaches 130°, loosely tent with foil while you make the sauce.
Add the pan drippings, splash of olive oil, mushrooms, chopped shallot to the pan drippings and sauté until translucent.
Stir in flour until well blended; add the red wine, broth and demi-glace.
Simmer until reduced by about by half. Add 2 tablespoons unsalted butter and season with salt and pepper to taste. Pour the sauce into a serving dish such as a gravy boat.
Slice the tenderloin after it has rested for at least five minutes.
This cut of meat can be called a filet mignon roast or chateaubriand
Demi-glace can be found at Gelson's, Lazy Ares and Bristol Farms

Molten Chocolate Lava Cakes for Two
- 2 ounces unsalted butter
- 3 ounces dark chocolate, chopped
- 1 teaspoon espresso powder
- 1/4 cup light brown sugar, packed
- 1/4 cup confectioners' sugar
- 1 large egg, room temperature
- 1 egg yolk, room temperature
- 1/2 teaspoon vanilla extract
- 1/4 cup flour
- 1/8 teaspoon salt
- Raspberries, for garnish
Preheat oven to 450°F.
Generously grease two 6-ounce ramekins with butter and place on a baking sheet and set aside until needed.
Add the butter and chocolate to a large, microwave safe bowl and microwave in 20 second increments, making sure to stir well after each increment, until chocolate is completely melted. Remove from the microwave and whisk smooth. Whisk in the espresso powder. Then whisk in both sugars, stirring until well combined. Add in the egg, egg yolk, and vanilla and mix until well combined.
Toss in the flour and salt and mix until just combined, being sure not to over mix the batter.
Evenly divide the batter among the prepared ramekins and place them back on the baking sheet.
Bake for 11 to 12 minutes, or until the tops have puffed up and the edges are firm, but the center is still slightly jiggly.
Remove from the oven and cool for exactly 1 minute. Using a tea towel to protect your hands, carefully invert each ramekin onto a small plate. Top with chocolate shavings and berries, if using. Serve at once and enjoy!
Avocado with Shrimp Salad photo by Food 52
Chocolate Lava Cake photo, Ghirardelli
White Wine Braised Artichoke Hearts
Serve with some toasty slices of artisan bread.
- ¼ cup chicken or vegetable stock
- ¼ cup white wine
- 1 clove garlic, minced
- 1 lemon, zested and juiced
- 2 packages Melissa’s Steamed Artichoke Hearts*
- 2 tablespoons lemon olive oil, or regular olive oil
- 2 tablespoons Italian parsley
Add stock, white wine, garlic and lemon juice to a deep sauté pan then add the artichoke hearts. Simmer until most of the liquid has been reduced then toss with lemon zest, olive oil and Italian parsley.
Melissa's Artichoke Hearts can be found at many markets, Gelsons, Lazy Acres, Bristol Farms and Trader Joe's