Author: Chef Debbi Dubbs
Osso Buco

I was in Lazy Acres meat department picking up an order when I notice the beautiful veal shanks in the case. This time of year, I love any kind of braised meat, beef, or chicken and one of my favorites is Osso Bucco. I’m not sure why you don’t see it on restaurant menu’s very often, perhaps the cost of veal would choke you, but you can also make it with beef shanks which aren’t quite as expensive.
Although this dish takes a fair amount of time to cook, hands-on cooking time is very little. Instead of cooking the dish in an oven for up to 3 hours, a slow cooker or maybe even an instant-pot would do.
A braise is a dish that used two kinds of cooking techniques, one is searing, and the other is moist heat cooking (in liquid). Wine, broth, and tomatoes are used to ‘stew’ this rather tough cut of meat into fall apart deliciousness. Typically served with Risotto Milanese but you could substitute mashed potatoes or pasta.
6 1-1/4-inch-thick veal (or beef) shanks
Sea salt and freshly ground black pepper
1/2 cup all-purpose flour for dredging
1/4 cup extra-virgin olive oil, reserve 1 tablespoon
1 tablespoon unsalted butter
1 large yellow onion, diced
2 stalks celery, finely diced
1 medium carrot, diced
1 teaspoon dried oregano
3/4 cup dry white wine
2 tablespoon tomato paste 1
1 28-oz. can Italian plum tomatoes, drained and chopped, juices reserved
1 cup low-salt chicken broth, more if needed
1 large sprig thyme
1 bay leaf
1 Tbs. arrowroot mixed with 2 tsp. broth or water
Preheat the oven to 350°.
Wrap string around the shanks to hold them together. Put the flour onto a paper plate, Season the shanks with salt and pepper. Dredge the shanks lightly in flour, shake off the excess.
Use a large Le Creuset or the like, one that you can fit all the shanks in laying flat.
Heat pan and add oil, when hot add ½ the shanks and brown well on both sides. Remove and repeat with remaining shanks, set aside.
Pour or scoop excess oil out of the pan leaving the browned bits on the bottom of the pan. Return the pan to medium heat and add the butter and reserved 1 Tbs. of oil.
When the butter is melted, add the onion, celery, carrot, oregano, and 1 tsp. salt. Cook the vegetables, stirring occasionally, until soft and lightly browned and translucent. Add the wine, and increase the heat to medium-high, and cook, scraping up any brown bits with a wooden spoon, until the wine is reduced to about 1/4 cup, about 3 minutes Stir in the tomato paste. Add the tomatoes with their juices, the broth, thyme, bay leaf, 1/2 tsp. salt, and a few grinds of pepper. Add the shanks back to the pan, cover and cook in the oven until tender, 1-1/2 to 2 hours, checking the liquid occasionally.
If it has cooked down, add enough broth to keep the level about halfway up the shanks. To check for doneness, pierce a shank with a fork. The meat should pull apart easily.
Strain the pan juices through a medium-mesh sieve into a saucepan, pressing hard on the solids with a spatula to extract as much sauce as you can. Bring the sauce to a simmer. Whisk in the arrowroot mixture and cook briefly to thicken.
To cook in a slow cooker, after browning the meat and deglazing the pot, add the shanks to a slow cooker and pour all the juices over them. Cover and cook on low heat for 6 to 8 hours.
Recipe edited from Fine Cooking
New Classes 2022
Happy New Year to all!
Unfortunately, we are still dealing with a pandemic and since infections & hospitalizations are on the rise Cal State Fullerton’s Arboretum has decided not to host indoor classes at this time. We are trying to arrange ‘al fresco’ cooking classes but for comfort (weather-wise) they won’t be offered until a little later in the spring. But we WILL be back, patience for good food!
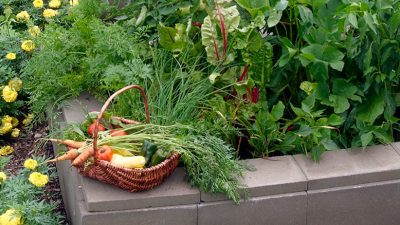
In the meantime, I’ve been falling back on my other love, Edible Gardening. Most of you know I’ve been gardening for over 20 years. Last year I was asked by a local (Oceanside) college to teach online Zoom classes in vegetable gardening. They are going so well we decided to add more Edible Gardening classes this winter/spring. I will add those to my website when registration is live. I’ve also added extra classes to my own company, Debs Kitchen, classes are 2-2 ½ hours in length with the last half hour dedicated to sharing a recipe. I hope you’ll join me.
Farm Tours Update
![]()
YES! Spring tours will be back! Mary & I are in the process of setting up some new, local, So. Cal farm tours & educational seminars & tastings. Send us an email on what you’d like to see, do, taste!
Debs Kitchen Winter Classes
On Line Classes begin Jan 29
Registration is live! For the moment, all classes will be Zoom classes
 Register Here for all Classes
Questions? Send me an email, Debbi
Debs Kitchen Class Registration
Sign Up for Current Class Schedule
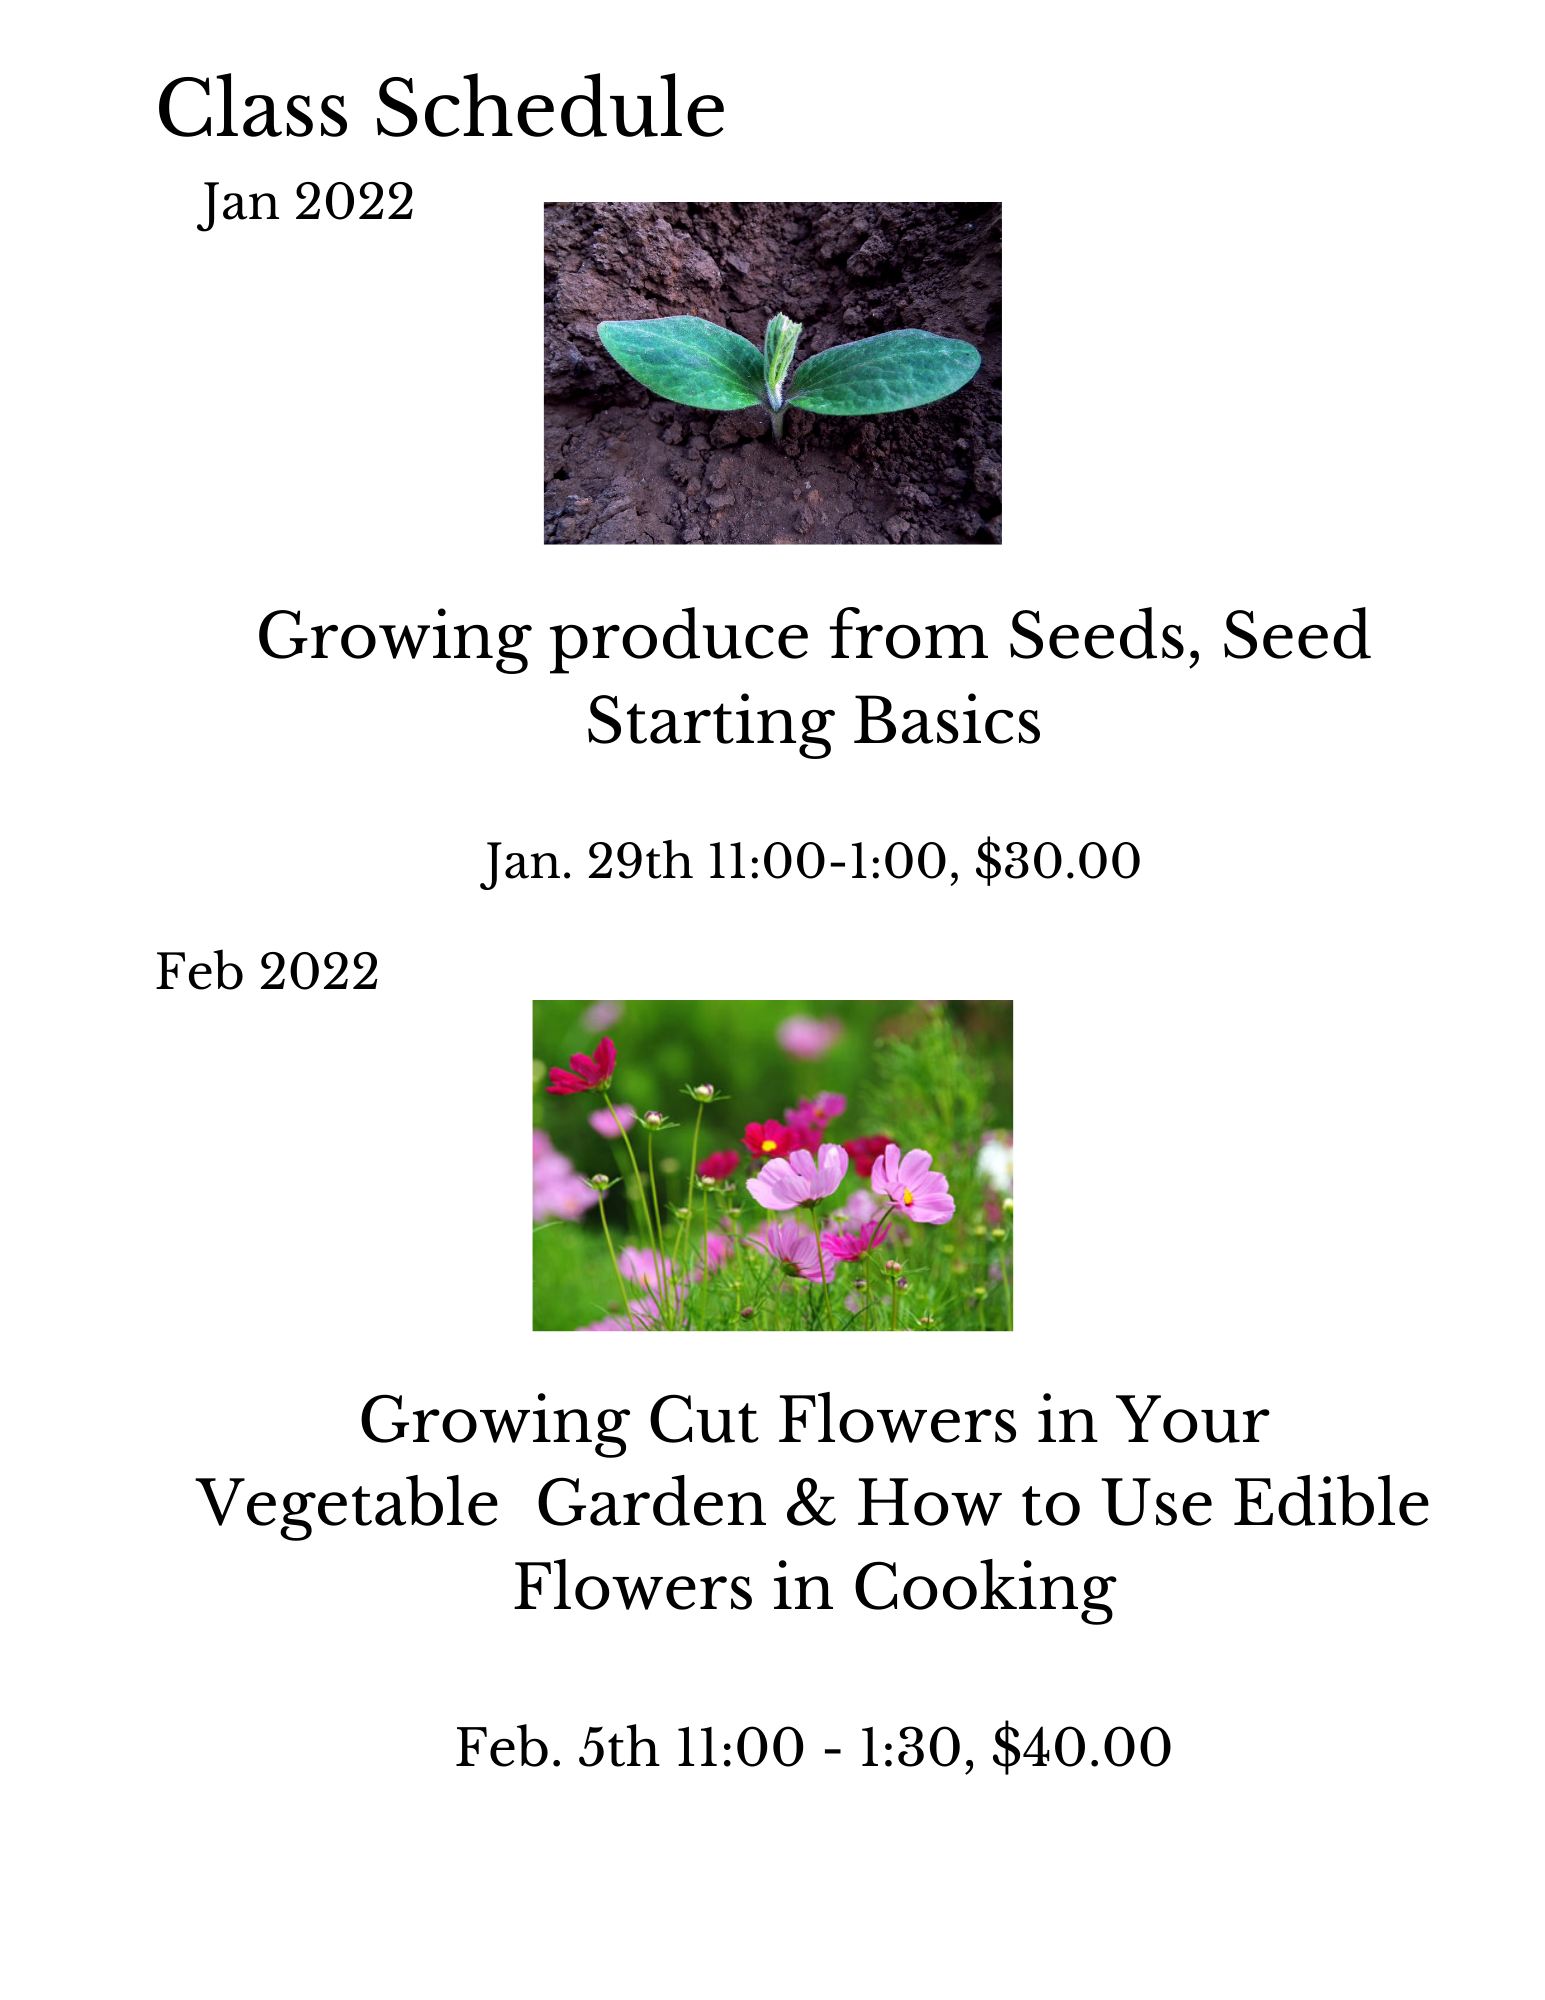
Growing produce from Seeds, Seed Starting Basics
Jan. 29th 11:00-1:00, $30.00
Growing Cut Flowers in Your Vegetable Garden & How to Use Edible Flowers in Cooking
Feb. 5th 11:00 – 1:30, $40.00
Growing a Spring Salad Garden & Salad Harvest Demo
Feb. 26th 11:00 – 1:30, $40.00
Organic Vegetable Gardening & Cooking Demo
March 26 11:00 – 1:30, $40.00
Clean and Husk (strings and all) Corn on the Cob

Here’s a simple trick to cleaning up corn on the cob while not quite cooking it all the way. I love corn on the grill but husking it before hand can be a pain trying to get all the strings off.
Cut off the bottom of the cob just above first row of kernels. Place on microwave-safe plate, cover with a damp paper towel and microwave on full power for 30 to 60 seconds. (If you want to fully cook the corn, microwave for 4 min. per cob)
Remove from microwave and using a hot pad or cloth pinch and squeeze the top of the husk to push out the whole corn. It should slip out fairly easy.
Proceed to cooking it in the manner you like.
Marinated Cucumber and Tomato Salad
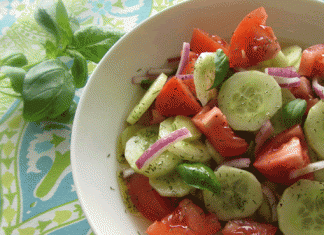
Marinated Cucumber and Tomato Salad
- 3 medium cucumbers, peeled and sliced ¼ inch thick
- 1-2 large tomatoes, cut into wedges
- 1 medium red onion, sliced and separated into rings, optional
- ½ cup red wine or pomegranate vinegar
- ¼ cup sugar
- 1 cup water
- ¼ cup oil
- Sea salt and fresh ground pepper
Combine ingredients in a large bowl and mix well. Refrigerate at least 2 hours before serving so the flavors have a chance to blend.
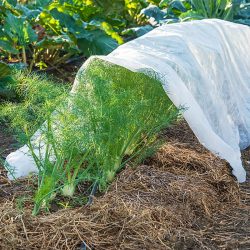
What to Plan/Plant for Your Fall Garden
Fall into Winter Gardens
Remove any summer crops that are starting to fade and prepare soil with mulch, mycorrhiza, compost. Re-plant with fall/winter crops or cover crops.
Plant last round of heat loving crops
(early) tomatoes with harvest dates within 50-60 day range
Summer/winter squash (same requirements)
Peppers
Mid-season planting in August
Basil
Beans
Beets
Broccoli
Brussels sprouts
Cabbage
Carrots
Cauliflower
Chives
Cilantro
Cucumber
Dill
Lettuce
Kale
Mustard Greens
Onion, Shallots, Green onions
Radish
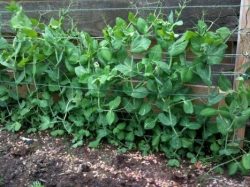
Peas, plant 2 rounds, August and again in Sept for fall/spring harvest
Spinach
Turnips, baby white turnips & regular
Late summer (end of Sept) plant cover crops for any areas where you won’t be planting any winter crops.
Some cool season vegetables should probably be protected from the hot months of Sept into Oct. But by planting these vegetables/fruits now they will benefit from the warmth of the soil and the longer days. If you wait too long, late Oct, the soil is already cooling down and the sun is leaning towards winter, the days growing shorter.
Need more help? Send me an email with questions. I have video’s available for guidance, contact me, [email protected]
Hatch Chile Roast
Hatch Chile Time!
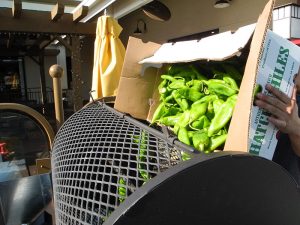
New Mexico Hatch Chiles are here in Southern California and we’ve been waiting all year to replenish our supplies! These chiles are only here for a short month or so before being gone again until next season. A favorite Southwestern chile, the Hatch chiles are grown in Hatch, New Mexico where everyone celebrates their harvest. Roasters are going hot on every street corner and people are buying them by the case.
Here in So. California, Melissa’s Produce brings us these gorgeous chiles in mild and hot, buy both! Melissa’s has teamed up with several local grocery stores to provide roasting your chiles by the case. Click on the Hatch Chile Roasting link and it will take you to a list of roastings by Melissa’s Produce.
Try Hatch Chile’s in all your dishes, from omelets to soups, stews, Chile Verde and even maybe a Hatch Chile Sorbet, mmmmm. Click here for one of my favorite recipes.The list is endless!
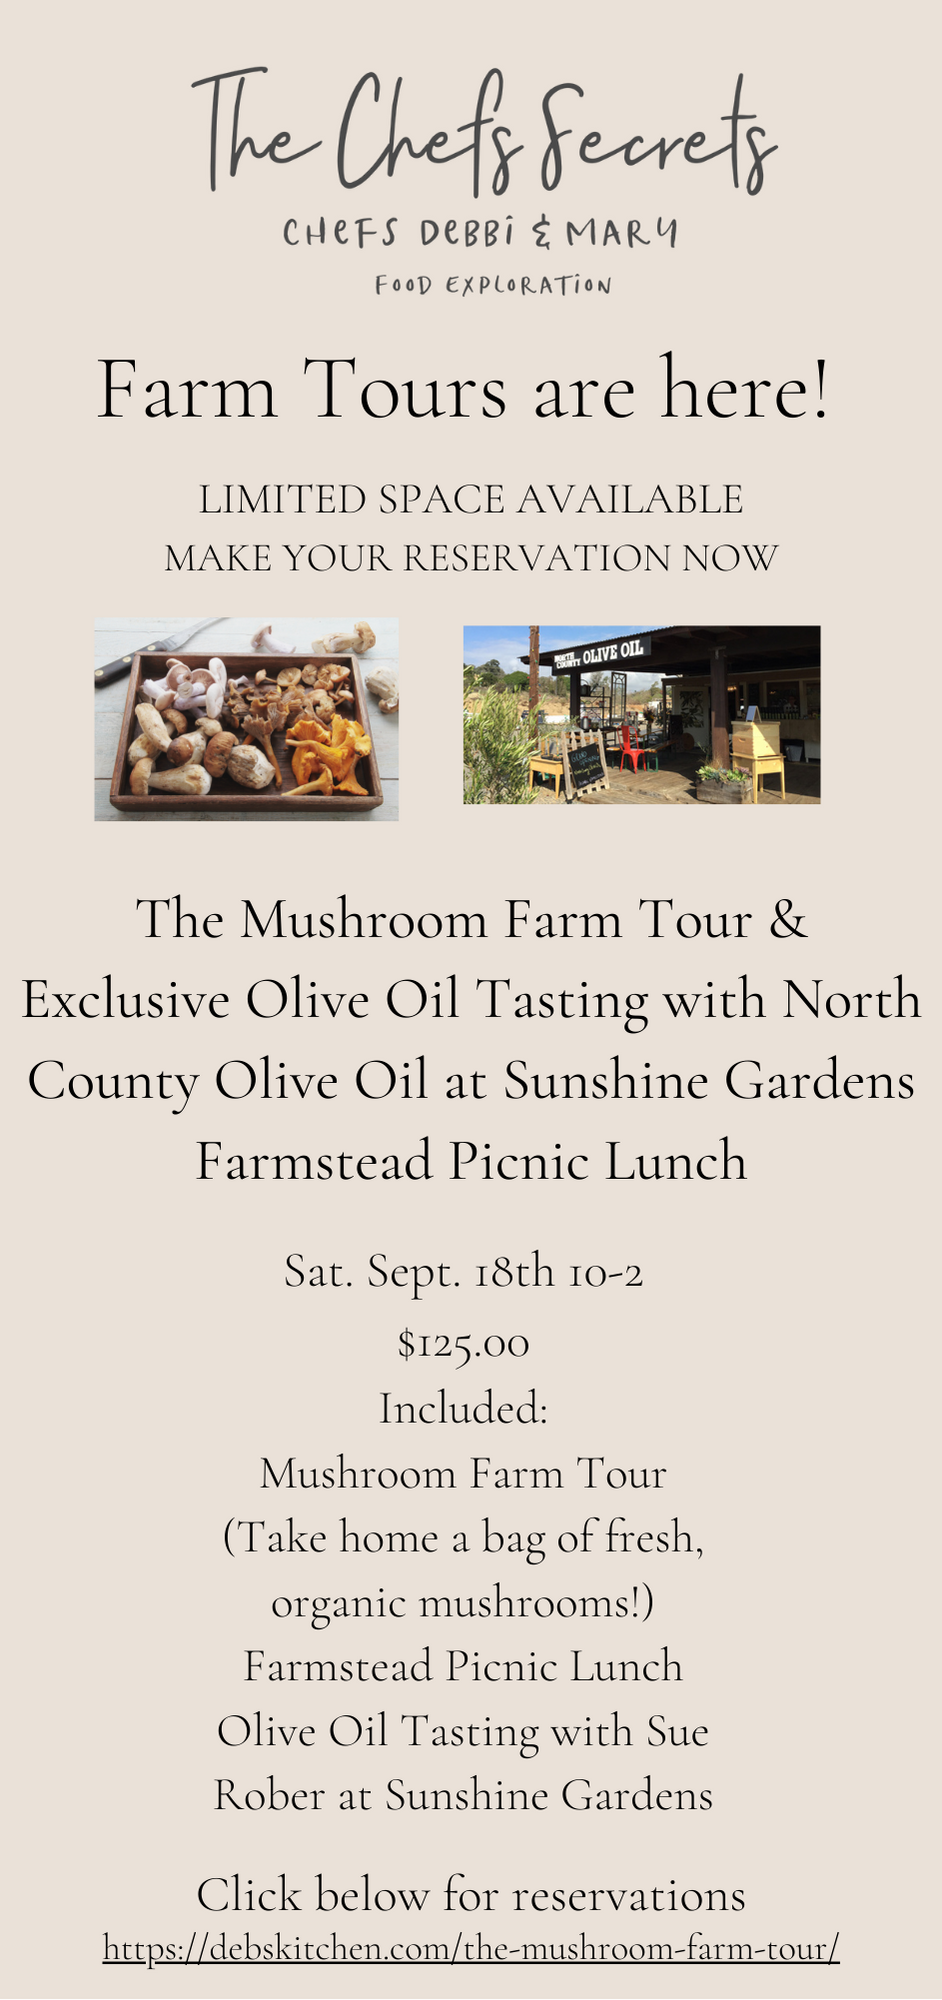
The Mushroom Farm Tour
We are all scheduled for our first local farm tour for 2021! Join us for farm, food & fun.
No transportation is provided, we suggest carpooling as much as possible. Please wear sturdy, flat shoes, this is a real farm and perhaps carry a hat just in case, Sept. can be warm if we’re out in the sun at all.
It’s Asparagus & Artichoke Season
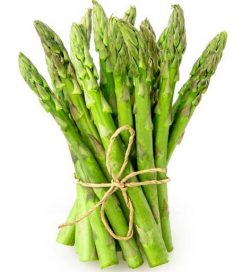
A few things to know about asparagus now that it’s in season. Buy organic, fresh, California grown asparagus for the most nutritious and best tasting.
Asparagus is dioecious, meaning that it has separate male and female plants. The female plants make berries, containing seeds. The male plants just make flowers, containing pollen. But both of them produce spears.
Scott Walker, president of the world’s biggest asparagus seed company (Walker Brothers, of Pittsgrove, N.J.), says that he’s heard that on really hot days, asparagus can grow an inch per hour. But he’s never actually measured them. During harvest season, farmers struggle to stay ahead of the growing spears. Each field has to be harvested every day, and sometimes even twice a day.
After about six or eight weeks, farmers stop harvesting and let them grow wild. The plant needs to grow into a fern to capture energy from the sun and store it in the root for the next growing season.
After harvest, asparagus loses quality very rapidly––the sugar content declines and the amount of fibrous material increases. Use spears with compact heads; those with loose heads are fibrous and do not keep well.
There are 3 types of asparagus, green, white (which is blanched by covering the stalks with straw or mulch to keep it from turning green) and there is a purple variety.
Green asparagus is a bit grassy in flavor, while white asparagus is mild and slightly bitter. Purple asparagus is a bit nuttier and sweeter because it has about 20 percent more sugar in its stalks. Purple asparagus is a bit nuttier and sweeter because it has about 20 percent more sugar in its stalks. While the stalks are purple on the outside, the interior is the same green spear. The outside may appear a little purple-greenish when cooked. Blanch this and use it in salads.
How to buy asparagus; look for bright, green, evenly colored spears with tight buds. You can store asparagus standing up in a glass with a little water in the refrigerator, I like to use them within a few days. If the stalks are a little thick you might want to peel them down up a bit so they’re not so fibrous.
Cook asparagus by blanching, steaming, roasting or grilling. Here are a few of my favorite ways to serve asparagus.
Spring Artichokes
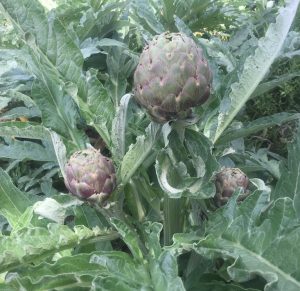
Read all about artichokes, how to choose and store them.
Artichoke Info & Recipes, click here
Caesar Salad with Spring Asparagus
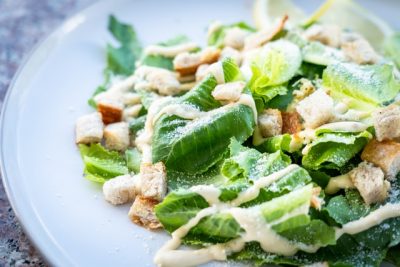
Caesar Salad with Spring Asparagus
- 2 bunches pencil-thin asparagus, trimmed and chopped into 1/2-inch pieces
- 1 tablespoon mayonnaise
- 1 ½ tablespoons red wine vinegar
- 2 tablespoons freshly squeezed lemon juice
- 1 garlic clove, minced
- 1 teaspoon Dijon mustard
- 1 teaspoon Worcestershire sauce
- 1 teaspoon anchovy paste (or 1 anchovy filet)
- 6 tablespoons extra virgin olive oil
- Sea salt and freshly ground black pepper
- 1/2 cup freshly grated Parmigiano-Reggiano
- 1 head romaine hearts, chopped
Prepare a large bowl with ice and cold water, set aside to blanch the asparagus.
Bring a saucepan big enough to hold the asparagus to a boil, add a heaping tablespoon of salt and plunge the asparagus into the water, boil for 2 minutes. Drain the asparagus and put into the water bath until cooled, drain and set aside on a baking sheet covered with paper towels.
Combine mayonnaise, vinegar, lemon juice, garlic, Dijon mustard, Worcestershire sauce, and anchovy paste in a medium bowl and whisk until combined. While whisking constantly, add the olive oil in a thin, steady stream until incorporated. Season to taste with salt and pepper.
Toss the romaine with a little of the dressing. Transfer to a serving platter and top with asparagus and the grated Parmigiano-Reggiano. Serve extra dressing on the side.
Naturally Dyed Easter Eggs
Instant Pot or Stove Top, your choice. Be creative and enjoy this really fun project!

To Make the Dye
Directions are for each individual dye. if making more than one color, rinse the pot thoroughly between each batch to prevent mixing colors
Purple = 1½ cup shredded red beets
Rust = 7 yellow onion skins
Yellow = 3 tablespoons ground turmeric or cumin
Orange = 3 tablespoons chili powder
Sky Blue = 1½ cups shredded red cabbage
Dark Blue = 2 cups blueberry juice
Green = 2 cups spinach
1 cup red onion skins = lavender or red eggs
1 bag Red Zinger tea = lavender eggs
Stovetop
Bring 2 cups water to a rolling boil.
Add coloring agent.
Reduce heat and simmer for 30 minutes or longer for the deepest color.
Strain liquid into a large mason jar, and allow to cool to room temperature, 2-3 hours.
Stir in 2 tablespoons white vinegar and add 3 or more hard-boiled eggs.
Seal the jar and refrigerate overnight or until the egg is the desired color.
Rub dried eggs with a dab of vegetable oil to give them a shinier finish (optional).
Instant Pot
Pour 2 cups of water into the Instant pot and add desired dyeing agent.
Secure the lid and turn pressure release knob to a sealed position. Cook at high pressure for 10 minutes on manual.
When cooking is complete, use a quick release.
Carefully pour through a strainer into a larger bowl, discard dyeing agent.
Pour colored water into a quart size wide mouth mason jar and add 2 tablespoons of vinegar. Top with a lid and place in fridge.
Let it chill 4 hours or overnight before placing hard boiled eggs in the jar to dye.
Repeat with the other dyeing agents to create more colors.
Dye will keep in the fridge for at least 1 week.
Note: Each jar will hold 4-5 eggs at a time. The eggs will have white spots where they touch each other, or the jar so lightly rotate the jar a few times while they are in the jar for more even coloring.
Dye the eggs
Gently place the eggs into the dye and allow them to sit in the dye for at least an hour or overnight in the refrigerator, depending on how dark you want them. I put them in quart jars, they can hold about 4 eggs each.
When they have achieved the color you want, use a slotted spoon to gently lift them from the jar.
While they are wet, the color will come off if you rub on it too hard. Place on a cooling rack in the fridge to dry completely. This will set the dye, so it won’t rub off.
Once dry, store in an egg carton or other sealed container.
Repeat with more eggs if desired.
* How to hard boil eggs
Instant Pot
Place 1 cup of COLD water in the inner pot of Instant Pot for a 6 quart instant pot and 1.5 cups COLD water for an 8-quart Instant pot.
Place rack into pot and carefully set as many eggs as desired on the rack.
Let the pressure release naturally for 5 minutes. Then do a quick release and remove eggs from Instant Pot and place in ice water bath.
Let eggs sit in water bath for 5 minutes.
Store in the fridge for up to 7 days unpeeled or peel and use within 3 days.
Stove Top
Place eggs into a saucepan and cover with cool water. Bring to a boil then turn heat off and cover the pan. Set timer for 15 minutes, drain and place eggs in ice bath to cool, then store in refrigerator.