Deb's Kitchen - Farm, Food, Wine & Lifestyle Adventures
  • Facebook
  • Google
  • Twitter
  • Instagram
  • Pinterest
  • Email
Menu
Skip to content
  • Home
  • Blog
  • Events
    • Classes
    • Tours & Adventures
  • Edible Gardening
  • Preserving
  • Recipes
    • Appetizers
    • Soups and Salads
    • Main Dishes
    • Side Dishes
    • Desserts
  • About
    • Whats In Your Pantry
    • Ask Debbi
    • Deb’s Kitchen Botanicals
    • Press
  • Contact

Category Archives: Appetizers

Growing Corn

5 / 26 / 23

It’s time to start late spring and summer flowers & veggie’s


Photo: Farmers Almanac


Corn can be fickle, it likes warm weather and the bugs and four-legged critters may eat all of yours before you can get to it. Native Americans planted corn with beans and once the beans sprout they planted squash at the base of the corn. The beans will use the corn stalk as a trellis and the squash leaves will protect the base of the corn which grows very shallow. This is called The Three Sisters or Companion Planting.
Plant corn directly in the garden where it will receive at least 6 hours of sun, water well and help the pollen to reach the tassels. Each tassel that gets pollinated turns into a kernel. To make sure the plant is getting pollinated, shake the tassels so the pollen falls onto them, nature will take it from there. 
The ears are ready to harvest when the silks turn from light yellow to dark brown.

To cook, grill, steam or pop in the microwave. Leave the husk on the corn if you microwave and cook on high for 3 minutes (for two ears), add an extra minute with more ears. Let them slightly cool and peel the husk and silk off the corn.

NOW Booking for Vegetable & Flower Garden consult & Design

[email protected]
Leave a comment
Share
  • Pin it
  • Share
  • Tweet
  • Share
  • Email

Superbowl Sunday Party

2 / 8 / 232 / 9 / 23

Here are some recipes to help you through the day!

Pigs in a Blanket with Everything Bagel Topping

Save
Print
  • 1 package puff pastry
  • 1 package of little smokies or cocktail sausages
  • 1 large egg, beaten with a little water
  • 2 tablespoons everything bagel seasoning

Preheat oven to 400°. Line a baking sheet with parchment paper, or a silpat.

Defrost puff pastry as directed on box. Sprinkle a cutting board with a dusting of flour, place one puff pastry sheet at a time on the cutting board and lightly roll out.

Cut puff pastry into equally sized rectangles for the number of sausages you have. Cut the pastry as wide as you like, leave a little bit of the sausage uncovered or cover the entire sausage.

Roll the sausage in the puff pastry. Place seam side down onto the baking sheet at least once inch apart.

Brush beaten egg/water mixture over the top of each pig in the blanket. Then sprinkle each pig in a blanket with a bit of the everything bagel seasoning blend.

Bake the pigs in a blanket in the preheated oven for about 25 minutes, or until pastry is puffed and golden brown.


Boursin Cheese Dip with Roasted Grapes Crostini

Save
Print
  • 1 ½ cups grapes, approximately (cut in ½)
  • Olive oil
  • Sea salt
  • 2 fresh thyme sprigs
  • Boursin cheese dip
  • 6 oz. Boursin cheese
  • 2 tablespoons heavy cream or milk
  • Good rustic bread, sliced into 1/2-inch thick pieces
  • Olive oil

Preheat oven to 450ºF. Spread grapes onto a sheet pan. Drizzle with olive oil. Sprinkle with salt. Lay thyme leaves over top. Toss all together gently with your hands. Place pan in the oven for 7 to 9 minutes or until grapes just begin to burst.

Mix the Boursin cheese with enough cream to make it slightly soft and runny, set aside.

Meanwhile, heat a grill or grill pan to medium-high. Brush the bread with olive oil. Grill until nice and toasty.

Assemble the open-faced sandwiches: Spread Boursin mix over bread. Top with roasted grapes. Discard thyme sprigs.

Artichoke Bruschetta

Save
Print
  • ½ large jar marinated artichoke hearts -- drained, patted dry, chopped
  • ¼ cup Romano cheese grated
  • ½ shallot -- minced
  • 2 ½ tablespoons mayonnaise
  • ½ clove garlic
  • ½ loaf ciabatta

Place first 3 ingredients in bowl. Mix in enough mayonnaise to form thick

spread.

Preheat broiler. Slice bread in half lengthwise and rub garlic onto bread,

cut into slices. Toast lightly, spread artichoke mixture on bread and

broil until mixture is heated through and begins to brown, about 2

minutes.

Instant Pot Baby Back Ribs

Save
Print
  • 1 rack baby back ribs*
  • 1 onion, rough chopped
  • 1 carrot, rough chopped
  • 1 celery, rough chopped
  • 1 cup broth or water
  • barbecue sauce

Dry the ribs with a paper towel, then remove the thin membrane from the back of the ribs.

Cut ribs cut into 3 bone pieces. Add rough chopped vegetables to the pot and place rack in the bottom of the Instant Pot. Add broth or water and set ribs upright on the rack.

Close lid and select manual pressure and set the timer for 23 minutes. Let the Instant Pot vent for 5 minutes and release the rest of the pressure. Take care of the steam, don’t burn yourself.

Brush with barbecue sauce and broil or grill until slightly charred.

I like to have the butcher cut the ribs down the center to create ‘riblets’.

Crab Stuffed Mushrooms

Save
Print
  • 16 large white mushrooms, brushed with stems and gills removed*
  • Olive oil
  • 8 oz. cooked crab or lobster meat
  • 1/2 cup Panko breadcrumbs, divided
  • 1/3 cup freshly grated parmesan cheese
  • 1/3 cup mayonnaise
  • 4 oz. whipped cream cheese, softened
  • 2 green onions, chopped
  • ¼ cup minced celery
  • 1 tablespoon finely chopped Italian parsley
  • ¼ teaspoon dried oregano
  • Sea salt and fresh ground pepper
  • ½ teaspoon garlic powder
  • ½ tablespoon lemon olive oil

Preheat the oven to 400°. Place a piece of parchment paper on a baking sheet and set aside.

Brush the outside of the mushrooms with a little olive oil and arrange on baking sheet.

In a large bowl combine crab meat, 1/3 cup Panko crumbs, parmesan, mayonnaise, cream cheese, green onions, celery, herbs, salt and pepper.

Stuff each mushroom cap generously with the crab mixture.

Combine oil and remaining Panko crumbs until evenly coated. Sprinkle the panko mixture over the tops of the mushrooms.

Bake until the mushrooms begin to brown, approximately 15 minutes then broil for 2 minutes until golden all over with crispy tops.

Serve immediately.

Choose mushrooms about the size of a half dollar.

Crispy Chicken Wings

Save
Print
  • 4 pounds free-range chicken wings cut into pieces
  • 2-4 Tablespoon sunflower or other oil*
  • Blue Cheese Dip
  • 1 cup crumbled blue cheese softened
  • 1/4 cup sour cream
  • 1/3 cup mayonnaise
  • 1 Tablespoon lemon juice
  • Sea salt and ground black pepper

Preheat oven to 450°.

Line a baking sheet with parchment paper or tin foil and set a heat-proof wire rack on top.

Dry the chicken wings well and transfer them to a large bowl. Toss with a little oil and season with salt and pepper. Place on rack and bake for 30 minutes, turn the wings over and bake until crisp, 20 -30 minutes.

Bake for 30 minutes; flip and continue to cook until crisp and golden brown, (about 20-30 minutes longer), until golden browned and crispy.

Serve wings immediately.

*Note:

You could toss the wings with a little BBQ sauce instead of the oil if you want them with more flavor or spiciness.

Leave a comment
Share
  • Pin it
  • Share
  • Tweet
  • Share
  • Email

Merry Christmas

12 / 1 / 2212 / 1 / 22

Chef Debbi & The Debettes

would like to send you warm and safe wishes for the upcoming holiday!

I’m reposting this great appetizer recipe for you to enjoy. Cheers to a New Year!


Bacon Wrapped Stuffed Dates with Maple Glazed Walnuts and Boursin Cheese

Save
Print

Easy to make ahead of time and bake off at the last minute, make extra they go fast!

  • Maple Glazed Walnuts
  • ½ cup maple syrup
  • 1/8 teaspoon sea salt
  • 2 cups walnut halves
  • For the Dates
  • 1 package of dried Medjool Dates, 16 oz.
  • 1 12 oz. package of bacon, slices cut in half widthwise
  • 4 oz. package of Boursin cheese

Preheat the oven to 350° and line a baking sheet with parchment paper.

Mix the maple syrup and salt together, add the walnuts and stir until coated.

Spread the nuts on the baking sheet and bake for 12 - 15 minutes or until the glaze is bubbly and coats the walnuts well. Remove from oven and let cool.

Turn the oven up to 425° and line a baking sheet with a new piece of parchment paper.

Slice dates lengthwise and remove pits.

Scoop a small amount of Boursin cheese with a spoon and fill the date with the cheese, press a glazed nut into the cheese.

Wrap dates with a slice of bacon, and secure with a toothpick to hold bacon onto date. Place the dates on the parchment on their side and bake for about 7-8 minutes or until browned on the bottom and turn to the other side continue to cook for another 7-8 minutes or until the bacon is cooked and a little crispy, and the cheese is slightly melted.

Let cool and serve warm or at room temperature.

Leave a comment
Share
  • Pin it
  • Share
  • Tweet
  • Share
  • Email

Late Summer/Early Fall Menu’s

9 / 21 / 20

While it’s still pretty hot out in So. California it’s hard to go into the kitchen to cook. Here are some light recipes that are quick and easy to prepare. Mangia!

Spinach Salad, Traditional

Save
Print

Serves 2

  • 6 ounces baby spinach, washed and dried well
  • 1/4 small or medium shallot, minced
  • 2 pieces thick-sliced bacon, finely diced
  • ¼ cup Champagne Vinegar, or Red Wine Vinegar
  • 1/2 teaspoon smooth Dijon mustard
  • Sea salt and freshly ground black pepper, to taste
  • 4 large white mushrooms, thinly sliced
  • 2 large egg, hard-boiled, chilled, peeled and thinly sliced

Remove any stems from the spinach and place in a salad serving bowl.

In a heated sauté pan add bacon and cook until crisp, drain on paper towels. Remove all but 2 Tb. of bacon grease and add vinegar, whisk in Dijon mustard and taste for seasoning. Pour over salad and toss quickly, scatter with mushrooms and eggs.

Serve while still warm.

Roasted Tomato & Goat Cheese Flatbread with Artichoke Pesto

Save
Print
  • 1 jar artichoke hearts, 12 oz., drained
  • 1 cup walnuts, toasted
  • 1/4 cup grated Parmesan cheese
  • 2 cloves garlic, peeled
  • 1/3 cup lemon juice, to taste
  • 1/2 cup olive oil, to taste
  • 1/4 cup minced fresh parsley
  • Salt and pepper, to taste
  • 1 pizza dough
  • 1 large heirloom tomatoes or ½ basket cherry tomatoes, cut in half
  • 4 ounces soft goat cheese

Drain the artichoke hearts. If they are marinated in oil, you can omit draining the hearts and adjust the oil measure downwards appropriately.

Add the artichoke to the food processor with the nuts, cheese, and garlic and pulse until you have a paste. Add in the lemon juice and with the motor running, drizzle in the olive oil. Scrape down the sides of the processor as needed and pulse until you have a uniform paste-like consistency.

Taste and season with salt, pepper, oil, and lemon juice to taste.

Heat oven to 450°. Roll pizza dough out to desired shape, place onto parchment lined baking pan. Brush 1” of the edge of the pizza dough with olive oil, spoon on the artichoke dip to the remaining dough, top with tomatoes, goat cheese and bake for 12 – 15 minutes.

Spinach Bacon Cheese Puffs

Save
Print

Baked pastry puffs stuffed with a cream cheese, feta, bacon and spinach filling. These are great appetizers that you can put together ahead of time and bake off as needed.

Yield: 10 puffs

  • 4 ounces cream cheese, softened
  • 1 large egg
  • 1 tablespoon olive oil
  • 1/2 teaspoon dried dill
  • 2 packed cups chopped fresh spinach
  • 3/4 cup crumbled feta
  • 3 slices crispy cooked bacon, crumbled
  • Sea salt and fresh ground black pepper
  • 1 sheet frozen puff pastry, thawed and cut into 10 squares (cut on a floured board), Keep the pastry cold until ready to use.
  • 1 tablespoon butter, melted

Preheat oven to 400°. Grease round or square muffin pan.

Place the cream cheese into a food processor, add egg, oil and dill and pulse until combined.

In a separate bowl mix the spinach, feta and bacon. Pour the cream cheese mixture over top, season it with salt and pepper and stir until combined.

Line the muffin pan with the pastry squares, stretching them out a little if needed; press them into the bottom of the cups. Divide the spinach among the cups as evenly as possible. Bring the 4 points together over the filling and press them together.

Lightly brush with the melted butter.

Bake about 25 minute until golden brown and puffy. Allow to cool in pan on wire rack 10 minutes then run a knife around the edges to loosen them and help pop them out.

Bird's Nest Pesto With Stuffed Tomatoes

Save
Print
  • Pesto
  • 1/2 cup pine nut -- lightly toasted; plus, some for garnish
  • 1 clove garlic -- peeled
  • 2 cups basil leaf -- loosely packed
  • 1/2 cup Parmesan cheese -- grated
  • Salt and pepper
  • Tomatoes
  • 11 ounces goat cheese -- room temperature
  • 1/4 cup heavy cream
  • Salt and pepper
  • 6 small tomatoes -- plum
  • Olive oil
  • 1 pound spaghetti -- or angel hair pasta

Pesto

In a food processor, rough chop pine nuts and garlic. Add basil and process using pulse until the leaves start to break down. Add the cheese and blend until you have a rough paste. With machine running add olive oil to emulsify. Season with salt and pepper.

Preheat oven to 425° and put a pot of water on to boil for the pasta.

Mix the goat and Boursin cheese with enough cream to make it soft and spreadable. Season with salt and pepper.

Cut the tops off of the tomatoes and scoop out the insides. Lightly salt and place, cut side down, on paper towels to drain for 20 min. Spread a little pesto on the inside of the tomato and fill to the top with the goat cheese mixture. Place in a lightly oiled baking dish. Drizzle a little olive oil over each one and bake until they start to shrivel, and the cheese is lightly browned, about 20 min.

Cook the pasta until al dente, reserving about 1 cup of the cooking water.

Transfer to a large serving bowl and toss with the pesto, adding a bit of the pasta water if necessary, to loosen the pesto. Plate the pasta and add a tomato in the center. Top with a sprinkling of toasted pine nuts.

Sea Bass Provençal

Save
Print
  • Olive oil
  • 1 small leek, cut in half and then into half moons
  • 1 clove garlic
  • 1 small can whole tomatoes, drained and chopped or 2 large fresh garden tomatoes
  • ¼ cup dry white wine
  • 2 teaspoons fresh thyme
  • ¼ cup Greek olives, halved
  • 1 teaspoon capers, drained
  • 4 4 ounce Sea Bass fillets, or any white fish

Heat a medium sauté or saucepan. Add enough oil to coat the bottom of the pan, add onion and sauté until lightly translucent. Add garlic and stir for about a minute. Crush or squish tomatoes and add tomatoes and remaining ingredients except the fish then simmer about 10 minutes. Set aside and keep warm.

Heat a large sauté pan over medium heat; add enough oil to coat the bottom of the pan. When oil is hot carefully place dried fish fillets into oil, it should start to simmer right away. Cook about 3-4 minutes and turn carefully for another 4 minutes.

Serve with sauce.

French Apple Cake

Save
Print
  • 1 cup all-purpose flour, spooned into measuring cup and leveled-off
  • 1 teaspoon baking powder
  • 1/4 teaspoon salt
  • 1 stick (1/2 cup) unsalted butter, at room temperature
  • 2/3 cup granulated sugar, plus more for sprinkling over cake
  • 2 large eggs
  • 1 teaspoon vanilla extract
  • 3 tablespoons dark rum
  • 2 baking apples, peeled, cored and cut into 1/2-inch cubes (I like Honeycrisp, Fuji or Granny Smith)
  • Confectioners' sugar (optional), for decorating cake

Preheat the oven to 350°F. Grease a 9-inch springform or regular cake pan with butter or nonstick cooking spray. If using a regular cake pan, line the bottom of the pan with parchment paper and grease again.

In a small bowl, whisk together the flour, baking powder and salt.

Using a handheld mixer with beaters or a stand mixer with the paddle attachment, cream the butter and granulated sugar until light and fluffy, about 3 minutes. Add the eggs, one at a time, beating well and scraping down the sides of the bowl after each addition. Beat in the vanilla and rum. Don't worry if the batter looks grainy at this point; that's okay. Add the flour mixture and mix on low speed until just combined. Using a rubber spatula, fold in the chopped apples.

Scrape the batter into the prepared pan and even the top. Sprinkle evenly with 1 tablespoon of granulated sugar. Bake for about 40 minutes, or until the cake is golden and a toothpick inserted into the center comes out clean. Allow the cake to cool on a rack. Run a blunt knife around the edges of the cake. If using a springform pan, remove the sides. If using a regular cake pan, carefully invert the cake onto the rack, remove the parchment paper, then gently flip the cake over and place right-side-up on a platter. Using a fine sieve, dust with Confectioners' sugar (if using). Cake can be served warm or room temperature, plain or with lightly sweetened whipped cream or vanilla ice cream.

Freezer Friendly Instructions: The cake can be frozen for up to 3 months. After it is completely cooled, cover it tightly with aluminum foil or freezer wrap. Thaw overnight on the countertop before serving.


Leave a comment
Share
  • Pin it
  • Share
  • Tweet
  • Share
  • Email

Memorial Day 2019

5 / 23 / 19

Summer is almost here! Not that you would know that by the weather we’re having. The rain is nice and it makes the garden grow but my other half is craving those warm summer days. Even though here in Southern California we grill all year long, Memorial Day is the official start of grilling season. Whether you grill on gas, charcoal or wood these recipes are easy do ahead recipes for cooking outdoors and picnics. So clean up that grill and set the table because dinner is served! Check out this simple cheese platter, get A Little Book of Cheese to learn all about cheese and how to make a platter!

Summer Pasta Salad

Save
Print

Make this light summer pasta salad recipe a day ahead of time so that it can soak up all the bright, tangy dressing.

  • 1/4 cup red wine vinegar
  • 1 teaspoon Dijon mustard
  • 1/2 cup olive oil, approximately
  • Salt and pepper
  • 1 teaspoon garlic powder
  • 2 teaspoon fresh basil, torn
  • 1/2 cup diced cucumber
  • 1 pint cherry tomatoes, halved or quartered
  • 1/2 cup diced red bell pepper
  • 1/3 cup thinly sliced green onions
  • 1/4 cup sliced black olives
  • 1/2 cup crumbled or diced cheese, mozzarella, chedderella, goat cheese or any you prefer
  • 1 ½ cup cooked pasta, cooked and chilled*

For dressing, mix together vinegar, Dijon, salt, pepper, and garlic powder and whisk until it comes together. While continually whisking slowly add olive oil to taste. Set aside.

Mix together remaining ingredients and toss with dressing. Serve cold.

*Boil the pasta according to package directions, drain and rinse with cold water. When pasta has cooled down a bit, shake off excess water (dry with a towel, if necessary) and toss lightly with olive oil to keep from it sticking together. Refrigerate until ready to toss with dressing. Be sure to cool your pasta before adding the dressing otherwise the pasta will soak it all up.


BBQ Baby Back Ribs

Save
Print

This is quick and easy do ahead baby back ribs. By using your Instant Pot or pressure cooker your ribs will come out nice and tender. Finish off on the grill with your favorite BBQ sauce.

  • 1 slab Baby Back Pork Ribs
  • Sea salt and pepper
  • 1 small yellow onion, roughly chopped
  • 1 celery stalk, large diced, roughly chopped
  • 1 carrot, roughly chopped
  • 1 cup beer (or water)
  • 1 cup BBQ sauce or more

Cut the racks of ribs in to sections that will fit in the pressure cooker and rub with salt and pepper.

Place onion, celery, carrot and beer in the pressure cooking pot. If you’re going to make sauce from the juices in the pressure cooker you can place the ribs directly in the liquid or put the ribs on the rack if you’re going to finish the ribs on the grill or under the broiler with another sauce.

Close and lock the lid of the pressure cooker. Select High Pressure and set the timer for 12 minutes. Press start.

When beep sounds, turn off pressure cooker and use a natural pressure release for 10 minutes and then do a quick pressure release to release any remaining pressure. When valve drops carefully remove lid.

Remove the ribs and cool to room temperature. Once cool, refrigerate until ready to serve.

To finish the ribs:

Preheat the BBQ grill to a medium high heat. Coat one side of the ribs with BBQ sauce and grill 3 minutes. Coat the other side with BBQ sauce flip and grill an additional 3 minutes. Slather on additional BBQ sauce and grill each side for an additional 3 minutes.

You could do the same as above by broiling them until just how you like them.

Serve immediately.

Stuffed Baked Potatoes

Save
Print

The perfect BBQ side dish as they can be made in advance, wrapped in foil and heated on the grill before serving.

  • 2 medium to large russet potatoes, rinsed, dried
  • 1/4 cup sour cream
  • 1/4 cup cheddar cheese, grated
  • 1/4 cup butter, (1/2 stick) room temperature
  • 2 green onions or chives, chopped
  • Sea salt and pepper, to taste
  • 4 tablespoons cooked bacon, crumbled, optional

Preheat oven to 450°. Pierce potatoes with fork. Lightly oil potatoes and

place on oven rack. Bake until cooked through, about 1 hour. If potatoes

starts to crisp and brown up, turn the oven down to 400. Transfer to baking

sheet; cool 5 minutes. Cut potato in half lengthwise. Carefully scoop meat

from the shell and mix with remaining ingredients, mashing lightly as you go. Season and taste before scooping mixture into potato shell.

Can be prepared 1 day ahead, covered and refrigerated. Bring to room temperature before the final cooking stage.

Preheat oven to 400°. Bake potatoes on baking sheet until heated through

and beginning to brown, about 25 minutes. For the grill, wrap each ½ in heavy duty foil, heat on the indirect side of the grill for about 20 minutes or until hot. Garnish with finely minced green onions, chives or crumbled bacon.

Leave a comment
Share
  • Pin it
  • Share
  • Tweet
  • Share
  • Email

Flashback BBQ

4 / 24 / 196 / 16 / 19

This cooking class demo is being held at a private home, everyone’s invited! Address will be given upon paid reservation. North Long Beach area

Saturday, June 22
4:00 – 7:00

$60.00
BYOB

Menu

Chef Debbi’s Pickled Vegetables

Grilled Artichokes with Walt’s Wharf Dip

Sweet ‘n Sour Surf and Turf Kabobs

Cold Green Bean, Tomato and Watermelon Radish Salad

Pineapple Upside Down Cake

Register here for Credit Card


If you prefer to pay by check,

Contact Debbi @ 562-243-3926 or [email protected]  

Leave a comment
Share
  • Pin it
  • Share
  • Tweet
  • Share
  • Email

Artichokes!

4 / 10 / 194 / 10 / 19

Spring is nearly here and with it comes lovely artichokes. Artichokes are perennial plants in the same family as dandelions and sunflowers, they are a thistle plant and, in most artichokes, there is a center that’s inedible, the ‘choke’. In cooler climates, such as California’s northern coast they can be grown as annual’s. Spring and fall are times when you can find fresh artichokes in the markets. An easy plant to grow, they do require full sun and will take up a large space, 3 feet or more. Be sure to cut the artichoke before the leaves begin to open and it blossoms into a flower.

When you choose your artichoke, you want to make sure that it’s firm when you press the sides and you’ll often hear a squeaky noise, that’s good. The leaves should be tight and closed. If there is a little bit of brown on the leaves that’s ok, it just means there was a little frost during its growing season but that’s not a bad thing. The inside will be perfectly delightful. You also might want to consider only organic artichokes since you’ll be eating parts of the plant that may have been sprayed with pesticides during its growing season. Pesticides cannot be washed off with water or vegetables soaps, they are oil based and you know what happens when oil and water mix! If you can’t find beautiful California Artichokes in the market, here is a great local source where you can order them, Melissa’s Produce, http://www.melissas.com/Organic-Artichokes-p/1375.htm

To store your artichokes, you could place in a plastic bag and store in the produce drawer of your refrigerator or just pop it into the drawer itself. They will last up to 7 days but best eaten within a few.

Rinse the artichoke under cool water; pull off the lower, smaller leaves and cut the stem at the base of the choke. If you have a nice long stem, you can cook this separately and eat it like you would the heart, it tastes the same. If desired, with a sharp chef’s knife cut across the top third of the artichoke and snip the sticker off the remaining leaves. Even though there are many ways to prepare a fresh artichoke, most people fall back to either boiling/steaming them, although it takes quite a while, up to half an hour or more. You could put them in a microwave bowl or in an Instant Pot adding a cup of water and cook for 10 minutes, cover the microwave ones, or grill them over hard wood. Anyway is fine with me.

Here’s the traditional method:

Put them into a large pot and cover with cool water, squeeze two lemons into the water and a little sea salt, bring to a boil and simmer until you can run a small knife through the bottom part of the artichoke, 30-45 minutes or longer depending on the size of the vegetable. Remove from the water using tongs and picking up the artichoke with the top facing down so not to spill hot water all over yourself, drain and serve with my favorite sauce from Walt’s Wharf in Seal Beach.

Get the recipe here, 

Leave a comment
Share
  • Pin it
  • Share
  • Tweet
  • Share
  • Email

Quick and Easy Charcuterie Board

12 / 29 / 1812 / 29 / 18


1 cup mixed olives
2 Tablespoons olive oil
1 teaspoon dried Italian herbs, ground
1 wedge triple cream brie
1 small jar of fig jam or fruit spread
8 ounces aged Gouda
8 ounces aged sharp cheddar, thinly sliced
1 baguette, sliced 1-inch thick
1 round of boursin, any flavor
2 packages of interesting looking crackers
1 wedge blue cheese, partially crumbled
1 small jar of honey
1 package mixed Italian meats
1 small bunch red seedless grapes
4 ounces nuts, mixed or single
1 package, 4 oz. of dried apricots
2 apples, cored and sliced tossed with lemon juice to prevent browning

Mix together olives, olive oil and ground Italian herbs, let rest for at least an hour or longer.

Don’t crowd the cheese on the platter, make the board big enough to accommodate all ingredients.

Put the mixed olives in a small bowl and place on the platter.

Place the triple cream brie on the platter and arrange the fig or fruit spread next to the brie.

Place the sharp cheddar and gouda on the board next with the baguette slices nearby.

Then arrange the boursin near the baguette slices with the crackers next.

Add the blue cheese and honey on the board filling out the outer edges of the board. Tuck in the Italian meats all around the board, add the grapes in clumps and spread the nuts throughout the board with little pockets of dried fruit. Place the apples near the cheddar cheese.

Leave a comment
Share
  • Pin it
  • Share
  • Tweet
  • Share
  • Email

Fontina & Gruyere Gougére’s

12 / 29 / 1812 / 29 / 18


Save
Print

Makes 24-30

  • ½ cup water
  • ½ cup whole milk
  • 8 tablespoons unsalted butter, cut into pieces
  • 1 teaspoon salt
  • 1 cup plus 1 Tb. all-purpose flour
  • 4 whole eggs
  • ½ cup grated gruyere cheese
  • ½ cup grated fontina cheese

Preheat oven to 450° and line 2 pans with parchment paper or baking sheet liners.

In a large sauce pan, combine the water, milk, butter and salt and bring the mixture to a full boil over medium-high heat. When the butter has melted add the flour, all at once, and stir vigorously with a wooden spoon until the mixture forms a ball that pulls away from the sides of the pan.

Turn the heat down to medium and cook the dough for another 3 or 4 minutes to dry out and cook the flour taste out of the dough. It will look a little shiny and there will some starch remaining on the bottom of the pan and the dough will be stiff.

Transfer the dough to the bowl of a stand mixer fitted with a paddle attachment. (Alternatively, use an electric hand mixer or beat by hand with a stiff spatula.) Beat the dough on medium-low speed until it stops steaming and is just warm to the touch, about 1 minute.

Continue beating and add the eggs in one at a time. Wait for each egg to be absorbed completely before adding the next. Scrape down the sides of the bowl if needed. Once the dough comes together after the addition of all the eggs, add the cheese and mix until it’s well distributed.

Scoop rounded tablespoons of dough onto the baking sheets, spacing the about 1-inch apart. They can be piped on using a piping bag or a storage bag with the corner snipped off.

Press the top down with a fork or spoon dampened slightly with water, until the tops are smooth. Brush with the egg wash mix and bake for 5 minutes. Turn the heat down to 350° and bake for 20-25 minutes until they are golden brown. Rotate the sheets half way through the baking period. If the inside of the gougere isn’t done, turn off the oven and prop the door open with a wooden spoon for about ½ hour so they can dry out a little.

The gougere’s can be stored in the refrigerator up to a week or frozen for a month. You can fill these with any kind of cheese stuffing or serve them as a stand-alone bite.

Leave a comment
Share
  • Pin it
  • Share
  • Tweet
  • Share
  • Email

Chicken Parmesan Meatballs

11 / 30 / 18


Save
Print
  • 1 # ground chicken
  • ½ cup bread crumbs
  • ¼ cup grated parmesan cheese
  • 2 tablespoons Italian flat leafed parsley, chopped
  • 1 large egg
  • 1 tablespoon fresh ground Italian spices
  • Sea salt and pepper
  • Olive oil
  • 28 oz. can crushed tomatoes
  • 1 ½ cup shredded mozzarella cheese

Combine ground chicken, bread crumbs, parmesan cheese, parsley, egg and season with ground Italian spices and salt and pepper. Heat a large sauté pan, add enough oil to coast the bottom of the pan and brown meatballs on all sides. Remove meatballs and whip out the pan with a towel. Add the crushed tomatoes to the pan and bring to a simmer. Add the meatballs and mozzarella cheese and cook until the cheese is melted, about 10 minutes. Cover with a lid if you like to melt the cheese faster, the meatballs are already cooked.

Serve immediately over pasta.

Meatballs and sauce can be frozen for up to 3 months.

Adapted from Delish

Leave a comment
Share
  • Pin it
  • Share
  • Tweet
  • Share
  • Email

Lettuce Varieties

11 / 29 / 18


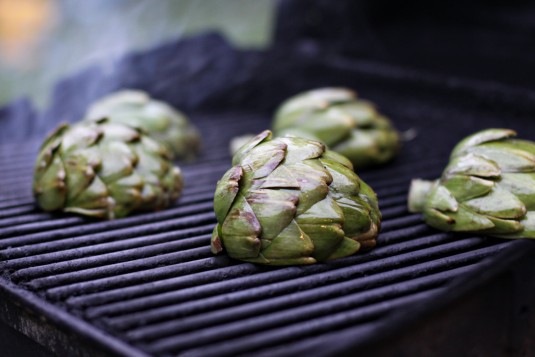
Are you hankering for some romaine lettuce? Well, there are tons of alternatives here in So. Cal for you. From the CDC website here’s what they are saying about the current outbreak of e coli on romaine lettuce.

‘Based on new information, CDC is narrowing its warning to consumers. CDC is advising that U.S. consumers not eat and retailers and restaurants not serve or sell any romaine lettuce harvested from the Central Coastal growing regions of northern and central California. If you do not know where the romaine is from, do not eat it.’
Here’s the link for more information, CDC.

Personally, I like a mix of lettuce mostly, a little crunch, a little color and a tangy dressing. My favorite is a good old Italian dressing made with a very good red wine vinegar. I love a little cheese as well, blue, parmesan or goat goes well with a tangy Italian dressing.

Just mix a little Dijon mustard, like Maille, with your red wine vinegar, add a little minced shallot, some fresh ground Italian spices and whisk in a little olive oil, season with salt and pepper and you’re done.
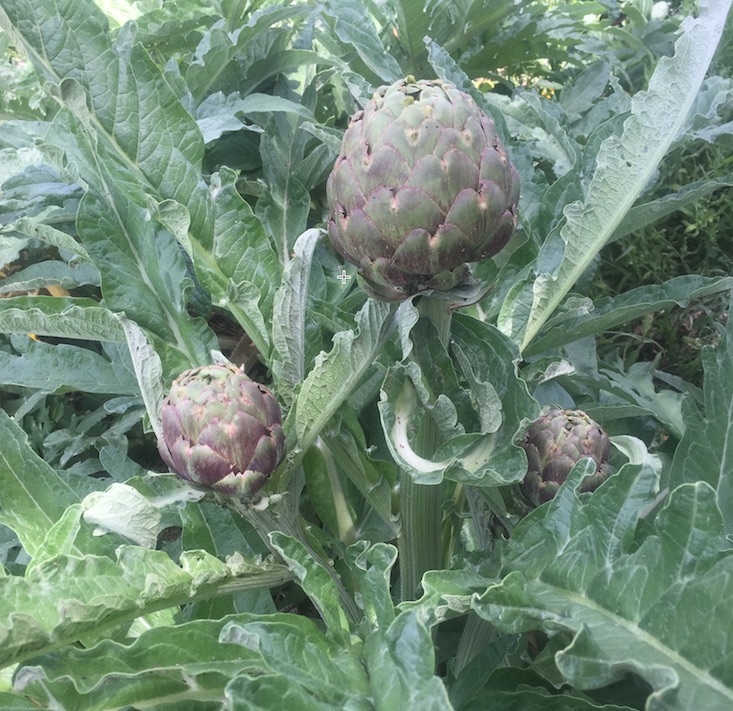
Local lettuce varieties are usually more plentiful during the winter as most lettuce prefers to grow in the cooler weather. Here are some varieties that will offer no only color but flavor to your salad bowl.

Choose lettuce that is bright with no brown edges or spots. Try and get them not too wet, if they are wet, they have a tendency to go bad faster. Pick whole heads of lettuce rather than bagged lettuce. The more lettuce is handled from field to bag the greater chance it can pick up any bacteria. Bagged lettuce can also be washed with chlorinated water and tends to be older than a non-bagged lettuce. Are you tempted to buy the bag that says triple washed and leave it at that? That lettuce may be contaminated with more than just chlorinated water and if it’s wet at all it will likely rot within a couple of days in that bag. Buy un-bagged lettuce, wash and dry well before storing. You might notice that if you purchase your lettuce at a farmers market that it lasts longer than a store bought lettuce, it’s because your farmers market lettuce was probably picked within a couple of days. I’ve had lettuce last up to 2 weeks from my farmers markets. So here are just some of the lettuce types you should be able to pick up anywhere.

Arugula (Rocket)-spicy and peppery, the larger the leaves the more bite it will have

Batavia is a loose-leaf lettuce similar to red or green leaf lettuce with a mild flavor

Belgian Endive-these can be a tad bitter, but they will add crunch to any salad mix

Butter-a very mild lettuce with big cupped leaves, great for serving topped with a crab salad

Frisee (Curly Endive)-Sometimes called chicory, the leaves are thin and curly with a little bit of a bite, aka peppery.

Iceberg-A dense head of lettuce with lots of crunch but little flavor

Leaf Lettuce, Red or Green-Another loose leaf lettuce with mild flavor but both add a lot of color to a salad bowl, great on sandwiches as well.

Little Gem-This lettuce looks like a mini version of romaine but it’s not as crunchy, mild flavor

Oakleaf-Another beautiful bi-colored loose-leaf lettuce that has a mild taste

Radicchio-There are numerous colors of radicchio, most have a little bitterness but a great addition to any salad.

Spring Mix-Usually a variety of small lettuces, some are mild, and some mixes can be spicy.

Watercress – Although probably a little difficult to find it makes a nice addition to a mixed salad or added to a rustic piece of bread slathered with some soft cheese. It has a peppery bit, much like Arugula. Use smaller leaves for less intense flavor.

Leave a comment
Share
  • Pin it
  • Share
  • Tweet
  • Share
  • Email

January 2019 Cooking Demo

11 / 28 / 18


Join us in Seal Beach

NEW DATES/DAYS

Thur. Jan 10th

Tue Jan 22

6:30 – 8:30, approximately

Menu

Pink Grapefruit, Avocado & Watercress Salad with Pomegranate Vinaigrette

Chicken Cordon Bleu

Spaghettini with Vodka Cream Sauce

Winter Roasted Vegetables with Basil Vinaigrette

Lemon Curd Cream Puffs

$45.00
Taking reservations now, call:
Temecula Olive Oil, 148 Main St. Seal Beach
(562) 296-5421

Sponsored by our friends at

Related Posts Plugin for WordPress, Blogger...
Leave a comment
Share
  • Pin it
  • Share
  • Tweet
  • Share
  • Email

Posts navigation

1 2 3 Next Page
Deb

Meet Chef Debbi

READ BIO

Join-Us Sign up for our newsletter to receive exclusive tips 'n tricks, and special offers on classes, tours, and more!

Recent Posts

  • New E-Book!
  • From the Pantry
  • Spaghettini at Home
  • Growing Corn
  • Spring IS Coming!

Categories

BookCUT

What's in Your Pantry?

How to stock your pantry to create delicious dishes.

Learn Chef Debbi's pantry essentials and how to substitute ingredients for pantry staples in her basic recipes for quick and easy meals.
BUY BOOK>

FacebookTwitterInstagramGooglepinterest


© 2014, DEB'S KITCHEN
Angie Makes Feminine WordPress Themes