Deb's Kitchen - Farm, Food, Wine & Lifestyle Adventures
  • Facebook
  • Google
  • Twitter
  • Instagram
  • Pinterest
  • Email
Menu
Skip to content
  • Home
  • Blog
  • Events
    • Classes
    • Tours & Adventures
  • Edible Gardening
  • Preserving
  • Recipes
    • Appetizers
    • Soups and Salads
    • Main Dishes
    • Side Dishes
    • Desserts
  • About
    • Whats In Your Pantry
    • Ask Debbi
    • Deb’s Kitchen Botanicals
    • Press
  • Contact

Category Archives: Fall Recipes

Apples

10 / 27 / 20


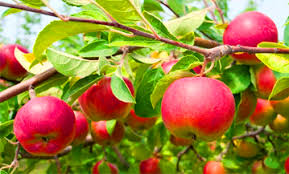
Apples are the ultimate fruit, low in calories with no fat, sodium or cholesterol. The pectin in apples actually helps to dissolve the cholesterol in one’s blood stream. High in fiber, anti-oxidants, potassium, niacin and a variety of vitamins, apples are a near perfect fruit. To get the most of the nutrition from an apple, eat organic apples with the peel on, most of the pectin lies just below the skin.

How to choose and store your apples…..

Choose organic apples as apples have topped the Environmental Working Groups ‘Dirty Dozen’ list, which identifies the most pest laden fruit and vegetables. You’ll want to eat the skin of the apple as disease-fighting pectin (fiber) lies directly under the skin

Select firm fruit with no bruises or scars and treat them gently.

Don’t wash your apples until you’re ready to use them.

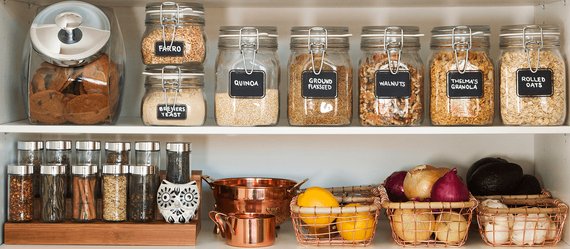
Keep them in a cool place, your fruit drawer of the refrigerator is fine but don’t store with other fruit. Apples give off a gas, ethylene, which will ripen your other fruit faster. Some apples will keep weeks in the refrigerator. They will keep a few days on the counter.

How to choose which to use for baking or eating? Here’s a quick list:

Cooking

Ambrosia

Braeburn

Cameo

Golden Delicious

Honeycrisp

Jazz

Jonagold

Jonalicious

Jonathon

McIntosh

Pink Lady

Red Delicious

Fresh Eating

Ambrosia

Envy

Fuji

Gala

Golden Delicious

Honeycrisp

Jazz

Opal

Pink Lady

Sweetie


Oven Roasted Pork Chops

Save
Print

Serves 2 to 4

  • For the brine (optional)
  • 3 cups cold water, divided
  • 3 tablespoons kosher salt
  • 1 smashed garlic clove, 1/2 teaspoon black peppercorns, 1 bay leaf
  • For the chops:
  • 2-4 center cut, bone-in pork chops, 1-inch thick or more
  • Olive oil
  • Sea salt and fresh ground pepper
  • Fresh applesauce, optional as a side

Brine the pork chops if you have time, brining the pork makes it more tender and juicier.

Bring 1 cup of the water to a boil, add the salt, garlic, peppercorns and bay leaf to the water, and stir to dissolve the salt. Add 2 more cups of cold water to bring the temperature of the brine down to room temperature. Place the pork chops in a shallow dish and with the brine, if the chops aren’t covered add additional water and salt (1 cup water to 1 tablespoon salt) until the chops are submerged. Cover the dish and refrigerate for 30 minutes or up to 4 hours.

Heat the oven to 400°. Put a skillet that can hold the chops into the oven while it heats.

If you brined the chops remove and dry both sides, rub with olive oil and season with salt and pepper.

When the oven is preheated remove the skillet and set over a medium high heat on the stove. Sear the chops on both sides quickly, if they brown quickly turn the heat down slightly. You might want to open your windows and turn on a fan, the chops may smoke when you add them to the pan. When browned slide a probe thermometer into the middle of the chop without touching the bone and set to 140°, place the pan in the oven and cook until the thermometer’s alarm goes off. Remove the chops to a plate and let rest about 5 min. They will cook fast, 5-10 min. DO NOT OVERCOOK.

Serve with homemade applesauce and oven roasted potatoes.

Herb Roasted Potatoes

Save
Print
  • 1 pound Dutch Yellow Potatoes*, Yukon Gold or fingerling potatoes, cut in half lengthwise
  • salt and pepper
  • olive oil, as needed
  • 1 shallot, chopped
  • 1 tablespoon Italian parsley, minced
  • 1/2 tablespoon chives, minced
  • 2 tablespoons butter or olive oil

Preheat oven to 400°.

Place potatoes on foil lined baking sheet; season with salt and pepper and toss with just enough oil to lightly coat potatoes.

Bake for approximately 35 minutes. The last 10 minutes add shallots and herbs.

Toss with butter or olive oil.

*Dutch Yellow Potatoes are available from Melissas Produce

Order potatoes from Melissas Produce, click here
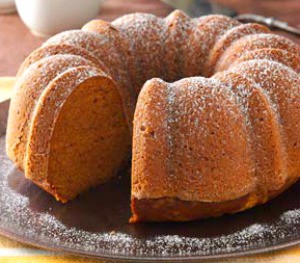
Applesauce Cake

Save
Print
  • Cake:
  • 2 cups all-purpose flour
  • 2 teaspoons baking powder
  • ½ teaspoon baking soda
  • ½ teaspoon salt
  • 1 teaspoon cinnamon
  • ½ teaspoon ground ginger
  • 1 stick unsalted butter, softened
  • 1 cup packed light brown sugar
  • 1 teaspoon pure vanilla extract
  • 2 large eggs
  • 1 ½ cups cinnamon applesauce
  • ½ cup walnuts chopped walnuts
  • Frosting:
  • 5 oz cream cheese softened
  • 3 tablespoons unsalted butter, softened
  • ¼ teaspoon pure vanilla extract
  • 1 cup confectioners sugar
  • ½ teaspoon cinnamon

Preheat oven to 350°F with rack in middle. Butter a baking dish.

Cake:

Whisk together flour, baking powder, baking soda, salt, and spices.

Beat butter, brown sugar, and vanilla with an electric mixer at high speed until pale and fluffy, 2 to 3 minutes. Add eggs 1 at a time, beating well after each addition, then beat in applesauce. At low speed, mix in flour mixture until just combined, then stir in walnuts.

Spread batter evenly in pan and bake until golden-brown and a wooden pick inserted into center comes out clean, 40 to 45 minutes. Cool in pan 15 minutes. Run a knife around edge of cake to loosen, then invert onto a plate. Reinvert cake onto a rack to cool completely.

Frosting:

Beat cream cheese, butter, and vanilla with an electric mixer at high speed until fluffy. Sift confectioners sugar and cinnamon over cream cheese mixture, then beat at medium speed until incorporated.

Spread frosting over top of cooled cake.
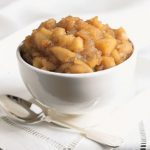
Easy Applesauce

Save
Print
  • 3 pounds organic apples, Fuji, Gala, Honeycrisp or Jonagold
  • 2/3 cup apple juice, orange juice or water
  • 8 tablespoons sugar
  • 3 teaspoons cinnamon
  • 1/4 teaspoon nutmeg

Core, peel and cut the apples into medium sized pieces. Place all ingredients into a saucepan with lid and simmer over low heat until apples are very tender, about 45 minutes. Put through a food mill to create a soft creamy applesauce or use a potato masher and serve chunky.

Pressure cooker or Instant pot:

Combine all the ingredients in the container, cover and lock into place. Press manual button and set timer for 4 min. Let the closed pressure cooker rest for about 10 minutes, release any pressure that’s left.

Carefully open lid, angling it away from you to avoid getting burned by the steam. Use a potato masher to crush with a slightly chunky consistency or put through a food mill for a smoother one.

Get one now!


Leave a comment
Share
  • Pin it
  • Share
  • Tweet
  • Share
  • Email

Hello Fall!

10 / 17 / 20

Gordon Skagit Pumpkin Farms

It’s starting to feel like fall, I’m sure hoping all the hot days are behind us, they’re not my favorite!

I still have great looking tomatoes in the garden and some seasonal herbs, my summer lettuce is going to seed so it’s time to get busy with my fall/winter garden. Actually I’m a little late but we decided to drive up the coast just to get a break. Now it’s time to focus before the ground gets too cool.

I’m working on a new Debs Kitchen Garden newsletter which I’ll begin sending out on opposite weeks of the regular newsletter. I have some appointments left if you need a little advice on getting your own winter garden growing. In the meantime here are some pumpkin/squash recipes for you because I know many of you just can’t get enough pumpkin! Mangia!


Pumpkin Risotto

Save
Print

Serves 4

  • 1 qt. homemade or low-sodium chicken or vegetable stock
  • 1 cup pumpkin purée (not pumpkin pie filling)
  • Sea salt and pepper
  • ½ teaspoon ground nutmeg, or 6 to 10 scrapes on a grater from a whole nutmeg
  • 8 tablespoons (4 ounces) unsalted butter
  • 8 ounces shallots (7 to 8), minced
  • 1 ¾ cups carnaroli, vialone nano rice, you could also use an arborio rice
  • 1 ½ cups dry white wine
  • 1 ¼ cups grated Parmesan cheese
  • 6-10 sage leaves, finely chopped (optional)

Place the stock, pumpkin, nutmeg, a sprinkling of salt and pepper in a medium saucepan over high heat, Stir to combine and bring to a gentle boil. Reduce the heat to a simmer.

In a large, deep pan add the butter, and melt over medium heat. Add the shallots and cook, stirring until they are translucent. Add the rice and stir until each grain is coated in fat, 2 to 3 minutes. Reduce the heat to low. Add the wine or vermouth and cook, stirring constantly, until it is absorbed.

Add 1/2 cup of the pumpkin stock mixture and stir constantly until absorbed. Add the remaining stock mixture, 1/2 cup at a time, stirring constantly after each addition and adding the next amount only after the previous one is fully absorbed by the rice.

After you have used about 4 1/2 to 5 cups of the stock mixture taste the rice to determine if it is al dente. Continue to add more stock, if necessary, to reach al dente.

Stir in the cheese and sage if using. Serve immediately.

Instant Pot Pumpkin Purée

Save
Print

Yield about 2 cups

  • 1 ½ cups water
  • 1 (3- to 4-pound) sugar or pie pumpkin*

Wash and dry the pumpkin Remove the top and then cut in half lengthwise. (You can remove the seeds now or wait until the squash is cooked and scoop them out).

Set a wire rack in a 6-quart or larger electric pressure cooker or Instant Pot. Add the water. Place the pumpkin cut-side up on the rack. Lock on the lid and make sure the pressure valve is set to seal. Set the cook time for 15 minutes at high pressure.

When the cook time is up, let the pressure cooker naturally release pressure for 5 minutes. Quick release any remaining pressure. Open the pressure cooker and check the texture of the pumpkin. The pumpkin flesh should be fork tender. If it's not, cook for 5 minutes more at high pressure, repeating the 5 minute natural release. Transfer the pumpkin to a cutting board until cool enough to handle.

Fit a large fine-mesh strainer over a bowl or line a regular colander with cheesecloth first. Cut the pumpkin in half. Remove any remaining seeds. Scrape the pumpkin flesh away from the skin and place in the strainer or colander. Using the back of a spoon, press on the pumpkin firmly to remove excess liquid. Set aside to drain for 1 hour.

Transfer the drained pumpkin to the bowl of a food processor fitted with the blade attachment. Blend until smooth, about 1 minute. Measure into 16-ounce portions, about 2 cups each. If any pumpkin remains, use it in smoothies.

*Pumpkin substitute: If you can't find a sugar pumpkin, use 2 acorn squash instead, 3 to 4 pounds total.

Storage: Keep the purée in the refrigerator for up to 2 days or place the fully cooled purée into a plastic freezer bag. Flatten and freeze for up to 3 months. Thaw in the refrigerator overnight before using.

Maple Roasted Brussels Sprouts with Squash

Save
Print
  • 1 pound butternut squash peeled and diced into 1/2-inch cubes
  • 1 pound Brussels sprouts ends cut off and halved (if they are large, cut in quarters)
  • 4 slices thick-cut bacon diced
  • 2 tablespoons extra virgin olive oil
  • 1 tablespoon fresh thyme
  • 1 tablespoon fresh sage
  • Sea salt and fresh ground pepper to taste
  • 1/2 cup halved pecans, optional
  • FOR THE MAPLE GLAZE
  • 3 tablespoons maple syrup
  • 1 tablespoon balsamic vinegar
  • 2 tablespoons extra virgin olive oil
  • Sea salt and fresh ground pepper to taste

Preheat oven to 425°.

Line a large baking sheet with parchment paper or foil and set aside.

In a large mixing bowl combine diced butternut squash, brussels sprouts, bacon, olive oil, thyme, sage, salt, and pepper; mix until thoroughly incorporated.

Transfer veggies to prepared baking sheet and roast for 30 to 35 minutes, stirring around halfway through cooking.

In the last 7 minutes, add pecans, if using

In a small saucepan whisk together maple syrup, balsamic vinegar, olive oil, salt, and pepper.

Set saucepan over medium heat and bring to a simmer; stirring often, simmer for 3 to 4 minutes or until reduced and syrupy.

Take veggies out of the oven and toss with prepared glaze.

Arrange on a large plate or bowl and serve.

Lemon Roast Chicken with Delicata Squash

Save
Print
  • 1 whole chicken, cut up
  • 3 small Delicata squash (about 1½ pounds), halved lengthwise, seeds removed
  • 1 medium onion, chopped
  • 2 Meyer lemons, zested and juiced
  • 3 tablespoons extra-virgin olive oil
  • Sea salt and pepper
  • 3 sprigs fresh sage
  • Meyer lemon wedges, for serving
  • Fresh thyme and sage sprigs, for serving

Preheat oven to 450°.

Line a baking sheet with parchment paper or foil. Place the chicken and squash on the parchment. Toss the squash and onions with oil and place on the baking sheet with the chicken. Rub the chicken with oil, pour the lemon juice overall, sprinkle with zest and season with sea salt and pepper. Chop half the sage and sprinkle over both chicken and squash-onion mixture. Sprinkle zest over the chicken.

Roast the chicken and squash for 30–40 minutes, or until an instant read thermometer registers 165° at the thickest part of the thighs and the squash is cooked through and fork tender, while the onions are softened and slightly charred around the edges.

Transfer the chicken and squash to a serving platter, garnish with lemon wedges, thyme and sage, serve right away.

Caramel Pumpkin Pots du Crème

Save
Print
  • 2 cups heavy cream
  • 5 large egg yolks
  • 1/4 cup plus sugar
  • Pinch of sea salt
  • 1/2 cup plus two tablespoons of pumpkin puree
  • 1/4 cup caramel sauce
  • 1/2 teaspoon cinnamon
  • 1/4 teaspoon nutmeg
  • 1 teaspoon vanilla

In a medium saucepan, bring heavy cream and sugar to a boil, whisking constantly until the sugar is dissolved. Put aside and let cool for five minutes.

In a medium heatproof bowl, whisk the egg yolks. Add 1/4 cup of heated cream mixture to egg mixture and whisk to combine. Continue adding cream mixture in 1/4 cup increments to eggs until the two are fully combined. Place fully combined mixture back into saucepan and cook over moderate heat, stirring with a wooden spoon, until the custard coats the back of the spoon, about 4 minutes.

Add remaining ingredients and stir to combine. Transfer the mixture to a blender and puree until very smooth, about 1 minute. Pour the finished custard through a strainer.

Refrigerate until chilled about 2 hours.

To serve warm: Let the pots de crème stand at room temperature for 15-20 minutes prior to serving.

Serve with a dollop of whipped cream.


Leave a comment
Share
  • Pin it
  • Share
  • Tweet
  • Share
  • Email

Late Summer/Early Fall Menu’s

9 / 21 / 20

While it’s still pretty hot out in So. California it’s hard to go into the kitchen to cook. Here are some light recipes that are quick and easy to prepare. Mangia!

Spinach Salad, Traditional

Save
Print

Serves 2

  • 6 ounces baby spinach, washed and dried well
  • 1/4 small or medium shallot, minced
  • 2 pieces thick-sliced bacon, finely diced
  • ¼ cup Champagne Vinegar, or Red Wine Vinegar
  • 1/2 teaspoon smooth Dijon mustard
  • Sea salt and freshly ground black pepper, to taste
  • 4 large white mushrooms, thinly sliced
  • 2 large egg, hard-boiled, chilled, peeled and thinly sliced

Remove any stems from the spinach and place in a salad serving bowl.

In a heated sauté pan add bacon and cook until crisp, drain on paper towels. Remove all but 2 Tb. of bacon grease and add vinegar, whisk in Dijon mustard and taste for seasoning. Pour over salad and toss quickly, scatter with mushrooms and eggs.

Serve while still warm.

Roasted Tomato & Goat Cheese Flatbread with Artichoke Pesto

Save
Print
  • 1 jar artichoke hearts, 12 oz., drained
  • 1 cup walnuts, toasted
  • 1/4 cup grated Parmesan cheese
  • 2 cloves garlic, peeled
  • 1/3 cup lemon juice, to taste
  • 1/2 cup olive oil, to taste
  • 1/4 cup minced fresh parsley
  • Salt and pepper, to taste
  • 1 pizza dough
  • 1 large heirloom tomatoes or ½ basket cherry tomatoes, cut in half
  • 4 ounces soft goat cheese

Drain the artichoke hearts. If they are marinated in oil, you can omit draining the hearts and adjust the oil measure downwards appropriately.

Add the artichoke to the food processor with the nuts, cheese, and garlic and pulse until you have a paste. Add in the lemon juice and with the motor running, drizzle in the olive oil. Scrape down the sides of the processor as needed and pulse until you have a uniform paste-like consistency.

Taste and season with salt, pepper, oil, and lemon juice to taste.

Heat oven to 450°. Roll pizza dough out to desired shape, place onto parchment lined baking pan. Brush 1” of the edge of the pizza dough with olive oil, spoon on the artichoke dip to the remaining dough, top with tomatoes, goat cheese and bake for 12 – 15 minutes.

Spinach Bacon Cheese Puffs

Save
Print

Baked pastry puffs stuffed with a cream cheese, feta, bacon and spinach filling. These are great appetizers that you can put together ahead of time and bake off as needed.

Yield: 10 puffs

  • 4 ounces cream cheese, softened
  • 1 large egg
  • 1 tablespoon olive oil
  • 1/2 teaspoon dried dill
  • 2 packed cups chopped fresh spinach
  • 3/4 cup crumbled feta
  • 3 slices crispy cooked bacon, crumbled
  • Sea salt and fresh ground black pepper
  • 1 sheet frozen puff pastry, thawed and cut into 10 squares (cut on a floured board), Keep the pastry cold until ready to use.
  • 1 tablespoon butter, melted

Preheat oven to 400°. Grease round or square muffin pan.

Place the cream cheese into a food processor, add egg, oil and dill and pulse until combined.

In a separate bowl mix the spinach, feta and bacon. Pour the cream cheese mixture over top, season it with salt and pepper and stir until combined.

Line the muffin pan with the pastry squares, stretching them out a little if needed; press them into the bottom of the cups. Divide the spinach among the cups as evenly as possible. Bring the 4 points together over the filling and press them together.

Lightly brush with the melted butter.

Bake about 25 minute until golden brown and puffy. Allow to cool in pan on wire rack 10 minutes then run a knife around the edges to loosen them and help pop them out.

Bird's Nest Pesto With Stuffed Tomatoes

Save
Print
  • Pesto
  • 1/2 cup pine nut -- lightly toasted; plus, some for garnish
  • 1 clove garlic -- peeled
  • 2 cups basil leaf -- loosely packed
  • 1/2 cup Parmesan cheese -- grated
  • Salt and pepper
  • Tomatoes
  • 11 ounces goat cheese -- room temperature
  • 1/4 cup heavy cream
  • Salt and pepper
  • 6 small tomatoes -- plum
  • Olive oil
  • 1 pound spaghetti -- or angel hair pasta

Pesto

In a food processor, rough chop pine nuts and garlic. Add basil and process using pulse until the leaves start to break down. Add the cheese and blend until you have a rough paste. With machine running add olive oil to emulsify. Season with salt and pepper.

Preheat oven to 425° and put a pot of water on to boil for the pasta.

Mix the goat and Boursin cheese with enough cream to make it soft and spreadable. Season with salt and pepper.

Cut the tops off of the tomatoes and scoop out the insides. Lightly salt and place, cut side down, on paper towels to drain for 20 min. Spread a little pesto on the inside of the tomato and fill to the top with the goat cheese mixture. Place in a lightly oiled baking dish. Drizzle a little olive oil over each one and bake until they start to shrivel, and the cheese is lightly browned, about 20 min.

Cook the pasta until al dente, reserving about 1 cup of the cooking water.

Transfer to a large serving bowl and toss with the pesto, adding a bit of the pasta water if necessary, to loosen the pesto. Plate the pasta and add a tomato in the center. Top with a sprinkling of toasted pine nuts.

Sea Bass Provençal

Save
Print
  • Olive oil
  • 1 small leek, cut in half and then into half moons
  • 1 clove garlic
  • 1 small can whole tomatoes, drained and chopped or 2 large fresh garden tomatoes
  • ¼ cup dry white wine
  • 2 teaspoons fresh thyme
  • ¼ cup Greek olives, halved
  • 1 teaspoon capers, drained
  • 4 4 ounce Sea Bass fillets, or any white fish

Heat a medium sauté or saucepan. Add enough oil to coat the bottom of the pan, add onion and sauté until lightly translucent. Add garlic and stir for about a minute. Crush or squish tomatoes and add tomatoes and remaining ingredients except the fish then simmer about 10 minutes. Set aside and keep warm.

Heat a large sauté pan over medium heat; add enough oil to coat the bottom of the pan. When oil is hot carefully place dried fish fillets into oil, it should start to simmer right away. Cook about 3-4 minutes and turn carefully for another 4 minutes.

Serve with sauce.

French Apple Cake

Save
Print
  • 1 cup all-purpose flour, spooned into measuring cup and leveled-off
  • 1 teaspoon baking powder
  • 1/4 teaspoon salt
  • 1 stick (1/2 cup) unsalted butter, at room temperature
  • 2/3 cup granulated sugar, plus more for sprinkling over cake
  • 2 large eggs
  • 1 teaspoon vanilla extract
  • 3 tablespoons dark rum
  • 2 baking apples, peeled, cored and cut into 1/2-inch cubes (I like Honeycrisp, Fuji or Granny Smith)
  • Confectioners' sugar (optional), for decorating cake

Preheat the oven to 350°F. Grease a 9-inch springform or regular cake pan with butter or nonstick cooking spray. If using a regular cake pan, line the bottom of the pan with parchment paper and grease again.

In a small bowl, whisk together the flour, baking powder and salt.

Using a handheld mixer with beaters or a stand mixer with the paddle attachment, cream the butter and granulated sugar until light and fluffy, about 3 minutes. Add the eggs, one at a time, beating well and scraping down the sides of the bowl after each addition. Beat in the vanilla and rum. Don't worry if the batter looks grainy at this point; that's okay. Add the flour mixture and mix on low speed until just combined. Using a rubber spatula, fold in the chopped apples.

Scrape the batter into the prepared pan and even the top. Sprinkle evenly with 1 tablespoon of granulated sugar. Bake for about 40 minutes, or until the cake is golden and a toothpick inserted into the center comes out clean. Allow the cake to cool on a rack. Run a blunt knife around the edges of the cake. If using a springform pan, remove the sides. If using a regular cake pan, carefully invert the cake onto the rack, remove the parchment paper, then gently flip the cake over and place right-side-up on a platter. Using a fine sieve, dust with Confectioners' sugar (if using). Cake can be served warm or room temperature, plain or with lightly sweetened whipped cream or vanilla ice cream.

Freezer Friendly Instructions: The cake can be frozen for up to 3 months. After it is completely cooled, cover it tightly with aluminum foil or freezer wrap. Thaw overnight on the countertop before serving.


Leave a comment
Share
  • Pin it
  • Share
  • Tweet
  • Share
  • Email

Tuscan Bean Soup

3 / 29 / 20

So have you been baking all that bread? Well, now you need something to go with it. Here’s my recipe for Tuscan Bean Soup using pantry items from my first book ‘What’s In Your Pantry’.

Tuscan Bean Soup

Save
Print

There are as many recipes for Tuscan Bean Soup as there are Italians, everyone makes their soup slightly different. Sometimes I like to use an immersion blender and mash some of the soup when it’s finished. Serve with lots of crusty bread and fresh butter.

  • 2 tablespoons olive oil
  • 1 onion, minced
  • 1 clove garlic
  • ¼ lb. pancetta, chopped
  • 1 stalk celery, minced
  • 1 carrot, minced
  • 1 tablespoon tomato paste
  • 1 qt. chicken or vegetable stock
  • 2 cans cooked cannelini beans, white kidney beans will do
  • 1 small can chopped plum tomatoes
  • 1 leftover rind of Parmigiano-Reggiano
  • 2 tablespoons Italian seasoning, ground or crushed
  • ½ bunch fresh sage, chopped
  • 2 sprigs Italian parsley, chopped

Heat a Dutch oven over a medium high heat, add oil and when hot, sauté onions until lightly translucent. Turn down the heat to medium; add garlic and pancetta, stir to cook but do not brown the garlic.

Stir in the celery and carrot, season with a pinch or two of salt and pepper; cook, stirring occasionally until the vegetables are soft. Add the tomato paste and stir until the vegetables are well coated.

Add the stock, beans, tomatoes, cheese rind and seasonings. Bring to a boil, turn down to a simmer and let the soup simmer for at least 30 minutes. The cheese rind should have melted into the soup, but, if there is still a hard piece left, remove it and season to taste with salt and pepper.

Serves 4.

Leave a comment
Share
  • Pin it
  • Share
  • Tweet
  • Share
  • Email

What’s In Your Fall Pantry

10 / 4 / 19


This is but a small list of fall pantry items that I like to keep for fall. With these on hand you can make breakfast, lunch, dinner and dessert without stress. There are even some items to have on hand for those friends who like to drop in for a visit. Throw the artichoke hearts in a food processor, add some spices and a little yogurt, cream cheese or mayo and bake for 20 minutes. Or drain and throw the roasted red peppers into a food processor, add a little leftover bread, walnuts, tomato paste with a little olive oil, salt and Aleppo pepper for a tasty dip for bread or crackers. Add things that your family likes to eat in the fall, for all the upcoming holidays and special events. Here’s a great fresh, homemade applesauce recipes, serve along side pork chops or bake into an applesauce cake for a warm, spiced dessert or breakfast snack. Happy Fall!


Beverages

Cocoa

Tea

Mulled Cider

 Fruit

Apples (do not store with other fruit or vegetables-apples give off ethylene gas which will hasten the ripening of other fruits and vegetables)

Applesauce

Dried fruit

Pears

Pomegranates

Citrus

 Vegetables

Potatoes

Carrots

Onions

Canned

Dried fruit (cranberries, apricots, blueberries etc.)

Canned pumpkin

Canned and dried beans (for soups, stews, chili)

Canned Tomatoes

Tomato sauce

Tomato Paste

Garlic

Onions

Pickles

Roasted Red Peppers, in water

Grains

Oatmeal (rolled oats & steel cut)

Alternative grains

Breadcrumbs

Rice

Soup

 Pasta

Mac & Cheese Pasta

Lasagna noodles

Flour

 Dairy

yogurt

cheese

Condensed milk

Unsalted butter

Variety of cheeses

 Staples

Artichoke Hearts, canned in water

Breadcrumbs

Chicken, Vegetable, Beef Stock

Crackers

Honey

Maple Syrup

Molasses

Sugar, white, brown, dk. Brown

White vinegar (for pickling)

Apple Cider Vinegar

Balsamic Vinegar

Spices

Aleppo Pepper

Sea salt

Baking Spices

Cinnamon sticks

Nuts

Pickling spice

Peppercorns

Yeast

Simple Homemade Applesauce

Save
Print
  • 3 pounds organic apples, Fuji, Gala, Honeycrisp or Jonagold
  • 2/3 cup apple juice, orange juice or water
  • 8 tablespoons sugar, optional
  • 3 teaspoons cinnamon
  • 1/4 teaspoon nutmeg

Core, peel and cut the apples into medium sized pieces. Place all ingredients into a saucepan with lid and simmer over low heat until apples are very tender, about 45 minutes. Put through a food mill to create a soft creamy applesauce or use a potato masher and serve chunky.

Pressure cooker or Instant-pot:

Combine all the ingredients in the container, cover and lock into place. Press manual button and set timer for 4 min. Let the closed pressure cooker rest for about 10 minutes, release any pressure that’s left.

Carefully open lid, angling it away from you to avoid getting burned by the steam. Use a potato masher to crush with a slightly chunky consistency or put through a food mill for a smoother one.


Leave a comment
Share
  • Pin it
  • Share
  • Tweet
  • Share
  • Email

Cranberry-Apple Salad with Walnuts

9 / 26 / 19

Winter Green Salad with Apples, Cranberries & Walnuts With French Vinaigrette

Save
Print

Fresh Autumn-Winter Salad with seasonal fruit, walnuts and feta cheese.

Serves: 4-6

  • Vinaigrette
  • ¼ cup pomegranate vinegar, any vinegar can be
  • 1 tablespoon Dijon mustard
  • 1 small shallot, minced
  • 1 sprig Italian parsley, chopped
  • 1 teaspoon thyme, chopped
  • ¾ cup vegetable, olive or canola oil, approximately
  • salt and pepper, to taste
  • Salad
  • 6 cups mixed greens
  • 2 organic apples*
  • 1 cup toasted walnuts, roughly chopped
  • ⅓ cup crumbled feta cheese
  • ⅓ cup dried cranberries

In a medium bowl make the vinaigrette by whisking together all the ingredients except the oil. While constantly whisking, drizzle in some of the oil, stopping to taste occasionally. Season to taste with salt and pepper.

Can be made in advance and stored in the refrigerator.

Bring to room temperature before serving.

For a creamier dressing add 1 Tb. mayonnaise

Core and chop apples (thin slices or 1 inch chunks). Toss lettuce, apples, walnuts, feta, and cranberries together in a large bowl. Add a little dressing and toss, taste for seasoning and adjust.

*If conventional apples are used, peel first.

Leave a comment
Share
  • Pin it
  • Share
  • Tweet
  • Share
  • Email

Holiday Entertaining

9 / 21 / 199 / 21 / 19

Winter Cooking Demo

Thur. Dec. 5th    

6:30 – 9:30, approximately

$65.00

Sold Out

This class is sold out but if you’d like to get on a wait list, send me a note

Wait List, click here


Charcuterie & Vegetable Platter

Tuscan White Bean Soup

Sun Dried Cranberry Salad with Orange Vinaigrette

Herb-Mustard Crusted Rack of Pork

Mascarpone Mashed Potatoes with Chives

Chocolate Raspberry Linzertorte


The class is in a private home,

Location is N. Seal Beach

Address will be given upon Registration

(562) 243-3926; If you’d like to send a check call for address please

Leave a comment
Share
  • Pin it
  • Share
  • Tweet
  • Share
  • Email

Artichokes!

4 / 10 / 194 / 10 / 19

Spring is nearly here and with it comes lovely artichokes. Artichokes are perennial plants in the same family as dandelions and sunflowers, they are a thistle plant and, in most artichokes, there is a center that’s inedible, the ‘choke’. In cooler climates, such as California’s northern coast they can be grown as annual’s. Spring and fall are times when you can find fresh artichokes in the markets. An easy plant to grow, they do require full sun and will take up a large space, 3 feet or more. Be sure to cut the artichoke before the leaves begin to open and it blossoms into a flower.

When you choose your artichoke, you want to make sure that it’s firm when you press the sides and you’ll often hear a squeaky noise, that’s good. The leaves should be tight and closed. If there is a little bit of brown on the leaves that’s ok, it just means there was a little frost during its growing season but that’s not a bad thing. The inside will be perfectly delightful. You also might want to consider only organic artichokes since you’ll be eating parts of the plant that may have been sprayed with pesticides during its growing season. Pesticides cannot be washed off with water or vegetables soaps, they are oil based and you know what happens when oil and water mix! If you can’t find beautiful California Artichokes in the market, here is a great local source where you can order them, Melissa’s Produce, http://www.melissas.com/Organic-Artichokes-p/1375.htm

To store your artichokes, you could place in a plastic bag and store in the produce drawer of your refrigerator or just pop it into the drawer itself. They will last up to 7 days but best eaten within a few.

Rinse the artichoke under cool water; pull off the lower, smaller leaves and cut the stem at the base of the choke. If you have a nice long stem, you can cook this separately and eat it like you would the heart, it tastes the same. If desired, with a sharp chef’s knife cut across the top third of the artichoke and snip the sticker off the remaining leaves. Even though there are many ways to prepare a fresh artichoke, most people fall back to either boiling/steaming them, although it takes quite a while, up to half an hour or more. You could put them in a microwave bowl or in an Instant Pot adding a cup of water and cook for 10 minutes, cover the microwave ones, or grill them over hard wood. Anyway is fine with me.

Here’s the traditional method:

Put them into a large pot and cover with cool water, squeeze two lemons into the water and a little sea salt, bring to a boil and simmer until you can run a small knife through the bottom part of the artichoke, 30-45 minutes or longer depending on the size of the vegetable. Remove from the water using tongs and picking up the artichoke with the top facing down so not to spill hot water all over yourself, drain and serve with my favorite sauce from Walt’s Wharf in Seal Beach.

Get the recipe here, 

Leave a comment
Share
  • Pin it
  • Share
  • Tweet
  • Share
  • Email

Lettuce Varieties

11 / 29 / 18


Are you hankering for some romaine lettuce? Well, there are tons of alternatives here in So. Cal for you. From the CDC website here’s what they are saying about the current outbreak of e coli on romaine lettuce.

‘Based on new information, CDC is narrowing its warning to consumers. CDC is advising that U.S. consumers not eat and retailers and restaurants not serve or sell any romaine lettuce harvested from the Central Coastal growing regions of northern and central California. If you do not know where the romaine is from, do not eat it.’
Here’s the link for more information, CDC.

Personally, I like a mix of lettuce mostly, a little crunch, a little color and a tangy dressing. My favorite is a good old Italian dressing made with a very good red wine vinegar. I love a little cheese as well, blue, parmesan or goat goes well with a tangy Italian dressing.

Just mix a little Dijon mustard, like Maille, with your red wine vinegar, add a little minced shallot, some fresh ground Italian spices and whisk in a little olive oil, season with salt and pepper and you’re done.
Local lettuce varieties are usually more plentiful during the winter as most lettuce prefers to grow in the cooler weather. Here are some varieties that will offer no only color but flavor to your salad bowl.

Choose lettuce that is bright with no brown edges or spots. Try and get them not too wet, if they are wet, they have a tendency to go bad faster. Pick whole heads of lettuce rather than bagged lettuce. The more lettuce is handled from field to bag the greater chance it can pick up any bacteria. Bagged lettuce can also be washed with chlorinated water and tends to be older than a non-bagged lettuce. Are you tempted to buy the bag that says triple washed and leave it at that? That lettuce may be contaminated with more than just chlorinated water and if it’s wet at all it will likely rot within a couple of days in that bag. Buy un-bagged lettuce, wash and dry well before storing. You might notice that if you purchase your lettuce at a farmers market that it lasts longer than a store bought lettuce, it’s because your farmers market lettuce was probably picked within a couple of days. I’ve had lettuce last up to 2 weeks from my farmers markets. So here are just some of the lettuce types you should be able to pick up anywhere.

Arugula (Rocket)-spicy and peppery, the larger the leaves the more bite it will have

Batavia is a loose-leaf lettuce similar to red or green leaf lettuce with a mild flavor

Belgian Endive-these can be a tad bitter, but they will add crunch to any salad mix

Butter-a very mild lettuce with big cupped leaves, great for serving topped with a crab salad

Frisee (Curly Endive)-Sometimes called chicory, the leaves are thin and curly with a little bit of a bite, aka peppery.

Iceberg-A dense head of lettuce with lots of crunch but little flavor

Leaf Lettuce, Red or Green-Another loose leaf lettuce with mild flavor but both add a lot of color to a salad bowl, great on sandwiches as well.

Little Gem-This lettuce looks like a mini version of romaine but it’s not as crunchy, mild flavor

Oakleaf-Another beautiful bi-colored loose-leaf lettuce that has a mild taste

Radicchio-There are numerous colors of radicchio, most have a little bitterness but a great addition to any salad.

Spring Mix-Usually a variety of small lettuces, some are mild, and some mixes can be spicy.

Watercress – Although probably a little difficult to find it makes a nice addition to a mixed salad or added to a rustic piece of bread slathered with some soft cheese. It has a peppery bit, much like Arugula. Use smaller leaves for less intense flavor.

Leave a comment
Share
  • Pin it
  • Share
  • Tweet
  • Share
  • Email

Herb Roasted Turkey

11 / 16 / 18

From my book, What’s In Your Pantry. Buy the book here


Herb Roasted Turkey

Save
Print

I no longer stuff my turkey; it takes too long to cook the stuffing to 165°, the recommended temperature to kill any bacteria; by that time the turkey itself is overcooked. I can also make the dressing the day before, bake it and heat it while I’m making the gravy.
Try serving with Duchess Potatoes instead of the traditional mashed.

  • 12-14 lb. free range or organic turkey, room temperature
  • 2 medium onion, quartered with skin on
  • 4 carrots, peeled and rough chopped
  • 3 celery stalks, rough chopped
  • 1 bay leaf
  • 1 bunch Italian flat leaf parsley
  • 1 bunch fresh sage
  • 1 bunch fresh thyme
  • ¼ cup butter, room temperature
  • salt and pepper
  • 1 lemon, Meyer lemon is preferred
  • 1 cup white wine
  • 1 cup turkey stock, see recipe in Basics chapter
  • Gravy
  • ¼ cup dry white wine
  • 8 tablespoons unsalted butter
  • ½ cup flour
  • 7 cups turkey stock, approximately
  • salt and pepper

Preheat oven to 425°.

Wash and dry turkey inside and out; dry well.

Choose a roasting pan that will fit the turkey with no more than 2” of space on any side, otherwise the juices that accumulate in the bottom of the pan may burn.

Place ¾ of the onion, carrots and celery plus bay leaf, ½ of the bunch of parsley, sage and thyme into the bottom of a baking pan that will fit the turkey, don’t let the turkey hang over the edge and make sure there is no more than 2” open on each side of the bird. (The turkey will sit on this bed of vegetables instead of a rack).

Pat the turkey dry and rub the turkey with butter, season with salt and pepper. Squeeze lemon over turkey and tuck rind under the bird. Insert an oven-proof probe thermometer into thick part of the thigh and set for 165°.

Pour wine and turkey stock in the bottom of the pan and place uncovered in hot oven. (The total cooking time will be approximately 1 – 1 ½ hours).

Baste after ½ hour; if you don't have enough juice in pan use some extra stock. Do not cover bird until browned and then loosely place foil over breast. If wings start to brown too early, wrap with foil. Baste every ½ hour until the turkey is done. Remove from the oven, place turkey on a cutting board or platter, and tent lightly with foil, do not remove probe thermometer until you’re ready to carve the turkey. Let the turkey rest for 20 minutes before carving.

Remove the vegetables and herbs from the roasting pan; place the roasting pan on two burners, add the wine, and turn the heat to medium, bring to a boil and scrape the bits (fond) from the bottom of the pan. Strain this liquid into a large measuring cup, through a cheesecloth lined sieve before continuing, add turkey stock to equal 8 cups.

Make a roux for the gravy:

Add ½ cup of butter to the hot roasting pan and, when melted, add flour and whisk until roux is light brown.

Whisk pan the reserved pan drippings and stock into the roux, pouring in a steady stream until desired consistency is reached. Season with salt and pepper, keep warm.

Makes approximately 8 cups.

Turkey will serve 8-10

Leave a comment
Share
  • Pin it
  • Share
  • Tweet
  • Share
  • Email

How to Make Pumpkin or Squash Puree

10 / 2 / 18

You don’t want to use just any kind of pumpkin for puree, most pumpkins have too much water in them and not enough flavor. Use the small pumpkins known as sugar or pie pumpkins. Or better yet use butternut squash, cooked in the same manner as a pumpkin, butternut squash will give a richer, deeper flavor. The cooked pulp can be stored in the refrigerator for up to a week or can be frozen. Use the squash for pumpkin pie, cakes or for a soup, it can be used in any recipe calling for pumpkin puree.

Preheat the oven to 400°. Line a sheet pan with parchment paper or tin foil.

Wash and dry the squash, slice the top off and cut the pumpkin in half, from the top to the bottom.

Do not remove the seeds and pulp, they will be easy to scoop out after the squash has cooked.

Brush the flesh of each half of the pumpkin with olive oil (or any kind of cooking oil) and place face down on the baking sheet.

Roast for about 40 – 50 minutes, until fork-tender or until a paring knife slips right through the flesh. Let cool for about 10 minutes then scoop out the seeds and the pulp, discard, and then scoop out the cooked flesh.

Blend or puree in a food processor until smooth. Store in the refrigerator for up to a week or freeze up to 3 months.

Photo: Davison Orchards Ltd.

Leave a comment
Share
  • Pin it
  • Share
  • Tweet
  • Share
  • Email

Pumpkin Olive Oil Cake

10 / 2 / 1810 / 2 / 18


Pumpkin Olive Oil Cake

Save
Print
  • 3 cups all-purpose flour
  • 2 teaspoons baking soda
  • 1 teaspoon ground cinnamon
  • 1 teaspoon ground nutmeg
  • ½ teaspoon salt
  • ¼ teaspoon ground cloves
  • 1 1/2 cups sugar
  • 1 cup olive oil*
  • 3 eggs
  • 1 can (15 ounces) solid-pack pumpkin (or 2 cups freshly roasted sugar pumpkin)
  • Powdered sugar
  • 1 package cream cheese, room temperature

Preheat oven to 350°.

In a medium-sized bowl, stir together flour, baking soda, cinnamon, nutmeg, salt and cloves.

Combine sugar and oil in a large bowl with a rubber spatula until blended.

Add eggs, one at a time, beating well after each addition.

Add flour mixture to egg mixture alternately with pumpkin in three batches, beating

well after each addition.

Transfer to a greased Bundt cake pan.

Bake 60-65 minutes or until toothpick inserted near the center comes out clean.

Cool for approximately 10-15 minutes before inverting onto a wire rack.

Remove pan carefully from cake and cool completely.

Easy Cream Cheese Frosting

Combine all ingredients in the bowl of a stand mixer fitted with a paddle attachment, and beat at low speed until sugar is incorporated.

Increase speed to medium high and beat until frosting is light and whipped, about 3 to 4 minutes. Use to top cookies, cupcakes, or cakes

I like to use an orange flavored olive oil for this cake.

Related Posts Plugin for WordPress, Blogger...
Leave a comment
Share
  • Pin it
  • Share
  • Tweet
  • Share
  • Email

Posts navigation

1 2 3 Next Page
Deb

Meet Chef Debbi

READ BIO

Join-Us Sign up for our newsletter to receive exclusive tips 'n tricks, and special offers on classes, tours, and more!

Recent Posts

  • New E-Book!
  • From the Pantry
  • Spaghettini at Home
  • Growing Corn
  • Spring IS Coming!

Categories

BookCUT

What's in Your Pantry?

How to stock your pantry to create delicious dishes.

Learn Chef Debbi's pantry essentials and how to substitute ingredients for pantry staples in her basic recipes for quick and easy meals.
BUY BOOK>

FacebookTwitterInstagramGooglepinterest


© 2014, DEB'S KITCHEN
Angie Makes Feminine WordPress Themes