Deb's Kitchen - Farm, Food, Wine & Lifestyle Adventures
  • Facebook
  • Google
  • Twitter
  • Instagram
  • Pinterest
  • Email
Menu
Skip to content
  • Home
  • Blog
  • Events
    • Classes
    • Tours & Adventures
  • Edible Gardening
  • Preserving
  • Recipes
    • Appetizers
    • Soups and Salads
    • Main Dishes
    • Side Dishes
    • Desserts
  • About
    • Whats In Your Pantry
    • Ask Debbi
    • Deb’s Kitchen Botanicals
    • Press
  • Contact

Category Archives: Gardens

Spring Garden Workshops

4 / 2 / 214 / 2 / 21

It’s not too late to plant that spring garden! Are you new to gardening or just have unanswered questions? I have the answers!

Spring Raised Bed Gardens

I’ll give you ideas on how to design your spring kitchen garden, where to put the garden and how to plant so you’ll have a big harvest of fresh organic vegetables. Downloadable pdf’s for you to keep! We’ll answer questions on where to buy your plants or how to start seeds, how to care for your babies, fertilizing and harvesting.

You’re invited! This will be a Zoom class, we hope to return to in person teaching soon

Sun, April 11th

11:00 – 12:30, $30.00

You can sign up here


NEW NEW NEW

Zoom Class

Sun. April 18th

11 – 12:30, $30.00

All about Growing Tomatoes

Learn to grow big, juicy, ripe tomatoes

Sign up below


Leave a comment
Share
  • Pin it
  • Share
  • Tweet
  • Share
  • Email

Fall/Winter Vegetable Gardening

9 / 26 / 19

Vegetables to plant in our

So. California gardens now


Beets

Be sure to thin plants to about 3″ apart and harvest when they are small for a sweet flavor. Leaves and stems are edible, steam lightly or add to a salad.
To cook, place in a piece of foil, drizzle with olive oil and salt and pepper. Roast in a 450° oven for about 10-15 min. or until tender. Rub skin off with a towel

 Broccoli/Cauliflower

Buy transplants in the fall and bury the stem up above second row of leaves. Try roasting these vegetables in a 450° oven. Place cut up pieces on a parchment lined baking sheet, toss with a little olive oil, salt and pepper and any other seasoning you may like (red pepper flakes, garlic powder, lemon juice. Roast for 10 -15 minutes or until tender.

Cabbage

Cabbage is in the same family as broccoli and cauliflower. Homemade sauerkraut is the best! Cut out the fore of the cabbage and thinly slice the leaves into shreds. Place in a large bowl, add 1 1/2 Tb. kosher or canning salt and knead or massage the salt into the cabbage until it releases it’s liquid. Pack into a quart jar with a wide mouth and pour all liquid over the cabbage. Make a brine of 1 cup water and 1 Tb. kosher salt, stir to dissolve salt and then pour it all into a quart freezer bag, place this on top on the cabbage and place a piece of cheesecloth over the mouth of the jar, tie down with string or a rubber band and place in a cool, dark place on your counter. The second day, remove bag and press down on the cabbage to see if it will release more moisture. It should ideally cover the cabbage, if it doesn’t add more brine by either adding the ingredients in the freezer bag or make a new brine by stirring together 1 cup water and 1 tea. kosher salt. cover the cabbage and let stand for 3 -10 days. Begin tasting sauerkraut on the 3rd day, when it reaches the flavor you want, place a cap on the jar and store in your refrigerator.

Carrots

Make sure you have nice loose soil so the carrots can grow long and deep. Thin them when they sprout to give them room to grow, add the thinnings to your salad, soup or stew. Slow roast carrots as you would the broccoli or cauliflower. Drizzle with honey after roasting.

Leafy Greens

Lettuces, spinach, chard, mustard and kale all grow very well over the winter but plant at 2 -3 week intervals for a staggered supply of greens instead of harvesting all at once. Many greens can be lightly sautéed or eaten raw.

Onions & Garlic

Plant onions from ‘starts’ rather than from seeds. Pick short day varieties for best harvest. Scallions that are succession planted can be harvested over the winter/spring season.
Plant garlic from bulbs, plant pointed end up and cut off any green that is sprouting from the top.

Peas

Fall & Spring harvested peas are sweet and easy to grow. Plant a variety from English peas or shelling peas to sugar snap peas. Give them a trellis or cage to grown on and harvest daily for a continued harvest.
Peas and pea pods are lovely lightly steamed or even raw.

You can still plant sweet peas this month for spring flowering

Leave a comment
Share
  • Pin it
  • Share
  • Tweet
  • Share
  • Email

Hands On Fun at Rancho los Alamitos

9 / 11 / 199 / 11 / 19

Food Crafting with Chef Debbi

& Debs Kitchen


Saturday, Oct 12th

10:00 am– 12:30

Adults $75.00

Children* ages 10-14 $35.00

*Children must be accompanied by an adult.


By reservation only

Click below for reservations or call or email

Reserve my spot

562-431-3541 or [email protected]

Reservations close Mon. Oct 7th


Enjoy a fun-filled autumn morning with family at the beautiful

Rancho Los Alamitos Historic Ranch & Gardens.

Learn together to make (& take)

Gifts from the Garden.

For the adults to make and take:

Herbal Salt Tin

Cranberry Vinegar

Meyer Lemon Infused Olive Oil

Peppermint-Lavender Room Spray

Holiday Stovetop Potpourri

For the Kids to make and take:

Peppermint Biscotti in a Jar

Strawberry Mint Mojito Mocktail

A seasonal salad will be served with a

Cranberry-Lemon Vinaigrette prepared by Chef Debbi.

Special thanks to Melissa’s Produce for donating event supplies.

Leave a comment
Share
  • Pin it
  • Share
  • Tweet
  • Share
  • Email

Artichokes!

4 / 10 / 194 / 10 / 19

Spring is nearly here and with it comes lovely artichokes. Artichokes are perennial plants in the same family as dandelions and sunflowers, they are a thistle plant and, in most artichokes, there is a center that’s inedible, the ‘choke’. In cooler climates, such as California’s northern coast they can be grown as annual’s. Spring and fall are times when you can find fresh artichokes in the markets. An easy plant to grow, they do require full sun and will take up a large space, 3 feet or more. Be sure to cut the artichoke before the leaves begin to open and it blossoms into a flower.

When you choose your artichoke, you want to make sure that it’s firm when you press the sides and you’ll often hear a squeaky noise, that’s good. The leaves should be tight and closed. If there is a little bit of brown on the leaves that’s ok, it just means there was a little frost during its growing season but that’s not a bad thing. The inside will be perfectly delightful. You also might want to consider only organic artichokes since you’ll be eating parts of the plant that may have been sprayed with pesticides during its growing season. Pesticides cannot be washed off with water or vegetables soaps, they are oil based and you know what happens when oil and water mix! If you can’t find beautiful California Artichokes in the market, here is a great local source where you can order them, Melissa’s Produce, http://www.melissas.com/Organic-Artichokes-p/1375.htm

To store your artichokes, you could place in a plastic bag and store in the produce drawer of your refrigerator or just pop it into the drawer itself. They will last up to 7 days but best eaten within a few.

Rinse the artichoke under cool water; pull off the lower, smaller leaves and cut the stem at the base of the choke. If you have a nice long stem, you can cook this separately and eat it like you would the heart, it tastes the same. If desired, with a sharp chef’s knife cut across the top third of the artichoke and snip the sticker off the remaining leaves. Even though there are many ways to prepare a fresh artichoke, most people fall back to either boiling/steaming them, although it takes quite a while, up to half an hour or more. You could put them in a microwave bowl or in an Instant Pot adding a cup of water and cook for 10 minutes, cover the microwave ones, or grill them over hard wood. Anyway is fine with me.

Here’s the traditional method:

Put them into a large pot and cover with cool water, squeeze two lemons into the water and a little sea salt, bring to a boil and simmer until you can run a small knife through the bottom part of the artichoke, 30-45 minutes or longer depending on the size of the vegetable. Remove from the water using tongs and picking up the artichoke with the top facing down so not to spill hot water all over yourself, drain and serve with my favorite sauce from Walt’s Wharf in Seal Beach.

Get the recipe here, 

Leave a comment
Share
  • Pin it
  • Share
  • Tweet
  • Share
  • Email

How To Grow Amaryllis & Paperwhite Bulbs

10 / 20 / 16

amaryllis-potted-2

I love growing Narcissus (Paperwhites) in the spring and in the fall/early winter. If you stagger planting these bulbs you can have continuous blooms from now all through the holidays. Narcissus and Amaryllis both grow well in soil or in a vase or shallow bowl with no soil at all. I love taking amaryllis bulbs to anyone that I visit during the holidays; you can even find bulb kits at the nursery or almost any store this time of year.

Unlike most bulbs these two don’t need to be chilled before planting, they love our warm climate (even if sometimes we don’t!). If you want continuous blooms buy a dozen or so bulbs and store some in a cool dark place and ‘plant’ every few weeks through late winter. Amaryllis will bloom 6 – 8 weeks after planting and Paperwhites 3-5 weeks after planting.

To plant in soil make sure the container is about 5”- 6” deep, plant the Paperwhite bulbs, with the root end down so that the tops peek above the soil surface. You can plant 5 bulbs in this pot and space them a little apart from each other. Water until the soil is damp but not soggy or the bulbs will rot, water occasionally until they bloom then water regularly but do not overwater. Some Paperwhites are very tall and need support to keep from falling over. Plant one Amaryllis bulb in the same size pot with the tip about one-third above the soil. Amaryllis can be encouraged to bloom again next year if planted in soil, cut off the old bloom to about 1” above the bulb, water and feed regularly and let the leaves grow throughout the year. In late summer stop watering and let the leaves dies back naturally as they start to store energy for the next season. You can dig up the bulb or leave in the pot and place into a cool, dark place for about 8 weeks. You can repot in fresh soil or add a little finished compost to it, bring it back into a light area, water infrequently until you see growth and then repeat the process. Paperwhites won’t usually bloom again so buy new bulbs each year.

To plant in gravel or stones place a layer of stones or gravel over the bottom of a vase to a depth of 2-4” for the Amaryllis or paperwhites and place the bulb or bulbs on top of the stones, fill the vase with more stones up to the top third of the bulb and add water up to 1” below the base of the bulb, do not let the bulb sit in water or it will rot. Add water as needed but keep the level below the base of the bulb. Be sure to use a vase or jar that is tall enough so that it won’t tip over as the flower shoots grow.

Buy some ‘kits’ as hostess gifts for the holidays and store in a cool, dark place until you need them. (Don’t forget where you stash them though!)

paperwhites-potted

Leave a comment
Share
  • Pin it
  • Share
  • Tweet
  • Share
  • Email

Tomato Confit

6 / 11 / 166 / 12 / 16

Is your garden overflowing with tomatoes? I always grow too many and one of my favorite ways to make them go a little farther is to oven dry them. Much like sun dried, these concentrated gems pack a powerful punch and can be used in any dish where you’d use tomatoes. Especially nice on a cheese plate with some creamy goat cheese nearby.

tomatoconfit-chez pim 2006


To preserve them I turn them into a tomato confit and keep in my ‘pantry’ refrigerator. They can’t be water bath canned because of the oil, but they will keep for about 6 months in the refrigerator, if they last that long. The refrigeration will also help to preserve the oil and keep it from going rancid quicker. Use only fresh organic herbs and make sure you wash and dry them very well, you don’t want any water going into your beautiful confit.

Mangia (Eat!)

Save
Print
  • 1 pound tomatoes, cut in half lengthwise
  • Sea salt and freshly ground black pepper
  • 1/4 cup olive oil, approximately
  • 1 tablespoon basil, chiffonade
  • 2 teaspoon fresh thyme
  • 1 clove garlic -- minced

Preheat the oven to 350°.

Arrange the tomato halves cut side up and close together on a baking sheet, season with salt and pepper.

In a bowl, combine olive oil, garlic, and herbs. Drizzle over tomatoes and bake until the tomatoes are soft and shriveled but still retain some moisture, 1-2 hours or more.

Let cool completely. Tomatoes can be stored in a glass jar, cover tomatoes with olive oil, add a fresh sprig of thyme, seal and refrigerate.

Photo: Chez Pim

Leave a comment
Share
  • Pin it
  • Share
  • Tweet
  • Share
  • Email

Making an Herbal Wreath

9 / 25 / 15

herb wreath, garden therapy

Herb Wreath Directions

Save
Print
  • Supplies Needed:
  • Wreath frame
  • Floral wire
  • Rubber bands
  • Twist ties
  • Herb stems, leaves and flowers

Gather your supplies and choose an herb to become the base of your wreath. I chose rosemary. Using twist ties and/or floral wire begin covering your wreath base. Be patient with this process. It takes longer to do than one would think.

Here are a few different techniques. Select 2-3 different herbs and create small bunches using rubber bands. Then add each bunch to the wreath, using floral wire to secure it. Or, simply poke individual sprigs into the wreath and securing them again with floral wire.

Directions and photo’s edited from Garden Therapy

Herb wreath #1Herb Wreath #2

Leave a comment
Share
  • Pin it
  • Share
  • Tweet
  • Share
  • Email

Growing An Herb Garden

12 / 3 / 1412 / 18 / 14

potted herbs
An herb garden doesn’t have to be big so you don’t need much space to grow one. You can even start a potted herb garden on your windowsill! This way you’ll have the aroma of fresh herbs right inside your kitchen or on your patio.

When growing herbs, location is key. Some like it sunny and dry, while others prefer filtered sunlight and moist soil. Regardless, make sure to use well-drained fertile soil. Most herbs will survive in poor sandy soil, but few will tolerate wet clay soil. If your yard is all sun, try planting shade-loving plants east of taller varieties like sunflowers. The tall plants will generate shade for the smaller ones.

Basil, Chives, Dill, Oregano, Rosemary, Tarragon, and Thyme prefer full sun, while Chervil, Lemon Balm, and Mint prefer partial shade in your herb garden.

Water newly planted herbs regularly but once they are established, most are naturally drought resistant. Watering and drainage goes hand in hand. Rather give your herbs too little than too much water. After a good soaking, allow the water to drain away and the soil to dry out slightly. Water again when the top 1″ or so of soil is dry to the touch.

During the growing season fertilize about once a month with a weak solution of fish emulsion. Compost 4 times a year (at the beginning of each season, will also provide the plants with the nutrients they need. Don’t fertilize dormant plants, such as tarragon, some thyme and sometimes chives, just add a little compost around them and wait for them to wake up in the spring.

If you over feed your herbs and make them happy and beautiful they may lack some flavor. Hold back a little water and a little fertilizer to help concentrate the oils in the leaves thus increasing their flavor, aroma and medicinal value.

Pruning is essential to encourage healthy, bushy growth. Remove dead leaves and flowers on a regular basis. Should you frequently use your herbs, pruning may not be necessary, as you would be pruning automatically.

Be sure to let some of your herbs flower and ‘go to seed’, it will encourage good bugs, butterflies and hummingbirds into the garden.


Leave a comment
Share
  • Pin it
  • Share
  • Tweet
  • Share
  • Email

7 Crops to Kick Off Your Spring Garden

12 / 2 / 1412 / 2 / 14

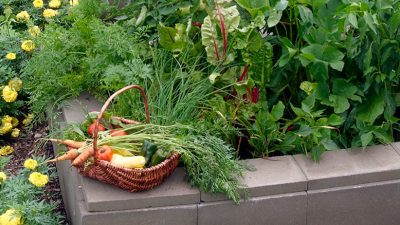
Is your green thumb itching to get gardening again? These cold-loving crops will help you get the growing season started.

spring-crops_800 (1)

Most of us gardeners eagerly anticipate getting our hands in the dirt after a long winter indoors. To get a jump on the spring growing season requires a bit of planning, as well as knowledge of cold-tolerant vegetables and season extension techniques.

A key is to prepare the soil in the fall, so you can begin planting seeds in the spring as soon as the soil has completely thawed and warmed to the seed variety’s minimum temperature for germination. Keep in mind that heavy soils, such as clay, compact when worked while wet, preventing drainage. Allow them to dry out adequately before working them, especially if you didn’t prepare them in the fall.

Growing crops that germinate at cooler soil temperatures also helps you get an early start. (It also helps if they can withstand unexpected late frosts, though isn’t necessary if you use row covers or cold frames when the temperature is expected to dip below freezing.) To determine the soil temperature, stick a soil thermometer about 1 inch deep into the soil and allow it to stabilize. If it’s at the minimum recommended temperature, it’s time to kick off planting your spring garden. Here are seven crops to try.

1. Beets (Beta vulgaris subsp. vulgaris)

Some beet varieties, like heirloom Chioggia, mature in as little as 45 days, making them ideal for an early crop. When soil has warmed to 40 degrees F, plant seeds 3/4 inch deep, 1 inch apart, in rows spaced 12 to 18 inches apart. When seedlings are 4 inches tall, thin them to 4 to 6 inches apart by cutting off the tops. Don’t pull seedlings, as this might uproot nearby plants you want to keep.

Beets tolerate soil low in nutrients but need even water to prevent becoming bitter, so keep soil moist, but not soggy, throughout the growing season.

Begin harvesting beets when they reach 1 inch in diameter, or if you want larger crops, wait until they reach 3 inches in size. Larger beets can become pithy. Beets can withstand light frost, but should be harvested before the heat of summer, which slows sugar production, making them less palatable.

2. Spinach (Spinacia oleracea)

Spinach likes it cold, making it an ideal spring crop. Seeds germinate as low as 40 degrees F, and young seedlings can withstand temperatures down to 15 degrees F if frost occurs. Sow seeds 1/2 inch deep, 1 inch apart, in rows 12 to 18 inches apart. As an alternative, broadcast seeds and thin seedlings to 4 inches apart to prevent bolting. Keep the soil evenly moist throughout the growing season.

You can begin harvesting spinach when leaves are young, or wait for them to grow larger. Harvest outer leaves first. Spinach bolts when the air temperature warms, so plan to harvest plants before bolting occurs. Some spinach varieties, such as Razzle Dazzle, reach maturity in 30 days.

3. Spring Radish (Raphanus sativus)

Radish likes cool, wet weather, and you can be eating most varieties within three weeks of sowing seeds. Plant seeds four to five weeks before the last spring frost. Sow them 1/2 inch deep and 1 inch apart, in rows 12 inches apart. When seedlings emerge, thin plants to 2 inches apart; enjoy the thinned seedlings in salads or other dishes. Keep the soil evenly moist throughout the growing season to prevent cracking.

Harvest radishes when 1/2 to 1½ inches in diameter. Spring radishes come in many colors, shapes and sizes. Champion is round, bright red and matures within 20 days. The tapered April Cross is snowy white, grows up to 16 inches long, and is ready for harvest in 60 days. To avoid pithiness, harvest radishes before the heat of summer. For small gardens, save space by growing radishes between rows of larger, slower growing crops.

4. Pak Choy (Brassica rapa var. chinensis)

When the nighttime air temperature and the soil temperature have risen to 50 degrees F, consistently, sow pak choy seeds 1/4 to 1/2 inch deep and 1 inch apart in rows spaced 20 to 30 inches apart. When seedlings emerge, thin dwarf varieties to 6 inches apart and taller varieties to 12 inches apart. Thinned seedlings can be added to salads. Maintain plenty of water in the soil, without making it soggy, to prevent bolting and poor flavor.

If you harvest pak choy by cutting it about 2 inches above the soil level, a new plant regrows for continued harvest. The variety Autumn Poem can be sown in spring and harvested about 35 days later; many varieties can be harvested in less than 50 days.

5. Loose-leaf lettuce (Lactuca sativa var. crispa)

Lettuce thrives in cool weather and cool soil. When the soil has warmed to 40 degrees F, sow seeds 1/8 inch deep and 1 inch apart in rows 12 inches apart. When seedlings have two to three true leaves, thin plants to 6 inches part. Water regularly, keeping soil moist with 1 inch of water per week. Lettuce has shallow roots and cannot tolerate long dry spells.

You can begin harvesting young leaves when 2 inches long, about four weeks after sowing seeds. Harvest them by picking the outer leaves first so plants continue to produce. For the crispest lettuce, pick leaves during cool, early morning hours. Most varieties take 45 to 60 days to mature.

6. Peas (Pisum sativum)

Whether you grow snap, shell or snow varieties, peas are an excellent spring crop because seeds can be sown at 40 degrees F, and if seedling suffer frost damage, the plant responds by producing more fruit. Sow seeds 1 inch deep, 2 to 4 inches apart, in 18-inch rows. Vining types will need to be trellised. Spring rains should keep soil adequately moist, but if not, water enough to keep the top 1 inch of the soil wet without becoming waterlogged. Do not overwater, especially during flowering. This can reduce pollination and setting of pods.

Harvest peas in the early morning for crispness. The more you harvest the more the plant will produce. Pick snap and shelling varieties when peas round out pods, are light green and before pods yellow and become tough. Harvest snow varieties when pods have reached mature length and are still flat. Two fast-growing varieties to try are Sugar Sprint, a snap pea that is ready to harvest in 58 days, and Sugar Marvel, a shelling pea that grows 18-inch vines.

7. Spring Onions

Onion sets can be planted in the garden up to four weeks before the last spring frost and harvested in less than 60 days, making them ideal for spring. Plant onion sets that are 1/2 to 3/4 inch in diameter 1 inch deep, with the pointy, root side down. Space small varieties 2 inches apart and large varieties 4 inches apart. Keep onions sets evenly watered, and don’t allow them to dry out. A 2-inch layer of mulch can help retain moisture and suppress weeds.

Harvest bulbing onions when half of the tops have fallen over. Allow them to dry for about three to four weeks in a well-ventilated area then cut off the tops and trim the roots before storing them.

About the Author: Diana K. Williams is a certified master gardener and holds a Bachelor of Science in environmental studies and biology. She is presently serving on a committee that is designing community gardens for a local municipality. She writes from her home in Florida.


Leave a comment
Share
  • Pin it
  • Share
  • Tweet
  • Share
  • Email

Peaches

6 / 4 / 1312 / 4 / 14

peach-cobbler-2

Oh all those beautiful rosy peaches from the farmers market! They smell like summer and I don’t know about you but I wait all year for them to show up!
I have a peach tree but that in no way yields enough peaches to satisfy my sweet tooth. Seasonal peaches are available in California from June to Sept. Peaches from other parts of the world are usually picked hard and mostly premature and will never develop that sweet summer flavor.

The following is part of the prologue to David Mas Masumoto’s book ‘Epitaph for a Peach’, he is talking about the Sun Crest peach but I think it reflects all good peaches. “Sun Crest is one of the last remaining truly juicy peaches. When you wash that treasure under a stream of cooling water, your fingertips instinctively search for the gushy side of the fruit. Your mouth waters in anticipation. You lean over the sink to make sure you don’t drip on yourself. Then you sink your teeth into the flesh and the juices trickle down your cheeks and dangle on your chin. This is a real bite, a primal act, a magical sensory celebration announcing that summer has arrived. “

Choose peaches that yield slightly to pressure, hard fruit isn’t ripe and though it will get softer, it won’t get tastier. Peaches need to develop flavor and sweetness while still hanging on the tree, color will vary with peach varieties but avoid and peaches that show any sign of green. Smell the peach for sweetness and you’ll be fine.

Peaches should be kept at room temperature until soft and then refrigerated but don’t wait too long to eat them or they’ll over ripen.

I find it pretty easy to peel a ripe peach with a sharp paring knife or you can blanch in boiling water for a few seconds, don’t over do or you’ll start to cook the fruit flesh.

Here’s my favorite cobbler recipe that I pieced together from two different recipes that I use. One from my favorite boysenberry pie and the cobbler batter from Marcy Masumoto’s ‘French Peach Cobbler’ recipe from The Perfect Peach: Recipes and Stories from The Masumoto Family Farm.

Debbi’s Peach Cobbler recipe

Related Posts Plugin for WordPress, Blogger...
Leave a comment
Share
  • Pin it
  • Share
  • Tweet
  • Share
  • Email
Deb

Meet Chef Debbi

READ BIO

Join-Us Sign up for our newsletter to receive exclusive tips 'n tricks, and special offers on classes, tours, and more!

Recent Posts

  • New E-Book!
  • From the Pantry
  • Spaghettini at Home
  • Growing Corn
  • Spring IS Coming!

Categories

BookCUT

What's in Your Pantry?

How to stock your pantry to create delicious dishes.

Learn Chef Debbi's pantry essentials and how to substitute ingredients for pantry staples in her basic recipes for quick and easy meals.
BUY BOOK>

FacebookTwitterInstagramGooglepinterest


© 2014, DEB'S KITCHEN
Angie Makes Feminine WordPress Themes