Deb's Kitchen - Farm, Food, Wine & Lifestyle Adventures
  • Facebook
  • Google
  • Twitter
  • Instagram
  • Pinterest
  • Email
Menu
Skip to content
  • Home
  • Blog
  • Events
    • Classes
    • Tours & Adventures
  • Edible Gardening
  • Preserving
  • Recipes
    • Appetizers
    • Soups and Salads
    • Main Dishes
    • Side Dishes
    • Desserts
  • About
    • Whats In Your Pantry
    • Ask Debbi
    • Deb’s Kitchen Botanicals
    • Press
  • Contact

Category Archives: Main Dishes

Mexican Skillet Fry

12 / 18 / 17


I use this mix for tostada’s and scoop it over some great refried beans or top with tamale topping and bake or even spread on nachos or in tacos and burritos. Feel free to use other ingredients as well, look to see ‘What’s In Your Pantry’

Mexican Skillet Fry

Save
Print
  • 1 lb. ground beef or turkey
  • 1 small onion, diced
  • 2 bell peppers, diced, I used 1 red & 1 green
  • 1 8oz can diced tomatoes with green chile
  • 1 cup long grain white rice
  • 2 cups chicken or beef stock
  • 2 teaspoons taco seasoning
  • Sea salt
  • 1 cup shredded Mexican cheese or a mixture of jack & cheddar cheese*
  • 3 green onions, sliced to garnish
  • Optional
  • Tamale Topping:
  • 1 ½ cups milk
  • 1 teaspoon salt
  • 2 tablespoons butter
  • 1/2 cup yellow cornmeal
  • 1 cup shredded Cheddar cheese
  • 2 eggs, lightly beaten

In a large pan skillet with a lid, brown ground beef (sauté the meat until you can break it up but don’t cook all the way through before adding next ingredients. Do not drain, if using ground turkey, you may have to add a little vegetable oil to the pan.

Add onions & peppers and cook until they are soft, then add spices and a little salt to taste, mix well.

Add can of tomatoes with green chile’s (including juice), rice, and stock and stir together, cover and let simmer until liquid is absorbed and the rice is cooked, about 10 minutes. Taste and re-season if needed, top with cheese and cover, cook over low heat until the cheese has melted. Garnish with chopped green onions.

Serve with soft tortillas or chips.

*Omit cheese if using the tamale topping.

Follow these instructions for Tamale Pie:

Preheat oven to 375°.

In a medium saucepan, heat milk with 1 teaspoon salt and the butter. When the milk is hot, but not boiling, gradually stir in the 1/2 cup yellow cornmeal. Continue cooking until thickened, stirring constantly.

Remove from heat and stir add the cheese and beaten eggs. Stir to blend.

Place meat mixture into an oiled baking dish and top with tamale mixture, bake for 20-25 minutes or until lightly browned.


Leave a comment
Share
  • Pin it
  • Share
  • Tweet
  • Share
  • Email

Chicken Stew Cassoulet

10 / 3 / 17


Chicken Stew Cassoulet

Save
Print
  • 8 chicken thighs
  • Sea Salt and pepper to taste
  • 2 tablespoons butter
  • 2 tablespoons canola oil
  • 1 small to medium onion, finely chopped
  • 4 carrots, cut in half and then sliced into half-moons about ¼” thick
  • 3 celery, sliced 1/4" thick
  • 3-4 cups chicken broth
  • 2 bay leaves
  • 1 tablespoon dried thyme, crushed
  • 1 lg. can whole tomatoes
  • 2 cups white beans
  • 1 cup bread crumbs, large pieces not fine

Rinse and pat dry the chicken. Trim any excess skin and fat.

Preheat oven to 375°.

Heat a large Dutch oven, add the butter and oil. Season the chicken with sea salt and pepper, place the chicken pieces skin side down in the pan and brown well on both sides. Don’t crowd the chicken in the pan, do this in 2 steps if needed.

Set aside and pour off most of the drippings leaving about 2 Tablespoons in the pan. Sauté the onions, carrots and celery, return the chicken to the

pan and add chicken broth, bay leaves, thyme, tomatoes, white beans and a little salt

and pepper. Cover and place into oven and cook 30 minutes.

Check to make sure that chicken is nearly cooked.

Add bread crumbs and return to the oven, uncovered. Cook until crumbs are

lightly browned, about 15 minutes.

Leave a comment
Share
  • Pin it
  • Share
  • Tweet
  • Share
  • Email

Tomato Overload

7 / 6 / 17

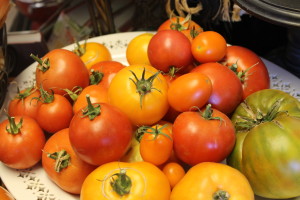
There are many ways to save your harvest and if you have more tomatoes than you know what to do with here are some ideas.


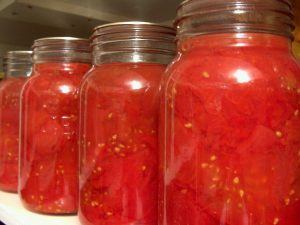
First and foremost is water bath canning, I love this because it means that I can store tomatoes on the shelf in my pantry for the year. Fairly easy to do but when it’s hot and humid out like it has been this summer FORGET IT!

As many of you already know, I like to freeze my tomatoes also so later when it’s cool I can make sauce or unfreeze and can them to make more room in the freezer for up and coming dinners. Freezing tomatoes is the fastest way to get things done, wash, and dry then freeze on a baking sheet until frozen solid, pop into a freezer bag and you are done for the day! You can remove one or four at a time, whatever you need and as they begin to defrost, which is almost right away, the skin will slip off easily.

IMG_0481

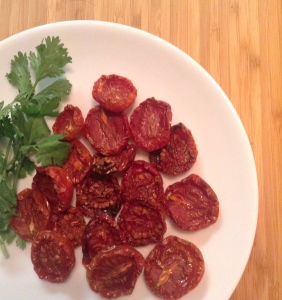
My second favorite is to make Oven Roasted Tomatoes, although it does require having the oven on for some length of time. I love to dry my cherry tomatoes and then float them in a good olive oil and store in the refrigerator for up to 3 months. Chopped in a salad, in a bruschetta or top on a pizza, they pack a flavorful punch. Fill up your baking sheet and get started right away!

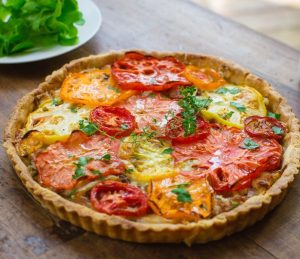
Fontina & Tomato Tart

Oven Roasted Tomato Recipe

Leave a comment
Share
  • Pin it
  • Share
  • Tweet
  • Share
  • Email

Fontina & Tomato Tart

7 / 6 / 17

Add a baby green salad tossed lightly with olive oil & vinegar for a nice summer lunch or light dinner.

Fontina & Tomato Tart

Save
Print
  • 1 sheet puff pastry, thawed in the refrigerator, keep cold until ready to use
  • 4 tablespoons Dijon mustard
  • 4 ounces grated fontina cheese
  • 3 large tomatoes, cut into 1/4" thick slices
  • 4 tablespoons grated Parmesan cheese

Preheat the oven to 425°F. Line a sheet pan with parchment paper or use with a non-stick tart pan.

Unfold one sheet of puff pastry on a lightly floured surface and roll it lightly to an 11-by-11-inch square or roll to the size of your tart pan adding ½” for the sides. I using the tart pan, fold up the pastry carefully and lay into the pan, unfold the pastry draping it over the sides of the pan. If using just the sheet pan, lay the pastry in the middle of the piece of parchment on the pan. Prick (called 'docking') the pastry with a fork leaving a 1/2" edge clear.

Spread a thin amount of mustard on the pricked part of the dough.

Sprinkle an even amount of the cheese on the mustard and top with slices of tomato. Fold a couple of inches of the dough over the filling, leaving a large part of the middle open, disregard if using the part pan. If the pastry is warm, chill for 15 minutes.

Bake for 20 to 25 minutes, until the pastry is golden brown. Garnish with a sprinkle of Parmesan cheese.

2 Comments
Share
  • Pin it
  • Share
  • Tweet
  • Share
  • Email

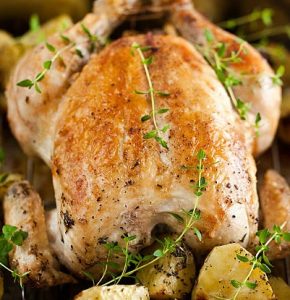
Lemon Roasted Chicken

6 / 12 / 17

This is by far my favorite dish with hints of Meyer lemon and sea salt and I like to add some roasted baby potatoes to the pan to soak up some of the juices. I use ‘Mary’s Organic Chicken‘ always for the best meat, always tender & juicy, it costs a little more but I think it’s worth the extra few bucks. (And they didn’t pay me to say that). And I love to tuck into the pan the ‘Baby Dutch Yellow Potatoes’ from Melissa’s Produce!

You can dress this up by making the ‘pan’ sauce listed in the recipe of you can by pass it. I’ve also made brioche dressing for the side and it makes a great holiday dish without the hassle of cooking a whole turkey dinner. Add a beautiful green vegetable and you’ll find an easy weeknight dinner. It pairs well with my Spring Asparagus recipe. Prep all the ingredients the night before & you can walk in the door, pop the chicken in a preheated oven and within the hour you’ll have the best meal in town, no drive through chicken can EVER take the place of a chicken roasted at home.

Lemon Roasted Chicken

Save
Print
  • Serves 4
  • 1 whole chicken -- rinsed, drained and dried
  • 1 medium onion -- peeled and chopped
  • 3 baby carrots -- peeled and chopped
  • 3 celery stalks -- cut into chunks
  • 1 lemon -- zested and juiced; preferably Meyer lemon
  • 1 bunch Italian flat leaf parsley -- minced
  • 1 bunch fresh sage -- minced
  • 1/2 bunch fresh thyme -- minced
  • 2 tablespoons butter -- room temperature
  • 1 tablespoon lemon olive oil, butter or regular olive oil
  • Salt and pepper
  • 1 cup white wine
  • 1 cup chicken stock
  • 2 tablespoons chicken demi glace -- optional for sauce

Preheat oven to 400°.

Wash and dry chicken inside and out then dry well. Fit chicken into a roasting pan (you want no more than 1" of space on any side of the chicken otherwise the juices will burn).

Mix together onion, carrot, celery, lemon zest, and 1/2 of the minced herbs. Loosely stuff cavity with some of the ingredients, place the remainder on the bottom of the roasting pan and place chicken on top of the aromatic vegetables.

Mix remaining minced herbs with butter. Gently separate the chicken skin from the breast meat and carefully rub herb butter on breast under the skin.

Rub the chicken with lemon olive oil and season with salt and pepper. Squeeze lemon over chicken and place rind into cavity. Insert probe thermometer into thigh and set for 165 degrees. Pour half of the wine and chicken stock in the bottom of the pan and place, uncovered in hot oven.

Baste after 1/2 hour, if you don't have enough juice in pan use some chicken stock. Do not cover bird until browned and then loosely place foil over breast. If wings start to brown to early wrap with foil.

Remove chicken to a warm plate and loosely cover with foil. Let rest for 10 minutes before carving.

Remove some of the fat in the pan by using a paper towel or ice cubes. (Dredge the paper towel through the juices to pull out some of the fat or pour off the juices into a heat proof measuring cup. Add a few ice cubes; the fat will stick to the cold cube, discard cube. You may have to do this several times).

Put the roasting pan on top of the stove over medium-high heat and bring a boil, add remaining wine and stock scraping the fond (the yummy pieces stuck to the pan) from the bottom of the pan. Reduce by half, add demi-glace if using and serve with chicken.

Leave a comment
Share
  • Pin it
  • Share
  • Tweet
  • Share
  • Email

Seafood Grill Packets

5 / 26 / 17


Seafood Grill Packets

12        littlenecks or cherrystones clams

12        uncooked medium shrimp in shells

12        sea scallops

4          ears fresh sweet corn, husks removed, cleaned, cut into fourths

2          medium lobster tails

8          small red or Yukon Gold potatoes, cut in half

            Sea Salt and fresh ground pepper

            Old Bay seasoning

4          lemons cut in half

4          tablespoons butter


Preheat your grill, gas or coals.

Cut 4 large sheets of heavy-duty foil into about 12”.

Place 3 clams, 3 shrimp, 3 scallops, 2 pieces of corn, ½ lobster tail and 4 pieces of potato into the center of the foil and sprinkle with a little salt, a grind of pepper and a pinch or two of Old Bay Seasoning. Squeeze ½ lemon over the seafood and add 1 tablespoon of butter to the top.

Fold all edges together tightly leaving a little room inside the foil for expansion.

Place on grill over medium heat, cover and cook about 10 minutes, check to see if the clams are open and the shrimp and lobster are cooked. If not cook another 5 minutes and serve with extra lemon wedges and melted butter.


2 Comments
Share
  • Pin it
  • Share
  • Tweet
  • Share
  • Email

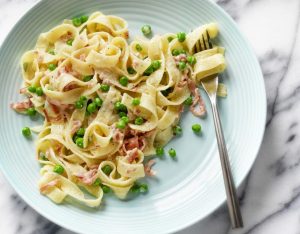
Fettuccine with Fresh Spring Peas & Pancetta

2 / 24 / 172 / 24 / 17


Fettuccine with Fresh Spring Peas & Pancetta

Save
Print
  • 1 pound fettuccine pasta
  • 1 tablespoon olive oil
  • 8 oz. pancetta, diced
  • 1 small shallot, minced
  • 2 tablespoons dry white wine
  • 2 tablespoons chicken stock
  • 1 cup fresh peas
  • 1 sprinkle of sea salt
  • ¼ cup heavy cream
  • 1/2 cup grated Parmesan cheese, reserving some for garnish.
  • Fresh ground pepper

Cook the pasta according to directions, adding a good tablespoon of salt to the water, and while that is cooking continue with the recipe.

Heat a large saucepan over medium high heat and add a little olive oil to cover the bottom of the pan, add the diced pancetta and cook until lightly browned.

Add the shallots and sauté until translucent. Add the wine and chicken stock, bring to a boil and add the peas with a generous sprinkle of sea salt, cover and cook until most of the liquid has been absorbed and the peas are a bright green color.

When the liquid is reduced to about a tablespoon, add the cream and cook for about 3 minutes then add the cheese and the pasta. Toss well and add a little of the pasta water if the sauce is too thick. Serve with a grind of fresh pepper.

Serves 4


Leave a comment
Share
  • Pin it
  • Share
  • Tweet
  • Share
  • Email

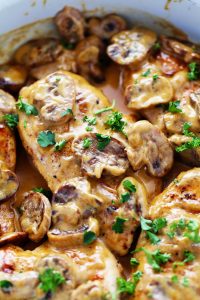
Chicken Marsala for a Quick, Easy Weeknight Dinner

1 / 10 / 171 / 11 / 17

chicken-marsala


Chicken Marsala

Save
Print

There is a simple trick that you can do ahead of time to make life a little easier cooking during the week. Buy chicken cutlets*, place them between 2 sheets of plastic or parchment paper and pound to ¼” thickness. Stack them with parchment paper between each breast, freeze on a sheet pan separately then wrap in plastic and place the entire stack into a freezer bag. Now you can remove 1 or 2 or 4 when you get home from work and proceed with any recipe. The chicken breast (you can do this with pork tenderloin as well), will defrost almost immediately and you’ll have dinner on the table in ½ hour.

  • 1/3 cup flour plus more for mushrooms
  • Sea salt and pepper, to taste
  • Olive oil
  • 4 Chicken cutlets, pounded ¼” thick
  • 1 tablespoon unsalted butter
  • 6 ounces brown crimini mushrooms, sliced or quartered
  • 1 ½ tablespoon minced shallot
  • 2 teaspoons minced garlic
  • 1⁄2 cup chicken stock
  • 1⁄3 cup dry Marsala wine
  • 1 tablespoon lemon juice
  • 1 tablespoon lemon zest
  • 1 tablespoon Italian flat leafed parsley, minced

Season the flour with sea salt and pepper and dredge the chicken in the flour shaking off the excess.

Heat the slow cooker to sauté if you can or use a skillet, add enough oil to coat the bottom of the pan and lightly brown the chicken on both sides. Set aside.

If needed add a little more oil to the pan, just enough to coat the bottom and add the butter, when melted sauté the mushrooms until browned. Add the shallots and cook until translucent, add the garlic and stir briefly until it’s aromatic.

To finish on stove top:

Sprinkle the mushroom mixture with a little flour and cook, stirring until flour is incorporated and browned. Whisk in the chicken stock, Marsala wine and lemon juice, reduce until slightly thickened. Add the chicken back to the mixture and cook for about 2 minutes. Serve with chopped parsley and lemon zest over the chicken breasts.

*If you want to buy chicken breasts or cut from a whole chicken just butterfly them before pounding.

Leave a comment
Share
  • Pin it
  • Share
  • Tweet
  • Share
  • Email

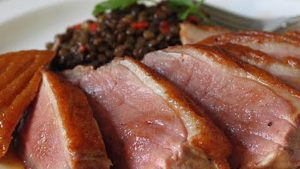
Duck Breast with Grand Marnier Sauce

12 / 22 / 16

duck-breast


Duck Breast with Grand Marnier Sauce

Save
Print
  • Serves 4 - 6
  • 4 duck breast fillets
  • 3 tablespoons olive oil
  • Sea salt and fresh ground pepper
  • 1 tablespoon sugar
  • 1 cup freshly squeezed orange juice, strained
  • 1 tablespoon orange zest
  • 1/3 cup Grand Marnier liqueur
  • 3/4 cup chilled butter, cut into 6-7 pieces

Preheat oven to 350°.

Score the duck breast skin without cutting into the breast, cut in a criss cross pattern.

Season the duck breast on both sides with sea salt and pepper. Heat a sauté pan over medium high heat until hot and sear the breast skin side down, do not put oil or butter into the pan, you’ll have plenty of rendered duck fat shortly. When the breast is nicely browned turn and cook the other side, turn the heat down on the pan if needed.

Remove breast to a small baking sheet lined with parchment, a baking pan will do as well. Do not use a pan that’s too big or the fat will burn as it’s rendered, place a probe thermometer into the center of the breast and cook until temperature reaches 135°. Remove from oven and let rest while you finish the sauce.

Combine orange juice, sugar, orange zest, and half of the Grand Marnier in a small saucepan. Bring to a boil, uncovered, over medium-high heat. Reduce heat to medium and simmer until the liquid is reduced to 2–3 tablespoons. Remove the pan from the heat and whisk in butter, a few pieces at a time, until thoroughly blended, and then whisk in the remaining Grand Marnier.

Slice the duck breasts on an angle and serve with the Grand Marnier Sauce, top with some orange peel or zest.


Photo: Chef Jon

Leave a comment
Share
  • Pin it
  • Share
  • Tweet
  • Share
  • Email

Santa Maria Style BBQ

9 / 2 / 16

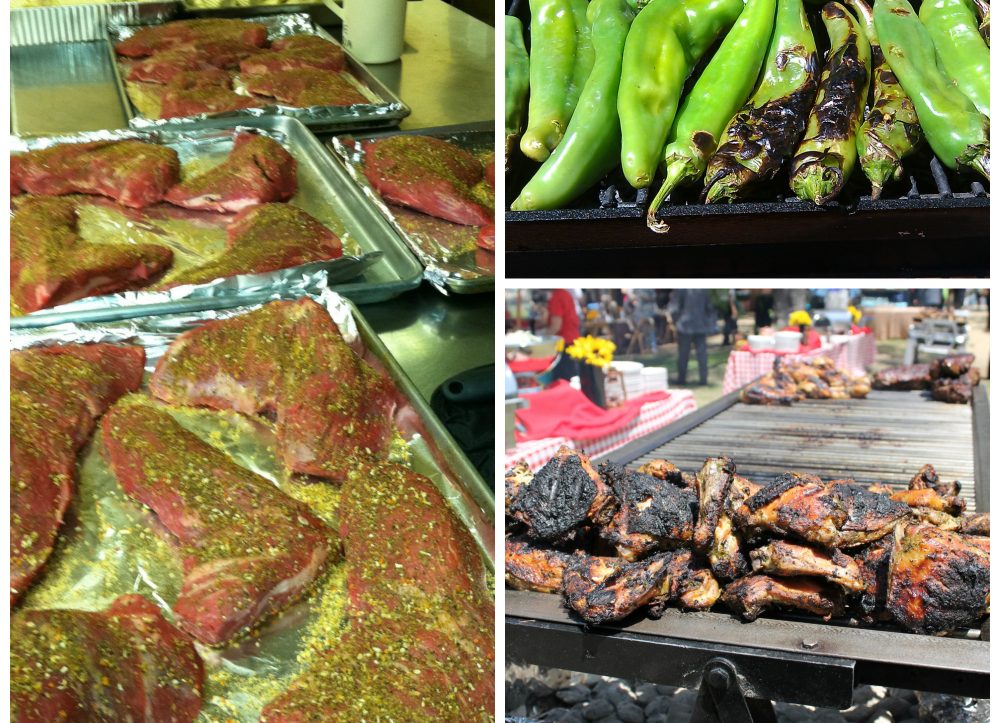
Santa Maria style bbq tri tip is traditionally made with a simple rub and grilled over hard wood, sliced thin and served with salsa, pinquinto beans and tortillas. You can find bbq’s on most street corners in Santa Maria but if you can’t get there, grill up your own. I prefer a wet marinade for a little extra flavor and sometimes I’d rather cook it in the oven so I’ve offered a recipe for both. Be sure to let it rest after grilling and slice it thin against the grain. Make extra for sandwiches or tacos or heating leftovers up to serve with some nice fried eggs. You’ll want to make sure you have enough so plan on 1/2 # per person.


tri tip, hatch chile collage

Santa Maria Style Tri Tip

Save
Print
  • 1/2 cup red wine
  • 1/2 cup olive oil
  • 2 tablespoons Worcestershire
  • 1 tablespoon soy sauce
  • 1 lemon, juiced
  • 3 cloves garlic, minced
  • 1/4 teaspoon dry mustard
  • 1 tri tip, about 2 1/2 – 3 pounds

Combine red wine, oil, Worcestershire, soy, lemon juice, garlic and mustard.

Marinate meat in sauce in refrigerator for up to 2 hours, turning several times.

Grilling Method

Remove from refrigerator 2 hours before grilling. Grill over medium heat about 15 to 20 minutes on each side, brushing frequently with marinade. For a more accurate temperature use a probe style thermometer that has been designed to be used with a grill. Use the temperature guides below for cooking.

Oven Method

Preheat the oven to 450°. Remove the meat from the marinade and pat it dry. Discard the marinade.

Place the tri-tip, fat side up, on a rack in a shallow roasting pan. Use a probe style thermometer inserted into the center of the meat. Set temperature for 115° - 120° for rare, 120° - 125° for medium-rare or 130° for medium, it is not recommended to cook tri tip higher than 130°, the meat will be tough and dry.

Transfer the meat to a carving board or platter, cover loosely with foil, and let it rest for 10 to 15 minutes before carving to allow the residual heat to complete the cooking and the juices to stabilize.

Slice the meat into thin slices across the grain.

Santa Maria Pinquinto Beans

Save
Print
  • 1 pound Rancho Gordo dried heirloom Santa Maria pinquito beans
  • 10 cups water, divided
  • 3 tablespoons olive oil, divided
  • 1 carrot, peeled
  • ½ onion, chopped
  • 1 celery stalk
  • 3 teaspoons kosher salt, divided
  • 2 slices bacon, diced
  • 1 large red onion, chopped
  • 3 cloves garlic, minced
  • 6 ounces tomato purée
  • 2 tablespoons brown sugar
  • 2 teaspoons ground dry mustard
  • 1 teaspoon Tabasco sauce, optional

Pick through the beans and remove any foreign matter. Rinse with cold water. Place the beans in a large bowl, cover with 6 cups of water and refrigerate overnight.

Drain the beans and rinse. Place the beans in a pot with 4 cups of water, 1 tablespoon olive oil, carrot, onion and celery. Bring to a boil and then reduce to a simmer. Cover and cook for 1 hour or until the beans are tender.

Season with 1 teaspoon kosher salt, then allow the beans to cool in the liquid. Once cool, remove and discard the carrot, onion and celery.

In a large pot set over medium heat, add bacon and remaining olive oil. Cook until bacon is golden brown. Add the red onion and cook for 5 minutes, stirring occasionally. Add the garlic and cook for 2 minutes more. Add the tomato purée, brown sugar, dry mustard and Tabasco sauce. Next, add the reserved beans, 2 cups of the bean-cooking liquid, 2 teaspoons kosher salt and cook for 30 minutes at a low simmer. The beans can be refrigerated for up to one week, or freeze for up to 3 months.

Courtesy of Cambria Winery

Rancho Gordo Beans can be purchased from www.ranchogordo.com

Santa Maria Style Salsa

Save
Print
  • 3 medium fresh tomatoes, chopped
  • ½ cup finely chopped celery
  • ½ cup chopped green onions
  • ½ cup finely chopped California green chiles
  • 2 tablespoons snipped cilantro
  • 1 teaspoon vinegar
  • Dash of Worcestershire sauce
  • Pinch of garlic salt
  • Pinch of dried oregano, crushed
  • Few drops of hot pepper sauce

Combine all ingredients in a bowl, cover and let stand for one hour to blend flavors.


Leave a comment
Share
  • Pin it
  • Share
  • Tweet
  • Share
  • Email

Hot Weather Dinner

6 / 20 / 166 / 20 / 16

A basket of sweet corn, three ears partially husked

There is nothing like summers sweet corn on the cob. The tables at the farmers market this weekend were loaded with all kinds of corn and great prices make you want to stock up but corns sweetness will turn to starch the longer it’s stored. There’s an old saying that you should start the water boiling for the corn before you pick it. But if you don’t have a corn field in your back yard here are a couple of tips to help maintain that sweetness.

One, don’t peel and husk your corn, leave it in its little corn jacket and store in the refrigerator. This won’t maintain it’s sweetness long but it will stay sweet for about a day.

Two, peel and husk your corn, freeze separately and when frozen wrap in plastic and pop into a freezer bag. Use within a few weeks for best results.

Three, (this is my favorite), peel a few leaves off the outer ear but leave the husk and some leaves still attached. Chop off the very top and the bottom. Here’s another tip for you-usually corn worms are only found in the top of the ear, just lop that part off, the corn is still good to eat and it means that the farmer didn’t dust the corn with insecticide (a good thing). Put the corn into the microwave and cook for 5 minutes, remove carefully it will be hot. Place in a colander in the sink and run some cool water over it. After it cools, refrigerate and it will hold it’s sweetness for a day or two.

Here’s one of my favorite hot weather dinner salads using sweet corn right off the cob!

Shrimp and Avocado Salad

Save
Print
  • Dressing
  • ¼ cup Pomegranate vinegar or good red wine vinegar
  • 1 teaspoon finely diced shallots
  • 1 teaspoon Dijon mustard
  • Dash of dried parsley flakes, crushed
  • ½ cup olive oil, approximately
  • Salad
  • 1 head Bibb lettuce, peel the leaves from the core, rinse with cool water and dry well
  • 1 ear fresh sweet corn, prepare the corn as directed in the notes.
  • 1 small Persian cucumber, cut in half lengthwise and then into half moons
  • 1 medium tomato, chopped into bite-sized pieces
  • 8 large shrimp, (U16), cut into bite-sized pieces
  • 1 Haas avocado cut in half; pit removed and scoop out the whole half
  • 2 rashers (slices) bacon, cooked and crumbled
  • ¼ cup crumbled blue cheese, optional

Dressing

In a jar or small bowl add vinegar, shallots, Dijon mustard and parsley flakes, add a sprinkle of salt and pepper. Slowly whisk in the olive oil to emulsify. As soon as the dressing starts to thicken stop and taste the dressing, if it needs more continue to add the olive oil while whisking. Any extra dressing may be stored in the refrigerator for up to 3 weeks.

Tear the lettuce leaves into large pieces and add to a large bowl and toss with a little of the dressing. Add the corn, cucumber, tomato and shrimp and toss again with a little dressing. Lightly mix in the avocado and place into shallow bowls or large plates, sprinkle with bacon and cheese and serve extra dressing on the side.

Makes 2 entrée salads

Notes:

Pick up fresh corn from the farmers market, not the supermarket. The sugar in corn starts to turn to starch when it’s picked so by the time it gets to the supermarket much of the sweetness will be gone. When you get the corn home here’s an easy trick to help keep the sweetness in for a day or two. Remove some of the outer leaves but not all. Cut the top and bottom off the ear and microwave for 5 minutes. It will be hot when you bring it out of the microwave so run some cool water over it and set it aside to cool completely. This method is similar to blanching and shocking your vegetables. Use right away (peel the remaining leaves and silk then slice off the cob) or store in the refrigerator for a day or two.

In the hot weather buy the shrimp already cooked for an easy meal at the end of the day. If you purchase raw shrimp to cook it simply bring a large pot of water to a boil, add a tablespoon of Old Bay Seasoning and cook at a slow boil (bubbles just break the surface) until the shrimp is done, about 5 minutes. To test the shrimp simply take one out, run cool water over it, peel, devein and eat it!

Pomegranate vinegar can be ordered from Temecula Olive Oil Co.

2 Comments
Share
  • Pin it
  • Share
  • Tweet
  • Share
  • Email

Easy Pizza Margherita

2 / 2 / 162 / 2 / 16

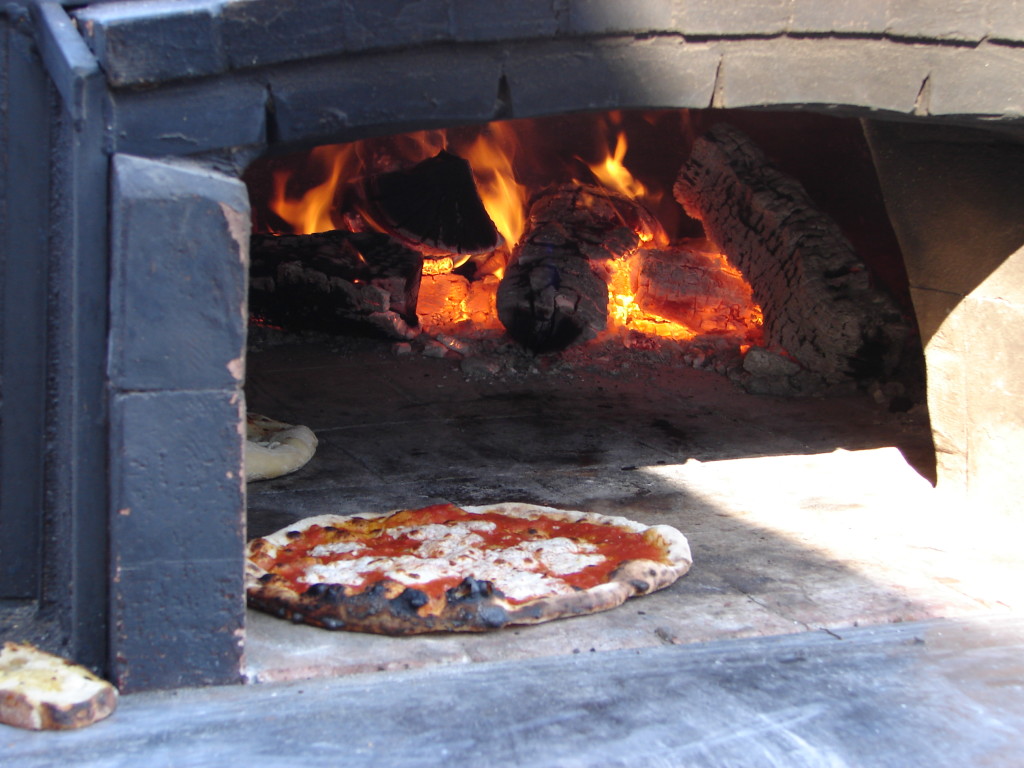
Pasolivo Pizza


Pizza, Flatbread & Calzone

Save
Print

Makes 2 flatbreads

*Stir the flour with a table knife to lighten the flour; it becomes compacted as it rests. Dip your measuring cup into the flour and use the knife to sweep the excess flour off the top of the cup. According to King Arthur Flour it should weigh 4 ¼ ounces.
Dough recipe adapted from ‘Artisan Bread in 5 Minutes a Day’

Sauce recipe will yield 2 cups and hold for several days. Adapted from Sunset Magazine

  • 1 ½ cups lukewarm water
  • 1 packet granulated yeast, 2 ¼ teaspoons
  • ½ teaspoon sea salt
  • 3 ¼ cups King Arthur unbleached white flour, measured with the scoop and sweep method*
  • Sauce:
  • 2 tablespoons olive oil
  • ½ small onion, chopped
  • 2 small cloves garlic, minced
  • 1 pound fresh tomatoes, quartered or 1 lg. can whole or crushed tomatoes
  • 1 small can tomato paste
  • 2 teaspoons dried oregano
  • 1 teaspoon dried thyme
  • 1 granulated sugar or more as needed
  • 2 tablespoons chopped fresh basil
  • Sea Salt and fresh pepper, to taste
  • Pinch crushed red pepper flakes (optional)
  • Pizza Margherita Topping
  • Sauce
  • Mozzarella, torn into pieces
  • Fresh basil, torn into pieces

Dough: (Make at least 1 day up to 5 days ahead of time)

The water should be warm to the touch but not more than 110°, and add the yeast to the water.

Add salt to the flour and whisk to distribute using a large bowl or a plastic food container with lid. Add the water to the flour all at once and mix with a wooden spoon or wet hands, the dough will be sticky. No kneading is necessary.

Loosely cover with lid and let stand at room temperature approximately 2 hrs. The dough can rise longer, up to 5 hours without affecting the results. The dough is easier to handle if you can make it the night before and refrigerate overnight.

Working on a lightly floured surface, pinch off a palm sized piece of dough, shape into a round, rectangular or square shape. Dough is sticky so keep some extra flour nearby, dust your hands as necessary to shape the dough. If the dough starts to snap back you should let it rest for a few minutes and then resume shaping. I use a rolling pin to thin the dough out to my desired style

Place onto parchment paper, a dusted pizza peel or the bottom of a dusted baking sheet. You can use anything you want providing the pizza can slip right off onto the rack.

If you are baking in an oven, preheat your oven to 500° or as high as it will go. Top the dough with anything you like, slid it into the hot oven and bake for 12-14 minutes.

Sauce:

Heat a deep saucepan big enough to hold all the ingredients, add the oil and onions and sauté until translucent. Add the garlic and stir briefly.

Place all the ingredients along with the garlic and onions into a blender, or use an immersion blender and puree.

Ladle or spoon onto pizza dough leaving an clean edge around the outside of the dough. Sprinkle or place the cheese on top and bake on a hot pizza stone for about 6-8 minutes, checking frequently. Sprinkle with fresh basil and let rest for a minute or two before slicing. Mangia!

Related Posts Plugin for WordPress, Blogger...
Leave a comment
Share
  • Pin it
  • Share
  • Tweet
  • Share
  • Email

Posts navigation

Previous Page 1 2 3 4 Next Page
Deb

Meet Chef Debbi

READ BIO

Join-Us Sign up for our newsletter to receive exclusive tips 'n tricks, and special offers on classes, tours, and more!

Recent Posts

  • New E-Book!
  • From the Pantry
  • Spaghettini at Home
  • Growing Corn
  • Spring IS Coming!

Categories

BookCUT

What's in Your Pantry?

How to stock your pantry to create delicious dishes.

Learn Chef Debbi's pantry essentials and how to substitute ingredients for pantry staples in her basic recipes for quick and easy meals.
BUY BOOK>

FacebookTwitterInstagramGooglepinterest


© 2014, DEB'S KITCHEN
Angie Makes Feminine WordPress Themes