Deb's Kitchen - Farm, Food, Wine & Lifestyle Adventures
  • Facebook
  • Google
  • Twitter
  • Instagram
  • Pinterest
  • Email
Menu
Skip to content
  • Home
  • Blog
  • Events
    • Classes
    • Tours & Adventures
  • Edible Gardening
  • Preserving
  • Recipes
    • Appetizers
    • Soups and Salads
    • Main Dishes
    • Side Dishes
    • Desserts
  • About
    • Whats In Your Pantry
    • Ask Debbi
    • Deb’s Kitchen Botanicals
    • Press
  • Contact

Category Archives: Spring Gardening

Artichokes!

4 / 10 / 194 / 10 / 19

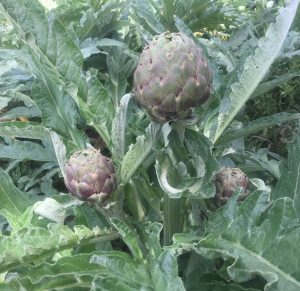
Spring is nearly here and with it comes lovely artichokes. Artichokes are perennial plants in the same family as dandelions and sunflowers, they are a thistle plant and, in most artichokes, there is a center that’s inedible, the ‘choke’. In cooler climates, such as California’s northern coast they can be grown as annual’s. Spring and fall are times when you can find fresh artichokes in the markets. An easy plant to grow, they do require full sun and will take up a large space, 3 feet or more. Be sure to cut the artichoke before the leaves begin to open and it blossoms into a flower.

When you choose your artichoke, you want to make sure that it’s firm when you press the sides and you’ll often hear a squeaky noise, that’s good. The leaves should be tight and closed. If there is a little bit of brown on the leaves that’s ok, it just means there was a little frost during its growing season but that’s not a bad thing. The inside will be perfectly delightful. You also might want to consider only organic artichokes since you’ll be eating parts of the plant that may have been sprayed with pesticides during its growing season. Pesticides cannot be washed off with water or vegetables soaps, they are oil based and you know what happens when oil and water mix! If you can’t find beautiful California Artichokes in the market, here is a great local source where you can order them, Melissa’s Produce, http://www.melissas.com/Organic-Artichokes-p/1375.htm

To store your artichokes, you could place in a plastic bag and store in the produce drawer of your refrigerator or just pop it into the drawer itself. They will last up to 7 days but best eaten within a few.

Rinse the artichoke under cool water; pull off the lower, smaller leaves and cut the stem at the base of the choke. If you have a nice long stem, you can cook this separately and eat it like you would the heart, it tastes the same. If desired, with a sharp chef’s knife cut across the top third of the artichoke and snip the sticker off the remaining leaves. Even though there are many ways to prepare a fresh artichoke, most people fall back to either boiling/steaming them, although it takes quite a while, up to half an hour or more. You could put them in a microwave bowl or in an Instant Pot adding a cup of water and cook for 10 minutes, cover the microwave ones, or grill them over hard wood. Anyway is fine with me.

Here’s the traditional method:

Put them into a large pot and cover with cool water, squeeze two lemons into the water and a little sea salt, bring to a boil and simmer until you can run a small knife through the bottom part of the artichoke, 30-45 minutes or longer depending on the size of the vegetable. Remove from the water using tongs and picking up the artichoke with the top facing down so not to spill hot water all over yourself, drain and serve with my favorite sauce from Walt’s Wharf in Seal Beach.

Get the recipe here, 

Leave a comment
Share
  • Pin it
  • Share
  • Tweet
  • Share
  • Email

Tips on Growing Tomatoes

3 / 16 / 17

How To Grow Great Tomato Plants


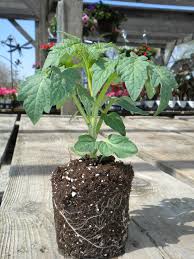
Buy transplants

Purchase healthy, stocky plants that have no flowers, fruits or buds

Choose a sunny location, rotate planting beds every year

Plant in an area where you may have grown peas or beans the previous year

Add compost to the soil and make sure the soil isn’t compacted.


Succession plant

Choose an early variety that can be planted in early spring. I like to plant my main crop in April and then another couple of plants in July for fall harvest. Check Sunset Gardening Guide for the best time in your area to plant.

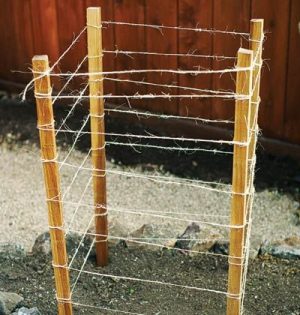
Depending on how you’re going to stake or cage tomatoes, have all the equipment ready for planting day, stake the plants at the same time you transplant.


Planting

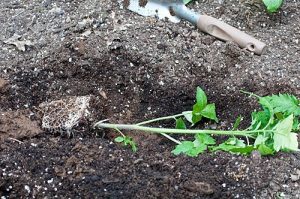
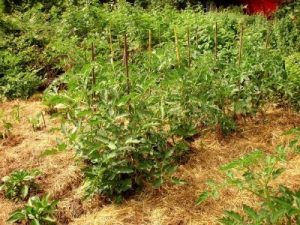
When planting remove lower leaves and plant the tomato deep, so that only about 3” are above ground. Tomato plants have the ability to grow roots from the buried stem. Water well after planting. Water well and deep but infrequently, keep your watering consistent, tomatoes need about 1” water a week.

Fertilize

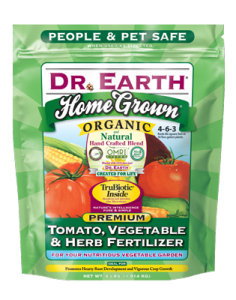
Don’t over fertilize your tomato plants. Use a high phosphorus content fertilizer such as Dr. Earth Organic Tomato/Vegetable Fertilizer, 5-7-3. A high nitrogen content will give you lots of green leaves but little fruit.

Pinch branches out

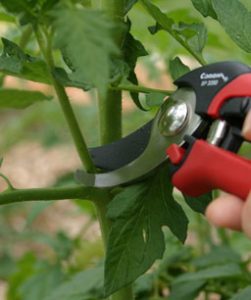
I always pinch out side shoots in the beginning to help the plant grow tall rather than gangly.

Mulch and Companion Planting

Tomatoes love carrots; basil and marigolds so plant them in the same bed and mulch the rest of the soil to keep the moisture in.


Leave a comment
Share
  • Pin it
  • Share
  • Tweet
  • Share
  • Email

Growing Spring & Fall Peas

2 / 24 / 17

Growing Spring and Fall Peas

There are several types of peas that you can grow in the spring or late fall garden. Tall vining types or short bush ones that don’t need trellising.

Then you need to decide if you want fresh shelling peas, pea pods or snow peas.

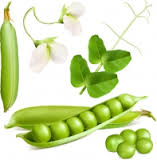
All peas grow in pods but not all pods are edible. Shelling peas, also called ‘English’ peas have tough outer pods and so must be ‘shelled’. Snap peas can be eaten whole and are good blanched or eaten raw. They plump up a little more in the pod than a snow pea, which has a flat, pod and are very tender. Grow them all, the shell peas are great for freezing to use in soups, stews or just about any dish. The snap or snow peas add a great crunch to salads and many times most of them are eaten right off the vine in the garden.

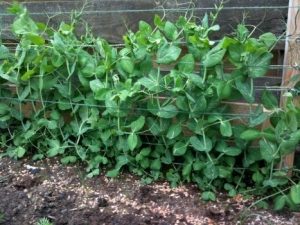
Plant peas in spring or late summer (in warmer climates), loosen the soil and add some compost, mixing it well. If using a trellis, place the trellis in the soil and plant peas on both sides of the trellis. Plant the seeds about 1” deep and 2” apart. Water well and wait for them to grow. That’s it!

Harvest when the pods are fully mature, the shelling peas will be plump and fat while the snap peas are just beginning to swell inside the pod and the snow peas are full size and sort of waxy looking. Some of the flowers may be still attached to the bottom of the pod but they will be looking rather dried out.

Refrigerate peas just after picking so they stay sweet and crunchy for up to 3 days. Blanch peas right away if you’re planning on freezing some. Cook in boiling, salted water for 2 minutes, drain and lay flat on a baking sheet. Dry them well and freeze on the sheet pan then you can toss them into a freezer bag and pull out only what you want to work with later.

Pick peas in the morning and use care not to pull the plant out of the ground while you pull off the pea pod. You can also use the leafy pea shoots from the tops of the plants as they get taller, plan on using these right away.

Leave a comment
Share
  • Pin it
  • Share
  • Tweet
  • Share
  • Email

It’s Easy to Grow Potatoes!

2 / 8 / 17

potato growing

Choose organic seed potatoes, don’t plant potatoes that you’ve purchased from the market even if they have sprouts. They won’t perform well in the garden and you’ll be disappointed. Buy certified organic see potatoes from a reputable nursery. In LA check out Two Dog Nursery, http://www.twodognursery.com/ or by mail, Peaceful Valley Farm, https://www.groworganic.com/

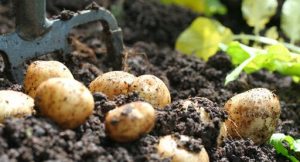
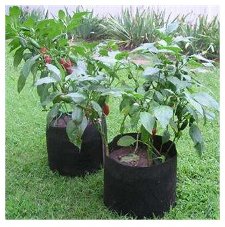
Pre-spouted potatoes will grow faster and you’ll be able to pick potatoes about a month earlier. Growing potatoes is SO easy! You can grow in Smart Pots, the easiest in my opinion, or in the ground.

To pre-sprout the potatoes, put them in a paper bag or lay them out singly in a warm room. If they are larger than a couple of inches I cut them into pieces with each piece having 2 or more ‘eyes’ and let them dry out of the sun for a couple of days. Potatoes like sandy, loose soil so if that’s not the kind of soil you find in your garden a Smart Pot is the way to go, it also makes harvesting easier. If you are planting right in the ground, make a furrow about 3” deep and plant the seed potato eyes up, cover with soil and plant the next potato seed about 2’ away. As the potatoes sprout and grow keep covering the plant with loose soil or straw leaving about 3” exposed. The new potatoes grow on top of the seed potato, keep the soil moist but not wet and keep ‘hilling’ the plant until it’s about 10 – 12” tall. Fertilize with a general organic gardening fertilizer such as EB Stone Tomato & Vegetable Food, 4-5-3.

Harvest potatoes in about 60 days after the blooms start to die back. Stop watering and leave the potatoes in the ground, covered with soil or straw to prevent greening (don’t eat a green potato), to set the skin. Fresh potatoes have a very thin, delicate skin so if you’re planning on storing any of them you’ll want it to ‘toughen’ up a little. If you’re growing in a Smart Pot after you’ve toughened up the skin, just dump the pot out in the garden and collect all your potato gems! Start each season with fresh new seed potatoes. In California you can grow potatoes in spring and in fall, yippee for California!


potato smart pots

Get Smart Pots here


Leave a comment
Share
  • Pin it
  • Share
  • Tweet
  • Share
  • Email

Blackberry Crumb Bars

5 / 26 / 155 / 26 / 15

blackberry crumb bar-smitten kitchen

Blackberry Crumb Bar

Save
Print
  • 6 tablespoons unsalted butter melted, and
  • 1/2 cup (1 stick), room temperature, plus more for pan
  • 1 3/4 cups all-purpose flour (spooned and leveled), plus more for pan
  • 1/2 cup packed light-brown sugar
  • 1/2 teaspoon salt
  • 1/2 teaspoon baking powder
  • 1 cup confectioners' sugar
  • 1/2 teaspoon Grand Marnier or pure vanilla extract
  • 2 large eggs
  • 10 ounces blackberries

Preheat oven to 350°. Butter an 8-inch square-baking pan. Line bottom with parchment paper, leaving an overhang on two sides; butter and flour paper, tapping out excess.

Make topping:

In a medium bowl, whisk together melted butter, brown sugar, and 1/4 teaspoon salt; add 1 cup flour, and mix with a fork until large moist crumbs form. Refrigerate topping until ready to use.

In a medium bowl, whisk together remaining 3/4 cup flour, baking powder, and remaining 1/4 teaspoon salt; set aside.

In a large bowl, using an electric mixer, beat room-temperature butter, confectioners' sugar, and vanilla until light and fluffy, add eggs, one at a time, beating well after each addition. Reduce speed to low; mix in flour mixture. Spread batter evenly in pan; sprinkle with blackberries, then chilled topping.

Bake until golden and a toothpick inserted in center comes out with moist crumbs attached, 40 to 45. Cool completely in pan. Using paper overhang, lift cake onto a work surface and cut into 16 squares.

Adapted lightly from Martha Stewart

Photo: Smitten Kitchen

Leave a comment
Share
  • Pin it
  • Share
  • Tweet
  • Share
  • Email

What to do in your Spring Garden

3 / 31 / 15

April in the Garden

Coming Soon....

Chef Debbi will be presenting a seminar, ‘Al Fresco Mothers Day Brunch’, at the South Coast Plaza Garden Show on Sat. April 25th, 12:30 in the Mitchell Gold & Bob Williams home store. Chef will be talking about spring vegetables, edible flowers and demonstrating a ‘Microgreen and Baby Lettuce Salad with Spring Vegetables, Edible Flowers and a Pomegranate Vinaigrette’ and serving that along with a Seasonal Asparagus and Goat Cheese Tart

The seminar is free but seating is limited.

What To Do in The Spring Garden in So. California

Last Chances:

You can get another crop of spring vegetables, peas (in cooler climates), asparagus, spinach, lettuce and last chance to plant artichokes from seedlings.

Spring Potatoes
Plant from certified organic ‘seeds’.

Spring and Early Summer

Tomatoes
Plant early season, cherry, heirloom & indeterminate varieties
Choose plants that are stocky with a thick stem, about the size of a pencil. Don’t choose plants with flowers or fruit on it, your tomato plant needs to develop strong, deep roots before starting to flower. Remove lower leaves and plant the seedling up to the first two set of leaves. All those furry little things on the side of the stem will turn into roots for you.
Companion plants to tomatoes are carrots, basil, lettuce and parsley.

Beans
All kinds of beans! Bush, pole and dried beans for winter soups and stews.
Companion plants to beans are corn, potatoes, radish and carrots.
Corn
Plant pole beans at the base of the corn and squash around the beans.

Beets, Turnips, Carrots and Radish
All grow underground in loose soil and can be grown in less sunny areas of the garden.

Peppers
All kinds of peppers can go in the ground, planting companions are spinach, basil and tomatoes.

Zucchini
Early squash can be planted but hold off on pumpkins until June if you want them for the fall holidays.

Herbs
Cilantro, Basil, Thyme, Dill, Fennel, Chives and most herbs will do well now.

Watch out for runners and re-seeders such as mint, oregano, borage, lemon verbena and pineapple sage for a few.

Now is a good time to amend your soil for the long summer growing season.

Bon Appetit!

Seminar is sponsored by 1logo 2004
Leave a comment
Share
  • Pin it
  • Share
  • Tweet
  • Share
  • Email

7 Crops to Kick Off Your Spring Garden

12 / 2 / 1412 / 2 / 14

Is your green thumb itching to get gardening again? These cold-loving crops will help you get the growing season started.

spring-crops_800 (1)

Most of us gardeners eagerly anticipate getting our hands in the dirt after a long winter indoors. To get a jump on the spring growing season requires a bit of planning, as well as knowledge of cold-tolerant vegetables and season extension techniques.

A key is to prepare the soil in the fall, so you can begin planting seeds in the spring as soon as the soil has completely thawed and warmed to the seed variety’s minimum temperature for germination. Keep in mind that heavy soils, such as clay, compact when worked while wet, preventing drainage. Allow them to dry out adequately before working them, especially if you didn’t prepare them in the fall.

Growing crops that germinate at cooler soil temperatures also helps you get an early start. (It also helps if they can withstand unexpected late frosts, though isn’t necessary if you use row covers or cold frames when the temperature is expected to dip below freezing.) To determine the soil temperature, stick a soil thermometer about 1 inch deep into the soil and allow it to stabilize. If it’s at the minimum recommended temperature, it’s time to kick off planting your spring garden. Here are seven crops to try.

1. Beets (Beta vulgaris subsp. vulgaris)

Some beet varieties, like heirloom Chioggia, mature in as little as 45 days, making them ideal for an early crop. When soil has warmed to 40 degrees F, plant seeds 3/4 inch deep, 1 inch apart, in rows spaced 12 to 18 inches apart. When seedlings are 4 inches tall, thin them to 4 to 6 inches apart by cutting off the tops. Don’t pull seedlings, as this might uproot nearby plants you want to keep.

Beets tolerate soil low in nutrients but need even water to prevent becoming bitter, so keep soil moist, but not soggy, throughout the growing season.

Begin harvesting beets when they reach 1 inch in diameter, or if you want larger crops, wait until they reach 3 inches in size. Larger beets can become pithy. Beets can withstand light frost, but should be harvested before the heat of summer, which slows sugar production, making them less palatable.

2. Spinach (Spinacia oleracea)

Spinach likes it cold, making it an ideal spring crop. Seeds germinate as low as 40 degrees F, and young seedlings can withstand temperatures down to 15 degrees F if frost occurs. Sow seeds 1/2 inch deep, 1 inch apart, in rows 12 to 18 inches apart. As an alternative, broadcast seeds and thin seedlings to 4 inches apart to prevent bolting. Keep the soil evenly moist throughout the growing season.

You can begin harvesting spinach when leaves are young, or wait for them to grow larger. Harvest outer leaves first. Spinach bolts when the air temperature warms, so plan to harvest plants before bolting occurs. Some spinach varieties, such as Razzle Dazzle, reach maturity in 30 days.

3. Spring Radish (Raphanus sativus)

Radish likes cool, wet weather, and you can be eating most varieties within three weeks of sowing seeds. Plant seeds four to five weeks before the last spring frost. Sow them 1/2 inch deep and 1 inch apart, in rows 12 inches apart. When seedlings emerge, thin plants to 2 inches apart; enjoy the thinned seedlings in salads or other dishes. Keep the soil evenly moist throughout the growing season to prevent cracking.

Harvest radishes when 1/2 to 1½ inches in diameter. Spring radishes come in many colors, shapes and sizes. Champion is round, bright red and matures within 20 days. The tapered April Cross is snowy white, grows up to 16 inches long, and is ready for harvest in 60 days. To avoid pithiness, harvest radishes before the heat of summer. For small gardens, save space by growing radishes between rows of larger, slower growing crops.

4. Pak Choy (Brassica rapa var. chinensis)

When the nighttime air temperature and the soil temperature have risen to 50 degrees F, consistently, sow pak choy seeds 1/4 to 1/2 inch deep and 1 inch apart in rows spaced 20 to 30 inches apart. When seedlings emerge, thin dwarf varieties to 6 inches apart and taller varieties to 12 inches apart. Thinned seedlings can be added to salads. Maintain plenty of water in the soil, without making it soggy, to prevent bolting and poor flavor.

If you harvest pak choy by cutting it about 2 inches above the soil level, a new plant regrows for continued harvest. The variety Autumn Poem can be sown in spring and harvested about 35 days later; many varieties can be harvested in less than 50 days.

5. Loose-leaf lettuce (Lactuca sativa var. crispa)

Lettuce thrives in cool weather and cool soil. When the soil has warmed to 40 degrees F, sow seeds 1/8 inch deep and 1 inch apart in rows 12 inches apart. When seedlings have two to three true leaves, thin plants to 6 inches part. Water regularly, keeping soil moist with 1 inch of water per week. Lettuce has shallow roots and cannot tolerate long dry spells.

You can begin harvesting young leaves when 2 inches long, about four weeks after sowing seeds. Harvest them by picking the outer leaves first so plants continue to produce. For the crispest lettuce, pick leaves during cool, early morning hours. Most varieties take 45 to 60 days to mature.

6. Peas (Pisum sativum)

Whether you grow snap, shell or snow varieties, peas are an excellent spring crop because seeds can be sown at 40 degrees F, and if seedling suffer frost damage, the plant responds by producing more fruit. Sow seeds 1 inch deep, 2 to 4 inches apart, in 18-inch rows. Vining types will need to be trellised. Spring rains should keep soil adequately moist, but if not, water enough to keep the top 1 inch of the soil wet without becoming waterlogged. Do not overwater, especially during flowering. This can reduce pollination and setting of pods.

Harvest peas in the early morning for crispness. The more you harvest the more the plant will produce. Pick snap and shelling varieties when peas round out pods, are light green and before pods yellow and become tough. Harvest snow varieties when pods have reached mature length and are still flat. Two fast-growing varieties to try are Sugar Sprint, a snap pea that is ready to harvest in 58 days, and Sugar Marvel, a shelling pea that grows 18-inch vines.

7. Spring Onions

Onion sets can be planted in the garden up to four weeks before the last spring frost and harvested in less than 60 days, making them ideal for spring. Plant onion sets that are 1/2 to 3/4 inch in diameter 1 inch deep, with the pointy, root side down. Space small varieties 2 inches apart and large varieties 4 inches apart. Keep onions sets evenly watered, and don’t allow them to dry out. A 2-inch layer of mulch can help retain moisture and suppress weeds.

Harvest bulbing onions when half of the tops have fallen over. Allow them to dry for about three to four weeks in a well-ventilated area then cut off the tops and trim the roots before storing them.

About the Author: Diana K. Williams is a certified master gardener and holds a Bachelor of Science in environmental studies and biology. She is presently serving on a committee that is designing community gardens for a local municipality. She writes from her home in Florida.

 

Leave a comment
Share
  • Pin it
  • Share
  • Tweet
  • Share
  • Email

Bulb Basics

9 / 22 / 1412 / 3 / 14

Jonquils02_aug_2007

As we prepare for fall planting season, we’re going back to bulb school. Follow these
tips from the experts to ensure successful planting and bulb longevity!

  • Always plant bulbs pointed side up.
  • Do not use strong commercial fertilizer or fresh manure when planting.
  • Label bulbs as you plant them to prevent accidentally digging up bulbs out of
    season. Use labels that are large enough so that 2-3″ of the label is below soil level.
  • Let the foliage die back on its own before trimming it back, and take as little foliage
    as possible when harvesting cut flowers. The leaves and foliage are essential for storing
    food for next year.
  • Never store bulbs in the sun or in an airtight container. A dry, shady, well-ventilated
    area will prevent mold and mildew.
  • Do not grow bulbs year after year in the same place. This could invite fire blight, a fungal
    disease that affects both the flowers and the foliage.

Thanks to K. Van Bourgondien & Sons, Inc. and Gardens Alive! for timely bulb help!


Leave a comment
Share
  • Pin it
  • Share
  • Tweet
  • Share
  • Email

Growing Asparagus

1 / 14 / 1412 / 14 / 14

Coming Soon....
Growing Asparagus

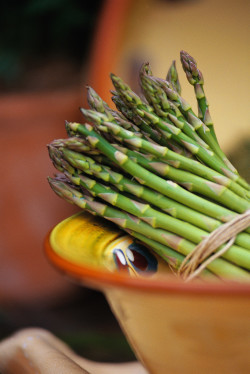
Asparagus is a very hardy, cool-season perennial vegetable, which can produce a spring harvest for 10-20 years! Therefore, it must be planted in a “dedicated bed”. It can be grown from seed, but most often is grown from 1-2 year old “crowns” (rhizomes), which is offered in January.

For 6 crowns, you will need a dedicated area measuring 6’ wide x 6’ long.
For 13 crowns, you will need a dedicated area measuring 6’ wide x 10’ long.

Crowns are dormant and must be planted within one week; you may keep them in the refrigerator, so they don’t break dormancy, until you can plant out.

Asparagus requires rich, fertile, well-drained soil, with a pH of 7.0 – 7.2.
Mix in lots of compost. If gophers are a problem for you, install wire barriers down in the bed before planting. Be sure the bed is as weed-free as possible. They prefer full sun.

Be sure the soil is at least 50 degrees. Dig a trench 12-15” deep (roughly twice the length of the roots), and allow 3-4’ between rows. Mound up soil inside the trench to create a cone 6” tall; cones should be 1’ apart. If you are trenching down into regular soil, prepare the bed by the “double dig” method, adding in compost to assure a well-draining soil.

Over each cone, drape the roots of one asparagus crown. Begin filling the trench with soil, up to just 1” above the crowns, to start. Firm the plants in well. As the plants grow and shoots emerge, begin covering the crowns with more soil until the trench becomes level with the soil surface. Water well each time.

asparagus bed planting


Asparagus takes a few years to fully mature. Do not harvest any shoots the first year; after they emerge, let them leaf out so the foliage can nourish the growing roots and rhizome for future production. Remember that good things come to those who wait!

You can begin to harvest lightly the shoots in the second year for about a month. The fleshy roots still need to develop and support perennial growth in future seasons. Plants that are harvested too much, too soon will become spindly and weak, and perhaps not recover. To harvest, simply cut or snap the spears 1-2” below the soil and at least 2” above the crown.

Subsequent harvests generally last for 8-12 weeks. Be sure to harvest daily during the season; either use or refrigerate immediately in a plastic bag. 6-8” is the optimum size. Don’t leave them to become tall and woody.

If you want blanched asparagus, which is a gourmet treat, mound soil around them (or otherwise exclude light from them so they do not form chlorophyll.)

At the end of the harvest, let the spears leaf out and become ferny. It can make a nice tall border. When the foliage yellows, cut it down to 2” stubs and add a 4-6” mulch of compost or leaves, which will help control weeds and feed the soil with organic matter and nutrients. If you live in an area with lots of frost, you can help protect your plants (which are hardy down to zone 4) by adding a thick layer of compost and straw to the bed.

Next Spring, be sure to weed the bed thoroughly, but pull the weeds instead of hoeing them to prevent damaging the plants, which are spreading out underground. The 6 or 13 plants you’ve planted will eventually fill out the entire bed, and you will enjoy this fantastic veggie for many, many years!

Written by Jo Ann Trigo of Two Dog Nursery. Jo Ann and Alex have many other growing guides on their site under Helpful Guides, visit them soon.

Related Posts Plugin for WordPress, Blogger...
Leave a comment
Share
  • Pin it
  • Share
  • Tweet
  • Share
  • Email
Deb

Meet Chef Debbi

READ BIO

Join-Us Sign up for our newsletter to receive exclusive tips 'n tricks, and special offers on classes, tours, and more!

Recent Posts

  • Spring IS Coming!
  • Cheese Education & Demo Class
  • Farm, Food & Wine Tour 2023
  • Happy Valentine’s Day
  • Superbowl Sunday Party

Categories

BookCUT

What's in Your Pantry?

How to stock your pantry to create delicious dishes.

Learn Chef Debbi's pantry essentials and how to substitute ingredients for pantry staples in her basic recipes for quick and easy meals.
BUY BOOK>

FacebookTwitterInstagramGooglepinterest


© 2014, DEB'S KITCHEN
Angie Makes Feminine WordPress Themes
Manage Cookie Consent
To provide the best experiences, we use technologies like cookies to store and/or access device information. Consenting to these technologies will allow us to process data such as browsing behavior or unique IDs on this site. Not consenting or withdrawing consent, may adversely affect certain features and functions.
Functional Always active
The technical storage or access is strictly necessary for the legitimate purpose of enabling the use of a specific service explicitly requested by the subscriber or user, or for the sole purpose of carrying out the transmission of a communication over an electronic communications network.
Preferences
The technical storage or access is necessary for the legitimate purpose of storing preferences that are not requested by the subscriber or user.
Statistics
The technical storage or access that is used exclusively for statistical purposes. The technical storage or access that is used exclusively for anonymous statistical purposes. Without a subpoena, voluntary compliance on the part of your Internet Service Provider, or additional records from a third party, information stored or retrieved for this purpose alone cannot usually be used to identify you.
Marketing
The technical storage or access is required to create user profiles to send advertising, or to track the user on a website or across several websites for similar marketing purposes.
Manage options Manage services Manage vendors Read more about these purposes
View preferences
{title} {title} {title}