Deb's Kitchen - Farm, Food, Wine & Lifestyle Adventures
  • Facebook
  • Google
  • Twitter
  • Instagram
  • Pinterest
  • Email
Menu
Skip to content
  • Home
  • Blog
  • Events
    • Classes
    • Tours & Adventures
  • Edible Gardening
  • Preserving
  • Recipes
    • Appetizers
    • Soups and Salads
    • Main Dishes
    • Side Dishes
    • Desserts
  • About
    • Whats In Your Pantry
    • Ask Debbi
    • Deb’s Kitchen Botanicals
    • Press
  • Contact

Category Archives: Uncategorized

Easter Potatoes

3 / 31 / 154 / 1 / 15

potato gratin-molly stevens

Potato Gratin

Save
Print

This rich, creamy gratin gets a note of smokiness from the bacon between the layers of tender potatoes.
by Molly Stevens from Fine Cooking

  • 2-1/2 lb. Yukon Gold potatoes, peeled & sliced into 1/8-inch thick rounds
  • 2-1/2 cups heavy or light cream
  • Sea salt & fresh ground pepper, to taste
  • 4 oz. bacon
  • 3 medium leeks, white and light-green parts only, thinly sliced
  • 6 oz. grated Gruyère
  • 2 to 3 tsp. chopped fresh thyme
  • 1/4 tsp. freshly grated nutmeg
  • 1/2 cup fresh breadcrumbs
  • 1/4 cup finely grated Parmigiano-Reggiano
  • 2 tablespoons unsalted butter, melted

Serves 8

Position a rack in the center of the oven and heat the oven to 400°F. Butter or oil a 3-quart gratin dish; set aside.

Put the potatoes, cream , 1/2 tsp. salt, and a few grinds of pepper in a 12-inch skillet. Simmer, partially covered, over medium to medium-low heat, stirring occasionally and gently with a rubber spatula until the potatoes are barely tender when pierced with a fork or skewer, 8 to 12 minutes.

In a medium skillet, cook the bacon until browned and fully cooked. Set aside to cool, reserving 2 tablespoons of the fat in the skillet. Heat the reserved fat over medium-high heat and sauté leeks until tender, fragrant, and lightly browned. Season to taste with salt and pepper. When the bacon is cool, crumble it into small pieces.

Using a slotted spoon, transfer half the potatoes to the prepared gratin dish, spreading them evenly. Layer on the leeks, bacon, Gruyère, thyme, and nutmeg. Top with the remaining potatoes spreading them evenly, and pour over any liquid remaining in the pan.

In a small bowl, combine the breadcrumbs, Parmigiano-Reggiano, and melted butter.

Evenly scatter the topping mixture over the potatoes. Bake the gratin until it’s bubbly, the top is brown, and the potatoes are completely tender when poked with a fork or a skewer, 25 to 30 minutes. Let the gratin sit for at least 10 and up to 30 minutes before serving so the liquid is fully absorbed and the layers are cohesive.


Leave a comment
Share
  • Pin it
  • Share
  • Tweet
  • Share
  • Email

Why You Should Grow Your Own Organic Potatoes

2 / 17 / 15

The Potato: One of EWG’s Dirty Dozen

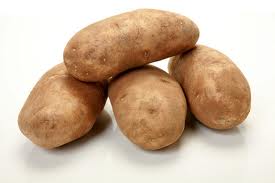
russet potatoes

By: Connie Rosemont (Only Organic)

The potato is a great food – calorie-dense and rich in nutrients like vitamin B6, vitamin C, potassium and manganese. It is America’s largest vegetable crop: the average American consumes 29 pounds of French fries a year and 142 pounds of potatoes overall.

Alas, the conventional potato tests positive for 35 different pesticides — more pesticides by weight than any other vegetable, according to EWG’s 2014 Dirty Dozen List. Some of these pesticides remain even after peeling and washing. Pesticides found on potatoes by the U.S. Department of Agriculture Pesticide Data Program include:

— Six known or probable carcinogens

— 12 suspected hormone disruptors

— Seven neurotoxins

— Six developmental or reproductive toxins

— Nine honeybee toxins

More potatoes aren’t organic because of production challenges, says Nate Lewis, Crop and Livestock specialist with the Organic Trade Association.

Farmers who raise conventional potatoes take a “kill-down” step just before harvest, spraying their potato fields with an herbicide that kills all the green leafy vegetation. With the leaves gone, the potato goes into a finishing-off process that thickens the skin, rendering it less susceptible to injury and blemishes.

After farmers harvest conventional potatoes, they warehouse them for up to nine months and ship them, as retailers and processing centers need them. Conventional producers apply post-harvest fungicides and sprouting inhibitors during storage to retard the spread of small blemishes and bad spots from one potato. Not surprisingly, these pesticides applied during storage show up most frequently on residue tests.

Organic standards enforced by the USDA bar organic farmers from using most field and storage pesticides. Organic farmers must work harder to store their potatoes for months without fungicides and sprout inhibitors. As a result, they face significantly larger hurdles than conventional producers in large-scale potato farming.

The hurdles of raising storage crops organically on a large scale might consign organic potatoes always to a small niche market. However, buying organic potatoes means that those farmers who decide to try organic potatoes will find a market for their efforts.


Leave a comment
Share
  • Pin it
  • Share
  • Tweet
  • Share
  • Email

Growing Potatoes in Your Edible Garden

2 / 17 / 152 / 17 / 15

How To Grow Potatoes:
by Dan Lake, Peaceful Valley employee

potato-blossom-470x419

Since I was 12 years old, my family has grown about 4 or 5 different varieties of potatoes in our garden at home every year.  I would love to brag about my tater planting abilities, and with all of that experience one would think that I was a spud-growing expert, but after reflecting on what I knew, I came to a different conclusion: I devoted most of my time to harvesting and eating the delicious potatoes and have a lot to learn about the process of planting them!

Now that I have my own garden, I’ve done some research, talked to a friend who happens to be a farmer, and compiled some good tips below.

Crop Rotation: When planting potatoes from season to season, they should be kept on a 3-year rotating cycle in terms of location in your garden. This means,  3-4 suitable sites are needed if you want to grow potatoes every year, rotating the site where you plant every season.

Soil & Sun: When it comes to soil, potatoes are not picky. They are adaptable and will usually produce a decent crop even when the soil conditions are less than perfect. What they do require, however, is as much sun as possible because of how aggressive their root systems are, so keep that in mind when picking your spot(s) to plant.

Preparing Seed Potatoes: When you have your seed potatoes (potatoes certified for growing), set them somewhere where they will be exposed to light and warmth (between 60 and 70F). This will help them to start sprouting. A day or two before planting, use a clean knife to slice the larger potatoes into smaller pieces that contain at least 1 or 2 “eyes” or buds. Each seed should be approximately 1 1/2-2 inches square, and the smaller potatoes may be planted whole. In the next day or so, your seed potato pieces will form thick calluses over the cuts, to help prevent it from rotting once planted.

Planting Seed Potatoes: After you have trenched a 4’” deep furrow, plant the seed potato pieces or small potatoes 4” deep in the furrow about 12” apart and cover lightly with soil. The soil should be evenly moist, but not wet or soggy. If the soil is water logged when you dig, your seed potatoes will probably rot before they even get started. Depending on how cold it gets in your area, it might be a good idea to put a layer of mulch or straw on top of the furrow for a little extra frost protection. Two to four months later, I hope you will be enjoying some of the most delicious potatoes ever!

You can also reference our Potato Planting & Growing Guide online.

Leave a comment
Share
  • Pin it
  • Share
  • Tweet
  • Share
  • Email

Citrus Olive Oil Cake

1 / 6 / 151 / 6 / 15

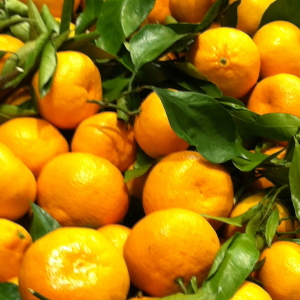
citrus

Most fruits and vegetables have a season, a time when they are picked and rushed to the market to maintain flavor and nutrition but when one talks about citrus it can be very confusing. Citrus ‘season’ really runs all year long with different varieties ripening at different times. During the summer months we have delicious Valencia oranges and Star Ruby Grapefruit, but you’ll find most citrus in season from fall until late spring.

In the market right now you’ll find Navel, Cara Cara and Moro Oranges, delicious Meyer Lemons and my favorite produce guru, Robert Schueller of Melissa’s Produce, recommends the Cocktail Grapefruit, Key Limes and Kishu tangerines! And all of us tangerines freaks know that come March those Ojai Pixie Tangerines start coming our way! The best of the best……

IMG_1122

Other than eating juicy, sweet citrus out of hand or in a dish our friends at Temecula Olive Oil crush seasonal citrus fruit, Blood Oranges or Meyer Lemons, at the same time they press their olives. While the Blood Orange Olive Oil is available year round, Meyer Lemon Olive Oil is seasonal usually beginning in early spring. If you see it on their shelves don’t hesitate, this oil sells out every year! I’ve used both Blood Orange and Meyer Lemon Olive Oil in this cake and each one is distinct and fabulous.

For those of you who can’t conceive of using an olive oil in a cake I urge to try this recipe, not only is it easy, it’s delicious. I like serving it with a little chopped citrus on the side or a handful of fresh raspberries.

 Click here for the recipe

Leave a comment
Share
  • Pin it
  • Share
  • Tweet
  • Share
  • Email

The Plant Stand~Jan

1 / 6 / 151 / 6 / 16

the plant stand logo

Rescheduled due to rain! See us on the 23rd

January 23rd, Sat

10 a.m.

Companion Planting

Spring Garden Planning

&

Companion Planting

Join us for a little talk and a tasty treat!

The Plant Stand
2972-A Century Place
Costa Mesa, California 92626-4324

(714) 966-0797

DKB-12

Leave a comment
Share
  • Pin it
  • Share
  • Tweet
  • Share
  • Email

Peach Cobbler

6 / 4 / 1312 / 4 / 14

peach-cobbler-2
Filling

4 cups peeled, chopped fresh peaches
1 cup sugar, approximately
¼ cup cornstarch
pinch sea salt
1 teaspoon cinnamon
1/3 cup Grand Marnier
1 tablespoon fresh lemon juice

Batter

½ cup unbleached all-purpose flour
1/3 cup sugar
½ teaspoon baking powder
¼ teaspoon sea salt
2 tablespoons unsalted butter, room temperature
1 egg, lightly beaten

Preheat the oven to 375°. Butter a 9” square baking pan and set aside.

Filling:

Add peaches to a medium sized bowl and toss gently with sugar. Depending on how sweet the peaches are, add more or less sugar.

In a small bowl, mix together the cornstarch, sea salt, cinnamon and Grand Marnier. Toss the peaches with the cornstarch mixture and lemon juice.

Add the filling to the prepared pan.

Batter:

Combine the flour, sugar, baking powder and sea salt, mix well. Add the butter and egg, stir together until the batter is smooth.

Drop the batter by spoonfuls onto the fruit mixture and bake 40 – 45 minutes or until bubbly and golden.

Remove from oven and cool before serving.

Related Posts Plugin for WordPress, Blogger...
Leave a comment
Share
  • Pin it
  • Share
  • Tweet
  • Share
  • Email

Posts navigation

Previous Page 1 2 … 9 10 11
Deb

Meet Chef Debbi

READ BIO

Join-Us Sign up for our newsletter to receive exclusive tips 'n tricks, and special offers on classes, tours, and more!

Recent Posts

  • New E-Book!
  • From the Pantry
  • Spaghettini at Home
  • Growing Corn
  • Spring IS Coming!

Categories

BookCUT

What's in Your Pantry?

How to stock your pantry to create delicious dishes.

Learn Chef Debbi's pantry essentials and how to substitute ingredients for pantry staples in her basic recipes for quick and easy meals.
BUY BOOK>

FacebookTwitterInstagramGooglepinterest


© 2014, DEB'S KITCHEN
Angie Makes Feminine WordPress Themes