Deb's Kitchen - Farm, Food, Wine & Lifestyle Adventures
  • Facebook
  • Google
  • Twitter
  • Instagram
  • Pinterest
  • Email
Menu
Skip to content
  • Home
  • Blog
  • Events
    • Classes
    • Tours & Adventures
  • Edible Gardening
  • Preserving
  • Recipes
    • Appetizers
    • Soups and Salads
    • Main Dishes
    • Side Dishes
    • Desserts
  • About
    • Whats In Your Pantry
    • Ask Debbi
    • Deb’s Kitchen Botanicals
    • Press
  • Contact

Tag Archives: bumper crops

New E-Book!

10 / 6 / 2310 / 11 / 23

Try some new recipes this fall!

Included in the ebook are recipes such as Tomato Sauce, Ketchup, How to peel fruit the easy way and much more.

Just $8.00

click the Buy Now Button & your ebook you will receive the book via download. I’m available for questions via email, [email protected]


Leave a comment
Share
  • Pin it
  • Share
  • Tweet
  • Share
  • Email

Growing Corn

5 / 26 / 23

It’s time to start late spring and summer flowers & veggie’s


Photo: Farmers Almanac


Corn can be fickle, it likes warm weather and the bugs and four-legged critters may eat all of yours before you can get to it. Native Americans planted corn with beans and once the beans sprout they planted squash at the base of the corn. The beans will use the corn stalk as a trellis and the squash leaves will protect the base of the corn which grows very shallow. This is called The Three Sisters or Companion Planting.
Plant corn directly in the garden where it will receive at least 6 hours of sun, water well and help the pollen to reach the tassels. Each tassel that gets pollinated turns into a kernel. To make sure the plant is getting pollinated, shake the tassels so the pollen falls onto them, nature will take it from there. 
The ears are ready to harvest when the silks turn from light yellow to dark brown.

To cook, grill, steam or pop in the microwave. Leave the husk on the corn if you microwave and cook on high for 3 minutes (for two ears), add an extra minute with more ears. Let them slightly cool and peel the husk and silk off the corn.

NOW Booking for Vegetable & Flower Garden consult & Design

[email protected]
Leave a comment
Share
  • Pin it
  • Share
  • Tweet
  • Share
  • Email

How To Use Meyer Lemons

2 / 8 / 232 / 9 / 23

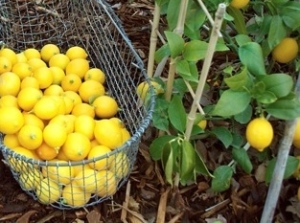
picking-lemons-490x326


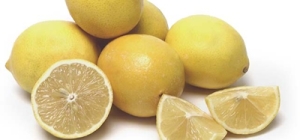
The bright star of the season, Meyer Lemons are the sweetest lemons to use in cooking. Thin-skinned, juicy and brightly colored you can use every part of the lemon, well, except maybe the seeds! In season now you can find them in all markets and at your local farmers market. If you have your own tree about now you might be wondering what to do with all those lemons. If you have trouble finding them you can call our friends at Melissa’s Produce and they can fill up your pantry!

Below you’ll find a few of my favorite recipes.


Meyer lemons

 How to choose, store and use beautiful Meyer

Lemons

Meyer Lemon Season (Commercial) Nov-May

Home Tree will fruit late Summer-April/May

Choose, Store and Use Meyer Lemons:

Pick lemons that have a smooth, yellow skin with no signs of bruises or cuts. Lemons that are heavy will have more juice in

them; unfortunately, Meyer lemons also contain many seeds. Easily seeded if cut in half, most of the seeds are centered in the middle of the fruit.

Store lemons in a bowl on the counter in a cool place with no direct contact with the sun. If the lemons begin to become soft, refrigerate and use within a few days. If using refrigerated lemons, let them come to room temperature if possible. Roll all lemons around on the counter to help free up the juice.

Extra lemon juice can be poured into ice cube trays, frozen and then placed into a freezer bag and used within 6 months.

Grow:Citrus_lemon

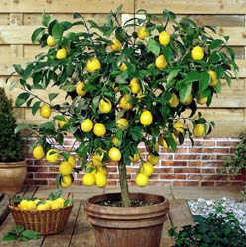
Meyer lemon trees grow well in pots in So. California, use a fast draining soil. They are hungry fellows so feed with an organic citrus fertilizer according to directions. They love the So. California sunshine but not so much our sometimes-windy weather. Meyer lemons like to be moist but not wet, deep infrequent watering and don’t let water sit in the liner or pot. If the weather threatens to freeze, water well and cover with a blanket or row cover at night, be very careful not to know off the fruit or flowers on the tree. Feed with an organic citrus food as directed and keep a close watch for citrus pests. Fruit will hold a long time on the tree, make sure they are nice and yellow before picking and after fruiting a little light pruning, if necessary will keep them compact and tidy.


Lemon Roasted Chicken

Save
Print
  • Serves 4
  • 1 whole chicken -- rinsed, drained and dried
  • 1 medium onion -- peeled and chopped
  • 3 baby carrots -- peeled and chopped
  • 3 celery stalks -- cut into chunks
  • 1 lemon -- zested and juiced; preferably Meyer lemon
  • 1 bunch Italian flat leaf parsley -- minced
  • 1 bunch fresh sage -- minced
  • 1/2 bunch fresh thyme -- minced
  • 2 tablespoons butter -- room temperature
  • 1 tablespoon lemon olive oil, butter or regular olive oil
  • Salt and pepper
  • 1 cup white wine
  • 1 cup chicken stock
  • 2 tablespoons chicken demi glace -- optional for sauce

Preheat oven to 400°.

Wash and dry chicken inside and out then dry well. Fit chicken into a roasting pan (you want no more than 1" of space on any side of the chicken otherwise the juices will burn).

Mix together onion, carrot, celery, lemon zest, and 1/2 of the minced herbs. Loosely stuff cavity with some of the ingredients, place the remainder on the bottom of the roasting pan and place chicken on top of the aromatic vegetables.

Mix remaining minced herbs with butter. Gently separate the chicken skin from the breast meat and carefully rub herb butter on breast under the skin.

Rub the chicken with lemon olive oil and season with salt and pepper. Squeeze lemon over chicken and place rind into cavity. Insert probe thermometer into thigh and set for 165 degrees. Pour half of the wine and chicken stock in the bottom of the pan and place, uncovered in hot oven.

Baste after 1/2 hour, if you don't have enough juice in pan use some chicken stock. Do not cover bird until browned and then loosely place foil over breast. If wings start to brown to early wrap with foil.

Remove chicken to a warm plate and loosely cover with foil. Let rest for 10 minutes before carving.

Remove some of the fat in the pan by using a paper towel or ice cubes. (Dredge the paper towel through the juices to pull out some of the fat or pour off the juices into a heat proof measuring cup. Add a few ice cubes; the fat will stick to the cold cube, discard cube. You may have to do this several times).

Put the roasting pan on top of the stove over medium-high heat and bring a boil, add remaining wine and stock scraping the fond (the yummy pieces stuck to the pan) from the bottom of the pan. Reduce by half, add demi-glace if using and serve with chicken.

Photo: Annabelle Breakey; Styling: Dan Becker

French Yogurt Cake

Save
Print

I love this bright lemony cake so much I adapted it slightly from Dorie Greenspan by adding these super sweet little strawberries, Alpine strawberries.

  • 1 1/2   cup all-purpose flour
  • 2         teaspoons baking powder
  •            Pinch of salt
  • 1         cup sugar
  • 1         lemon, grated and zest
  • 1/2      cup plain yogurt
  • 3         eggs
  • 1/4      teaspoon pure vanilla extract
  • 1/2      cup citrus olive oil
  • 1         cup Alpine strawberries, whole or halved

Center a rack in the oven and preheat the oven to 350 degrees F. Generously butter an 8 1/2-x-41/2-inch loaf pan and place the pan on a baking sheet.

Whisk together the flour, baking powder and salt.

Put the sugar and zest in a medium bowl and, with your fingertips, rub the zest into the sugar until the sugar is moist and aromatic.

Add the yogurt, eggs and vanilla and whisking vigorously until the mixture is very well blended.

Still whisking, add the dry ingredients, then switch to a large rubber spatula and fold in the oil and then the strawberries. You'll have a thick, smooth batter with a slight sheen. Scrape the batter into the pan and smooth the top.

Bake for 50 to 55 minutes, or until the cake begins to come away from the sides of the pan; it should be golden brown and a thin knife inserted into the center will come out clean. Transfer the pan to a rack and cool for 5 minutes, then run a blunt knife between the cake and the sides of the pan. Unmold, and cool to room temperature right side up on the rack.

Glaze (optional)

½ cup lemon marmalade mixed with 1 teaspoon water

To Make the Glaze:

Put the marmalade in a small saucepan or in a microwave-safe bowl, stir in the teaspoon of the water and heat until the jelly is hot and liquefied. Using a pastry brush, gently brush the cake with the glaze.

Citrus Olive Oil Cake

Save
Print

You can make this cake with any flavored or un-flavored olive oil that you like. Instead of poppy seeds try adding some dried cranberries or cherries. For serving dust with powdered sugar or make a citrus glaze with orange or lemon juice mixed with some powdered sugar and drizzle over the top of the cake, I like serving this with fresh raspberries on the side and a dollop of freshly whipped cream wouldn’t hurt either!
I’ve used cake pans, bundt cake pans and small Mason jars for this cake, just be aware of your baking time, test by inserting a clean toothpick into the center of the cake and it comes out dry.

  • 2 cups flour
  • 1 ¼ cups sugar
  • 1 teaspoon baking powder
  • 1 teaspoon baking soda
  • ¼ teaspoon salt
  • 3 large eggs, beaten
  • 1 ½ cups whole milk
  • ½ cup Orange olive oil, or any flavored olive oil
  • 1 orange, zested
  • 1 teaspoon vanilla
  • ½ cup sliced almonds
  • 1 tablespoon poppy seeds, optional

Preheat the oven to 350°.

Sift together the flour, sugar, salt, baking powder and baking soda Make a well in the center of the dry ingredients and whisk in the eggs, milk, olive oil, zest and vanilla. 


Add the almonds and poppyseeds to the batter, and mix with a spatula or wooden spoon. 


Pour the batter into a greased Bundt cake pan. Bake for 55 to 60 minutes, until the cake is golden on top. Cool the cake, invert on a plate and dust with confectioners sugar if you like.

If using Mason jars, spray the inside of the jar with oil spray and fill only 2/3 of the jar with batter. Place jar on a baking sheet and when all jars are done place the sheetpan into the oven and bake accordingly. Check the cakes at 30 minutes and then every 5 minutes until a toothpick comes out clean.

2 Comments
Share
  • Pin it
  • Share
  • Tweet
  • Share
  • Email

Debs Kitchen Class Registration

1 / 3 / 22

Sign Up for Current Class Schedule

Growing produce from Seeds, Seed Starting Basics

Jan. 29th 11:00-1:00, $30.00


Guest Count


Growing Cut Flowers in Your Vegetable  Garden & How to Use Edible Flowers in Cooking

Feb. 5th 11:00 – 1:30, $40.00


Guest Count


Growing a Spring Salad Garden & Salad Harvest Demo

Feb. 26th 11:00 – 1:30, $40.00


Guest Count


Organic Vegetable Gardening & Cooking Demo

March 26 11:00 – 1:30, $40.00


Guest Count


Leave a comment
Share
  • Pin it
  • Share
  • Tweet
  • Share
  • Email

Clean and Husk (strings and all) Corn on the Cob

9 / 4 / 21


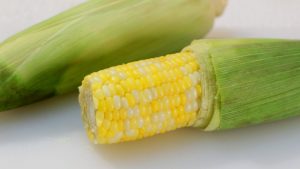
Here’s a simple trick to cleaning up corn on the cob while not quite cooking it all the way. I love corn on the grill but husking it before hand can be a pain trying to get all the strings off.

Cut off the bottom of the cob just above first row of kernels. Place on microwave-safe plate, cover with a damp paper towel and microwave on full power for 30 to 60 seconds. (If you want to fully cook the corn, microwave for 4 min. per cob)

Remove from microwave and using a hot pad or cloth pinch and squeeze the top of the husk to push out the whole corn. It should slip out fairly easy.

Proceed to cooking it in the manner you like.


Leave a comment
Share
  • Pin it
  • Share
  • Tweet
  • Share
  • Email

What to Plan/Plant for Your Fall Garden

8 / 2 / 21

Fall into Winter Gardens

Remove any summer crops that are starting to fade and prepare soil with mulch, mycorrhiza, compost.  Re-plant with fall/winter crops or cover crops.

Plant last round of heat loving crops

(early) tomatoes with harvest dates within 50-60 day range

Summer/winter squash (same requirements)

Peppers

Mid-season planting in August

Basil

Beans

Beets

Broccoli

Brussels sprouts

Cabbage

Carrots

Cauliflower

Chives

Cilantro

Cucumber

Dill

Lettuce

Kale

Mustard Greens

Onion, Shallots, Green onions

Radish

Peas, plant 2 rounds, August and again in Sept for fall/spring harvest

Spinach

Turnips, baby white turnips & regular

Late summer (end of Sept) plant cover crops for any areas where you won’t be planting any winter crops.


Some cool season vegetables should probably be protected from the hot months of Sept into Oct. But by planting these vegetables/fruits now they will benefit from the warmth of the soil and the longer days. If you wait too long, late Oct, the soil is already cooling down and the sun is leaning towards winter, the days growing shorter.

Need more help? Send me an email with questions. I have video’s available for guidance, contact me, [email protected]


Leave a comment
Share
  • Pin it
  • Share
  • Tweet
  • Share
  • Email

San Diego County Farm Tour

2 / 21 / 202 / 27 / 20
San Diego County Farm Tour
Sat, April 18th
10:30-4
$125.00
Hosted by Chefs Secrets which is a new collaboration between
Debs Kitchen
&
California Greek Girl
Meet up at
Mountain Meadow Mushroom Farm, Escondido


Farm Tour!
Do you know how mushrooms grow? You’ll learn everything about mushrooms that you need to know! Did you know that mushrooms are a nutrient dense food? Good for you!

Here’s a link to their website for more info
Mountain Meadow Mushroom Farm
Here’s a blog post about the farm & yummy Mushroom Risotto recipe from Mary at California Greek Girl
Mushroom Risotto


Next we’ll head over to
North County Olive Oil Co. and meet Sue Rober at her Sunshine Gardens location where we will taste and experience their True California Olive Oils with style.

Their vision is to share with you their experience in the California olive oil industry. They have selected a portfolio of top producers who make both extra virgin olive oils and vinegars from California olives and grapes. They represent a variety of regions which offer unique styles from many varietals and cultivars of local California olives. We look for producers that promote sustainable practices in the grove and throughout their day to day practices.

Our Olive Oil Tastings offer a unique experience created around a variety of artisan producers of California extra virgin oil, wine and specialty artisan products.

A cooking demo & lunch will be served by
Chef Debbi & Chef Mary

Menu*

Cheese Platter with Seasonal Vegetables & Fruit
Winter Salad with Pixie Tangerines
Mushroom Risotto
Road Home Brownies

*Menu subject to availability
One glass of wine will be served with lunch.
Lemonade & Spring Water will be available.

Don’t miss the great swag bags that you’ll get to take home!

We encourage car pooling, need a ride or want to provide a ride?
Get in touch with Chef Debbi here
[email protected]

Now taking reservations

# in Party


Sponsored by Melissa’s Produce

Leave a comment
Share
  • Pin it
  • Share
  • Tweet
  • Share
  • Email

What’s In Season Now

1 / 27 / 20

Straight from your local farmers market you should start to see some of this produce available.

Asparagus
Avocados
Beets
Broccoli
Brussels Sprouts
Cabbage
Carrots
Cauliflower
Celery
Chard
Citrus:
Blood Orange
Grapefruit
Lemons
Navel Oranges
Tangelos/Tangerines
Lettuce
Mushroom
Mustard
Onion, Green
Passion Fruit
Peas, Snow & Sugar Snap
Spinach
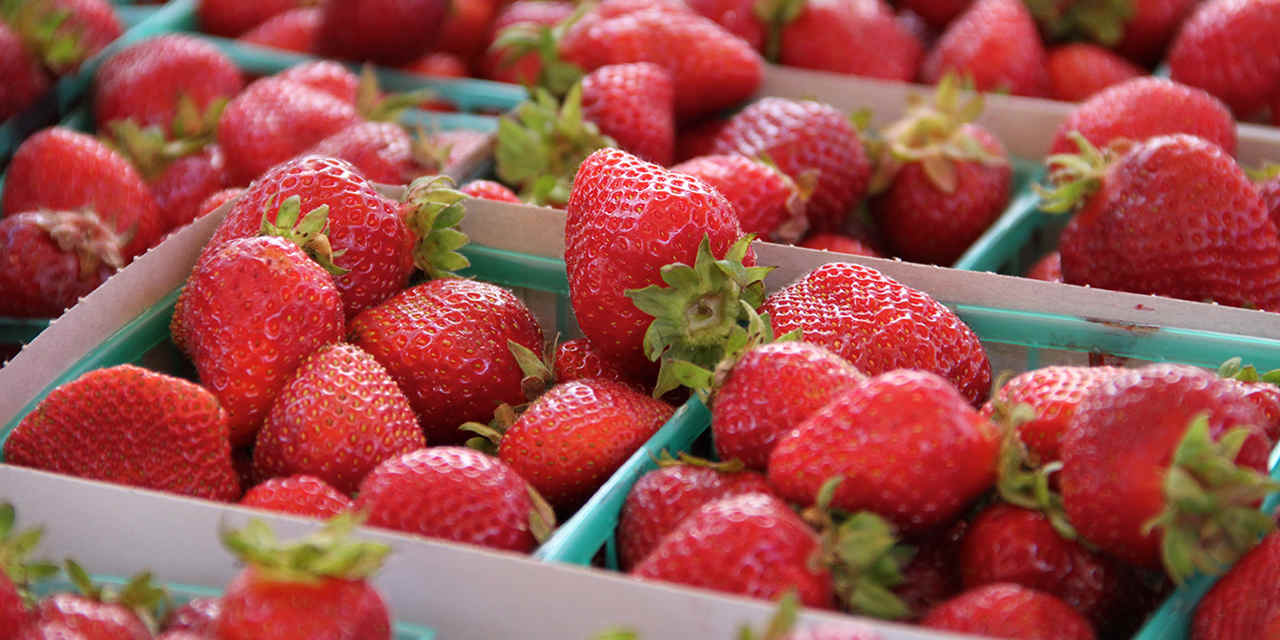
Strawberries
Turnips

Leave a comment
Share
  • Pin it
  • Share
  • Tweet
  • Share
  • Email

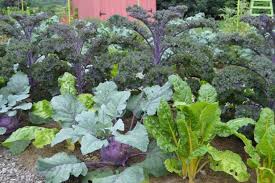
Fall/Winter Vegetable Gardening

9 / 26 / 19

Vegetables to plant in our

So. California gardens now


Beets

Be sure to thin plants to about 3″ apart and harvest when they are small for a sweet flavor. Leaves and stems are edible, steam lightly or add to a salad.
To cook, place in a piece of foil, drizzle with olive oil and salt and pepper. Roast in a 450° oven for about 10-15 min. or until tender. Rub skin off with a towel

 Broccoli/Cauliflower

Buy transplants in the fall and bury the stem up above second row of leaves. Try roasting these vegetables in a 450° oven. Place cut up pieces on a parchment lined baking sheet, toss with a little olive oil, salt and pepper and any other seasoning you may like (red pepper flakes, garlic powder, lemon juice. Roast for 10 -15 minutes or until tender.

Cabbage

Cabbage is in the same family as broccoli and cauliflower. Homemade sauerkraut is the best! Cut out the fore of the cabbage and thinly slice the leaves into shreds. Place in a large bowl, add 1 1/2 Tb. kosher or canning salt and knead or massage the salt into the cabbage until it releases it’s liquid. Pack into a quart jar with a wide mouth and pour all liquid over the cabbage. Make a brine of 1 cup water and 1 Tb. kosher salt, stir to dissolve salt and then pour it all into a quart freezer bag, place this on top on the cabbage and place a piece of cheesecloth over the mouth of the jar, tie down with string or a rubber band and place in a cool, dark place on your counter. The second day, remove bag and press down on the cabbage to see if it will release more moisture. It should ideally cover the cabbage, if it doesn’t add more brine by either adding the ingredients in the freezer bag or make a new brine by stirring together 1 cup water and 1 tea. kosher salt. cover the cabbage and let stand for 3 -10 days. Begin tasting sauerkraut on the 3rd day, when it reaches the flavor you want, place a cap on the jar and store in your refrigerator.

Carrots

Make sure you have nice loose soil so the carrots can grow long and deep. Thin them when they sprout to give them room to grow, add the thinnings to your salad, soup or stew. Slow roast carrots as you would the broccoli or cauliflower. Drizzle with honey after roasting.

Leafy Greens

Lettuces, spinach, chard, mustard and kale all grow very well over the winter but plant at 2 -3 week intervals for a staggered supply of greens instead of harvesting all at once. Many greens can be lightly sautéed or eaten raw.

Onions & Garlic

Plant onions from ‘starts’ rather than from seeds. Pick short day varieties for best harvest. Scallions that are succession planted can be harvested over the winter/spring season.
Plant garlic from bulbs, plant pointed end up and cut off any green that is sprouting from the top.

Peas

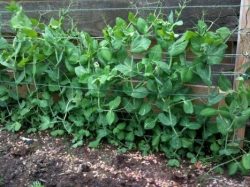
Fall & Spring harvested peas are sweet and easy to grow. Plant a variety from English peas or shelling peas to sugar snap peas. Give them a trellis or cage to grown on and harvest daily for a continued harvest.
Peas and pea pods are lovely lightly steamed or even raw.

You can still plant sweet peas this month for spring flowering

Leave a comment
Share
  • Pin it
  • Share
  • Tweet
  • Share
  • Email

Rancho Los Alamitos

4 / 8 / 194 / 8 / 19

Chef Debbi returns to the Rancho! We’ve been waiting a long time to bring our classes back to Rancho los Alamitos. We’ve schedule our first class for Sat. June 8th, we’re going to pickle!

Saturday, June 8, 2019
9:30 am – 12:30 pm
$75 Future member/ $65 per RLA member
Advance Reservations Required,  Reservations close 5/27/19


Click here to sign up


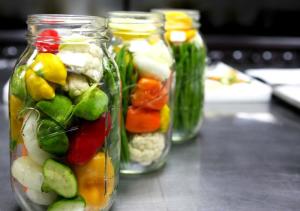
Join us at Rancho Los Alamitos for a hands-on class on the basics of pickling and fermenting vegetables from your garden or the farmers’ market. In this class, you will make two kinds of pickled vegetables and a jar of sauerkraut. (If you think that you don’t like sauerkraut, wait until you try your own!) This is a refrigerator-style pickling where no water bath canning is necessary. Chef Debbi will demonstrate techniques, discuss food safety and the basics of canning pickles in brine. Each participant will prepare and take home three jars of their very own preserved produce.

The class is suitable for adults and interested teens. Reservations are required. Parking is limited at Rancho Los Alamitos, so car-pooling is encouraged and appreciated.


Sponsored by

Leave a comment
Share
  • Pin it
  • Share
  • Tweet
  • Share
  • Email

Green Beans, Bacon and Caramelized Shallots

8 / 22 / 178 / 23 / 17

Grow a Second Crop of Green Beans

In Southern California we are lucky enough to grow a fall crop of beans. With warm days still ahead the beans will sprout and grow quickly. Bush beans are your best bet, with shorter days to harvest than pole beans you should be able to harvest in just 45-50 days. Check your seed packet for harvesting information.
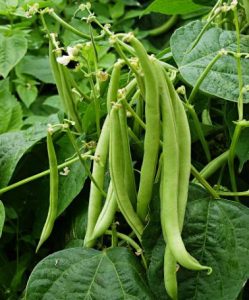
There are three types of bush beans, snap beans (eat the pod & all), shelling beans (eat the beans inside the pod like peas) or dried beans. Dried beans you’ll want to leave on the plant until everything has dried up, pick the dried pods and put into a grocery bag. You can knock the bag around to remove the shell or pull the dried pod away from the beans. I like to freeze the beans for 24 hours to kill any pests that may have hitched a ride. Then store in a glass jar or other container in your pantry, away from heat and light. When you’re ready to use them, treat them like any other dried bean (that’s another story….)

Most bush beans don’t need to be trellised, and they produce most of their crop all at once. For a great harvest and good use of space, plant Square Foot Gardening style, 9 plants to a square foot.
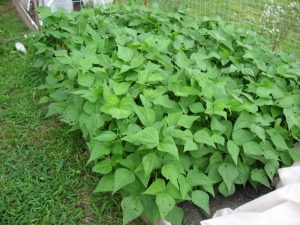
To get the best crop inoculate your bean seeds before planting. Beans, peas and all legumes ‘fix’ nitrogen into the soil. The inoculant, Rhizobium leguminosarum,  is a nitrogen fixing bacteria. These bacteria “infect” the legumes growing in the soil and cause the legumes to form the nitrogen fixing nodules that make peas and beans bombshells.
You should be able to find the inoculant at any garden center or nursery. It can also be ordered from www.groworganic.com (Peaceful Valley Farm Supply).

While you are digging the holes for the seed, soak the seeds in water for about ½ hour. Dig your hole and sprinkle a generous helping of inoculant into the hole. Water and then plant your seeds. They’ll take up to 10 days to sprout, don’t overwater while you are waiting for them to poke up from the ground, overwatering can cause the seed to rot before it sprouts. Watch out for birds as well, they love seeds! I like to cover my bed with a floating row cover until the seeds are up and have several sets of leaves.

Give the plants 2 – 3” of water a week and you can side dress with a little compost. I mulch my beds with straw to help keep water evaporation down and to keep weeds from sprouting.

Plant companion plants near beans for the best growing bed, they like to grow near beets, cucumber, nasturtiums, peas and radish.

Watch for pests such as a cucumber beetle, bean beetle or weevil. I planted my beans near basil which is usually a good pest deterrent but this year those white butterflies (which are really cabbage moths) laid eggs on the basil and the little worms devoured my newly sprouted beans. So I planted a new round because I love green beans, especially in the fall. I freeze some for soups when winter comes and hopefully have enough until next spring when I can get some more in the ground.

Here’s an easy side dish recipe for you to try.
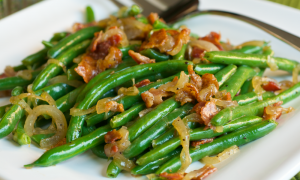
Green Beans with Smoked Bacon & Caramelized Shallots

Save
Print

Serves 6
* To blanch green beans: Fill a large bowl with ice and cold water leaving room for green beans. Bring a large saucepan full of water to a boil and add green beans and a good helping of salt, cook for 1-2 minutes, drain the beans and plunge them into the bowl of ice water. Let them cool, drain and dry well.

  • 2 pounds haricots verts (thin green beans), trimmed, blanched and dried well*
  • ½ pound applewood smoked bacon
  • 3 large shallots, quartered
  • 2 tablespoon olive oil
  • 2 tablespoons red wine or balsamic vinegar
  • Sea salt & freshly ground black pepper

Cook bacon until crisp. Remove with a slotted spoon, and drain on paper towels, reserving 2 Tbsp. drippings in skillet.

Add olive oil to the pan with the bacon drippings then add the quartered shallots and sauté until browned. Add the vinegar, stir well, then add the green beans and toss until coated with oil, cook for another minute then season with salt and pepper and toss with bacon, serve hot.

Leave a comment
Share
  • Pin it
  • Share
  • Tweet
  • Share
  • Email

Tips on Growing Tomatoes

3 / 16 / 17

How To Grow Great Tomato Plants


Buy transplants

Purchase healthy, stocky plants that have no flowers, fruits or buds

Choose a sunny location, rotate planting beds every year

Plant in an area where you may have grown peas or beans the previous year

Add compost to the soil and make sure the soil isn’t compacted.


Succession plant

Choose an early variety that can be planted in early spring. I like to plant my main crop in April and then another couple of plants in July for fall harvest. Check Sunset Gardening Guide for the best time in your area to plant.

Depending on how you’re going to stake or cage tomatoes, have all the equipment ready for planting day, stake the plants at the same time you transplant.


Planting

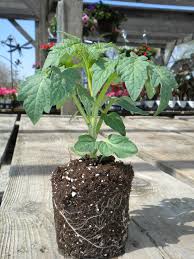
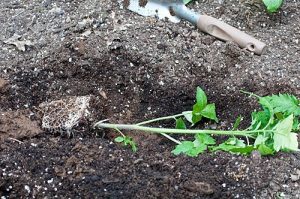
When planting remove lower leaves and plant the tomato deep, so that only about 3” are above ground. Tomato plants have the ability to grow roots from the buried stem. Water well after planting. Water well and deep but infrequently, keep your watering consistent, tomatoes need about 1” water a week.

Fertilize

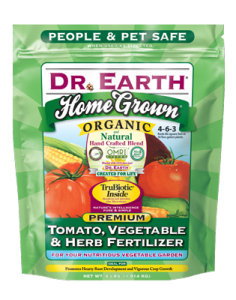
Don’t over fertilize your tomato plants. Use a high phosphorus content fertilizer such as Dr. Earth Organic Tomato/Vegetable Fertilizer, 5-7-3. A high nitrogen content will give you lots of green leaves but little fruit.

Pinch branches out

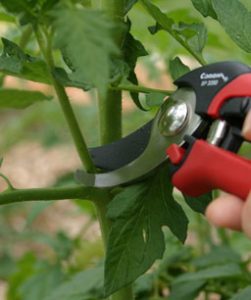
I always pinch out side shoots in the beginning to help the plant grow tall rather than gangly.

Mulch and Companion Planting

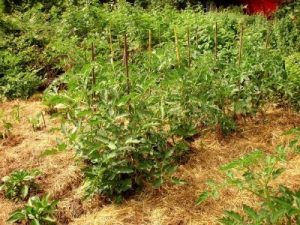
Tomatoes love carrots; basil and marigolds so plant them in the same bed and mulch the rest of the soil to keep the moisture in.


Related Posts Plugin for WordPress, Blogger...
Leave a comment
Share
  • Pin it
  • Share
  • Tweet
  • Share
  • Email

Posts navigation

1 2 3 Next Page
Deb

Meet Chef Debbi

READ BIO

Join-Us Sign up for our newsletter to receive exclusive tips 'n tricks, and special offers on classes, tours, and more!

Recent Posts

  • New E-Book!
  • From the Pantry
  • Spaghettini at Home
  • Growing Corn
  • Spring IS Coming!

Categories

BookCUT

What's in Your Pantry?

How to stock your pantry to create delicious dishes.

Learn Chef Debbi's pantry essentials and how to substitute ingredients for pantry staples in her basic recipes for quick and easy meals.
BUY BOOK>

FacebookTwitterInstagramGooglepinterest


© 2014, DEB'S KITCHEN
Angie Makes Feminine WordPress Themes