Deb's Kitchen - Farm, Food, Wine & Lifestyle Adventures
  • Facebook
  • Google
  • Twitter
  • Instagram
  • Pinterest
  • Email
Menu
Skip to content
  • Home
  • Blog
  • Events
    • Classes
    • Tours & Adventures
  • Edible Gardening
  • Preserving
  • Recipes
    • Appetizers
    • Soups and Salads
    • Main Dishes
    • Side Dishes
    • Desserts
  • About
    • Whats In Your Pantry
    • Ask Debbi
    • Deb’s Kitchen Botanicals
    • Press
  • Contact

Tag Archives: cooking with herbs

Pantry Cooking

3 / 23 / 20

Here are a few Cooking From The Pantry recipes for you to enjoy. For more ideas on how to stock your pantry and learn new ways to cook, check out my first book, ‘What’s In Your Pantry’. Available below

No-Knead Cranberry Nut Bread

Save
Print
  • 3 cups + 2 Tablespoons all-purpose flour, plus more for hands
  • 2 teaspoons coarse sea salt
  • ½ teaspoon yeast
  • ¾ cup chopped walnuts
  • ¾ cup dried cranberries
  • 1 tablespoon honey
  • 1 ½ cups warm water

Stir the first 6 ingredients together in a large bowl. Stir in the warm water. The dough will be sticky. Gently shape into a ball as best you can. Cover tightly with plastic wrap or aluminum foil. Set on the counter at room temperature and allow to rise for 12-18 hours. The dough will double in size, stick to the sides of the bowl, and be covered in air bubbles.

Turn the dough out onto a lightly floured work surface and, using lightly floured hands, shape into a ball as best you can. Doesn't have to be perfect! Transfer dough to a large piece of parchment paper.

Using a very sharp knife, gently score an X into the top. Cover dough lightly with plastic wrap and leave alone for 30 minutes.

Preheat the oven to 475°. Place your Dutch oven (with the lid) inside for 30 minutes so that it's extremely hot before the dough is placed inside. After 30 minutes, remove the Dutch oven from the oven and carefully place the dough inside by lifting it up with the parchment paper and sticking it all-- the parchment paper included-- inside the pot. Cover with the lid.

Bake for 25 minutes with the lid on. Carefully remove the lid and continue baking for 8-10 more minutes until the bread is golden brown. Remove pot from the oven, carefully remove the bread from the pot, and allow to cool on the counter for 30

minutes before breaking/slicing/serving.

Cover and store leftover bread at room temperature for 1 week.

Adapted from Sally’s Baking Addiction

Oatmeal Fruit Bars

Save
Print
  • 2 sticks unsalted, cold butter, cut into cubes
  • 1 ½ cup flour
  • 1 cup packed brown sugar
  • 2 cup oats
  • ¼ teaspoon salt
  • teaspoon baking powder
  • 1 8 oz. jar fruit spread

Preheat oven to 350°. Butter a 9x 13” baking dish and line the bottom with parchment paper.

In a medium size bowl, mix together the flour, baking powder, salt, oats and brown sugar. Stir together to mix the dry ingredients. Using a pastry blender or your fingers, mix the butter into the dry mix. If using your fingers pinch the butter into the dry mix to distribute the butter into small pieces about the size of a pea.

Press half of the mixture into the prepared pan. Spread the jar of jam or fruit spread evenly on top of the crust. Sprinkle the other half of the oat mixture on top of the fruit spread. Bake in your oven for 30 – 40 minutes. Cool completely in the pan. Cut into squares.

Recipe adapted from Just Jans
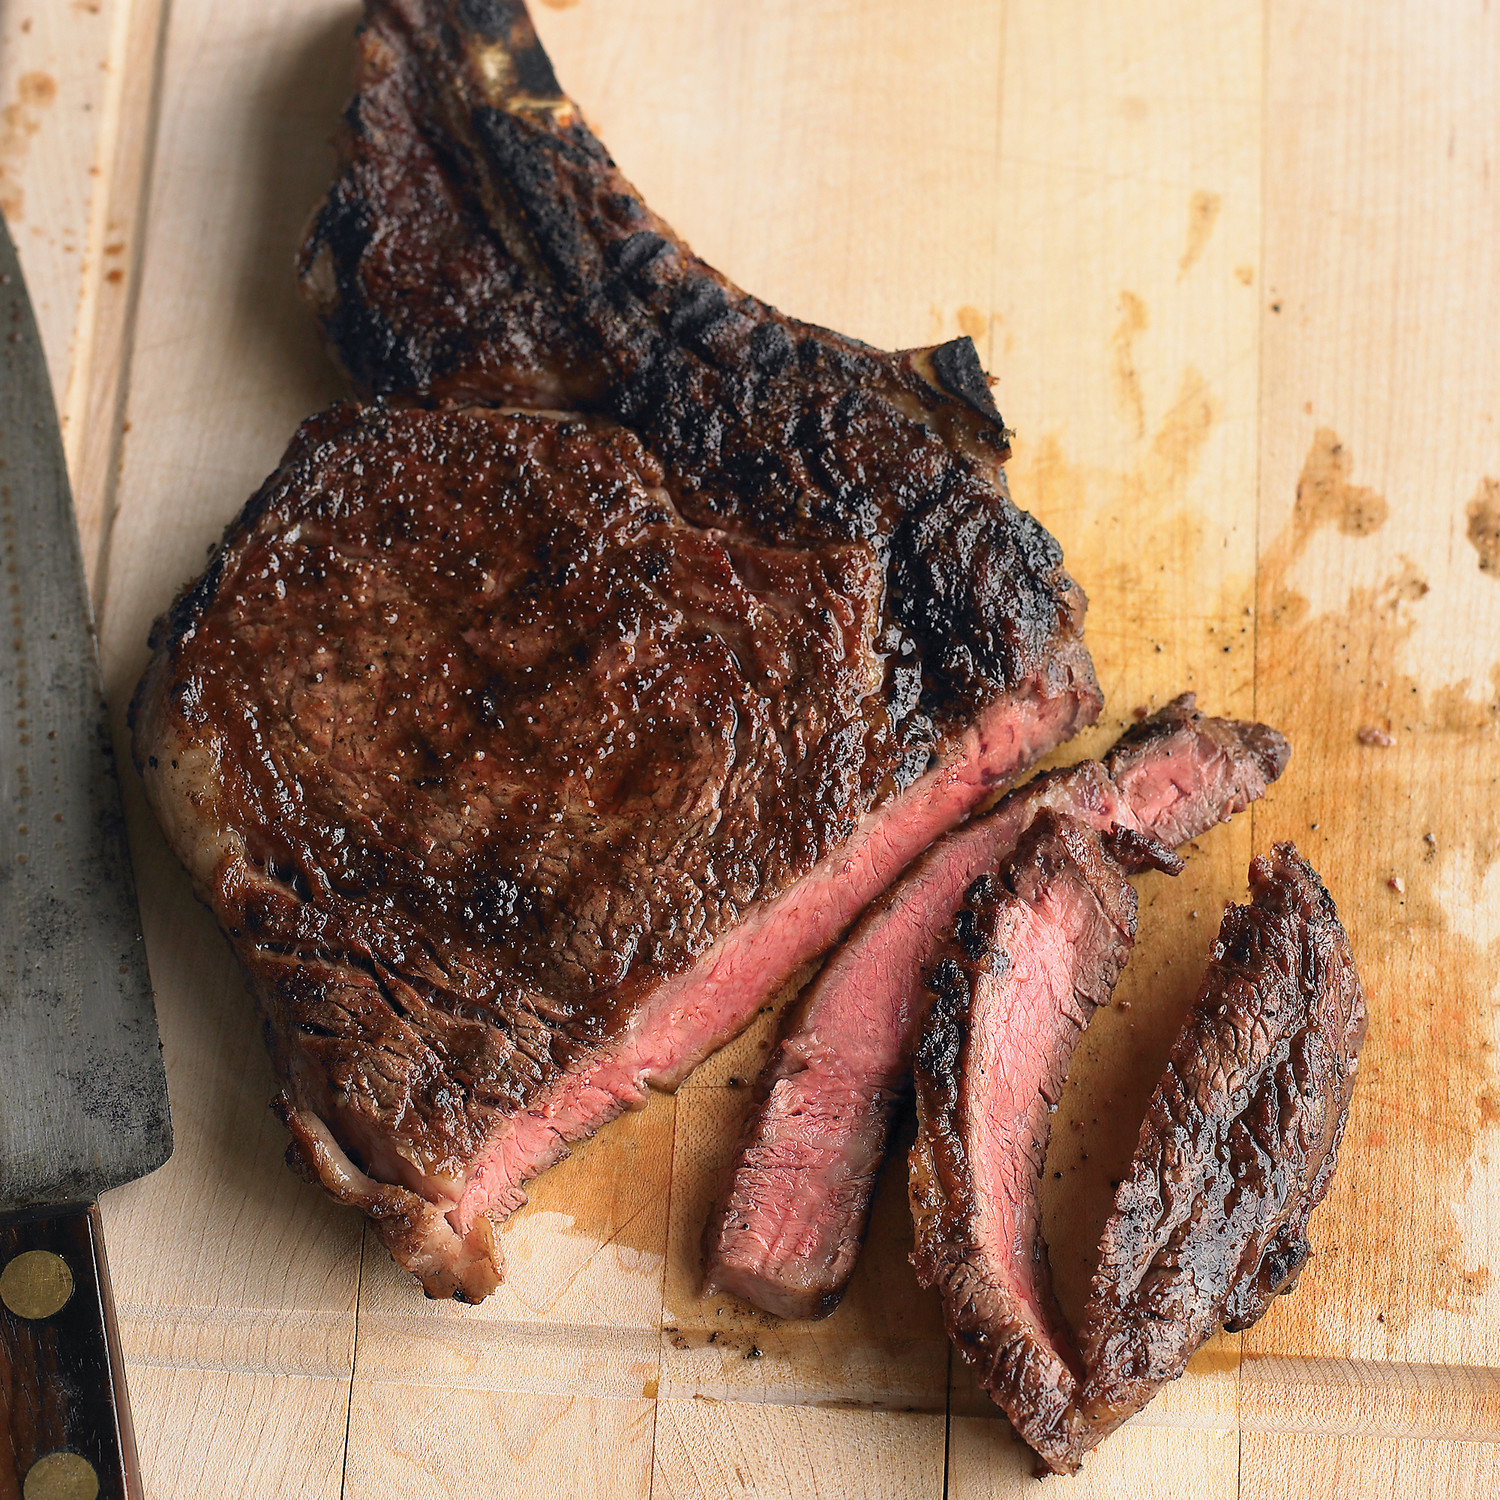
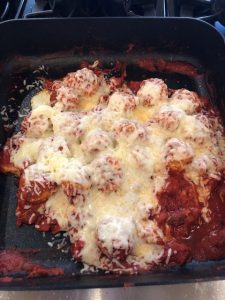
Chicken Parmigiana

Save
Print
  • 2 boneless skinless chicken breasts, cut in half side to side (butterflied)
  • Sea salt and pepper
  • ¼ cup flour, approximately
  • 1 teaspoon garlic powder
  • 1 teaspoon ground Italian spices
  • 2 eggs, lightly whisked
  • 1 cup panko breadcrumbs
  • ½ cup parmesan cheese, grated
  • 2 tablespoons olive oil
  • 1 cup marinara sauce
  • ½ cup mozzarella cheese, shredded

Place chicken into a freezer type bag and pound until about ½” thick. Pound each piece until ½ inch thick. Sprinkle with salt and pepper.

Set up a dredging station, place each of the following next to each other beginning with the flour.

Mix flour with garlic powder and Italian spices, place on a plate or shallow dish for dredging.

Place whisked egg into a shallow bowl and set next to flour.

Mix breadcrumbs and Parmesan cheese and place into another shallow dish or plate next to the egg.

Serves 4

Dip the chicken pieces, one at a time into the flour, then egg and then the Parmesan breadcrumb mixture.

Heat a pan large enough to hold all the chicken pieces so they don’t touch, add olive oil and then the chicken, don’t overcrowd the pan or the pieces won’t brown. Cook until lightly browned then set aside, if needed, and cook remaining pieces.

When finished browning the chicken you can add them back to the pan or place on a sheet pan and top with a little marinara sauce and mozzarella cheese, broil until cheese has melted.

Serve immediately.

Fettuccini Alfredo

Save
Print
  • 1 pound fettuccini
  • 2 cups heavy cream
  • ¾ cup grated Parmesan cheese
  • 3 tablespoons butter
  • 1 pinch ground nutmeg
  • ground black pepper to taste

Serves 4

Cook pasta according to directions on package. Drain and set aside.

In a medium saucepan over low heat, heat cream and butter, stirring

constantly. When cream begins to simmer mix in a small amounts of Parmesan

cheese, stirring constantly, until all cheese is added, and sauce has

reduced. It should be thick and easily cover the back of a spoon.

Stir in nutmeg and black pepper. Toss with warm fettuccini and serve.

Meyer Lemon and Blood Orange Cannoli’s

Save
Print
  • 1 15 oz. container of whole milk ricotta cheese
  • 1/2 cup confectioners sugar
  • 2 tablespoons white sugar
  • 1 teaspoon vanilla
  • 1 Meyer lemons, zested and juiced
  • 1 Blood orange, zested
  • Prepared Cannoli shells

Prepare the filling by combining all the ingredients in a bowl and mixing with an electric mixer until well-combined. Refrigerate for at least an hour and up to 2 days.

Fill a plastic zip bag with the ricotta mixture, snip off a corner of the bag, and pipe the mixture into the shells. Serve and enjoy!


Leave a comment
Share
  • Pin it
  • Share
  • Tweet
  • Share
  • Email

San Diego County Farm Tour

2 / 21 / 202 / 27 / 20
San Diego County Farm Tour
Sat, April 18th
10:30-4
$125.00
Hosted by Chefs Secrets which is a new collaboration between
Debs Kitchen
&
California Greek Girl
Meet up at
Mountain Meadow Mushroom Farm, Escondido


Farm Tour!
Do you know how mushrooms grow? You’ll learn everything about mushrooms that you need to know! Did you know that mushrooms are a nutrient dense food? Good for you!

Here’s a link to their website for more info
Mountain Meadow Mushroom Farm
Here’s a blog post about the farm & yummy Mushroom Risotto recipe from Mary at California Greek Girl
Mushroom Risotto


Next we’ll head over to
North County Olive Oil Co. and meet Sue Rober at her Sunshine Gardens location where we will taste and experience their True California Olive Oils with style.

Their vision is to share with you their experience in the California olive oil industry. They have selected a portfolio of top producers who make both extra virgin olive oils and vinegars from California olives and grapes. They represent a variety of regions which offer unique styles from many varietals and cultivars of local California olives. We look for producers that promote sustainable practices in the grove and throughout their day to day practices.

Our Olive Oil Tastings offer a unique experience created around a variety of artisan producers of California extra virgin oil, wine and specialty artisan products.

A cooking demo & lunch will be served by
Chef Debbi & Chef Mary

Menu*

Cheese Platter with Seasonal Vegetables & Fruit
Winter Salad with Pixie Tangerines
Mushroom Risotto
Road Home Brownies

*Menu subject to availability
One glass of wine will be served with lunch.
Lemonade & Spring Water will be available.

Don’t miss the great swag bags that you’ll get to take home!

We encourage car pooling, need a ride or want to provide a ride?
Get in touch with Chef Debbi here
[email protected]

Now taking reservations

# in Party


Sponsored by Melissa’s Produce

Leave a comment
Share
  • Pin it
  • Share
  • Tweet
  • Share
  • Email

Fall/Winter Vegetable Gardening

9 / 26 / 19

Vegetables to plant in our

So. California gardens now


Beets

Be sure to thin plants to about 3″ apart and harvest when they are small for a sweet flavor. Leaves and stems are edible, steam lightly or add to a salad.
To cook, place in a piece of foil, drizzle with olive oil and salt and pepper. Roast in a 450° oven for about 10-15 min. or until tender. Rub skin off with a towel

 Broccoli/Cauliflower

Buy transplants in the fall and bury the stem up above second row of leaves. Try roasting these vegetables in a 450° oven. Place cut up pieces on a parchment lined baking sheet, toss with a little olive oil, salt and pepper and any other seasoning you may like (red pepper flakes, garlic powder, lemon juice. Roast for 10 -15 minutes or until tender.

Cabbage

Cabbage is in the same family as broccoli and cauliflower. Homemade sauerkraut is the best! Cut out the fore of the cabbage and thinly slice the leaves into shreds. Place in a large bowl, add 1 1/2 Tb. kosher or canning salt and knead or massage the salt into the cabbage until it releases it’s liquid. Pack into a quart jar with a wide mouth and pour all liquid over the cabbage. Make a brine of 1 cup water and 1 Tb. kosher salt, stir to dissolve salt and then pour it all into a quart freezer bag, place this on top on the cabbage and place a piece of cheesecloth over the mouth of the jar, tie down with string or a rubber band and place in a cool, dark place on your counter. The second day, remove bag and press down on the cabbage to see if it will release more moisture. It should ideally cover the cabbage, if it doesn’t add more brine by either adding the ingredients in the freezer bag or make a new brine by stirring together 1 cup water and 1 tea. kosher salt. cover the cabbage and let stand for 3 -10 days. Begin tasting sauerkraut on the 3rd day, when it reaches the flavor you want, place a cap on the jar and store in your refrigerator.

Carrots

Make sure you have nice loose soil so the carrots can grow long and deep. Thin them when they sprout to give them room to grow, add the thinnings to your salad, soup or stew. Slow roast carrots as you would the broccoli or cauliflower. Drizzle with honey after roasting.

Leafy Greens

Lettuces, spinach, chard, mustard and kale all grow very well over the winter but plant at 2 -3 week intervals for a staggered supply of greens instead of harvesting all at once. Many greens can be lightly sautéed or eaten raw.

Onions & Garlic

Plant onions from ‘starts’ rather than from seeds. Pick short day varieties for best harvest. Scallions that are succession planted can be harvested over the winter/spring season.
Plant garlic from bulbs, plant pointed end up and cut off any green that is sprouting from the top.

Peas

Fall & Spring harvested peas are sweet and easy to grow. Plant a variety from English peas or shelling peas to sugar snap peas. Give them a trellis or cage to grown on and harvest daily for a continued harvest.
Peas and pea pods are lovely lightly steamed or even raw.

You can still plant sweet peas this month for spring flowering

Leave a comment
Share
  • Pin it
  • Share
  • Tweet
  • Share
  • Email

Holiday Entertaining

9 / 21 / 199 / 21 / 19

Winter Cooking Demo

Thur. Dec. 5th    

6:30 – 9:30, approximately

$65.00

Sold Out

This class is sold out but if you’d like to get on a wait list, send me a note

Wait List, click here


Charcuterie & Vegetable Platter

Tuscan White Bean Soup

Sun Dried Cranberry Salad with Orange Vinaigrette

Herb-Mustard Crusted Rack of Pork

Mascarpone Mashed Potatoes with Chives

Chocolate Raspberry Linzertorte


The class is in a private home,

Location is N. Seal Beach

Address will be given upon Registration

(562) 243-3926; If you’d like to send a check call for address please

Leave a comment
Share
  • Pin it
  • Share
  • Tweet
  • Share
  • Email

A Simple Meal

7 / 9 / 19

Grilled Prime Ribeye Steak

Last week we had friends over and grilled a Prime Ribeye steak that I had cut off a bone in prime rib roast, the steak was about 3 lbs. and 4″ thick. I had just attended a book signing/demo at Melissa’s Produce with Jamie Purviance and his new book, Weber’s Ultimate Grilling and was eager to try some of his fabulous recipes.

When I brought this book home my husband, Frank,  promptly stole it and put it on his side of the table. After several readings he was excited to try some new ideas that he picked up from the book. He decided to set up our Weber with a ‘hot’ side and a ‘cool’ side and he also wanted to get a little smoke on the steak so to get the ‘smoke’ he placed a chunk of hardwood into a pan, filled it with water and let it soak for an hour or so. Then he placed it on the hot side of the bbq, closed the lid and let it heat up to a smoke point.

I made sure the meat was nice and dry, seasoned it with Himalayan Pink Sea Salt and freshly ground pepper. We grilled it on the hot side of the bbq for about 3 minutes, turning it a quarter turn before flipping it over to the other side and repeating the process. Frank then moved the steak to the cool side and covered the Weber with the lid; we let it smoke until the steak was about 125°, removed it and let it rest for about 10 minutes before slicing it. This ensures the meat will be rare to medium rare when we do cut it; the steak will continue to cook after it’s removed from the heat and it needs the off heat time to let the juices settle back into the meat.

We added some grilled corn and a garden fresh salad with just picked tomatoes, cucumbers & mixed greens. The prime rib was tender, juicy with just a little hint of smoke, a success all around. We’ll definitely be using this method in the future for all cuts of meat and poultry. Thanks for the informative and thoughtful book Jamie!

Leave a comment
Share
  • Pin it
  • Share
  • Tweet
  • Share
  • Email

Artichokes!

4 / 10 / 194 / 10 / 19

Spring is nearly here and with it comes lovely artichokes. Artichokes are perennial plants in the same family as dandelions and sunflowers, they are a thistle plant and, in most artichokes, there is a center that’s inedible, the ‘choke’. In cooler climates, such as California’s northern coast they can be grown as annual’s. Spring and fall are times when you can find fresh artichokes in the markets. An easy plant to grow, they do require full sun and will take up a large space, 3 feet or more. Be sure to cut the artichoke before the leaves begin to open and it blossoms into a flower.

When you choose your artichoke, you want to make sure that it’s firm when you press the sides and you’ll often hear a squeaky noise, that’s good. The leaves should be tight and closed. If there is a little bit of brown on the leaves that’s ok, it just means there was a little frost during its growing season but that’s not a bad thing. The inside will be perfectly delightful. You also might want to consider only organic artichokes since you’ll be eating parts of the plant that may have been sprayed with pesticides during its growing season. Pesticides cannot be washed off with water or vegetables soaps, they are oil based and you know what happens when oil and water mix! If you can’t find beautiful California Artichokes in the market, here is a great local source where you can order them, Melissa’s Produce, http://www.melissas.com/Organic-Artichokes-p/1375.htm

To store your artichokes, you could place in a plastic bag and store in the produce drawer of your refrigerator or just pop it into the drawer itself. They will last up to 7 days but best eaten within a few.

Rinse the artichoke under cool water; pull off the lower, smaller leaves and cut the stem at the base of the choke. If you have a nice long stem, you can cook this separately and eat it like you would the heart, it tastes the same. If desired, with a sharp chef’s knife cut across the top third of the artichoke and snip the sticker off the remaining leaves. Even though there are many ways to prepare a fresh artichoke, most people fall back to either boiling/steaming them, although it takes quite a while, up to half an hour or more. You could put them in a microwave bowl or in an Instant Pot adding a cup of water and cook for 10 minutes, cover the microwave ones, or grill them over hard wood. Anyway is fine with me.

Here’s the traditional method:

Put them into a large pot and cover with cool water, squeeze two lemons into the water and a little sea salt, bring to a boil and simmer until you can run a small knife through the bottom part of the artichoke, 30-45 minutes or longer depending on the size of the vegetable. Remove from the water using tongs and picking up the artichoke with the top facing down so not to spill hot water all over yourself, drain and serve with my favorite sauce from Walt’s Wharf in Seal Beach.

Get the recipe here, 

Leave a comment
Share
  • Pin it
  • Share
  • Tweet
  • Share
  • Email

April Demo Class

2 / 4 / 192 / 10 / 19

We’ve Moved!

Join us in our new home at Chef Tech in Bixby Knolls, Long Beach with owner Chef Teri.

We now have a full kitchen with tables & chairs and lots of room. We look forward to seeing you there soon! See new address at the bottom of the class menu. You can sign up with Chef Debbi (call me, 562-243-3926) or click on the pay-pal button below. There is a small service charge for using pay-pal but you can always mail me a check. Classes are pre-paid reservations and cancellations are 100% refundable up to 3 days prior to class.

April Menu

Wed. April 10th

6:30 – 8:30PM

‘A Little Book of Cheese‘ is here!

Book Signing & Demo Class

How to Prepare a Cheese & Charcuterie Board and Tasting

Smoked Gouda and Red Pepper Grilled Cheese Sandwich Bites

Fried Blue Cheese Stuffed Olives

Italian Stuffed Shells with Broccoli and Pine Nuts

Brie Puff Pastry Pockets

NEW LOCATION!

Chef Tech Cooking School

3842 Atlantic Avenue
Long Beach, CA 90807

See  April class date & menu by clicking on the month.

By Reservation Only, Sign up below

$55.00

(562) 243-3926

Or

Debskitchen.com

[email protected]

Enjoy larger portions, Tables & More

Sponsored by 


Sign Up Here for Classes


Leave a comment
Share
  • Pin it
  • Share
  • Tweet
  • Share
  • Email

Fontina & Gruyere Gougére’s

12 / 29 / 1812 / 29 / 18


Save
Print

Makes 24-30

  • ½ cup water
  • ½ cup whole milk
  • 8 tablespoons unsalted butter, cut into pieces
  • 1 teaspoon salt
  • 1 cup plus 1 Tb. all-purpose flour
  • 4 whole eggs
  • ½ cup grated gruyere cheese
  • ½ cup grated fontina cheese

Preheat oven to 450° and line 2 pans with parchment paper or baking sheet liners.

In a large sauce pan, combine the water, milk, butter and salt and bring the mixture to a full boil over medium-high heat. When the butter has melted add the flour, all at once, and stir vigorously with a wooden spoon until the mixture forms a ball that pulls away from the sides of the pan.

Turn the heat down to medium and cook the dough for another 3 or 4 minutes to dry out and cook the flour taste out of the dough. It will look a little shiny and there will some starch remaining on the bottom of the pan and the dough will be stiff.

Transfer the dough to the bowl of a stand mixer fitted with a paddle attachment. (Alternatively, use an electric hand mixer or beat by hand with a stiff spatula.) Beat the dough on medium-low speed until it stops steaming and is just warm to the touch, about 1 minute.

Continue beating and add the eggs in one at a time. Wait for each egg to be absorbed completely before adding the next. Scrape down the sides of the bowl if needed. Once the dough comes together after the addition of all the eggs, add the cheese and mix until it’s well distributed.

Scoop rounded tablespoons of dough onto the baking sheets, spacing the about 1-inch apart. They can be piped on using a piping bag or a storage bag with the corner snipped off.

Press the top down with a fork or spoon dampened slightly with water, until the tops are smooth. Brush with the egg wash mix and bake for 5 minutes. Turn the heat down to 350° and bake for 20-25 minutes until they are golden brown. Rotate the sheets half way through the baking period. If the inside of the gougere isn’t done, turn off the oven and prop the door open with a wooden spoon for about ½ hour so they can dry out a little.

The gougere’s can be stored in the refrigerator up to a week or frozen for a month. You can fill these with any kind of cheese stuffing or serve them as a stand-alone bite.

Leave a comment
Share
  • Pin it
  • Share
  • Tweet
  • Share
  • Email

Chicken Parmesan Meatballs

11 / 30 / 18


Save
Print
  • 1 # ground chicken
  • ½ cup bread crumbs
  • ¼ cup grated parmesan cheese
  • 2 tablespoons Italian flat leafed parsley, chopped
  • 1 large egg
  • 1 tablespoon fresh ground Italian spices
  • Sea salt and pepper
  • Olive oil
  • 28 oz. can crushed tomatoes
  • 1 ½ cup shredded mozzarella cheese

Combine ground chicken, bread crumbs, parmesan cheese, parsley, egg and season with ground Italian spices and salt and pepper. Heat a large sauté pan, add enough oil to coast the bottom of the pan and brown meatballs on all sides. Remove meatballs and whip out the pan with a towel. Add the crushed tomatoes to the pan and bring to a simmer. Add the meatballs and mozzarella cheese and cook until the cheese is melted, about 10 minutes. Cover with a lid if you like to melt the cheese faster, the meatballs are already cooked.

Serve immediately over pasta.

Meatballs and sauce can be frozen for up to 3 months.

Adapted from Delish

Leave a comment
Share
  • Pin it
  • Share
  • Tweet
  • Share
  • Email

Lettuce Varieties

11 / 29 / 18


Are you hankering for some romaine lettuce? Well, there are tons of alternatives here in So. Cal for you. From the CDC website here’s what they are saying about the current outbreak of e coli on romaine lettuce.

‘Based on new information, CDC is narrowing its warning to consumers. CDC is advising that U.S. consumers not eat and retailers and restaurants not serve or sell any romaine lettuce harvested from the Central Coastal growing regions of northern and central California. If you do not know where the romaine is from, do not eat it.’
Here’s the link for more information, CDC.

Personally, I like a mix of lettuce mostly, a little crunch, a little color and a tangy dressing. My favorite is a good old Italian dressing made with a very good red wine vinegar. I love a little cheese as well, blue, parmesan or goat goes well with a tangy Italian dressing.

Just mix a little Dijon mustard, like Maille, with your red wine vinegar, add a little minced shallot, some fresh ground Italian spices and whisk in a little olive oil, season with salt and pepper and you’re done.
Local lettuce varieties are usually more plentiful during the winter as most lettuce prefers to grow in the cooler weather. Here are some varieties that will offer no only color but flavor to your salad bowl.

Choose lettuce that is bright with no brown edges or spots. Try and get them not too wet, if they are wet, they have a tendency to go bad faster. Pick whole heads of lettuce rather than bagged lettuce. The more lettuce is handled from field to bag the greater chance it can pick up any bacteria. Bagged lettuce can also be washed with chlorinated water and tends to be older than a non-bagged lettuce. Are you tempted to buy the bag that says triple washed and leave it at that? That lettuce may be contaminated with more than just chlorinated water and if it’s wet at all it will likely rot within a couple of days in that bag. Buy un-bagged lettuce, wash and dry well before storing. You might notice that if you purchase your lettuce at a farmers market that it lasts longer than a store bought lettuce, it’s because your farmers market lettuce was probably picked within a couple of days. I’ve had lettuce last up to 2 weeks from my farmers markets. So here are just some of the lettuce types you should be able to pick up anywhere.

Arugula (Rocket)-spicy and peppery, the larger the leaves the more bite it will have

Batavia is a loose-leaf lettuce similar to red or green leaf lettuce with a mild flavor

Belgian Endive-these can be a tad bitter, but they will add crunch to any salad mix

Butter-a very mild lettuce with big cupped leaves, great for serving topped with a crab salad

Frisee (Curly Endive)-Sometimes called chicory, the leaves are thin and curly with a little bit of a bite, aka peppery.

Iceberg-A dense head of lettuce with lots of crunch but little flavor

Leaf Lettuce, Red or Green-Another loose leaf lettuce with mild flavor but both add a lot of color to a salad bowl, great on sandwiches as well.

Little Gem-This lettuce looks like a mini version of romaine but it’s not as crunchy, mild flavor

Oakleaf-Another beautiful bi-colored loose-leaf lettuce that has a mild taste

Radicchio-There are numerous colors of radicchio, most have a little bitterness but a great addition to any salad.

Spring Mix-Usually a variety of small lettuces, some are mild, and some mixes can be spicy.

Watercress – Although probably a little difficult to find it makes a nice addition to a mixed salad or added to a rustic piece of bread slathered with some soft cheese. It has a peppery bit, much like Arugula. Use smaller leaves for less intense flavor.

Leave a comment
Share
  • Pin it
  • Share
  • Tweet
  • Share
  • Email

December Cooking Demo

11 / 16 / 18


Join us in Seal Beach

Thursday,

Dec. 6th Only!

6:30 – 8:30, approximately


Camembert & Cranberry Pastries

Mini Spanakopita

Cabernet Braised Short Rib Bites

Warm Potato Salad with Bacon

Chocolate Peppermint Cake

$45.00
For reservations call
Temecula Olive Oil, 148 Main St. Seal Beach
(562) 296-5421


Sponsored by

What’s coming up in 2019?

We will continue to host 2 cooking demo’s a month but we will host them on Thursdays and Tuesdays. Here are the dates for Jan – Mar. Menu’s tbd

Jan

Thur. 10th & Tues. 22nd

Feb. 

Thur 7th & Tues 19th

Mar.

Thur 7th & Tues 19th

Happy Holidays!

Leave a comment
Share
  • Pin it
  • Share
  • Tweet
  • Share
  • Email

Herb Roasted Turkey

11 / 16 / 18

From my book, What’s In Your Pantry. Buy the book here


Herb Roasted Turkey

Save
Print

I no longer stuff my turkey; it takes too long to cook the stuffing to 165°, the recommended temperature to kill any bacteria; by that time the turkey itself is overcooked. I can also make the dressing the day before, bake it and heat it while I’m making the gravy.
Try serving with Duchess Potatoes instead of the traditional mashed.

  • 12-14 lb. free range or organic turkey, room temperature
  • 2 medium onion, quartered with skin on
  • 4 carrots, peeled and rough chopped
  • 3 celery stalks, rough chopped
  • 1 bay leaf
  • 1 bunch Italian flat leaf parsley
  • 1 bunch fresh sage
  • 1 bunch fresh thyme
  • ¼ cup butter, room temperature
  • salt and pepper
  • 1 lemon, Meyer lemon is preferred
  • 1 cup white wine
  • 1 cup turkey stock, see recipe in Basics chapter
  • Gravy
  • ¼ cup dry white wine
  • 8 tablespoons unsalted butter
  • ½ cup flour
  • 7 cups turkey stock, approximately
  • salt and pepper

Preheat oven to 425°.

Wash and dry turkey inside and out; dry well.

Choose a roasting pan that will fit the turkey with no more than 2” of space on any side, otherwise the juices that accumulate in the bottom of the pan may burn.

Place ¾ of the onion, carrots and celery plus bay leaf, ½ of the bunch of parsley, sage and thyme into the bottom of a baking pan that will fit the turkey, don’t let the turkey hang over the edge and make sure there is no more than 2” open on each side of the bird. (The turkey will sit on this bed of vegetables instead of a rack).

Pat the turkey dry and rub the turkey with butter, season with salt and pepper. Squeeze lemon over turkey and tuck rind under the bird. Insert an oven-proof probe thermometer into thick part of the thigh and set for 165°.

Pour wine and turkey stock in the bottom of the pan and place uncovered in hot oven. (The total cooking time will be approximately 1 – 1 ½ hours).

Baste after ½ hour; if you don't have enough juice in pan use some extra stock. Do not cover bird until browned and then loosely place foil over breast. If wings start to brown too early, wrap with foil. Baste every ½ hour until the turkey is done. Remove from the oven, place turkey on a cutting board or platter, and tent lightly with foil, do not remove probe thermometer until you’re ready to carve the turkey. Let the turkey rest for 20 minutes before carving.

Remove the vegetables and herbs from the roasting pan; place the roasting pan on two burners, add the wine, and turn the heat to medium, bring to a boil and scrape the bits (fond) from the bottom of the pan. Strain this liquid into a large measuring cup, through a cheesecloth lined sieve before continuing, add turkey stock to equal 8 cups.

Make a roux for the gravy:

Add ½ cup of butter to the hot roasting pan and, when melted, add flour and whisk until roux is light brown.

Whisk pan the reserved pan drippings and stock into the roux, pouring in a steady stream until desired consistency is reached. Season with salt and pepper, keep warm.

Makes approximately 8 cups.

Turkey will serve 8-10

Related Posts Plugin for WordPress, Blogger...
Leave a comment
Share
  • Pin it
  • Share
  • Tweet
  • Share
  • Email

Posts navigation

Previous Page 1 2 3 4 … 9 10 Next Page
Deb

Meet Chef Debbi

READ BIO

Join-Us Sign up for our newsletter to receive exclusive tips 'n tricks, and special offers on classes, tours, and more!

Recent Posts

  • New E-Book!
  • From the Pantry
  • Spaghettini at Home
  • Growing Corn
  • Spring IS Coming!

Categories

BookCUT

What's in Your Pantry?

How to stock your pantry to create delicious dishes.

Learn Chef Debbi's pantry essentials and how to substitute ingredients for pantry staples in her basic recipes for quick and easy meals.
BUY BOOK>

FacebookTwitterInstagramGooglepinterest


© 2014, DEB'S KITCHEN
Angie Makes Feminine WordPress Themes