Deb's Kitchen - Farm, Food, Wine & Lifestyle Adventures
  • Facebook
  • Google
  • Twitter
  • Instagram
  • Pinterest
  • Email
Menu
Skip to content
  • Home
  • Blog
  • Events
    • Classes
    • Tours & Adventures
  • Edible Gardening
  • Preserving
  • Recipes
    • Appetizers
    • Soups and Salads
    • Main Dishes
    • Side Dishes
    • Desserts
  • About
    • Whats In Your Pantry
    • Ask Debbi
    • Deb’s Kitchen Botanicals
    • Press
  • Contact

Tag Archives: Foodies

Easy Thanksgiving Shortcuts

11 / 16 / 16

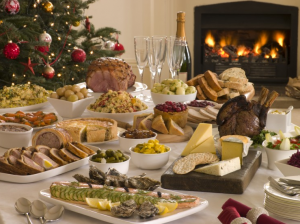
How to Make Stock & Gravy for the Holidays

These are two great project to make this weekend and freeze for your holiday next week. You don’t need to wait until the turkey is cooked before making your gravy. You can make the stock in a slow cooker, much hands off and you don’t need to precisely cut the vegetables since you will discard them after the stock is made. 
This time of year all grocery stores, especially the high end ones, Whole Foods, Gelsons, Lazy Acres, Bristol Farms will carry turkey and chicken pieces for your stock. You can mix chicken parts with the turkey and you won’t notice a difference.

Even if you say you don’t want ‘pre-made’ gravy and want to wait until your bird is done, make the roux (flour and fat which thickens the gravy) ahead of time and refrigerate. Cut up the vegetables for the stock, put them in a freezer bag and pop in the freezer until you make the actual stock. There’s enough to do at the last minute! I know many of you will balk at not stuffing your bird but it’s very dangerous and takes so much longer to cook that the turkey is usually overdone. If you insist that the dressing tastes better there are a couple of ways you can accomplish more ‘turkey’ flavor in the dressing. One, use turkey stock to make the dressing/stuffing and mince some turkey parts to mix in with the dressing. You can buy gizzards, hearts etc. and use them to make stock then mince and add to the dressing. Here’s a really great trick to cut down on time in the kitchen….Cut your turkey into pieces instead of cooking a huge unwieldy bird. Add the dressing to the pan with the turkey 30 minutes before it’s due to come out of the oven and you’ll have that ‘cooked in turkey’ taste. The turkey not only cooks faster, it’s easier to serve, easier to carve and the clean up is next to nothing. You won’t have that carcass that you try and cover and stick in the overcrowded refrigerator and you will have a perfectly cooked bird as you can now remove the breast pieces from the oven when they are done rather than take the chance the breast will be overdone before the legs/thighs are cooked. 

So those are my simple tricks to make Thanksgiving an easier meal to cook. Get started with these two short video’s and get cookin’ this weekend! 

Happy Thanksgiving to you all!

Here are a couple of video’s that I made with my friend, Christina Peters from
Food Photography Blog


Leave a comment
Share
  • Pin it
  • Share
  • Tweet
  • Share
  • Email

Holiday Appeteaser Party

11 / 4 / 16

Last Cooking Demo of the Year! Come and enjoy some tasty holiday party treats with us and we’ll send you off with some delicious, easy recipes for the season.

Thurs, Dec 8th
6:30 – 8:30, approximately
 

The Holiday Appeteaser Party

holiday-buffet
Smoked Salmon Mousse Coins with Roasted Red PepperSauce
Shrimp Cocktail Butter Lettuce Cups
Smoked Trout Crostini
Tuscan Lemon Chicken Speidini
Mini Hasselback Potato Bites
Chocolate Peppermint Truffles

By Reservation Only
(562) 296-5421
148 Main Street
Seal Beach, CA 90740

Sponsored by

Leave a comment
Share
  • Pin it
  • Share
  • Tweet
  • Share
  • Email

Holiday Cooking

11 / 4 / 16

November Cooking Demo’s

Don’t miss out! These are some of the last classes of the year. All based around holiday cooking, join us to learn tips & tricks on how to get through the season deliciously!

fall-table-stackedinteriors

Thurs, Nov. 10th
6:30 – 8:30, approximately

Reserve your spot today!

Temecula Olive Oil Tasting Room, Seal Beach

Apple, Goat Cheese & Sage Tart
Duck Breast with Balsamic Jus
Pan Roasted Brussels Sprouts with Bacon & Pomegranate Seeds
Pear Cranberry Crisp  

Thurs., Nov. 17th
6:30 – 8:30, approximately

Fruit & Cheese Plates
Roasted Chicken with Chestnuts & Shallots
Learn how to cut up a whole chicken!
Fresh Sage, Apple & Brioche Dressing with Pancetta
Cranberry Frisee Salad
Salted Caramel Apple Cake

By Reservation Only
(562) 296-5421
148 Main Street
Seal Beach, CA 90740

Sponsored by

Leave a comment
Share
  • Pin it
  • Share
  • Tweet
  • Share
  • Email

10 must have pantry items for the holidays

11 / 4 / 1611 / 4 / 16

10 must have pantry items for the holidays

herbsspices-411nutrition

Basic Pantry

  1. Organic Chicken Stock
  2. Unsalted butter and a variety of oils (Olive Oil, Peanut, Vegetable & Grapeseed)
  3. Organic Large Eggs
  4. Organic Milk and Cream (for whipping and cooking)
  5. Variety of cheeses, for cooking and serving as appetizers or dessert
  6. Variety of potatoes, Russet for baked or mashed, Fingerlings or Yukon Gold for roasting
  7. Day old breads for breadcrumbs and stuffing or dressing. Freeze for later use. Crackers
  8. Celery, Carrots and Onions, Fresh Citrus
  9. Fresh Sage, Italian Parsley and other herbs
  10. Fresh and Dried Mushrooms

Book Cover

Buy my book ‘What’s In Your Pantry’ for more tips & tricks in the kitchen!


Baking

Beyond the basics, flour, white, brown and powdered sugars, baking soda, baking powder and vanilla.

  1. Nuts
  2. Chocolate
  3. Cocoa Powder
  4. Cinnamon or Baking Spice, Allspice, Nutmeg
  5. Dried Fruits
  6. Variety of jam for easy to make desserts
  7. Peppermint and dried fruit candies
  8. Cream of tartar
  9. Parchment paper
  10. Caramels and Toffee

Make Ahead for the Freezer

  1. Pie Dough
  2. Cookie Dough
  3. Puff Pastry (buy an all butter pastry-read the label)
  4. Gravy
  5. Easy bake appetizers, Empanadas, Pot Stickers, Crab Cakes, Cheese Balls
  6. Meatballs, basic recipe use different sauces for quick appetizers
  7. Quickbreads
  8. Casseroles
  9. Breakfast Treats, Cinnamon Rolls, Scones,
  10. Frozen Seafood, Shrimp, Scallops, Lobster
Leave a comment
Share
  • Pin it
  • Share
  • Tweet
  • Share
  • Email

October Cooking Demo

10 / 26 / 1610 / 27 / 16

Join us in Seal Beach

Thursday October 13th 6:30 – 8:30, approximately

Repeat Class Thur, Oct 27th!

Boursin Cheese Dip with Roasted Grapes Crostini’s

Apple, Parmesan and Walnut Salad with  White Balsamic Apple Vinaigrette

Fall is the time when I start thinking about casseroles and slow cookers, here’s the first casserole of the fall!  

Balsamic Chicken & Pork Riblettes

served with Roasted Red Bell Peppers, Green Onions and Fresh Lemon Olive Rice Pilaf

Orange Olive Oil Chocolate Pumpkin Cupcakes 

Temecula Olive Oil Tasting Room, Seal Beach

Call Now for reservations
562-296-5421

Sponsored by

 Melissas logo small

Leave a comment
Share
  • Pin it
  • Share
  • Tweet
  • Share
  • Email

Cooking at The Flower Fields

9 / 22 / 16

oct-5-cook-at-flower-fields

Join us for a unique Culinary Event and Cookbook Signing on Wednesday, October 5th
Time: 11:00-1:00
Cost $45.00 per person

Chef Debbi Dubbs will be teaching this Fall inspired menu, with a cooking – technique you can all take home and try. Join us for lunch at the Flower Fields, and enjoy our highlighted local artisans.

Menu:
Pan-Roast Chicken with Porcini Bucatini

Classic Panzanella Salad

Homemade Chocolate Biscotti

Her cookbook, ‘What’s in Your Pantry”, will be available for signing.

Eventbrite - Kitchen Gardens Culinary Event with Chef Debbi Dubbs

Sponsored by Melissa’s Produce and ScanPan

Leave a comment
Share
  • Pin it
  • Share
  • Tweet
  • Share
  • Email

Chocolate Cherry Cookies

9 / 16 / 16

In honor of my friends birthday I made him these cookies and I had some leftover (this recipe makes about 4 dozen cookies). I took them to last nights cooking class and everybody seemed to love them. They’re not too sweet but just the right size for a nice little bite and they pair well with any red wine (what doesn’t?).

During the holidays I replace the cherries with crushed peppermint candies and add peppermint extract instead of the vanilla. So I hope you enjoy them!

chocolate-peppermint-crinkle-cookies

Chocolate Cherry Cookies

Save
Print
  • 1 1/2 cups all-purpose flour
  • 1/2 cup unsweetened cocoa powder
  • 2 teaspoons baking powder
  • ½ teaspoon salt
  • ¼ cup chopped walnut pieces, optional
  • 1/2 cup chopped dried cherries
  • 8 tablespoons (1 stick) unsalted butter, softened
  • 1 cup packed light brown sugar
  • 2 large eggs
  • 8 ounces bittersweet chocolate, melted and cooled*
  • 1 teaspoon vanilla extract
  • 1/2 cup granulated sugar
  • 1 cup powdered sugar

In a medium bowl, whisk together the flour, cocoa powder, baking powder, and salt. Add the chopped walnuts and peppermint chips, stir to distribute well.

In the bowl of a stand mixer, fitted with the paddle attachment, or in a large mixing bowl, cream the butter and brown sugar until light and fluffy, about 3 minutes.

Add the eggs and vanilla, and beat until completely incorporated. Add the melted chocolate and beat until completely incorporated. Gradually fold in the flour mixture until just combined.

Chill the dough for at least 2 hours until firm, or up to overnight.

Remove the dough from the refrigerator. Preheat the oven to 350°F. Line a baking sheet with parchment paper or a silicone baking mat.

Place the granulated and powdered sugar in separate small bowls. Scoop 1 tablespoon of the dough, form into a ball, and place on a plate. Repeat with the remaining dough.

Roll each ball in granulated sugar and then in powdered sugar to coat. Place on the baking sheet 2 inches apart. Bake for 10 to 12 minutes, until the cookies begin to spread and the tops split. Remove from the oven and cool for a few minutes on the baking sheet, then transfer the cookies to wire cooling racks. Let the baking sheet cool, and repeat with the remaining dough.

Cookies will keep in an airtight container for about one week.

*To melt the chocolate, place in a microwave safe bowl and heat for 30 seconds, stir, and heat at 10 second intervals until melted, stir occasionally.

Optional:

For Peppermint Cookies add 1/4 cup crushed peppermint candies and use peppermint extract instead of the vanilla.

*To crush peppermint pieces, place several candy canes or peppermint candies into a freezer type bag and crush with a meat pounder or rolling pin.

Leave a comment
Share
  • Pin it
  • Share
  • Tweet
  • Share
  • Email

It’s Hatch Chile Time!

8 / 15 / 16


IMAG0020

Get out your BBQ’s or roasters, it’s time for Hatch Chile’s! You’ll want to stock up on these fabulous, versatile chiles while they are in season. Melissa’s Produce brings these chiles from Hatch, New Mexico to Southern California and hosts roastings all over the southland (actually all over the US). You could order raw ones from Melissa’s website, melissas.com , or you could pop into a roasting (check out roasting dates, times & stores here) and they will roast them up for you on-site. Inside the store you’ll find all kinds of Hatch chile treats as well as things to cook up like Hatch Salmon Burgers or Hatch Chile Crab Cakes and Hatch chile sausage. Baked goods, cheese with Hatch chile’s, salsa and sauces. The list is endless!

Here is a perfect chicken wing recipe for football season, we grilled it up for the LA Rams first pre-season football game last weekend.

Tangerine Hatch Chile Chicken Wings and Cucumber-Yogurt Sauce

Save
Print

Serve the wings with the Cucumber-Yogurt Sauce and sliced veggies and LOTS of napkins.

  • 3 small Persian cucumbers or large English cucumber, diced
  • 1 tablespoon salt
  • 2 cups Greek yogurt*
  • 1 tablespoon lemon juice
  • 1 garlic clove, minced
  • 1 tablespoon fresh dill
  • 1 tablespoon olive oil
  • Salt & freshly ground black pepper, to taste
  • 1 package chicken wings
  • 1 bottle of Not Ketchup Sugar Free Tangerine Hatch Chile Sauce*

Toss a bunch of chicken wings with Tangerine Hatch Chile Sauce and grill over hot coals until the chicken wings are blackened and tender.

Cucumber Yogurt Sauce

Peel cucumbers and dice, if using English cucumber you can remove the seeds. Put them in a colander and sprinkle with the tablespoon of salt to draw out some of the water, let drain for about 30 min. Place the cucumbers into a piece of cheesecloth or kitchen towel and twist the towel to get out any remaining liquid.

Add everything to the food processor and blend until you get the consistency you want (chunky or creamy). Season with salt and pepper and refrigerate before serving, best if made a few hours before you’re going to serve it.

*If the yogurt is a little runny you can drain it through cheesecloth for several hours or overnight.

tnagerine hatch chile sauce

*You can find the Sugar-Free Tangerine Hatch Chile ‘Not Ketchup’ here

Leave a comment
Share
  • Pin it
  • Share
  • Tweet
  • Share
  • Email

Refrigerator Pickled Veggies

8 / 4 / 16

pickling2


Pickled Veggies

Save
Print
  • 1 bunch of radish
  • 3 carrots
  • 4 mini white turnips
  • ¼ # thin green beans
  • 4 small watermelon radish
  • 1 lg. clove garlic, crushed but whole
  • 2 shallots, sliced thin
  • 2 ½ cups pomegranate or red wine vinegar
  • 1 cup apple cider vinegar
  • ½ cup white vinegar
  • 2 cup water
  • 2 tablespoons sugar
  • 4 strips of lemon peel
  • 2 tablespoons pickling or canning salt (do not use any other salt)

Cut up all your veggies into what ever shape you like, making sure they fit into the jar that you will pickle them in.

In a medium sized saucepan add vinegar, sugar, lemon peel and salt; bring to a slow boil, whisk until all the sugar is dissolved,

Wash a quart canning jar and fill with hot water. Let stand while you are bringing the brine to a boil.

Once the sugar has dissolved in the brine, pour the water out of the jar and fill with veggies. Pour the brine over them, let cool, then cap and refrigerate.

Leave a comment
Share
  • Pin it
  • Share
  • Tweet
  • Share
  • Email

September Cooking Demo

8 / 4 / 16

Join us in Seal Beach

Thursday September 15th 6:30 – 8:30

Pork Milanese Michael Symon

Oven Dried Tomato Crostata with Fresh Ricotta

Hearts of Romaine Salad with Fresh Grated Parmigiano-Reggiano

Pork Milanese with Meyer Lemon & Chopped Tomato ‘Salsa’

Cheese Tortellini Alfredo with Broccoli Rabe

Peach Amaretti Crisp

DKB-12

Temecula Olive Oil Tasting Room

Seal Beach

Call Now for reservations
562-296-5421

Sponsored by

Melissas logo small

Leave a comment
Share
  • Pin it
  • Share
  • Tweet
  • Share
  • Email

Ceviche with Avocado and Tomato Broth

7 / 20 / 167 / 20 / 16


ceviche tomato


Ceviche with Avocado and Tomato Broth

Save
Print
  • 1 pound white fish halibut, red snapper, sole,
  • 2 teaspoons mild or hot pepper
  • 2 tablespoons cilantro, minced
  • 1 tablespoon shallot, minced
  • 1 large rib celery, cut into a small dice
  • 1 medium tomato, cut into the same size as the fish, squeeze out the seeds
  • 1/2 cup freshly squeezed lime juice, or enough to cover ingredients
  • 1 splash olive oil
  • Tomato Broth
  • 1 slice white bread
  • 1 can whole tomatoes, with juice
  • 1 cucumber, peeled, rough chopped
  • 1 small shallot, rough chopped
  • 1 cup tomato juice
  • 1 tablespoon red wine vinegar
  • 1 tablespoon olive oil
  • 1 pinch garlic powder
  • Salt and pepper
  • 1 pinch sugar
  • 2 Haas avocadoes, peeled, cut in half, pit removed
  • 1 lemon or lime zested
  • cilantro sprigs, for garnish

Ceviche:

Chop the white fish into small dice, add to a mixing bowl and set aside.

Clean the pepper of stems, seeds and ribs and mince into a fine dice. You may want to wear glove to do this.

Mix all ingredients together well; making sure it’s all covered by the lime juice and olive oil. Refrigerate for at least 3 hours.

Tomato Broth:

Place the bread into the bowl of a food processor and process until you have coarse crumbs. Add remaining ingredient and process until pureed. Chill for 30 minutes before serving.

Ladle some tomato broth into a cup or bowl. Place avocado into center of bowl, place ceviche into the center and top with lemon zest and a sprig of cilantro.


Leave a comment
Share
  • Pin it
  • Share
  • Tweet
  • Share
  • Email

Hot Weather Dinner

6 / 20 / 166 / 20 / 16

A basket of sweet corn, three ears partially husked

There is nothing like summers sweet corn on the cob. The tables at the farmers market this weekend were loaded with all kinds of corn and great prices make you want to stock up but corns sweetness will turn to starch the longer it’s stored. There’s an old saying that you should start the water boiling for the corn before you pick it. But if you don’t have a corn field in your back yard here are a couple of tips to help maintain that sweetness.

One, don’t peel and husk your corn, leave it in its little corn jacket and store in the refrigerator. This won’t maintain it’s sweetness long but it will stay sweet for about a day.

Two, peel and husk your corn, freeze separately and when frozen wrap in plastic and pop into a freezer bag. Use within a few weeks for best results.

Three, (this is my favorite), peel a few leaves off the outer ear but leave the husk and some leaves still attached. Chop off the very top and the bottom. Here’s another tip for you-usually corn worms are only found in the top of the ear, just lop that part off, the corn is still good to eat and it means that the farmer didn’t dust the corn with insecticide (a good thing). Put the corn into the microwave and cook for 5 minutes, remove carefully it will be hot. Place in a colander in the sink and run some cool water over it. After it cools, refrigerate and it will hold it’s sweetness for a day or two.

Here’s one of my favorite hot weather dinner salads using sweet corn right off the cob!

Shrimp and Avocado Salad

Save
Print
  • Dressing
  • ¼ cup Pomegranate vinegar or good red wine vinegar
  • 1 teaspoon finely diced shallots
  • 1 teaspoon Dijon mustard
  • Dash of dried parsley flakes, crushed
  • ½ cup olive oil, approximately
  • Salad
  • 1 head Bibb lettuce, peel the leaves from the core, rinse with cool water and dry well
  • 1 ear fresh sweet corn, prepare the corn as directed in the notes.
  • 1 small Persian cucumber, cut in half lengthwise and then into half moons
  • 1 medium tomato, chopped into bite-sized pieces
  • 8 large shrimp, (U16), cut into bite-sized pieces
  • 1 Haas avocado cut in half; pit removed and scoop out the whole half
  • 2 rashers (slices) bacon, cooked and crumbled
  • ¼ cup crumbled blue cheese, optional

Dressing

In a jar or small bowl add vinegar, shallots, Dijon mustard and parsley flakes, add a sprinkle of salt and pepper. Slowly whisk in the olive oil to emulsify. As soon as the dressing starts to thicken stop and taste the dressing, if it needs more continue to add the olive oil while whisking. Any extra dressing may be stored in the refrigerator for up to 3 weeks.

Tear the lettuce leaves into large pieces and add to a large bowl and toss with a little of the dressing. Add the corn, cucumber, tomato and shrimp and toss again with a little dressing. Lightly mix in the avocado and place into shallow bowls or large plates, sprinkle with bacon and cheese and serve extra dressing on the side.

Makes 2 entrée salads

Notes:

Pick up fresh corn from the farmers market, not the supermarket. The sugar in corn starts to turn to starch when it’s picked so by the time it gets to the supermarket much of the sweetness will be gone. When you get the corn home here’s an easy trick to help keep the sweetness in for a day or two. Remove some of the outer leaves but not all. Cut the top and bottom off the ear and microwave for 5 minutes. It will be hot when you bring it out of the microwave so run some cool water over it and set it aside to cool completely. This method is similar to blanching and shocking your vegetables. Use right away (peel the remaining leaves and silk then slice off the cob) or store in the refrigerator for a day or two.

In the hot weather buy the shrimp already cooked for an easy meal at the end of the day. If you purchase raw shrimp to cook it simply bring a large pot of water to a boil, add a tablespoon of Old Bay Seasoning and cook at a slow boil (bubbles just break the surface) until the shrimp is done, about 5 minutes. To test the shrimp simply take one out, run cool water over it, peel, devein and eat it!

Pomegranate vinegar can be ordered from Temecula Olive Oil Co.

Related Posts Plugin for WordPress, Blogger...
2 Comments
Share
  • Pin it
  • Share
  • Tweet
  • Share
  • Email

Posts navigation

Previous Page 1 2 … 8 9 10 11 12 … 15 16 Next Page
Deb

Meet Chef Debbi

READ BIO

Join-Us Sign up for our newsletter to receive exclusive tips 'n tricks, and special offers on classes, tours, and more!

Recent Posts

  • New E-Book!
  • From the Pantry
  • Spaghettini at Home
  • Growing Corn
  • Spring IS Coming!

Categories

BookCUT

What's in Your Pantry?

How to stock your pantry to create delicious dishes.

Learn Chef Debbi's pantry essentials and how to substitute ingredients for pantry staples in her basic recipes for quick and easy meals.
BUY BOOK>

FacebookTwitterInstagramGooglepinterest


© 2014, DEB'S KITCHEN
Angie Makes Feminine WordPress Themes