Deb's Kitchen - Farm, Food, Wine & Lifestyle Adventures
  • Facebook
  • Google
  • Twitter
  • Instagram
  • Pinterest
  • Email
Menu
Skip to content
  • Home
  • Blog
  • Events
    • Classes
    • Tours & Adventures
  • Edible Gardening
  • Preserving
  • Recipes
    • Appetizers
    • Soups and Salads
    • Main Dishes
    • Side Dishes
    • Desserts
  • About
    • Whats In Your Pantry
    • Ask Debbi
    • Deb’s Kitchen Botanicals
    • Press
  • Contact

Tag Archives: gardening

Tomato Overload

7 / 6 / 17

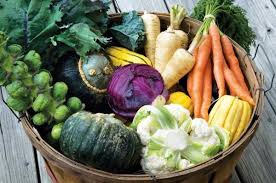
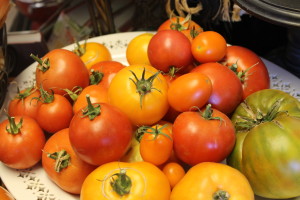
There are many ways to save your harvest and if you have more tomatoes than you know what to do with here are some ideas.


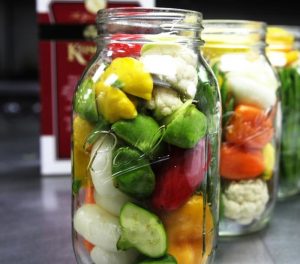
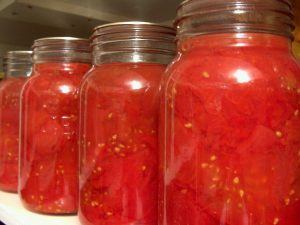
First and foremost is water bath canning, I love this because it means that I can store tomatoes on the shelf in my pantry for the year. Fairly easy to do but when it’s hot and humid out like it has been this summer FORGET IT!

As many of you already know, I like to freeze my tomatoes also so later when it’s cool I can make sauce or unfreeze and can them to make more room in the freezer for up and coming dinners. Freezing tomatoes is the fastest way to get things done, wash, and dry then freeze on a baking sheet until frozen solid, pop into a freezer bag and you are done for the day! You can remove one or four at a time, whatever you need and as they begin to defrost, which is almost right away, the skin will slip off easily.

IMG_0481

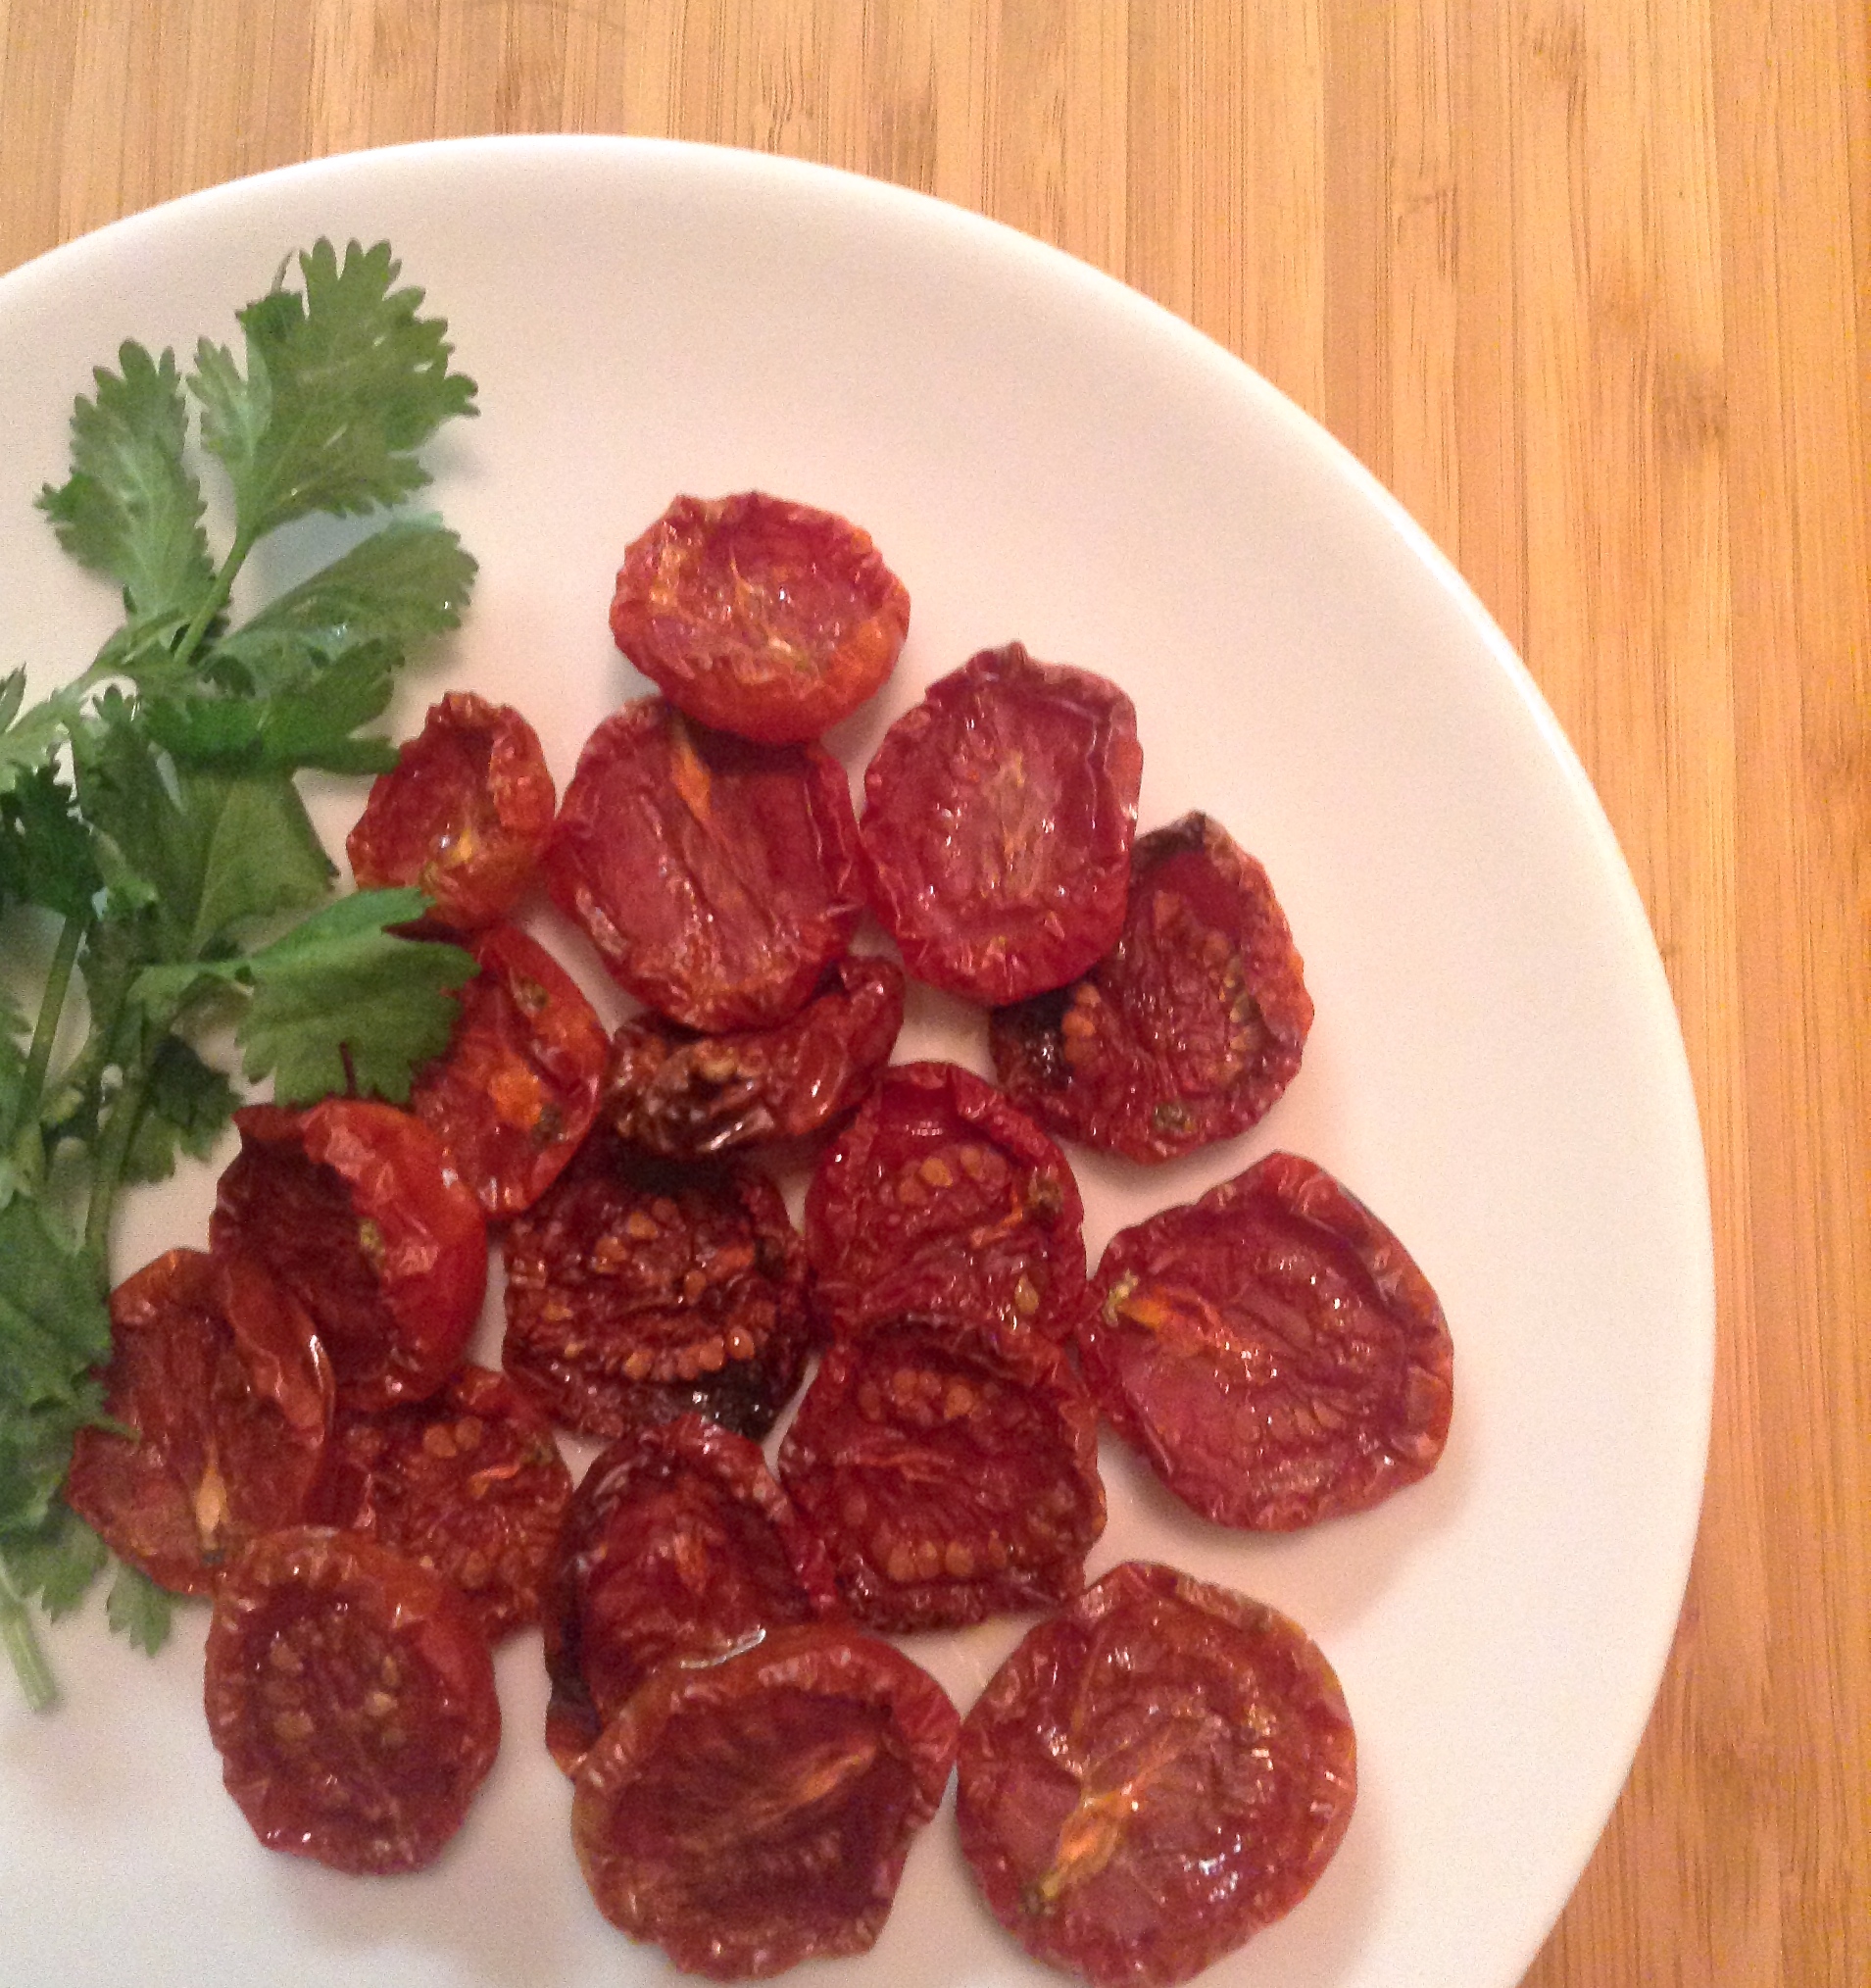
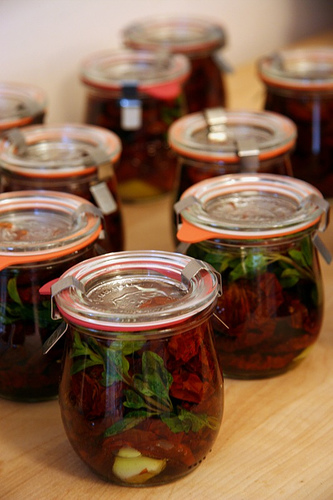
My second favorite is to make Oven Roasted Tomatoes, although it does require having the oven on for some length of time. I love to dry my cherry tomatoes and then float them in a good olive oil and store in the refrigerator for up to 3 months. Chopped in a salad, in a bruschetta or top on a pizza, they pack a flavorful punch. Fill up your baking sheet and get started right away!

Fontina & Tomato Tart

Oven Roasted Tomato Recipe

Leave a comment
Share
  • Pin it
  • Share
  • Tweet
  • Share
  • Email

July Cooking Demo Event

6 / 26 / 177 / 3 / 17

Join us at Temecula Olive Oil, Seal Beach for a tasty cooking demo!

Demo Cooking Class

July 13 & 27

6:30 – 8:30 p.m., approximately

By reservation only, see below

Sweet Corn and Balsamic Tomato Salad

Creamy Beef Stroganoff with Morel Mushrooms & Crème Frâiche

Green Beans with Bacon & Caramelized Shallots

Stone Fruit Cobbler

For reservations call

Temecula Olive Oil

(562) 296-5421

Sponsored by

Leave a comment
Share
  • Pin it
  • Share
  • Tweet
  • Share
  • Email

Zucchini Blossom Quesadilla

6 / 26 / 17


 I first tasted these at The Santa Monica Farmers Market about 15 years ago when The Two Hot Tamale girls were doing a demo for their restaurant, Border Grill (now closed, sadly). It’s a perfect little snack for an early summer day, zucchini plants are going wild with flowers and are daring to be picked & stuffed. Make sure you pick all male blossoms rather than female blossoms or you won’t have any fruit. To tell the difference look at the bottom of the flower, you’ll see a round little nub or small zucchini attached, this is a female blossom….move on. The male blossoms are attached just by them stem with no nub at the bottom, you’ll be able to tell. Open the flowers gently as there may be a bee inside collecting pollen, he will fly away when you open the petals, be gentle. If you want to wash them use cool water and dry well but do this just before you’re ready to prepare the dish. Or you can buy them at your local farmers market, the blossoms are delicate and will last no more than a day so pick right before you’re going to make the quesadillas.

Squash Blossom Quesadilla

Save
Print
  • 4-6 squash blossoms, stems and stamens removed, chopped
  • 4 roasted red peppers, drained and chopped
  • 2 ears of corn, roasted, cut off the cob
  • 4 tablespoons cilantro, chopped
  • 1-2 cups Monterrey Jack cheese, grated
  • 8 flour tortillas
  • Salt and pepper to taste
  • Tomatillo Salsa
  • 1/2 pound tomatillos, husked, rinsed, and quartered

  • 1/2 - 1 jalapeño pepper, chopped
(depending on how much heat you want)
  • 1 clove garlic, peeled and chopped

  • 1/2 cup packed cilantro leaves

  • 1/2 teaspoon salt,
or more to taste,
  • squeeze of fresh lime juice

Mix together all ingredients together seasoning with salt and pepper, to taste.

Heat a grill pan or griddle, add 1 Tb. butter. Add a tortilla and cook it on one side until it puffs (about 30 seconds).

Flip tortilla over and sprinkle over entire surface 1/4 cup of squash blossom filling.

Top with another tortilla, and after cheese has melted and the two tortillas stick together (a couple of minutes), flip quesadilla and cook for a couple of minutes more.

Repeat for the remainder of the filling and tortillas.

For the Tomatillo Salsa

Place all ingredients in a blender or food processor and pulse to combine. Blend on low speed until a coarse puree is formed.

Pour into a bowl, taste and add more salt or lime if desired. Salsa can be thinned with a bit of water if desired.

2 Comments
Share
  • Pin it
  • Share
  • Tweet
  • Share
  • Email

Asparagus Gratin

6 / 9 / 17

I love sweet California asparagus, especially the small early stalks simply sautéed in butter and seasoned with a little lemon zest, sea salt and freshly ground pepper. But for serving to guests I also enjoy this quick and easy gratin, it pairs well with Lemon Roasted Chicken and a cold glass of Viognier.


Asparagus Gratin

Save
Print
  • 2 pounds thin asparagus
  • salt and pepper
  • 2 tablespoons unsalted butter
  • 2 tablespoons flour
  • pinch of cayenne pepper
  • 1 cup milk
  • ¾ cup Parmesan cheese, grated and divided
  • ½ cup Monterey Jack cheese, shredded

Adjust oven rack to upper-middle position and heat broiler.

Prepare an ice bath (cold water and ice) large enough to hold the asparagus.

Cut ends off the asparagus and set aside.

Fill a large skillet ¾ full of hot water, bring to a boil. Add asparagus and a heaping tablespoon of salt. Cook for about 2-4 minutes or until lightly cooked. Immediately plunge asparagus into ice bath to stop the cooking.

Melt butter in now empty skillet over medium heat. Add flour and cook, stirring constantly until golden, about 1 minute. Whisk in milk and bring to boil. Reduce heat to medium-low and simmer until thickened, 3-5 minutes., whisk in ½ cup Parmesan and Monterey jack until smooth, season with salt and pepper. Turn off heat. Cover and let stand for 5 minuets.

Place asparagus into an oven proof serving dish and drizzle sauce over center of asparagus and top with remaining Parmesan. Broil until cheese is golden and asparagus is tender, 4-8 minutes. Serve.


Photo: LA Times

Leave a comment
Share
  • Pin it
  • Share
  • Tweet
  • Share
  • Email

Container Herb Gardens

4 / 12 / 17

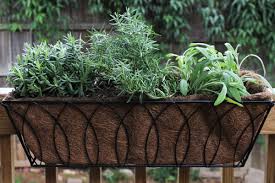
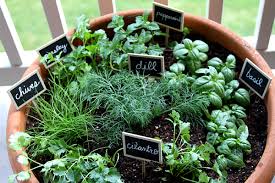
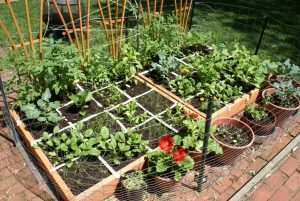
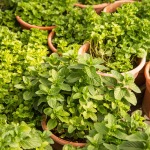
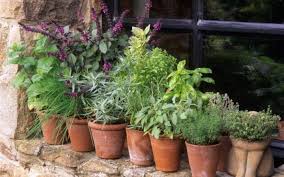
I know some of you aren’t gardeners but like to have some fresh herbs around for creative cooking. Now you can buy herbs in the market and remove some of the bottom leaves and store them in a vase changing the water every day or you could easily grow some major herbs in pots on your patio or railing. You could choose to grow them in one big pot or give each herb it’s own container (then it’s a little easier to change out the plants). You could plant seeds and tend to them as they grow but if you’re not into gardening start as transplants.

Sun, most herbs like sun, at least 6 hours a day and a well draining potting soil. Use an organic potting soil and a liquid fertilizer like Dr. Earth. You should be able to find most herbs in the nursery right now but basil may be lagging because of the cold winter we had, the growers weren’t able to get the basil going as early as usual.

Here’s a little tip I picked up recently, if you are anywhere near a few pine trees (look in your local park) you could find tons of small pinecones. Place them in the bottom of the pot over the hole and it will help the soil from running out the bottom when you water the plant. The pinecone will slowly degrade into mulch helping to feed the plant. Put some potting soil on top of that and then squeeze the sides of the container the herb is growing in, turn the pot upside down holding the plant gently with your other hand. Squeeze the pot until the plant comes out (don’t pull on the plant or you may damage the stem and kill the poor baby before it evens hits the pot!), place the plant into the pot and fill the surrounding area with more soil. Water well and grow little baby herbs! Fertilize according to the directions on the box or the bottle and never snip off more than 1/3 of the plant. I let my herbs flower as it brings the bees and butterflies to the pots but you may not want that so just pinch back the flowers. The flowers are edible as long as you haven’t sprayed the plant with pesticides or herbicides (no no no). Many herbs are annuals such as basil and need to be planted every spring, but some are biennial (every other year) and many are perennial and will continue to grow. If they out grow the pot just move them up to the next size and plant new babies in the small container. When winter comes be mindful of cold weather, most herbs prefer warm sunny areas so you may have to move them or cover them during cold spells. But if that’s too much for you just toss them into a compost pile or chop them up and plant behind a shrub where they can decompose and plant a new herb baby next spring.

For more tips on growing and using herbs come and see me at The South Coast Plaza Garden Show. The seminars are free!

Thursday April 27th at noon

Friday April 28th at 12:30


Leave a comment
Share
  • Pin it
  • Share
  • Tweet
  • Share
  • Email

Tips on Growing Tomatoes

3 / 16 / 17

How To Grow Great Tomato Plants


Buy transplants

Purchase healthy, stocky plants that have no flowers, fruits or buds

Choose a sunny location, rotate planting beds every year

Plant in an area where you may have grown peas or beans the previous year

Add compost to the soil and make sure the soil isn’t compacted.


Succession plant

Choose an early variety that can be planted in early spring. I like to plant my main crop in April and then another couple of plants in July for fall harvest. Check Sunset Gardening Guide for the best time in your area to plant.

Depending on how you’re going to stake or cage tomatoes, have all the equipment ready for planting day, stake the plants at the same time you transplant.


Planting

When planting remove lower leaves and plant the tomato deep, so that only about 3” are above ground. Tomato plants have the ability to grow roots from the buried stem. Water well after planting. Water well and deep but infrequently, keep your watering consistent, tomatoes need about 1” water a week.

Fertilize

Don’t over fertilize your tomato plants. Use a high phosphorus content fertilizer such as Dr. Earth Organic Tomato/Vegetable Fertilizer, 5-7-3. A high nitrogen content will give you lots of green leaves but little fruit.

Pinch branches out

I always pinch out side shoots in the beginning to help the plant grow tall rather than gangly.

Mulch and Companion Planting

Tomatoes love carrots; basil and marigolds so plant them in the same bed and mulch the rest of the soil to keep the moisture in.


Leave a comment
Share
  • Pin it
  • Share
  • Tweet
  • Share
  • Email

How To Grow Amaryllis & Paperwhite Bulbs

10 / 20 / 16

amaryllis-potted-2

I love growing Narcissus (Paperwhites) in the spring and in the fall/early winter. If you stagger planting these bulbs you can have continuous blooms from now all through the holidays. Narcissus and Amaryllis both grow well in soil or in a vase or shallow bowl with no soil at all. I love taking amaryllis bulbs to anyone that I visit during the holidays; you can even find bulb kits at the nursery or almost any store this time of year.

Unlike most bulbs these two don’t need to be chilled before planting, they love our warm climate (even if sometimes we don’t!). If you want continuous blooms buy a dozen or so bulbs and store some in a cool dark place and ‘plant’ every few weeks through late winter. Amaryllis will bloom 6 – 8 weeks after planting and Paperwhites 3-5 weeks after planting.

To plant in soil make sure the container is about 5”- 6” deep, plant the Paperwhite bulbs, with the root end down so that the tops peek above the soil surface. You can plant 5 bulbs in this pot and space them a little apart from each other. Water until the soil is damp but not soggy or the bulbs will rot, water occasionally until they bloom then water regularly but do not overwater. Some Paperwhites are very tall and need support to keep from falling over. Plant one Amaryllis bulb in the same size pot with the tip about one-third above the soil. Amaryllis can be encouraged to bloom again next year if planted in soil, cut off the old bloom to about 1” above the bulb, water and feed regularly and let the leaves grow throughout the year. In late summer stop watering and let the leaves dies back naturally as they start to store energy for the next season. You can dig up the bulb or leave in the pot and place into a cool, dark place for about 8 weeks. You can repot in fresh soil or add a little finished compost to it, bring it back into a light area, water infrequently until you see growth and then repeat the process. Paperwhites won’t usually bloom again so buy new bulbs each year.

To plant in gravel or stones place a layer of stones or gravel over the bottom of a vase to a depth of 2-4” for the Amaryllis or paperwhites and place the bulb or bulbs on top of the stones, fill the vase with more stones up to the top third of the bulb and add water up to 1” below the base of the bulb, do not let the bulb sit in water or it will rot. Add water as needed but keep the level below the base of the bulb. Be sure to use a vase or jar that is tall enough so that it won’t tip over as the flower shoots grow.

Buy some ‘kits’ as hostess gifts for the holidays and store in a cool, dark place until you need them. (Don’t forget where you stash them though!)

paperwhites-potted

Leave a comment
Share
  • Pin it
  • Share
  • Tweet
  • Share
  • Email

Fall Vegetable Gardens

8 / 16 / 16

Fall Vegetable Gardens

Fall Vegetable Garden

Although here in Southern California there aren’t many place where we get frost, some places away from the beach will get a light frost and towards the mountains an early frost and snow. But our last frost date near the coastline is anywhere from early Nov to early Dec. and our first frost date is somewhere around Feb. It’s good to know this information so you can plan on what and when to plant.

As the ground gets cold seeds will have a hard time sprouting or will not sprout at all. Planting a fall garden with vegetables that can ‘over-winter’ will see you through the cool, rainy (hoping) months. Heartier vegetables like broccoli, cauliflower and Brussels sprouts actually get a little sweeter with a touch of frost.

If you get tomatoes, beans and cucumbers in the ground now (Aug-Sept) make sure you plant early varieties that have time to fruit before the ground begins to cool. Most nurseries will still be carrying good supplies of summer vegetables for the next month.

These are some fruit and vegetables that will grow for you now.

Broccoli, Cabbage, Kale & Brussels Sprouts
Parsley & Cilantro (but if we get a hot spell between Sept & Oct they may bolt)
Beets, Carrots, Turnips (try the little white turnip, sweet tasting even raw)
Leeks, Scallions, Onions, Shallots
Peas & Potatoes
Lettuce (provide a little shade until Nov), Spinach & Mustard

Here are two nurseries in our area that I love for great vegetable plants.

H & H, Lakewood Blvd, Lakewood

http://hhnursery.com/

Rogers Gardens, Newport Beach

http://rogersgardens.com/

Almost all the seed catalogs have great sale prices too, a good time to pick up some fall and spring seeds.

Grow Organic/Peaceful Valley Farms

http://www.groworganic.com/

Baker Creek Seeds

http://www.rareseeds.com/

High Mowing Seeds

http://www.highmowingseeds.com/

Renee’s Garden

http://www.reneesgarden.com/

Seeds From Italy

http://www.growitalian.com/

Leave a comment
Share
  • Pin it
  • Share
  • Tweet
  • Share
  • Email

Refrigerator Pickled Veggies

8 / 4 / 16

pickling2


Pickled Veggies

Save
Print
  • 1 bunch of radish
  • 3 carrots
  • 4 mini white turnips
  • ¼ # thin green beans
  • 4 small watermelon radish
  • 1 lg. clove garlic, crushed but whole
  • 2 shallots, sliced thin
  • 2 ½ cups pomegranate or red wine vinegar
  • 1 cup apple cider vinegar
  • ½ cup white vinegar
  • 2 cup water
  • 2 tablespoons sugar
  • 4 strips of lemon peel
  • 2 tablespoons pickling or canning salt (do not use any other salt)

Cut up all your veggies into what ever shape you like, making sure they fit into the jar that you will pickle them in.

In a medium sized saucepan add vinegar, sugar, lemon peel and salt; bring to a slow boil, whisk until all the sugar is dissolved,

Wash a quart canning jar and fill with hot water. Let stand while you are bringing the brine to a boil.

Once the sugar has dissolved in the brine, pour the water out of the jar and fill with veggies. Pour the brine over them, let cool, then cap and refrigerate.

Leave a comment
Share
  • Pin it
  • Share
  • Tweet
  • Share
  • Email

Tomato Confit

6 / 11 / 166 / 12 / 16

Is your garden overflowing with tomatoes? I always grow too many and one of my favorite ways to make them go a little farther is to oven dry them. Much like sun dried, these concentrated gems pack a powerful punch and can be used in any dish where you’d use tomatoes. Especially nice on a cheese plate with some creamy goat cheese nearby.

tomatoconfit-chez pim 2006


To preserve them I turn them into a tomato confit and keep in my ‘pantry’ refrigerator. They can’t be water bath canned because of the oil, but they will keep for about 6 months in the refrigerator, if they last that long. The refrigeration will also help to preserve the oil and keep it from going rancid quicker. Use only fresh organic herbs and make sure you wash and dry them very well, you don’t want any water going into your beautiful confit.

Mangia (Eat!)

Save
Print
  • 1 pound tomatoes, cut in half lengthwise
  • Sea salt and freshly ground black pepper
  • 1/4 cup olive oil, approximately
  • 1 tablespoon basil, chiffonade
  • 2 teaspoon fresh thyme
  • 1 clove garlic -- minced

Preheat the oven to 350°.

Arrange the tomato halves cut side up and close together on a baking sheet, season with salt and pepper.

In a bowl, combine olive oil, garlic, and herbs. Drizzle over tomatoes and bake until the tomatoes are soft and shriveled but still retain some moisture, 1-2 hours or more.

Let cool completely. Tomatoes can be stored in a glass jar, cover tomatoes with olive oil, add a fresh sprig of thyme, seal and refrigerate.

Photo: Chez Pim

Leave a comment
Share
  • Pin it
  • Share
  • Tweet
  • Share
  • Email

Square Foot Gardening

5 / 12 / 16

When I got my first community garden, the city had to run an ad to get people interested in gardening. That was 20 yrs ago, today we have a 3 year waiting list for available plots.

The first thing I did was research, which I love to do, on the best way to grow organic vegetables. The one book I kept going back to was ‘Square Foot Gardening’ by Mel Bartholomew, an engineer who redesigned the backyard garden in order to grow more vegetables in a smaller space. We all learned to garden from books and farmers who grew in large spaces on large farms, we don’t need to use their methods in our little backyards.

Photo:http://simplysquarefootgardening.blogspot.com/

Mel’s design was basic, a 4 x 4’ raised bed with 6” sides (or taller) set upon landscape fabric to prevent weed or grass growth, other materials could also be used, then filled with equal portions of vermiculite, peat moss and compost and then divided into 16 one foot spaces. In each space Mel created a planting guide depending on the recommended space for each seed. Such as corn gets 1’ space to itself and so do tomatoes because they are large plants, smaller veggies can be planted 4, 16 or 18 to a square. We can help you understand that, we’ll be talking about Square Foot Gardening this Sat, May 14 at 10 a.m. at The Plant Stand in Costa Mesa.

You can also check out Mel’s book and website,

http://www.melbartholomew.com/what-is-square-foot-gardening/

Or

http://squarefootgardening.org/square-foot-gardening-method


the plant stand logo

2972-A Century Place
(In the back)
Costa Mesa, Ca

(714) 966-0797

1 Comment
Share
  • Pin it
  • Share
  • Tweet
  • Share
  • Email

South Coast Plaza Garden Show

3 / 18 / 16

The Southern California Spring Garden Show

The Southern California Spring Garden Show

From Your Herbal Garden Seminars

potted herbs

Thurs. April 28th 2 p.m.

Sun. May 1st 11:30 a.m.

Free

Related Posts Plugin for WordPress, Blogger...
Leave a comment
Share
  • Pin it
  • Share
  • Tweet
  • Share
  • Email

Posts navigation

Previous Page 1 2 3 Next Page
Deb

Meet Chef Debbi

READ BIO

Join-Us Sign up for our newsletter to receive exclusive tips 'n tricks, and special offers on classes, tours, and more!

Recent Posts

  • New E-Book!
  • From the Pantry
  • Spaghettini at Home
  • Growing Corn
  • Spring IS Coming!

Categories

BookCUT

What's in Your Pantry?

How to stock your pantry to create delicious dishes.

Learn Chef Debbi's pantry essentials and how to substitute ingredients for pantry staples in her basic recipes for quick and easy meals.
BUY BOOK>

FacebookTwitterInstagramGooglepinterest


© 2014, DEB'S KITCHEN
Angie Makes Feminine WordPress Themes