Here’s a special Mother’s Day menu that I love. It’s a throw \back from the 70’s when Veal Oscar was on every fine dining menu. I love it still but with a thick filet mignon. It may seem like a lot of work (but mom’s worth it, right?). It’s not difficult but it will take some organization. Be sure to read through the recipe before you begin and make sure that you have all the ingredients.
A couple of tricks for you begin with what you can do ahead of time. You can ‘poach’ the potatoes the day before then let come to room temperature before roasting. Brown the steaks ahead of time and refrigerate, let come to room temperature also before placing into the oven. If you brown the steaks at the last minute, put the potatoes on the sheet tray and begin roasting, when the steaks are browned place alongside the potatoes in the oven to finish at the same time.
Make the strawberry sauce ahead of time and keep refrigerated. You can even make the whipped cream ahead of time as well. It will hold for a long time.
And last but definitely not least is the Bearnaise Sauce, I’ll forgive you if you decide to use the package mix but it’s really a sad imitation of a real Bearnaise sauce. Try making it on your own, you can even make it an hour ahead of time. Again, it’s important to read through the entire recipe before you start. Be adventurous! Happy Mother’s Day!

Stonyriver Steakhouse
Menu
Filet Oscar
Oven Roasted Baby Potatoes
Strawberry Shortcake
Filet Oscar
- 2 (2-inch-thick) filets mignons
- 2 tablespoons olive oil
- ½ lb. thin fresh asparagus
- 6 ounces fresh crab meat, room temperature
Preheat the oven to 400°.
Bring steaks to room temperature for about 30 minutes.
Heat a large skillet.
Dry the filets with a paper towel.
Brush the filets lightly all over with the oil. Season both side wells with sea salt and pepper.
When the pan is hot, add the steaks and sear evenly on all sides for about 2 minutes per side or until well browned. If the steaks won’t release from the pan, wait another minute or so and it will release when browned.
Arrange the steaks on a parchment lined baking sheet and place into the oven and cook until 120°, about 10 minutes. Remove from oven and let rest for 5 minutes.
Asparagus and Crab
While the steaks are cooking you can lightly steam the asparagus or cook it in the still hot pan that you cooked the steaks in.
Cut the stems from the asparagus so the spears are all the same length. Lightly toss with a little olive oil and season with salt and pepper. Cook until you can pierce with a knife, about 5 minutes. Let rest until you’re ready to assemble the dish.
Warm the crab in a steamer basket over simmering water for about 5 minutes.
Make the bearnaise sauce. I’ll let you cheat here and use the package sauce from Knorr. If you can’t find bearnaise sauce use the hollandaise sauce and add with a little fresh chopped tarragon.
If you want to make the sauce yourself the recipe follows.
Assembly:
Place the steaks on two plates, top with asparagus spears, then add the crab and drizzle with sauce.
Blender Bearnaise Sauce
- 2 tablespoons Champagne or white wine vinegar
- 2 tablespoons good white wine
- 1 tablespoon minced shallot
- 2 tablespoons chopped fresh tarragon leaves, divided
- Sea salt and fresh ground pepper
- 3 large egg yolks
- ¾ lb. unsalted butter, melted
Yield 1 cup
In a small saucepan, add vinegar, wine, shallots and 1 TB. tarragon leaves with a little sea salt and pepper. Bring to a boil and simmer over medium heat until liquid is reduced to about a tablespoon. Cool slightly.
Transfer the cooled mixture with the egg yolks into a blender. Blend 30 seconds.
With the blender on, slowly pour the hot butter through the opening in the lid. Add the remaining tablespoon of tarragon leaves and blend for only a second.
If the sauce is too thick, add a tablespoon of white wine to thin.
Note: To make the sauce in advance, prepare an hour before serving and allow it
to sit in the blender. Before serving, add 1 tablespoon of the hottest tap water
and blend for a few seconds.
Adapted from Ina Garten
Oven Roasted Baby Potatoes
- 1 lb. baby yellow (or red) potatoes
- 1 tablespoon olive oil
- Sea salt and fresh ground pepper
Serves 2
Preheat oven to 400°. Line a small baking sheet with a piece of parchment paper.
Cut potatoes in half unless really tiny.
Place them in a large pot covered with cool water. Bring potatoes to a boil, add a heaping tablespoon of salt and cook for 7-9 minutes or until you can pierce them with a knife, they won’t be fully cooked. Drain and arrange on baking sheet. Toss with olive oil, sea salt and pepper and cook for about 20 minutes or until lightly browned.
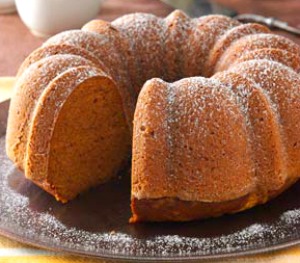
Strawberry Shortcake
- 2 cups strawberries (hulled and sliced)
- 2 tablespoons sugar
- 1 tablespoon Grand Marnier
- 1 tablespoon minced mint leaves, optional
- 1 ½ tablespoons powdered sugar
- 1 teaspoon vanilla
- 1 frozen pound cake (thawed)
- ½ cup heavy cream
Mash half of the strawberries in a large bowl. Add the sliced strawberries, sugar, Grand Marnier and mint and chill.
Beat the heavy cream into soft peaks, add the vanilla and sprinkle in the powdered sugar while mixing just a little more until you have stiff peaks but don't over beat it. If you over beat it (where is looks separated) you need to start over.
Slice the pound cake and place on plates, top with strawberries and whipped cream.