Deb's Kitchen - Farm, Food, Wine & Lifestyle Adventures
  • Facebook
  • Google
  • Twitter
  • Instagram
  • Pinterest
  • Email
Menu
Skip to content
  • Home
  • Blog
  • Events
    • Classes
    • Tours & Adventures
  • Edible Gardening
  • Preserving
  • Recipes
    • Appetizers
    • Soups and Salads
    • Main Dishes
    • Side Dishes
    • Desserts
  • About
    • Whats In Your Pantry
    • Ask Debbi
    • Deb’s Kitchen Botanicals
    • Press
  • Contact

Tag Archives: holidays

Holiday Appeteaser Party

11 / 4 / 16

Last Cooking Demo of the Year! Come and enjoy some tasty holiday party treats with us and we’ll send you off with some delicious, easy recipes for the season.

Thurs, Dec 8th
6:30 – 8:30, approximately
 

The Holiday Appeteaser Party

holiday-buffet
Smoked Salmon Mousse Coins with Roasted Red PepperSauce
Shrimp Cocktail Butter Lettuce Cups
Smoked Trout Crostini
Tuscan Lemon Chicken Speidini
Mini Hasselback Potato Bites
Chocolate Peppermint Truffles

By Reservation Only
(562) 296-5421
148 Main Street
Seal Beach, CA 90740

Sponsored by

Leave a comment
Share
  • Pin it
  • Share
  • Tweet
  • Share
  • Email

Holiday Cooking

11 / 4 / 16

November Cooking Demo’s

Don’t miss out! These are some of the last classes of the year. All based around holiday cooking, join us to learn tips & tricks on how to get through the season deliciously!

fall-table-stackedinteriors

Thurs, Nov. 10th
6:30 – 8:30, approximately

Reserve your spot today!

Temecula Olive Oil Tasting Room, Seal Beach

Apple, Goat Cheese & Sage Tart
Duck Breast with Balsamic Jus
Pan Roasted Brussels Sprouts with Bacon & Pomegranate Seeds
Pear Cranberry Crisp  

Thurs., Nov. 17th
6:30 – 8:30, approximately

Fruit & Cheese Plates
Roasted Chicken with Chestnuts & Shallots
Learn how to cut up a whole chicken!
Fresh Sage, Apple & Brioche Dressing with Pancetta
Cranberry Frisee Salad
Salted Caramel Apple Cake

By Reservation Only
(562) 296-5421
148 Main Street
Seal Beach, CA 90740

Sponsored by

Leave a comment
Share
  • Pin it
  • Share
  • Tweet
  • Share
  • Email

10 must have pantry items for the holidays

11 / 4 / 1611 / 4 / 16

10 must have pantry items for the holidays

herbsspices-411nutrition

Basic Pantry

  1. Organic Chicken Stock
  2. Unsalted butter and a variety of oils (Olive Oil, Peanut, Vegetable & Grapeseed)
  3. Organic Large Eggs
  4. Organic Milk and Cream (for whipping and cooking)
  5. Variety of cheeses, for cooking and serving as appetizers or dessert
  6. Variety of potatoes, Russet for baked or mashed, Fingerlings or Yukon Gold for roasting
  7. Day old breads for breadcrumbs and stuffing or dressing. Freeze for later use. Crackers
  8. Celery, Carrots and Onions, Fresh Citrus
  9. Fresh Sage, Italian Parsley and other herbs
  10. Fresh and Dried Mushrooms

Book Cover

Buy my book ‘What’s In Your Pantry’ for more tips & tricks in the kitchen!


Baking

Beyond the basics, flour, white, brown and powdered sugars, baking soda, baking powder and vanilla.

  1. Nuts
  2. Chocolate
  3. Cocoa Powder
  4. Cinnamon or Baking Spice, Allspice, Nutmeg
  5. Dried Fruits
  6. Variety of jam for easy to make desserts
  7. Peppermint and dried fruit candies
  8. Cream of tartar
  9. Parchment paper
  10. Caramels and Toffee

Make Ahead for the Freezer

  1. Pie Dough
  2. Cookie Dough
  3. Puff Pastry (buy an all butter pastry-read the label)
  4. Gravy
  5. Easy bake appetizers, Empanadas, Pot Stickers, Crab Cakes, Cheese Balls
  6. Meatballs, basic recipe use different sauces for quick appetizers
  7. Quickbreads
  8. Casseroles
  9. Breakfast Treats, Cinnamon Rolls, Scones,
  10. Frozen Seafood, Shrimp, Scallops, Lobster
Leave a comment
Share
  • Pin it
  • Share
  • Tweet
  • Share
  • Email

How To Grow Amaryllis & Paperwhite Bulbs

10 / 20 / 16

amaryllis-potted-2

I love growing Narcissus (Paperwhites) in the spring and in the fall/early winter. If you stagger planting these bulbs you can have continuous blooms from now all through the holidays. Narcissus and Amaryllis both grow well in soil or in a vase or shallow bowl with no soil at all. I love taking amaryllis bulbs to anyone that I visit during the holidays; you can even find bulb kits at the nursery or almost any store this time of year.

Unlike most bulbs these two don’t need to be chilled before planting, they love our warm climate (even if sometimes we don’t!). If you want continuous blooms buy a dozen or so bulbs and store some in a cool dark place and ‘plant’ every few weeks through late winter. Amaryllis will bloom 6 – 8 weeks after planting and Paperwhites 3-5 weeks after planting.

To plant in soil make sure the container is about 5”- 6” deep, plant the Paperwhite bulbs, with the root end down so that the tops peek above the soil surface. You can plant 5 bulbs in this pot and space them a little apart from each other. Water until the soil is damp but not soggy or the bulbs will rot, water occasionally until they bloom then water regularly but do not overwater. Some Paperwhites are very tall and need support to keep from falling over. Plant one Amaryllis bulb in the same size pot with the tip about one-third above the soil. Amaryllis can be encouraged to bloom again next year if planted in soil, cut off the old bloom to about 1” above the bulb, water and feed regularly and let the leaves grow throughout the year. In late summer stop watering and let the leaves dies back naturally as they start to store energy for the next season. You can dig up the bulb or leave in the pot and place into a cool, dark place for about 8 weeks. You can repot in fresh soil or add a little finished compost to it, bring it back into a light area, water infrequently until you see growth and then repeat the process. Paperwhites won’t usually bloom again so buy new bulbs each year.

To plant in gravel or stones place a layer of stones or gravel over the bottom of a vase to a depth of 2-4” for the Amaryllis or paperwhites and place the bulb or bulbs on top of the stones, fill the vase with more stones up to the top third of the bulb and add water up to 1” below the base of the bulb, do not let the bulb sit in water or it will rot. Add water as needed but keep the level below the base of the bulb. Be sure to use a vase or jar that is tall enough so that it won’t tip over as the flower shoots grow.

Buy some ‘kits’ as hostess gifts for the holidays and store in a cool, dark place until you need them. (Don’t forget where you stash them though!)

paperwhites-potted

Leave a comment
Share
  • Pin it
  • Share
  • Tweet
  • Share
  • Email

June Cooking Class

5 / 17 / 165 / 17 / 16

Chef Debbi Cooking Demo 

with


TOOC LOGO

June

Thur.  June 9th

6:30 – 8:30. approximately

Photo: Food Network BBC

Blue Cheese & Heirloom Tomato Tartlettes
Dilled Smoked Salmon & Cucumber Toasts
Peculiar Pickled Veggies& Pickled Deviled Eggs
Bacon Wrapped Bourbon Glazed Shrimp Skewers
Broccoli Bow Tie Salad
Apricot Jam Shortbread Bars

Seal Beach Tasting Room
$45.00
By Reservation Only (562) 296-5421

Sponsored by

Melissas logo small

Photo: Food Network BBC

Leave a comment
Share
  • Pin it
  • Share
  • Tweet
  • Share
  • Email

Easy Pizza Margherita

2 / 2 / 162 / 2 / 16

Pasolivo Pizza


Pizza, Flatbread & Calzone

Save
Print

Makes 2 flatbreads

*Stir the flour with a table knife to lighten the flour; it becomes compacted as it rests. Dip your measuring cup into the flour and use the knife to sweep the excess flour off the top of the cup. According to King Arthur Flour it should weigh 4 ¼ ounces.
Dough recipe adapted from ‘Artisan Bread in 5 Minutes a Day’

Sauce recipe will yield 2 cups and hold for several days. Adapted from Sunset Magazine

  • 1 ½ cups lukewarm water
  • 1 packet granulated yeast, 2 ¼ teaspoons
  • ½ teaspoon sea salt
  • 3 ¼ cups King Arthur unbleached white flour, measured with the scoop and sweep method*
  • Sauce:
  • 2 tablespoons olive oil
  • ½ small onion, chopped
  • 2 small cloves garlic, minced
  • 1 pound fresh tomatoes, quartered or 1 lg. can whole or crushed tomatoes
  • 1 small can tomato paste
  • 2 teaspoons dried oregano
  • 1 teaspoon dried thyme
  • 1 granulated sugar or more as needed
  • 2 tablespoons chopped fresh basil
  • Sea Salt and fresh pepper, to taste
  • Pinch crushed red pepper flakes (optional)
  • Pizza Margherita Topping
  • Sauce
  • Mozzarella, torn into pieces
  • Fresh basil, torn into pieces

Dough: (Make at least 1 day up to 5 days ahead of time)

The water should be warm to the touch but not more than 110°, and add the yeast to the water.

Add salt to the flour and whisk to distribute using a large bowl or a plastic food container with lid. Add the water to the flour all at once and mix with a wooden spoon or wet hands, the dough will be sticky. No kneading is necessary.

Loosely cover with lid and let stand at room temperature approximately 2 hrs. The dough can rise longer, up to 5 hours without affecting the results. The dough is easier to handle if you can make it the night before and refrigerate overnight.

Working on a lightly floured surface, pinch off a palm sized piece of dough, shape into a round, rectangular or square shape. Dough is sticky so keep some extra flour nearby, dust your hands as necessary to shape the dough. If the dough starts to snap back you should let it rest for a few minutes and then resume shaping. I use a rolling pin to thin the dough out to my desired style

Place onto parchment paper, a dusted pizza peel or the bottom of a dusted baking sheet. You can use anything you want providing the pizza can slip right off onto the rack.

If you are baking in an oven, preheat your oven to 500° or as high as it will go. Top the dough with anything you like, slid it into the hot oven and bake for 12-14 minutes.

Sauce:

Heat a deep saucepan big enough to hold all the ingredients, add the oil and onions and sauté until translucent. Add the garlic and stir briefly.

Place all the ingredients along with the garlic and onions into a blender, or use an immersion blender and puree.

Ladle or spoon onto pizza dough leaving an clean edge around the outside of the dough. Sprinkle or place the cheese on top and bake on a hot pizza stone for about 6-8 minutes, checking frequently. Sprinkle with fresh basil and let rest for a minute or two before slicing. Mangia!

Leave a comment
Share
  • Pin it
  • Share
  • Tweet
  • Share
  • Email

How To Make Perfect Gravy

12 / 15 / 15

Christina Peters, The Food Shooter, and I decided we needed to make a second video using the Perfect Stock recipe and this is what we offer you today. You will have Perfect Gravy for your holiday, just follow our simple tips!

Leave a comment
Share
  • Pin it
  • Share
  • Tweet
  • Share
  • Email

Braised Short Ribs

12 / 1 / 1512 / 1 / 15

short ribs-debskitchen


Easy Braised Short Ribs

Save
Print

Braising a tough cut of meat over a long period of time makes the meat deep, rich and delicious. With a small amount of preparation and a long cooking time these are easy to make and warms you up on those cold winter days. Make extra! You’ll want them for leftovers, you can make a ragu out of them, a pot pie or even a Shepherds pie for quick weeknight dinners. You’ll get more flavor out of the short ribs if they are on the bone, they will fall right off the bone after their long slow cooking so they’ll be easy to remove.

Serves 4

  • Olive oil
  • 1/3 cup flour (or more as needed)
  • 2 teaspoons sea salt
  • 1 teaspoon ground pepper
  • 4 pounds short ribs on the bone
  • 1 brown onion, chopped
  • 1 medium carrot, roughly chopped
  • 2 stalks celery, roughly chopped
  • 1 tablespoon tomato paste (double concentrate from a tube-found in the ‘Italian’ section
  • 2 tablespoons flour
  • ¼ cup dry red wine
  • 1 qt. beef stock, may use chicken stock
  • 1 bouquet garni (1 bay leaf, 1 sprig thyme, 2 sprigs Italian parsley tied together in cheesecloth

Heat oven to 350°.

Mix flour, salt and pepper together in a shallow bowl or on a plate.

Heat a large Dutch oven over medium high heat; add enough oil to coat the bottom of the pan.

Dry short ribs well and dredge in the flour mixture, shake off the excess and place the meaty side into the hot oil. Do not crowd the meat in the pan or it will not brown properly. This is the most important step in braising so take your time. Remove the ribs, set aside and continue until all ribs are browned.

In the same pan, add more oil as necessary, add onions, carrots, celery to the pan and sauté until lightly browned.

Add tomato paste and stir to coat all the vegetables and cook the paste a little, about 2 minutes.

Add flour and stirring constantly cook for another 5 minutes without burning. The flour may turn a little dark but that’s fine.

Add the dry red wine to the pan and scrape the bits that have stuck to the bottom of the pan. Let reduce and thicken slightly. Remove from the heat.

Return the ribs to the pan, cover with stock and add the bouquet garni. Put the lid on the Dutch oven and bake for 3 hours. Remove bouquet garni.

Juices may be thickened into gravy with a beurre maníe, roux or cornstarch slurry.

Beurre Manie, Roux, Cornstarch Slurry

Save
Print

Beurre Manie

Mix together equal parts softened butter and flour until it looks like thick butter and all the flour is incorporated.

Roux

Melt 2 Tb. butter in a pan, add 2 Tb. flour, whisk together and cook until lightly browned

Cornstarch Slurry

2 parts cold water mixed with 1 part cornstarch

Whisk any of these into your hot liquid, stirring until thickened. Don't over-cook the cornstarch slurry or it will start to break down and become thin again.

Leave a comment
Share
  • Pin it
  • Share
  • Tweet
  • Share
  • Email

Book Signing & Wine Tasting

11 / 17 / 1511 / 17 / 15

Saturday & Sunday, Nov. 21 ~ 22 Events!

logo-2

DON’T MISS THIS WEEKEND
IN TEMECULA!

Mary Platis, Author of Cooking Techniques & Recipes with Olive Oil &
Chef Debbi, Author of ‘What’s In Your Pantry’
are teaming up to bring you
Cooking From The Pantry Series!

Book Covercover-award

First stop
Temecula Olive Oil Co.
Temecula tasting Room
Cooking Class Demo-Wine Tasting & Book Signing
Sat. Nov. 21st
12 – 2 $45.00

Menu
Mediterranean Vegetables in Olive Oil
Fresh Tomato Risotto
Baby Beets and Brussels sprouts Salad
Turkey Rollatini with White Wine, Porcini Mushroom Pan Sauce
Pumpkin Olive Oil Cake with Vanilla & Fig Balsamic Compote

For Temecula Reservations please call:
951-693-0607

Second stop

Sunday, Nov 22nd
Book Signing and Wine Tasting 12 ~ 2

Sponsored by

Leave a comment
Share
  • Pin it
  • Share
  • Tweet
  • Share
  • Email

Pie Crust

11 / 17 / 1511 / 17 / 15

Nothing beats a great pie, perfectly balanced filling and a tender, flaky piecrust. Piecrusts are easy to do, don’t let them intimidate you! My Grandmother taught me her secrets to a good crust, use good butter (unsalted), keep all of your ingredients very cold and work quickly. So there’s a little more to it than that but remember those three things and you’ll be fine.

pie-crust-guide

This recipe calls for shortening which creates a tender, flaky crust, my Grandmother used lard and if it’s available to you it may be a better choice than shortening (which is another discussion). If you’d rather not use lard or shortening you could use all butter and the pie will be just as delicious.

Another trick that I picked up from King Arthur Flour is instead of just cutting your piecrust in half; cut it in 2/3 and 1/3 discs. The bottom of the pie will take more crust because it will hold the entire filling and the top crust only needs to cover all the ingredients. Well, duh…..why we never thought of that before! (See this is probably why I don’t bake much).

If you’d like to pre-make your pie crust you could freeze it two ways; one freeze the disc or roll the crust out, fit it into the pan and freeze, defrost overnight in the refrigerator and then continue with the recipe.

I cut the butter into the dry ingredients in the food processor, it takes less time, and just pulse it a few times until it looks like peas and you’ll be fine. I like to put the flour/butter ingredients into a bowl and incorporate the ice water using my fingers and tossing the dough until it comes together, that way I make sure I’m not adding too much liquid. I turn it out onto a rolling mat while it’s still very crumbly and bring it all together quickly by rolling and kneading lightly. I add only enough flour to the rolling mat as needed to keep the dough from sticking to the mat; I use a bench or dough scraper to actually fold it all together. Once the water hits the dough you begin developing gluten, which can make the dough tough so work it as little as possible at this stage. Press the dough into discs and refrigerate for at least an hour and then roll out and blind bake as described in the recipe. Blind baking helps keep the crust light and flaky, especially with a wet filling. Protect the edges of the crust if they start to brown by using a pie shield or cover with the edges with foil. Bake up some pies today~ Happy Holidays!

Perfectly Flaky Pie Crust Recipe

Talisman Designs Adjustable Pie Crust Shield, BPA-free Silcone, Red, Fits 8.5″ – 11.5″ Rimmed Dish

Leave a comment
Share
  • Pin it
  • Share
  • Tweet
  • Share
  • Email

Holiday Gifts to Make

11 / 5 / 15
Sat. Nov. 7th
10 – 11 a.m. Free

How to Make Gifts from the Garden

Chef Debbi will also have some seasonal spices and holiday botanicals
Pick up a copy of ‘What’s In Your Pantry’ for holiday gift giving
A great hostess gift!

Join us for some conversation and a tasty bite!

The Plant Stand 
2972-A Century Place
(In the back)
Costa Mesa, Ca
(714) 966-0797

Leave a comment
Share
  • Pin it
  • Share
  • Tweet
  • Share
  • Email

How to Choose and Sharpen Kitchen Knives

11 / 3 / 1511 / 3 / 15

One of the most important tasks you can do to get ready for any event or holiday is to make sure that your knives are sharp. It’s so much easier to cut yourself with a dull knife (really), and a sharp knife makes chopping a dream. Sharpen your knives when the time changes, this makes it easier to remember to drop your knives at the cutlery store or with the farmers market knife specialist. There are electric knife sharpeners galore or you can learn the old fashioned way with a whetstone and mineral oil. I should also mention here that a knife ‘steel’ does not sharpen your knife. (The steel is the long piece that comes with the knife block that you don’t really need-the knife block, not the steel.) The steel is designed to hone the edge of your knife between sharpening and should be used prior to any use of the knife. Be sure to wipe the edge of the blade carefully after honing.

Here is an excerpt from my book, ‘What’s In Your Pantry‘ about knives.
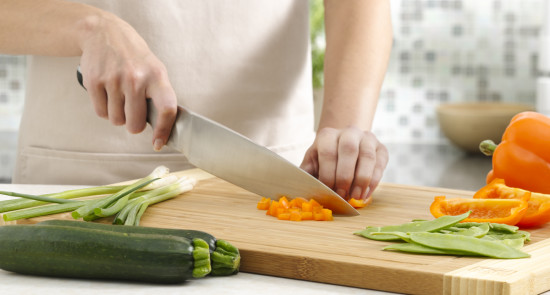
knife chopping

Photo: chowhound

Forged construction. A forged knife is one that’s been squeezed in a die (a type of mold) with tons of force. This strengthens the knife by aligning the steel molecules, like wood grain, and also makes the steel’s edge more consistent so it will both take and hold a better edge.

Stamped construction. Provided they’re made from good-quality steel, stamped knives (which have been punched from sheet steel, like how you use a cookie cutter) are a good low-cost alternative to forged knives. But given the easy availability of affordable forged knives, I’d say you should bypass stamped knives altogether.

Full-tang designs. A full tang knife is one in which the blade’s steel extends into the handle for its entire length. The myth is that this is necessary for strength. In the kitchen, a full tang is not necessary, although a full tang can help balance a knife.

Hollow-ground designs. It’s become quite fashionable to have little hollows, known as grantons, ground into the sides of the blade. In theory, they minimize blade-to-food friction and prevent sliced foods from sticking to the blade. I’ve found this is true about 10 percent of the time.

Knives

Chef’s Knife:

This is the most important knife in your arsenal, the one you’ll reach for 95 percent of the time. No matter how tight your budget, get yourself a great chef’s knife. If you need to save money, do it with the other knives.

Santoku

This has become a tremendously popular blade style, and for many cooks the Santoku has supplanted the traditional French chef’s knife as their go-to blade. It’s offset, like a French chef’s knife, but tends to be shorter (less versatile). And many have essentially straight cutting edges, without the smooth curve that helps promote a rocking/paper-cutter motion useful for mincing and chopping.

Paring

The paring knife is going to be your second-most-used blade for fine detail work like trimming meats and vegetables, or peeling and de-seeding fruits.

Bread/Serrated Knife

Serrated blades rip through food, so sharpness isn’t that essential. Quality steel is less important than blade length—longer is better (I like 10 inches, don’t settle for less than 8 inches). Offset blades are preferred—otherwise you have to cut near the edge of the cutting board to stop your knuckles from hitting the surface.

Slicing/Carving Knife

Look for a knife that’s not too tall, so it’ll be easier to make curving slices (handy when circumnavigating a turkey rib cage, or the bone in a roast). And be sure it’s at least 10 inches long, so you can slice through with the fewest number of strokes for a smooth surface and clean presentation.

Boning/Filleting Knife

This is a very special-purpose knife, and in this once instance it’s actually preferable to have a stamped blade. Forged blades are stiffer, and a flexible blade follows bones more closely for better yield. Be sure you choose a knife with a textured grip—boning and filleting is a greasy, messy operation, and you don’t one that knife to slip.

Here’s a little Winter Soup recipe for you to practice your knife skills,

Minestrone Soup with Pesto

Buy the Book

Book Cover

Related Posts Plugin for WordPress, Blogger...
Leave a comment
Share
  • Pin it
  • Share
  • Tweet
  • Share
  • Email

Posts navigation

Previous Page 1 2 3 4 Next Page
Deb

Meet Chef Debbi

READ BIO

Join-Us Sign up for our newsletter to receive exclusive tips 'n tricks, and special offers on classes, tours, and more!

Recent Posts

  • New E-Book!
  • From the Pantry
  • Spaghettini at Home
  • Growing Corn
  • Spring IS Coming!

Categories

BookCUT

What's in Your Pantry?

How to stock your pantry to create delicious dishes.

Learn Chef Debbi's pantry essentials and how to substitute ingredients for pantry staples in her basic recipes for quick and easy meals.
BUY BOOK>

FacebookTwitterInstagramGooglepinterest


© 2014, DEB'S KITCHEN
Angie Makes Feminine WordPress Themes