Deb's Kitchen - Farm, Food, Wine & Lifestyle Adventures
  • Facebook
  • Google
  • Twitter
  • Instagram
  • Pinterest
  • Email
Menu
Skip to content
  • Home
  • Blog
  • Events
    • Classes
    • Tours & Adventures
  • Edible Gardening
  • Preserving
  • Recipes
    • Appetizers
    • Soups and Salads
    • Main Dishes
    • Side Dishes
    • Desserts
  • About
    • Whats In Your Pantry
    • Ask Debbi
    • Deb’s Kitchen Botanicals
    • Press
  • Contact

Tag Archives: Meyer lemons

Spring IS Coming!

3 / 7 / 23

It’s time to start late winter/early spring flowers & veggie’s

You still have time in zones 9/10 to get another round of onions, carrots, potatoes, beets, turnips, and radish in. Don’t forget to plant more lettuce, kale etc. Need a salad garden design? Email me

[email protected]

Plant your early spring flowering seeds and bulbs, Dahlias (tubers or seeds), sweet peas, tulips, narcissus, & ranunculus,
visit the bulb shop at your local nursery.

Even though you can pick up some tomato plants I’m waiting a week or two to start mine, it’s pretty cold out there right now, even if they go in later this month or next they’ll easily catch up to plants that go in now.

When the soil is too cool the roots just sit there until they get warmer weather.

If you’re shopping for tomato plants remember to choose plants that have thick stalks (like the size of a pencil) with no fruit or flowers. When you first plant them you want the roots to grow and grow to get big & strong to support heavy loads of super juicy fruit! Be sure to stake or tie up early.

More Organic Edible Gardening & Flower Classes coming in 2023
Starting tomatoes from seed soon

For vegetables and fruits to plant now and mid-month visit

Debs Kitchen
and for more reading click below
Edible Gardening

NOW Booking for Vegetable & Flower Garden consult & Design

[email protected]

Ojai Pixie Tangerines

For now,  citrus picking has been going strong when it dries out for a little while. They won’t pick when the trees are wet and can’t get into the muddy fields. Our tangerine  favorites this time of year are the Ojai Pixie tangerines and the trees are loaded with fruit & should be readily available at your supermarket or from Melissa’s Produce! New crop just picked.

Leave a comment
Share
  • Pin it
  • Share
  • Tweet
  • Share
  • Email

How To Use Meyer Lemons

2 / 8 / 232 / 9 / 23

picking-lemons-490x326


The bright star of the season, Meyer Lemons are the sweetest lemons to use in cooking. Thin-skinned, juicy and brightly colored you can use every part of the lemon, well, except maybe the seeds! In season now you can find them in all markets and at your local farmers market. If you have your own tree about now you might be wondering what to do with all those lemons. If you have trouble finding them you can call our friends at Melissa’s Produce and they can fill up your pantry!

Below you’ll find a few of my favorite recipes.


Meyer lemons

 How to choose, store and use beautiful Meyer

Lemons

Meyer Lemon Season (Commercial) Nov-May

Home Tree will fruit late Summer-April/May

Choose, Store and Use Meyer Lemons:

Pick lemons that have a smooth, yellow skin with no signs of bruises or cuts. Lemons that are heavy will have more juice in

them; unfortunately, Meyer lemons also contain many seeds. Easily seeded if cut in half, most of the seeds are centered in the middle of the fruit.

Store lemons in a bowl on the counter in a cool place with no direct contact with the sun. If the lemons begin to become soft, refrigerate and use within a few days. If using refrigerated lemons, let them come to room temperature if possible. Roll all lemons around on the counter to help free up the juice.

Extra lemon juice can be poured into ice cube trays, frozen and then placed into a freezer bag and used within 6 months.

Grow:Citrus_lemon

Meyer lemon trees grow well in pots in So. California, use a fast draining soil. They are hungry fellows so feed with an organic citrus fertilizer according to directions. They love the So. California sunshine but not so much our sometimes-windy weather. Meyer lemons like to be moist but not wet, deep infrequent watering and don’t let water sit in the liner or pot. If the weather threatens to freeze, water well and cover with a blanket or row cover at night, be very careful not to know off the fruit or flowers on the tree. Feed with an organic citrus food as directed and keep a close watch for citrus pests. Fruit will hold a long time on the tree, make sure they are nice and yellow before picking and after fruiting a little light pruning, if necessary will keep them compact and tidy.


Lemon Roasted Chicken

Save
Print
  • Serves 4
  • 1 whole chicken -- rinsed, drained and dried
  • 1 medium onion -- peeled and chopped
  • 3 baby carrots -- peeled and chopped
  • 3 celery stalks -- cut into chunks
  • 1 lemon -- zested and juiced; preferably Meyer lemon
  • 1 bunch Italian flat leaf parsley -- minced
  • 1 bunch fresh sage -- minced
  • 1/2 bunch fresh thyme -- minced
  • 2 tablespoons butter -- room temperature
  • 1 tablespoon lemon olive oil, butter or regular olive oil
  • Salt and pepper
  • 1 cup white wine
  • 1 cup chicken stock
  • 2 tablespoons chicken demi glace -- optional for sauce

Preheat oven to 400°.

Wash and dry chicken inside and out then dry well. Fit chicken into a roasting pan (you want no more than 1" of space on any side of the chicken otherwise the juices will burn).

Mix together onion, carrot, celery, lemon zest, and 1/2 of the minced herbs. Loosely stuff cavity with some of the ingredients, place the remainder on the bottom of the roasting pan and place chicken on top of the aromatic vegetables.

Mix remaining minced herbs with butter. Gently separate the chicken skin from the breast meat and carefully rub herb butter on breast under the skin.

Rub the chicken with lemon olive oil and season with salt and pepper. Squeeze lemon over chicken and place rind into cavity. Insert probe thermometer into thigh and set for 165 degrees. Pour half of the wine and chicken stock in the bottom of the pan and place, uncovered in hot oven.

Baste after 1/2 hour, if you don't have enough juice in pan use some chicken stock. Do not cover bird until browned and then loosely place foil over breast. If wings start to brown to early wrap with foil.

Remove chicken to a warm plate and loosely cover with foil. Let rest for 10 minutes before carving.

Remove some of the fat in the pan by using a paper towel or ice cubes. (Dredge the paper towel through the juices to pull out some of the fat or pour off the juices into a heat proof measuring cup. Add a few ice cubes; the fat will stick to the cold cube, discard cube. You may have to do this several times).

Put the roasting pan on top of the stove over medium-high heat and bring a boil, add remaining wine and stock scraping the fond (the yummy pieces stuck to the pan) from the bottom of the pan. Reduce by half, add demi-glace if using and serve with chicken.

Photo: Annabelle Breakey; Styling: Dan Becker

French Yogurt Cake

Save
Print

I love this bright lemony cake so much I adapted it slightly from Dorie Greenspan by adding these super sweet little strawberries, Alpine strawberries.

  • 1 1/2   cup all-purpose flour
  • 2         teaspoons baking powder
  •            Pinch of salt
  • 1         cup sugar
  • 1         lemon, grated and zest
  • 1/2      cup plain yogurt
  • 3         eggs
  • 1/4      teaspoon pure vanilla extract
  • 1/2      cup citrus olive oil
  • 1         cup Alpine strawberries, whole or halved

Center a rack in the oven and preheat the oven to 350 degrees F. Generously butter an 8 1/2-x-41/2-inch loaf pan and place the pan on a baking sheet.

Whisk together the flour, baking powder and salt.

Put the sugar and zest in a medium bowl and, with your fingertips, rub the zest into the sugar until the sugar is moist and aromatic.

Add the yogurt, eggs and vanilla and whisking vigorously until the mixture is very well blended.

Still whisking, add the dry ingredients, then switch to a large rubber spatula and fold in the oil and then the strawberries. You'll have a thick, smooth batter with a slight sheen. Scrape the batter into the pan and smooth the top.

Bake for 50 to 55 minutes, or until the cake begins to come away from the sides of the pan; it should be golden brown and a thin knife inserted into the center will come out clean. Transfer the pan to a rack and cool for 5 minutes, then run a blunt knife between the cake and the sides of the pan. Unmold, and cool to room temperature right side up on the rack.

Glaze (optional)

½ cup lemon marmalade mixed with 1 teaspoon water

To Make the Glaze:

Put the marmalade in a small saucepan or in a microwave-safe bowl, stir in the teaspoon of the water and heat until the jelly is hot and liquefied. Using a pastry brush, gently brush the cake with the glaze.

Citrus Olive Oil Cake

Save
Print

You can make this cake with any flavored or un-flavored olive oil that you like. Instead of poppy seeds try adding some dried cranberries or cherries. For serving dust with powdered sugar or make a citrus glaze with orange or lemon juice mixed with some powdered sugar and drizzle over the top of the cake, I like serving this with fresh raspberries on the side and a dollop of freshly whipped cream wouldn’t hurt either!
I’ve used cake pans, bundt cake pans and small Mason jars for this cake, just be aware of your baking time, test by inserting a clean toothpick into the center of the cake and it comes out dry.

  • 2 cups flour
  • 1 ¼ cups sugar
  • 1 teaspoon baking powder
  • 1 teaspoon baking soda
  • ¼ teaspoon salt
  • 3 large eggs, beaten
  • 1 ½ cups whole milk
  • ½ cup Orange olive oil, or any flavored olive oil
  • 1 orange, zested
  • 1 teaspoon vanilla
  • ½ cup sliced almonds
  • 1 tablespoon poppy seeds, optional

Preheat the oven to 350°.

Sift together the flour, sugar, salt, baking powder and baking soda Make a well in the center of the dry ingredients and whisk in the eggs, milk, olive oil, zest and vanilla. 


Add the almonds and poppyseeds to the batter, and mix with a spatula or wooden spoon. 


Pour the batter into a greased Bundt cake pan. Bake for 55 to 60 minutes, until the cake is golden on top. Cool the cake, invert on a plate and dust with confectioners sugar if you like.

If using Mason jars, spray the inside of the jar with oil spray and fill only 2/3 of the jar with batter. Place jar on a baking sheet and when all jars are done place the sheetpan into the oven and bake accordingly. Check the cakes at 30 minutes and then every 5 minutes until a toothpick comes out clean.

2 Comments
Share
  • Pin it
  • Share
  • Tweet
  • Share
  • Email

Thanksgiving Feast

11 / 20 / 2211 / 20 / 22

These are my family favorites for the Thanksgiving Holiday, these recipes will serve 6-8 people. Many of the recipes can be made ahead of time making it easier to pull together the entire meal on one day. Make ahead the stock, gravy (add pan drippings later), mashed potatoes, dressing (I don’t stuff my turkey any longer and because I don’t I can cook a large bird in about 2 hours), green beans and of course the apple pie! I hope you enjoy and have a safe and tasty holiday!

Debbi & The Debettes (Sue & Barbara)

Watch my YouTube videos with Christina Peters on making Turkey/Chicken Stock and how to make successful gravy! Click here to watch!


Both recipes can also be found in my book, ‘What’s In Your Pantry’ pages 43, 44 and in the video’s.

Order my book here, next day shipping!


Click here to order

Citrus Cranberry Sauce, Instant Pot

Save
Print
  • 2 (12-ounce) packages fresh cranberries
  • 1/2 cup sugar
  • 1/2 cup brown sugar
  • 1 medium orange, zester and juiced
  • 1 small cinnamon stick

Place cranberries, sugars, orange juice, orange zest, cinnamon and cloves into a 6-qt Instant Pot®. Stir until well combined.

Select manual setting; adjust pressure to high, and set time for 4 minutes. When finished cooking, naturally release pressure according to manufacturer’s directions, about 20-30 minutes.

Remove orange zest and cinnamon. Using a potato masher, mash cranberry mixture until desired consistency is reached.

Let cool completely.

My Best Dressing for Thanksgiving

Save
Print

Old fashioned stuffing recipe but I cook it as a ‘dressing’ rather than stuffing a turkey. For one reason it’s safer (temperature-wise) and the turkey cooks faster if it’s not stuffed. If you stuff a turkey the stuffing needs to reach 165° to kill any bacteria, but that means the turkey is well past 185°, overcooked and dry. The spice that makes this dressing the bomb is Penzy’s Poultry seasoning, penzys.com, it’s definitely my go to herb blend!

  • 1 loaf (1 pound) day-old crusty sourdough bread
  • 1 ½ sticks unsalted butter
  • 2 leeks, halved, thinly sliced, and rinsed well
  • 1 small shallot, finely minced
  • 4 celery stalks, diced (I like to use the celery hearts for this)
  • ¾ teaspoon sea salt
  • ½ teaspoon freshly ground black pepper
  • 1 ½ Tablespoons poultry seasoning
  • ¼ cup chopped parsley
  • 1½ chicken stock, maybe up to 2 cups
  • 2 eggs, lightly beaten

The day before you make the dressing tear the bread into 1-inch pieces and place on a baking sheet, set atop your stove for the bread to dry out slightly.

Preheat the oven to 350°F and grease a 9x13-inch baking dish.

Melt the butter in a large skillet over medium heat. Add the leeks, shallots, celery, salt, and pepper, and sauté until tender and translucent.

Place the bread into a large bowl and pour the vegetable mixture onto the bread cubes, add the poultry seasoning and parsley and toss lightly until coated. Add 1 cup of the chicken stock & toss again, the bread cubes should be fairly wet, if not add more stock and mix well until it is wet.

Before you add the eggs, taste the dressing, and adjust any seasoning. Then add the eggs and mix in well. *For a heartier dressing add Melissa's Steamed and Peeled Chestnuts (chop them into bite sized pieces and mix in). See link below.

Transfer to the prepared baking dish and bake, covered, for 30 minutes, uncover the dish and bake for 5 to 10 more minutes to crisp the top a bit.

Dried Herbs or ‘Poultry Seasoning’ from Penzy’s Spices

Melissa’s Steamed & Peeled Chestnuts

*Recipe for Chestnut Dressing can be found on page 120 in ‘What’s In Your Pantry’

Green Beans with Smoked Bacon & Caramelized Shallots

Save
Print

These are similar to my Grandmother’s Famous Green Beans but I replace her garlic with Caramelized Shallots.

  • 2 pounds haricots verts (thin green beans), trimmed, blanched and dried well*
  • ½ pound applewood smoked bacon
  • 3 large shallots, quartered
  • 2 tablespoon olive oil
  • 2 tablespoons red wine or balsamic vinegar
  • Sea salt & freshly ground black pepper

Cook bacon until crisp. Remove with a slotted spoon, and drain on paper towels, reserving 2 Tbsp. drippings in skillet.

Add olive oil to the pan with the bacon drippings then add the quartered shallots and sauté until browned. Add the vinegar, stir well, then add the green beans and toss until coated with oil, cook for another minute then season with salt and pepper and toss with bacon, serve hot.

To blanch green beans: Fill a large bowl with ice and cold water leaving room for green beans. Bring a large saucepan full of water to a boil and add green beans and a good helping of salt, cook for 1-2 minutes, drain the beans and plunge them into the bowl of ice water. Let them cool, drain and dry well.

Do Ahead Mashed Potatoes

Save
Print
  • 3 lb. medium Melissa’s Dutch Yellow Potato*, scrubbed and cut in half
  • Kosher salt
  • ½ cup heavy cream
  • ½ cup whole milk
  • 1 stick unsalted butter, cut into pieces, room temperature
  • ¼ cup sour cream
  • Sea salt and fresh ground pepper

Cut the potatoes into like sized pieces so they all cook at the same rate. Cook the potatoes in large pot of boiling salted water until they are tender, about 20 to 30 minutes.

Drain the potatoes and return to the dry pot. Shake over low heat for about 1 minute. This helps make the potatoes fluffy as it whisks off excess moisture.

Mash the potatoes until there are no lumps

Heat cream, milk and butter in a small saucepan over medium until just about to simmer. Reduce heat to low and keep warm until ready to add to potatoes.

(If you have a potato ricer or mill, pass the potatoes through into a bowl. If you don’t have a food mill you can mash the potatoes with a potato masher), slowly add cream mixture while tossing gently, season with sea salt and pepper and mix in sour cream.

Take the potatoes out of the refrigerator about 3 1/2 hours before serving time. Stir the potato mixture well. Remove the potatoes from the dish and place it in a 4- or 5-quart crockpot. Cover and cook on low heat for 3 to 4 hours, stirring once or twice.

add more melted butter, sour cream or milk if you want a softer consistency. The potatoes can be held in the slow cooker an additional 30 minutes or more on low. Or turn the crockpot to "keep warm" for another hour or two.

*Melissa’s Dutch Yellow Potatoes can be found at Gelsons, Bristol Farms and Lazy Acres or order from their website (link below).

Herb Roasted Turkey

Save
Print
  • 10 -12pounds free range or organic turkey, Diestal is my favorite and available at Gelsons
  • 2 medium onion, quartered with peel on
  • 6 carrots, peeled and roughly chopped
  • 6 celery stalks, roughly chopped
  • 1 bunch Italian flat leaf parsley
  • 1 bunch fresh sage
  • 1 whole bay leaf
  • ½ bunch fresh thyme
  • 2 Meyer lemon
  • ¼ cup butter, room temperature
  • Sea salt and pepper
  • 1 cup dry white wine, Sauvignon Blanc is my go to
  • 1 cup chicken or turkey stock

Preheat oven to 425°

Remove turkey from refrigerator and let rest for 1 hour before cooking. Carefully rinse and dry turkey inside and out, dry well. Select a roasting pan where the turkey will fit snugly but doesn’t hang over the side. Place ½ of the herbs into the pan as a bed for the turkey, roughly chop the remainder of the herbs and stuff inside the turkey. Squeeze the lemons over the turkey and place the rinds into the pan with the herbs.

Place the turkey inside the pan and rub with butter, season with sea salt and pepper.

Insert probe thermometer and set for 165°. The turkey will cook for approximately 2 hours. Pour wine and chicken stock in the bottom of the pan and place, uncovered in hot oven.

Baste after 1/2 hour, if you don't have enough juice in pan use some stock. Do not cover bird until browned and then loosely place foil over breast. If wings start to brown to early wrap with foil. If the breast starts to brown too much, loosely cover with foil and turn oven down to 400°.

Let turkey rest for 15 minutes before carving.

*Pick up a probe digital thermometer here

To make sure your oven is the correct temperature use an oven thermometer

Dutch Apple Pie

Save
Print
  • Pâte Brisée, (Pie Crust)
  • 1 ¼ cups flour
  • ½ teaspoon salt
  • 1 stick cold butter, cut into pieces
  • 2-4 tablespoons ice water
  • 1 tablespoon sugar, optional (for Pâte Sucrée, sweet pie dough)
  • For the Dutch Apple Pie:
  • 1 pie crust
  • 2 ¼ pounds of baking apples, about 6 medium
  • 1 teaspoon cinnamon
  • 8 tablespoons unsalted butter, 1 stick)
  • 3 tablespoon flour
  • 1/4 cup water
  • 1 cup sugar
  • For the Crumb Topping:
  • 1 cup all-purpose flour
  • 1/4 cup packed brown sugar
  • 2 tablespoon sugar
  • 1/4 teaspoon cinnamon*
  • 1/4 teaspoon sea salt
  • 8 tablespoon unsalted butter, room temperature

Add flour and salt (sugar also if making Pâte Sucrée) into the bowl of a food processor; pulse a few times to incorporate all the ingredients.

Add the butter and process until the mixture is crumbly and the butter is pea size.

Place the mixture into a wide bowl and add water 1 tablespoon at a time until the mixture comes together. Don’t overwork the dough or it will be tough, not flaky. Once the dough comes together in a ball flatten into a disk, wrap in plastic wrap and refrigerate for 30 minutes.

Dough can be wrapped well at this point and frozen for up to three months. Let the dough defrost overnight in the refrigerator before using.

Roll chilled disk out on a floured counter or rolling mat, lifting and moving the dough every few rolls to help prevent sticking. Add only enough flour to the counter to keep the dough from sticking.

Place your pan on top of the dough to make sure it is the correct size, it should be slightly larger than the pan, then roll the dough onto your rolling pin and unroll over your pan. Gently lift and lay the dough to fit the pan, never pull the dough to stretch it. Lightly press the dough into the pan, roll your rolling pin over the top edge of the tart or pie pan and remove excess pastry, or pinch the edges to your liking.

Cover and refrigerate for 30 minutes or while you prepare filling.

Your pie crust should be rolled out into the pie pan and be resting in the refrigerator.

Preheat oven to 375˚F. Place your rack in the center of the oven.

Peel, core, and thinly slice apples to about 1/4” thickness. You should have 7 cups of sliced apples. Place them in a mixing bowl and stir in 1 teaspoon cinnamon.

Melt butter in a medium saucepan over medium heat. Whisk in flour then simmer for 1 minute, whisking constantly. Whisk in water and sugar and bring to a boil. Reduce heat and continue simmering for 3 minutes, whisking frequently. Pour the sauce over the apples and stir to coat the apple slices. Pour apples over bottom crust.

To Make the Crumb Topping, stir together dry ingredients: flour, sugars, cinnamon, and salt. Add butter and work it into the mixture with our hands until pea-size crumbs form throughout the mixture. Spread the crumb topping evenly over your apples, place pie onto a baking sheet and bake uncovered for 50-60 minutes or until the center of the pie registers 175˚F. If topping is browning too much, cover with a sheet of foil. Remove from oven and cool 1 hour to allow the filling to set so it’s easier to slice.

*Cinnamon, I like using Penzey’s Spices ‘Baking Spices’ instead of just cinnamon.

Leave a comment
Share
  • Pin it
  • Share
  • Tweet
  • Share
  • Email

Citrus Season!

1 / 19 / 21


Nutritious and healthy we all know that citrus fruits are high in vitamin c which helps your immune system; they are loaded in plant compounds that have various health benefits, including anti-inflammatory and antioxidant effects. They contain B vitamins, potassium, phosphorous, magnesium and copper as well. A versatile fruit they can be made into jams, jellies, drinks and savory or sweet dishes or just eaten out of hand. Try this Roasted Chicken with Lemon and Herbs along with Melissa’s Dutch Yellow Potatoes for a tasty, comforting dinner.

Lemon Herb Roasted Chicken With Dutch Yellow Potatoes®

Save
Print
  • 1 Meyer lemon, zested and juiced
  • 2 tablespoons unsalted butter, softened
  • ½ teaspoon minced fresh thyme
  • Sea Salt and freshly ground pepper
  • 1 large onion, rough chopped
  • 2 small carrots, rough chopped
  • 1 stalk celery, rough chopped
  • 4 sprigs Italian flat leafed parsley
  • 1 bag Melissa’s Dutch Yellow Potatoes®, cut in half
  • ½ cup chicken stock

Preheat the oven to 425° and place the rack in the lower third of the oven.

Mince the lemon zest and mix with the butter and minced thyme.

Rinse and pat the chicken dry. Slide half of the butter mixture under the skin and the rest over the chicken, season with salt and pepper.

Scatter the onion, carrots, celery and parsley over the middle of a roasting pan*. Place the chicken on top of the vegetables and place the potatoes around the chicken.

Roast for approximately 50 minutes, using a probe type or instant read thermometer placed into the thigh and it should read 165° - 175°. Let the chicken rest in the pan for 15 minutes. Remove to a cutting board, remove vegetables from pan and place the pan over a medium high heat. Add the stock and scrape any bits from the bottom of the pan, reduce the liquid to about ½ and serve along with the chicken.

Use a roasting pan with no more than 2” sides

Leave a comment
Share
  • Pin it
  • Share
  • Tweet
  • Share
  • Email

Hello Fall!

10 / 17 / 20

Gordon Skagit Pumpkin Farms

It’s starting to feel like fall, I’m sure hoping all the hot days are behind us, they’re not my favorite!

I still have great looking tomatoes in the garden and some seasonal herbs, my summer lettuce is going to seed so it’s time to get busy with my fall/winter garden. Actually I’m a little late but we decided to drive up the coast just to get a break. Now it’s time to focus before the ground gets too cool.

I’m working on a new Debs Kitchen Garden newsletter which I’ll begin sending out on opposite weeks of the regular newsletter. I have some appointments left if you need a little advice on getting your own winter garden growing. In the meantime here are some pumpkin/squash recipes for you because I know many of you just can’t get enough pumpkin! Mangia!


Pumpkin Risotto

Save
Print

Serves 4

  • 1 qt. homemade or low-sodium chicken or vegetable stock
  • 1 cup pumpkin purée (not pumpkin pie filling)
  • Sea salt and pepper
  • ½ teaspoon ground nutmeg, or 6 to 10 scrapes on a grater from a whole nutmeg
  • 8 tablespoons (4 ounces) unsalted butter
  • 8 ounces shallots (7 to 8), minced
  • 1 ¾ cups carnaroli, vialone nano rice, you could also use an arborio rice
  • 1 ½ cups dry white wine
  • 1 ¼ cups grated Parmesan cheese
  • 6-10 sage leaves, finely chopped (optional)

Place the stock, pumpkin, nutmeg, a sprinkling of salt and pepper in a medium saucepan over high heat, Stir to combine and bring to a gentle boil. Reduce the heat to a simmer.

In a large, deep pan add the butter, and melt over medium heat. Add the shallots and cook, stirring until they are translucent. Add the rice and stir until each grain is coated in fat, 2 to 3 minutes. Reduce the heat to low. Add the wine or vermouth and cook, stirring constantly, until it is absorbed.

Add 1/2 cup of the pumpkin stock mixture and stir constantly until absorbed. Add the remaining stock mixture, 1/2 cup at a time, stirring constantly after each addition and adding the next amount only after the previous one is fully absorbed by the rice.

After you have used about 4 1/2 to 5 cups of the stock mixture taste the rice to determine if it is al dente. Continue to add more stock, if necessary, to reach al dente.

Stir in the cheese and sage if using. Serve immediately.

Instant Pot Pumpkin Purée

Save
Print

Yield about 2 cups

  • 1 ½ cups water
  • 1 (3- to 4-pound) sugar or pie pumpkin*

Wash and dry the pumpkin Remove the top and then cut in half lengthwise. (You can remove the seeds now or wait until the squash is cooked and scoop them out).

Set a wire rack in a 6-quart or larger electric pressure cooker or Instant Pot. Add the water. Place the pumpkin cut-side up on the rack. Lock on the lid and make sure the pressure valve is set to seal. Set the cook time for 15 minutes at high pressure.

When the cook time is up, let the pressure cooker naturally release pressure for 5 minutes. Quick release any remaining pressure. Open the pressure cooker and check the texture of the pumpkin. The pumpkin flesh should be fork tender. If it's not, cook for 5 minutes more at high pressure, repeating the 5 minute natural release. Transfer the pumpkin to a cutting board until cool enough to handle.

Fit a large fine-mesh strainer over a bowl or line a regular colander with cheesecloth first. Cut the pumpkin in half. Remove any remaining seeds. Scrape the pumpkin flesh away from the skin and place in the strainer or colander. Using the back of a spoon, press on the pumpkin firmly to remove excess liquid. Set aside to drain for 1 hour.

Transfer the drained pumpkin to the bowl of a food processor fitted with the blade attachment. Blend until smooth, about 1 minute. Measure into 16-ounce portions, about 2 cups each. If any pumpkin remains, use it in smoothies.

*Pumpkin substitute: If you can't find a sugar pumpkin, use 2 acorn squash instead, 3 to 4 pounds total.

Storage: Keep the purée in the refrigerator for up to 2 days or place the fully cooled purée into a plastic freezer bag. Flatten and freeze for up to 3 months. Thaw in the refrigerator overnight before using.

Maple Roasted Brussels Sprouts with Squash

Save
Print
  • 1 pound butternut squash peeled and diced into 1/2-inch cubes
  • 1 pound Brussels sprouts ends cut off and halved (if they are large, cut in quarters)
  • 4 slices thick-cut bacon diced
  • 2 tablespoons extra virgin olive oil
  • 1 tablespoon fresh thyme
  • 1 tablespoon fresh sage
  • Sea salt and fresh ground pepper to taste
  • 1/2 cup halved pecans, optional
  • FOR THE MAPLE GLAZE
  • 3 tablespoons maple syrup
  • 1 tablespoon balsamic vinegar
  • 2 tablespoons extra virgin olive oil
  • Sea salt and fresh ground pepper to taste

Preheat oven to 425°.

Line a large baking sheet with parchment paper or foil and set aside.

In a large mixing bowl combine diced butternut squash, brussels sprouts, bacon, olive oil, thyme, sage, salt, and pepper; mix until thoroughly incorporated.

Transfer veggies to prepared baking sheet and roast for 30 to 35 minutes, stirring around halfway through cooking.

In the last 7 minutes, add pecans, if using

In a small saucepan whisk together maple syrup, balsamic vinegar, olive oil, salt, and pepper.

Set saucepan over medium heat and bring to a simmer; stirring often, simmer for 3 to 4 minutes or until reduced and syrupy.

Take veggies out of the oven and toss with prepared glaze.

Arrange on a large plate or bowl and serve.

Lemon Roast Chicken with Delicata Squash

Save
Print
  • 1 whole chicken, cut up
  • 3 small Delicata squash (about 1½ pounds), halved lengthwise, seeds removed
  • 1 medium onion, chopped
  • 2 Meyer lemons, zested and juiced
  • 3 tablespoons extra-virgin olive oil
  • Sea salt and pepper
  • 3 sprigs fresh sage
  • Meyer lemon wedges, for serving
  • Fresh thyme and sage sprigs, for serving

Preheat oven to 450°.

Line a baking sheet with parchment paper or foil. Place the chicken and squash on the parchment. Toss the squash and onions with oil and place on the baking sheet with the chicken. Rub the chicken with oil, pour the lemon juice overall, sprinkle with zest and season with sea salt and pepper. Chop half the sage and sprinkle over both chicken and squash-onion mixture. Sprinkle zest over the chicken.

Roast the chicken and squash for 30–40 minutes, or until an instant read thermometer registers 165° at the thickest part of the thighs and the squash is cooked through and fork tender, while the onions are softened and slightly charred around the edges.

Transfer the chicken and squash to a serving platter, garnish with lemon wedges, thyme and sage, serve right away.

Caramel Pumpkin Pots du Crème

Save
Print
  • 2 cups heavy cream
  • 5 large egg yolks
  • 1/4 cup plus sugar
  • Pinch of sea salt
  • 1/2 cup plus two tablespoons of pumpkin puree
  • 1/4 cup caramel sauce
  • 1/2 teaspoon cinnamon
  • 1/4 teaspoon nutmeg
  • 1 teaspoon vanilla

In a medium saucepan, bring heavy cream and sugar to a boil, whisking constantly until the sugar is dissolved. Put aside and let cool for five minutes.

In a medium heatproof bowl, whisk the egg yolks. Add 1/4 cup of heated cream mixture to egg mixture and whisk to combine. Continue adding cream mixture in 1/4 cup increments to eggs until the two are fully combined. Place fully combined mixture back into saucepan and cook over moderate heat, stirring with a wooden spoon, until the custard coats the back of the spoon, about 4 minutes.

Add remaining ingredients and stir to combine. Transfer the mixture to a blender and puree until very smooth, about 1 minute. Pour the finished custard through a strainer.

Refrigerate until chilled about 2 hours.

To serve warm: Let the pots de crème stand at room temperature for 15-20 minutes prior to serving.

Serve with a dollop of whipped cream.


Leave a comment
Share
  • Pin it
  • Share
  • Tweet
  • Share
  • Email

The Olive Oil Issue

4 / 28 / 20

About Olive Oil

The following information is from my friend, Mary Platis, California Greek Girl. Check out her excellent book Cooking Techniques and Recipes with Olive Oil. You can purchase a copy below.

Not All Olive Oils Are Created Equal

It couldn’t be a better time than this to reconsider the brand of extra-virgin olive oil you use in your kitchen. UC Davis just released a new study [PDF], conducted in April of 2010, showing the results of several different brands of extra-virgin olive oils and how they ranked according to their panel’s chemistry and taste standards.

In a nutshell this is what they found:

Many extra-virgin olive oils contained cheaper canola oils, seeds, and nuts.
They were exposed to elevated temperatures, light, and aging which produced oxidation.
Poor quality extra-virgin olive oil was made from damaged, overripe olives.

So, Let’s Go Shopping!

  • Look for the USDA or CCOF Certified Organic labels.
  • Shop brands with International Olive Oil Council certification.
  • Buy extra-virgin olive oil from California with the California Olive Oil Council seal.
  • If you have special dietary needs, look for KOSHER or VEGAN seals.
  • Here are a few more extra-virgin olive oil labels to know.
  • Shop with local olive oil producers, if possible.
  • Purchase from estate-produced extra-virgin olive oil companies from here and abroad.
  • Find reliable stores in your community that you can trust.

How to Keep your Olive Oils Safe

  • Buy small bottles of your favorite extra-virgin olive oil.
  • Store your bottle in a cool, dark location in an airtight container.
  • Do not cook with your extra-virgin olive oil over 400 degrees.
  • Use up your extra-virgin olive oil within 12 weeks.
  • Occasionally smell your extra-virgin olive oil for rancidity.

If you’d like to read more you can visit Mary here, California Greek Girl 

Visit our friends Karen & Jennifer at Groves on 41 for fresh, delicious olive oil delivered right to your door!

Let’s Get Cooking with olive oil

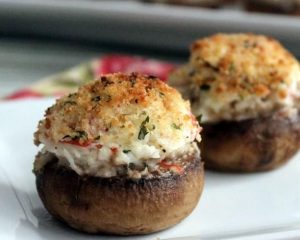
Crab Stuffed Mushrooms

Save
Print
  • 16 large white mushrooms, brushed with stems and gills removed*
  • Olive oil
  • 8 oz. cooked crab or lobster meat
  • 1/2 cup Panko breadcrumbs, divided
  • 1/3 cup freshly grated parmesan cheese
  • 1/3 cup mayonnaise
  • 4 oz. whipped cream cheese, softened
  • 2 green onions, chopped
  • ¼ cup minced celery
  • 1 tablespoon finely chopped Italian parsley
  • ¼ teaspoon dried oregano
  • Sea salt and fresh ground pepper
  • ½ teaspoon garlic powder
  • ½ tablespoon lemon olive oil

Preheat the oven to 400°. Place a piece of parchment paper on a baking sheet and set aside.

Brush the outside of the mushrooms with a little olive oil and arrange on baking sheet.

In a large bowl combine crab meat, 1/3 cup Panko crumbs, parmesan, mayonnaise, cream cheese, green onions, celery, herbs, salt and pepper.

Stuff each mushroom cap generously with the crab mixture.Combine oil and remaining Panko crumbs until evenly coated. Sprinkle the panko mixture over the tops of the mushrooms.

Bake until the mushrooms begin to brown, approximately 15 minutes then broil for a 2 minutes until golden all over with crispy tops.

Serve immediately.

Choose mushrooms about the size of a half dollar.


Avocado and Asparagus Salad

Save
Print

Serves:4

  • 1 lb. asparagus
  • 1 tablespoon olive oil
  • Sea salt
  • 5 oz. mixed salad greens
  • 1 cup cherry tomatoes, cut in half
  • 1 large Hass avocado
  • Orange Vinaigrette
  • ¼ cup White Balsamic Vinegar, champagne or white wine vinegar will work also
  • 1 teaspoon Dijon mustard
  • 1 teaspoon minced shallot
  • ½ cup Blood Orange Olive Oil
  • Sea salt and fresh ground pepper

Preheat broiler, cut the ends off of the asparagus, drizzle with the 1 Tb. olive oil and sprinkle with sea salt. Roast until lightly browned. Set aside to cool*.

Mix salad greens together with cherry tomatoes. Cut the avocado in half and remove the seed, scoop out the meat and dice then place into a small bowl.

Whisk together the vinegar, Dijon mustard and shallot, while continuing to whisk drizzle the olive oil in (tasting as you go). When you have a blend that tastes good to you, season with salt and pepper.

Toss the greens and tomatoes with a little of the dressing and place on a plate. Top with the avocado pieces and asparagus and top with a drizzle of the dressing.**

*If desired cook asparagus ahead of time, cool and refrigerate. Serve cold.

** If you have leftover dressing, place in a jar and keep in the refrigerator for up to a month.

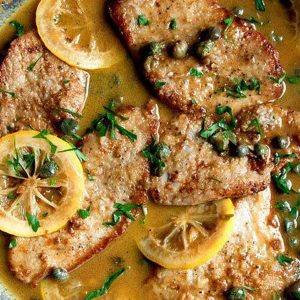
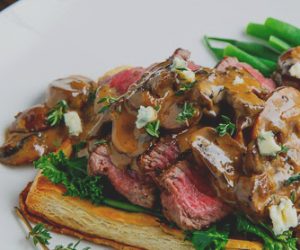
Pork Scallopini with Leek & Caper Vinaigrette

Save
Print
  • 1/3 cup all-purpose flour
  • 4-6 pork cutlets, pounded thin
  • Sea salt and ground pepper
  • ½ teaspoon garlic powder
  • Olive Oil
  • 2 large leeks, trimmed, washed and thinly sliced
  • 1 cup chicken stock or broth
  • 2 tablespoons capers, rinsed
  • 1 teaspoon freshly grated lemon zest
  • 1 tablespoon lemon juice
  • 3 tablespoons chopped flat-leaf parsley

Place the flour on a paper plate; season the cutlets on both sides with salt, pepper and garlic powder and dredge in the flour, shaking off excess.

Heat a large nonstick skillet over medium heat; coat the bottom of the pan with olive oil, adding more oil for the second batch if needed.

In two batches, sauté the cutlets until golden brown and just cooked through, 1 to 3 minutes per side. Transfer to a platter; tent with foil to keep warm.

To the same pan again coat the bottom of the pan with olive oil and sauté the leeks until soft and translucent.

Add the stock, bring to a boil and scrape any bits (fond) off the bottom of the pan. Simmer and reduce slightly (cook for about 3 or 4 minutes). Stir in the capers, lemon zest, lemons juice and parsley. Return the pork to the pan along with any juices that have accumulated, turn to coat with the sauce and until the pork has heated, 1 – 2 minutes.

Place the pork on a platter or individual plates, sauce with the leek mixture.

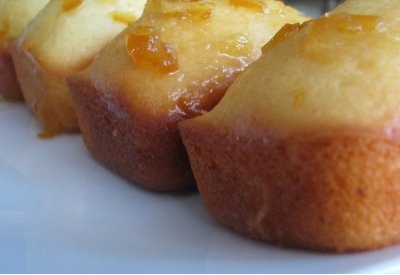
Meyer Lemon Cupcakes

1 1/2   cups all purpose flour

1 1/2   teaspoons baking powder

1/2      teaspoon salt

3/4      cup granulated sugar

2          teaspoons zest from Meyer lemon

1          cup plain Greek yogurt

4          eggs

2          tablespoons juice from Meyer lemon

1          teaspoon vanilla extract

1/2      cup citrus olive oil


Center a rack in the oven and preheat the oven to 350°.Line muffin tin with cupcake papers. Whisk together the flour, baking powder and salt.Put the sugar and zest in a medium bowl and, with your fingertips, rub the zest into the sugar until the sugar is moist and aromatic.Add the yogurt, eggs, lemon juice and vanilla and whisking vigorously until the mixture is very well blended. Still whisking, add the dry ingredients, then switch to a large rubber spatula and fold in the oil. Ladle the batter into the cupcake papers and bake 20-25 minutes or until a knife or toothpick inserted comes out clean. Top with whipped cream.

Leave a comment
Share
  • Pin it
  • Share
  • Tweet
  • Share
  • Email

April Demo Cooking Class

3 / 1 / 18


Join us on

Thur.  April 12 or 26

6:30 – 8:30, approximately

Endive Spears with Blue Cheese, Pear, Candied Pepitas and Orange-Shallot Vinaigrette

Grilled Salmon with Citrus Salsa & Spring Micro Greens

Roasted Asparagus with Lemon Gremolata and Parmesan

Balsamic Strawberries in Meringue Nests with Crème Fraiche

$45.00

For reservations call

Temecula Olive Oil, 148 Main St. Seal Beach

(562) 296-5421

Sponsored by


Leave a comment
Share
  • Pin it
  • Share
  • Tweet
  • Share
  • Email

Alpine Strawberries

1 / 24 / 18

You’ll never have enough Alpine Strawberries, also called fraises des bois, to make a pie but they are so delicious with a scoop of vanilla ice cream or with a creamy panna cotta. I love them with my cereal in the morning fresh from the garden. Best grown in containers, in my opinion, they are small plants that will do well in partial shade or full sun. Mostly without runners I grow from transplants instead of seeds. I just never had any luck starting the tiny seeds. Alpine strawberries are related to wood (wild) strawberries and can be red or white with delicate white flowers. I think the red taste like perfume and the white are reminiscent of pineapple.

They like well-drained soil, rich in organic matter so that they drain well.  I amend my soil every fall and feed regularly with an organic fertilizer. Be careful not to cover the crown of the plant and keep the leaves off the soil. You can plant these much closer together than a bigger strawberry as the plants are small and grow slowly. Here in So. California my alpine strawberries start fruiting in Jan and finish up late fall. They do stop producing in summer if it gets too hot and sometimes I’ll move the pots to partial shade where they get morning sun. Other than protecting the delicate fruit from the birds, alpine strawberries are easy to grow and are pretty little plants in pots near my front door.

French Yogurt Cake

Save
Print

I love this bright lemony cake so much I adapted it slightly from Dorie Greenspan by adding these super sweet little strawberries, Alpine strawberries.

  • 1 1/2   cup all-purpose flour
  • 2         teaspoons baking powder
  •            Pinch of salt
  • 1         cup sugar
  • 1         lemon, grated and zest
  • 1/2      cup plain yogurt
  • 3         eggs
  • 1/4      teaspoon pure vanilla extract
  • 1/2      cup citrus olive oil
  • 1         cup Alpine strawberries, whole or halved

Center a rack in the oven and preheat the oven to 350 degrees F. Generously butter an 8 1/2-x-41/2-inch loaf pan and place the pan on a baking sheet.

Whisk together the flour, baking powder and salt.

Put the sugar and zest in a medium bowl and, with your fingertips, rub the zest into the sugar until the sugar is moist and aromatic.

Add the yogurt, eggs and vanilla and whisking vigorously until the mixture is very well blended.

Still whisking, add the dry ingredients, then switch to a large rubber spatula and fold in the oil and then the strawberries. You'll have a thick, smooth batter with a slight sheen. Scrape the batter into the pan and smooth the top.

Bake for 50 to 55 minutes, or until the cake begins to come away from the sides of the pan; it should be golden brown and a thin knife inserted into the center will come out clean. Transfer the pan to a rack and cool for 5 minutes, then run a blunt knife between the cake and the sides of the pan. Unmold, and cool to room temperature right side up on the rack.

Glaze (optional)

½ cup lemon marmalade mixed with 1 teaspoon water

To Make the Glaze:

Put the marmalade in a small saucepan or in a microwave-safe bowl, stir in the teaspoon of the water and heat until the jelly is hot and liquefied. Using a pastry brush, gently brush the cake with the glaze.

Leave a comment
Share
  • Pin it
  • Share
  • Tweet
  • Share
  • Email

August Cooking Demo

7 / 16 / 17

Join us for our next cooking demo

Thurs. August 10th & 17th

6:30 – 8:30, approximately

Reservations required (see below)

End of Summer Party

Artichoke Bruschetta

Heirloom Tomato & Asparagus Salad

 Clambake BBQ Foil Packets

With Shrimp, Clams, Sausage, Fresh Corn, Baby Yukon Gold Potatoes in Lemon Herbed Garlic Sauce

Watermelon Sorbet


$45.00

For reservations call

Temecula Olive Oil

(562) 296-5421

Sponsored by

Leave a comment
Share
  • Pin it
  • Share
  • Tweet
  • Share
  • Email

Lemon Roasted Chicken

6 / 12 / 17

This is by far my favorite dish with hints of Meyer lemon and sea salt and I like to add some roasted baby potatoes to the pan to soak up some of the juices. I use ‘Mary’s Organic Chicken‘ always for the best meat, always tender & juicy, it costs a little more but I think it’s worth the extra few bucks. (And they didn’t pay me to say that). And I love to tuck into the pan the ‘Baby Dutch Yellow Potatoes’ from Melissa’s Produce!

You can dress this up by making the ‘pan’ sauce listed in the recipe of you can by pass it. I’ve also made brioche dressing for the side and it makes a great holiday dish without the hassle of cooking a whole turkey dinner. Add a beautiful green vegetable and you’ll find an easy weeknight dinner. It pairs well with my Spring Asparagus recipe. Prep all the ingredients the night before & you can walk in the door, pop the chicken in a preheated oven and within the hour you’ll have the best meal in town, no drive through chicken can EVER take the place of a chicken roasted at home.

Lemon Roasted Chicken

Save
Print
  • Serves 4
  • 1 whole chicken -- rinsed, drained and dried
  • 1 medium onion -- peeled and chopped
  • 3 baby carrots -- peeled and chopped
  • 3 celery stalks -- cut into chunks
  • 1 lemon -- zested and juiced; preferably Meyer lemon
  • 1 bunch Italian flat leaf parsley -- minced
  • 1 bunch fresh sage -- minced
  • 1/2 bunch fresh thyme -- minced
  • 2 tablespoons butter -- room temperature
  • 1 tablespoon lemon olive oil, butter or regular olive oil
  • Salt and pepper
  • 1 cup white wine
  • 1 cup chicken stock
  • 2 tablespoons chicken demi glace -- optional for sauce

Preheat oven to 400°.

Wash and dry chicken inside and out then dry well. Fit chicken into a roasting pan (you want no more than 1" of space on any side of the chicken otherwise the juices will burn).

Mix together onion, carrot, celery, lemon zest, and 1/2 of the minced herbs. Loosely stuff cavity with some of the ingredients, place the remainder on the bottom of the roasting pan and place chicken on top of the aromatic vegetables.

Mix remaining minced herbs with butter. Gently separate the chicken skin from the breast meat and carefully rub herb butter on breast under the skin.

Rub the chicken with lemon olive oil and season with salt and pepper. Squeeze lemon over chicken and place rind into cavity. Insert probe thermometer into thigh and set for 165 degrees. Pour half of the wine and chicken stock in the bottom of the pan and place, uncovered in hot oven.

Baste after 1/2 hour, if you don't have enough juice in pan use some chicken stock. Do not cover bird until browned and then loosely place foil over breast. If wings start to brown to early wrap with foil.

Remove chicken to a warm plate and loosely cover with foil. Let rest for 10 minutes before carving.

Remove some of the fat in the pan by using a paper towel or ice cubes. (Dredge the paper towel through the juices to pull out some of the fat or pour off the juices into a heat proof measuring cup. Add a few ice cubes; the fat will stick to the cold cube, discard cube. You may have to do this several times).

Put the roasting pan on top of the stove over medium-high heat and bring a boil, add remaining wine and stock scraping the fond (the yummy pieces stuck to the pan) from the bottom of the pan. Reduce by half, add demi-glace if using and serve with chicken.

Leave a comment
Share
  • Pin it
  • Share
  • Tweet
  • Share
  • Email

Fullerton Arboretum Demo Cooking Class with Chef Louise

1 / 22 / 17

Fullerton Arboretum Cooking Demo

I’ll be pairing up with my friend, Louise Mellor for monthly cooking demo’s and foodie tastings, tips on how to stock your pantry, cooking with seasonality and celebrations at the table with design and style

Sat. Feb 11th

11 – 2, approximately

See below for reservations

Cupid in the kitchen…

Chocolate Tasting

Beef Wellington Tarts with Mushroom Blue Cheese Sauce 800 2765

Roasted Spring Asparagus salad with Meyer Lemon vinaigrette

Elegant Beef Wellington Puff Pastry Tarts with Caramelized Onions, Maytag Blue Cheese, Sautéed Mushrooms

Dark chocolate hazelnut flourless cake with vanilla bean ice cream and fresh berries

Wine will be available in class

Sponsored by

Melissas logo small

For a full 6 month class schedule and to register for a class click

Fullerton Arboretum

Leave a comment
Share
  • Pin it
  • Share
  • Tweet
  • Share
  • Email

Temecula Olive Oil Tasting Room, Seal Beach Cooking Demo

1 / 22 / 17

Temecula Olive Oil Tasting Room

Seal Beach

Thur. Feb. 2nd  (Additional class  Feb. 16th  if Feb. 2nd sells out,)

6:30 – 8:30, approximately

See below for reservations

salmon blood orange

Pear, Pecan & Feta Salad

Farro & Balsamic Roasted Butternut Squash

Blood Orange Butter Broiled Salmon

Raspberry Dark Chocolate Mousse

For Seal Beach Reservations please call:

562-296-5421

Sponsored by

Melissas logo small

Related Posts Plugin for WordPress, Blogger...
Leave a comment
Share
  • Pin it
  • Share
  • Tweet
  • Share
  • Email

Posts navigation

1 2 Next Page
Deb

Meet Chef Debbi

READ BIO

Join-Us Sign up for our newsletter to receive exclusive tips 'n tricks, and special offers on classes, tours, and more!

Recent Posts

  • New E-Book!
  • From the Pantry
  • Spaghettini at Home
  • Growing Corn
  • Spring IS Coming!

Categories

BookCUT

What's in Your Pantry?

How to stock your pantry to create delicious dishes.

Learn Chef Debbi's pantry essentials and how to substitute ingredients for pantry staples in her basic recipes for quick and easy meals.
BUY BOOK>

FacebookTwitterInstagramGooglepinterest


© 2014, DEB'S KITCHEN
Angie Makes Feminine WordPress Themes