Deb's Kitchen - Farm, Food, Wine & Lifestyle Adventures
  • Facebook
  • Google
  • Twitter
  • Instagram
  • Pinterest
  • Email
Menu
Skip to content
  • Home
  • Blog
  • Events
    • Classes
    • Tours & Adventures
  • Edible Gardening
  • Preserving
  • Recipes
    • Appetizers
    • Soups and Salads
    • Main Dishes
    • Side Dishes
    • Desserts
  • About
    • Whats In Your Pantry
    • Ask Debbi
    • Deb’s Kitchen Botanicals
    • Press
  • Contact

Author: Chef Debbi Dubbs

Marinated Olives

12 / 5 / 1412 / 6 / 14

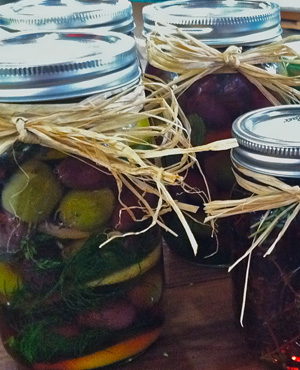
Olives-Fair 2011

Marinated Olives

Save
Print

There are a million ways to adapt this recipe to your liking. Marinate the
olives for at least 24 hours and serve at room temperature. Try different
herbs, spices, fruit zest and vinegar. Look to see what’s in your pantry.
This is great served with a little Baked Goat Cheese and a baguette.

  • 1 lb. mixed olives, not pitted
  • 1 lemon rind, cut from the lemon without removing the white pith beneath the skin
  • 1 tablespoon mixed dried Italian herbs, crushed
  • pinch of salt and pepper
  • 1 clove garlic, minced
  • ¼ cup Zinfandel vinegar
  • 1 cup (or more) lemon flavored olive oil or use an extra virgin olive oil

Place the olives into a jar so they fit snug.

Chop the lemon rind into fine strips, mix with remaining ingredients and pour over the olives to cover. Add a little more oil if it doesn’t quite cover the olives. Place the lid on the jar and refrigerate overnight.

You can store these olives for several days in the refrigerator but serve at room temperature

Leave a comment
Share
  • Pin it
  • Share
  • Tweet
  • Share
  • Email

Fall Tour 2014

12 / 4 / 1412 / 4 / 14

Farm Tour Fall 2014

Farmers Market-0041Farmers Market-0045Finger Lime-0030Halter Ranch-0441Jack Creek Farms-0760Rangeland-0338Windrose Farms Oct 2014-0484Windrose Farms Oct 2014-0549Windrose Farms Oct 2014-0554Windrose Farms Oct 2014-0665Windrose Farms Oct 2014-0726Cambria Tour-4848Cheesecakes-0099fall grapevines Halter Ranch 2011

Leave a comment
Share
  • Pin it
  • Share
  • Tweet
  • Share
  • Email

Growing An Herb Garden

12 / 3 / 1412 / 18 / 14

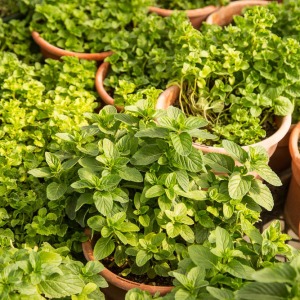
potted herbs
An herb garden doesn’t have to be big so you don’t need much space to grow one. You can even start a potted herb garden on your windowsill! This way you’ll have the aroma of fresh herbs right inside your kitchen or on your patio.

When growing herbs, location is key. Some like it sunny and dry, while others prefer filtered sunlight and moist soil. Regardless, make sure to use well-drained fertile soil. Most herbs will survive in poor sandy soil, but few will tolerate wet clay soil. If your yard is all sun, try planting shade-loving plants east of taller varieties like sunflowers. The tall plants will generate shade for the smaller ones.

Basil, Chives, Dill, Oregano, Rosemary, Tarragon, and Thyme prefer full sun, while Chervil, Lemon Balm, and Mint prefer partial shade in your herb garden.

Water newly planted herbs regularly but once they are established, most are naturally drought resistant. Watering and drainage goes hand in hand. Rather give your herbs too little than too much water. After a good soaking, allow the water to drain away and the soil to dry out slightly. Water again when the top 1″ or so of soil is dry to the touch.

During the growing season fertilize about once a month with a weak solution of fish emulsion. Compost 4 times a year (at the beginning of each season, will also provide the plants with the nutrients they need. Don’t fertilize dormant plants, such as tarragon, some thyme and sometimes chives, just add a little compost around them and wait for them to wake up in the spring.

If you over feed your herbs and make them happy and beautiful they may lack some flavor. Hold back a little water and a little fertilizer to help concentrate the oils in the leaves thus increasing their flavor, aroma and medicinal value.

Pruning is essential to encourage healthy, bushy growth. Remove dead leaves and flowers on a regular basis. Should you frequently use your herbs, pruning may not be necessary, as you would be pruning automatically.

Be sure to let some of your herbs flower and ‘go to seed’, it will encourage good bugs, butterflies and hummingbirds into the garden.


Leave a comment
Share
  • Pin it
  • Share
  • Tweet
  • Share
  • Email

7 Crops to Kick Off Your Spring Garden

12 / 2 / 1412 / 2 / 14

Is your green thumb itching to get gardening again? These cold-loving crops will help you get the growing season started.

spring-crops_800 (1)

Most of us gardeners eagerly anticipate getting our hands in the dirt after a long winter indoors. To get a jump on the spring growing season requires a bit of planning, as well as knowledge of cold-tolerant vegetables and season extension techniques.

A key is to prepare the soil in the fall, so you can begin planting seeds in the spring as soon as the soil has completely thawed and warmed to the seed variety’s minimum temperature for germination. Keep in mind that heavy soils, such as clay, compact when worked while wet, preventing drainage. Allow them to dry out adequately before working them, especially if you didn’t prepare them in the fall.

Growing crops that germinate at cooler soil temperatures also helps you get an early start. (It also helps if they can withstand unexpected late frosts, though isn’t necessary if you use row covers or cold frames when the temperature is expected to dip below freezing.) To determine the soil temperature, stick a soil thermometer about 1 inch deep into the soil and allow it to stabilize. If it’s at the minimum recommended temperature, it’s time to kick off planting your spring garden. Here are seven crops to try.

1. Beets (Beta vulgaris subsp. vulgaris)

Some beet varieties, like heirloom Chioggia, mature in as little as 45 days, making them ideal for an early crop. When soil has warmed to 40 degrees F, plant seeds 3/4 inch deep, 1 inch apart, in rows spaced 12 to 18 inches apart. When seedlings are 4 inches tall, thin them to 4 to 6 inches apart by cutting off the tops. Don’t pull seedlings, as this might uproot nearby plants you want to keep.

Beets tolerate soil low in nutrients but need even water to prevent becoming bitter, so keep soil moist, but not soggy, throughout the growing season.

Begin harvesting beets when they reach 1 inch in diameter, or if you want larger crops, wait until they reach 3 inches in size. Larger beets can become pithy. Beets can withstand light frost, but should be harvested before the heat of summer, which slows sugar production, making them less palatable.

2. Spinach (Spinacia oleracea)

Spinach likes it cold, making it an ideal spring crop. Seeds germinate as low as 40 degrees F, and young seedlings can withstand temperatures down to 15 degrees F if frost occurs. Sow seeds 1/2 inch deep, 1 inch apart, in rows 12 to 18 inches apart. As an alternative, broadcast seeds and thin seedlings to 4 inches apart to prevent bolting. Keep the soil evenly moist throughout the growing season.

You can begin harvesting spinach when leaves are young, or wait for them to grow larger. Harvest outer leaves first. Spinach bolts when the air temperature warms, so plan to harvest plants before bolting occurs. Some spinach varieties, such as Razzle Dazzle, reach maturity in 30 days.

3. Spring Radish (Raphanus sativus)

Radish likes cool, wet weather, and you can be eating most varieties within three weeks of sowing seeds. Plant seeds four to five weeks before the last spring frost. Sow them 1/2 inch deep and 1 inch apart, in rows 12 inches apart. When seedlings emerge, thin plants to 2 inches apart; enjoy the thinned seedlings in salads or other dishes. Keep the soil evenly moist throughout the growing season to prevent cracking.

Harvest radishes when 1/2 to 1½ inches in diameter. Spring radishes come in many colors, shapes and sizes. Champion is round, bright red and matures within 20 days. The tapered April Cross is snowy white, grows up to 16 inches long, and is ready for harvest in 60 days. To avoid pithiness, harvest radishes before the heat of summer. For small gardens, save space by growing radishes between rows of larger, slower growing crops.

4. Pak Choy (Brassica rapa var. chinensis)

When the nighttime air temperature and the soil temperature have risen to 50 degrees F, consistently, sow pak choy seeds 1/4 to 1/2 inch deep and 1 inch apart in rows spaced 20 to 30 inches apart. When seedlings emerge, thin dwarf varieties to 6 inches apart and taller varieties to 12 inches apart. Thinned seedlings can be added to salads. Maintain plenty of water in the soil, without making it soggy, to prevent bolting and poor flavor.

If you harvest pak choy by cutting it about 2 inches above the soil level, a new plant regrows for continued harvest. The variety Autumn Poem can be sown in spring and harvested about 35 days later; many varieties can be harvested in less than 50 days.

5. Loose-leaf lettuce (Lactuca sativa var. crispa)

Lettuce thrives in cool weather and cool soil. When the soil has warmed to 40 degrees F, sow seeds 1/8 inch deep and 1 inch apart in rows 12 inches apart. When seedlings have two to three true leaves, thin plants to 6 inches part. Water regularly, keeping soil moist with 1 inch of water per week. Lettuce has shallow roots and cannot tolerate long dry spells.

You can begin harvesting young leaves when 2 inches long, about four weeks after sowing seeds. Harvest them by picking the outer leaves first so plants continue to produce. For the crispest lettuce, pick leaves during cool, early morning hours. Most varieties take 45 to 60 days to mature.

6. Peas (Pisum sativum)

Whether you grow snap, shell or snow varieties, peas are an excellent spring crop because seeds can be sown at 40 degrees F, and if seedling suffer frost damage, the plant responds by producing more fruit. Sow seeds 1 inch deep, 2 to 4 inches apart, in 18-inch rows. Vining types will need to be trellised. Spring rains should keep soil adequately moist, but if not, water enough to keep the top 1 inch of the soil wet without becoming waterlogged. Do not overwater, especially during flowering. This can reduce pollination and setting of pods.

Harvest peas in the early morning for crispness. The more you harvest the more the plant will produce. Pick snap and shelling varieties when peas round out pods, are light green and before pods yellow and become tough. Harvest snow varieties when pods have reached mature length and are still flat. Two fast-growing varieties to try are Sugar Sprint, a snap pea that is ready to harvest in 58 days, and Sugar Marvel, a shelling pea that grows 18-inch vines.

7. Spring Onions

Onion sets can be planted in the garden up to four weeks before the last spring frost and harvested in less than 60 days, making them ideal for spring. Plant onion sets that are 1/2 to 3/4 inch in diameter 1 inch deep, with the pointy, root side down. Space small varieties 2 inches apart and large varieties 4 inches apart. Keep onions sets evenly watered, and don’t allow them to dry out. A 2-inch layer of mulch can help retain moisture and suppress weeds.

Harvest bulbing onions when half of the tops have fallen over. Allow them to dry for about three to four weeks in a well-ventilated area then cut off the tops and trim the roots before storing them.

About the Author: Diana K. Williams is a certified master gardener and holds a Bachelor of Science in environmental studies and biology. She is presently serving on a committee that is designing community gardens for a local municipality. She writes from her home in Florida.
 

Leave a comment
Share
  • Pin it
  • Share
  • Tweet
  • Share
  • Email

Paella

11 / 14 / 1412 / 14 / 14


Paella-0177


Paella

Save
Print
  • 1 package chicken thighs
  • 1/4 cup extra-virgin olive oil
  • Sea salt and freshly ground pepper
  • 1 shallot, minced or ½ onion, chopped
  • 2 cloves garlic, minced
  • 1 tablespoon flat-leaf parsley leaves, chopped, reserve some for garnish
  • ½ cup white wine
  • 1 (15-ounce) can whole tomatoes, drained and hand-crushed
  • 4 cups short grain Spanish rice
  • 6 cups stock, warmed with a generous pinch of saffron thread
  • 1 dozen littleneck clams, scrubbed
  • 1 pound jumbo shrimp, peeled and de-veined
  • 1-2 pound mussels
  • 1/2 cup sweet peas, frozen and thawed
  • Lemon wedges, for serving

Heat oil in a paella or sided sauté pan over medium-high heat. Add salt and freshly ground pepper to the chicken and brown skin-side down both sides. Remove from pan and reserve.

In the same pan, make a sofrito by sautéing the shallot, garlic, and parsley. Cook for 2 or 3 minutes on a medium heat. Add the wine and cook until it reduces some, about 5 minutes, stir in the rice and stir-fry to coat the grains. Add the crushed tomatoes and stock and simmer for 10 minutes, gently moving the pan around so the rice cooks evenly and absorbs the liquid. Add chicken, clams, mussels and shrimp, tucking them into the rice. Let the paella simmer, without stirring, until the rice is al dente, for about 10 minutes. During the last 5 minutes of cooking, when the rice is filling the pan add the peas.

Remove from heat and rest for 5 minutes. Garnish with parsley and lemon wedges.

Leave a comment
Share
  • Pin it
  • Share
  • Tweet
  • Share
  • Email

Paella for a Crowd

11 / 14 / 1412 / 14 / 14
PAELLA FOR A CROWD

Having a houseful of people for days at a time can be tough to figure out just what to feed everyone. I love quick and easy dishes that don’t require a lot of my time or attention. Once you get all the ingredients into the pan, it’s an easy go. You don’t even need a paella pan, a regular sauté pan or even a large electric skillet works beautifully.

Paella-0177

You’ll want to use Spanish rice and Spanish saffron if you can for the best flavor but any short grain rice will do nicely such as an Italian Arborio which can be found in your local supermarket. Sauté a little shallot, preferred, or onion, garlic and infuse some chicken or vegetable stock with the saffron to start. Choose some protein to mix into the rice such as chicken, shrimp, scallops, mussels or chorizo and the dish comes together quickly. Follow the recipe or be creative and enjoy your company for the weekend! Mangia~

Chicken and Shellfish Paella

1 package chicken thighs
1/4 cup extra-virgin olive oil
Sea salt and freshly ground pepper
1 shallot, minced or ½ onion, chopped
2 cloves garlic, minced
1 tablespoon flat-leaf parsley leaves, chopped, reserve some for garnish
½ cup white wine
1 (15-ounce) can whole tomatoes, drained and hand-crushed
4 cups short grain Spanish rice
6 cups stock, warmed with a generous pinch of saffron thread
1 dozen littleneck clams, scrubbed
1 pound jumbo shrimp, peeled and de-veined
1-2 pound mussels
1/2 cup sweet peas, frozen and thawed
Lemon wedges, for serving

Heat oil in a paella or sided sauté pan over medium-high heat. Add salt and freshly ground pepper to the chicken and brown skin-side down both sides. Remove from pan and reserve.

In the same pan, make a sofrito by sautéing the shallot, garlic, and parsley. Cook for 2 or 3 minutes on a medium heat. Add the wine and cook until it reduces some, about 5 minutes, stir in the rice and stir-fry to coat the grains. Add the crushed tomatoes and stock and simmer for 10 minutes, gently moving the pan around so the rice cooks evenly and absorbs the liquid. Add chicken, clams, mussels and shrimp, tucking them into the rice. Let the paella simmer, without stirring, until the rice is al dente, for about 10 minutes. During the last 5 minutes of cooking, when the rice is filling the pan add the peas.

Remove from heat and rest for 5 minutes. Garnish with parsley and lemon wedges.

Leave a comment
Share
  • Pin it
  • Share
  • Tweet
  • Share
  • Email

Pumpkin Cranberry Bars

10 / 10 / 14

My aunt-in-law gave me this great recipe and I’ve adapted it by adding cranberries and powdered sugar frosting; although the bars a great without a frosting too!


1          cup flour
1          teaspoon baking powder
½         teaspoon baking soda
1          teaspoon baking spice (nutmeg, cinnamon, cloves etc.)
½         teaspoon salt
1          cup dried cranberries or other dried fruit
2          eggs
¾         cups sugar
½         cup canola oil
1          cup pumpkin puree

Frosting:

1          cup powdered sugar
½         teaspoon vanilla
1          tablespoon milk
 

Preheat oven to 350 °.

Sift together flour, baking powder, baking soda, baking spice and salt. Stir in cranberries; set aside.

Using an electric mixer beat together eggs, sugar and oil; add pumpkin puree and mix until just blended. Add dry ingredients and mix until combined.

Spread mixture into a 9 x 11” pan and bake for 15 to 20 minutes.

Frosting:

In a small bowl, add powdered sugar and vanilla. Drizzle in milk, stirring until you have a smooth mixture.

Cut the bars and place them on a cooling rack over a piece of parchment paper. Drizzle with the powdered sugar frosting and let set for a few minutes.

Leave a comment
Share
  • Pin it
  • Share
  • Tweet
  • Share
  • Email

Summer Ceviche

9 / 24 / 1412 / 3 / 14

ceviche

Ceviche with Avocado and Tomato Broth

Serves 4, approximately

1          pound white fish halibut, red snapper, sole,
2         teaspoons mild or hot pepper
2          tablespoons cilantro, minced
1          tablespoon shallot, minced
1          large rib celery, cut into a small dice
1          medium tomato, cut into the same size as the fish, squeeze out the seeds
1/2      cup freshly squeezed lime juice, or enough to cover ingredients
1          splash olive oil

Tomato Broth

1          slice white bread
1          can whole tomatoes, with juice
1          cucumber, peeled, rough chopped
1          small shallot, rough chopped
1          cup tomato juice
1          tablespoon red wine vinegar
1         tablespoon olive oil
1          pinch garlic powder
Salt and pepper
1         pinch sugar

To Serve:
2          Haas avocadoes, peeled, cut in half, pit removed
1          lemon or lime zested

cilantro sprigs, for garnish

Ceviche:

Chop the white fish into small dice, add to a mixing bowl and set aside.

Clean the pepper of stems, seeds and ribs and mince into a fine dice. You may want to wear glove to do this.

Mix all ingredients together well; making sure it’s all covered by the lime juice and olive oil. Refrigerate for at least 3 hours.

Tomato Broth:

Place the bread into the bowl of a food processor and process until you have coarse crumbs. Add remaining ingredient and process until pureed. Chill for 30 minutes before serving.

Ladle some tomato broth into a cup or bowl. Place avocado into center of bowl, place ceviche into the center and top wit


Leave a comment
Share
  • Pin it
  • Share
  • Tweet
  • Share
  • Email

Bulb Basics

9 / 22 / 1412 / 3 / 14

Jonquils02_aug_2007

As we prepare for fall planting season, we’re going back to bulb school. Follow these
tips from the experts to ensure successful planting and bulb longevity!

  • Always plant bulbs pointed side up.
  • Do not use strong commercial fertilizer or fresh manure when planting.
  • Label bulbs as you plant them to prevent accidentally digging up bulbs out of
    season. Use labels that are large enough so that 2-3″ of the label is below soil level.
  • Let the foliage die back on its own before trimming it back, and take as little foliage
    as possible when harvesting cut flowers. The leaves and foliage are essential for storing
    food for next year.
  • Never store bulbs in the sun or in an airtight container. A dry, shady, well-ventilated
    area will prevent mold and mildew.
  • Do not grow bulbs year after year in the same place. This could invite fire blight, a fungal
    disease that affects both the flowers and the foliage.

Thanks to K. Van Bourgondien & Sons, Inc. and Gardens Alive! for timely bulb help!


Leave a comment
Share
  • Pin it
  • Share
  • Tweet
  • Share
  • Email

Pate Brisée

9 / 4 / 1412 / 3 / 14

Pate Brisée is  French term for a short crust, sweet or savory, and used for many pies, tarts, quiches and more. A standard pie crust could be used instead.

make-perfect-pie-crust-1

2 ½      cups all-purpose flour

1          teaspoon salt

1          tablespoon sugar, for sweet dough or

1          tablespoon fresh herbs, chopped, for savory dough

1          cup unsalted butter, chilled and cut into 1” pieces

4          tablespoons ice water, or more if needed

In a food processor, place the flour, salt, and sugar and process until combined. Add the butter and process until the mixture resembles coarse meal (about 15 seconds). Place mix into wide bowl. Add 3 Tb. water and toss to combine. If needed, add more water 1 TB. at a time until dough just comes together. Don’t overwork dough, be light and gentle for a flaky crust.

Turn the dough out onto your work surface and gather it into a ball. Divide the dough into two equal pieces, flatten each portion into a disk, cover with plastic wrap, and refrigerate for 30 minutes to one hour before using. This will chill the butter and allow the gluten in the flour to relax. At this point you can also freeze the dough for later use.

For each disk of pastry, on a lightly floured surface, roll out the chilled pastry to fit it into a 8 or 9 inch tart pan. To prevent the pastry from sticking to the counter and to ensure uniform thickness, keep lifting up and turning the pastry a quarter turn as you roll (always roll from the center of the pastry outwards to get uniform thickness). To make sure it is the right size, take your tart pan, flip it over, and place it on the rolled out pastry. The pastry should be about an inch larger than your pan.

When the pastry is rolled to the desired size, lightly roll the pastry around your rolling pin, dusting off any excess flour as you roll. Unroll on the top of your tart pan. Never pull pastry or you will get shrinkage (shrinkage is caused by too much pulling of the pastry when placing it in the pan). Gently lay in pan and with a small floured piece of pastry, lightly press pastry into bottom and up sides of pan. Roll your rolling pin over top of pan to get rid of excess pastry. With a thumb up movement, again press dough into pan. Roll rolling pin over top again to get rid of any extra pastry. Prick bottom of dough (this will prevent the dough from puffing up as it bakes). Cover and refrigerate for 20 minutes to chill the butter and to rest the gluten.

To blind bake (bake without ingredients) the tart shell: Preheat oven to 400° and place rack in center of oven. Line the unbaked pastry shell with parchment paper or aluminum foil. Fill tart pan with pie weights or beans, making sure the weights are to the top of the pan and evenly distributed over the entire surface. Bake crust for 20 to 25 minutes or until the crust is dry and lightly browned. Remove weights and cool crust on wire rack. Proceed with desired recipe that calls for a pre-baked shell.

Makes two – 9 inch tart shells.

Leave a comment
Share
  • Pin it
  • Share
  • Tweet
  • Share
  • Email

Wine Harvest Lunch

9 / 4 / 1412 / 3 / 14

Napa Harvest MalbecVeraison2014

The drought and the warmest temperatures in California’s recorded history have once again brought about an early wine grape harvest all over Ca. From Napa, Sonoma to Paso Robles, Los Olivos in between and even Temecula. Harvest seems to be about 2 weeks ahead of schedule and brix levels are promising another great vintage. Brix levels are measurements used on the grapes to determine the sugar content and helps vineyard management decide when to harvest in an effort the get the ideal balance of flavor and alcohol content in the wine.

The warm temperatures this winter caused an early bud break and great early growth of the vines. Veraison, “the onset of ripening”, is the process where the grapes begin the transition from growth to ripening. Some areas in California actually began harvesting in July, in Paso and parts of Napa for example. After a warm winter and spring, in July and August they have experienced some morning marine influence with warm, windy afternoons that has slowed the grape maturity allowing the gradual development of sugars and acidity for harvest. Many white varietals have been picked and light reds such as Pinots have begun with Merlot and Cabernet to follow. Vintners are looking for another good vintage out of this years harvest. We all look forward to experiencing the 2014 Ca. harvest in the future.

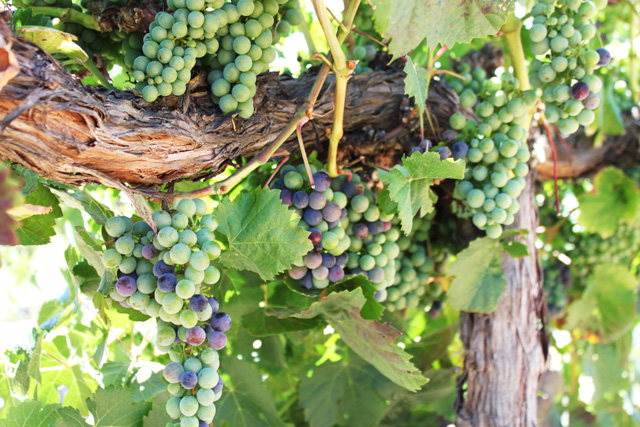
fall grapevines Halter Ranch 2011

By the time we visit Rangeland Winery & Adelaida Ranch with our Fall Harvest Tour, most grapes will have been picked which is a good thing if it turns out to be true that California expects to experience a moderate El Nino, of course I that would be good for all of California. Expect a few grape clusters perhaps; fall leaves will prevail for our trip making for some excellent photographs. Rangeland is dotted with mighty oaks; laurel, live, blue and valley are growing all over the ranch. During our tour of the ranch Laird will share the history of the Adelaida Ranch, the Salinan Nation and Chumash natives as well as the miners and homesteaders. Lisa and Laird have an extensive collection of Native American tools and artifacts that have been found on the property as well. Late fall you might even glimpse the wild turkeys that can be found all over Paso Robles, hawks, deer, bobcats and even a pair of bald eagles may be spotted. Join us on our late fall tour, we have a few available accommodations left.


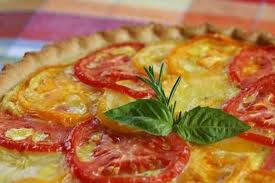
This has been our Fall Harvest Tour ‘Windrose Farm Heirloom Tomato Tart’ recipe for many of our farm lunches. Enjoy,


tomato cheese tart

Windrose Farm Tomato Tart

1          recipe pate brisee

1          cup fontina cheese, grated (or more-to your taste)

1/4      cup boursin cheese

1/4      cup mozzarella, shredded

1/4      cup Jarlsberg cheese, shredded

3          medium heirloom tomatoes, sliced

1          tablespoon Parmigiano-Reggiano

salt and pepper, to taste

Preheat the oven to 400°. Pre-bake the shell according to directions in Pate Brisee recipe. Let cool to room temperature or cool overnight.

Sprinkle with the cooled crust with cheeses.

Arrange the tomatoes in an overlapping circle and season with salt and pepper; sprinkle with Parmigianno-Reggiano.

Bake until the cheese is melted and tomatoes are slightly wilted, about 15 minutes.

Garnish with fresh herb sprigs. Serve room temperature or slightly warmed. Can be served along with a light salad tossed with vinaigrette dressing.

Serves 6

Adapted from ‘What’s In Your Pantry’ by Debbi Dubbs

Leave a comment
Share
  • Pin it
  • Share
  • Tweet
  • Share
  • Email

Windrose Farm

8 / 28 / 1411 / 5 / 14

windrose-farm-valley copy

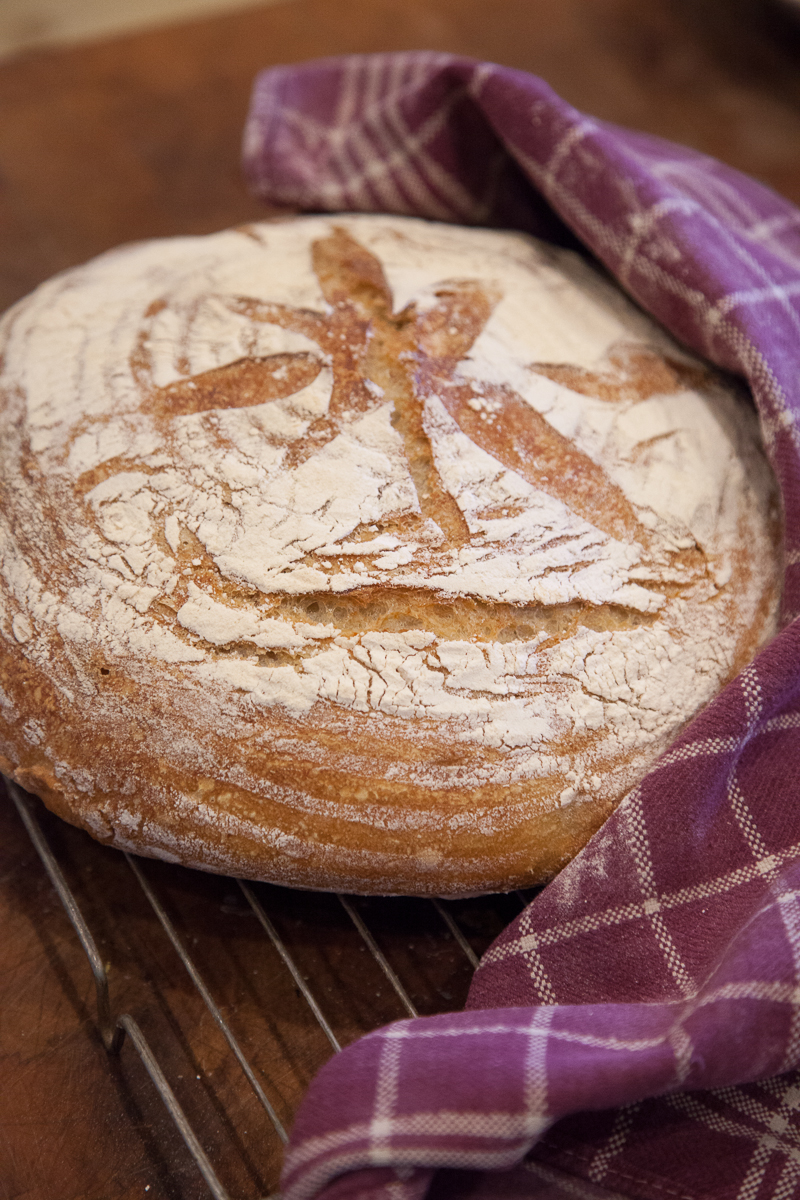
I met Barbara and Bill Spencer sometime around 2004 when I was scouting heirloom tomatoes from Paso Robles farmers market. Barbara invited me out to the farm and so my husband and I trekked out there one morning. We didn’t want to disrupt their farm work but yet they stopped working when we arrived and gave us a thorough tour of their lovely little farm. It is such a peaceful unique farm you just want to lie down in the grass and daydream watching the clouds pass by. But a farmers work is never done and we wanted to get out of their way so they could return to their chores. Absolutely not! They insisted we stay for lunch and Bill pulled a beautiful roasted mutton out of the refrigerator and a loaf of freshly baked bread, yes Bill makes his own bread! Barbara foraged for greens and veggies for a salad and whipped up a delicious little dressing. We ate and chatted about life and the farm for what seemed like all afternoon and with sadness had to depart and leave this magical place.

bill bread 2


I host several tours to Cambria and Paso Robles and I always finish the tour on Sunday with a day at Windrose Farm with Bill and Barbara. No-one ever wants to leave! I wish all of you could join us for a weekend discovering food and wine and a central coast lifestyle but if you can’t, I’d like to share a piece of Windrose Farm with you. Following is an excerpt from their website and a glimpse inside the magic of Windrose Farm. Join us Oct 24th – Oct 26th for a trip that includes a visit to Windrose.
Windrose is a small family farm located east of Paso Robles and tucked into a unique valley of 50 acres, 12 are in vegetable rotations, 6 are in apples and stone fruit and 5 are sheep pasture. The rest is habitat – full of animal, bird and insect life.

Owners Bill and Barbara Spencer have been certified organic from August 1999 to 2009, but are currently transitioning to biodynamic! The farm has been “clean” for twenty years; since its purchase in 1990.

Cambria Tour-4848

In 1993 Windrose began going to the Farmer’s Markets with produce from their first small market garden. Having already discovered the enjoyment of growing many “specialty” varieties of vegetables – most particularly heirloom tomatoes and potatoes, they also found they loved selling to wonderful restaurants as well as to their friends at Farmer’s Markets.
In addition to tomatoes and potatoes, Windrose grows onions, garlic, green and dry beans, peppers, eggplant, winter squash, carrots, turnips, beets, cucumbers, melons and many varieties of greens. They also have apples and stone fruit. Their little valley is a unique micro-climate that is good for the diverse crops of lilacs, apples, super-sweet onions and melons.
Bill & Barbara state that “The longer we farm, the more enthralled we are with the old traditional seeds and plants. We strive as much as possible to use open-pollinated or heirloom varieties and have begun our own seed-saving program. Every day brings us more knowledge and a stronger belief in the principals and practices of sustainable organic farming. It is complex and labor-intensive – but the burst of life in the soil and the habitat of our little valley is astonishing.”


Our Philosophy

Barbara and Bill have often sought to better explain their philosophy about the environment that is Windrose Farm.

In this years Biodynamic calendar we found the following by Patrick Holden, a soils expert, long time organic farmer and advocate of the ‘biodynamic‘ philosophy:

“We subscribe to Rudolph Steiner’s* philosophy that the farm should be seen as an ecosystem in its own right, and that our striving should be to move towards building and maintaining plant and animal communities, which are ecologically suited to its unique combination of soil, climate and place.”

Barbara and Bill cherish their time at the ecosystem that is Windrose and sharing the bounty that it produces.
* Rudolph Steiner founder and creator of the “Biodynamic philosophy and principles.

Visit Windrose Farm at www.windrosefarm.org 

 Join Chef Debbi and The Debettes for our

Fall Farm, Food and Wine Tour

of California’s Central Coast

for more info click here

Related Posts Plugin for WordPress, Blogger...
Leave a comment
Share
  • Pin it
  • Share
  • Tweet
  • Share
  • Email

Posts navigation

Previous Page 1 2 … 20 21 22 23 24 25 26 Next Page
Deb

Meet Chef Debbi

READ BIO

Join-Us Sign up for our newsletter to receive exclusive tips 'n tricks, and special offers on classes, tours, and more!

Recent Posts

  • New E-Book!
  • From the Pantry
  • Spaghettini at Home
  • Growing Corn
  • Spring IS Coming!

Categories

BookCUT

What's in Your Pantry?

How to stock your pantry to create delicious dishes.

Learn Chef Debbi's pantry essentials and how to substitute ingredients for pantry staples in her basic recipes for quick and easy meals.
BUY BOOK>

FacebookTwitterInstagramGooglepinterest


© 2014, DEB'S KITCHEN
Angie Makes Feminine WordPress Themes