Deb's Kitchen - Farm, Food, Wine & Lifestyle Adventures
  • Facebook
  • Google
  • Twitter
  • Instagram
  • Pinterest
  • Email
Menu
Skip to content
  • Home
  • Blog
  • Events
    • Classes
    • Tours & Adventures
  • Edible Gardening
  • Preserving
  • Recipes
    • Appetizers
    • Soups and Salads
    • Main Dishes
    • Side Dishes
    • Desserts
  • About
    • Whats In Your Pantry
    • Ask Debbi
    • Deb’s Kitchen Botanicals
    • Press
  • Contact

Category Archives: Blog

4th of July Cooking Demo

5 / 26 / 177 / 3 / 17

Join us at Temecula Olive Oil, Seal Beach for a tasty cooking demo!


Get Ready for Holiday 4th!

Demo Cooking Class

June 15 & 29

6:30 – 8:30 p.m., approximately

By reservation only, see below

Cheesy Pesto Tortellini Skewers

Chicken Parmesan Pinwheels with Roasted Red Bell Pepper Dip

Poached Shrimp Salad Sliders

Watermelon, Feta & Mint Salad

Peach Clafoutis with Berries

For reservations call

Temecula Olive Oil

(562) 296-5421

Sponsored by

Leave a comment
Share
  • Pin it
  • Share
  • Tweet
  • Share
  • Email

Growing Pumpkins

5 / 26 / 175 / 26 / 17

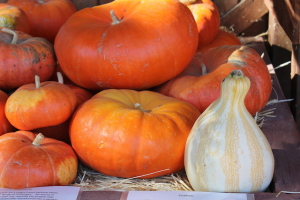
The first couple of weeks in June is the perfect time to get in a crop of any gourd or squash for fall harvest. This will give your heirloom pumpkins and gourds plenty of time to ‘cure’ for Halloween. It’s also a great time to plant another crop of beans, corn and late season tomatoes. The weather has warmed up and so has the soil. It’s not necessary to make a mound to plant squash seeds of any kind unless your soil doesn’t drain well. If that’s the case I recommend a good amount of compost should be dug into the soil before planting.

Plant the seeds about 1 1/2″ – 2″ deep and water well, I like to sprinkle the soil every day until the seeds emerge. As the plant begins to grow you’ll want to water less often, let the soil begin to dry out, and water deeply when you do water. Keeping the leaves dry will help prevent many diseases such as powdery mildew which can have an adverse affect on the production of the plants and fruit.

It’s easy to keep the soil from splashing up on the plants if you mulch around them. I put down a thick layer of newsprint, black and white parts only, and then I cover that with straw. This is a great way to prevent weed seeds from sprouting and to help keep moisture in the soil. The worms love the newsprint and they will help to aerate the soil as well.

A general fertilizer and compost will keep your plants healthy as the gourds start to grow. Small pumpkins, gourds and squashes can be plant on a trellis to save room. The large pumpkins have vines that can run for 30 feet or so; before fruit develops or when it’s very small, wrap the vines around the base of your corn plants or sunflowers.

51fKTNC-qSL._SL500_AA300_

If you like to pick the blossoms for cooking, pick the males flowers as there are many more of those than the female ones that produce the fruit. The male flowers will have a straight stem coming from the vine while the female flowers have a little bulge around the base of the flower, which turns into the squash or pumpkin. All squash flowers can be used in cooking, be careful when picking that you don’t accidentally take a bee into the house. Open the flower very gently and the bee should fly out to another plant. I have never been stung in all my gardening years by a bee! In fact I plant lots of flowers throughout my garden to attract them, bees pollinate a whopping 1/3 of our crops so they are essential to the garden. Don’t use any chemical sprays in the garden to avoid killing beneficial insects. Pick off beetles or squash bugs and drop them in a bowl of soapy water. If you do have to spray for any pest use an insecticidal soap such as Safer brand or Dr. Earth. Plant sunflowers along with the squash/gourds and the bugs will have a tendency to stay on the sunflowers rather than the squash. Ladybugs are wonderful for snacking up all of the aphids in the garden too!

While your pumpkins, large squash or gourds are small, place them on the straw to prevent them sitting directly on the soil, this will help to prevent rot on the bottom. Also keep an eye out for critter damage, scratches on the surface or gnaw marks from their teeth. I cover my fruit with floating row cover to keep the critters out but let the sunlight in. If you have children or grandchildren have them scratch their name or a simple design lightly onto the surface of the pumpkin and watch it grow as the pumpkin does.

When the vines start to die it’s a sign the pumpkin or gourd is getting ready to harvest. Let the stem near the gourd dry completely and let the shell start to harden. If you can press the outside and the skin ‘gives’ a little, it’s not quite ready. When it is cut the vine leaving a good amount of the stem attached and pick the pumpkin up from the base, never by the stem.

Store your squash, pumpkins and gourds out of direct sunlight and in a cool area. Many times pumpkins and gourds will last for long periods of time, I had a few that lasted more than a year! Hard shelled squash will store quite a long time, just remember the softer the shell, the less shelf life it will have.

I think the sugar pumpkins have the best flavor for use in recipes but I like to grow a variety for fall displays and of course for All Hallows Eve! The pumpkins I use for decoration I cut up and save the seed when I’m done and place the chopped up squash in the compost pile. Dry the seed on a parchment lined baking sheet until completely dry and then store in a dry, cool place such as your pantry.

And now that your summer crops are all growing along very well, it’s time to think about planting a fall garden, the best time to grow in Southern California, if you ask me!

Mangia!

Leave a comment
Share
  • Pin it
  • Share
  • Tweet
  • Share
  • Email

Buffet Party Dishes

5 / 10 / 17

Demo Cooking Class

May 18th & June 1st

6:30 – 8:30 p.m., approximately

By reservation only, see below

Smoked Salmon Cream Cheese Tart With Fresh Lemon Olives

Marinated Vegetable Salad California

Nicoise Style Sandwich

Candied Bacon Deviled Eggs

Mixed Berry Cheesecake 

For reservations call

Temecula Olive Oil

(562) 296-5421

Sponsored by

Leave a comment
Share
  • Pin it
  • Share
  • Tweet
  • Share
  • Email

Temecula Olive Oil, Seal Beach Cooking Demo for April & May

4 / 12 / 17

Seal Beach Store Cooking Demo

April 20th & May 4th

6:30 – 8:30, approximately

 Menu

Rick Bayless Slow Cooker Carnitas

Roasted Tomatillo (Carnitas) Enchilada’s With Mexican Crema and Monterey Jack Cheese

Fresh Tomato Salsa 

Refried (Heirloom) Black Beans

Corn, Cherry Tomato Salad with Hatch Chili Vinaigrette

Hatch Chili Chewy Brownies 

For reservations call

Temecula Olive Oil

(562) 296-5421

Sponsored by

Leave a comment
Share
  • Pin it
  • Share
  • Tweet
  • Share
  • Email

Puff Pastry Tart

4 / 11 / 17

This recipe is great as a side dish, an appetizer or a light lunch with a salad. It’s easy to make, most of it can be done ahead of time and assembled just before baking. Be sure to use a quality puff pastry dough such as Dufour’s which is made with 100% butter and no preservatives. It’s a little more expensive but if you want real puff pastry, this is it. Be sure to keep the dough refrigerated and if it warms up a little while you are rolling it out, pop it back in the refrigerator until cold. It won’t puff correctly unless the dough is as cold as possible into a hot oven. Be creative and add some chopped (blanched) asparagus to this, it’s a perfect spring time recipe. Enjoy!

Leek and Goat Cheese Puff Pastry Tart

Save
Print
  • 1 cup baby leeks, sliced thin
  • 1 tablespoon unsalted butter
  • 2 tablespoons extra-virgin olive oil
  • Sea salt
  • 1 teaspoon finely chopped fresh thyme
  • 1 box (14 ounces) frozen puff pastry, such as Dufour, thawed
  • 1 large egg beaten with 1 tablespoon water
  • 1/4 cup Nicoise olives, pitted
  • 6 ounces goat cheese, room temperature

Rinse leeks well, and drain; set aside.

Melt butter with oil in a medium sauté pan over medium heat. Add leeks and sprinkle with salt; cook, stirring occasionally, 5 minutes, cook until translucent and soft, add thyme. Leeks can be refrigerated in an airtight container up to 1 day; bring to room temperature before assembling tart.

Cut or roll out pastry to a 6-by-14-inch rectangle; place on a parchment-lined baking sheet (reserve remaining pastry for another use). Score a 3/4-inch border. Brush with egg wash; sprinkle with Parmesan. Refrigerate 30 minutes.

Preheat oven to 375°. Bake pastry until light brown; remove from oven, and press center area with spatula. Using an offset spatula or a spoon, smear the pastry with the cheese within the border, add leeks and olives, and bake until crust is golden brown, about 10 minutes. If bottom is soft, bake 3 to 5 minutes more.

Remove tart from oven place tart onto a wire rack; let cool slightly. Cut into pieces; serve warm or at room temperature (tart can stand at room temperature up to 1 hour).

Olive Magazine Photo

Leave a comment
Share
  • Pin it
  • Share
  • Tweet
  • Share
  • Email

Guinness Cupcakes with Bailey’s Cream Cheese Frosting

3 / 16 / 17


Guinness Cupcakes with Bailey’s Cream Cheese Frosting

Save
Print

Easily made into a Bundt cake as well.

  • 1 bottle Guinness
  • 1 cup (2 sticks) unsalted butter
  • 3/4 cup unsweetened cocoa powder
  • 2 cups all purpose flour
  • 2 cups sugar
  • 1 1/2 teaspoons baking soda
  • 3/4 teaspoon salt
  • 2 large eggs
  • 2/3 cup sour cream
  • Baileys Cream Cheese Frosting
  • 4 oz. cream cheese, room temperature
  • ½ cup butter, room temperature
  • 2½ cups powdered sugar
  • 3 tablespoons Baileys Irish Cream
  • Green nonpareils for garnish

Preheat oven to 350°. In a large bowl, combine flour, sugar, baking soda, and salt. Set aside.

Bring Guinness and butter to a simmer in large saucepan over medium heat. Add cocoa powder and whisk until mixture is smooth. Cool slightly.

In the bowl of a stand mixer, beat eggs and sour cream. With the mixer running on low slowly add Guinness-chocolate mixture to egg mixture and beat until just combined. Add flour mixture and beat on medium-low speed until combined.

Divide batter among cupcake liners, filling them 2/3 to 3/4 of the way. Bake cake until toothpick inserted into center comes out clean, rotating them once front to back if your oven bakes unevenly, about 17 minutes. Cool cupcakes on a rack completely before frosting.

As a Bundt cake, oil the pan well and bake for 40 minutes. Stick a toothpick into the center to make sure the cake is done, cool before taking out of the pan.

In a mixing bowl, add in the cream cheese and butter. Mix until light and fluffy. This will take about 2 minutes.

Add in the powdered sugar and Baileys and mix until incorporated. Turn the mixer on high and beat for another 2 minutes until the frosting is fluffy.

Add the frosting into a piping bag with a straight tip and pipe swirls on the cooled cupcakes.

Add the nonpareils to the frosting.

Photo: Cookie Dough & Oven Mitt

Leave a comment
Share
  • Pin it
  • Share
  • Tweet
  • Share
  • Email

Tips on Growing Tomatoes

3 / 16 / 17

How To Grow Great Tomato Plants


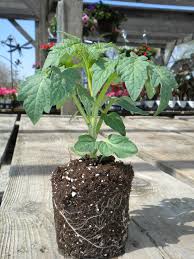
Buy transplants

Purchase healthy, stocky plants that have no flowers, fruits or buds

Choose a sunny location, rotate planting beds every year

Plant in an area where you may have grown peas or beans the previous year

Add compost to the soil and make sure the soil isn’t compacted.


Succession plant

Choose an early variety that can be planted in early spring. I like to plant my main crop in April and then another couple of plants in July for fall harvest. Check Sunset Gardening Guide for the best time in your area to plant.

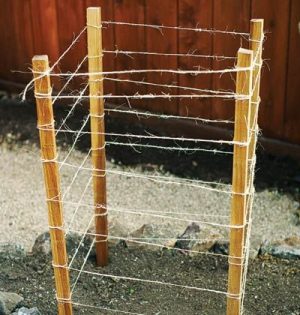
Depending on how you’re going to stake or cage tomatoes, have all the equipment ready for planting day, stake the plants at the same time you transplant.


Planting

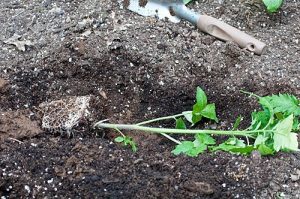
When planting remove lower leaves and plant the tomato deep, so that only about 3” are above ground. Tomato plants have the ability to grow roots from the buried stem. Water well after planting. Water well and deep but infrequently, keep your watering consistent, tomatoes need about 1” water a week.

Fertilize

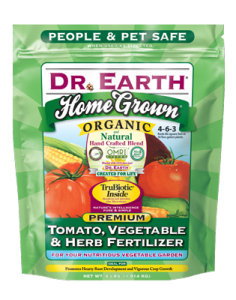
Don’t over fertilize your tomato plants. Use a high phosphorus content fertilizer such as Dr. Earth Organic Tomato/Vegetable Fertilizer, 5-7-3. A high nitrogen content will give you lots of green leaves but little fruit.

Pinch branches out

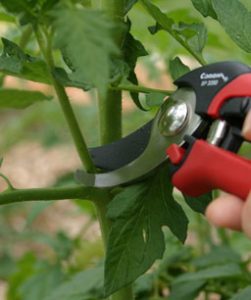
I always pinch out side shoots in the beginning to help the plant grow tall rather than gangly.

Mulch and Companion Planting

Tomatoes love carrots; basil and marigolds so plant them in the same bed and mulch the rest of the soil to keep the moisture in.


Leave a comment
Share
  • Pin it
  • Share
  • Tweet
  • Share
  • Email

Easter Menu

3 / 16 / 17

April cooking demo at Temecula Olive Oil tasting room, Seal Beach

April 6th, Thursday

6:30 – 8:30, approximately

See below for reservations

Menu

Roasted Asparagus Caesar Salad

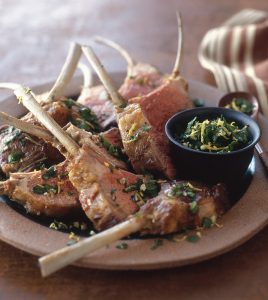
Pan Seared Lamb Chops with Meyer Lemon & Mint Gremolata

Honey Glazed Baby Carrots with Cippolini Onions

Fontina & Gruyere Potatoes Au Gratin

Blood Orange Carrot Cupcakes with Cream Cheese Frosting

For Seal Beach Reservations please call:

562-296-5421

Sponsored by

Leave a comment
Share
  • Pin it
  • Share
  • Tweet
  • Share
  • Email

Fettuccine with Fresh Spring Peas & Pancetta

2 / 24 / 172 / 24 / 17


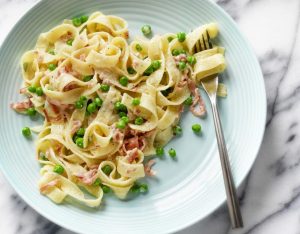
Fettuccine with Fresh Spring Peas & Pancetta

Save
Print
  • 1 pound fettuccine pasta
  • 1 tablespoon olive oil
  • 8 oz. pancetta, diced
  • 1 small shallot, minced
  • 2 tablespoons dry white wine
  • 2 tablespoons chicken stock
  • 1 cup fresh peas
  • 1 sprinkle of sea salt
  • ¼ cup heavy cream
  • 1/2 cup grated Parmesan cheese, reserving some for garnish.
  • Fresh ground pepper

Cook the pasta according to directions, adding a good tablespoon of salt to the water, and while that is cooking continue with the recipe.

Heat a large saucepan over medium high heat and add a little olive oil to cover the bottom of the pan, add the diced pancetta and cook until lightly browned.

Add the shallots and sauté until translucent. Add the wine and chicken stock, bring to a boil and add the peas with a generous sprinkle of sea salt, cover and cook until most of the liquid has been absorbed and the peas are a bright green color.

When the liquid is reduced to about a tablespoon, add the cream and cook for about 3 minutes then add the cheese and the pasta. Toss well and add a little of the pasta water if the sauce is too thick. Serve with a grind of fresh pepper.

Serves 4


Leave a comment
Share
  • Pin it
  • Share
  • Tweet
  • Share
  • Email

Growing Spring & Fall Peas

2 / 24 / 17

Growing Spring and Fall Peas

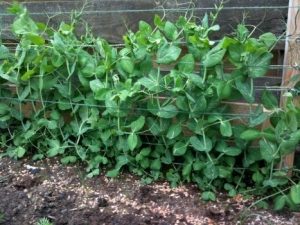
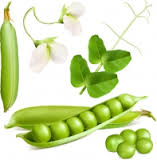
There are several types of peas that you can grow in the spring or late fall garden. Tall vining types or short bush ones that don’t need trellising.

Then you need to decide if you want fresh shelling peas, pea pods or snow peas.

All peas grow in pods but not all pods are edible. Shelling peas, also called ‘English’ peas have tough outer pods and so must be ‘shelled’. Snap peas can be eaten whole and are good blanched or eaten raw. They plump up a little more in the pod than a snow pea, which has a flat, pod and are very tender. Grow them all, the shell peas are great for freezing to use in soups, stews or just about any dish. The snap or snow peas add a great crunch to salads and many times most of them are eaten right off the vine in the garden.

Plant peas in spring or late summer (in warmer climates), loosen the soil and add some compost, mixing it well. If using a trellis, place the trellis in the soil and plant peas on both sides of the trellis. Plant the seeds about 1” deep and 2” apart. Water well and wait for them to grow. That’s it!

Harvest when the pods are fully mature, the shelling peas will be plump and fat while the snap peas are just beginning to swell inside the pod and the snow peas are full size and sort of waxy looking. Some of the flowers may be still attached to the bottom of the pod but they will be looking rather dried out.

Refrigerate peas just after picking so they stay sweet and crunchy for up to 3 days. Blanch peas right away if you’re planning on freezing some. Cook in boiling, salted water for 2 minutes, drain and lay flat on a baking sheet. Dry them well and freeze on the sheet pan then you can toss them into a freezer bag and pull out only what you want to work with later.

Pick peas in the morning and use care not to pull the plant out of the ground while you pull off the pea pod. You can also use the leafy pea shoots from the tops of the plants as they get taller, plan on using these right away.

Leave a comment
Share
  • Pin it
  • Share
  • Tweet
  • Share
  • Email

It’s Easy to Grow Potatoes!

2 / 8 / 17

potato growing

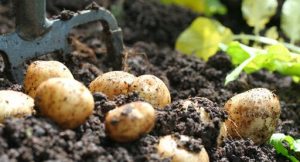
Choose organic seed potatoes, don’t plant potatoes that you’ve purchased from the market even if they have sprouts. They won’t perform well in the garden and you’ll be disappointed. Buy certified organic see potatoes from a reputable nursery. In LA check out Two Dog Nursery, http://www.twodognursery.com/ or by mail, Peaceful Valley Farm, https://www.groworganic.com/

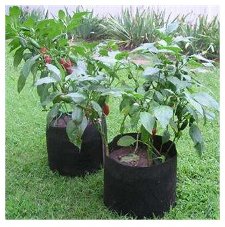
Pre-spouted potatoes will grow faster and you’ll be able to pick potatoes about a month earlier. Growing potatoes is SO easy! You can grow in Smart Pots, the easiest in my opinion, or in the ground.

To pre-sprout the potatoes, put them in a paper bag or lay them out singly in a warm room. If they are larger than a couple of inches I cut them into pieces with each piece having 2 or more ‘eyes’ and let them dry out of the sun for a couple of days. Potatoes like sandy, loose soil so if that’s not the kind of soil you find in your garden a Smart Pot is the way to go, it also makes harvesting easier. If you are planting right in the ground, make a furrow about 3” deep and plant the seed potato eyes up, cover with soil and plant the next potato seed about 2’ away. As the potatoes sprout and grow keep covering the plant with loose soil or straw leaving about 3” exposed. The new potatoes grow on top of the seed potato, keep the soil moist but not wet and keep ‘hilling’ the plant until it’s about 10 – 12” tall. Fertilize with a general organic gardening fertilizer such as EB Stone Tomato & Vegetable Food, 4-5-3.

Harvest potatoes in about 60 days after the blooms start to die back. Stop watering and leave the potatoes in the ground, covered with soil or straw to prevent greening (don’t eat a green potato), to set the skin. Fresh potatoes have a very thin, delicate skin so if you’re planning on storing any of them you’ll want it to ‘toughen’ up a little. If you’re growing in a Smart Pot after you’ve toughened up the skin, just dump the pot out in the garden and collect all your potato gems! Start each season with fresh new seed potatoes. In California you can grow potatoes in spring and in fall, yippee for California!


potato smart pots

Get Smart Pots here


Leave a comment
Share
  • Pin it
  • Share
  • Tweet
  • Share
  • Email

Temecula Olive Oil Cooking Class March 2017

2 / 8 / 17

Celebrate the Irish with us in downtown Seal Beach !

Thur. March 2

(Additional class March 16th  if March 2nd sells out,) BYOB

6:30 – 8:30, approximately

See below for reservations

Guinness-Beef-Stew-Recipe-wonkywonderful

Kerrygold Aged Cheddar Cheese Sandwich Fingers with Sun Dried Tomatoes

Irish Pub Salad

 Beef & Guinness Stew

Potato Torte with Bacon & Cabbage

Guinness Chocolate Cake 

For Seal Beach Reservations please call:

562-296-5421

Sponsored by

Melissas logo small

Photo: Wonky Wonderful
Related Posts Plugin for WordPress, Blogger...
Leave a comment
Share
  • Pin it
  • Share
  • Tweet
  • Share
  • Email

Posts navigation

Previous Page 1 2 … 10 11 12 13 14 … 21 22 Next Page
Deb

Meet Chef Debbi

READ BIO

Join-Us Sign up for our newsletter to receive exclusive tips 'n tricks, and special offers on classes, tours, and more!

Recent Posts

  • New E-Book!
  • From the Pantry
  • Spaghettini at Home
  • Growing Corn
  • Spring IS Coming!

Categories

BookCUT

What's in Your Pantry?

How to stock your pantry to create delicious dishes.

Learn Chef Debbi's pantry essentials and how to substitute ingredients for pantry staples in her basic recipes for quick and easy meals.
BUY BOOK>

FacebookTwitterInstagramGooglepinterest


© 2014, DEB'S KITCHEN
Angie Makes Feminine WordPress Themes