Deb's Kitchen - Farm, Food, Wine & Lifestyle Adventures
  • Facebook
  • Google
  • Twitter
  • Instagram
  • Pinterest
  • Email
Menu
Skip to content
  • Home
  • Blog
  • Events
    • Classes
    • Tours & Adventures
  • Edible Gardening
  • Preserving
  • Recipes
    • Appetizers
    • Soups and Salads
    • Main Dishes
    • Side Dishes
    • Desserts
  • About
    • Whats In Your Pantry
    • Ask Debbi
    • Deb’s Kitchen Botanicals
    • Press
  • Contact

Category Archives: Blog

October Cooking Demo

10 / 26 / 1610 / 27 / 16

Join us in Seal Beach

Thursday October 13th 6:30 – 8:30, approximately

Repeat Class Thur, Oct 27th!

Boursin Cheese Dip with Roasted Grapes Crostini’s

Apple, Parmesan and Walnut Salad with  White Balsamic Apple Vinaigrette

Fall is the time when I start thinking about casseroles and slow cookers, here’s the first casserole of the fall!  

Balsamic Chicken & Pork Riblettes

served with Roasted Red Bell Peppers, Green Onions and Fresh Lemon Olive Rice Pilaf

Orange Olive Oil Chocolate Pumpkin Cupcakes 

Temecula Olive Oil Tasting Room, Seal Beach

Call Now for reservations
562-296-5421

Sponsored by

 Melissas logo small

Leave a comment
Share
  • Pin it
  • Share
  • Tweet
  • Share
  • Email

How To Grow Amaryllis & Paperwhite Bulbs

10 / 20 / 16

amaryllis-potted-2

I love growing Narcissus (Paperwhites) in the spring and in the fall/early winter. If you stagger planting these bulbs you can have continuous blooms from now all through the holidays. Narcissus and Amaryllis both grow well in soil or in a vase or shallow bowl with no soil at all. I love taking amaryllis bulbs to anyone that I visit during the holidays; you can even find bulb kits at the nursery or almost any store this time of year.

Unlike most bulbs these two don’t need to be chilled before planting, they love our warm climate (even if sometimes we don’t!). If you want continuous blooms buy a dozen or so bulbs and store some in a cool dark place and ‘plant’ every few weeks through late winter. Amaryllis will bloom 6 – 8 weeks after planting and Paperwhites 3-5 weeks after planting.

To plant in soil make sure the container is about 5”- 6” deep, plant the Paperwhite bulbs, with the root end down so that the tops peek above the soil surface. You can plant 5 bulbs in this pot and space them a little apart from each other. Water until the soil is damp but not soggy or the bulbs will rot, water occasionally until they bloom then water regularly but do not overwater. Some Paperwhites are very tall and need support to keep from falling over. Plant one Amaryllis bulb in the same size pot with the tip about one-third above the soil. Amaryllis can be encouraged to bloom again next year if planted in soil, cut off the old bloom to about 1” above the bulb, water and feed regularly and let the leaves grow throughout the year. In late summer stop watering and let the leaves dies back naturally as they start to store energy for the next season. You can dig up the bulb or leave in the pot and place into a cool, dark place for about 8 weeks. You can repot in fresh soil or add a little finished compost to it, bring it back into a light area, water infrequently until you see growth and then repeat the process. Paperwhites won’t usually bloom again so buy new bulbs each year.

To plant in gravel or stones place a layer of stones or gravel over the bottom of a vase to a depth of 2-4” for the Amaryllis or paperwhites and place the bulb or bulbs on top of the stones, fill the vase with more stones up to the top third of the bulb and add water up to 1” below the base of the bulb, do not let the bulb sit in water or it will rot. Add water as needed but keep the level below the base of the bulb. Be sure to use a vase or jar that is tall enough so that it won’t tip over as the flower shoots grow.

Buy some ‘kits’ as hostess gifts for the holidays and store in a cool, dark place until you need them. (Don’t forget where you stash them though!)

paperwhites-potted

Leave a comment
Share
  • Pin it
  • Share
  • Tweet
  • Share
  • Email

Apple

10 / 5 / 16

apple-tree9


Fall isn’t quite here yet but when you see fresh apples in the farmers markets you know it’s coming quickly! Apples starting coming into the market in August actually.

Home made applesauce is so easy and oh so tasty, not like that runny stuff you get from a jar. It’s pretty much hands off cooking so try making your own today!

Here’s a quick little guide to choosing apples

Choose organic apples as apples have topped the Environmental Working Groups ‘Dirty Dozen’ list, which identifies the most pest laden fruit and vegetables. You’ll want to eat the skin of the apple as disease-fighting pectin (fiber) lies directly under the skin

Select firm fruit with no bruises or scars and treat them gently.

Don’t wash your apples until you’re ready to use them.

Keep them in a cool place, your fruit drawer of the refrigerator is fine but don’t store with other fruit. Apples give off a gas, which will ripen you’re other fruit faster. Some apples will keep weeks in the refrigerator. They will keep a few days on the counter.

Apples are the ultimate fruit, low in calories with no fat, sodium or cholesterol. The pectin in apples actually helps to dissolve the cholesterol in ones blood stream. High in fiber, anti-oxidants, potassium, niacin and a variety of vitamins, apples are a near perfect fruit.


Apple Variety Guide

Cooking

Ambrosia, Braeburn, Cameo, Golden Delicious, Honeycrisp, Jazz, Jonagold, Jonalicious, Jonathon, McIntosh, Pink Lady, Red Delicious

Fresh Eating
Ambrosia, Envy, Fuji, Gala, Golden Delicious, Honeycrisp, Jazz, Kiku, Opal, Pink Lady, Sweetie
Apple Recipes
Applesauce
Apple Crisp
Apple Cake
Melissa’s Apple Fritters
Leave a comment
Share
  • Pin it
  • Share
  • Tweet
  • Share
  • Email

Apple Cake

10 / 5 / 16


apple-cake-in-a-jar

Apple Cake in a Jar

Save
Print

Serves 12

  • 3 1/3 cups all purpose flour
  • 1/2 teaspoon baking powder
  • 11/2 teaspoons salt
  • 1/2 teaspoon nutmeg
  • 1/2 teaspoon allspice
  • 2 teaspoons ground cinnamon
  • 2 teaspoons baking soda
  • 2/3 cups vegetable shortening or olive oil
  • 2 1/3 cups sugar
  • 4 eggs
  • 2 cups applesauce
  • 1 cup chopped walnuts

Preheat oven to 350°. Grease 12 (2 1/2-inch) wide-mouth canning jars with a paper towel dipped in oil.

Sift flour, baking powder, salt, nutmeg, allspice, cinnamon, and baking soda into a large bowl.

Using the electric mixer and a medium mixing bowl, cream together the shortening and sugar on low speed, then increase to medium mixing speed to mix well. While the mixer is running, add the eggs, one at a time. Stop the mixer and scrape down the sides.

Remove the bowl from the mixer and stir in the applesauce. With a large spoon, stir in the sifted flour mixture and the walnuts.

Pour the batter into a measuring cup with a spout; pour the batter neatly into greased jars. Fill the jars halfway full. Place the filled jars on the sheet tray and bake on the center rack of the oven for 45 minutes. When done, the top of the cake will spring back when pressed with a finger, and the sides will have come away from the jar.

Remove from oven and let cool 5 minutes. Poke holes in the cake with a toothpick and pour salted caramel over the top. Serve with whipped cream.

Adapted from Riki Senn at Greenbriar

Leave a comment
Share
  • Pin it
  • Share
  • Tweet
  • Share
  • Email

Cooking at The Flower Fields

9 / 22 / 16

oct-5-cook-at-flower-fields

Join us for a unique Culinary Event and Cookbook Signing on Wednesday, October 5th
Time: 11:00-1:00
Cost $45.00 per person

Chef Debbi Dubbs will be teaching this Fall inspired menu, with a cooking – technique you can all take home and try. Join us for lunch at the Flower Fields, and enjoy our highlighted local artisans.

Menu:
Pan-Roast Chicken with Porcini Bucatini

Classic Panzanella Salad

Homemade Chocolate Biscotti

Her cookbook, ‘What’s in Your Pantry”, will be available for signing.

Eventbrite - Kitchen Gardens Culinary Event with Chef Debbi Dubbs

Sponsored by Melissa’s Produce and ScanPan

Leave a comment
Share
  • Pin it
  • Share
  • Tweet
  • Share
  • Email

Chocolate Cherry Cookies

9 / 16 / 16

In honor of my friends birthday I made him these cookies and I had some leftover (this recipe makes about 4 dozen cookies). I took them to last nights cooking class and everybody seemed to love them. They’re not too sweet but just the right size for a nice little bite and they pair well with any red wine (what doesn’t?).

During the holidays I replace the cherries with crushed peppermint candies and add peppermint extract instead of the vanilla. So I hope you enjoy them!

chocolate-peppermint-crinkle-cookies

Chocolate Cherry Cookies

Save
Print
  • 1 1/2 cups all-purpose flour
  • 1/2 cup unsweetened cocoa powder
  • 2 teaspoons baking powder
  • ½ teaspoon salt
  • ¼ cup chopped walnut pieces, optional
  • 1/2 cup chopped dried cherries
  • 8 tablespoons (1 stick) unsalted butter, softened
  • 1 cup packed light brown sugar
  • 2 large eggs
  • 8 ounces bittersweet chocolate, melted and cooled*
  • 1 teaspoon vanilla extract
  • 1/2 cup granulated sugar
  • 1 cup powdered sugar

In a medium bowl, whisk together the flour, cocoa powder, baking powder, and salt. Add the chopped walnuts and peppermint chips, stir to distribute well.

In the bowl of a stand mixer, fitted with the paddle attachment, or in a large mixing bowl, cream the butter and brown sugar until light and fluffy, about 3 minutes.

Add the eggs and vanilla, and beat until completely incorporated. Add the melted chocolate and beat until completely incorporated. Gradually fold in the flour mixture until just combined.

Chill the dough for at least 2 hours until firm, or up to overnight.

Remove the dough from the refrigerator. Preheat the oven to 350°F. Line a baking sheet with parchment paper or a silicone baking mat.

Place the granulated and powdered sugar in separate small bowls. Scoop 1 tablespoon of the dough, form into a ball, and place on a plate. Repeat with the remaining dough.

Roll each ball in granulated sugar and then in powdered sugar to coat. Place on the baking sheet 2 inches apart. Bake for 10 to 12 minutes, until the cookies begin to spread and the tops split. Remove from the oven and cool for a few minutes on the baking sheet, then transfer the cookies to wire cooling racks. Let the baking sheet cool, and repeat with the remaining dough.

Cookies will keep in an airtight container for about one week.

*To melt the chocolate, place in a microwave safe bowl and heat for 30 seconds, stir, and heat at 10 second intervals until melted, stir occasionally.

Optional:

For Peppermint Cookies add 1/4 cup crushed peppermint candies and use peppermint extract instead of the vanilla.

*To crush peppermint pieces, place several candy canes or peppermint candies into a freezer type bag and crush with a meat pounder or rolling pin.

Leave a comment
Share
  • Pin it
  • Share
  • Tweet
  • Share
  • Email

Santa Maria Style BBQ

9 / 2 / 16

Santa Maria style bbq tri tip is traditionally made with a simple rub and grilled over hard wood, sliced thin and served with salsa, pinquinto beans and tortillas. You can find bbq’s on most street corners in Santa Maria but if you can’t get there, grill up your own. I prefer a wet marinade for a little extra flavor and sometimes I’d rather cook it in the oven so I’ve offered a recipe for both. Be sure to let it rest after grilling and slice it thin against the grain. Make extra for sandwiches or tacos or heating leftovers up to serve with some nice fried eggs. You’ll want to make sure you have enough so plan on 1/2 # per person.


tri tip, hatch chile collage

Santa Maria Style Tri Tip

Save
Print
  • 1/2 cup red wine
  • 1/2 cup olive oil
  • 2 tablespoons Worcestershire
  • 1 tablespoon soy sauce
  • 1 lemon, juiced
  • 3 cloves garlic, minced
  • 1/4 teaspoon dry mustard
  • 1 tri tip, about 2 1/2 – 3 pounds

Combine red wine, oil, Worcestershire, soy, lemon juice, garlic and mustard.

Marinate meat in sauce in refrigerator for up to 2 hours, turning several times.

Grilling Method

Remove from refrigerator 2 hours before grilling. Grill over medium heat about 15 to 20 minutes on each side, brushing frequently with marinade. For a more accurate temperature use a probe style thermometer that has been designed to be used with a grill. Use the temperature guides below for cooking.

Oven Method

Preheat the oven to 450°. Remove the meat from the marinade and pat it dry. Discard the marinade.

Place the tri-tip, fat side up, on a rack in a shallow roasting pan. Use a probe style thermometer inserted into the center of the meat. Set temperature for 115° - 120° for rare, 120° - 125° for medium-rare or 130° for medium, it is not recommended to cook tri tip higher than 130°, the meat will be tough and dry.

Transfer the meat to a carving board or platter, cover loosely with foil, and let it rest for 10 to 15 minutes before carving to allow the residual heat to complete the cooking and the juices to stabilize.

Slice the meat into thin slices across the grain.

Santa Maria Pinquinto Beans

Save
Print
  • 1 pound Rancho Gordo dried heirloom Santa Maria pinquito beans
  • 10 cups water, divided
  • 3 tablespoons olive oil, divided
  • 1 carrot, peeled
  • ½ onion, chopped
  • 1 celery stalk
  • 3 teaspoons kosher salt, divided
  • 2 slices bacon, diced
  • 1 large red onion, chopped
  • 3 cloves garlic, minced
  • 6 ounces tomato purée
  • 2 tablespoons brown sugar
  • 2 teaspoons ground dry mustard
  • 1 teaspoon Tabasco sauce, optional

Pick through the beans and remove any foreign matter. Rinse with cold water. Place the beans in a large bowl, cover with 6 cups of water and refrigerate overnight.

Drain the beans and rinse. Place the beans in a pot with 4 cups of water, 1 tablespoon olive oil, carrot, onion and celery. Bring to a boil and then reduce to a simmer. Cover and cook for 1 hour or until the beans are tender.

Season with 1 teaspoon kosher salt, then allow the beans to cool in the liquid. Once cool, remove and discard the carrot, onion and celery.

In a large pot set over medium heat, add bacon and remaining olive oil. Cook until bacon is golden brown. Add the red onion and cook for 5 minutes, stirring occasionally. Add the garlic and cook for 2 minutes more. Add the tomato purée, brown sugar, dry mustard and Tabasco sauce. Next, add the reserved beans, 2 cups of the bean-cooking liquid, 2 teaspoons kosher salt and cook for 30 minutes at a low simmer. The beans can be refrigerated for up to one week, or freeze for up to 3 months.

Courtesy of Cambria Winery

Rancho Gordo Beans can be purchased from www.ranchogordo.com

Santa Maria Style Salsa

Save
Print
  • 3 medium fresh tomatoes, chopped
  • ½ cup finely chopped celery
  • ½ cup chopped green onions
  • ½ cup finely chopped California green chiles
  • 2 tablespoons snipped cilantro
  • 1 teaspoon vinegar
  • Dash of Worcestershire sauce
  • Pinch of garlic salt
  • Pinch of dried oregano, crushed
  • Few drops of hot pepper sauce

Combine all ingredients in a bowl, cover and let stand for one hour to blend flavors.


Leave a comment
Share
  • Pin it
  • Share
  • Tweet
  • Share
  • Email

Fall Vegetable Gardens

8 / 16 / 16

Fall Vegetable Gardens

Fall Vegetable Garden

Although here in Southern California there aren’t many place where we get frost, some places away from the beach will get a light frost and towards the mountains an early frost and snow. But our last frost date near the coastline is anywhere from early Nov to early Dec. and our first frost date is somewhere around Feb. It’s good to know this information so you can plan on what and when to plant.

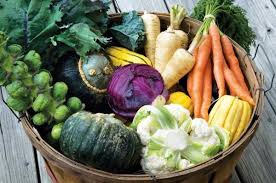
As the ground gets cold seeds will have a hard time sprouting or will not sprout at all. Planting a fall garden with vegetables that can ‘over-winter’ will see you through the cool, rainy (hoping) months. Heartier vegetables like broccoli, cauliflower and Brussels sprouts actually get a little sweeter with a touch of frost.

If you get tomatoes, beans and cucumbers in the ground now (Aug-Sept) make sure you plant early varieties that have time to fruit before the ground begins to cool. Most nurseries will still be carrying good supplies of summer vegetables for the next month.

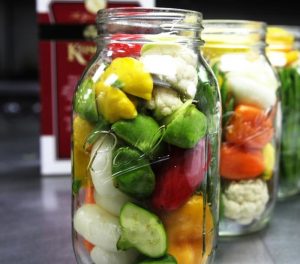
These are some fruit and vegetables that will grow for you now.

Broccoli, Cabbage, Kale & Brussels Sprouts
Parsley & Cilantro (but if we get a hot spell between Sept & Oct they may bolt)
Beets, Carrots, Turnips (try the little white turnip, sweet tasting even raw)
Leeks, Scallions, Onions, Shallots
Peas & Potatoes
Lettuce (provide a little shade until Nov), Spinach & Mustard

Here are two nurseries in our area that I love for great vegetable plants.

H & H, Lakewood Blvd, Lakewood

http://hhnursery.com/

Rogers Gardens, Newport Beach

http://rogersgardens.com/

Almost all the seed catalogs have great sale prices too, a good time to pick up some fall and spring seeds.

Grow Organic/Peaceful Valley Farms

http://www.groworganic.com/

Baker Creek Seeds

http://www.rareseeds.com/

High Mowing Seeds

http://www.highmowingseeds.com/

Renee’s Garden

http://www.reneesgarden.com/

Seeds From Italy

http://www.growitalian.com/

Leave a comment
Share
  • Pin it
  • Share
  • Tweet
  • Share
  • Email

It’s Hatch Chile Time!

8 / 15 / 16


IMAG0020

Get out your BBQ’s or roasters, it’s time for Hatch Chile’s! You’ll want to stock up on these fabulous, versatile chiles while they are in season. Melissa’s Produce brings these chiles from Hatch, New Mexico to Southern California and hosts roastings all over the southland (actually all over the US). You could order raw ones from Melissa’s website, melissas.com , or you could pop into a roasting (check out roasting dates, times & stores here) and they will roast them up for you on-site. Inside the store you’ll find all kinds of Hatch chile treats as well as things to cook up like Hatch Salmon Burgers or Hatch Chile Crab Cakes and Hatch chile sausage. Baked goods, cheese with Hatch chile’s, salsa and sauces. The list is endless!

Here is a perfect chicken wing recipe for football season, we grilled it up for the LA Rams first pre-season football game last weekend.

Tangerine Hatch Chile Chicken Wings and Cucumber-Yogurt Sauce

Save
Print

Serve the wings with the Cucumber-Yogurt Sauce and sliced veggies and LOTS of napkins.

  • 3 small Persian cucumbers or large English cucumber, diced
  • 1 tablespoon salt
  • 2 cups Greek yogurt*
  • 1 tablespoon lemon juice
  • 1 garlic clove, minced
  • 1 tablespoon fresh dill
  • 1 tablespoon olive oil
  • Salt & freshly ground black pepper, to taste
  • 1 package chicken wings
  • 1 bottle of Not Ketchup Sugar Free Tangerine Hatch Chile Sauce*

Toss a bunch of chicken wings with Tangerine Hatch Chile Sauce and grill over hot coals until the chicken wings are blackened and tender.

Cucumber Yogurt Sauce

Peel cucumbers and dice, if using English cucumber you can remove the seeds. Put them in a colander and sprinkle with the tablespoon of salt to draw out some of the water, let drain for about 30 min. Place the cucumbers into a piece of cheesecloth or kitchen towel and twist the towel to get out any remaining liquid.

Add everything to the food processor and blend until you get the consistency you want (chunky or creamy). Season with salt and pepper and refrigerate before serving, best if made a few hours before you’re going to serve it.

*If the yogurt is a little runny you can drain it through cheesecloth for several hours or overnight.

tnagerine hatch chile sauce

*You can find the Sugar-Free Tangerine Hatch Chile ‘Not Ketchup’ here

Leave a comment
Share
  • Pin it
  • Share
  • Tweet
  • Share
  • Email

Refrigerator Pickled Veggies

8 / 4 / 16

pickling2


Pickled Veggies

Save
Print
  • 1 bunch of radish
  • 3 carrots
  • 4 mini white turnips
  • ¼ # thin green beans
  • 4 small watermelon radish
  • 1 lg. clove garlic, crushed but whole
  • 2 shallots, sliced thin
  • 2 ½ cups pomegranate or red wine vinegar
  • 1 cup apple cider vinegar
  • ½ cup white vinegar
  • 2 cup water
  • 2 tablespoons sugar
  • 4 strips of lemon peel
  • 2 tablespoons pickling or canning salt (do not use any other salt)

Cut up all your veggies into what ever shape you like, making sure they fit into the jar that you will pickle them in.

In a medium sized saucepan add vinegar, sugar, lemon peel and salt; bring to a slow boil, whisk until all the sugar is dissolved,

Wash a quart canning jar and fill with hot water. Let stand while you are bringing the brine to a boil.

Once the sugar has dissolved in the brine, pour the water out of the jar and fill with veggies. Pour the brine over them, let cool, then cap and refrigerate.

Leave a comment
Share
  • Pin it
  • Share
  • Tweet
  • Share
  • Email

September Cooking Demo

8 / 4 / 16

Join us in Seal Beach

Thursday September 15th 6:30 – 8:30

Pork Milanese Michael Symon

Oven Dried Tomato Crostata with Fresh Ricotta

Hearts of Romaine Salad with Fresh Grated Parmigiano-Reggiano

Pork Milanese with Meyer Lemon & Chopped Tomato ‘Salsa’

Cheese Tortellini Alfredo with Broccoli Rabe

Peach Amaretti Crisp

DKB-12

Temecula Olive Oil Tasting Room

Seal Beach

Call Now for reservations
562-296-5421

Sponsored by

Melissas logo small

Leave a comment
Share
  • Pin it
  • Share
  • Tweet
  • Share
  • Email

August Cooking Demo

7 / 20 / 168 / 4 / 16

Hot August Menu!

Thursday, 6:30 – 8:30

August 11th & 25th

flourless choc cake

Goat Cheese Puffs with Honey & Lavender

Fresh Fish Crudo

Zucchini Salad

Chicken, Seafood & Sausage Party Paella

Blood Orange Flourless Chocolate Cake with Lavender

DKB-12

Temecula Olive Oil Tasting Room

Seal Beach

Call Now for reservations
562-296-5421

Sponsored by

Related Posts Plugin for WordPress, Blogger...
Leave a comment
Share
  • Pin it
  • Share
  • Tweet
  • Share
  • Email

Posts navigation

Previous Page 1 2 … 12 13 14 15 16 … 21 22 Next Page
Deb

Meet Chef Debbi

READ BIO

Join-Us Sign up for our newsletter to receive exclusive tips 'n tricks, and special offers on classes, tours, and more!

Recent Posts

  • New E-Book!
  • From the Pantry
  • Spaghettini at Home
  • Growing Corn
  • Spring IS Coming!

Categories

BookCUT

What's in Your Pantry?

How to stock your pantry to create delicious dishes.

Learn Chef Debbi's pantry essentials and how to substitute ingredients for pantry staples in her basic recipes for quick and easy meals.
BUY BOOK>

FacebookTwitterInstagramGooglepinterest


© 2014, DEB'S KITCHEN
Angie Makes Feminine WordPress Themes