Deb's Kitchen - Farm, Food, Wine & Lifestyle Adventures
  • Facebook
  • Google
  • Twitter
  • Instagram
  • Pinterest
  • Email
Menu
Skip to content
  • Home
  • Blog
  • Events
    • Classes
    • Tours & Adventures
  • Edible Gardening
  • Preserving
  • Recipes
    • Appetizers
    • Soups and Salads
    • Main Dishes
    • Side Dishes
    • Desserts
  • About
    • Whats In Your Pantry
    • Ask Debbi
    • Deb’s Kitchen Botanicals
    • Press
  • Contact

Category Archives: Blog

Lemon Chiffon Cup Cakes with Fresh Berries

4 / 11 / 154 / 11 / 15

chiffon-cake,photo Marcus Nill

Save
Print
  • 2 cups all purpose flour
  • 1½ cups granulated sugar
  • 1 tablespoon baking powder
  • ½ teaspoon salt
  • ½ cup vegetable oil
  • 8 eggs, separated
  • ¼ cup lemon juice
  • ¼ cup water
  • 2-1/2 tablespoon grated lemon zest
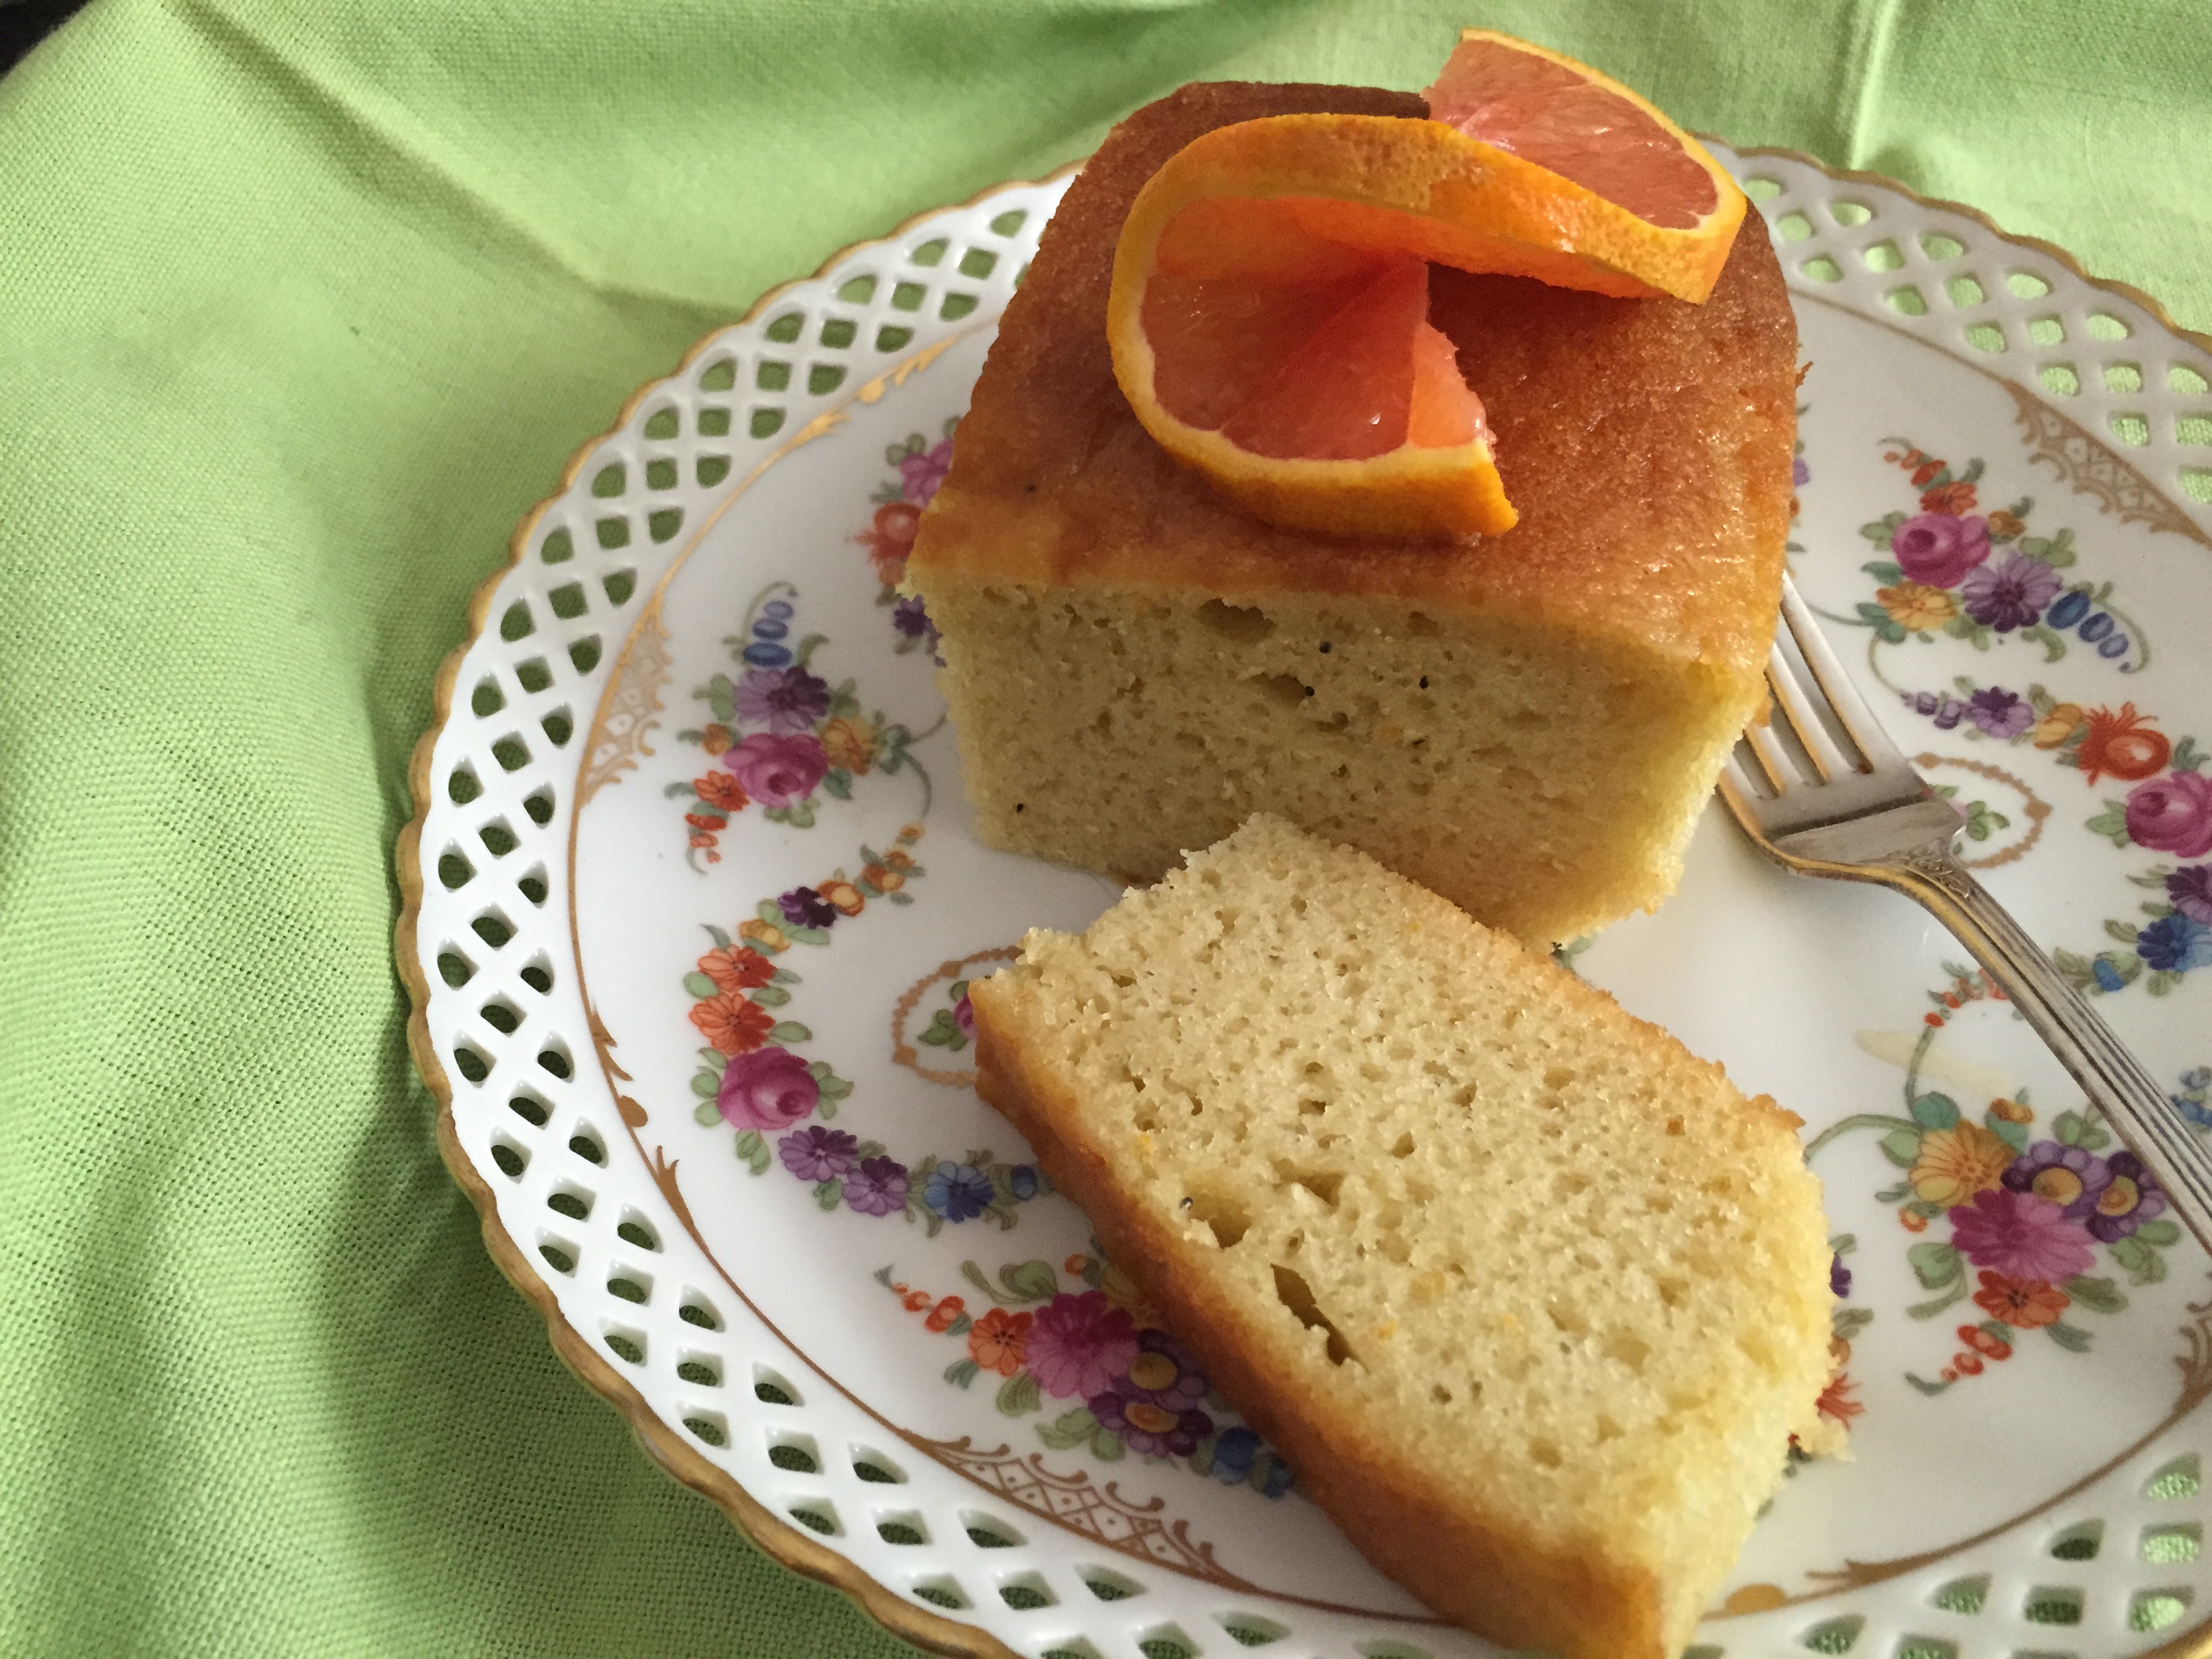
  • Lemon Glaze
  • 6 tablespoon butter, melted
  • 1 tablespoon grated lemon zest
  • 2 cups powdered sugar
  • 3 tablespoon lemon juice
  • 1 teaspoon vanilla extract

Preheat oven to 325°F.

In large bowl, add flour, granulated sugar, baking powder and salt. Add oil, egg yolks, lemon juice, water and lemon zest; whisk until well combined. In large bowl, beat egg whites until stiff peaks form.

Fold ⅓ of whipped egg whites into the batter to lighten. Gently fold in the remaining egg whites until mixture is combined; do not over mix or batter will deflate. Pour into ungreased pan; tap gently on counter to release air pockets.

Bake 50-60 minutes or until cake springs back when touched. Invert pan immediately after removing from oven and allow to cool completely. Run knife around the sides and center of cake to loosen.

For glaze, combine butter, zest, powdered sugar, juice and vanilla in medium bowl; stir until smooth. Pour over cooled cake and spread with spatula. Glaze will set hard within 30 minutes.

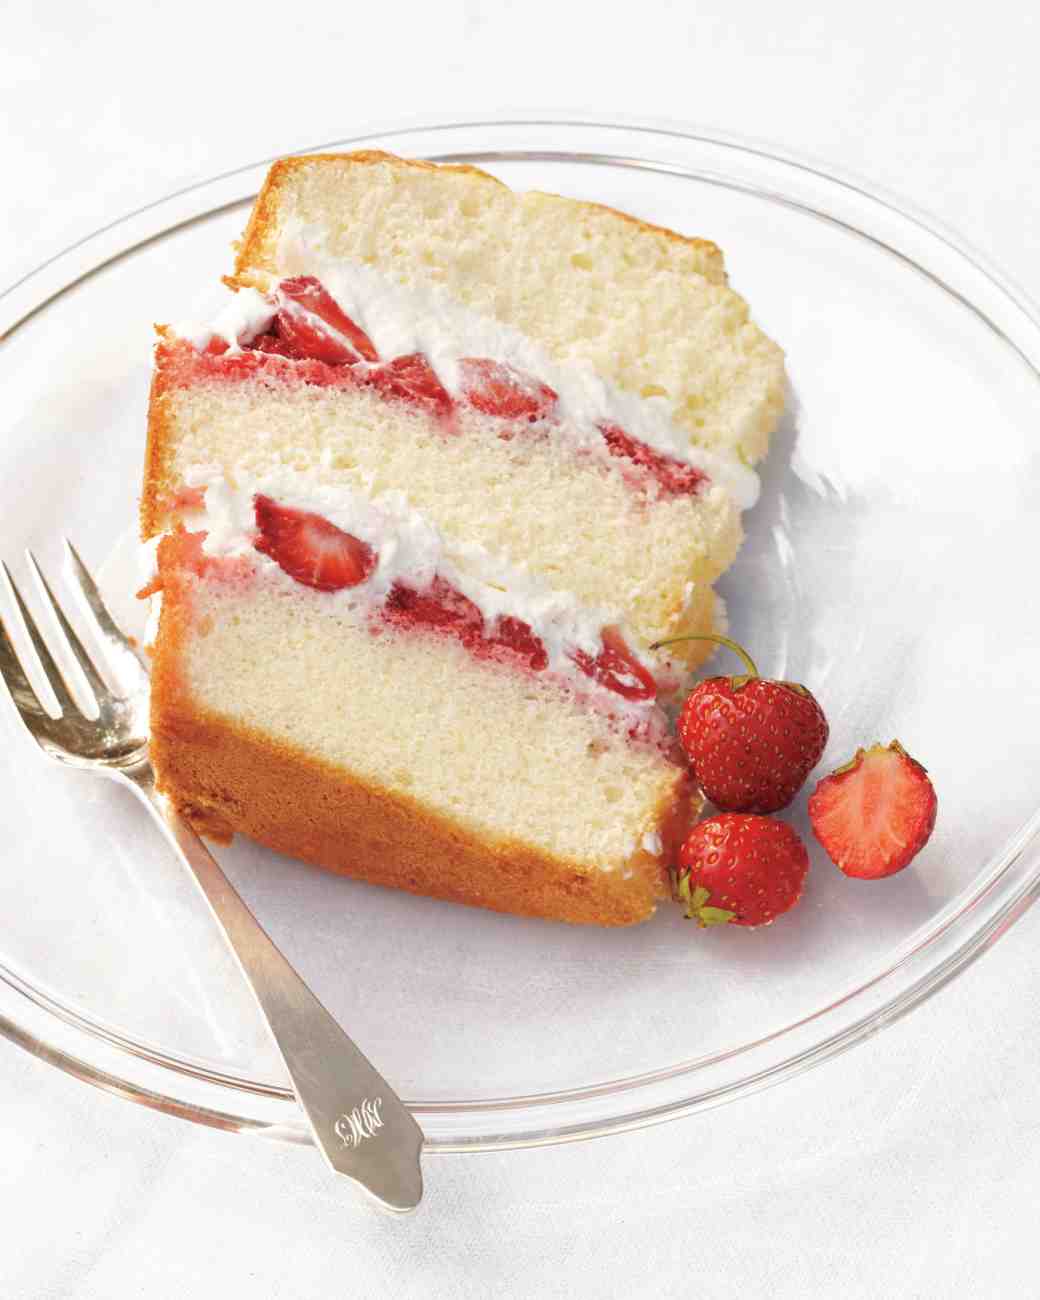
For Berries and Cream

Whip 1 pint fresh heavy cream and fold in sliced mixed berries.

Makes 24 cupcakes or 1 large Bundt cake

Courtesy of Martha Stewart

Photo: Marcus Nilsson

Leave a comment
Share
  • Pin it
  • Share
  • Tweet
  • Share
  • Email

What to do in your Spring Garden

3 / 31 / 15

April in the Garden

Coming Soon....

Chef Debbi will be presenting a seminar, ‘Al Fresco Mothers Day Brunch’, at the South Coast Plaza Garden Show on Sat. April 25th, 12:30 in the Mitchell Gold & Bob Williams home store. Chef will be talking about spring vegetables, edible flowers and demonstrating a ‘Microgreen and Baby Lettuce Salad with Spring Vegetables, Edible Flowers and a Pomegranate Vinaigrette’ and serving that along with a Seasonal Asparagus and Goat Cheese Tart

The seminar is free but seating is limited.

What To Do in The Spring Garden in So. California

Last Chances:

You can get another crop of spring vegetables, peas (in cooler climates), asparagus, spinach, lettuce and last chance to plant artichokes from seedlings.

Spring Potatoes
Plant from certified organic ‘seeds’.

Spring and Early Summer

Tomatoes
Plant early season, cherry, heirloom & indeterminate varieties
Choose plants that are stocky with a thick stem, about the size of a pencil. Don’t choose plants with flowers or fruit on it, your tomato plant needs to develop strong, deep roots before starting to flower. Remove lower leaves and plant the seedling up to the first two set of leaves. All those furry little things on the side of the stem will turn into roots for you.
Companion plants to tomatoes are carrots, basil, lettuce and parsley.

Beans
All kinds of beans! Bush, pole and dried beans for winter soups and stews.
Companion plants to beans are corn, potatoes, radish and carrots.
Corn
Plant pole beans at the base of the corn and squash around the beans.

Beets, Turnips, Carrots and Radish
All grow underground in loose soil and can be grown in less sunny areas of the garden.

Peppers
All kinds of peppers can go in the ground, planting companions are spinach, basil and tomatoes.

Zucchini
Early squash can be planted but hold off on pumpkins until June if you want them for the fall holidays.

Herbs
Cilantro, Basil, Thyme, Dill, Fennel, Chives and most herbs will do well now.

Watch out for runners and re-seeders such as mint, oregano, borage, lemon verbena and pineapple sage for a few.

Now is a good time to amend your soil for the long summer growing season.

Bon Appetit!

Seminar is sponsored by 1logo 2004
Leave a comment
Share
  • Pin it
  • Share
  • Tweet
  • Share
  • Email

Easter Potatoes

3 / 31 / 154 / 1 / 15

potato gratin-molly stevens

Potato Gratin

Save
Print

This rich, creamy gratin gets a note of smokiness from the bacon between the layers of tender potatoes.
by Molly Stevens from Fine Cooking

  • 2-1/2 lb. Yukon Gold potatoes, peeled & sliced into 1/8-inch thick rounds
  • 2-1/2 cups heavy or light cream
  • Sea salt & fresh ground pepper, to taste
  • 4 oz. bacon
  • 3 medium leeks, white and light-green parts only, thinly sliced
  • 6 oz. grated Gruyère
  • 2 to 3 tsp. chopped fresh thyme
  • 1/4 tsp. freshly grated nutmeg
  • 1/2 cup fresh breadcrumbs
  • 1/4 cup finely grated Parmigiano-Reggiano
  • 2 tablespoons unsalted butter, melted

Serves 8

Position a rack in the center of the oven and heat the oven to 400°F. Butter or oil a 3-quart gratin dish; set aside.

Put the potatoes, cream , 1/2 tsp. salt, and a few grinds of pepper in a 12-inch skillet. Simmer, partially covered, over medium to medium-low heat, stirring occasionally and gently with a rubber spatula until the potatoes are barely tender when pierced with a fork or skewer, 8 to 12 minutes.

In a medium skillet, cook the bacon until browned and fully cooked. Set aside to cool, reserving 2 tablespoons of the fat in the skillet. Heat the reserved fat over medium-high heat and sauté leeks until tender, fragrant, and lightly browned. Season to taste with salt and pepper. When the bacon is cool, crumble it into small pieces.

Using a slotted spoon, transfer half the potatoes to the prepared gratin dish, spreading them evenly. Layer on the leeks, bacon, Gruyère, thyme, and nutmeg. Top with the remaining potatoes spreading them evenly, and pour over any liquid remaining in the pan.

In a small bowl, combine the breadcrumbs, Parmigiano-Reggiano, and melted butter.

Evenly scatter the topping mixture over the potatoes. Bake the gratin until it’s bubbly, the top is brown, and the potatoes are completely tender when poked with a fork or a skewer, 25 to 30 minutes. Let the gratin sit for at least 10 and up to 30 minutes before serving so the liquid is fully absorbed and the layers are cohesive.


Leave a comment
Share
  • Pin it
  • Share
  • Tweet
  • Share
  • Email

Companion Planting

3 / 21 / 153 / 28 / 15

What is Companion Planting


Two or more plant types as to be beneficial to each other. Companion planting will help with pest control, higher yields, healthier soil and to keep weeds away.

Some flowers (marigolds, nasturtiums) can act as trap crops to attract insects away from vegetable crops. Aromatic herbs (basil, rosemary, lavender, sage) repel many insects away from more susceptible plants (tomatoes)

Umbel flowers, dill, fennel, parsley attract beneficial insects to the garden. The large flower heads provide a place where they beneficials can land and rest while they feed. Be sure to plant extra around the garden and let them go to seed. You may get some volunteers the next year (from all the seed flying around) but you can just dig those up and transplant them, free plants!

companion-plants-2Here are some classic combinations.

3 sisters, corn, beans, squash.  Plant corn and beans first, squash a couple of weeks later; beans feed nitrogen into the soil for both corn and squash, the squash leaves will protect the shallow roots of the corn and beans will grow up the corn stalks.

Basil and tomatoes are a classic example of companion planting. Plant carrots around the base of the tomatoes, they’ll be ready for harvest before the tomato plants go wild. No brassicas (cauliflower, broccoli, brussels sprouts) with tomatoes. No peppers or eggplant near or within the last year in the same spot. They are in the same family and can transfer soil born diseases.

Plant some of the umbel plants near tomatoes for help with hornworm which helps attract parasitic wasps and their larvae will feed on the hornworms.

Beans and potatoes.

While these grow together well don’t plant the beans near the corn as we talked about before. Another row of beans never hurt to have around so plant away from the squash and plant with potatoes. Potato doesn’t like squash, cucumbers or sunflowers.

Lettuce and radish

Both with tolerate less sun than 6 hrs. and the radish will be ready to harvest before lettuce starts getting big, neither one likes the heat.

Sunflowers & Pumpkins

A natural combination that get along well

Leave a comment
Share
  • Pin it
  • Share
  • Tweet
  • Share
  • Email

Drunken Corned Beef

3 / 17 / 15

The Irish in All of Us

corned beef & cabbage

Not all corned beef recipes are created equal. We’ve all had ‘just’ corned beef and we’ve all had ‘ok’ corned beef. But how many have had that juicy, tender corned beef that melts in your mouth? Well, the difference lies in cooking techniques and a few chosen ingredients.

The brisket (which becomes ‘corned’ beef after pickling), requires long slow cooking to break down the tough working muscle. A crockpot will do nicely or a large, heavy cast iron soup pot. I use my Le Crueset 7 qt. pot for all my braising, stewing and soup making. I like that it can hold lots of veggies to surround the meats and I also like the way it distributes heat evenly. It also can go into the refrigerator (after cooling) and then back onto the stove eliminating several dishwashing chores.

Next, I use only Guinness ale and water to cover the beef with. The dark Guinness gives the corned beef nice flavor and the alcohol tenderizes the roast as it cooks, much like using wine in a beef stew. (Yes, you can use Guinness in your beef stew for even better flavor!)

I add aromatic vegetables to the pot for the initial cooking period, removing them only before I add the vegetables that will be served alongside the meat. I use them to flavor the roast and the broth. Don’t cut them in small pieces or they will be tough to fish out when the time comes. You could also tie them in a cheesecloth (a bouquet garni) and then simply remove it before serving.

You’ll want to cook the meat slowly for a long period of time. Again the crockpot is ideal for this if you have a large enough one. Bring the corned beef and bouquet garni to a boil, skimming any foam that forms on the top. If you leave the foam some may sink down into the liquid and cause the beef to become bitter as it continues to cook. Once it reaches a boil, turn the heat down to a slow simmer and cook for 45 minutes a pound. Hard-boiling will separate the muscle tissue and make the meat dry and stringy. Add the vegetables the last half hour of cooking and the cabbage the last 15 minutes.

For something different use Brussels sprouts instead of cabbage. I like to use the smaller ones cutting them in half so they cook a little faster. Add them at the same time you add the carrots and potatoes. If you don’t like cooked cabbage at all, serve some cole slaw on the side instead.


Drunken Corned Beef

Save
Print
  • 1 corned beef brisket, I like using the 'flat' cut
  • 2 cans Guinness stout
  • 1 quart chicken stock
  • For cooking and seasoning the beef:
  • 1 large onion, quartered (leave skin on)
  • 1 large carrot, peeled & cut into large chunks
  • 2 celery stalks, cut into chunks
  • After removing the seasoning vegetables add:
  • 2 large peeled carrots, cut in half and quartered
  • 2 large russet potatoes, peeled and quartered
  • 1 small head of cabbage cut into wedges, cut out the hard center

Place brisket, including package ingredients and vegetables that are cut into large chunks (the seasoning onion, carrot & celery) into a large soup pot. Add the Guinness and the stock to cover the meat, add water if the meat is not covered. Bring to a boil and skim off any foam that rises to the top, then turn heat down to a simmer. Cook for 45 minutes per pound. Remove the seasoning vegetables and add remaining carrots and potatoes. Simmer about 15 minutes then add cabbage last and simmer for another 10 to 15 minutes.

1 Comment
Share
  • Pin it
  • Share
  • Tweet
  • Share
  • Email

Artichoke Dip

3 / 5 / 153 / 28 / 15


artichokes Melissas

Walt's Wharf Artichoke Dip

Save
Print

Adapted slightly from Walt’s Wharf recipe.

  • 1/4 cup sesame oil
  • 1/4 cup olive oil
  • 3 tablespoons local honey
  • 2 tablespoons lemon juice
  • 2 teaspoons sea salt
  • 4 tablespoons Lea & Perrins Worcestershire Sauce
  • 1 cup mayo

Mix all ingredients together until well blended. Taste for seasoning and adjust as necessary for your taste. Refrigerate until ready to use.


Chef Debbi

Leave a comment
Share
  • Pin it
  • Share
  • Tweet
  • Share
  • Email

Growing Potatoes in Your Edible Garden

2 / 17 / 152 / 17 / 15

How To Grow Potatoes:
by Dan Lake, Peaceful Valley employee

potato-blossom-470x419

Since I was 12 years old, my family has grown about 4 or 5 different varieties of potatoes in our garden at home every year.  I would love to brag about my tater planting abilities, and with all of that experience one would think that I was a spud-growing expert, but after reflecting on what I knew, I came to a different conclusion: I devoted most of my time to harvesting and eating the delicious potatoes and have a lot to learn about the process of planting them!

Now that I have my own garden, I’ve done some research, talked to a friend who happens to be a farmer, and compiled some good tips below.

Crop Rotation: When planting potatoes from season to season, they should be kept on a 3-year rotating cycle in terms of location in your garden. This means,  3-4 suitable sites are needed if you want to grow potatoes every year, rotating the site where you plant every season.

Soil & Sun: When it comes to soil, potatoes are not picky. They are adaptable and will usually produce a decent crop even when the soil conditions are less than perfect. What they do require, however, is as much sun as possible because of how aggressive their root systems are, so keep that in mind when picking your spot(s) to plant.

Preparing Seed Potatoes: When you have your seed potatoes (potatoes certified for growing), set them somewhere where they will be exposed to light and warmth (between 60 and 70F). This will help them to start sprouting. A day or two before planting, use a clean knife to slice the larger potatoes into smaller pieces that contain at least 1 or 2 “eyes” or buds. Each seed should be approximately 1 1/2-2 inches square, and the smaller potatoes may be planted whole. In the next day or so, your seed potato pieces will form thick calluses over the cuts, to help prevent it from rotting once planted.

Planting Seed Potatoes: After you have trenched a 4’” deep furrow, plant the seed potato pieces or small potatoes 4” deep in the furrow about 12” apart and cover lightly with soil. The soil should be evenly moist, but not wet or soggy. If the soil is water logged when you dig, your seed potatoes will probably rot before they even get started. Depending on how cold it gets in your area, it might be a good idea to put a layer of mulch or straw on top of the furrow for a little extra frost protection. Two to four months later, I hope you will be enjoying some of the most delicious potatoes ever!

You can also reference our Potato Planting & Growing Guide online.

Leave a comment
Share
  • Pin it
  • Share
  • Tweet
  • Share
  • Email

Chocolate Covered Strawberries

2 / 11 / 152 / 11 / 15

Chocolate_Covered_Strawberries

Most chocolate covered strawberries, if just dipped in melted chocolate, will crack when you bite into them. Here’s a recipe for Ganache Covered Strawberries that can be refrigerated and eaten without the chocolate falling off the berry. Ganache is simple and easy to make and it stores well in the refrigerator for days. Use it to frost a cake, cupcakes, dip all kinds of fruit or make delicious truffles. Send me a comment if you’d like me to post a truffle recipe! Happy Valentines Day!

Chocolate Ganache Covered Strawberries


1          # large stemmed strawberries

12        oz. (by weight) dark chocolate

1          cup heavy cream

½         tablespoon butter, unsalted (makes the chocolate shiny)

Wash and dry strawberries carefully, set aside on a towel. Line a baking sheet with parchment paper.

Chop the chocolate into small chunks using a serrated knife. You could use dark chocolate chips instead if desired.

Heat the cream slowly in the top of a double boiler, add the chocolate pieces and stir until the chocolate is nearly melted, add the butter and remove from the heat, continue to stir until the chocolate and the butter have melted.

Dip the dry strawberries into the melted chocolate (Ganache) mixture and lay on parchment lined baking sheet to dry.

You could sprinkle the berries with finely chopped nuts if desired or drizzle with a little melted white chocolate. When the chocolate is dry place strawberries into paper cups and place in a chocolate box or on a platter to serve or give as a gift.

Here’s a great gift from Melissa’s Produce, Chocolate and Strawberries!

Melissa strawberries

Leave a comment
Share
  • Pin it
  • Share
  • Tweet
  • Share
  • Email

Citrus Olive Oil Cake

1 / 6 / 151 / 6 / 15

citrus

Most fruits and vegetables have a season, a time when they are picked and rushed to the market to maintain flavor and nutrition but when one talks about citrus it can be very confusing. Citrus ‘season’ really runs all year long with different varieties ripening at different times. During the summer months we have delicious Valencia oranges and Star Ruby Grapefruit, but you’ll find most citrus in season from fall until late spring.

In the market right now you’ll find Navel, Cara Cara and Moro Oranges, delicious Meyer Lemons and my favorite produce guru, Robert Schueller of Melissa’s Produce, recommends the Cocktail Grapefruit, Key Limes and Kishu tangerines! And all of us tangerines freaks know that come March those Ojai Pixie Tangerines start coming our way! The best of the best……

IMG_1122

Other than eating juicy, sweet citrus out of hand or in a dish our friends at Temecula Olive Oil crush seasonal citrus fruit, Blood Oranges or Meyer Lemons, at the same time they press their olives. While the Blood Orange Olive Oil is available year round, Meyer Lemon Olive Oil is seasonal usually beginning in early spring. If you see it on their shelves don’t hesitate, this oil sells out every year! I’ve used both Blood Orange and Meyer Lemon Olive Oil in this cake and each one is distinct and fabulous.

For those of you who can’t conceive of using an olive oil in a cake I urge to try this recipe, not only is it easy, it’s delicious. I like serving it with a little chopped citrus on the side or a handful of fresh raspberries.

 Click here for the recipe

Leave a comment
Share
  • Pin it
  • Share
  • Tweet
  • Share
  • Email

Citrus Olive Oil Cake

12 / 28 / 1412 / 29 / 14

citrus


Citrus Olive Oil Cake

Save
Print

You can make this cake with any flavored or un-flavored olive oil that you like. Instead of poppy seeds try adding some dried cranberries or cherries. For serving dust with powdered sugar or make a citrus glaze with orange or lemon juice mixed with some powdered sugar and drizzle over the top of the cake, I like serving this with fresh raspberries on the side and a dollop of freshly whipped cream wouldn’t hurt either!
I’ve used cake pans, bundt cake pans and small Mason jars for this cake, just be aware of your baking time, test by inserting a clean toothpick into the center of the cake and it comes out dry.

  • 2 cups flour
  • 1 ¼ cups sugar
  • 1 teaspoon baking powder
  • 1 teaspoon baking soda
  • ¼ teaspoon salt
  • 3 large eggs, beaten
  • 1 ½ cups whole milk
  • ½ cup Orange olive oil, or any flavored olive oil
  • 1 orange, zested
  • 1 teaspoon vanilla
  • ½ cup sliced almonds
  • 1 tablespoon poppy seeds, optional

Preheat the oven to 350°.

Sift together the flour, sugar, salt, baking powder and baking soda Make a well in the center of the dry ingredients and whisk in the eggs, milk, olive oil, zest and vanilla. 


Add the almonds and poppyseeds to the batter, and mix with a spatula or wooden spoon. 


Pour the batter into a greased Bundt cake pan. Bake for 55 to 60 minutes, until the cake is golden on top. Cool the cake, invert on a plate and dust with confectioners sugar if you like.

If using Mason jars, spray the inside of the jar with oil spray and fill only 2/3 of the jar with batter. Place jar on a baking sheet and when all jars are done place the sheetpan into the oven and bake accordingly. Check the cakes at 30 minutes and then every 5 minutes until a toothpick comes out clean.

2 Comments
Share
  • Pin it
  • Share
  • Tweet
  • Share
  • Email

Paella for a Crowd

11 / 14 / 1412 / 14 / 14
PAELLA FOR A CROWD

Having a houseful of people for days at a time can be tough to figure out just what to feed everyone. I love quick and easy dishes that don’t require a lot of my time or attention. Once you get all the ingredients into the pan, it’s an easy go. You don’t even need a paella pan, a regular sauté pan or even a large electric skillet works beautifully.

Paella-0177

You’ll want to use Spanish rice and Spanish saffron if you can for the best flavor but any short grain rice will do nicely such as an Italian Arborio which can be found in your local supermarket. Sauté a little shallot, preferred, or onion, garlic and infuse some chicken or vegetable stock with the saffron to start. Choose some protein to mix into the rice such as chicken, shrimp, scallops, mussels or chorizo and the dish comes together quickly. Follow the recipe or be creative and enjoy your company for the weekend! Mangia~

Chicken and Shellfish Paella

1 package chicken thighs
1/4 cup extra-virgin olive oil
Sea salt and freshly ground pepper
1 shallot, minced or ½ onion, chopped
2 cloves garlic, minced
1 tablespoon flat-leaf parsley leaves, chopped, reserve some for garnish
½ cup white wine
1 (15-ounce) can whole tomatoes, drained and hand-crushed
4 cups short grain Spanish rice
6 cups stock, warmed with a generous pinch of saffron thread
1 dozen littleneck clams, scrubbed
1 pound jumbo shrimp, peeled and de-veined
1-2 pound mussels
1/2 cup sweet peas, frozen and thawed
Lemon wedges, for serving

Heat oil in a paella or sided sauté pan over medium-high heat. Add salt and freshly ground pepper to the chicken and brown skin-side down both sides. Remove from pan and reserve.

In the same pan, make a sofrito by sautéing the shallot, garlic, and parsley. Cook for 2 or 3 minutes on a medium heat. Add the wine and cook until it reduces some, about 5 minutes, stir in the rice and stir-fry to coat the grains. Add the crushed tomatoes and stock and simmer for 10 minutes, gently moving the pan around so the rice cooks evenly and absorbs the liquid. Add chicken, clams, mussels and shrimp, tucking them into the rice. Let the paella simmer, without stirring, until the rice is al dente, for about 10 minutes. During the last 5 minutes of cooking, when the rice is filling the pan add the peas.

Remove from heat and rest for 5 minutes. Garnish with parsley and lemon wedges.

Leave a comment
Share
  • Pin it
  • Share
  • Tweet
  • Share
  • Email

Summer Ceviche

9 / 24 / 1412 / 3 / 14

ceviche

Ceviche with Avocado and Tomato Broth

Serves 4, approximately

1          pound white fish halibut, red snapper, sole,
2         teaspoons mild or hot pepper
2          tablespoons cilantro, minced
1          tablespoon shallot, minced
1          large rib celery, cut into a small dice
1          medium tomato, cut into the same size as the fish, squeeze out the seeds
1/2      cup freshly squeezed lime juice, or enough to cover ingredients
1          splash olive oil

Tomato Broth

1          slice white bread
1          can whole tomatoes, with juice
1          cucumber, peeled, rough chopped
1          small shallot, rough chopped
1          cup tomato juice
1          tablespoon red wine vinegar
1         tablespoon olive oil
1          pinch garlic powder
Salt and pepper
1         pinch sugar

To Serve:
2          Haas avocadoes, peeled, cut in half, pit removed
1          lemon or lime zested

cilantro sprigs, for garnish

Ceviche:

Chop the white fish into small dice, add to a mixing bowl and set aside.

Clean the pepper of stems, seeds and ribs and mince into a fine dice. You may want to wear glove to do this.

Mix all ingredients together well; making sure it’s all covered by the lime juice and olive oil. Refrigerate for at least 3 hours.

Tomato Broth:

Place the bread into the bowl of a food processor and process until you have coarse crumbs. Add remaining ingredient and process until pureed. Chill for 30 minutes before serving.

Ladle some tomato broth into a cup or bowl. Place avocado into center of bowl, place ceviche into the center and top wit


Related Posts Plugin for WordPress, Blogger...
Leave a comment
Share
  • Pin it
  • Share
  • Tweet
  • Share
  • Email

Posts navigation

Previous Page 1 2 … 17 18 19 20 21 22 Next Page
Deb

Meet Chef Debbi

READ BIO

Join-Us Sign up for our newsletter to receive exclusive tips 'n tricks, and special offers on classes, tours, and more!

Recent Posts

  • New E-Book!
  • From the Pantry
  • Spaghettini at Home
  • Growing Corn
  • Spring IS Coming!

Categories

BookCUT

What's in Your Pantry?

How to stock your pantry to create delicious dishes.

Learn Chef Debbi's pantry essentials and how to substitute ingredients for pantry staples in her basic recipes for quick and easy meals.
BUY BOOK>

FacebookTwitterInstagramGooglepinterest


© 2014, DEB'S KITCHEN
Angie Makes Feminine WordPress Themes