Deb's Kitchen - Farm, Food, Wine & Lifestyle Adventures
  • Facebook
  • Google
  • Twitter
  • Instagram
  • Pinterest
  • Email
Menu
Skip to content
  • Home
  • Blog
  • Events
    • Classes
    • Tours & Adventures
  • Edible Gardening
  • Preserving
  • Recipes
    • Appetizers
    • Soups and Salads
    • Main Dishes
    • Side Dishes
    • Desserts
  • About
    • Whats In Your Pantry
    • Ask Debbi
    • Deb’s Kitchen Botanicals
    • Press
  • Contact

Category Archives: Recipes

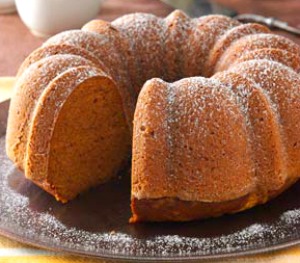
Pumpkin Blood Orange Olive Oil Cake

10 / 18 / 1511 / 20 / 15

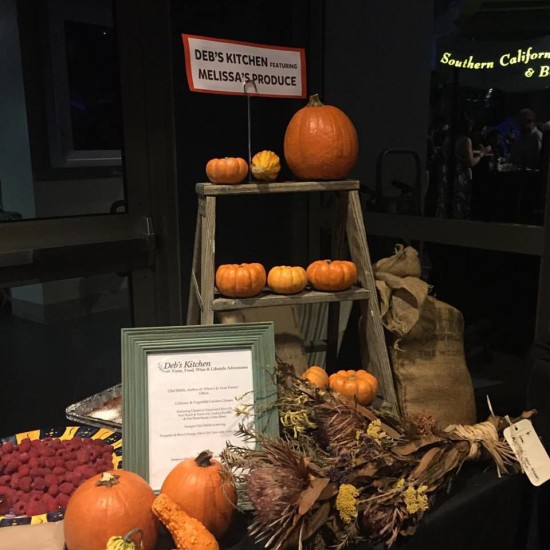
Aquarium Event

I served this last night at The Aquarium of the Pacific’s Sea Fare fund raising event and it was declared by the President of the Aquarium ‘the best food at the event’. Now that was very nice of him but there was some really tasty food there from local restaurants. It was a wonderful event with music, food and wine and lots of grateful fishes. Thanks to everyone who came out and those who stopped by my booth, I’m happy you enjoyed the cake! And you can learn how to make this cake and more at my cooking classes here in Seal Beach at Temecula Olive Oil‘s tasting room, click on Nov. for the upcoming menu!

pumpkin bundt cake

Pumpkin Olive Oil Cake

Save
Print

Try different flavored olive oils for this cake. Orange, lemon or a lightly flavored olive oil, don’t use a big heavy tasting oil as it will overpower the pumpkin and spice in the cake.
You could make this cake into a sheet cake, round cakes or even cupcakes; just remember to adjust the cooking time.

  • 3 cups all-purpose flour
  • 2 teaspoons baking soda
  • 1 teaspoon ground cinnamon
  • 1 teaspoon ground nutmeg
  • ½ teaspoon salt
  • ¼ teaspoon ground cloves
  • 1 1/2 cups sugar
  • 1 cup olive oil
  • 3 eggs
  • 1 can (15 ounces) solid-pack pumpkin (or 2 cups freshly roasted sugar pumpkin)
  • 1/4 cup powdered sugar
  • 1 package cream cheese, room temperature
  • 1 splash of vanilla, optional

Preheat oven to 350°.

In a medium-sized bowl, stir together flour, baking soda, cinnamon, nutmeg, salt and cloves.

Combine sugar and oil in a large bowl with a rubber spatula until blended.

Add eggs, one at a time, beating well after each addition.

Add flour mixture to egg mixture alternately with pumpkin in three batches, beating

well after each addition.

Transfer to a greased Bundt cake pan.

Bake 60-65 minutes or until toothpick inserted near the center comes out clean.

Cool for approximately 10-15 minutes before inverting onto a wire rack.

Remove pan carefully from cake and cool completely.

Easy Cream Cheese Frosting

Combine all ingredients in the bowl of a stand mixer fitted with a paddle attachment, and beat at low speed until sugar is incorporated.

Increase speed to medium high and beat until frosting is light and whipped, about 3 to 4 minutes. Use to top cookies, cupcakes, or cakes


Leave a comment
Share
  • Pin it
  • Share
  • Tweet
  • Share
  • Email

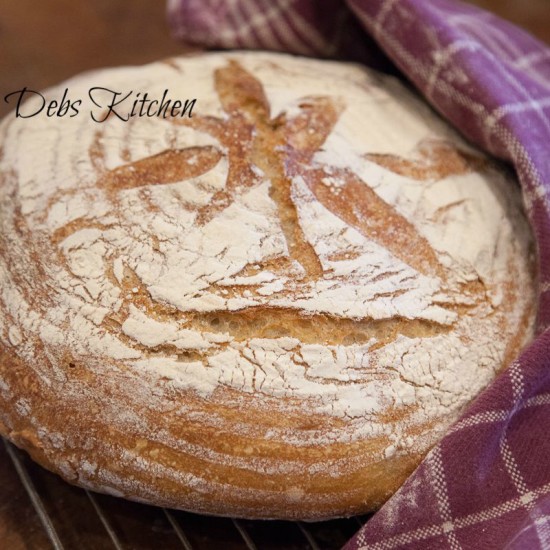
Easy Artisan Bread

9 / 22 / 159 / 22 / 15

Bread, wtrmk


Debbi's Artisan Bread

Save
Print
  • 3 cups lukewarm water
  • 1½ tablespoons granulated yeast (2 packets)
  • 1½ tablespoons kosher or other coarse salt
  • 6½ cups unsifted, unbleached, all-purpose white flour

Add yeast and salt to the water in a 5-quart bowl or, preferably, in a resealable, lidded (not airtight) plastic food container or food-grade bucket

Mix in the flour—kneading is unnecessary: Add all of the flour at once.

Mix with a wooden spoon, a high-capacity food processor (14 cups or larger) fitted with the dough attachment, or a heavy-duty stand mixer fitted with the dough hook until the mixture is uniform. If you’re hand-mixing and it becomes too difficult to incorporate all the flour with the spoon, you can reach into your mixing vessel with very wet hands and press the mixture together. Don’t knead! It isn’t necessary. You’re finished when everything is uniformly moist, without dry patches. This step is in a matter of minutes, and will yield a dough that is wet and loose enough to conform to the shape of its container.

(I placed dough onto parchment paper and baked it on parchment in a Dutch oven.)

Cover with a lid (not airtight) or a towel. Do not use screw-topped bottles or Mason jars, which could explode from the trapped gases. Lidded plastic buckets designed for dough storage are readily available. Allow the mixture to rise at room temperature until it begins to collapse (or at least flattens on the top), approximately 2 hours. Longer rising times, up to about 5 hours, will not harm the result. You can use a portion of the dough any time after this period. Fully refrigerated wet dough is less sticky and is easier to work with than dough at room temperature. So, the first time you try our method, it’s best to refrigerate the dough overnight (or at least 3 hours), before shaping a loaf.

BAKING

Cut a piece of parchment paper a little bigger than a notebook size of paper, dust with a little flour.

Dust the surface of your refrigerated dough with flour. Pull up and cut off a 1-pound (grapefruit-size) piece of dough, using a serrated knife. Hold the mass of dough in your hands and add a little more flour as needed so it won’t stick to your hands. It will be very sticky. Gently stretch the surface of the dough around to the bottom on all four sides, rotating the ball a quarter-turn as you go. Most of the dusting flour will fall off; it’s not intended to be incorporated into the dough. The bottom of the loaf may appear to be a collection of bunched ends, but it will flatten out and adhere during resting and baking. The correctly shaped final product will be smooth and cohesive. The entire process should take no more than 30 to 60 seconds.

Rest the loaf and let it rise on the parchment. Allow the loaf to rest for about 40 minutes (it doesn’t need to be covered during. the rest period). Depending on the age of the dough, you may not see much rise during this period; more rising will occur during baking (“oven spring”).

Twenty minutes before baking, preheat the oven to 450°F, with a baking stone placed on the middle rack. Place an empty broiler tray for holding water on any other shelf that won’t interfere with the rising bread.

Debbi's notes: I take a 2 qt. Le Crueset (or any stone-ware or cast iron) Dutch oven and put it in the oven with the lid (make sure if the knob on the lid top is plastic to wrap it in tin foil so it doesn't melt). Let it preheat with the oven. When the oven is hot and the dough is ready pick up the parchment paper and plop it into the hot Dutch oven pan, Put the lid back on and carefully slide it into the oven. Alternatively you could slide the dough, still on the parchment paper, onto a pizza or baking stone that you heated with the oven.

Dust and slash: Unless otherwise indicated in a specific recipe, dust the top of the loaf liberally with flour, which will allow the slashing knife to pass without sticking. Slash a ¼-inch-deep cross, “scallop,” or tic-tac toe pattern into the top, using a serrated bread knife.

Bake for about 30 minutes, or until the crust is nicely browned and firm to the touch. Because you’ve used wet dough, there is little risk of drying out the interior, despite the dark crust. When you remove the loaf from the oven, it will audibly crackle, or “sing,” when initially exposed to room-temperature air. Allow to cool completely, preferably on a wire cooling rack, for best flavor, texture, and slicing. The perfect crust may initially soften, but will firm up again when cooled.

I found that it may take more than 30 minutes to bake, up to 40 to completely bake the inside. If you can use a hot pad and turn the bread over in your hand, tap the bottom of the loaf with your finger, it should make a hollow sound. If it's still a little soft, return it to the oven for a few minutes.

Store the remaining dough in the refrigerator in your lidded (not airtight) container and use it over the next 14 days: You’ll find that even one day’s storage improves the flavor and texture of your bread. This maturation continues over the 14-day storage period. Refrigerate unused dough in a lidded storage container (again, not airtight). If you mixed your dough in this container, you’ve avoided some cleanup. Cut off and shape more loaves as you need them. We often have several types of dough storing in the refrigerator at once. The dough can also be frozen in 1-pound portions in an airtight container and defrosted overnight in the refrigerator prior to baking day.

FOR PIZZA:

Pinch off a palm sized piece of dough, shape into a round, rectangular or square shape. Dough is sticky so keep some extra flour nearby, dust your hands as necessary to shape the dough. If the dough starts to snap back you should let it rest for a few minutes and then resume shaping.

Place onto parchment paper, a dusted pizza peel or the bottom of a dusted baking sheet. You can use anything you want providing the pizza can slip right off onto the rack.

If you are baking in an oven, preheat your oven to 500° or as high as it will go. Top the dough with anything you like, slid it into the hot oven and bake for 12-14 minutes.

If you are grilling dough, preheat bbq to high. Slide dough onto rack and cook 5-10 minutes on one side. Remove from grill, top the cooked side and return to the grill. Close the lid so the toppings will cook evenly.

Francois, Zoe; Hertzberg, Jeff , MD (2007-11-13). Artisan Bread in Five Minutes a Day: The Discovery That Revolutionizes Home Baking (pp. 26-27). Macmillan. Kindle Edition.

Leave a comment
Share
  • Pin it
  • Share
  • Tweet
  • Share
  • Email

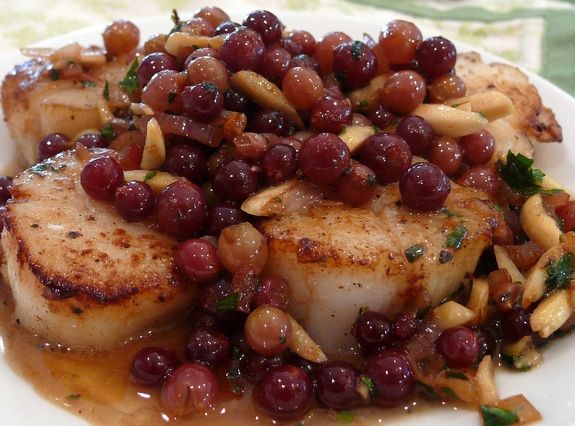
Pan-Seared Scallops with Champagne Grapes and Almonds

7 / 28 / 15

Champagne grapes and scallops

Save
Print
  • 16 large sea scallops, side muscles removed
  • 5 Tablespoons unsalted butter, divided
  • 1-1/2 Tablespoons minced shallots
  • 2/3 cup Champagne grapes (4 ounces) or black grapes, halved
  • 1-1/2 Tablespoons fresh lemon juice
  • 1/3 cup slivered or sliced almonds, toasted
  • 1-1/2 Tablespoons chopped fresh Italian (flat-leaf) parsley
  • Salt and pepper

Melt 3 Tablespoons unsalted butter in a large skillet over medium-high heat. Cook the butter until it is browned, about 2 minutes. Salt and pepper your scallops before adding them to the pan. Cook 2 minutes on each side and transfer to a dish, covering to keep warm.

Melt the remaining 2 Tablespoons of unsalted butter in the same skillet over medium-high heat. Add shallots and grapes; sauce until the shallots are golden brown, about one minute. Stir in fresh lemon juice and any accumulated scallop juice from the plate of cooked scallops. Bring to a boil and season with salt and pepper. Stir in almonds and parsley.

Place scallops on individual plates and spoon the sauce over them. Serve immediately

Leave a comment
Share
  • Pin it
  • Share
  • Tweet
  • Share
  • Email

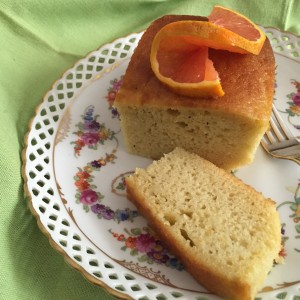
French Yogurt Cake

5 / 9 / 155 / 9 / 15

French Yogurt Cakes

French Yogurt Cake

Save
Print
  • 1 1/2 cup all-purpose flour
  • 2 teaspoons baking powder
  • Pinch of salt
  • 1 cup sugar
  • 1 lemon, grated and zest
  • 1/2 cup plain yogurt
  • 3 eggs
  • 1/4 teaspoon pure vanilla extract
  • 1/2 cup citrus olive oil

Center a rack in the oven and preheat the oven to 350°. Generously butter an 8 1/2-x-41/2-inch loaf pan and place the pan on a baking sheet. A cake pan, Bundt cake pan or any other pan may be used; you made need to adjust the cooking time.

Whisk together the flour, baking powder and salt.

Put the sugar and zest in a medium bowl and, with your fingertips, rub the zest into the sugar until the sugar is moist and aromatic.

Add the yogurt, eggs and vanilla and whisking vigorously until the mixture is very well blended.

Still whisking, add the dry ingredients, then switch to a large rubber spatula and fold in the oil. You’ll have a thick, smooth batter with a slight sheen. Scrape the batter into the pan and smooth the top.

Bake for 50 to 55 minutes, or until the cake begins to come away from the sides of the pan; it should be golden brown and a thin knife inserted into the center will come out clean. Transfer the pan to a rack and cool for 5 minutes, then run a blunt knife between the cake and the sides of the pan. Unmold, and cool to room temperature right side up on the rack.

Glaze (optional)

½ cup lemon marmalade mixed with 1 teaspoon water

To Make the Glaze:

Put the marmalade in a small saucepan or in a microwave-safe bowl, stir in the teaspoon of the water and heat until the jelly is hot and liquefied. Using a pastry brush, gently brush the cake with the glaze.

Adapted from Dorie Greenspan

Leave a comment
Share
  • Pin it
  • Share
  • Tweet
  • Share
  • Email

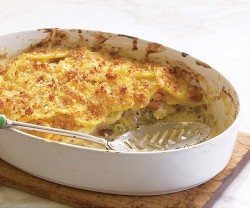
Easter Potatoes

3 / 31 / 154 / 1 / 15

potato gratin-molly stevens

Potato Gratin

Save
Print

This rich, creamy gratin gets a note of smokiness from the bacon between the layers of tender potatoes.
by Molly Stevens from Fine Cooking

  • 2-1/2 lb. Yukon Gold potatoes, peeled & sliced into 1/8-inch thick rounds
  • 2-1/2 cups heavy or light cream
  • Sea salt & fresh ground pepper, to taste
  • 4 oz. bacon
  • 3 medium leeks, white and light-green parts only, thinly sliced
  • 6 oz. grated Gruyère
  • 2 to 3 tsp. chopped fresh thyme
  • 1/4 tsp. freshly grated nutmeg
  • 1/2 cup fresh breadcrumbs
  • 1/4 cup finely grated Parmigiano-Reggiano
  • 2 tablespoons unsalted butter, melted

Serves 8

Position a rack in the center of the oven and heat the oven to 400°F. Butter or oil a 3-quart gratin dish; set aside.

Put the potatoes, cream , 1/2 tsp. salt, and a few grinds of pepper in a 12-inch skillet. Simmer, partially covered, over medium to medium-low heat, stirring occasionally and gently with a rubber spatula until the potatoes are barely tender when pierced with a fork or skewer, 8 to 12 minutes.

In a medium skillet, cook the bacon until browned and fully cooked. Set aside to cool, reserving 2 tablespoons of the fat in the skillet. Heat the reserved fat over medium-high heat and sauté leeks until tender, fragrant, and lightly browned. Season to taste with salt and pepper. When the bacon is cool, crumble it into small pieces.

Using a slotted spoon, transfer half the potatoes to the prepared gratin dish, spreading them evenly. Layer on the leeks, bacon, Gruyère, thyme, and nutmeg. Top with the remaining potatoes spreading them evenly, and pour over any liquid remaining in the pan.

In a small bowl, combine the breadcrumbs, Parmigiano-Reggiano, and melted butter.

Evenly scatter the topping mixture over the potatoes. Bake the gratin until it’s bubbly, the top is brown, and the potatoes are completely tender when poked with a fork or a skewer, 25 to 30 minutes. Let the gratin sit for at least 10 and up to 30 minutes before serving so the liquid is fully absorbed and the layers are cohesive.


Leave a comment
Share
  • Pin it
  • Share
  • Tweet
  • Share
  • Email

Citrus Olive Oil Cake

12 / 28 / 1412 / 29 / 14

citrus


Citrus Olive Oil Cake

Save
Print

You can make this cake with any flavored or un-flavored olive oil that you like. Instead of poppy seeds try adding some dried cranberries or cherries. For serving dust with powdered sugar or make a citrus glaze with orange or lemon juice mixed with some powdered sugar and drizzle over the top of the cake, I like serving this with fresh raspberries on the side and a dollop of freshly whipped cream wouldn’t hurt either!
I’ve used cake pans, bundt cake pans and small Mason jars for this cake, just be aware of your baking time, test by inserting a clean toothpick into the center of the cake and it comes out dry.

  • 2 cups flour
  • 1 ¼ cups sugar
  • 1 teaspoon baking powder
  • 1 teaspoon baking soda
  • ¼ teaspoon salt
  • 3 large eggs, beaten
  • 1 ½ cups whole milk
  • ½ cup Orange olive oil, or any flavored olive oil
  • 1 orange, zested
  • 1 teaspoon vanilla
  • ½ cup sliced almonds
  • 1 tablespoon poppy seeds, optional

Preheat the oven to 350°.

Sift together the flour, sugar, salt, baking powder and baking soda Make a well in the center of the dry ingredients and whisk in the eggs, milk, olive oil, zest and vanilla. 


Add the almonds and poppyseeds to the batter, and mix with a spatula or wooden spoon. 


Pour the batter into a greased Bundt cake pan. Bake for 55 to 60 minutes, until the cake is golden on top. Cool the cake, invert on a plate and dust with confectioners sugar if you like.

If using Mason jars, spray the inside of the jar with oil spray and fill only 2/3 of the jar with batter. Place jar on a baking sheet and when all jars are done place the sheetpan into the oven and bake accordingly. Check the cakes at 30 minutes and then every 5 minutes until a toothpick comes out clean.

2 Comments
Share
  • Pin it
  • Share
  • Tweet
  • Share
  • Email

Apple Crisp

12 / 5 / 1412 / 5 / 14

Apple Crisp

Save
Print

Such a quick, easy recipe for a seasonal dessert; can be a great breakfast treat for those with a sweet tooth! Use an apple that is best for baking such as:

Jonathans and Jonagolds, Honeycrisp, Granny Smith, Melrose, Winesap, Braeburn, Rome Beauty.

  • Serves: 8
  • 4 cups sliced or diced apples
  • 1 tablespoon flour
  • ½ cup sugar
  • ¾ cup brown sugar
  • ⅓ cup butter
  • ¾ cup oatmeal
  • ¼ teaspoon baking soda
  • ½ teaspoon salt

Preheat oven to 350°. Combine the first three ingredients and place in a greased 8×8 baking dish.

Combine the remaining ingredients and sprinkle over the top of the apple mixture.

Bake 30 minutes. Serve warm

apple crisp


Photo: All Recipes

Leave a comment
Share
  • Pin it
  • Share
  • Tweet
  • Share
  • Email

Pate Brisée

9 / 4 / 1412 / 3 / 14

Pate Brisée is  French term for a short crust, sweet or savory, and used for many pies, tarts, quiches and more. A standard pie crust could be used instead.

make-perfect-pie-crust-1

2 ½      cups all-purpose flour

1          teaspoon salt

1          tablespoon sugar, for sweet dough or

1          tablespoon fresh herbs, chopped, for savory dough

1          cup unsalted butter, chilled and cut into 1” pieces

4          tablespoons ice water, or more if needed

In a food processor, place the flour, salt, and sugar and process until combined. Add the butter and process until the mixture resembles coarse meal (about 15 seconds). Place mix into wide bowl. Add 3 Tb. water and toss to combine. If needed, add more water 1 TB. at a time until dough just comes together. Don’t overwork dough, be light and gentle for a flaky crust.

Turn the dough out onto your work surface and gather it into a ball. Divide the dough into two equal pieces, flatten each portion into a disk, cover with plastic wrap, and refrigerate for 30 minutes to one hour before using. This will chill the butter and allow the gluten in the flour to relax. At this point you can also freeze the dough for later use.

For each disk of pastry, on a lightly floured surface, roll out the chilled pastry to fit it into a 8 or 9 inch tart pan. To prevent the pastry from sticking to the counter and to ensure uniform thickness, keep lifting up and turning the pastry a quarter turn as you roll (always roll from the center of the pastry outwards to get uniform thickness). To make sure it is the right size, take your tart pan, flip it over, and place it on the rolled out pastry. The pastry should be about an inch larger than your pan.

When the pastry is rolled to the desired size, lightly roll the pastry around your rolling pin, dusting off any excess flour as you roll. Unroll on the top of your tart pan. Never pull pastry or you will get shrinkage (shrinkage is caused by too much pulling of the pastry when placing it in the pan). Gently lay in pan and with a small floured piece of pastry, lightly press pastry into bottom and up sides of pan. Roll your rolling pin over top of pan to get rid of excess pastry. With a thumb up movement, again press dough into pan. Roll rolling pin over top again to get rid of any extra pastry. Prick bottom of dough (this will prevent the dough from puffing up as it bakes). Cover and refrigerate for 20 minutes to chill the butter and to rest the gluten.

To blind bake (bake without ingredients) the tart shell: Preheat oven to 400° and place rack in center of oven. Line the unbaked pastry shell with parchment paper or aluminum foil. Fill tart pan with pie weights or beans, making sure the weights are to the top of the pan and evenly distributed over the entire surface. Bake crust for 20 to 25 minutes or until the crust is dry and lightly browned. Remove weights and cool crust on wire rack. Proceed with desired recipe that calls for a pre-baked shell.

Makes two – 9 inch tart shells.

Leave a comment
Share
  • Pin it
  • Share
  • Tweet
  • Share
  • Email

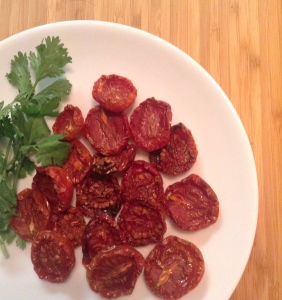
Oven Roasted Tomatoes

8 / 19 / 1412 / 3 / 14

IMG_0481


Store these tomatoes in a jar covered with olive oil, use a lemon olive oil if desired. For a quick appetizer see below.


1         pound Roma tomatoes, halved lengthwise

Sea salt and freshly ground black pepper

¼       cup olive oil

1         tablespoon basil, chiffonade

1          teaspoon thyme

1         clove garlic, minced

Preheat the oven to 350∫F. Arrange the tomato halves cut side up and close together on a baking sheet. Season with salt and pepper.

In a bowl, combine olive oil, garlic, and herb. Drizzle over tomatoes and bake until the tomatoes are soft and shriveled but still retain some moisture, about one hour.

Let cool completely. Tomatoes can be stored in a glass jar, cover tomatoes with olive oil, seal and refrigerate.

For sauce: Process in a food processor and warm in a large saute pan.


For a quick appetizer, stuff roasted tomato halves with the following.

Mix together 1 log of goat cheese, 2 Tb. fresh chopped herbs and 1 -2 Tb. of heavy cream.

Mix until goat cheese is soft but not runny.

Spoon or pipe herbed goat cheese onto dried tomato, serve with a drizzle of aged balsamic vinegar.

Leave a comment
Share
  • Pin it
  • Share
  • Tweet
  • Share
  • Email

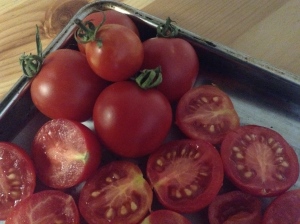
What do you do with all those Tomatoes?

8 / 19 / 1412 / 3 / 14

IMG_0463


There are many ways to save your harvest and if you have more tomatoes than you know what to do with here are some ideas.


First and foremost is water bath canning, I love this because it means that I can store tomatoes on the shelf in my pantry for the year. Fairly easy to do but when it’s hot and humid out like it has been this summer FORGET IT!


As many of you already know, I like to freeze my tomatoes also so later when it’s cool I can make sauce or unfreeze and can them to make more room in the freezer for up and coming dinners. Freezing tomatoes is the fastest way to get things done, wash, and dry then freeze on a baking sheet until frozen solid, pop into a freezer bag and you are done for the day! You can remove one or four at a time, whatever you need and as they begin to defrost, which is almost right away, the skin will slip off easily.

IMG_0481

My second favorite is to make Oven Roasted Tomatoes, although it does require having the oven on for some length of time. I love to dry my cherry tomatoes and then float them in a good olive oil and store in the refrigerator for up to 3 months. Chopped in a salad, in a bruschetta or top on a pizza, they pack a flavorful punch. Fill up your baking sheet and get started right away!


Oven Roasted Tomato Recipe

Leave a comment
Share
  • Pin it
  • Share
  • Tweet
  • Share
  • Email

Potato and Ham Quiche

2 / 22 / 14

Ingredients

Crust

1 1⁄4 cups flour

1 teaspoon salt

1 stick butter, cut into pieces

2 – 3 tablespoons ice water

Filling

1⁄4 cup finely diced ham

2 -3 Yukon Gold potatoes

1 1⁄2 cup shredded cheese, such as Chedderella

4 large eggs

1 1⁄2 cups heavy cream or half and half

1 – 2 tablespoons olive oil

Salt and pepper

Preparation

Crust

Add flour and salt into the bowl of a food processor; pulse a few times to incorporate all the ingredients.

Add the butter and process until the mixture is crumbly and the butter is pea size.

Place the mixture into a wide bowl and add water 1 tablespoon at a time until the mixture comes together. Don’t overwork the dough or it will be tough, not flaky. Once the dough comes together in a ball, divide it into two pieces, flatten into disks, wrap in plastic wrap and refrigerate for 30 minutes. Preheat oven to 400° while the dough is chilling.

Dough can be wrapped well at this point and frozen for up to three months. Let the dough defrost overnight in the refrigerator before using.

Roll one chilled disk out on a floured counter or rolling mat, lifting and moving the dough every few rolls to help prevent sticking. Add only enough flour to the counter to keep the dough from sticking.

Cut a piece of parchment paper to fit the bottom of the tart pan.

Place your pan on top of the dough to make sure it is the correct size, it should be slightly larger than the pan, then roll the dough onto your rolling pin and unroll over your pan. Gently lift and lay the dough to fit the pan, never pull the dough to stretch it.

Lightly press the dough into the pan, roll your rolling pin over the top edge of the tart or pie pan and remove excess pastry. Prick the dough well with a fork.

Cut a piece of foil a little larger than the tart pan, butter the shiny side and place butter side down onto the dough. Press so the foil lays against the dough snugly, add another piece of foil if it doesn’t cover the entire crust.

Bake the crust for 20 minutes, remove beans and foil, bake another 5 minutes. Remove from oven and cool before filling. (Leave oven on).

Filling

Boil potatoes until knife tender (when a knife can slip into the potato effortlessly with a little resistance). Drain and let cool until you’re able to handle them. Slice into disks or chop into a medium dice.

Heat a medium sauté pan, add oil until it covers the bottom of the pan, add potatoes and season with a pinch of salt and grind of pepper. Sauté potatoes until lightly browned, add ham and cook for about 2 minutes or until browned. Add potato mixture to the bottom of the cooled crust. Add cheese on top of the potato mixture.

Whisk together the eggs and cream, add a little seasoning of salt and pepper, pour over potato and cheese mixture, bake for 30 minutes or until puffed and lightly browned.

Let cool before serving.

Leave a comment
Share
  • Pin it
  • Share
  • Tweet
  • Share
  • Email

Giardiniera or Pickled Vegetables

11 / 11 / 1312 / 5 / 14

Giardinaria

Save
Print

When I was growing up, if I was lucky enough, once in awhile we’d dine at a fine dining restaurant. They always served a relish tray when the guests were seated, it was to stimulate your taste buds and make you hungry. I miss having those relish trays but once I learned how to make pickled vegetables myself, so easy!, I keep them in the refrigerator almost year round. The vegetables change with the seasons; they can be eaten alone, with cheese and crackers or chopped finely to make a wonderful relish for all kinds of meats. Be creative!

  • 2 pounds, approximately mixed vegetables, whole or cut into pieces
  • 2 cups cider vinegar
  • 1 cup white vinegar
  • 1/2 cup water
  • 1/2 tablespoon pickling salt
  • 1 tablespoons sugar, if desired
  • 2 tablespoon pickling spice

Makes 2 - 3 quarts

Wash and drain vegetables. Sterilize jars and lids in hot water.

Bring vinegar, water, salt, sugar and pickling spice to a boil.

Pack vegetable medley into hot, sterilized jars, leaving 1/2-inch headspace. Pour hot solution over mix in jars, leaving 1/4-inch headspace. Remove air bubbles. Add liquid to bring headspace to 1/4 inch. Wipe jar rims.

Refrigerate and let stand 2 days before serving. Will last several weeks refrigerated.

For longer storage, process in boiling water bath for 20 minutes.*

*Follow jar manufacturers directions for filling and processing jars.

Related Posts Plugin for WordPress, Blogger...
2 Comments
Share
  • Pin it
  • Share
  • Tweet
  • Share
  • Email

Posts navigation

Previous Page 1 2 … 4 5 6 7 Next Page
Deb

Meet Chef Debbi

READ BIO

Join-Us Sign up for our newsletter to receive exclusive tips 'n tricks, and special offers on classes, tours, and more!

Recent Posts

  • New E-Book!
  • From the Pantry
  • Spaghettini at Home
  • Growing Corn
  • Spring IS Coming!

Categories

BookCUT

What's in Your Pantry?

How to stock your pantry to create delicious dishes.

Learn Chef Debbi's pantry essentials and how to substitute ingredients for pantry staples in her basic recipes for quick and easy meals.
BUY BOOK>

FacebookTwitterInstagramGooglepinterest


© 2014, DEB'S KITCHEN
Angie Makes Feminine WordPress Themes