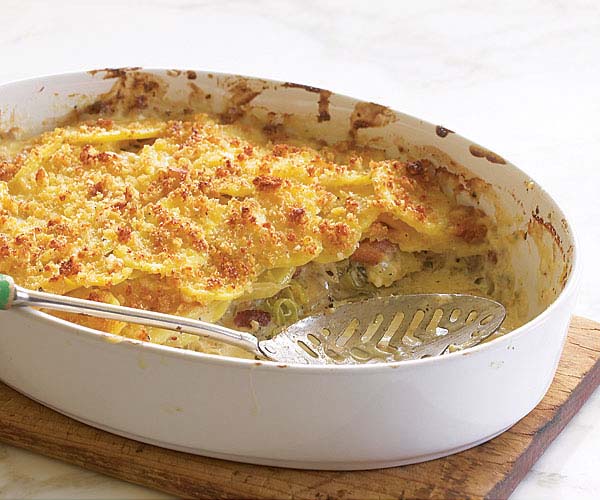
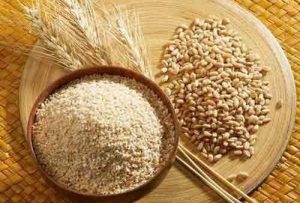
Deb's Kitchen - Farm, Food, Wine & Lifestyle Adventures
  • Facebook
  • Google
  • Twitter
  • Instagram
  • Pinterest
  • Email
Menu
Skip to content
  • Home
  • Blog
  • Events
    • Classes
    • Tours & Adventures
  • Edible Gardening
  • Preserving
  • Recipes
    • Appetizers
    • Soups and Salads
    • Main Dishes
    • Side Dishes
    • Desserts
  • About
    • Whats In Your Pantry
    • Ask Debbi
    • Deb’s Kitchen Botanicals
    • Press
  • Contact

Category Archives: Side Dishes

Mexican Skillet Fry

12 / 18 / 17


I use this mix for tostada’s and scoop it over some great refried beans or top with tamale topping and bake or even spread on nachos or in tacos and burritos. Feel free to use other ingredients as well, look to see ‘What’s In Your Pantry’

Mexican Skillet Fry

Save
Print
  • 1 lb. ground beef or turkey
  • 1 small onion, diced
  • 2 bell peppers, diced, I used 1 red & 1 green
  • 1 8oz can diced tomatoes with green chile
  • 1 cup long grain white rice
  • 2 cups chicken or beef stock
  • 2 teaspoons taco seasoning
  • Sea salt
  • 1 cup shredded Mexican cheese or a mixture of jack & cheddar cheese*
  • 3 green onions, sliced to garnish
  • Optional
  • Tamale Topping:
  • 1 ½ cups milk
  • 1 teaspoon salt
  • 2 tablespoons butter
  • 1/2 cup yellow cornmeal
  • 1 cup shredded Cheddar cheese
  • 2 eggs, lightly beaten

In a large pan skillet with a lid, brown ground beef (sauté the meat until you can break it up but don’t cook all the way through before adding next ingredients. Do not drain, if using ground turkey, you may have to add a little vegetable oil to the pan.

Add onions & peppers and cook until they are soft, then add spices and a little salt to taste, mix well.

Add can of tomatoes with green chile’s (including juice), rice, and stock and stir together, cover and let simmer until liquid is absorbed and the rice is cooked, about 10 minutes. Taste and re-season if needed, top with cheese and cover, cook over low heat until the cheese has melted. Garnish with chopped green onions.

Serve with soft tortillas or chips.

*Omit cheese if using the tamale topping.

Follow these instructions for Tamale Pie:

Preheat oven to 375°.

In a medium saucepan, heat milk with 1 teaspoon salt and the butter. When the milk is hot, but not boiling, gradually stir in the 1/2 cup yellow cornmeal. Continue cooking until thickened, stirring constantly.

Remove from heat and stir add the cheese and beaten eggs. Stir to blend.

Place meat mixture into an oiled baking dish and top with tamale mixture, bake for 20-25 minutes or until lightly browned.

Leave a comment
Share
  • Pin it
  • Share
  • Tweet
  • Share
  • Email

Green Beans, Bacon and Caramelized Shallots

8 / 22 / 178 / 23 / 17

Grow a Second Crop of Green Beans

In Southern California we are lucky enough to grow a fall crop of beans. With warm days still ahead the beans will sprout and grow quickly. Bush beans are your best bet, with shorter days to harvest than pole beans you should be able to harvest in just 45-50 days. Check your seed packet for harvesting information.

There are three types of bush beans, snap beans (eat the pod & all), shelling beans (eat the beans inside the pod like peas) or dried beans. Dried beans you’ll want to leave on the plant until everything has dried up, pick the dried pods and put into a grocery bag. You can knock the bag around to remove the shell or pull the dried pod away from the beans. I like to freeze the beans for 24 hours to kill any pests that may have hitched a ride. Then store in a glass jar or other container in your pantry, away from heat and light. When you’re ready to use them, treat them like any other dried bean (that’s another story….)

Most bush beans don’t need to be trellised, and they produce most of their crop all at once. For a great harvest and good use of space, plant Square Foot Gardening style, 9 plants to a square foot.

To get the best crop inoculate your bean seeds before planting. Beans, peas and all legumes ‘fix’ nitrogen into the soil. The inoculant, Rhizobium leguminosarum,  is a nitrogen fixing bacteria. These bacteria “infect” the legumes growing in the soil and cause the legumes to form the nitrogen fixing nodules that make peas and beans bombshells.
You should be able to find the inoculant at any garden center or nursery. It can also be ordered from www.groworganic.com (Peaceful Valley Farm Supply).

While you are digging the holes for the seed, soak the seeds in water for about ½ hour. Dig your hole and sprinkle a generous helping of inoculant into the hole. Water and then plant your seeds. They’ll take up to 10 days to sprout, don’t overwater while you are waiting for them to poke up from the ground, overwatering can cause the seed to rot before it sprouts. Watch out for birds as well, they love seeds! I like to cover my bed with a floating row cover until the seeds are up and have several sets of leaves.

Give the plants 2 – 3” of water a week and you can side dress with a little compost. I mulch my beds with straw to help keep water evaporation down and to keep weeds from sprouting.

Plant companion plants near beans for the best growing bed, they like to grow near beets, cucumber, nasturtiums, peas and radish.

Watch for pests such as a cucumber beetle, bean beetle or weevil. I planted my beans near basil which is usually a good pest deterrent but this year those white butterflies (which are really cabbage moths) laid eggs on the basil and the little worms devoured my newly sprouted beans. So I planted a new round because I love green beans, especially in the fall. I freeze some for soups when winter comes and hopefully have enough until next spring when I can get some more in the ground.

Here’s an easy side dish recipe for you to try.

Green Beans with Smoked Bacon & Caramelized Shallots

Save
Print

Serves 6
* To blanch green beans: Fill a large bowl with ice and cold water leaving room for green beans. Bring a large saucepan full of water to a boil and add green beans and a good helping of salt, cook for 1-2 minutes, drain the beans and plunge them into the bowl of ice water. Let them cool, drain and dry well.

  • 2 pounds haricots verts (thin green beans), trimmed, blanched and dried well*
  • ½ pound applewood smoked bacon
  • 3 large shallots, quartered
  • 2 tablespoon olive oil
  • 2 tablespoons red wine or balsamic vinegar
  • Sea salt & freshly ground black pepper

Cook bacon until crisp. Remove with a slotted spoon, and drain on paper towels, reserving 2 Tbsp. drippings in skillet.

Add olive oil to the pan with the bacon drippings then add the quartered shallots and sauté until browned. Add the vinegar, stir well, then add the green beans and toss until coated with oil, cook for another minute then season with salt and pepper and toss with bacon, serve hot.

Leave a comment
Share
  • Pin it
  • Share
  • Tweet
  • Share
  • Email

Hatch Chile & Potato Rajas

7 / 25 / 177 / 25 / 17


Hatch Chile & Potato Rajas

Save
Print
  • 1 large potato, peeled and cut into ½ inch dice, cooked
  • 2 tablespoons vegetable or canola oil
  • 1 small onion, cut into small strips
  • 4 mild Hatch chiles, roasted, peeled, seeded, and julienned *
  • ½ cup cream
  • ½ cup shredded Monterey Jack cheese
  • 12 corn tortillas

Heat a large sauté pan over medium heat. Add oil; add onions, season with salt and pepper and sauté until lightly browned.

Add chiles, and cream, bring to a boil and reduce to a simmer and cook 4 minutes.

Add cheese and potatoes, stirring occasionally, until just heated through. Remove from heat.

Wrap tortillas in plastic wrap or paper towel and heat in microwave on low until warm.

Leave a comment
Share
  • Pin it
  • Share
  • Tweet
  • Share
  • Email

Asparagus Gratin

6 / 9 / 17

I love sweet California asparagus, especially the small early stalks simply sautéed in butter and seasoned with a little lemon zest, sea salt and freshly ground pepper. But for serving to guests I also enjoy this quick and easy gratin, it pairs well with Lemon Roasted Chicken and a cold glass of Viognier.


Asparagus Gratin

Save
Print
  • 2 pounds thin asparagus
  • salt and pepper
  • 2 tablespoons unsalted butter
  • 2 tablespoons flour
  • pinch of cayenne pepper
  • 1 cup milk
  • ¾ cup Parmesan cheese, grated and divided
  • ½ cup Monterey Jack cheese, shredded

Adjust oven rack to upper-middle position and heat broiler.

Prepare an ice bath (cold water and ice) large enough to hold the asparagus.

Cut ends off the asparagus and set aside.

Fill a large skillet ¾ full of hot water, bring to a boil. Add asparagus and a heaping tablespoon of salt. Cook for about 2-4 minutes or until lightly cooked. Immediately plunge asparagus into ice bath to stop the cooking.

Melt butter in now empty skillet over medium heat. Add flour and cook, stirring constantly until golden, about 1 minute. Whisk in milk and bring to boil. Reduce heat to medium-low and simmer until thickened, 3-5 minutes., whisk in ½ cup Parmesan and Monterey jack until smooth, season with salt and pepper. Turn off heat. Cover and let stand for 5 minuets.

Place asparagus into an oven proof serving dish and drizzle sauce over center of asparagus and top with remaining Parmesan. Broil until cheese is golden and asparagus is tender, 4-8 minutes. Serve.


Photo: LA Times

Leave a comment
Share
  • Pin it
  • Share
  • Tweet
  • Share
  • Email

Tomato Confit

6 / 11 / 166 / 12 / 16

Is your garden overflowing with tomatoes? I always grow too many and one of my favorite ways to make them go a little farther is to oven dry them. Much like sun dried, these concentrated gems pack a powerful punch and can be used in any dish where you’d use tomatoes. Especially nice on a cheese plate with some creamy goat cheese nearby.

tomatoconfit-chez pim 2006


To preserve them I turn them into a tomato confit and keep in my ‘pantry’ refrigerator. They can’t be water bath canned because of the oil, but they will keep for about 6 months in the refrigerator, if they last that long. The refrigeration will also help to preserve the oil and keep it from going rancid quicker. Use only fresh organic herbs and make sure you wash and dry them very well, you don’t want any water going into your beautiful confit.

Mangia (Eat!)

Save
Print
  • 1 pound tomatoes, cut in half lengthwise
  • Sea salt and freshly ground black pepper
  • 1/4 cup olive oil, approximately
  • 1 tablespoon basil, chiffonade
  • 2 teaspoon fresh thyme
  • 1 clove garlic -- minced

Preheat the oven to 350°.

Arrange the tomato halves cut side up and close together on a baking sheet, season with salt and pepper.

In a bowl, combine olive oil, garlic, and herbs. Drizzle over tomatoes and bake until the tomatoes are soft and shriveled but still retain some moisture, 1-2 hours or more.

Let cool completely. Tomatoes can be stored in a glass jar, cover tomatoes with olive oil, add a fresh sprig of thyme, seal and refrigerate.

Photo: Chez Pim

Leave a comment
Share
  • Pin it
  • Share
  • Tweet
  • Share
  • Email

Easter Potatoes

3 / 31 / 154 / 1 / 15

potato gratin-molly stevens

Potato Gratin

Save
Print

This rich, creamy gratin gets a note of smokiness from the bacon between the layers of tender potatoes.
by Molly Stevens from Fine Cooking

  • 2-1/2 lb. Yukon Gold potatoes, peeled & sliced into 1/8-inch thick rounds
  • 2-1/2 cups heavy or light cream
  • Sea salt & fresh ground pepper, to taste
  • 4 oz. bacon
  • 3 medium leeks, white and light-green parts only, thinly sliced
  • 6 oz. grated Gruyère
  • 2 to 3 tsp. chopped fresh thyme
  • 1/4 tsp. freshly grated nutmeg
  • 1/2 cup fresh breadcrumbs
  • 1/4 cup finely grated Parmigiano-Reggiano
  • 2 tablespoons unsalted butter, melted

Serves 8

Position a rack in the center of the oven and heat the oven to 400°F. Butter or oil a 3-quart gratin dish; set aside.

Put the potatoes, cream , 1/2 tsp. salt, and a few grinds of pepper in a 12-inch skillet. Simmer, partially covered, over medium to medium-low heat, stirring occasionally and gently with a rubber spatula until the potatoes are barely tender when pierced with a fork or skewer, 8 to 12 minutes.

In a medium skillet, cook the bacon until browned and fully cooked. Set aside to cool, reserving 2 tablespoons of the fat in the skillet. Heat the reserved fat over medium-high heat and sauté leeks until tender, fragrant, and lightly browned. Season to taste with salt and pepper. When the bacon is cool, crumble it into small pieces.

Using a slotted spoon, transfer half the potatoes to the prepared gratin dish, spreading them evenly. Layer on the leeks, bacon, Gruyère, thyme, and nutmeg. Top with the remaining potatoes spreading them evenly, and pour over any liquid remaining in the pan.

In a small bowl, combine the breadcrumbs, Parmigiano-Reggiano, and melted butter.

Evenly scatter the topping mixture over the potatoes. Bake the gratin until it’s bubbly, the top is brown, and the potatoes are completely tender when poked with a fork or a skewer, 25 to 30 minutes. Let the gratin sit for at least 10 and up to 30 minutes before serving so the liquid is fully absorbed and the layers are cohesive.


Leave a comment
Share
  • Pin it
  • Share
  • Tweet
  • Share
  • Email

Balsamic Roasted Brussels Sprouts

12 / 5 / 1412 / 5 / 14

brussels sprouts cut

Balsamic Roasted Brussels Sprouts

Save
Print

The secret to great roasted brussels sprouts is to lightly blanch them in salted water for a few minutes before roasting. They can be blanched up to a day ahead of time and roasted at the last minute.

  • 1 pound baby Brussels sprouts – shaved or halved
  • 2 tablespoons olive oil
  • 6 tablespoons balsamic vinegar
  • Sea salt and freshly ground black pepper
  • 3 slices Applewood smoked bacon, cooked crisp
  • 3 Tablespoons sliced almonds, toasted
  • 1 dab unsalted butter, optional

Preheat oven to 400°.

Blanch brussels sprouts in boiling, salted water, drain and plunge into an ice water bath. Drain and dry.

Mix brussels sprouts with olive oil and vinegar, spread on a baking sheet lined with foil or parchment paper. Season with a sprinkling of sea salt and fresh ground pepper.

Roast for 45 minutes, or until fork tender, turning several times during cooking for even browning. Taste and adjust seasonings.

Toss with toasted almonds and bacon pieces and a dab of fresh unsalted butter if desired. Serve hot.

Leave a comment
Share
  • Pin it
  • Share
  • Tweet
  • Share
  • Email

Oven Roasted Tomatoes

8 / 19 / 1412 / 3 / 14

IMG_0481


Store these tomatoes in a jar covered with olive oil, use a lemon olive oil if desired. For a quick appetizer see below.


1         pound Roma tomatoes, halved lengthwise

Sea salt and freshly ground black pepper

¼       cup olive oil

1         tablespoon basil, chiffonade

1          teaspoon thyme

1         clove garlic, minced

Preheat the oven to 350∫F. Arrange the tomato halves cut side up and close together on a baking sheet. Season with salt and pepper.

In a bowl, combine olive oil, garlic, and herb. Drizzle over tomatoes and bake until the tomatoes are soft and shriveled but still retain some moisture, about one hour.

Let cool completely. Tomatoes can be stored in a glass jar, cover tomatoes with olive oil, seal and refrigerate.

For sauce: Process in a food processor and warm in a large saute pan.


For a quick appetizer, stuff roasted tomato halves with the following.

Mix together 1 log of goat cheese, 2 Tb. fresh chopped herbs and 1 -2 Tb. of heavy cream.

Mix until goat cheese is soft but not runny.

Spoon or pipe herbed goat cheese onto dried tomato, serve with a drizzle of aged balsamic vinegar.

Leave a comment
Share
  • Pin it
  • Share
  • Tweet
  • Share
  • Email

How to Make Mashed Potatoes

11 / 27 / 1311 / 5 / 14

How to Make  Mashed Potatoes!

 russet potatoes

 (Easy Peasy)

1 medium organic* russet potato person

1 tablespoon Kosher salt

1 -2 tablespoons butter, REAL BUTTER, unsalted

1/2 cup milk (cream if you want to be decadent, or mix the two)

Sea Salt and pepper

1 tablespoon sour cream, optional

1 teaspoon chives, optional

1 tablespoon grated cheese, optional


Wash potatoes and then cut into large chunks, place into a large saucepan and cover with cool water. Add a tablespoon of Kosher salt, bring to a boil and cook until fork tender, about 15 minutes. 

Heat the butter with the milk (I use the microwave). If you use the microwave wait to heat until the potatoes are cooked. Drain the potatoes and peel the skin off with tongs. For creamy soft mashed potatoes slip through a ricer into the still hot saucepan that you cooked them in (without any water!) If you don’t have a ricer just put the chunks back into the pan, place on the stove over low heat for a minute or two. This helps to dry them a little further so they absorb the butter and milk more evenly.mash


Add enough butter and milk (or cream) to the potatoes and lightly mashed with a potato masher, they should come together easily. Don’t overwork the potatoes or they can turn gummy. Season with sea salt and pepper to taste and add any optional ingredients, serve.

If you’re making potatoes for a crowd they can be made about 1 hour ahead of time and kept warm on low in a preheated slow cooker! (I don’t remember where I learned that trick but thank you to whoever it was that shared it)


*Organic potatoes, all kinds of pesticides and sprays are used on conventional potatoes to keep bugs from eating them while they grow. Then to harvest them and finally to keep them from sprouting in the store. Choose organic for your health.


2 Comments
Share
  • Pin it
  • Share
  • Tweet
  • Share
  • Email

Giardiniera or Pickled Vegetables

11 / 11 / 1312 / 5 / 14

Giardinaria

Save
Print

When I was growing up, if I was lucky enough, once in awhile we’d dine at a fine dining restaurant. They always served a relish tray when the guests were seated, it was to stimulate your taste buds and make you hungry. I miss having those relish trays but once I learned how to make pickled vegetables myself, so easy!, I keep them in the refrigerator almost year round. The vegetables change with the seasons; they can be eaten alone, with cheese and crackers or chopped finely to make a wonderful relish for all kinds of meats. Be creative!

  • 2 pounds, approximately mixed vegetables, whole or cut into pieces
  • 2 cups cider vinegar
  • 1 cup white vinegar
  • 1/2 cup water
  • 1/2 tablespoon pickling salt
  • 1 tablespoons sugar, if desired
  • 2 tablespoon pickling spice

Makes 2 - 3 quarts

Wash and drain vegetables. Sterilize jars and lids in hot water.

Bring vinegar, water, salt, sugar and pickling spice to a boil.

Pack vegetable medley into hot, sterilized jars, leaving 1/2-inch headspace. Pour hot solution over mix in jars, leaving 1/4-inch headspace. Remove air bubbles. Add liquid to bring headspace to 1/4 inch. Wipe jar rims.

Refrigerate and let stand 2 days before serving. Will last several weeks refrigerated.

For longer storage, process in boiling water bath for 20 minutes.*

*Follow jar manufacturers directions for filling and processing jars.

2 Comments
Share
  • Pin it
  • Share
  • Tweet
  • Share
  • Email

Applesauce

11 / 11 / 13

Ingredients

  • 4 pounds mixed apples, choose a variety of sweet apples, wash, peel, core chopped into chunks.
  • Apple Juice, real apple juice not concentrate or white grape juice (read the label)
  • Cinnamon
  • Sugar (only if your apples aren’t very sweet)

Instructions

  1. Place the chopped apples into a large saucepan and add about 1” of apple juice. Cook until the apples are soft and tender. If there is excess liquid after cooking the apples you can drain this off and save to drink as ‘juice’, that’s exactly what it is.
  2. Mash the apples with a potato masher or put through a food mill. You could also use a food processor or blender. Add cinnamon to taste and sugar if needed. Keep hot or cool and store in refrigerator for a week. That’s it!
Related Posts Plugin for WordPress, Blogger...
Leave a comment
Share
  • Pin it
  • Share
  • Tweet
  • Share
  • Email

Posts navigation

Previous Page 1 2
Deb

Meet Chef Debbi

READ BIO

Join-Us Sign up for our newsletter to receive exclusive tips 'n tricks, and special offers on classes, tours, and more!

Recent Posts

  • Spring IS Coming!
  • Cheese Education & Demo Class
  • Farm, Food & Wine Tour 2023
  • Happy Valentine’s Day
  • Superbowl Sunday Party

Categories

BookCUT

What's in Your Pantry?

How to stock your pantry to create delicious dishes.

Learn Chef Debbi's pantry essentials and how to substitute ingredients for pantry staples in her basic recipes for quick and easy meals.
BUY BOOK>

FacebookTwitterInstagramGooglepinterest


© 2014, DEB'S KITCHEN
Angie Makes Feminine WordPress Themes
Manage Cookie Consent
To provide the best experiences, we use technologies like cookies to store and/or access device information. Consenting to these technologies will allow us to process data such as browsing behavior or unique IDs on this site. Not consenting or withdrawing consent, may adversely affect certain features and functions.
Functional Always active
The technical storage or access is strictly necessary for the legitimate purpose of enabling the use of a specific service explicitly requested by the subscriber or user, or for the sole purpose of carrying out the transmission of a communication over an electronic communications network.
Preferences
The technical storage or access is necessary for the legitimate purpose of storing preferences that are not requested by the subscriber or user.
Statistics
The technical storage or access that is used exclusively for statistical purposes. The technical storage or access that is used exclusively for anonymous statistical purposes. Without a subpoena, voluntary compliance on the part of your Internet Service Provider, or additional records from a third party, information stored or retrieved for this purpose alone cannot usually be used to identify you.
Marketing
The technical storage or access is required to create user profiles to send advertising, or to track the user on a website or across several websites for similar marketing purposes.
Manage options Manage services Manage vendors Read more about these purposes
View preferences
{title} {title} {title}