Deb's Kitchen - Farm, Food, Wine & Lifestyle Adventures
  • Facebook
  • Google
  • Twitter
  • Instagram
  • Pinterest
  • Email
Menu
Skip to content
  • Home
  • Blog
  • Events
    • Classes
    • Tours & Adventures
  • Edible Gardening
  • Preserving
  • Recipes
    • Appetizers
    • Soups and Salads
    • Main Dishes
    • Side Dishes
    • Desserts
  • About
    • Whats In Your Pantry
    • Ask Debbi
    • Deb’s Kitchen Botanicals
    • Press
  • Contact

Category Archives: Winter Recipes

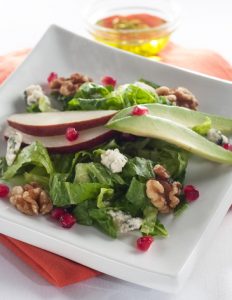
Cranberry-Apple Salad with Walnuts

9 / 26 / 19

Winter Green Salad with Apples, Cranberries & Walnuts With French Vinaigrette

Save
Print

Fresh Autumn-Winter Salad with seasonal fruit, walnuts and feta cheese.

Serves: 4-6

  • Vinaigrette
  • ¼ cup pomegranate vinegar, any vinegar can be
  • 1 tablespoon Dijon mustard
  • 1 small shallot, minced
  • 1 sprig Italian parsley, chopped
  • 1 teaspoon thyme, chopped
  • ¾ cup vegetable, olive or canola oil, approximately
  • salt and pepper, to taste
  • Salad
  • 6 cups mixed greens
  • 2 organic apples*
  • 1 cup toasted walnuts, roughly chopped
  • ⅓ cup crumbled feta cheese
  • ⅓ cup dried cranberries

In a medium bowl make the vinaigrette by whisking together all the ingredients except the oil. While constantly whisking, drizzle in some of the oil, stopping to taste occasionally. Season to taste with salt and pepper.

Can be made in advance and stored in the refrigerator.

Bring to room temperature before serving.

For a creamier dressing add 1 Tb. mayonnaise

Core and chop apples (thin slices or 1 inch chunks). Toss lettuce, apples, walnuts, feta, and cranberries together in a large bowl. Add a little dressing and toss, taste for seasoning and adjust.

*If conventional apples are used, peel first.

Leave a comment
Share
  • Pin it
  • Share
  • Tweet
  • Share
  • Email

Hands On Fun at Rancho los Alamitos

9 / 11 / 199 / 11 / 19

Food Crafting with Chef Debbi

& Debs Kitchen


Saturday, Oct 12th

10:00 am– 12:30

Adults $75.00

Children* ages 10-14 $35.00

*Children must be accompanied by an adult.


By reservation only

Click below for reservations or call or email

Reserve my spot

562-431-3541 or [email protected]

Reservations close Mon. Oct 7th


Enjoy a fun-filled autumn morning with family at the beautiful

Rancho Los Alamitos Historic Ranch & Gardens.

Learn together to make (& take)

Gifts from the Garden.

For the adults to make and take:

Herbal Salt Tin

Cranberry Vinegar

Meyer Lemon Infused Olive Oil

Peppermint-Lavender Room Spray

Holiday Stovetop Potpourri

For the Kids to make and take:

Peppermint Biscotti in a Jar

Strawberry Mint Mojito Mocktail

A seasonal salad will be served with a

Cranberry-Lemon Vinaigrette prepared by Chef Debbi.

Special thanks to Melissa’s Produce for donating event supplies.

Leave a comment
Share
  • Pin it
  • Share
  • Tweet
  • Share
  • Email

Artichokes!

4 / 10 / 194 / 10 / 19

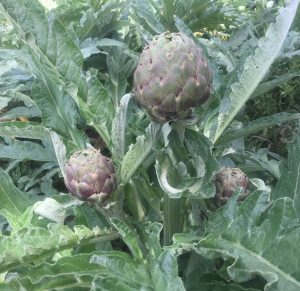
Spring is nearly here and with it comes lovely artichokes. Artichokes are perennial plants in the same family as dandelions and sunflowers, they are a thistle plant and, in most artichokes, there is a center that’s inedible, the ‘choke’. In cooler climates, such as California’s northern coast they can be grown as annual’s. Spring and fall are times when you can find fresh artichokes in the markets. An easy plant to grow, they do require full sun and will take up a large space, 3 feet or more. Be sure to cut the artichoke before the leaves begin to open and it blossoms into a flower.

When you choose your artichoke, you want to make sure that it’s firm when you press the sides and you’ll often hear a squeaky noise, that’s good. The leaves should be tight and closed. If there is a little bit of brown on the leaves that’s ok, it just means there was a little frost during its growing season but that’s not a bad thing. The inside will be perfectly delightful. You also might want to consider only organic artichokes since you’ll be eating parts of the plant that may have been sprayed with pesticides during its growing season. Pesticides cannot be washed off with water or vegetables soaps, they are oil based and you know what happens when oil and water mix! If you can’t find beautiful California Artichokes in the market, here is a great local source where you can order them, Melissa’s Produce, http://www.melissas.com/Organic-Artichokes-p/1375.htm

To store your artichokes, you could place in a plastic bag and store in the produce drawer of your refrigerator or just pop it into the drawer itself. They will last up to 7 days but best eaten within a few.

Rinse the artichoke under cool water; pull off the lower, smaller leaves and cut the stem at the base of the choke. If you have a nice long stem, you can cook this separately and eat it like you would the heart, it tastes the same. If desired, with a sharp chef’s knife cut across the top third of the artichoke and snip the sticker off the remaining leaves. Even though there are many ways to prepare a fresh artichoke, most people fall back to either boiling/steaming them, although it takes quite a while, up to half an hour or more. You could put them in a microwave bowl or in an Instant Pot adding a cup of water and cook for 10 minutes, cover the microwave ones, or grill them over hard wood. Anyway is fine with me.

Here’s the traditional method:

Put them into a large pot and cover with cool water, squeeze two lemons into the water and a little sea salt, bring to a boil and simmer until you can run a small knife through the bottom part of the artichoke, 30-45 minutes or longer depending on the size of the vegetable. Remove from the water using tongs and picking up the artichoke with the top facing down so not to spill hot water all over yourself, drain and serve with my favorite sauce from Walt’s Wharf in Seal Beach.

Get the recipe here, 

Leave a comment
Share
  • Pin it
  • Share
  • Tweet
  • Share
  • Email

Lettuce Varieties

11 / 29 / 18


Are you hankering for some romaine lettuce? Well, there are tons of alternatives here in So. Cal for you. From the CDC website here’s what they are saying about the current outbreak of e coli on romaine lettuce.

‘Based on new information, CDC is narrowing its warning to consumers. CDC is advising that U.S. consumers not eat and retailers and restaurants not serve or sell any romaine lettuce harvested from the Central Coastal growing regions of northern and central California. If you do not know where the romaine is from, do not eat it.’
Here’s the link for more information, CDC.

Personally, I like a mix of lettuce mostly, a little crunch, a little color and a tangy dressing. My favorite is a good old Italian dressing made with a very good red wine vinegar. I love a little cheese as well, blue, parmesan or goat goes well with a tangy Italian dressing.

Just mix a little Dijon mustard, like Maille, with your red wine vinegar, add a little minced shallot, some fresh ground Italian spices and whisk in a little olive oil, season with salt and pepper and you’re done.
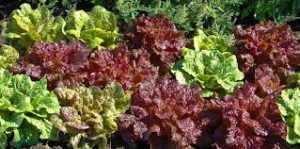
Local lettuce varieties are usually more plentiful during the winter as most lettuce prefers to grow in the cooler weather. Here are some varieties that will offer no only color but flavor to your salad bowl.

Choose lettuce that is bright with no brown edges or spots. Try and get them not too wet, if they are wet, they have a tendency to go bad faster. Pick whole heads of lettuce rather than bagged lettuce. The more lettuce is handled from field to bag the greater chance it can pick up any bacteria. Bagged lettuce can also be washed with chlorinated water and tends to be older than a non-bagged lettuce. Are you tempted to buy the bag that says triple washed and leave it at that? That lettuce may be contaminated with more than just chlorinated water and if it’s wet at all it will likely rot within a couple of days in that bag. Buy un-bagged lettuce, wash and dry well before storing. You might notice that if you purchase your lettuce at a farmers market that it lasts longer than a store bought lettuce, it’s because your farmers market lettuce was probably picked within a couple of days. I’ve had lettuce last up to 2 weeks from my farmers markets. So here are just some of the lettuce types you should be able to pick up anywhere.

Arugula (Rocket)-spicy and peppery, the larger the leaves the more bite it will have

Batavia is a loose-leaf lettuce similar to red or green leaf lettuce with a mild flavor

Belgian Endive-these can be a tad bitter, but they will add crunch to any salad mix

Butter-a very mild lettuce with big cupped leaves, great for serving topped with a crab salad

Frisee (Curly Endive)-Sometimes called chicory, the leaves are thin and curly with a little bit of a bite, aka peppery.

Iceberg-A dense head of lettuce with lots of crunch but little flavor

Leaf Lettuce, Red or Green-Another loose leaf lettuce with mild flavor but both add a lot of color to a salad bowl, great on sandwiches as well.

Little Gem-This lettuce looks like a mini version of romaine but it’s not as crunchy, mild flavor

Oakleaf-Another beautiful bi-colored loose-leaf lettuce that has a mild taste

Radicchio-There are numerous colors of radicchio, most have a little bitterness but a great addition to any salad.

Spring Mix-Usually a variety of small lettuces, some are mild, and some mixes can be spicy.

Watercress – Although probably a little difficult to find it makes a nice addition to a mixed salad or added to a rustic piece of bread slathered with some soft cheese. It has a peppery bit, much like Arugula. Use smaller leaves for less intense flavor.

Leave a comment
Share
  • Pin it
  • Share
  • Tweet
  • Share
  • Email

January 2019 Cooking Demo

11 / 28 / 18


Join us in Seal Beach

NEW DATES/DAYS

Thur. Jan 10th

Tue Jan 22

6:30 – 8:30, approximately

Menu

Pink Grapefruit, Avocado & Watercress Salad with Pomegranate Vinaigrette

Chicken Cordon Bleu

Spaghettini with Vodka Cream Sauce

Winter Roasted Vegetables with Basil Vinaigrette

Lemon Curd Cream Puffs

$45.00
Taking reservations now, call:
Temecula Olive Oil, 148 Main St. Seal Beach
(562) 296-5421

Sponsored by our friends at

Leave a comment
Share
  • Pin it
  • Share
  • Tweet
  • Share
  • Email

Fudgy Peppermint Brownies

12 / 21 / 17

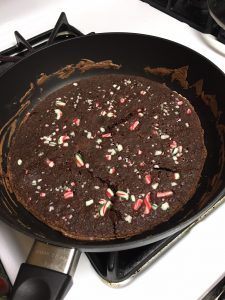
If you google how to bake brownies in a skillet you will find recipes that actually cook in the oven in a skillet rather than a recipe you can cook in a skillet on the stove top. Why bother unless you’re going to serve the brownies to your guests in the pan? I’m talking about actually BAKING them in a skillet on the stove top. This makes them super fudgy but a little difficult to get out of the pan so be sure to use a good nonstick skillet. Here are two recipes, one traditional and one cooked in a skillet (a cheater recipe as I used a box mix-yes a box!) You decide which one works for you!

Fudgy Peppermint Skillet Brownies

Save
Print

This recipe yields 2 pans of yummy, fudgy brownies using an 11″ skillet (w/lid) or sauté pan.

  • 1 box brownie mix, plus ingredients on box
  • ¼- ½ teaspoon peppermint extract
  • peppermint candies, crushed

Mix brownies according to package directions, adding peppermint extract.

Add ½ of the batter to skillet and stir it around over low to medium heat while it ‘bakes’ and solidifies. Cover and cook over low heat for approximately 10 minutes or until the sides start to crisp. Add candies to the top of the brownies, turn off heat and let the pan sit for about 5 minutes before cutting.

Fudgy Brownies

Save
Print
  • 1 cup flour
  • ¾ cup Dutch cocoa powder
  • 2 cups sugar
  • ¼ teaspoon salt
  • ¼ teaspoon baking powder
  • 3 lg. eggs
  • ½ cup butter, melted (8 Tb)
  • ¼ cup oil, vegetable, olive or flavored olive oil
  • 2 teaspoons vanilla, substitute any flavored extract
  • ¼ cup chopped nuts, chocolate chips, peppermint pieces etc.

Preheat the oven to 375° and lightly grease a 9x13 pan.

Add all the ingredients to a large bowl in the order they are listed. Stir together and beat until the mixture is smooth. Mix in nuts, chips etc. that you’d like to use.

Spoon into the prepared pan and bake 25-30 minutes, or until just barely beginning to pull away from the sides of the pan, remove from oven and let cool.

Leave a comment
Share
  • Pin it
  • Share
  • Tweet
  • Share
  • Email

Chicken Stew Cassoulet

10 / 3 / 17


Chicken Stew Cassoulet

Save
Print
  • 8 chicken thighs
  • Sea Salt and pepper to taste
  • 2 tablespoons butter
  • 2 tablespoons canola oil
  • 1 small to medium onion, finely chopped
  • 4 carrots, cut in half and then sliced into half-moons about ¼” thick
  • 3 celery, sliced 1/4" thick
  • 3-4 cups chicken broth
  • 2 bay leaves
  • 1 tablespoon dried thyme, crushed
  • 1 lg. can whole tomatoes
  • 2 cups white beans
  • 1 cup bread crumbs, large pieces not fine

Rinse and pat dry the chicken. Trim any excess skin and fat.

Preheat oven to 375°.

Heat a large Dutch oven, add the butter and oil. Season the chicken with sea salt and pepper, place the chicken pieces skin side down in the pan and brown well on both sides. Don’t crowd the chicken in the pan, do this in 2 steps if needed.

Set aside and pour off most of the drippings leaving about 2 Tablespoons in the pan. Sauté the onions, carrots and celery, return the chicken to the

pan and add chicken broth, bay leaves, thyme, tomatoes, white beans and a little salt

and pepper. Cover and place into oven and cook 30 minutes.

Check to make sure that chicken is nearly cooked.

Add bread crumbs and return to the oven, uncovered. Cook until crumbs are

lightly browned, about 15 minutes.

Leave a comment
Share
  • Pin it
  • Share
  • Tweet
  • Share
  • Email

Soup Season

10 / 3 / 17

Photo: Christina Peters

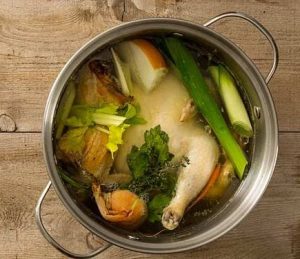
I love fall and winter and I love to cook hearty stews and warming soups. One of the most important ingredients is stock or broth for your dish and homemade is the best. Most of the time spent making stock is hands off, it needs to simmer for a good 4 hours so prep time in the kitchen can be limited to about 1/2 hour. Cut most of that time in half by making the stock in your pressure cooker but I like the results better just simmered slowly on the back of the stove. (Besides it makes your house smell wonderful!) I’ve included a list of descriptives for stock, broth, stew, soup etc. And my recipe for a perfect stock; stock is made with bones and broth is made with pieces of meat and vegetables and is a little less hearty than stock. Keep some stock in your freezer for quick meals during the winter season. Recipe below but here are some descriptives of soups, stews etc.

Bisque:           a rich, thick usually smooth soup. Thickened either by pureeing or adding                         cream and usually made with some kind of seafood.

Chowder:      a thick, chunky soup

Stock:             clear savory liquid made from vegetables or meat on the bone

Broth:             similar to stock but made with just meat or vegetables, not a hearty as stock

Gazpacho:     a cold vegetable soup usually with tomatoes as main ingredient

Gumbo:         thick broth with creole seasonings and chunks of meat & vegetables

Stew:              thick soup with chunks of vegetables and/or meat

Soup:              thinner than a stew with less chunks

Guides for making stocks

Use mild flavored vegetables, onions, celery, carrots, potatoes, tomatoes

No oily fish such as salmon

Beef bones with marrow will have more flavor

Use chicken feet for great taste and lots of natural gelatin

Do not season stock with salt until after it’s cooked

For making soups or stews

                        Any fresh or frozen veggie can be used. Do not defrost vegetable before      using,  just toss it into the stock.

                        Onion, peas, broccoli florets, celery, carrots, potatoes (will help to thicken soup also), corn, zucchini, peppers

                        Herbs

                        Basil, oregano, thyme, Italian parsley, crushed red peppers, Italian seasoning

                        Beans

                        Keep canned or frozen beans such as kidney, navy, white beans, pinto, black                    beans

Grains (pre-cook and freeze) Add at the end of cooking time

                        Farro, barley, rice, pasta, quinoa, beans

Chicken or Turkey Stock aka Bone Broth

Save
Print
  • 1 whole organic chicken, about 4 lbs., rinsed well, or
  • 3 # chicken pieces, backs, necks, wings, feet; these pieces will render a lot of gelatin (flavor) to your stock. Do not use livers but gizzards and heart are okay
  • 2 bay leaves
  • 3 sprigs of fresh flat-leaf parsley
  • 2 sprigs fresh thyme
  • 2 tablespoons cider vinegar, optional for bone broth
  • 1 large onion, quartered, leave skin intact but wash off any dirt from the root
  • 1 large carrot cut into thirds
  • 2 celery stalks cut into thirds, include some top leaves
  • 1 large leek, cut in half lengthwise and washed well between the leaves, cut into thirds
  • 6-9 whole black peppercorns

Place the chicken into a large stockpot and cover with cold water. Bring to a boil over high heat; reduce to a simmer and skim any foam that rises to the surface. This should take about 15 minutes.

After removing any foam add the cider vinegar (for bone broth), vegetables and herbs, bring back to a boil, turn heat to a simmer and cook 2 – 2 ½ hrs.

Remove from the heat and let the stock sit for 10 to 15 minutes, remove large chicken pieces and strain remaining stock through a cheesecloth-lined strainer. Cool by placing the container of strained stock in an ice water bath in the sink and then refrigerate overnight.

The next day, remove the fat from the stock by skimming with a ladle. The stock will keep for 3 days in the refrigerator or 3 months in the freezer. Be sure to label and date before freezing.

To adapt the recipe for Turkey Stock, roast a turkey back, neck, 2 wings and 1 package of chicken feet (yes, chicken feet have tons of flavor!) in the same manner as above.

For a deep rich flavor you can brown all your chicken pieces and vegetables, if desired, before making stock.

*Pressure Cooker or Instant Pot Directions

Place all pieces into the pot along with herbs, vegetables etc. Add 10 cups of cool water, cover and cook on high for 1 hour in your electric cooker. Let pressure cooker release naturally, strain and cool as above.



Leave a comment
Share
  • Pin it
  • Share
  • Tweet
  • Share
  • Email

Christmas Roast

12 / 6 / 16

A Christmas Roast, Dec. 2016

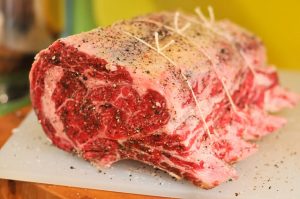
rib-roast

After the huge cooking spree for Thanksgiving I’m happy to create a simple elegant meal for Christmas and I always turn to a rib roast. Most people refer to them as a ‘prime rib’ yet that really refers to the grade of meat. While USDA Prime Grade is the best, it can also be on the expensive side, while a good ‘Choice’ grade is nearly as good as the prime, it can be purchased for much less. Both roasts are considered ‘standing rib roast’ and you treat them equally in cooking.

Costco has the absolute best deal on both Choice and Prime Grade roasts, choose bone in for the best flavor and juiciness. Either roast will need to cook a little longer with the bone in but the flavor is superior. A trick you can do is cut the bones off the roast and tie them back onto the roast, you’ll still get juicy flavor but won’t need to roast quite as long.

The roast will take some time to come to room temperature so remove from the refrigerator 3 house before roasting. Pre heat your oven for 30 minutes and roast for approximately 15 – 20 minutes per pound, start with a high heat, 450°, for 15 minutes, then turn the oven down to 325° and continue cooking. Use a digital probe thermometer for best results, it’s worth spending $15 or $20 on a digital thermometer for a $75.00 roast.

For rare roast remove from the oven when the thermometer reaches 120°, for medium rare, 125° or 130° for medium, the meat will continue to cook (called carry over cooking time) while it rests. I like to serve the roast with a Red Wine Sauce or Bordelaise Sauce but remember that your sauce will only be as good as the beef stock you use so use the best. Homemade is tops but if you must purchase a stock try More Than Gourmet Glace de Veau (veal stock). Standing rib roasts are great on the grill also but that’s another story.


Photo: Josh, The Meatwave

Prime Rib or Standing Rib Roast

Save
Print

Serves 8
Total preparation time: 1 hr. 30 min. – 2 hr.

  • 1 (7 lb.) Rib Roast, Bone-In or Boned & Tied
  • 2 tablespoons unsalted butter
  • 1 clove garlic, minced – optional use 1 teaspoon ground garlic (NOT garlic salt)
  • Sea Salt and ground pepper

Place roast in a shallow baking pan bone down, melt butter in small saucepan and add garlic and salt and pepper. Mix well, brush over roast, and let stand at room temperature for 2 hours.

Preheat oven to 450°F. Use a probe meat thermometer*, placed into the center of the roast but not touching bone. Roast for 10 minutes in uncovered pan, then reduce heat to 350°F and continue for 1 hour and 20 minutes for rare. Baste with pan drippings from time to time. Thermometer should read 120° - 125° for rare, 130° - 135° for medium rare. Do not cook beyond 140°, medium. Let the roast stand for 15 minutes, with the probe in the meat, before slicing. Slice either between the bones or cut off all the bones at once and the slice the meat into serving pieces.

Roast 15 minutes more if you want a medium roast, another 15 minutes for well done.

Remove from oven when done, and allow the meat to rest for a few minutes before carving. Transfer to a warmed serving platter.

• A digital probe meat thermometer – the probe remains in the meat while in the oven and the control sits outside on the stove or counter. See link below

Bordelaise Sauce

Save
Print
  • 3 tablespoons butter
  • 1 onion, chopped
  • 2 carrots, sliced in rounds
  • 2 cloves garlic, cut in half
  • 4 peppercorns
  • 1 bay leaf
  • 11/4 cups beef broth*
  • 1 sprig thyme
  • Sea Salt
  • 2 tablespoons flour
  • 1/2 cup dry red wine
  • 1 tablespoon Italian flat leaf parsley, chopped

Melt the butter in a heavy skillet and sauté the onion until transparent. Add the carrots and cook until soft.

Place garlic, peppercorns, and bay leaf in cheesecloth bag. Add to pan along with 1 cup of beef broth. Boil until broth has been slightly reduced, about 10 minutes, then season with thyme and salt.

Remove cheesecloth bag and put mixture through a coarse strainer. Return to pan.

Meanwhile, dissolve flour in the other 1/4 cup of broth and add gradually to sauce. Stir constantly until sauce thickens, then add the wine. Reduce heat and allow to simmer until ready to serve, and then sprinkle chopped parsley on top.

Use a quality beef broth if not making your own such as More Than Gourmet Glace de Veau (veal stock).

Leave a comment
Share
  • Pin it
  • Share
  • Tweet
  • Share
  • Email

Chocolate Cherry Cookies

9 / 16 / 16

In honor of my friends birthday I made him these cookies and I had some leftover (this recipe makes about 4 dozen cookies). I took them to last nights cooking class and everybody seemed to love them. They’re not too sweet but just the right size for a nice little bite and they pair well with any red wine (what doesn’t?).

During the holidays I replace the cherries with crushed peppermint candies and add peppermint extract instead of the vanilla. So I hope you enjoy them!

chocolate-peppermint-crinkle-cookies

Chocolate Cherry Cookies

Save
Print
  • 1 1/2 cups all-purpose flour
  • 1/2 cup unsweetened cocoa powder
  • 2 teaspoons baking powder
  • ½ teaspoon salt
  • ¼ cup chopped walnut pieces, optional
  • 1/2 cup chopped dried cherries
  • 8 tablespoons (1 stick) unsalted butter, softened
  • 1 cup packed light brown sugar
  • 2 large eggs
  • 8 ounces bittersweet chocolate, melted and cooled*
  • 1 teaspoon vanilla extract
  • 1/2 cup granulated sugar
  • 1 cup powdered sugar

In a medium bowl, whisk together the flour, cocoa powder, baking powder, and salt. Add the chopped walnuts and peppermint chips, stir to distribute well.

In the bowl of a stand mixer, fitted with the paddle attachment, or in a large mixing bowl, cream the butter and brown sugar until light and fluffy, about 3 minutes.

Add the eggs and vanilla, and beat until completely incorporated. Add the melted chocolate and beat until completely incorporated. Gradually fold in the flour mixture until just combined.

Chill the dough for at least 2 hours until firm, or up to overnight.

Remove the dough from the refrigerator. Preheat the oven to 350°F. Line a baking sheet with parchment paper or a silicone baking mat.

Place the granulated and powdered sugar in separate small bowls. Scoop 1 tablespoon of the dough, form into a ball, and place on a plate. Repeat with the remaining dough.

Roll each ball in granulated sugar and then in powdered sugar to coat. Place on the baking sheet 2 inches apart. Bake for 10 to 12 minutes, until the cookies begin to spread and the tops split. Remove from the oven and cool for a few minutes on the baking sheet, then transfer the cookies to wire cooling racks. Let the baking sheet cool, and repeat with the remaining dough.

Cookies will keep in an airtight container for about one week.

*To melt the chocolate, place in a microwave safe bowl and heat for 30 seconds, stir, and heat at 10 second intervals until melted, stir occasionally.

Optional:

For Peppermint Cookies add 1/4 cup crushed peppermint candies and use peppermint extract instead of the vanilla.

*To crush peppermint pieces, place several candy canes or peppermint candies into a freezer type bag and crush with a meat pounder or rolling pin.

Leave a comment
Share
  • Pin it
  • Share
  • Tweet
  • Share
  • Email

Braised Short Ribs

12 / 1 / 1512 / 1 / 15

short ribs-debskitchen


Easy Braised Short Ribs

Save
Print

Braising a tough cut of meat over a long period of time makes the meat deep, rich and delicious. With a small amount of preparation and a long cooking time these are easy to make and warms you up on those cold winter days. Make extra! You’ll want them for leftovers, you can make a ragu out of them, a pot pie or even a Shepherds pie for quick weeknight dinners. You’ll get more flavor out of the short ribs if they are on the bone, they will fall right off the bone after their long slow cooking so they’ll be easy to remove.

Serves 4

  • Olive oil
  • 1/3 cup flour (or more as needed)
  • 2 teaspoons sea salt
  • 1 teaspoon ground pepper
  • 4 pounds short ribs on the bone
  • 1 brown onion, chopped
  • 1 medium carrot, roughly chopped
  • 2 stalks celery, roughly chopped
  • 1 tablespoon tomato paste (double concentrate from a tube-found in the ‘Italian’ section
  • 2 tablespoons flour
  • ¼ cup dry red wine
  • 1 qt. beef stock, may use chicken stock
  • 1 bouquet garni (1 bay leaf, 1 sprig thyme, 2 sprigs Italian parsley tied together in cheesecloth

Heat oven to 350°.

Mix flour, salt and pepper together in a shallow bowl or on a plate.

Heat a large Dutch oven over medium high heat; add enough oil to coat the bottom of the pan.

Dry short ribs well and dredge in the flour mixture, shake off the excess and place the meaty side into the hot oil. Do not crowd the meat in the pan or it will not brown properly. This is the most important step in braising so take your time. Remove the ribs, set aside and continue until all ribs are browned.

In the same pan, add more oil as necessary, add onions, carrots, celery to the pan and sauté until lightly browned.

Add tomato paste and stir to coat all the vegetables and cook the paste a little, about 2 minutes.

Add flour and stirring constantly cook for another 5 minutes without burning. The flour may turn a little dark but that’s fine.

Add the dry red wine to the pan and scrape the bits that have stuck to the bottom of the pan. Let reduce and thicken slightly. Remove from the heat.

Return the ribs to the pan, cover with stock and add the bouquet garni. Put the lid on the Dutch oven and bake for 3 hours. Remove bouquet garni.

Juices may be thickened into gravy with a beurre maníe, roux or cornstarch slurry.

Beurre Manie, Roux, Cornstarch Slurry

Save
Print

Beurre Manie

Mix together equal parts softened butter and flour until it looks like thick butter and all the flour is incorporated.

Roux

Melt 2 Tb. butter in a pan, add 2 Tb. flour, whisk together and cook until lightly browned

Cornstarch Slurry

2 parts cold water mixed with 1 part cornstarch

Whisk any of these into your hot liquid, stirring until thickened. Don't over-cook the cornstarch slurry or it will start to break down and become thin again.

Leave a comment
Share
  • Pin it
  • Share
  • Tweet
  • Share
  • Email

Minestrone Soup

12 / 6 / 142 / 4 / 15

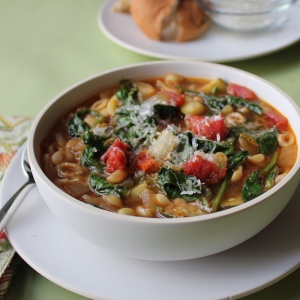
minestronesoup


Save
Print

This is my favorite cold weather soup, I love it with a little squeeze of lemon juice, it brightens up all the flavors in the soup. Served with a big chunk of homemade bread, it’s a meal all of it’s own. Make a big pot, the flavors get better the second day as it all marries together.

  • 2 tablespoons olive oil, approximately
  • 1/4 pound diced pancetta*
  • 1 medium onion, diced
  • 2 carrots, minced
  • 2 stalks celery, minced
  • 2 cloves garlic, minced
  • 1 tablespoon Italian parsley, minced
  • 1 can roma tomatoes, crushed, 15 oz.
  • 2 quarts chicken stock
  • 1 tablespoon Italian seasoning, crushed or ground, or as needed
  • 2 salt and pepper, to taste
  • 2 cups cooked mixed beans, red kidney, cannelini, black and borlotti
  • ¼ pound small pasta, cooked and cooled
  • 1 cup Swiss chard or spinach, chopped
  • 1 lemon, juiced, to taste
  • ½ cup pesto sauce or
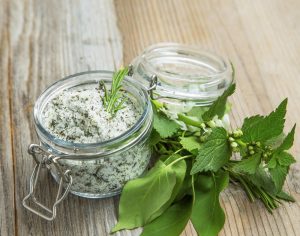
  • 2 tablespoons Chef Debbi's Romano Herb Seasoning Mix**
  • Parmigianno-Reggiano, for garnish

Serves 6

Heat a Dutch oven over medium high heat. Add 1 tablespoon of oil; when hot add pancetta and sauté until lightly browned. If needed, add another tablespoons of oil and onions, carrots, celery; sauté until the vegetables are translucent, approximately 3 - 4 minutes. Stir in garlic and parsley and then add the tomatoes and chicken stock. Season to taste with Italian seasoning, salt and pepper; bring to a boil, then turn heat down to a simmer. Cook for 20 minutes.

If using canned beans, rinse and drain them before adding to the soup. Add Swiss chard or spinach to the soup and cook until slightly wilted. Add pasta and lemon juice, stir to mix well, adjust the seasoning and ladle into bowls.

Swirl a little pesto on top or Debbi's Romano herb mix and garnish with Parmigianno-Reggiano.

*Omit for vegetarian version

**Romano Herb Seasoning Mix available www.debskitchen.com

Related Posts Plugin for WordPress, Blogger...
Leave a comment
Share
  • Pin it
  • Share
  • Tweet
  • Share
  • Email

Posts navigation

1 2 Next Page
Deb

Meet Chef Debbi

READ BIO

Join-Us Sign up for our newsletter to receive exclusive tips 'n tricks, and special offers on classes, tours, and more!

Recent Posts

  • New E-Book!
  • From the Pantry
  • Spaghettini at Home
  • Growing Corn
  • Spring IS Coming!

Categories

BookCUT

What's in Your Pantry?

How to stock your pantry to create delicious dishes.

Learn Chef Debbi's pantry essentials and how to substitute ingredients for pantry staples in her basic recipes for quick and easy meals.
BUY BOOK>

FacebookTwitterInstagramGooglepinterest


© 2014, DEB'S KITCHEN
Angie Makes Feminine WordPress Themes