Deb's Kitchen - Farm, Food, Wine & Lifestyle Adventures
  • Facebook
  • Google
  • Twitter
  • Instagram
  • Pinterest
  • Email
Menu
Skip to content
  • Home
  • Blog
  • Events
    • Classes
    • Tours & Adventures
  • Edible Gardening
  • Preserving
  • Recipes
    • Appetizers
    • Soups and Salads
    • Main Dishes
    • Side Dishes
    • Desserts
  • About
    • Whats In Your Pantry
    • Ask Debbi
    • Deb’s Kitchen Botanicals
    • Press
  • Contact

Tag Archives: Cheese

Fried Blue Cheese Stuffed Olives

1 / 21 / 16

Here’s a great ‘From The Pantry’ appetizer, serve up with any dip or all alone!


Fried Blue Cheese Stuffed Olives

Save
Print

Great out of the pantry appetizer….

  • 1/2 cup all-purpose flour
  • 2 large eggs, beaten
  • 3/4 cup dried bread crumbs
  • 40 Blue Cheese Stuffed Olives
  • Vegetable oil, for deep frying
  • Lemon wedges, for serving

Fill three bowls, from left to right, with the flour, eggs, and bread crumbs. Stuff the olives with your choice of fillings.

Spear and olive with a toothpick (optional- you can use your hands if you like) and coat it in the flour evenly, shaking off the excess, into the egg, and then roll it in the bread crumbs. Use a fork to pop it off the toothpick onto a plate. Repeat until all of the olives are crumbed.

Heat 1 1/2 inches of oil in a medium saucepan until it reaches 350°F on a deep-fat thermometer or a candy thermometer. Place a few of the olives at a time in the bowl of a slotted metal spoon and lower them into the oil. Fry in batches until golden brown, less than 1 minute. Fish out the olives with a spoon and transfer them to paper towels. Spritz them with lemon while sizzling, if you like. Serve hot.

Leave a comment
Share
  • Pin it
  • Share
  • Tweet
  • Share
  • Email

January Cooking Class

1 / 7 / 16

Temecula Olive Oil Tasting Rooms

Cooking Class

-Beet and Tangerine Salad edited

Seal Beach, Main St.

Jan 14th, Thursday

6:30-8:30p.m., approximately

SOLD OUT!

2nd CLASS ADDED

WE’VE ADDED THUR., JAN 28TH

IN SEAL BEACH

CALL FOR RESERVATIONS TODAY!

DKB-12

Temecula, Old Town

Jan 16th, Saturday

12-2 p.m., approximately

Menu for both venue’s

Blue Cheese Stuffed Fried Olives with Roasted Red Pepper Dip

Tangerine, Beet & Avocado Salad

Braised Chicken Breast with White Wine Crème Fraîche Sauce
on a bed of Blanched Spinach with Bacon

Tomato Stuffed Raviolis

Meyer Lemon Cupcakes

 
10 – 20% off on all purchases the night of the class

For Seal Beach Reservations Call:
562-296-5421

For Temecula Reservations please call:
951-693-0607

Sponsored by

Leave a comment
Share
  • Pin it
  • Share
  • Tweet
  • Share
  • Email

Book Signing & Wine Tasting

11 / 17 / 1511 / 17 / 15

Saturday & Sunday, Nov. 21 ~ 22 Events!

logo-2

DON’T MISS THIS WEEKEND
IN TEMECULA!

Mary Platis, Author of Cooking Techniques & Recipes with Olive Oil &
Chef Debbi, Author of ‘What’s In Your Pantry’
are teaming up to bring you
Cooking From The Pantry Series!

Book Covercover-award

First stop
Temecula Olive Oil Co.
Temecula tasting Room
Cooking Class Demo-Wine Tasting & Book Signing
Sat. Nov. 21st
12 – 2 $45.00

Menu
Mediterranean Vegetables in Olive Oil
Fresh Tomato Risotto
Baby Beets and Brussels sprouts Salad
Turkey Rollatini with White Wine, Porcini Mushroom Pan Sauce
Pumpkin Olive Oil Cake with Vanilla & Fig Balsamic Compote

For Temecula Reservations please call:
951-693-0607

Second stop

Sunday, Nov 22nd
Book Signing and Wine Tasting 12 ~ 2

Sponsored by

Leave a comment
Share
  • Pin it
  • Share
  • Tweet
  • Share
  • Email

Artisan Bread in 5 Minutes a Day

9 / 22 / 159 / 22 / 15

Bread, wtrmk


What’s better than fresh hot bread straight from the oven? (Well besides some delicious fresh butter on it!) What’s better is that this is a NO KNEAD recipe, couldn’t be easier. The dough will keep in your refrigerator for up to 2 weeks after mixing and there is nothing to do except pinch off a big piece, let it come to room temperature and bake it. The dough makes wonderful pizza, focaccia and flatbread as well. The authors, Jeff Hertzberg and Zoe Francois, use Gold Medal Flour for their bread but I am a die hard King Arthur Flour fan. Read about flour and how to measure and then decide for yourself which to use. I use this dough for bread, flatbread, pizza and rolls, check the Artisan Bread in 5 Minutes a Day for other recipes. This is a book you must have on your shelf. Buy it now from Amazon, click here.


I like baking my bread in a Le Crueset Dutch oven and I give directions for that procedure, the Artisan Bread website will guide you in other methods. If you like using a starter for your bread, the authors also give you instructions on how to incorporate that method into your bread making.

If you learn to weigh your flour you’ll have much better results in the end product. Actually weighing ingredients for recipes is really much easier and the recipe comes together much quicker and more efficient.

Watch the video made by King Arthur Flour on how to measure flour here, 
I’m posting my edited version of the bread but you can visit the authors website and read the original recipe with updates and tips. Go here for recipe


Leave a comment
Share
  • Pin it
  • Share
  • Tweet
  • Share
  • Email

Simple Cold Pasta Salad

8 / 18 / 15

On these dog days of summer, even here at the beach, this is one of my favorite go-to recipes. It’s quick and easy, you don’t have to turn on any heat, even to cook the pasta, and you can use bits and pieces of left overs from your refrigerator pantry.

Some of my typical summer refrigerator pantry items are, cheese, olives, tomatoes (home grown, of course), cucumbers, peppers and the like. Most often there will be some lemon chicken left over as well. All are perfect additions to this salad. First the pasta, no need to boil a big pot of water, we’ll use the microwave!

Summer Pasta Salad

Pour your dry pasta, something curly is best to hold all the wonderful dressing in it’s little nooks, into a microwave safe bowl. Cover with cool water by 1″, make sure the container is big enough that the water and pasta won’t boil over. You’ll want to cook your pasta for about 5 minutes longer than the directions guide you on the box. Test the pasta for doneness and cook a little longer if necessary. Drain well and rinse quickly with cool water. Do not add dressing to the warm pasta as it will just soak it all up and be mushy. Stir the pasta occasionally as it cools to keep it from sticking together. You could cook the pasta ahead of time and chill it before you  make the salad. If this is the case, toss the cooled pasta with a little olive oil before refrigerating. Now you’re ready to proceed with the salad.

In actuality, from this point on you could chop and dice almost anything you find in you refrigerator but here’s my stand by recipe.

Summer Pasta Salad

Save
Print
  • 1/4 cup red wine vinegar
  • 1 teaspoon Dijon mustard
  • 1/2 cup olive oil, approximately
  • Salt and pepper
  • 1 teaspoon garlic powder
  • 2 teaspoon fresh basil, torn
  • 1/2 cup diced cucumber
  • 1 pint cherry tomatoes, halved or quartered
  • 1/2 cup diced red bell pepper
  • 1/3 cup thinly sliced green onions
  • 1/4 cup sliced black olives
  • 1/2 cup crumbled or diced cheese, mozzarella, chedderella, goat cheese or any you prefer
  • 1 ½ cup cooked pasta

For dressing, mix together vinegar, Dijon, salt, pepper, and garlic powder and whisk until it comes together. While continually whisking slowly add olive oil to taste. Set aside.

Mix together remaining ingredients and toss with dressing. Serve cold.

Leave a comment
Share
  • Pin it
  • Share
  • Tweet
  • Share
  • Email

So. Coast Plaza Garden Show Recipes

4 / 25 / 154 / 29 / 15

Windrose Farms Oct 2014-Herb & Cheese Tart w.


Spring Herb Tart

Save
Print
  • 1 recipe pate Brisée recipe, with
  • 1 Tb. chopped fresh thyme, add thyme to flour and stir well
  • ½ pound fontina cheese, grated (or more-to your taste)
  • 1/2 pound fresh asparagus, trimmed and cut into ¼” pieces
  • 1 tablespoon Parmigiano-Reggiano
  • Salt and pepper, to taste

Preheat the oven to 400°. Pre-bake the shell according to directions in Pate Brisée recipe. Let cool to room temperature or cool overnight. Sprinkle with the cooled crust with fontina cheese. Arrange the asparagus pieces around the bottom of the shell, season with salt and pepper; sprinkle with Parmigiano-Reggiano. Bake until the cheese is melted, about 15 minutes. Garnish with fresh herb sprigs. Serve room temperature or slightly warmed. Can be served along with a light salad tossed with vinaigrette dressing.

Serves 6

If you wanted to turn this into a quiche mix together 4 eggs & one cup of cream, half and half or milk. Pour it over the cheese and asparagus and bake approximately 40 minutes. You may have to cover the edge of the crust with foil to prevent it from burning.

Adapted from 'What's In Your Pantry' by Debbi Dubbs

Pate Brisée (Pie Crust)

Save
Print

From ‘What’s In Your Pantry’

www.debskitchen.com
[email protected]

  • Pâte Brisée (Pie Dough)
  • 2 ½ cups flour, (10 ¾ oz.)
  • 1 teaspoon salt
  • 2 sticks butter, cut into pieces
  • 3-5 tablespoons ice water
  • 1 tablespoon sugar (for Pâte Sucrée, sweet pie dough)

Add flour and salt (sugar also if making Pâte Sucrée) into the bowl of a food processor; pulse a few times to incorporate all the ingredients.

Add the butter and process until the mixture is crumbly and the butter is pea size.

Place the mixture into a wide bowl and add water 1 tablespoon at a time until the mixture comes together. Don’t overwork the dough or it will be tough, not flaky. Once the dough comes together in a ball, divide it into two pieces, flatten into disks, wrap in plastic wrap and refrigerate for 30 minutes.

Dough can be wrapped well at this point and frozen for up to three months. Let the dough defrost overnight in the refrigerator before using.

Roll one chilled disk out on a floured counter or rolling mat, lifting and moving the dough every few rolls to help prevent sticking. Add only enough flour to the counter to keep the dough from sticking.

Place your pan on top of the dough to make sure it is the correct size, it should be slightly larger than the pan, then roll the dough onto your rolling pin and unroll over your pan. Gently lift and lay the dough to fit the pan, never pull the dough to stretch it. Lightly press the dough into the pan, roll your rolling pin over the top edge of the tart or pie pan and remove excess pastry.

Cover and refrigerate for 30 minutes. Preheat your oven to 400°.

To blind bake:

Blind baking is baking the dough without filling.

Prick the bottom and sides of the dough; cut a piece of foil large enough to cover the bottom and sides of the dough, butter the dull side and lay the buttered side on the bottom of the dough and press into the sides. Line with pie weights or dried beans and bake in the center of the oven for 20-25 minutes or until lightly browned. Remove the weights and foil and let cool before filling

Makes 2 - 10” crusts

Berry Salad with Pomegranate Vinaigrette

Save
Print
  • ½ shallot, minced
  • 2 teaspoon Dijon mustard
  • ½ cup Pomegranate vinegar, another light vinegar could be used as well
  • ¾ cup extra virgin olive oil, approximately
  • 6 cups baby greens, washed and dried well
  • 2 small Persian cucumbers, sliced
  • 2 cups croutons
  • 1 container each of strawberries, blueberries and raspberries (strawberries sliced)
  • 2 avocados, diced, optional

In a small bowl mix together the shallot, Dijon mustard and vinegar. Add a pinch of sea salt and a little grind of pepper. While whisking slowly pour the oil in until the dressing starts to thicken a little and emulsify. Stop and taste the dressing before adding the remaining oil. You may not need all of the oil depending on the flavor of the vinegar. Add more as necessary.

In a large salad bowl toss together the lettuce, cucumbers and croutons with a little of the dressing. Just until the greens have a shimmer of dressing on them. Season with sea salt and pepper, toss again, taste and adjust dressing and seasonings. Add berries and avocados and drizzle with a little of the dressing.

Serves 6

Leave a comment
Share
  • Pin it
  • Share
  • Tweet
  • Share
  • Email

Easter Potatoes

3 / 31 / 154 / 1 / 15

potato gratin-molly stevens

Potato Gratin

Save
Print

This rich, creamy gratin gets a note of smokiness from the bacon between the layers of tender potatoes.
by Molly Stevens from Fine Cooking

  • 2-1/2 lb. Yukon Gold potatoes, peeled & sliced into 1/8-inch thick rounds
  • 2-1/2 cups heavy or light cream
  • Sea salt & fresh ground pepper, to taste
  • 4 oz. bacon
  • 3 medium leeks, white and light-green parts only, thinly sliced
  • 6 oz. grated Gruyère
  • 2 to 3 tsp. chopped fresh thyme
  • 1/4 tsp. freshly grated nutmeg
  • 1/2 cup fresh breadcrumbs
  • 1/4 cup finely grated Parmigiano-Reggiano
  • 2 tablespoons unsalted butter, melted

Serves 8

Position a rack in the center of the oven and heat the oven to 400°F. Butter or oil a 3-quart gratin dish; set aside.

Put the potatoes, cream , 1/2 tsp. salt, and a few grinds of pepper in a 12-inch skillet. Simmer, partially covered, over medium to medium-low heat, stirring occasionally and gently with a rubber spatula until the potatoes are barely tender when pierced with a fork or skewer, 8 to 12 minutes.

In a medium skillet, cook the bacon until browned and fully cooked. Set aside to cool, reserving 2 tablespoons of the fat in the skillet. Heat the reserved fat over medium-high heat and sauté leeks until tender, fragrant, and lightly browned. Season to taste with salt and pepper. When the bacon is cool, crumble it into small pieces.

Using a slotted spoon, transfer half the potatoes to the prepared gratin dish, spreading them evenly. Layer on the leeks, bacon, Gruyère, thyme, and nutmeg. Top with the remaining potatoes spreading them evenly, and pour over any liquid remaining in the pan.

In a small bowl, combine the breadcrumbs, Parmigiano-Reggiano, and melted butter.

Evenly scatter the topping mixture over the potatoes. Bake the gratin until it’s bubbly, the top is brown, and the potatoes are completely tender when poked with a fork or a skewer, 25 to 30 minutes. Let the gratin sit for at least 10 and up to 30 minutes before serving so the liquid is fully absorbed and the layers are cohesive.


Leave a comment
Share
  • Pin it
  • Share
  • Tweet
  • Share
  • Email

Mushroom and Gruyere Puff Pastries

12 / 14 / 14

Mushroom-Herb-and-Gruyere-Cheese-Mini-Turnovers6-690x400


Mushroom and Gruyere Puff Triangles

Save
Print

A wonderful easy appetizer to make ahead and freeze individually, pull out cook as many as you need.

  • 1 tablespoon olive oil
  • 1 tablespoon butter
  • 2 cups finely chopped Cremini mushrooms
  • 1 onion, chopped finely
  • 1 teaspoon dried Italian herbs, crushed
  • Sea salt & fresh ground pepper to taste
  • 2 tablespoon flour
  • ½ cup heavy cream
  • 3 tablespoons dry white wine
  • 1/3 cup shredded Gruyere cheese
  • 2 sheets of puff pastry, thawed (12x12 inches)
  • 1 egg + 1 tablespoon water, whisked together

Serves: 32

Preheat your oven to 400°.

Line 2 baking sheets with parchment paper. Set aside.

Heat a medium sauté pan over medium high heat, add butter and olive oil, and add the onion and sauté until translucent. Add the mushrooms, herbs, sea salt and pepper and cook until the mushrooms are lightly browned and no liquid remains in the pan.

Stir in the flour and cook for 1 minute, add the wine and cream.

Remove from the heat, and stir in the Gruyere cheese. Chill.

Place a rolling mat on your counter, or a large piece of parchment paper. Add a little flour and lightly roll out the puff pasty, cut into 16 pieces using a pizza cutter or knife.

You should keep the puff pastry as cold as possible, if it starts to stick or becomes doughy, return it to the refrigerator for about 10 min. Keep the second piece of puff pastry in the refrigerator while you work on the first one.

Scoop about 1 t tablespoon of the cold mushroom mixture into the center of the dough (do not overfill or they will leak). Fold the over in a triangle and, using a fork, press the edges together to seal them.

Place the mini turnovers onto your prepared baking sheet, at least 1 inch apart. Place in the refrigerator for 20 minutes and prepare the second batch. Refrigerate the second batch for 20 minutes for best results.

Brush the sealed edges and tops of the turnovers with the egg mixture.

Bake each tray for about 15 minutes, or until the tops are golden brown.

Adapted from Jo-Anna, A Pretty Life in the Suburbs, courtesy of Kendall Jackson

Leave a comment
Share
  • Pin it
  • Share
  • Tweet
  • Share
  • Email

Minestrone Soup

12 / 6 / 142 / 4 / 15

minestronesoup


Save
Print

This is my favorite cold weather soup, I love it with a little squeeze of lemon juice, it brightens up all the flavors in the soup. Served with a big chunk of homemade bread, it’s a meal all of it’s own. Make a big pot, the flavors get better the second day as it all marries together.

  • 2 tablespoons olive oil, approximately
  • 1/4 pound diced pancetta*
  • 1 medium onion, diced
  • 2 carrots, minced
  • 2 stalks celery, minced
  • 2 cloves garlic, minced
  • 1 tablespoon Italian parsley, minced
  • 1 can roma tomatoes, crushed, 15 oz.
  • 2 quarts chicken stock
  • 1 tablespoon Italian seasoning, crushed or ground, or as needed
  • 2 salt and pepper, to taste
  • 2 cups cooked mixed beans, red kidney, cannelini, black and borlotti
  • ¼ pound small pasta, cooked and cooled
  • 1 cup Swiss chard or spinach, chopped
  • 1 lemon, juiced, to taste
  • ½ cup pesto sauce or
  • 2 tablespoons Chef Debbi's Romano Herb Seasoning Mix**
  • Parmigianno-Reggiano, for garnish

Serves 6

Heat a Dutch oven over medium high heat. Add 1 tablespoon of oil; when hot add pancetta and sauté until lightly browned. If needed, add another tablespoons of oil and onions, carrots, celery; sauté until the vegetables are translucent, approximately 3 - 4 minutes. Stir in garlic and parsley and then add the tomatoes and chicken stock. Season to taste with Italian seasoning, salt and pepper; bring to a boil, then turn heat down to a simmer. Cook for 20 minutes.

If using canned beans, rinse and drain them before adding to the soup. Add Swiss chard or spinach to the soup and cook until slightly wilted. Add pasta and lemon juice, stir to mix well, adjust the seasoning and ladle into bowls.

Swirl a little pesto on top or Debbi's Romano herb mix and garnish with Parmigianno-Reggiano.

*Omit for vegetarian version

**Romano Herb Seasoning Mix available www.debskitchen.com

Leave a comment
Share
  • Pin it
  • Share
  • Tweet
  • Share
  • Email

Windrose Farm

8 / 28 / 1411 / 5 / 14

windrose-farm-valley copy

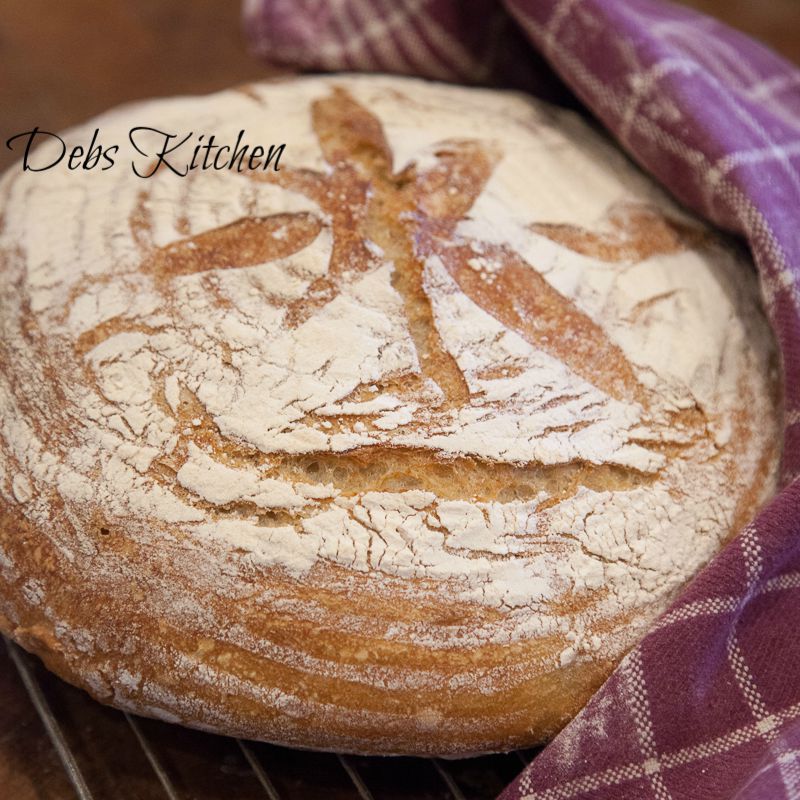
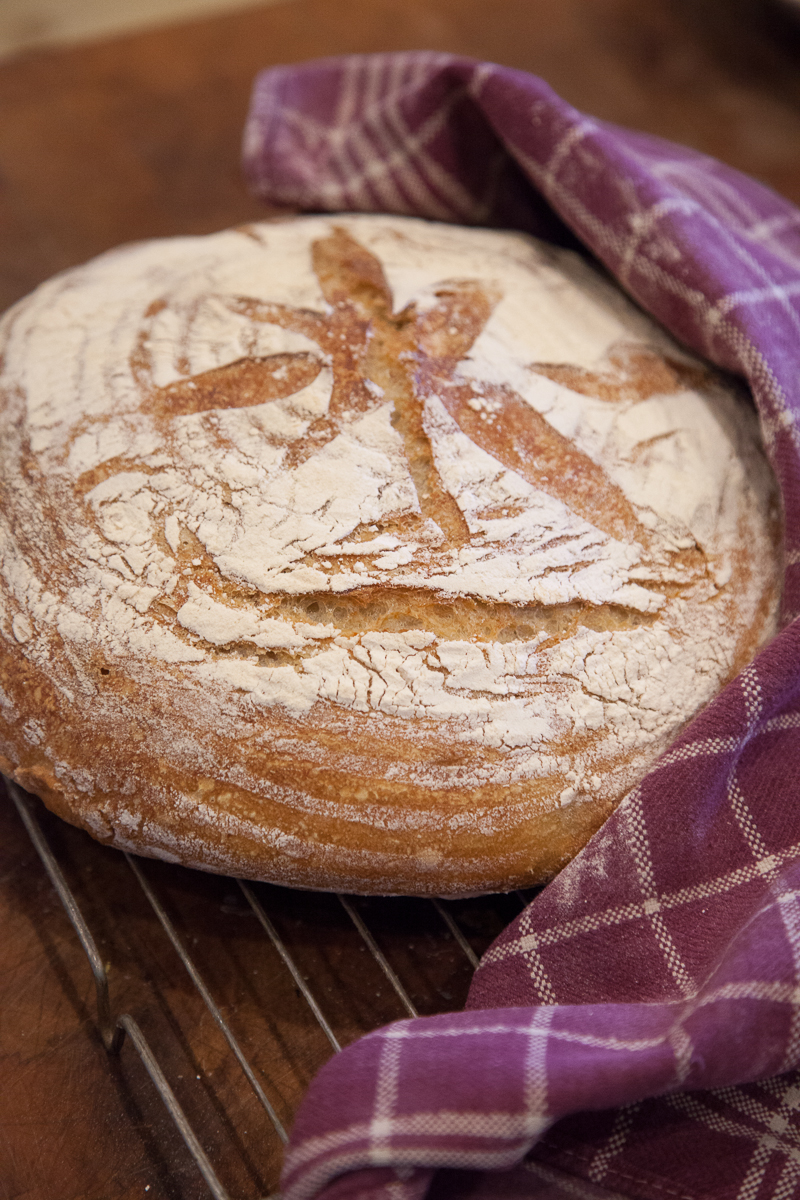
I met Barbara and Bill Spencer sometime around 2004 when I was scouting heirloom tomatoes from Paso Robles farmers market. Barbara invited me out to the farm and so my husband and I trekked out there one morning. We didn’t want to disrupt their farm work but yet they stopped working when we arrived and gave us a thorough tour of their lovely little farm. It is such a peaceful unique farm you just want to lie down in the grass and daydream watching the clouds pass by. But a farmers work is never done and we wanted to get out of their way so they could return to their chores. Absolutely not! They insisted we stay for lunch and Bill pulled a beautiful roasted mutton out of the refrigerator and a loaf of freshly baked bread, yes Bill makes his own bread! Barbara foraged for greens and veggies for a salad and whipped up a delicious little dressing. We ate and chatted about life and the farm for what seemed like all afternoon and with sadness had to depart and leave this magical place.

bill bread 2


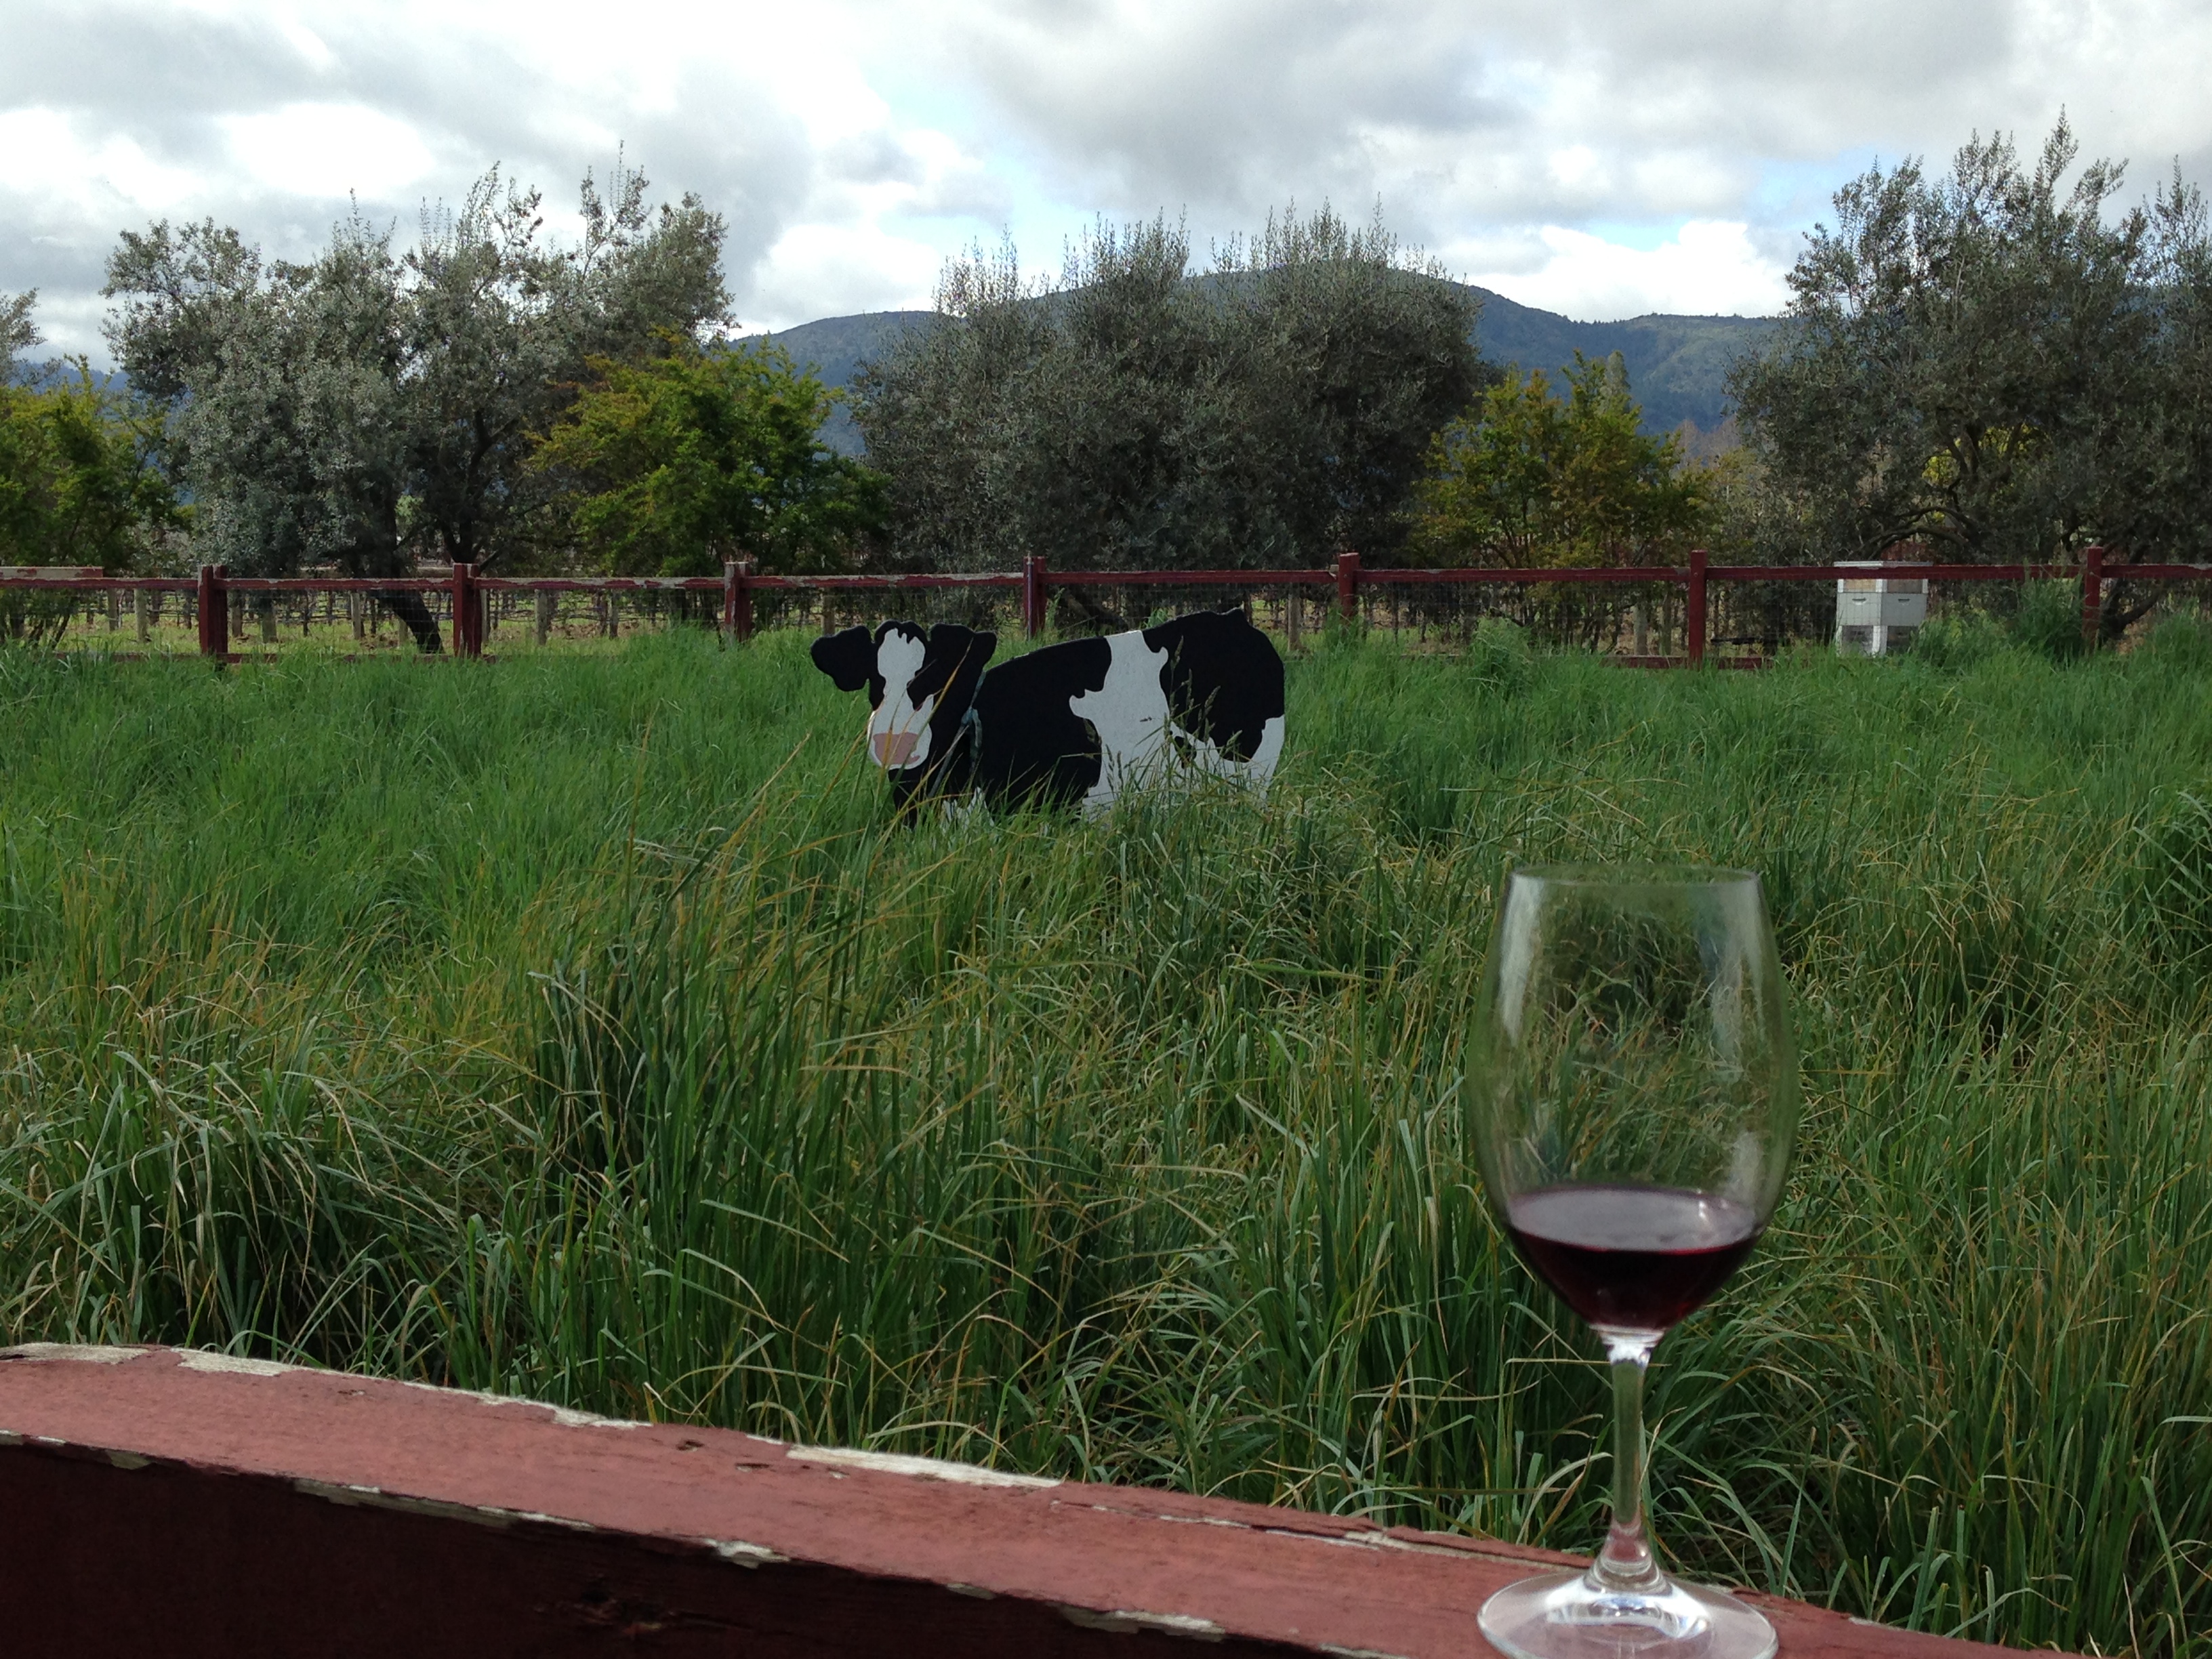
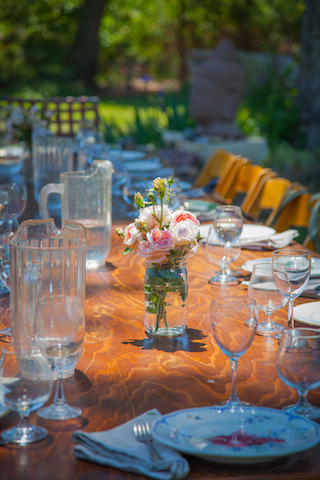
I host several tours to Cambria and Paso Robles and I always finish the tour on Sunday with a day at Windrose Farm with Bill and Barbara. No-one ever wants to leave! I wish all of you could join us for a weekend discovering food and wine and a central coast lifestyle but if you can’t, I’d like to share a piece of Windrose Farm with you. Following is an excerpt from their website and a glimpse inside the magic of Windrose Farm. Join us Oct 24th – Oct 26th for a trip that includes a visit to Windrose.
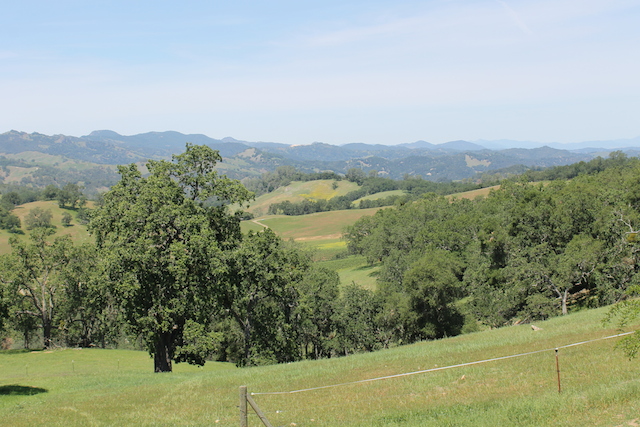
Windrose is a small family farm located east of Paso Robles and tucked into a unique valley of 50 acres, 12 are in vegetable rotations, 6 are in apples and stone fruit and 5 are sheep pasture. The rest is habitat – full of animal, bird and insect life.

Owners Bill and Barbara Spencer have been certified organic from August 1999 to 2009, but are currently transitioning to biodynamic! The farm has been “clean” for twenty years; since its purchase in 1990.

Cambria Tour-4848

In 1993 Windrose began going to the Farmer’s Markets with produce from their first small market garden. Having already discovered the enjoyment of growing many “specialty” varieties of vegetables – most particularly heirloom tomatoes and potatoes, they also found they loved selling to wonderful restaurants as well as to their friends at Farmer’s Markets.
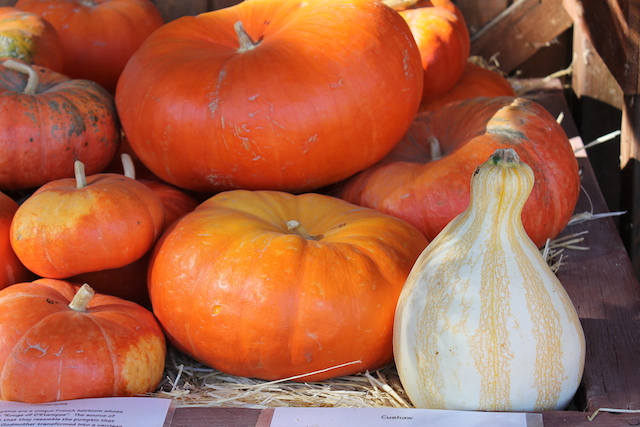
In addition to tomatoes and potatoes, Windrose grows onions, garlic, green and dry beans, peppers, eggplant, winter squash, carrots, turnips, beets, cucumbers, melons and many varieties of greens. They also have apples and stone fruit. Their little valley is a unique micro-climate that is good for the diverse crops of lilacs, apples, super-sweet onions and melons.
Bill & Barbara state that “The longer we farm, the more enthralled we are with the old traditional seeds and plants. We strive as much as possible to use open-pollinated or heirloom varieties and have begun our own seed-saving program. Every day brings us more knowledge and a stronger belief in the principals and practices of sustainable organic farming. It is complex and labor-intensive – but the burst of life in the soil and the habitat of our little valley is astonishing.”


Our Philosophy

Barbara and Bill have often sought to better explain their philosophy about the environment that is Windrose Farm.

In this years Biodynamic calendar we found the following by Patrick Holden, a soils expert, long time organic farmer and advocate of the ‘biodynamic‘ philosophy:

“We subscribe to Rudolph Steiner’s* philosophy that the farm should be seen as an ecosystem in its own right, and that our striving should be to move towards building and maintaining plant and animal communities, which are ecologically suited to its unique combination of soil, climate and place.”

Barbara and Bill cherish their time at the ecosystem that is Windrose and sharing the bounty that it produces.
* Rudolph Steiner founder and creator of the “Biodynamic philosophy and principles.

Visit Windrose Farm at www.windrosefarm.org 

 Join Chef Debbi and The Debettes for our

Fall Farm, Food and Wine Tour

of California’s Central Coast

for more info click here

Leave a comment
Share
  • Pin it
  • Share
  • Tweet
  • Share
  • Email

Fall Harvest Tour

7 / 2 / 1412 / 3 / 14

Frog's Leap fake cow
Fall Harvest Tour


Central Coast Fall Harvest Adventure

October 24th – 26th, 2014

Join Chef Debbi on another Farm, Food and Wine Adventure

Stay at the lovely Cambria Pines Lodge
Join Chef Debbi & her Debettes for a dinner party/wine tasting Friday evening

Saturday
Be escorted by The Wine Wrangler experts around Paso Robles to visit:
Pasolivo Olive Ranch for a tasting of local olive oils & more
Rangeland Ranch and Winery
Take a hay ride around the sustainable ranch and vineyards with owner Laird Foshay
Wine Tasting and Vineyard lunch with Lisa & Laird on the patio with a panaromic view of the hills

rangeland valley 2
Wine tasting on Vineyard Dr. as we make our way back to Jack Creek Pumpkin Farm where you can pick up holiday pumpkins, gourds and more

Sat. evening explore local cuisine on your own and rest up for Sun!


Jack Creek Pumpkins copy

Sunday we’ll caravan to Windrose Farm for a biodynamic tour of Bill & Barbara Spencers mystical farm
Chef Debbi, Barbara & Debettes will create a farm feast for you with what we’ve found on the farm that day
In season usually we can find luscious heirloom tomatoes, shishito peppers, potatoes, all kinds of greens and it’s apple season!

Don’t miss this limited seating tour. Drive yourself up the coast and meet Chef Debbi & her crew for a Farm, Food and Wine Adventure!

Cambria Tour-4848

Oct 24-26th
$675.00, per person, double occupancy
I also have a special suite for a party of 5-6 ppl, call for a special rate
All rooms have fireplaces, hot buffet breakfast is included

SAVE!!!
$650.00 total fee if paid in full by Sept 1. Payment plan available, contact Chef Debbi @ info@debskitchen for billing

There will be a 2.9% fee added (listed as a ‘tax’) but it is a credit card fee that goes to Paypal


Fall 2014 Tour


Leave a comment
Share
  • Pin it
  • Share
  • Tweet
  • Share
  • Email

Ojai Pixie Tangerines

3 / 4 / 1412 / 4 / 14

tangerines

There is nothing as sweet and juicy as an Ojai Pixie Tangerine! Unfortunately they are in season for such a short time, you’ll find them available only until the end of April, if you’re lucky!
Sometimes Pixie tangerines can be difficult to find but you can order direct from Melissa’s Produce website (click here).

Here is a great winter salad featuring the best of the Ojai Pixie’s, enjoy during this short season.

Blue Cheese Tangerine-Apple Walnut Salad with
Dried Cranberries

Serves 4
¼ cup pomegranate vinegar
1 teaspoon Dijon mustard
3 tablespoons extra-virgin olive oil
Sea salt and pepper, to taste

1 bunch baby spinach leaves
1 apple, peeled, cored and diced into large chunks
2 tablespoons dried cranberries
2 tablespoons toasted walnuts
3 tangerines — peeled and sectioned

For the dressing:
In a small bowl, whisk together the vinegar, mustard and olive oil; season with salt and pepper to taste.

Lightly toss the spinach with enough dressing to coat leaves; place onto individual plates or a platter. Garnish with apples, cranberries, nuts and tangerine sections. Serve extra dressing on the side.


Related Posts Plugin for WordPress, Blogger...
Leave a comment
Share
  • Pin it
  • Share
  • Tweet
  • Share
  • Email

Posts navigation

Previous Page 1 2 3 4 5 Next Page
Deb

Meet Chef Debbi

READ BIO

Join-Us Sign up for our newsletter to receive exclusive tips 'n tricks, and special offers on classes, tours, and more!

Recent Posts

  • New E-Book!
  • From the Pantry
  • Spaghettini at Home
  • Growing Corn
  • Spring IS Coming!

Categories

BookCUT

What's in Your Pantry?

How to stock your pantry to create delicious dishes.

Learn Chef Debbi's pantry essentials and how to substitute ingredients for pantry staples in her basic recipes for quick and easy meals.
BUY BOOK>

FacebookTwitterInstagramGooglepinterest


© 2014, DEB'S KITCHEN
Angie Makes Feminine WordPress Themes