Deb's Kitchen - Farm, Food, Wine & Lifestyle Adventures
  • Facebook
  • Google
  • Twitter
  • Instagram
  • Pinterest
  • Email
Menu
Skip to content
  • Home
  • Blog
  • Events
    • Classes
    • Tours & Adventures
  • Edible Gardening
  • Preserving
  • Recipes
    • Appetizers
    • Soups and Salads
    • Main Dishes
    • Side Dishes
    • Desserts
  • About
    • Whats In Your Pantry
    • Ask Debbi
    • Deb’s Kitchen Botanicals
    • Press
  • Contact

Tag Archives: Foodies

The Chef, The Photographer and The Adventure

5 / 26 / 155 / 27 / 15

tastyfstops-April-watermarked


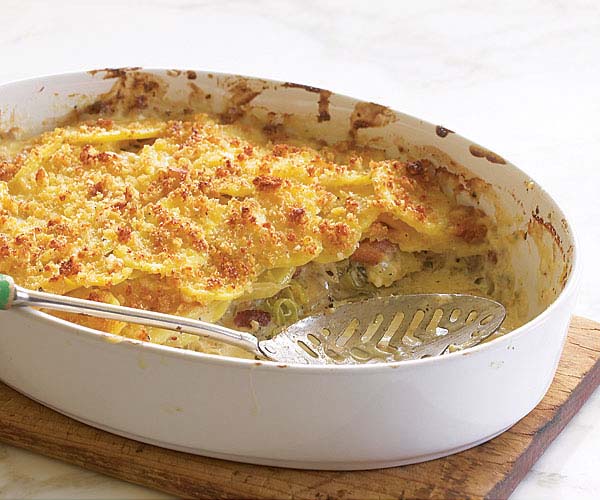
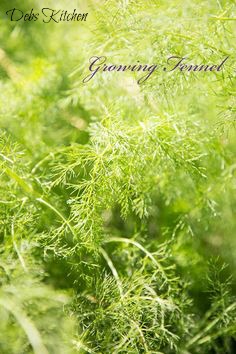
Meet my friend, Christina Peters, photographer, and experience adventure through her eyes and lens. Christina’s new website, tastyfstops.com, chronicles her adventures through food, farms, travel and more. She began her new adventure in my spring garden and through her lens and my recipes we’ll bring you through one (or more) harvests of my potager (vegetable) garden. Sign up for Christina’s newsletter and follow us through spring and summer into fall and winter. Enjoy.


Christina-blackberries-watermarked
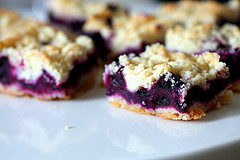
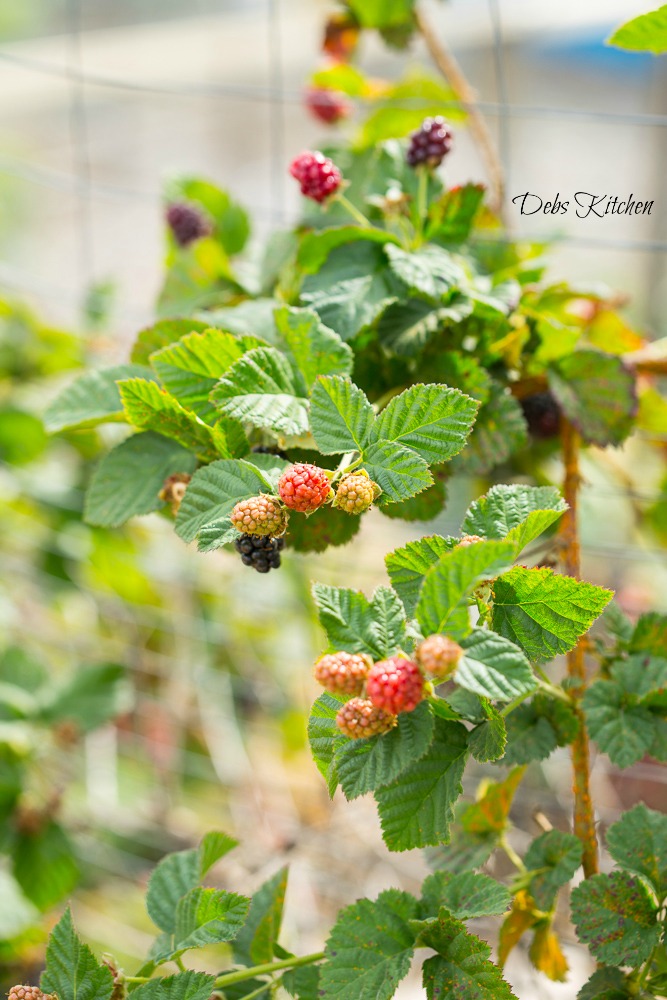
It’s berry season in the garden and my blackberries and boysenberries are off to an early start. This is one of Christina’s beautiful, succulent shots and here’s a tasty little recipe to get your summer started right! Blackberry Crumb Bars

And speaking of summer, check out the new cooking classes for June, we still have a few seats for this Thursday also. Two summery classes in June, A Summer Picnic Party and an Adult 4th of July menu. We’ll be hosting one more class in July (on the 9th) then I am off for another knee surgery and won’t see you back until the end of summer! So grab a spot while you can.

Mangia!

Debbi


Leave a comment
Share
  • Pin it
  • Share
  • Tweet
  • Share
  • Email

Blackberry Crumb Bars

5 / 26 / 155 / 26 / 15

blackberry crumb bar-smitten kitchen

Blackberry Crumb Bar

Save
Print
  • 6 tablespoons unsalted butter melted, and
  • 1/2 cup (1 stick), room temperature, plus more for pan
  • 1 3/4 cups all-purpose flour (spooned and leveled), plus more for pan
  • 1/2 cup packed light-brown sugar
  • 1/2 teaspoon salt
  • 1/2 teaspoon baking powder
  • 1 cup confectioners' sugar
  • 1/2 teaspoon Grand Marnier or pure vanilla extract
  • 2 large eggs
  • 10 ounces blackberries

Preheat oven to 350°. Butter an 8-inch square-baking pan. Line bottom with parchment paper, leaving an overhang on two sides; butter and flour paper, tapping out excess.

Make topping:

In a medium bowl, whisk together melted butter, brown sugar, and 1/4 teaspoon salt; add 1 cup flour, and mix with a fork until large moist crumbs form. Refrigerate topping until ready to use.

In a medium bowl, whisk together remaining 3/4 cup flour, baking powder, and remaining 1/4 teaspoon salt; set aside.

In a large bowl, using an electric mixer, beat room-temperature butter, confectioners' sugar, and vanilla until light and fluffy, add eggs, one at a time, beating well after each addition. Reduce speed to low; mix in flour mixture. Spread batter evenly in pan; sprinkle with blackberries, then chilled topping.

Bake until golden and a toothpick inserted in center comes out with moist crumbs attached, 40 to 45. Cool completely in pan. Using paper overhang, lift cake onto a work surface and cut into 16 squares.

Adapted lightly from Martha Stewart

Photo: Smitten Kitchen

Leave a comment
Share
  • Pin it
  • Share
  • Tweet
  • Share
  • Email

French Yogurt Cake

5 / 9 / 155 / 9 / 15

French Yogurt Cakes

French Yogurt Cake

Save
Print
  • 1 1/2 cup all-purpose flour
  • 2 teaspoons baking powder
  • Pinch of salt
  • 1 cup sugar
  • 1 lemon, grated and zest
  • 1/2 cup plain yogurt
  • 3 eggs
  • 1/4 teaspoon pure vanilla extract
  • 1/2 cup citrus olive oil

Center a rack in the oven and preheat the oven to 350°. Generously butter an 8 1/2-x-41/2-inch loaf pan and place the pan on a baking sheet. A cake pan, Bundt cake pan or any other pan may be used; you made need to adjust the cooking time.

Whisk together the flour, baking powder and salt.

Put the sugar and zest in a medium bowl and, with your fingertips, rub the zest into the sugar until the sugar is moist and aromatic.

Add the yogurt, eggs and vanilla and whisking vigorously until the mixture is very well blended.

Still whisking, add the dry ingredients, then switch to a large rubber spatula and fold in the oil. You’ll have a thick, smooth batter with a slight sheen. Scrape the batter into the pan and smooth the top.

Bake for 50 to 55 minutes, or until the cake begins to come away from the sides of the pan; it should be golden brown and a thin knife inserted into the center will come out clean. Transfer the pan to a rack and cool for 5 minutes, then run a blunt knife between the cake and the sides of the pan. Unmold, and cool to room temperature right side up on the rack.

Glaze (optional)

½ cup lemon marmalade mixed with 1 teaspoon water

To Make the Glaze:

Put the marmalade in a small saucepan or in a microwave-safe bowl, stir in the teaspoon of the water and heat until the jelly is hot and liquefied. Using a pastry brush, gently brush the cake with the glaze.

Adapted from Dorie Greenspan

Leave a comment
Share
  • Pin it
  • Share
  • Tweet
  • Share
  • Email

Lemon & Lavender Butter Cookies

5 / 5 / 155 / 8 / 15

Lemon & Lavender Butter Cookies

Save
Print

3 dozen cookies

  • 1 teaspoon dried lavender buds
  • 1 ½ cups all purpose flour
  • 1 tablespoon lemon zest
  • ¼ teaspoon salt
  • ¾ cup butter, softened
  • 1 cup powdered sugar

Preheat oven to 350°.

Line 2 baking sheets with parchment or baking liners.

Grind lavender buds in a clean coffee grinder or mortar and pestle. Set aside.

In a medium bowl, combine flour, ground lavender buds, lemon zest, and salt.

In a large mixing bowl beat the butter with an electric mixer on medium to high speed for 30 seconds. Add powdered sugar. Beat until combined. Beat in as much of the flour mixture as you can with the mixer. Stir in any remaining flour mixture.

On a lightly floured surface, roll dough into a 10-inch-long log. Wrap log in plastic wrap or waxed paper. Chill for 2 to 24 hours or until firm.

On a lightly floured surface, cut roll into 1/4-inch slices. Place slices 2 inches apart on prepared sheet pan.

Bake about 10 minutes or until edges are lightly browned. Transfer cookies to a wire rack and let cool.

Adapted from Better Homes & Gardens

Leave a comment
Share
  • Pin it
  • Share
  • Tweet
  • Share
  • Email

So. Coast Plaza Garden Show Recipes

4 / 25 / 154 / 29 / 15

Windrose Farms Oct 2014-Herb & Cheese Tart w.


Spring Herb Tart

Save
Print
  • 1 recipe pate Brisée recipe, with
  • 1 Tb. chopped fresh thyme, add thyme to flour and stir well
  • ½ pound fontina cheese, grated (or more-to your taste)
  • 1/2 pound fresh asparagus, trimmed and cut into ¼” pieces
  • 1 tablespoon Parmigiano-Reggiano
  • Salt and pepper, to taste

Preheat the oven to 400°. Pre-bake the shell according to directions in Pate Brisée recipe. Let cool to room temperature or cool overnight. Sprinkle with the cooled crust with fontina cheese. Arrange the asparagus pieces around the bottom of the shell, season with salt and pepper; sprinkle with Parmigiano-Reggiano. Bake until the cheese is melted, about 15 minutes. Garnish with fresh herb sprigs. Serve room temperature or slightly warmed. Can be served along with a light salad tossed with vinaigrette dressing.

Serves 6

If you wanted to turn this into a quiche mix together 4 eggs & one cup of cream, half and half or milk. Pour it over the cheese and asparagus and bake approximately 40 minutes. You may have to cover the edge of the crust with foil to prevent it from burning.

Adapted from 'What's In Your Pantry' by Debbi Dubbs

Pate Brisée (Pie Crust)

Save
Print

From ‘What’s In Your Pantry’

www.debskitchen.com
[email protected]

  • Pâte Brisée (Pie Dough)
  • 2 ½ cups flour, (10 ¾ oz.)
  • 1 teaspoon salt
  • 2 sticks butter, cut into pieces
  • 3-5 tablespoons ice water
  • 1 tablespoon sugar (for Pâte Sucrée, sweet pie dough)

Add flour and salt (sugar also if making Pâte Sucrée) into the bowl of a food processor; pulse a few times to incorporate all the ingredients.

Add the butter and process until the mixture is crumbly and the butter is pea size.

Place the mixture into a wide bowl and add water 1 tablespoon at a time until the mixture comes together. Don’t overwork the dough or it will be tough, not flaky. Once the dough comes together in a ball, divide it into two pieces, flatten into disks, wrap in plastic wrap and refrigerate for 30 minutes.

Dough can be wrapped well at this point and frozen for up to three months. Let the dough defrost overnight in the refrigerator before using.

Roll one chilled disk out on a floured counter or rolling mat, lifting and moving the dough every few rolls to help prevent sticking. Add only enough flour to the counter to keep the dough from sticking.

Place your pan on top of the dough to make sure it is the correct size, it should be slightly larger than the pan, then roll the dough onto your rolling pin and unroll over your pan. Gently lift and lay the dough to fit the pan, never pull the dough to stretch it. Lightly press the dough into the pan, roll your rolling pin over the top edge of the tart or pie pan and remove excess pastry.

Cover and refrigerate for 30 minutes. Preheat your oven to 400°.

To blind bake:

Blind baking is baking the dough without filling.

Prick the bottom and sides of the dough; cut a piece of foil large enough to cover the bottom and sides of the dough, butter the dull side and lay the buttered side on the bottom of the dough and press into the sides. Line with pie weights or dried beans and bake in the center of the oven for 20-25 minutes or until lightly browned. Remove the weights and foil and let cool before filling

Makes 2 - 10” crusts

Berry Salad with Pomegranate Vinaigrette

Save
Print
  • ½ shallot, minced
  • 2 teaspoon Dijon mustard
  • ½ cup Pomegranate vinegar, another light vinegar could be used as well
  • ¾ cup extra virgin olive oil, approximately
  • 6 cups baby greens, washed and dried well
  • 2 small Persian cucumbers, sliced
  • 2 cups croutons
  • 1 container each of strawberries, blueberries and raspberries (strawberries sliced)
  • 2 avocados, diced, optional

In a small bowl mix together the shallot, Dijon mustard and vinegar. Add a pinch of sea salt and a little grind of pepper. While whisking slowly pour the oil in until the dressing starts to thicken a little and emulsify. Stop and taste the dressing before adding the remaining oil. You may not need all of the oil depending on the flavor of the vinegar. Add more as necessary.

In a large salad bowl toss together the lettuce, cucumbers and croutons with a little of the dressing. Just until the greens have a shimmer of dressing on them. Season with sea salt and pepper, toss again, taste and adjust dressing and seasonings. Add berries and avocados and drizzle with a little of the dressing.

Serves 6

Leave a comment
Share
  • Pin it
  • Share
  • Tweet
  • Share
  • Email

Easter Potatoes

3 / 31 / 154 / 1 / 15

potato gratin-molly stevens

Potato Gratin

Save
Print

This rich, creamy gratin gets a note of smokiness from the bacon between the layers of tender potatoes.
by Molly Stevens from Fine Cooking

  • 2-1/2 lb. Yukon Gold potatoes, peeled & sliced into 1/8-inch thick rounds
  • 2-1/2 cups heavy or light cream
  • Sea salt & fresh ground pepper, to taste
  • 4 oz. bacon
  • 3 medium leeks, white and light-green parts only, thinly sliced
  • 6 oz. grated Gruyère
  • 2 to 3 tsp. chopped fresh thyme
  • 1/4 tsp. freshly grated nutmeg
  • 1/2 cup fresh breadcrumbs
  • 1/4 cup finely grated Parmigiano-Reggiano
  • 2 tablespoons unsalted butter, melted

Serves 8

Position a rack in the center of the oven and heat the oven to 400°F. Butter or oil a 3-quart gratin dish; set aside.

Put the potatoes, cream , 1/2 tsp. salt, and a few grinds of pepper in a 12-inch skillet. Simmer, partially covered, over medium to medium-low heat, stirring occasionally and gently with a rubber spatula until the potatoes are barely tender when pierced with a fork or skewer, 8 to 12 minutes.

In a medium skillet, cook the bacon until browned and fully cooked. Set aside to cool, reserving 2 tablespoons of the fat in the skillet. Heat the reserved fat over medium-high heat and sauté leeks until tender, fragrant, and lightly browned. Season to taste with salt and pepper. When the bacon is cool, crumble it into small pieces.

Using a slotted spoon, transfer half the potatoes to the prepared gratin dish, spreading them evenly. Layer on the leeks, bacon, Gruyère, thyme, and nutmeg. Top with the remaining potatoes spreading them evenly, and pour over any liquid remaining in the pan.

In a small bowl, combine the breadcrumbs, Parmigiano-Reggiano, and melted butter.

Evenly scatter the topping mixture over the potatoes. Bake the gratin until it’s bubbly, the top is brown, and the potatoes are completely tender when poked with a fork or a skewer, 25 to 30 minutes. Let the gratin sit for at least 10 and up to 30 minutes before serving so the liquid is fully absorbed and the layers are cohesive.


Leave a comment
Share
  • Pin it
  • Share
  • Tweet
  • Share
  • Email

Companion Planting

3 / 21 / 153 / 28 / 15

What is Companion Planting


Two or more plant types as to be beneficial to each other. Companion planting will help with pest control, higher yields, healthier soil and to keep weeds away.

Some flowers (marigolds, nasturtiums) can act as trap crops to attract insects away from vegetable crops. Aromatic herbs (basil, rosemary, lavender, sage) repel many insects away from more susceptible plants (tomatoes)

Umbel flowers, dill, fennel, parsley attract beneficial insects to the garden. The large flower heads provide a place where they beneficials can land and rest while they feed. Be sure to plant extra around the garden and let them go to seed. You may get some volunteers the next year (from all the seed flying around) but you can just dig those up and transplant them, free plants!

companion-plants-2Here are some classic combinations.

3 sisters, corn, beans, squash.  Plant corn and beans first, squash a couple of weeks later; beans feed nitrogen into the soil for both corn and squash, the squash leaves will protect the shallow roots of the corn and beans will grow up the corn stalks.

Basil and tomatoes are a classic example of companion planting. Plant carrots around the base of the tomatoes, they’ll be ready for harvest before the tomato plants go wild. No brassicas (cauliflower, broccoli, brussels sprouts) with tomatoes. No peppers or eggplant near or within the last year in the same spot. They are in the same family and can transfer soil born diseases.

Plant some of the umbel plants near tomatoes for help with hornworm which helps attract parasitic wasps and their larvae will feed on the hornworms.

Beans and potatoes.

While these grow together well don’t plant the beans near the corn as we talked about before. Another row of beans never hurt to have around so plant away from the squash and plant with potatoes. Potato doesn’t like squash, cucumbers or sunflowers.

Lettuce and radish

Both with tolerate less sun than 6 hrs. and the radish will be ready to harvest before lettuce starts getting big, neither one likes the heat.

Sunflowers & Pumpkins

A natural combination that get along well

Leave a comment
Share
  • Pin it
  • Share
  • Tweet
  • Share
  • Email

Artichoke Dip

3 / 5 / 153 / 28 / 15


artichokes Melissas

Walt's Wharf Artichoke Dip

Save
Print

Adapted slightly from Walt’s Wharf recipe.

  • 1/4 cup sesame oil
  • 1/4 cup olive oil
  • 3 tablespoons local honey
  • 2 tablespoons lemon juice
  • 2 teaspoons sea salt
  • 4 tablespoons Lea & Perrins Worcestershire Sauce
  • 1 cup mayo

Mix all ingredients together until well blended. Taste for seasoning and adjust as necessary for your taste. Refrigerate until ready to use.


Chef Debbi

Leave a comment
Share
  • Pin it
  • Share
  • Tweet
  • Share
  • Email

Why You Should Grow Your Own Organic Potatoes

2 / 17 / 15

The Potato: One of EWG’s Dirty Dozen

russet potatoes

By: Connie Rosemont (Only Organic)

The potato is a great food – calorie-dense and rich in nutrients like vitamin B6, vitamin C, potassium and manganese. It is America’s largest vegetable crop: the average American consumes 29 pounds of French fries a year and 142 pounds of potatoes overall.

Alas, the conventional potato tests positive for 35 different pesticides — more pesticides by weight than any other vegetable, according to EWG’s 2014 Dirty Dozen List. Some of these pesticides remain even after peeling and washing. Pesticides found on potatoes by the U.S. Department of Agriculture Pesticide Data Program include:

— Six known or probable carcinogens

— 12 suspected hormone disruptors

— Seven neurotoxins

— Six developmental or reproductive toxins

— Nine honeybee toxins

More potatoes aren’t organic because of production challenges, says Nate Lewis, Crop and Livestock specialist with the Organic Trade Association.

Farmers who raise conventional potatoes take a “kill-down” step just before harvest, spraying their potato fields with an herbicide that kills all the green leafy vegetation. With the leaves gone, the potato goes into a finishing-off process that thickens the skin, rendering it less susceptible to injury and blemishes.

After farmers harvest conventional potatoes, they warehouse them for up to nine months and ship them, as retailers and processing centers need them. Conventional producers apply post-harvest fungicides and sprouting inhibitors during storage to retard the spread of small blemishes and bad spots from one potato. Not surprisingly, these pesticides applied during storage show up most frequently on residue tests.

Organic standards enforced by the USDA bar organic farmers from using most field and storage pesticides. Organic farmers must work harder to store their potatoes for months without fungicides and sprout inhibitors. As a result, they face significantly larger hurdles than conventional producers in large-scale potato farming.

The hurdles of raising storage crops organically on a large scale might consign organic potatoes always to a small niche market. However, buying organic potatoes means that those farmers who decide to try organic potatoes will find a market for their efforts.


Leave a comment
Share
  • Pin it
  • Share
  • Tweet
  • Share
  • Email

Citrus Olive Oil Cake

1 / 6 / 151 / 6 / 15

citrus

Most fruits and vegetables have a season, a time when they are picked and rushed to the market to maintain flavor and nutrition but when one talks about citrus it can be very confusing. Citrus ‘season’ really runs all year long with different varieties ripening at different times. During the summer months we have delicious Valencia oranges and Star Ruby Grapefruit, but you’ll find most citrus in season from fall until late spring.

In the market right now you’ll find Navel, Cara Cara and Moro Oranges, delicious Meyer Lemons and my favorite produce guru, Robert Schueller of Melissa’s Produce, recommends the Cocktail Grapefruit, Key Limes and Kishu tangerines! And all of us tangerines freaks know that come March those Ojai Pixie Tangerines start coming our way! The best of the best……

IMG_1122

Other than eating juicy, sweet citrus out of hand or in a dish our friends at Temecula Olive Oil crush seasonal citrus fruit, Blood Oranges or Meyer Lemons, at the same time they press their olives. While the Blood Orange Olive Oil is available year round, Meyer Lemon Olive Oil is seasonal usually beginning in early spring. If you see it on their shelves don’t hesitate, this oil sells out every year! I’ve used both Blood Orange and Meyer Lemon Olive Oil in this cake and each one is distinct and fabulous.

For those of you who can’t conceive of using an olive oil in a cake I urge to try this recipe, not only is it easy, it’s delicious. I like serving it with a little chopped citrus on the side or a handful of fresh raspberries.

 Click here for the recipe

Leave a comment
Share
  • Pin it
  • Share
  • Tweet
  • Share
  • Email

Citrus Olive Oil Cake

12 / 28 / 1412 / 29 / 14

citrus


Citrus Olive Oil Cake

Save
Print

You can make this cake with any flavored or un-flavored olive oil that you like. Instead of poppy seeds try adding some dried cranberries or cherries. For serving dust with powdered sugar or make a citrus glaze with orange or lemon juice mixed with some powdered sugar and drizzle over the top of the cake, I like serving this with fresh raspberries on the side and a dollop of freshly whipped cream wouldn’t hurt either!
I’ve used cake pans, bundt cake pans and small Mason jars for this cake, just be aware of your baking time, test by inserting a clean toothpick into the center of the cake and it comes out dry.

  • 2 cups flour
  • 1 ¼ cups sugar
  • 1 teaspoon baking powder
  • 1 teaspoon baking soda
  • ¼ teaspoon salt
  • 3 large eggs, beaten
  • 1 ½ cups whole milk
  • ½ cup Orange olive oil, or any flavored olive oil
  • 1 orange, zested
  • 1 teaspoon vanilla
  • ½ cup sliced almonds
  • 1 tablespoon poppy seeds, optional

Preheat the oven to 350°.

Sift together the flour, sugar, salt, baking powder and baking soda Make a well in the center of the dry ingredients and whisk in the eggs, milk, olive oil, zest and vanilla. 


Add the almonds and poppyseeds to the batter, and mix with a spatula or wooden spoon. 


Pour the batter into a greased Bundt cake pan. Bake for 55 to 60 minutes, until the cake is golden on top. Cool the cake, invert on a plate and dust with confectioners sugar if you like.

If using Mason jars, spray the inside of the jar with oil spray and fill only 2/3 of the jar with batter. Place jar on a baking sheet and when all jars are done place the sheetpan into the oven and bake accordingly. Check the cakes at 30 minutes and then every 5 minutes until a toothpick comes out clean.

2 Comments
Share
  • Pin it
  • Share
  • Tweet
  • Share
  • Email

Mushroom and Gruyere Puff Pastries

12 / 14 / 14

Mushroom-Herb-and-Gruyere-Cheese-Mini-Turnovers6-690x400


Mushroom and Gruyere Puff Triangles

Save
Print

A wonderful easy appetizer to make ahead and freeze individually, pull out cook as many as you need.

  • 1 tablespoon olive oil
  • 1 tablespoon butter
  • 2 cups finely chopped Cremini mushrooms
  • 1 onion, chopped finely
  • 1 teaspoon dried Italian herbs, crushed
  • Sea salt & fresh ground pepper to taste
  • 2 tablespoon flour
  • ½ cup heavy cream
  • 3 tablespoons dry white wine
  • 1/3 cup shredded Gruyere cheese
  • 2 sheets of puff pastry, thawed (12x12 inches)
  • 1 egg + 1 tablespoon water, whisked together

Serves: 32

Preheat your oven to 400°.

Line 2 baking sheets with parchment paper. Set aside.

Heat a medium sauté pan over medium high heat, add butter and olive oil, and add the onion and sauté until translucent. Add the mushrooms, herbs, sea salt and pepper and cook until the mushrooms are lightly browned and no liquid remains in the pan.

Stir in the flour and cook for 1 minute, add the wine and cream.

Remove from the heat, and stir in the Gruyere cheese. Chill.

Place a rolling mat on your counter, or a large piece of parchment paper. Add a little flour and lightly roll out the puff pasty, cut into 16 pieces using a pizza cutter or knife.

You should keep the puff pastry as cold as possible, if it starts to stick or becomes doughy, return it to the refrigerator for about 10 min. Keep the second piece of puff pastry in the refrigerator while you work on the first one.

Scoop about 1 t tablespoon of the cold mushroom mixture into the center of the dough (do not overfill or they will leak). Fold the over in a triangle and, using a fork, press the edges together to seal them.

Place the mini turnovers onto your prepared baking sheet, at least 1 inch apart. Place in the refrigerator for 20 minutes and prepare the second batch. Refrigerate the second batch for 20 minutes for best results.

Brush the sealed edges and tops of the turnovers with the egg mixture.

Bake each tray for about 15 minutes, or until the tops are golden brown.

Adapted from Jo-Anna, A Pretty Life in the Suburbs, courtesy of Kendall Jackson

Related Posts Plugin for WordPress, Blogger...
Leave a comment
Share
  • Pin it
  • Share
  • Tweet
  • Share
  • Email

Posts navigation

Previous Page 1 2 … 12 13 14 15 16 Next Page
Deb

Meet Chef Debbi

READ BIO

Join-Us Sign up for our newsletter to receive exclusive tips 'n tricks, and special offers on classes, tours, and more!

Recent Posts

  • New E-Book!
  • From the Pantry
  • Spaghettini at Home
  • Growing Corn
  • Spring IS Coming!

Categories

BookCUT

What's in Your Pantry?

How to stock your pantry to create delicious dishes.

Learn Chef Debbi's pantry essentials and how to substitute ingredients for pantry staples in her basic recipes for quick and easy meals.
BUY BOOK>

FacebookTwitterInstagramGooglepinterest


© 2014, DEB'S KITCHEN
Angie Makes Feminine WordPress Themes