Deb's Kitchen - Farm, Food, Wine & Lifestyle Adventures
  • Facebook
  • Google
  • Twitter
  • Instagram
  • Pinterest
  • Email
Menu
Skip to content
  • Home
  • Blog
  • Events
    • Classes
    • Tours & Adventures
  • Edible Gardening
  • Preserving
  • Recipes
    • Appetizers
    • Soups and Salads
    • Main Dishes
    • Side Dishes
    • Desserts
  • About
    • Whats In Your Pantry
    • Ask Debbi
    • Deb’s Kitchen Botanicals
    • Press
  • Contact

Tag Archives: herbs

Thanksgiving Feast

11 / 20 / 2211 / 20 / 22

These are my family favorites for the Thanksgiving Holiday, these recipes will serve 6-8 people. Many of the recipes can be made ahead of time making it easier to pull together the entire meal on one day. Make ahead the stock, gravy (add pan drippings later), mashed potatoes, dressing (I don’t stuff my turkey any longer and because I don’t I can cook a large bird in about 2 hours), green beans and of course the apple pie! I hope you enjoy and have a safe and tasty holiday!

Debbi & The Debettes (Sue & Barbara)

Watch my YouTube videos with Christina Peters on making Turkey/Chicken Stock and how to make successful gravy! Click here to watch!

 

Both recipes can also be found in my book, ‘What’s In Your Pantry’ pages 43, 44 and in the video’s.

Order my book here, next day shipping!


Click here to order

Citrus Cranberry Sauce, Instant Pot

Save
Print
  • 2 (12-ounce) packages fresh cranberries
  • 1/2 cup sugar
  • 1/2 cup brown sugar
  • 1 medium orange, zester and juiced
  • 1 small cinnamon stick

Place cranberries, sugars, orange juice, orange zest, cinnamon and cloves into a 6-qt Instant Pot®. Stir until well combined.

Select manual setting; adjust pressure to high, and set time for 4 minutes. When finished cooking, naturally release pressure according to manufacturer’s directions, about 20-30 minutes.

Remove orange zest and cinnamon. Using a potato masher, mash cranberry mixture until desired consistency is reached.

Let cool completely.

My Best Dressing for Thanksgiving

Save
Print

Old fashioned stuffing recipe but I cook it as a ‘dressing’ rather than stuffing a turkey. For one reason it’s safer (temperature-wise) and the turkey cooks faster if it’s not stuffed. If you stuff a turkey the stuffing needs to reach 165° to kill any bacteria, but that means the turkey is well past 185°, overcooked and dry. The spice that makes this dressing the bomb is Penzy’s Poultry seasoning, penzys.com, it’s definitely my go to herb blend!

  • 1 loaf (1 pound) day-old crusty sourdough bread
  • 1 ½ sticks unsalted butter
  • 2 leeks, halved, thinly sliced, and rinsed well
  • 1 small shallot, finely minced
  • 4 celery stalks, diced (I like to use the celery hearts for this)
  • ¾ teaspoon sea salt
  • ½ teaspoon freshly ground black pepper
  • 1 ½ Tablespoons poultry seasoning
  • ¼ cup chopped parsley
  • 1½ chicken stock, maybe up to 2 cups
  • 2 eggs, lightly beaten

The day before you make the dressing tear the bread into 1-inch pieces and place on a baking sheet, set atop your stove for the bread to dry out slightly.

Preheat the oven to 350°F and grease a 9x13-inch baking dish.

Melt the butter in a large skillet over medium heat. Add the leeks, shallots, celery, salt, and pepper, and sauté until tender and translucent.

Place the bread into a large bowl and pour the vegetable mixture onto the bread cubes, add the poultry seasoning and parsley and toss lightly until coated. Add 1 cup of the chicken stock & toss again, the bread cubes should be fairly wet, if not add more stock and mix well until it is wet.

Before you add the eggs, taste the dressing, and adjust any seasoning. Then add the eggs and mix in well. *For a heartier dressing add Melissa's Steamed and Peeled Chestnuts (chop them into bite sized pieces and mix in). See link below.

Transfer to the prepared baking dish and bake, covered, for 30 minutes, uncover the dish and bake for 5 to 10 more minutes to crisp the top a bit.

Dried Herbs or ‘Poultry Seasoning’ from Penzy’s Spices

Melissa’s Steamed & Peeled Chestnuts

*Recipe for Chestnut Dressing can be found on page 120 in ‘What’s In Your Pantry’

Green Beans with Smoked Bacon & Caramelized Shallots

Save
Print

These are similar to my Grandmother’s Famous Green Beans but I replace her garlic with Caramelized Shallots.

  • 2 pounds haricots verts (thin green beans), trimmed, blanched and dried well*
  • ½ pound applewood smoked bacon
  • 3 large shallots, quartered
  • 2 tablespoon olive oil
  • 2 tablespoons red wine or balsamic vinegar
  • Sea salt & freshly ground black pepper

Cook bacon until crisp. Remove with a slotted spoon, and drain on paper towels, reserving 2 Tbsp. drippings in skillet.

Add olive oil to the pan with the bacon drippings then add the quartered shallots and sauté until browned. Add the vinegar, stir well, then add the green beans and toss until coated with oil, cook for another minute then season with salt and pepper and toss with bacon, serve hot.

To blanch green beans: Fill a large bowl with ice and cold water leaving room for green beans. Bring a large saucepan full of water to a boil and add green beans and a good helping of salt, cook for 1-2 minutes, drain the beans and plunge them into the bowl of ice water. Let them cool, drain and dry well.

Do Ahead Mashed Potatoes

Save
Print
  • 3 lb. medium Melissa’s Dutch Yellow Potato*, scrubbed and cut in half
  • Kosher salt
  • ½ cup heavy cream
  • ½ cup whole milk
  • 1 stick unsalted butter, cut into pieces, room temperature
  • ¼ cup sour cream
  • Sea salt and fresh ground pepper

Cut the potatoes into like sized pieces so they all cook at the same rate. Cook the potatoes in large pot of boiling salted water until they are tender, about 20 to 30 minutes.

Drain the potatoes and return to the dry pot. Shake over low heat for about 1 minute. This helps make the potatoes fluffy as it whisks off excess moisture.

Mash the potatoes until there are no lumps

Heat cream, milk and butter in a small saucepan over medium until just about to simmer. Reduce heat to low and keep warm until ready to add to potatoes.

(If you have a potato ricer or mill, pass the potatoes through into a bowl. If you don’t have a food mill you can mash the potatoes with a potato masher), slowly add cream mixture while tossing gently, season with sea salt and pepper and mix in sour cream.

Take the potatoes out of the refrigerator about 3 1/2 hours before serving time. Stir the potato mixture well. Remove the potatoes from the dish and place it in a 4- or 5-quart crockpot. Cover and cook on low heat for 3 to 4 hours, stirring once or twice.

add more melted butter, sour cream or milk if you want a softer consistency. The potatoes can be held in the slow cooker an additional 30 minutes or more on low. Or turn the crockpot to "keep warm" for another hour or two.

*Melissa’s Dutch Yellow Potatoes can be found at Gelsons, Bristol Farms and Lazy Acres or order from their website (link below).

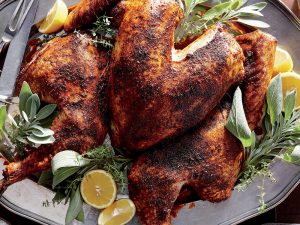
Herb Roasted Turkey

Save
Print
  • 10 -12pounds free range or organic turkey, Diestal is my favorite and available at Gelsons
  • 2 medium onion, quartered with peel on
  • 6 carrots, peeled and roughly chopped
  • 6 celery stalks, roughly chopped
  • 1 bunch Italian flat leaf parsley
  • 1 bunch fresh sage
  • 1 whole bay leaf
  • ½ bunch fresh thyme
  • 2 Meyer lemon
  • ¼ cup butter, room temperature
  • Sea salt and pepper
  • 1 cup dry white wine, Sauvignon Blanc is my go to
  • 1 cup chicken or turkey stock

Preheat oven to 425°

Remove turkey from refrigerator and let rest for 1 hour before cooking. Carefully rinse and dry turkey inside and out, dry well. Select a roasting pan where the turkey will fit snugly but doesn’t hang over the side. Place ½ of the herbs into the pan as a bed for the turkey, roughly chop the remainder of the herbs and stuff inside the turkey. Squeeze the lemons over the turkey and place the rinds into the pan with the herbs.

Place the turkey inside the pan and rub with butter, season with sea salt and pepper.

Insert probe thermometer and set for 165°. The turkey will cook for approximately 2 hours. Pour wine and chicken stock in the bottom of the pan and place, uncovered in hot oven.

Baste after 1/2 hour, if you don't have enough juice in pan use some stock. Do not cover bird until browned and then loosely place foil over breast. If wings start to brown to early wrap with foil. If the breast starts to brown too much, loosely cover with foil and turn oven down to 400°.

Let turkey rest for 15 minutes before carving.

*Pick up a probe digital thermometer here

To make sure your oven is the correct temperature use an oven thermometer

Dutch Apple Pie

Save
Print
  • Pâte Brisée, (Pie Crust)
  • 1 ¼ cups flour
  • ½ teaspoon salt
  • 1 stick cold butter, cut into pieces
  • 2-4 tablespoons ice water
  • 1 tablespoon sugar, optional (for Pâte Sucrée, sweet pie dough)
  • For the Dutch Apple Pie:
  • 1 pie crust
  • 2 ¼ pounds of baking apples, about 6 medium
  • 1 teaspoon cinnamon
  • 8 tablespoons unsalted butter, 1 stick)
  • 3 tablespoon flour
  • 1/4 cup water
  • 1 cup sugar
  • For the Crumb Topping:
  • 1 cup all-purpose flour
  • 1/4 cup packed brown sugar
  • 2 tablespoon sugar
  • 1/4 teaspoon cinnamon*
  • 1/4 teaspoon sea salt
  • 8 tablespoon unsalted butter, room temperature

Add flour and salt (sugar also if making Pâte Sucrée) into the bowl of a food processor; pulse a few times to incorporate all the ingredients.

Add the butter and process until the mixture is crumbly and the butter is pea size.

Place the mixture into a wide bowl and add water 1 tablespoon at a time until the mixture comes together. Don’t overwork the dough or it will be tough, not flaky. Once the dough comes together in a ball flatten into a disk, wrap in plastic wrap and refrigerate for 30 minutes.

Dough can be wrapped well at this point and frozen for up to three months. Let the dough defrost overnight in the refrigerator before using.

Roll chilled disk out on a floured counter or rolling mat, lifting and moving the dough every few rolls to help prevent sticking. Add only enough flour to the counter to keep the dough from sticking.

Place your pan on top of the dough to make sure it is the correct size, it should be slightly larger than the pan, then roll the dough onto your rolling pin and unroll over your pan. Gently lift and lay the dough to fit the pan, never pull the dough to stretch it. Lightly press the dough into the pan, roll your rolling pin over the top edge of the tart or pie pan and remove excess pastry, or pinch the edges to your liking.

Cover and refrigerate for 30 minutes or while you prepare filling.

Your pie crust should be rolled out into the pie pan and be resting in the refrigerator.

Preheat oven to 375˚F. Place your rack in the center of the oven.

Peel, core, and thinly slice apples to about 1/4” thickness. You should have 7 cups of sliced apples. Place them in a mixing bowl and stir in 1 teaspoon cinnamon.

Melt butter in a medium saucepan over medium heat. Whisk in flour then simmer for 1 minute, whisking constantly. Whisk in water and sugar and bring to a boil. Reduce heat and continue simmering for 3 minutes, whisking frequently. Pour the sauce over the apples and stir to coat the apple slices. Pour apples over bottom crust.

To Make the Crumb Topping, stir together dry ingredients: flour, sugars, cinnamon, and salt. Add butter and work it into the mixture with our hands until pea-size crumbs form throughout the mixture. Spread the crumb topping evenly over your apples, place pie onto a baking sheet and bake uncovered for 50-60 minutes or until the center of the pie registers 175˚F. If topping is browning too much, cover with a sheet of foil. Remove from oven and cool 1 hour to allow the filling to set so it’s easier to slice.

*Cinnamon, I like using Penzey’s Spices ‘Baking Spices’ instead of just cinnamon.

Leave a comment
Share
  • Pin it
  • Share
  • Tweet
  • Share
  • Email

What to Plan/Plant for Your Fall Garden

8 / 2 / 21

Fall into Winter Gardens

Remove any summer crops that are starting to fade and prepare soil with mulch, mycorrhiza, compost.  Re-plant with fall/winter crops or cover crops.

Plant last round of heat loving crops

(early) tomatoes with harvest dates within 50-60 day range

Summer/winter squash (same requirements)

Peppers

Mid-season planting in August

Basil

Beans

Beets

Broccoli

Brussels sprouts

Cabbage

Carrots

Cauliflower

Chives

Cilantro

Cucumber

Dill

Lettuce

Kale

Mustard Greens

Onion, Shallots, Green onions

Radish

Peas, plant 2 rounds, August and again in Sept for fall/spring harvest

Spinach

Turnips, baby white turnips & regular

Late summer (end of Sept) plant cover crops for any areas where you won’t be planting any winter crops.


Some cool season vegetables should probably be protected from the hot months of Sept into Oct. But by planting these vegetables/fruits now they will benefit from the warmth of the soil and the longer days. If you wait too long, late Oct, the soil is already cooling down and the sun is leaning towards winter, the days growing shorter.

Need more help? Send me an email with questions. I have video’s available for guidance, contact me, [email protected]


Leave a comment
Share
  • Pin it
  • Share
  • Tweet
  • Share
  • Email

Citrus Season!

1 / 19 / 21


Nutritious and healthy we all know that citrus fruits are high in vitamin c which helps your immune system; they are loaded in plant compounds that have various health benefits, including anti-inflammatory and antioxidant effects. They contain B vitamins, potassium, phosphorous, magnesium and copper as well. A versatile fruit they can be made into jams, jellies, drinks and savory or sweet dishes or just eaten out of hand. Try this Roasted Chicken with Lemon and Herbs along with Melissa’s Dutch Yellow Potatoes for a tasty, comforting dinner.

Lemon Herb Roasted Chicken With Dutch Yellow Potatoes®

Save
Print
  • 1 Meyer lemon, zested and juiced
  • 2 tablespoons unsalted butter, softened
  • ½ teaspoon minced fresh thyme
  • Sea Salt and freshly ground pepper
  • 1 large onion, rough chopped
  • 2 small carrots, rough chopped
  • 1 stalk celery, rough chopped
  • 4 sprigs Italian flat leafed parsley
  • 1 bag Melissa’s Dutch Yellow Potatoes®, cut in half
  • ½ cup chicken stock

Preheat the oven to 425° and place the rack in the lower third of the oven.

Mince the lemon zest and mix with the butter and minced thyme.

Rinse and pat the chicken dry. Slide half of the butter mixture under the skin and the rest over the chicken, season with salt and pepper.

Scatter the onion, carrots, celery and parsley over the middle of a roasting pan*. Place the chicken on top of the vegetables and place the potatoes around the chicken.

Roast for approximately 50 minutes, using a probe type or instant read thermometer placed into the thigh and it should read 165° - 175°. Let the chicken rest in the pan for 15 minutes. Remove to a cutting board, remove vegetables from pan and place the pan over a medium high heat. Add the stock and scrape any bits from the bottom of the pan, reduce the liquid to about ½ and serve along with the chicken.

Use a roasting pan with no more than 2” sides

Leave a comment
Share
  • Pin it
  • Share
  • Tweet
  • Share
  • Email

Apples

10 / 27 / 20


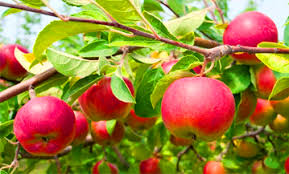
Apples are the ultimate fruit, low in calories with no fat, sodium or cholesterol. The pectin in apples actually helps to dissolve the cholesterol in one’s blood stream. High in fiber, anti-oxidants, potassium, niacin and a variety of vitamins, apples are a near perfect fruit. To get the most of the nutrition from an apple, eat organic apples with the peel on, most of the pectin lies just below the skin.

How to choose and store your apples…..

Choose organic apples as apples have topped the Environmental Working Groups ‘Dirty Dozen’ list, which identifies the most pest laden fruit and vegetables. You’ll want to eat the skin of the apple as disease-fighting pectin (fiber) lies directly under the skin

Select firm fruit with no bruises or scars and treat them gently.

Don’t wash your apples until you’re ready to use them.

Keep them in a cool place, your fruit drawer of the refrigerator is fine but don’t store with other fruit. Apples give off a gas, ethylene, which will ripen your other fruit faster. Some apples will keep weeks in the refrigerator. They will keep a few days on the counter.

How to choose which to use for baking or eating? Here’s a quick list:

Cooking

Ambrosia

Braeburn

Cameo

Golden Delicious

Honeycrisp

Jazz

Jonagold

Jonalicious

Jonathon

McIntosh

Pink Lady

Red Delicious

Fresh Eating

Ambrosia

Envy

Fuji

Gala

Golden Delicious

Honeycrisp

Jazz

Opal

Pink Lady

Sweetie


Oven Roasted Pork Chops

Save
Print

Serves 2 to 4

  • For the brine (optional)
  • 3 cups cold water, divided
  • 3 tablespoons kosher salt
  • 1 smashed garlic clove, 1/2 teaspoon black peppercorns, 1 bay leaf
  • For the chops:
  • 2-4 center cut, bone-in pork chops, 1-inch thick or more
  • Olive oil
  • Sea salt and fresh ground pepper
  • Fresh applesauce, optional as a side

Brine the pork chops if you have time, brining the pork makes it more tender and juicier.

Bring 1 cup of the water to a boil, add the salt, garlic, peppercorns and bay leaf to the water, and stir to dissolve the salt. Add 2 more cups of cold water to bring the temperature of the brine down to room temperature. Place the pork chops in a shallow dish and with the brine, if the chops aren’t covered add additional water and salt (1 cup water to 1 tablespoon salt) until the chops are submerged. Cover the dish and refrigerate for 30 minutes or up to 4 hours.

Heat the oven to 400°. Put a skillet that can hold the chops into the oven while it heats.

If you brined the chops remove and dry both sides, rub with olive oil and season with salt and pepper.

When the oven is preheated remove the skillet and set over a medium high heat on the stove. Sear the chops on both sides quickly, if they brown quickly turn the heat down slightly. You might want to open your windows and turn on a fan, the chops may smoke when you add them to the pan. When browned slide a probe thermometer into the middle of the chop without touching the bone and set to 140°, place the pan in the oven and cook until the thermometer’s alarm goes off. Remove the chops to a plate and let rest about 5 min. They will cook fast, 5-10 min. DO NOT OVERCOOK.

Serve with homemade applesauce and oven roasted potatoes.

Herb Roasted Potatoes

Save
Print
  • 1 pound Dutch Yellow Potatoes*, Yukon Gold or fingerling potatoes, cut in half lengthwise
  • salt and pepper
  • olive oil, as needed
  • 1 shallot, chopped
  • 1 tablespoon Italian parsley, minced
  • 1/2 tablespoon chives, minced
  • 2 tablespoons butter or olive oil

Preheat oven to 400°.

Place potatoes on foil lined baking sheet; season with salt and pepper and toss with just enough oil to lightly coat potatoes.

Bake for approximately 35 minutes. The last 10 minutes add shallots and herbs.

Toss with butter or olive oil.

*Dutch Yellow Potatoes are available from Melissas Produce

Order potatoes from Melissas Produce, click here

Applesauce Cake

Save
Print
  • Cake:
  • 2 cups all-purpose flour
  • 2 teaspoons baking powder
  • ½ teaspoon baking soda
  • ½ teaspoon salt
  • 1 teaspoon cinnamon
  • ½ teaspoon ground ginger
  • 1 stick unsalted butter, softened
  • 1 cup packed light brown sugar
  • 1 teaspoon pure vanilla extract
  • 2 large eggs
  • 1 ½ cups cinnamon applesauce
  • ½ cup walnuts chopped walnuts
  • Frosting:
  • 5 oz cream cheese softened
  • 3 tablespoons unsalted butter, softened
  • ¼ teaspoon pure vanilla extract
  • 1 cup confectioners sugar
  • ½ teaspoon cinnamon

Preheat oven to 350°F with rack in middle. Butter a baking dish.

Cake:

Whisk together flour, baking powder, baking soda, salt, and spices.

Beat butter, brown sugar, and vanilla with an electric mixer at high speed until pale and fluffy, 2 to 3 minutes. Add eggs 1 at a time, beating well after each addition, then beat in applesauce. At low speed, mix in flour mixture until just combined, then stir in walnuts.

Spread batter evenly in pan and bake until golden-brown and a wooden pick inserted into center comes out clean, 40 to 45 minutes. Cool in pan 15 minutes. Run a knife around edge of cake to loosen, then invert onto a plate. Reinvert cake onto a rack to cool completely.

Frosting:

Beat cream cheese, butter, and vanilla with an electric mixer at high speed until fluffy. Sift confectioners sugar and cinnamon over cream cheese mixture, then beat at medium speed until incorporated.

Spread frosting over top of cooled cake.

Easy Applesauce

Save
Print
  • 3 pounds organic apples, Fuji, Gala, Honeycrisp or Jonagold
  • 2/3 cup apple juice, orange juice or water
  • 8 tablespoons sugar
  • 3 teaspoons cinnamon
  • 1/4 teaspoon nutmeg

Core, peel and cut the apples into medium sized pieces. Place all ingredients into a saucepan with lid and simmer over low heat until apples are very tender, about 45 minutes. Put through a food mill to create a soft creamy applesauce or use a potato masher and serve chunky.

Pressure cooker or Instant pot:

Combine all the ingredients in the container, cover and lock into place. Press manual button and set timer for 4 min. Let the closed pressure cooker rest for about 10 minutes, release any pressure that’s left.

Carefully open lid, angling it away from you to avoid getting burned by the steam. Use a potato masher to crush with a slightly chunky consistency or put through a food mill for a smoother one.

Get one now!


Leave a comment
Share
  • Pin it
  • Share
  • Tweet
  • Share
  • Email

Herb Gardening

10 / 19 / 2010 / 19 / 20

Starting An Herb Garden

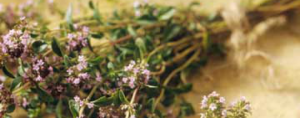
An herb garden doesn’t have to be big so you don’t need much space to grow one. You can even start a potted herb garden on your windowsill! This way you’ll have the aroma of fresh herbs right inside your kitchen or on your patio.

When growing herbs, location is key. Some like it sunny and dry, while others prefer filtered sunlight and moist soil. Regardless, make sure to use well-drained fertile soil. Most herbs will survive in poor sandy soil, but few will tolerate wet clay soil. If your yard is all sun, try planting shade-loving plants east of taller varieties like sunflowers. The tall plants will generate shade for the smaller ones.

Basil, Chives, Dill, Oregano, Rosemary, Tarragon, and Thyme prefer full sun, while Chervil, Lemon Balm, and Mint prefer partial shade in your herb garden.

Water newly planted herbs regularly but once they are established, most are naturally drought resistant. Watering and drainage goes hand in hand. Rather give your herbs too little than too much water. After a good soaking, allow the water to drain away and the soil to dry out slightly. Water again when the top 1″ or so of soil is dry to the touch.

During the growing season fertilize about once a month with a weak solution of fish emulsion. Compost 4 times a year (at the beginning of each season, will also provide the plants with the nutrients they need.  Don’t fertilize dormant plants, such as tarragon, some thyme and sometimes chives, just add a little compost around them and wait for them to wake up in the spring.

If you over feed your herbs and make them happy and beautiful they may lack some flavor. Hold back a little water and a little fertilizer to help concentrate the oils in the leaves thus increasing their flavor, aroma and medicinal value.

Pruning is essential to encourage healthy, bushy growth. Remove dead leaves and flowers on a regular basis. Should you frequently use your herbs, pruning may not be necessary, as you would be pruning automatically.

Be sure to let some of your herbs flower and ‘go to seed’, it will encourage good bugs, butterflies and hummingbirds into the garden.


Leave a comment
Share
  • Pin it
  • Share
  • Tweet
  • Share
  • Email

Hello Fall!

10 / 17 / 20

Gordon Skagit Pumpkin Farms

It’s starting to feel like fall, I’m sure hoping all the hot days are behind us, they’re not my favorite!

I still have great looking tomatoes in the garden and some seasonal herbs, my summer lettuce is going to seed so it’s time to get busy with my fall/winter garden. Actually I’m a little late but we decided to drive up the coast just to get a break. Now it’s time to focus before the ground gets too cool.

I’m working on a new Debs Kitchen Garden newsletter which I’ll begin sending out on opposite weeks of the regular newsletter. I have some appointments left if you need a little advice on getting your own winter garden growing. In the meantime here are some pumpkin/squash recipes for you because I know many of you just can’t get enough pumpkin! Mangia!


Pumpkin Risotto

Save
Print

Serves 4

  • 1 qt. homemade or low-sodium chicken or vegetable stock
  • 1 cup pumpkin purée (not pumpkin pie filling)
  • Sea salt and pepper
  • ½ teaspoon ground nutmeg, or 6 to 10 scrapes on a grater from a whole nutmeg
  • 8 tablespoons (4 ounces) unsalted butter
  • 8 ounces shallots (7 to 8), minced
  • 1 ¾ cups carnaroli, vialone nano rice, you could also use an arborio rice
  • 1 ½ cups dry white wine
  • 1 ¼ cups grated Parmesan cheese
  • 6-10 sage leaves, finely chopped (optional)

Place the stock, pumpkin, nutmeg, a sprinkling of salt and pepper in a medium saucepan over high heat, Stir to combine and bring to a gentle boil. Reduce the heat to a simmer.

In a large, deep pan add the butter, and melt over medium heat. Add the shallots and cook, stirring until they are translucent. Add the rice and stir until each grain is coated in fat, 2 to 3 minutes. Reduce the heat to low. Add the wine or vermouth and cook, stirring constantly, until it is absorbed.

Add 1/2 cup of the pumpkin stock mixture and stir constantly until absorbed. Add the remaining stock mixture, 1/2 cup at a time, stirring constantly after each addition and adding the next amount only after the previous one is fully absorbed by the rice.

After you have used about 4 1/2 to 5 cups of the stock mixture taste the rice to determine if it is al dente. Continue to add more stock, if necessary, to reach al dente.

Stir in the cheese and sage if using. Serve immediately.

Instant Pot Pumpkin Purée

Save
Print

Yield about 2 cups

  • 1 ½ cups water
  • 1 (3- to 4-pound) sugar or pie pumpkin*

Wash and dry the pumpkin Remove the top and then cut in half lengthwise. (You can remove the seeds now or wait until the squash is cooked and scoop them out).

Set a wire rack in a 6-quart or larger electric pressure cooker or Instant Pot. Add the water. Place the pumpkin cut-side up on the rack. Lock on the lid and make sure the pressure valve is set to seal. Set the cook time for 15 minutes at high pressure.

When the cook time is up, let the pressure cooker naturally release pressure for 5 minutes. Quick release any remaining pressure. Open the pressure cooker and check the texture of the pumpkin. The pumpkin flesh should be fork tender. If it's not, cook for 5 minutes more at high pressure, repeating the 5 minute natural release. Transfer the pumpkin to a cutting board until cool enough to handle.

Fit a large fine-mesh strainer over a bowl or line a regular colander with cheesecloth first. Cut the pumpkin in half. Remove any remaining seeds. Scrape the pumpkin flesh away from the skin and place in the strainer or colander. Using the back of a spoon, press on the pumpkin firmly to remove excess liquid. Set aside to drain for 1 hour.

Transfer the drained pumpkin to the bowl of a food processor fitted with the blade attachment. Blend until smooth, about 1 minute. Measure into 16-ounce portions, about 2 cups each. If any pumpkin remains, use it in smoothies.

*Pumpkin substitute: If you can't find a sugar pumpkin, use 2 acorn squash instead, 3 to 4 pounds total.

Storage: Keep the purée in the refrigerator for up to 2 days or place the fully cooled purée into a plastic freezer bag. Flatten and freeze for up to 3 months. Thaw in the refrigerator overnight before using.

Maple Roasted Brussels Sprouts with Squash

Save
Print
  • 1 pound butternut squash peeled and diced into 1/2-inch cubes
  • 1 pound Brussels sprouts ends cut off and halved (if they are large, cut in quarters)
  • 4 slices thick-cut bacon diced
  • 2 tablespoons extra virgin olive oil
  • 1 tablespoon fresh thyme
  • 1 tablespoon fresh sage
  • Sea salt and fresh ground pepper to taste
  • 1/2 cup halved pecans, optional
  • FOR THE MAPLE GLAZE
  • 3 tablespoons maple syrup
  • 1 tablespoon balsamic vinegar
  • 2 tablespoons extra virgin olive oil
  • Sea salt and fresh ground pepper to taste

Preheat oven to 425°.

Line a large baking sheet with parchment paper or foil and set aside.

In a large mixing bowl combine diced butternut squash, brussels sprouts, bacon, olive oil, thyme, sage, salt, and pepper; mix until thoroughly incorporated.

Transfer veggies to prepared baking sheet and roast for 30 to 35 minutes, stirring around halfway through cooking.

In the last 7 minutes, add pecans, if using

In a small saucepan whisk together maple syrup, balsamic vinegar, olive oil, salt, and pepper.

Set saucepan over medium heat and bring to a simmer; stirring often, simmer for 3 to 4 minutes or until reduced and syrupy.

Take veggies out of the oven and toss with prepared glaze.

Arrange on a large plate or bowl and serve.

Lemon Roast Chicken with Delicata Squash

Save
Print
  • 1 whole chicken, cut up
  • 3 small Delicata squash (about 1½ pounds), halved lengthwise, seeds removed
  • 1 medium onion, chopped
  • 2 Meyer lemons, zested and juiced
  • 3 tablespoons extra-virgin olive oil
  • Sea salt and pepper
  • 3 sprigs fresh sage
  • Meyer lemon wedges, for serving
  • Fresh thyme and sage sprigs, for serving

Preheat oven to 450°.

Line a baking sheet with parchment paper or foil. Place the chicken and squash on the parchment. Toss the squash and onions with oil and place on the baking sheet with the chicken. Rub the chicken with oil, pour the lemon juice overall, sprinkle with zest and season with sea salt and pepper. Chop half the sage and sprinkle over both chicken and squash-onion mixture. Sprinkle zest over the chicken.

Roast the chicken and squash for 30–40 minutes, or until an instant read thermometer registers 165° at the thickest part of the thighs and the squash is cooked through and fork tender, while the onions are softened and slightly charred around the edges.

Transfer the chicken and squash to a serving platter, garnish with lemon wedges, thyme and sage, serve right away.

Caramel Pumpkin Pots du Crème

Save
Print
  • 2 cups heavy cream
  • 5 large egg yolks
  • 1/4 cup plus sugar
  • Pinch of sea salt
  • 1/2 cup plus two tablespoons of pumpkin puree
  • 1/4 cup caramel sauce
  • 1/2 teaspoon cinnamon
  • 1/4 teaspoon nutmeg
  • 1 teaspoon vanilla

In a medium saucepan, bring heavy cream and sugar to a boil, whisking constantly until the sugar is dissolved. Put aside and let cool for five minutes.

In a medium heatproof bowl, whisk the egg yolks. Add 1/4 cup of heated cream mixture to egg mixture and whisk to combine. Continue adding cream mixture in 1/4 cup increments to eggs until the two are fully combined. Place fully combined mixture back into saucepan and cook over moderate heat, stirring with a wooden spoon, until the custard coats the back of the spoon, about 4 minutes.

Add remaining ingredients and stir to combine. Transfer the mixture to a blender and puree until very smooth, about 1 minute. Pour the finished custard through a strainer.

Refrigerate until chilled about 2 hours.

To serve warm: Let the pots de crème stand at room temperature for 15-20 minutes prior to serving.

Serve with a dollop of whipped cream.


Leave a comment
Share
  • Pin it
  • Share
  • Tweet
  • Share
  • Email

Summer Recipes with Herbs

8 / 4 / 20

Try these recipes using fresh herbs from your garden! Don’t have an herbs garden? I can teach you, more to come next week!


French Herbed Omelet

Save
Print

A classic French Herb Omelet. If you don’t have all the herbs, use what you have or whatever combination pleases you.

  • 3 large eggs
  • Sea salt and fresh ground pepper
  • 2 teaspoons finely chopped Italian parsley, chives, watercress, plus more to garnish
  • 1½ tablespoons unsalted butter

Whisk eggs in a bowl until the whites are completely mixed in. Add some sea salt and fresh ground pepper. Stir in the herbs.

In a small nonstick skillet (8”), melt the butter over medium heat and immediately add the eggs. Stir the eggs with a heatproof rubber spatula and slightly move the skillet around while stirring. Bring the sides over the middle so the edges don’t overcook and get crispy.

Roll the omelet from one side to the middle and while holding the pan at an angle, slide the bottom part of the omelet onto a plate and fold the rest of the omelet on top on that. You’ll have a nice little 3 fold omelet. Garnish with a few more finely chopped chives and serve.

Tomato and Goat Cheese Tart

Save
Print
  • Tart Dough
  • Makes 1-9” crust or 6 mini crusts
  • 1 ½ cups flour
  • pinch of salt, I use sea salt
  • 10 tablespoons butter cold unsalted
  • 2-4 tablespoons cold water
  • Tart
  • 6 ounces goat cheese
  • 2 tablespoons heavy cream
  • 1 tablespoon snipped fresh chives
  • 1 tablespoon minced basil
  • 3 large heirloom tomatoes or a large handful of cherry tomatoes

Combine the flour and salt in a food processor and pulse several times. Add butter and pulse until the mixture begins to look like little peas.

Transfer the mixture to a lightly floured surface and gather it into a ball with your hands. Gently flatten the ball into a smooth disk about 1-1/2 inches thick and wrap it in plastic. Refrigerate until firm enough to roll, at least 1 hour.

Heat the oven to 350°.

Roll the dough on a lightly floured surface into a round, about 1/8 inch thick. Roll the dough over your rolling pin and lift it over the tart pan. Unroll it loosely over the tart pan and gently press the dough into the pan without stretching it. Fold a bit of the excess dough inward to form a lip. Roll the rolling pin back and forth over the pan.

Dock the bottom of the dough by pricking with fork tines. Butter the dull side of a piece of foil and place butter side down over the dough. Fill with pie weights or dried beans.

Bake for 25 minutes until golden brown, rotate the tart pan halfway through the baking time.

Remove the crust from the oven, remove the foil and let the crust cool completely.

Preheat oven to 425°.

Mix goat cheese with just enough cream to make it spreadable. Mix in herbs and spread over the bottom of the cooled pie crust. Top with sliced tomatoes and bake until the tarts begin to bubble, and the crusts are golden brown, about 45-50 minutes. If the edges of the crust are getting too brown, cover with pieces of foil. Let cool on a rack for 15 minutes before serving.

*Can also be made into individual tart pans makes 6.

Filet of Sole with Fresh Herbs in Butter Sauce (Beurre Blanc)

Save
Print

Serves 4

  • 3 pounds sole or other white fish
  • Sea salt and fresh ground pepper
  • Old Bay seasoning, optional
  • 6 tablespoons Wondra flour approximately, white flour will do
  • Olive oil, or sunflower, safflower or peanut
  • Lemon wedges, for serving, optional
  • Beurre Blanc
  • 1/2 cup dry white wine
  • ¼ cup white wine vinegar
  • ½ tablespoon shallot (finely chopped)
  • ½ pound unsalted butter (cold)
  • Sea salt
  • ½ tablespoon finely chopped parsley
  • 1 teaspoon minced chives
  • 1 teaspoon minced thyme

Heat oven to 200°.

Dry the fish with paper towels, season lightly with salt, pepper and Old Bay if using. Dredge lightly with Wondra flour.

Add enough oil to coat the bottom of the pan and brown on both sides. Remove to an oven proof plate, place in the oven while you make the sauce.

Sauce:

Cut the butter into medium (1/2-inch) cubes and return the butter cubes to the refrigerator to keep them cold, which is very important.

Heat the wine, vinegar, and shallots in a saucepan until the liquid boils, then lower the heat a bit and continue simmering until the liquid has reduced down to about 2 tablespoons.

Once the wine-vinegar mixture has reduced to 2 tablespoons, reduce the heat to low, take the cubes of butter out of the fridge and start adding the cubes, one or two at a time, to the reduction, while you whisk rapidly with a whisk.

As the butter melts and incorporates, add more butter and keep whisking. Continue until you only have 2 to 3 cubes remaining. Remove from heat while whisking in the last few cubes and whisk for a moment or two more. The finished sauce should be thick and smooth.

Season to taste with sea salt, add herbs and serve over fish with lemon wedges, if using.

Focaccia with Fresh Herbs

Save
Print
  • 1 1/8 teaspoons active dry yeast
  • 1 cup warm water, not hot
  • Pinch of sugar
  • 2 cups all-purpose flour
  • 1 teaspoons sea salt
  • 2 tablespoons fresh herbs, thyme, sage, basil, rosemary-your choice
  • 2 tablespoons olive oil

Add yeast to the warm water then stir in sugar with a wooden spoon. Let stand until foamy.

Add flour, salt and herbs and stir well. Add the warm water and mix until the flour is well incorporated. Cover the bowl with plastic wrap and let rise for 2 hours or refrigerate for at least 7 hours and up to 24 hours.

Lightly coat one 9” pan with olive oil or butter then line the pan with parchment paper. Pour one tablespoon olive oil into the center of the pan. Roll the dough into a tight ball and place in the middle of the pan. Cover with plastic wrap and let rise another 2 hours. The dough should fill most of the pan when properly risen.

Preheat oven to 450°. Drizzle a little olive oil over the dough. Using your fingers press dimples all around the dough. Sprinkle with herbs and salt.

Place the pan into the oven and turn the temperature down to 425°. Bake for 30 minutes or until golden. Remove to a cooling rack.

Leave a comment
Share
  • Pin it
  • Share
  • Tweet
  • Share
  • Email

Hands On Fun at Rancho los Alamitos

9 / 11 / 199 / 11 / 19

Food Crafting with Chef Debbi

& Debs Kitchen


Saturday, Oct 12th

10:00 am– 12:30

Adults $75.00

Children* ages 10-14 $35.00

*Children must be accompanied by an adult.


By reservation only

Click below for reservations or call or email

Reserve my spot

562-431-3541 or [email protected]

Reservations close Mon. Oct 7th


Enjoy a fun-filled autumn morning with family at the beautiful

Rancho Los Alamitos Historic Ranch & Gardens.

Learn together to make (& take)

Gifts from the Garden.

For the adults to make and take:

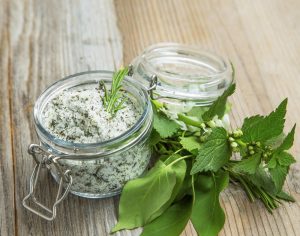
Herbal Salt Tin

Cranberry Vinegar

Meyer Lemon Infused Olive Oil

Peppermint-Lavender Room Spray

Holiday Stovetop Potpourri

For the Kids to make and take:

Peppermint Biscotti in a Jar

Strawberry Mint Mojito Mocktail

A seasonal salad will be served with a

Cranberry-Lemon Vinaigrette prepared by Chef Debbi.

Special thanks to Melissa’s Produce for donating event supplies.

Leave a comment
Share
  • Pin it
  • Share
  • Tweet
  • Share
  • Email

Fontina & Gruyere Gougére’s

12 / 29 / 1812 / 29 / 18


Save
Print

Makes 24-30

  • ½ cup water
  • ½ cup whole milk
  • 8 tablespoons unsalted butter, cut into pieces
  • 1 teaspoon salt
  • 1 cup plus 1 Tb. all-purpose flour
  • 4 whole eggs
  • ½ cup grated gruyere cheese
  • ½ cup grated fontina cheese

Preheat oven to 450° and line 2 pans with parchment paper or baking sheet liners.

In a large sauce pan, combine the water, milk, butter and salt and bring the mixture to a full boil over medium-high heat. When the butter has melted add the flour, all at once, and stir vigorously with a wooden spoon until the mixture forms a ball that pulls away from the sides of the pan.

Turn the heat down to medium and cook the dough for another 3 or 4 minutes to dry out and cook the flour taste out of the dough. It will look a little shiny and there will some starch remaining on the bottom of the pan and the dough will be stiff.

Transfer the dough to the bowl of a stand mixer fitted with a paddle attachment. (Alternatively, use an electric hand mixer or beat by hand with a stiff spatula.) Beat the dough on medium-low speed until it stops steaming and is just warm to the touch, about 1 minute.

Continue beating and add the eggs in one at a time. Wait for each egg to be absorbed completely before adding the next. Scrape down the sides of the bowl if needed. Once the dough comes together after the addition of all the eggs, add the cheese and mix until it’s well distributed.

Scoop rounded tablespoons of dough onto the baking sheets, spacing the about 1-inch apart. They can be piped on using a piping bag or a storage bag with the corner snipped off.

Press the top down with a fork or spoon dampened slightly with water, until the tops are smooth. Brush with the egg wash mix and bake for 5 minutes. Turn the heat down to 350° and bake for 20-25 minutes until they are golden brown. Rotate the sheets half way through the baking period. If the inside of the gougere isn’t done, turn off the oven and prop the door open with a wooden spoon for about ½ hour so they can dry out a little.

The gougere’s can be stored in the refrigerator up to a week or frozen for a month. You can fill these with any kind of cheese stuffing or serve them as a stand-alone bite.

Leave a comment
Share
  • Pin it
  • Share
  • Tweet
  • Share
  • Email

Lettuce Varieties

11 / 29 / 18


Are you hankering for some romaine lettuce? Well, there are tons of alternatives here in So. Cal for you. From the CDC website here’s what they are saying about the current outbreak of e coli on romaine lettuce.

‘Based on new information, CDC is narrowing its warning to consumers. CDC is advising that U.S. consumers not eat and retailers and restaurants not serve or sell any romaine lettuce harvested from the Central Coastal growing regions of northern and central California. If you do not know where the romaine is from, do not eat it.’
Here’s the link for more information, CDC.

Personally, I like a mix of lettuce mostly, a little crunch, a little color and a tangy dressing. My favorite is a good old Italian dressing made with a very good red wine vinegar. I love a little cheese as well, blue, parmesan or goat goes well with a tangy Italian dressing.

Just mix a little Dijon mustard, like Maille, with your red wine vinegar, add a little minced shallot, some fresh ground Italian spices and whisk in a little olive oil, season with salt and pepper and you’re done.
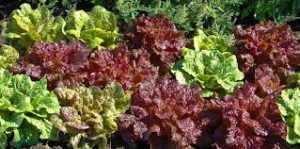
Local lettuce varieties are usually more plentiful during the winter as most lettuce prefers to grow in the cooler weather. Here are some varieties that will offer no only color but flavor to your salad bowl.

Choose lettuce that is bright with no brown edges or spots. Try and get them not too wet, if they are wet, they have a tendency to go bad faster. Pick whole heads of lettuce rather than bagged lettuce. The more lettuce is handled from field to bag the greater chance it can pick up any bacteria. Bagged lettuce can also be washed with chlorinated water and tends to be older than a non-bagged lettuce. Are you tempted to buy the bag that says triple washed and leave it at that? That lettuce may be contaminated with more than just chlorinated water and if it’s wet at all it will likely rot within a couple of days in that bag. Buy un-bagged lettuce, wash and dry well before storing. You might notice that if you purchase your lettuce at a farmers market that it lasts longer than a store bought lettuce, it’s because your farmers market lettuce was probably picked within a couple of days. I’ve had lettuce last up to 2 weeks from my farmers markets. So here are just some of the lettuce types you should be able to pick up anywhere.

Arugula (Rocket)-spicy and peppery, the larger the leaves the more bite it will have

Batavia is a loose-leaf lettuce similar to red or green leaf lettuce with a mild flavor

Belgian Endive-these can be a tad bitter, but they will add crunch to any salad mix

Butter-a very mild lettuce with big cupped leaves, great for serving topped with a crab salad

Frisee (Curly Endive)-Sometimes called chicory, the leaves are thin and curly with a little bit of a bite, aka peppery.

Iceberg-A dense head of lettuce with lots of crunch but little flavor

Leaf Lettuce, Red or Green-Another loose leaf lettuce with mild flavor but both add a lot of color to a salad bowl, great on sandwiches as well.

Little Gem-This lettuce looks like a mini version of romaine but it’s not as crunchy, mild flavor

Oakleaf-Another beautiful bi-colored loose-leaf lettuce that has a mild taste

Radicchio-There are numerous colors of radicchio, most have a little bitterness but a great addition to any salad.

Spring Mix-Usually a variety of small lettuces, some are mild, and some mixes can be spicy.

Watercress – Although probably a little difficult to find it makes a nice addition to a mixed salad or added to a rustic piece of bread slathered with some soft cheese. It has a peppery bit, much like Arugula. Use smaller leaves for less intense flavor.

Leave a comment
Share
  • Pin it
  • Share
  • Tweet
  • Share
  • Email

Herb Roasted Turkey

11 / 16 / 18

From my book, What’s In Your Pantry. Buy the book here


Herb Roasted Turkey

Save
Print

I no longer stuff my turkey; it takes too long to cook the stuffing to 165°, the recommended temperature to kill any bacteria; by that time the turkey itself is overcooked. I can also make the dressing the day before, bake it and heat it while I’m making the gravy.
Try serving with Duchess Potatoes instead of the traditional mashed.

  • 12-14 lb. free range or organic turkey, room temperature
  • 2 medium onion, quartered with skin on
  • 4 carrots, peeled and rough chopped
  • 3 celery stalks, rough chopped
  • 1 bay leaf
  • 1 bunch Italian flat leaf parsley
  • 1 bunch fresh sage
  • 1 bunch fresh thyme
  • ¼ cup butter, room temperature
  • salt and pepper
  • 1 lemon, Meyer lemon is preferred
  • 1 cup white wine
  • 1 cup turkey stock, see recipe in Basics chapter
  • Gravy
  • ¼ cup dry white wine
  • 8 tablespoons unsalted butter
  • ½ cup flour
  • 7 cups turkey stock, approximately
  • salt and pepper

Preheat oven to 425°.

Wash and dry turkey inside and out; dry well.

Choose a roasting pan that will fit the turkey with no more than 2” of space on any side, otherwise the juices that accumulate in the bottom of the pan may burn.

Place ¾ of the onion, carrots and celery plus bay leaf, ½ of the bunch of parsley, sage and thyme into the bottom of a baking pan that will fit the turkey, don’t let the turkey hang over the edge and make sure there is no more than 2” open on each side of the bird. (The turkey will sit on this bed of vegetables instead of a rack).

Pat the turkey dry and rub the turkey with butter, season with salt and pepper. Squeeze lemon over turkey and tuck rind under the bird. Insert an oven-proof probe thermometer into thick part of the thigh and set for 165°.

Pour wine and turkey stock in the bottom of the pan and place uncovered in hot oven. (The total cooking time will be approximately 1 – 1 ½ hours).

Baste after ½ hour; if you don't have enough juice in pan use some extra stock. Do not cover bird until browned and then loosely place foil over breast. If wings start to brown too early, wrap with foil. Baste every ½ hour until the turkey is done. Remove from the oven, place turkey on a cutting board or platter, and tent lightly with foil, do not remove probe thermometer until you’re ready to carve the turkey. Let the turkey rest for 20 minutes before carving.

Remove the vegetables and herbs from the roasting pan; place the roasting pan on two burners, add the wine, and turn the heat to medium, bring to a boil and scrape the bits (fond) from the bottom of the pan. Strain this liquid into a large measuring cup, through a cheesecloth lined sieve before continuing, add turkey stock to equal 8 cups.

Make a roux for the gravy:

Add ½ cup of butter to the hot roasting pan and, when melted, add flour and whisk until roux is light brown.

Whisk pan the reserved pan drippings and stock into the roux, pouring in a steady stream until desired consistency is reached. Season with salt and pepper, keep warm.

Makes approximately 8 cups.

Turkey will serve 8-10

Leave a comment
Share
  • Pin it
  • Share
  • Tweet
  • Share
  • Email

Oct. Cooking Demo

8 / 26 / 18

Join us in Seal Beach

Thursday,

Oct. 11th & 18th

6:30 – 8:30, approximately

Fall Harvest Celebration Menu

Gazpacho Shooters

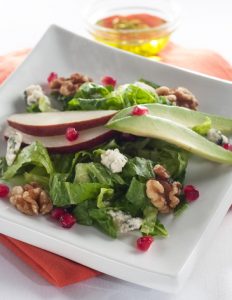
Fall Salad with Oranges and Pomegranate Arils

Santa Maria Style Tri Tip

Ranchero Beans

            With Tortillas

Mini Tangerine Olive Oil Cakes

$45.00
For reservations call
Temecula Olive Oil, 148 Main St. Seal Beach
(562) 296-5421
Sponsored by


Photo: Food and Wine Magazine

Related Posts Plugin for WordPress, Blogger...
Leave a comment
Share
  • Pin it
  • Share
  • Tweet
  • Share
  • Email

Posts navigation

1 2 3 … 5 6 Next Page
Deb

Meet Chef Debbi

READ BIO

Join-Us Sign up for our newsletter to receive exclusive tips 'n tricks, and special offers on classes, tours, and more!

Recent Posts

  • New E-Book!
  • From the Pantry
  • Spaghettini at Home
  • Growing Corn
  • Spring IS Coming!

Categories

BookCUT

What's in Your Pantry?

How to stock your pantry to create delicious dishes.

Learn Chef Debbi's pantry essentials and how to substitute ingredients for pantry staples in her basic recipes for quick and easy meals.
BUY BOOK>

FacebookTwitterInstagramGooglepinterest


© 2014, DEB'S KITCHEN
Angie Makes Feminine WordPress Themes