Deb's Kitchen - Farm, Food, Wine & Lifestyle Adventures
  • Facebook
  • Google
  • Twitter
  • Instagram
  • Pinterest
  • Email
Menu
Skip to content
  • Home
  • Blog
  • Events
    • Classes
    • Tours & Adventures
  • Edible Gardening
  • Preserving
  • Recipes
    • Appetizers
    • Soups and Salads
    • Main Dishes
    • Side Dishes
    • Desserts
  • About
    • Whats In Your Pantry
    • Ask Debbi
    • Deb’s Kitchen Botanicals
    • Press
  • Contact

Tag Archives: party food

Grilled Pizza

7 / 6 / 167 / 6 / 16

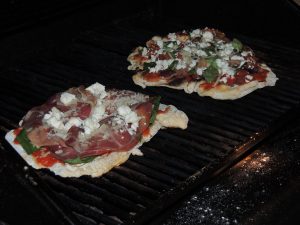
Pizza on the grill 1

I love pizza on the grill! The first time I cooked pizza on the grill I was worried the dough would slip through the grates but it doesn’t! The grill is a perfect tool for a backyard dinner, the house stays nice and cool and you can relax with a cold drink while your pizza cooks. First you have to heat your grill to it’s hottest! Pizza likes a good 500° – 600° oven to produce a great crust.

Buy or make your crust in the morning so it’s ready to go when you are. Prep your ingredients ahead of time. Grate or slice the cheese, pepperoni or salami, slice the mushrooms (store in a small bowl with a slightly damp paper towel over them), cut or tear your herbs such as basil, thyme and/or make a pesto for your pizza. Be creative and be organized.

Once your grill is at its hottest, roll out your dough on a lightly floured surface (or if you’re into hands on-flour your hands and stretch the dough out into any shape you like). Put your dough on a pizza peel that has been lightly dusted with flour or cornmeal, make sure the dough slides around on the peel so that when you put it on the grill it will slide off easily.

Brush your grill with oil and slide the dough onto that spot. Turn down the burners if you’re using a gas grill.* Grill for 2-3 minutes or until lightly charred. Turn your pizza over, brush the cooked side with a little olive oil if you like, add your sauce and any of the toppings you’ve chosen. Close the grill lid and let the pizza cook until the bottom is nicely charred and your toppings have melted and cooked. Remove from the grill with the pizza peel, let sit for a minute or two before slicing. Enjoy with a cold beer and tossed salad! That’s how to beat the heat at my house. Have a great summer!

*If using a grill with charcoal or wood you’ll want to make a direct heat side and an indirect heat side. You’ll be cooking the pizza on the indirect side.

Here’s the recipe

No Knead Pizza Dough

Save
Print

This is Jim Lahey’s no knead recipe for pizza dough, it’s easy and so much better than store bough pizza dough. The hardest part is to remember to make it ahead of time. You can store the dough up to 3 days in the refrigerator so it’s easy to plan ahead. This recipe makes 4 balls of dough (4 pizza’s). Jim likes to weigh all the ingredients and in reality you do get a much better and more consistent product but if you insist on measuring, I’ve included his instructions for that also.

  • 500 grams all-purpose flour, 17 ½ ounces or 3 ¾ cup, plus a little extra for shaping
  • 1 gram active dry yeast, ¼ teaspoon
  • 16 grams fine sea salt, 2 teaspoons
  • 350 grams water, 1 ½ cups

In a medium bowl, thoroughly blend the flour, yeast, and salt. Add the water and, with a wooden spoon or your hands, mix thoroughly.

Cover the bowl with plastic wrap or a kitchen towel and allow it to rise at room temperature for 18 hours or until more than doubled. It will take longer in a cook room and less time in a warm one.

Flour a work surface and scrape the dough out of the bowl, divide into 4 equal parts and shape them.

For each portion, start with the right side of the dough and pull it toward the center, then do the same with the left, then the top, then the bottom. (The order doesn't actually matter; what you want is four folds.) Shape each portion into a round and turn seam side down. Mold the dough into a neat circular mound. The mounds should not be sticky; if they are, dust with more flour.

If you don't intend to use the dough right away, wrap the balls individually in plastic and refrigerate for up to 3 days. Return to room temperature by leaving them out on the counter, covered in a damp cloth, for 2 to 3 hours before needed.

Leave a comment
Share
  • Pin it
  • Share
  • Tweet
  • Share
  • Email

June Cooking Class

5 / 17 / 165 / 17 / 16

Chef Debbi Cooking Demo 

with


TOOC LOGO

June

Thur.  June 9th

6:30 – 8:30. approximately

Photo: Food Network BBC

Blue Cheese & Heirloom Tomato Tartlettes
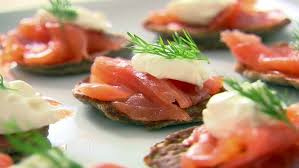
Dilled Smoked Salmon & Cucumber Toasts
Peculiar Pickled Veggies& Pickled Deviled Eggs
Bacon Wrapped Bourbon Glazed Shrimp Skewers
Broccoli Bow Tie Salad
Apricot Jam Shortbread Bars

Seal Beach Tasting Room
$45.00
By Reservation Only (562) 296-5421

Sponsored by

Melissas logo small

Photo: Food Network BBC

Leave a comment
Share
  • Pin it
  • Share
  • Tweet
  • Share
  • Email

Holiday Gift Giving

12 / 4 / 1512 / 4 / 15

Here are some of my favorite gifts for anyone!

….’If you want to learn about food…COOK…and Chef Debbi has created a guideline that taps into the practical and encourages the intuitive cook inside us all!’

Helene Kennan, Former Getty Ex. Chef

What's In Your Pantry


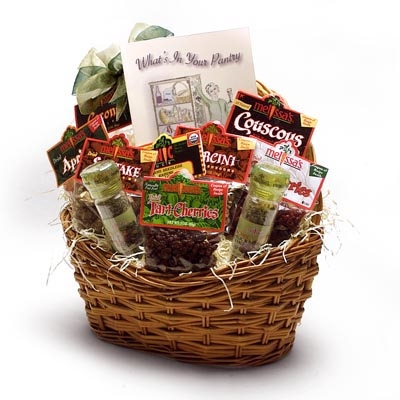
My specially designed gift basket, hand picked ‘Pantry Items’ from the best, Melissa’s produce. Included is a copy of my ‘What’s In Your Pantry’ book guiding you through the basics of stocking your kitchen from knives and cookware to seasonal recipes. And an exceptional selection of dried herbs, mushrooms, spices and more from Melissa’s Produce. Give the experts at Melissa’s a call for your special delivery! 800-588-0151

Chef Debbi basket

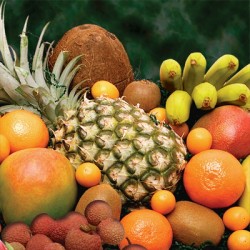
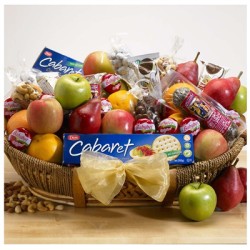
A sampling of other tasty gift baskets from our friends at Melissa’s!

Exotic Fruit BasketParty Basket

Leave a comment
Share
  • Pin it
  • Share
  • Tweet
  • Share
  • Email

Book Signing & Wine Tasting

11 / 17 / 1511 / 17 / 15

Saturday & Sunday, Nov. 21 ~ 22 Events!

logo-2

DON’T MISS THIS WEEKEND
IN TEMECULA!

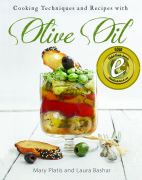
Mary Platis, Author of Cooking Techniques & Recipes with Olive Oil &
Chef Debbi, Author of ‘What’s In Your Pantry’
are teaming up to bring you
Cooking From The Pantry Series!

Book Covercover-award

First stop
Temecula Olive Oil Co.
Temecula tasting Room
Cooking Class Demo-Wine Tasting & Book Signing
Sat. Nov. 21st
12 – 2 $45.00

Menu
Mediterranean Vegetables in Olive Oil
Fresh Tomato Risotto
Baby Beets and Brussels sprouts Salad
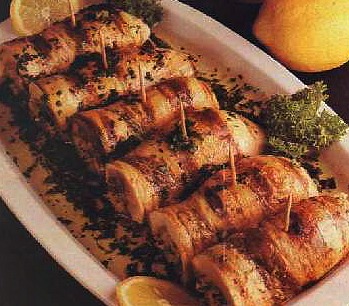
Turkey Rollatini with White Wine, Porcini Mushroom Pan Sauce
Pumpkin Olive Oil Cake with Vanilla & Fig Balsamic Compote

For Temecula Reservations please call:
951-693-0607

Second stop

Sunday, Nov 22nd
Book Signing and Wine Tasting 12 ~ 2

Sponsored by

Leave a comment
Share
  • Pin it
  • Share
  • Tweet
  • Share
  • Email

Pumpkin Blood Orange Olive Oil Cake

10 / 18 / 1511 / 20 / 15

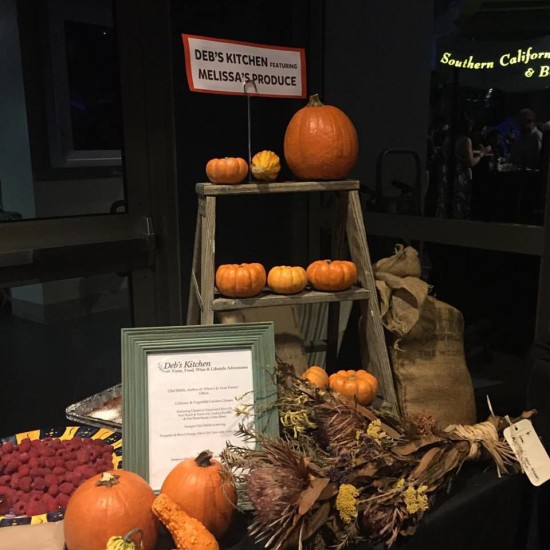
Aquarium Event

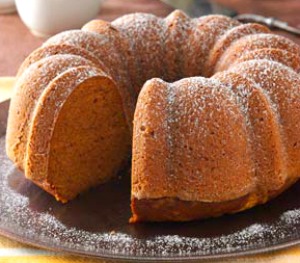
I served this last night at The Aquarium of the Pacific’s Sea Fare fund raising event and it was declared by the President of the Aquarium ‘the best food at the event’. Now that was very nice of him but there was some really tasty food there from local restaurants. It was a wonderful event with music, food and wine and lots of grateful fishes. Thanks to everyone who came out and those who stopped by my booth, I’m happy you enjoyed the cake! And you can learn how to make this cake and more at my cooking classes here in Seal Beach at Temecula Olive Oil‘s tasting room, click on Nov. for the upcoming menu!

pumpkin bundt cake

Pumpkin Olive Oil Cake

Save
Print

Try different flavored olive oils for this cake. Orange, lemon or a lightly flavored olive oil, don’t use a big heavy tasting oil as it will overpower the pumpkin and spice in the cake.
You could make this cake into a sheet cake, round cakes or even cupcakes; just remember to adjust the cooking time.

  • 3 cups all-purpose flour
  • 2 teaspoons baking soda
  • 1 teaspoon ground cinnamon
  • 1 teaspoon ground nutmeg
  • ½ teaspoon salt
  • ¼ teaspoon ground cloves
  • 1 1/2 cups sugar
  • 1 cup olive oil
  • 3 eggs
  • 1 can (15 ounces) solid-pack pumpkin (or 2 cups freshly roasted sugar pumpkin)
  • 1/4 cup powdered sugar
  • 1 package cream cheese, room temperature
  • 1 splash of vanilla, optional

Preheat oven to 350°.

In a medium-sized bowl, stir together flour, baking soda, cinnamon, nutmeg, salt and cloves.

Combine sugar and oil in a large bowl with a rubber spatula until blended.

Add eggs, one at a time, beating well after each addition.

Add flour mixture to egg mixture alternately with pumpkin in three batches, beating

well after each addition.

Transfer to a greased Bundt cake pan.

Bake 60-65 minutes or until toothpick inserted near the center comes out clean.

Cool for approximately 10-15 minutes before inverting onto a wire rack.

Remove pan carefully from cake and cool completely.

Easy Cream Cheese Frosting

Combine all ingredients in the bowl of a stand mixer fitted with a paddle attachment, and beat at low speed until sugar is incorporated.

Increase speed to medium high and beat until frosting is light and whipped, about 3 to 4 minutes. Use to top cookies, cupcakes, or cakes


Leave a comment
Share
  • Pin it
  • Share
  • Tweet
  • Share
  • Email

Cooking Class

10 / 18 / 1510 / 18 / 15

Temecula Olive Oil Co., Seal Beach

November Class

Thur. Nov. 12th
6:30-8:30 (approximately)
Braciole


Smoked Trout Canapés with Pickled Onions and Mascarpone

Pomegranate, Bacon and Brussels Sprouts Salad

Braciole

Italian Stuffed Beef Rolls

Mushroom Bolognese

Chocolate Raspberry Linzertorte


10 – 20% off on all purchases the night of the class


Class Sponsored by

1logo 2004

NOW TAKING RESERVATIONS!

Seal Beach Tasting Room By Reservation only, call: 562-296-5421

Classes are $45; Pre Paid Reservations only

Feel free to BYOB

DKB-12

Leave a comment
Share
  • Pin it
  • Share
  • Tweet
  • Share
  • Email

Artisan Bread in 5 Minutes a Day

9 / 22 / 159 / 22 / 15

Bread, wtrmk


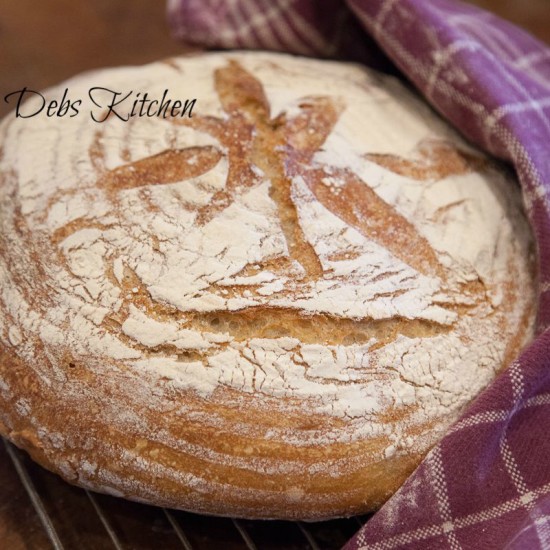
What’s better than fresh hot bread straight from the oven? (Well besides some delicious fresh butter on it!) What’s better is that this is a NO KNEAD recipe, couldn’t be easier. The dough will keep in your refrigerator for up to 2 weeks after mixing and there is nothing to do except pinch off a big piece, let it come to room temperature and bake it. The dough makes wonderful pizza, focaccia and flatbread as well. The authors, Jeff Hertzberg and Zoe Francois, use Gold Medal Flour for their bread but I am a die hard King Arthur Flour fan. Read about flour and how to measure and then decide for yourself which to use. I use this dough for bread, flatbread, pizza and rolls, check the Artisan Bread in 5 Minutes a Day for other recipes. This is a book you must have on your shelf. Buy it now from Amazon, click here.


I like baking my bread in a Le Crueset Dutch oven and I give directions for that procedure, the Artisan Bread website will guide you in other methods. If you like using a starter for your bread, the authors also give you instructions on how to incorporate that method into your bread making.

If you learn to weigh your flour you’ll have much better results in the end product. Actually weighing ingredients for recipes is really much easier and the recipe comes together much quicker and more efficient.

Watch the video made by King Arthur Flour on how to measure flour here, 
I’m posting my edited version of the bread but you can visit the authors website and read the original recipe with updates and tips. Go here for recipe


Leave a comment
Share
  • Pin it
  • Share
  • Tweet
  • Share
  • Email

Simple Cold Pasta Salad

8 / 18 / 15

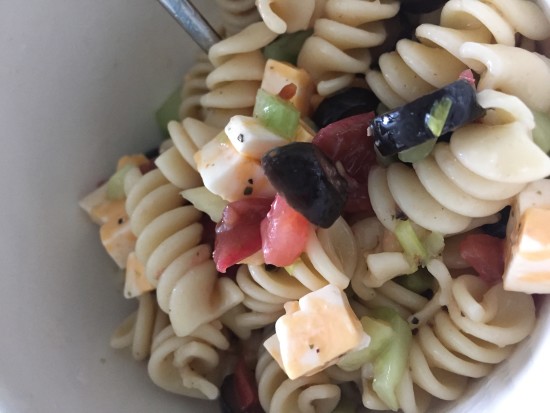
On these dog days of summer, even here at the beach, this is one of my favorite go-to recipes. It’s quick and easy, you don’t have to turn on any heat, even to cook the pasta, and you can use bits and pieces of left overs from your refrigerator pantry.

Some of my typical summer refrigerator pantry items are, cheese, olives, tomatoes (home grown, of course), cucumbers, peppers and the like. Most often there will be some lemon chicken left over as well. All are perfect additions to this salad. First the pasta, no need to boil a big pot of water, we’ll use the microwave!

Summer Pasta Salad

Pour your dry pasta, something curly is best to hold all the wonderful dressing in it’s little nooks, into a microwave safe bowl. Cover with cool water by 1″, make sure the container is big enough that the water and pasta won’t boil over. You’ll want to cook your pasta for about 5 minutes longer than the directions guide you on the box. Test the pasta for doneness and cook a little longer if necessary. Drain well and rinse quickly with cool water. Do not add dressing to the warm pasta as it will just soak it all up and be mushy. Stir the pasta occasionally as it cools to keep it from sticking together. You could cook the pasta ahead of time and chill it before you  make the salad. If this is the case, toss the cooled pasta with a little olive oil before refrigerating. Now you’re ready to proceed with the salad.

In actuality, from this point on you could chop and dice almost anything you find in you refrigerator but here’s my stand by recipe.

Summer Pasta Salad

Save
Print
  • 1/4 cup red wine vinegar
  • 1 teaspoon Dijon mustard
  • 1/2 cup olive oil, approximately
  • Salt and pepper
  • 1 teaspoon garlic powder
  • 2 teaspoon fresh basil, torn
  • 1/2 cup diced cucumber
  • 1 pint cherry tomatoes, halved or quartered
  • 1/2 cup diced red bell pepper
  • 1/3 cup thinly sliced green onions
  • 1/4 cup sliced black olives
  • 1/2 cup crumbled or diced cheese, mozzarella, chedderella, goat cheese or any you prefer
  • 1 ½ cup cooked pasta

For dressing, mix together vinegar, Dijon, salt, pepper, and garlic powder and whisk until it comes together. While continually whisking slowly add olive oil to taste. Set aside.

Mix together remaining ingredients and toss with dressing. Serve cold.

Leave a comment
Share
  • Pin it
  • Share
  • Tweet
  • Share
  • Email

Summer Salads

6 / 29 / 156 / 29 / 15


Summer Nicoise

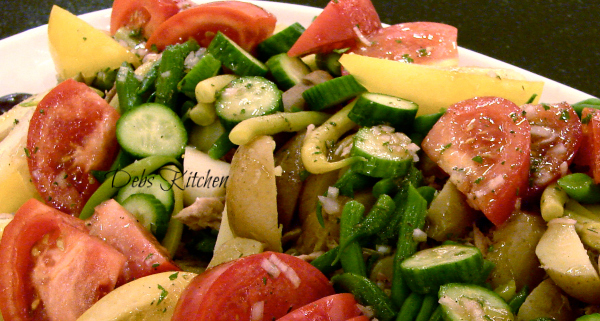
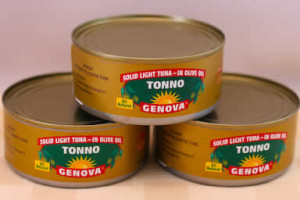
My summer pantry is usually a little lighter than my winter pantry as I use far more fresh ingredients, mostly from my kitchen garden. The French Nicoise Salad is one of my favorites and I like using whatever fresh veggies I find at the local farmers market or in my garden. As in most cases, the quality of ingredients that you use are directly reflected in the finished dish, therefore buy the best that you can afford. I use Italian tuna in olive oil; I love the Genova brand from Italy. Please don’t use all white tuna packed in water, as it has no flavor, better to leave it out. I drain most of the oil from the canned tuna, reserving it for use in making the salad dressing.

italiantuna_kalynskitchen

Another way to dress up the dish for a hot summer evening entree is to grill some fresh tuna or shrimp from your fishmonger. This recipe makes a beautifully plated salad for a buffet table but can be individually plated as well. Be creative and use what you have on hand.

Summer Nicoise Salad

Save
Print

This salad is great for adapting to whatever you find in your pantry and/or refrigerator. Left over vegetables from last night’s dinner work great; keep your pantry stocked with jars of olives, tuna, hearts of palm, baby corn or a myriad of other staples. Change the tuna; use bay shrimp, scallops, last nights chicken or steak. A great salad to stretch your creative talents!

  • Vinaigrette:
  • 1/4 cup red wine vinegar
  • 1 tablespoon Dijon mustard
  • 1 small shallot -- minced
  • 1 tablespoon Italian parsley -- chopped
  • Salt and pepper -- to taste
  • 3/4 cup olive oil, use drained oil from tuna and add more olive oil as needed
  • Salad:
  • 2 cans Italian tuna -- packed in olive oil, drained and flaked with a fork
  • Salt and pepper -- to taste
  • 1/4 pound haricot vert -- blanched, cooled and dried well
  • 4 new potatoes -- boiled
  • 2 medium plum tomatoes -- cut into quarters
  • 3 eggs, cooked~see recipe
  • 1/2 cup nicoise olives
  • 3 cups mixed baby greens

Make the vinaigrette:

In a large bowl make the vinaigrette by whisking together the vinegar and

Dijon mustard. Add shallot, parsley and salt and pepper. Drizzle olive oil, while whisking into vinegar mixture. Re-season if necessary.

Blanch the beans in boiling salted water, drain, and chill.

Cook the potatoes in salted water just until they are tender through, about 15 minutes. Drain. Peel them, if desired, as soon as they are cool enough to handle.

Hard boil eggs by covering eggs with cold water, bring to a boil, remove from heat, cover and time for 15 minutes, plunge into ice water and chill.

Drain tuna, leaving a small amount of oil clinging to fish, and reserving drained oil, flake tuna into a medium mixing bowl.

Toss mixed greens with enough vinaigrette to coat. Season with salt and pepper.

Plate salad by putting a mound of tuna in the center of the mixed greens and surround with remaining ingredients, drizzle a little dressing over vegetables and serve extra dressing on the side.

Save any remaining vinaigrette and store in glass jar, refrigerated for up to 4 weeks.

Leave a comment
Share
  • Pin it
  • Share
  • Tweet
  • Share
  • Email

Hawaiian Luau Feast

6 / 4 / 156 / 4 / 15

luau 002

Summer is almost here and if you can’t visit the Islands we can certainly take some of the traditional Hawaiian foods and tweak them to our recipes and summer picnics. Our next cooking class uses many of these ingredients and we show you ways to incorporate them into your backyard parties.

luau 001

While we can’t host a traditional luau in the tasting room we can enjoy a luau type picnic with foods of the Islands. In ancient Hawaii men and women ate their meals separately but in 1819 King Kamehameha removed all religious laws and taboos and men and women began eating together, creating the first luau feast.

luau_party_0

The name luau refers to a dish made with chicken wrapped in taro leaves (luau), and baked in coconut milk; it’s served with slightly salty, smoky Kalua pig (pork). Kalua means ‘the hole’ and refers to the pit (an imu oven) the pig is cooked in. Simply put, the pig is steamed over a long period of time and is similar to a smoky pulled pork dish.

Hawaiian-Luau Fun

We’ll be doing our Kalua pork in a pressure cooker but the flavors will be able to develop while we talk and prepare other side dishes that use traditional Hawaiian ingredients. We might even be able to talk Tammy into a little hula (we know she can)!

Join us in the Temecula Olive Oil Tasting Room, Seal Beach for our fun little Hawaiian party. Learn a little about Hawaiian tradition and a conversation about cooking with pressure cookers!

Click here to see full menu

Our class goes off next week! Thursday, June 11th 6:30 p.m.Make your reservation today!

Luau Sign

For Reservations Call (562) 296-5421


Leave a comment
Share
  • Pin it
  • Share
  • Tweet
  • Share
  • Email

Easter Potatoes

3 / 31 / 154 / 1 / 15

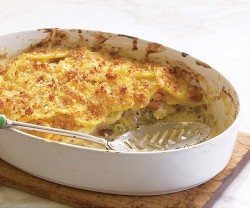
potato gratin-molly stevens

Potato Gratin

Save
Print

This rich, creamy gratin gets a note of smokiness from the bacon between the layers of tender potatoes.
by Molly Stevens from Fine Cooking

  • 2-1/2 lb. Yukon Gold potatoes, peeled & sliced into 1/8-inch thick rounds
  • 2-1/2 cups heavy or light cream
  • Sea salt & fresh ground pepper, to taste
  • 4 oz. bacon
  • 3 medium leeks, white and light-green parts only, thinly sliced
  • 6 oz. grated Gruyère
  • 2 to 3 tsp. chopped fresh thyme
  • 1/4 tsp. freshly grated nutmeg
  • 1/2 cup fresh breadcrumbs
  • 1/4 cup finely grated Parmigiano-Reggiano
  • 2 tablespoons unsalted butter, melted

Serves 8

Position a rack in the center of the oven and heat the oven to 400°F. Butter or oil a 3-quart gratin dish; set aside.

Put the potatoes, cream , 1/2 tsp. salt, and a few grinds of pepper in a 12-inch skillet. Simmer, partially covered, over medium to medium-low heat, stirring occasionally and gently with a rubber spatula until the potatoes are barely tender when pierced with a fork or skewer, 8 to 12 minutes.

In a medium skillet, cook the bacon until browned and fully cooked. Set aside to cool, reserving 2 tablespoons of the fat in the skillet. Heat the reserved fat over medium-high heat and sauté leeks until tender, fragrant, and lightly browned. Season to taste with salt and pepper. When the bacon is cool, crumble it into small pieces.

Using a slotted spoon, transfer half the potatoes to the prepared gratin dish, spreading them evenly. Layer on the leeks, bacon, Gruyère, thyme, and nutmeg. Top with the remaining potatoes spreading them evenly, and pour over any liquid remaining in the pan.

In a small bowl, combine the breadcrumbs, Parmigiano-Reggiano, and melted butter.

Evenly scatter the topping mixture over the potatoes. Bake the gratin until it’s bubbly, the top is brown, and the potatoes are completely tender when poked with a fork or a skewer, 25 to 30 minutes. Let the gratin sit for at least 10 and up to 30 minutes before serving so the liquid is fully absorbed and the layers are cohesive.


Leave a comment
Share
  • Pin it
  • Share
  • Tweet
  • Share
  • Email

Mushroom and Gruyere Puff Pastries

12 / 14 / 14

Mushroom-Herb-and-Gruyere-Cheese-Mini-Turnovers6-690x400


Mushroom and Gruyere Puff Triangles

Save
Print

A wonderful easy appetizer to make ahead and freeze individually, pull out cook as many as you need.

  • 1 tablespoon olive oil
  • 1 tablespoon butter
  • 2 cups finely chopped Cremini mushrooms
  • 1 onion, chopped finely
  • 1 teaspoon dried Italian herbs, crushed
  • Sea salt & fresh ground pepper to taste
  • 2 tablespoon flour
  • ½ cup heavy cream
  • 3 tablespoons dry white wine
  • 1/3 cup shredded Gruyere cheese
  • 2 sheets of puff pastry, thawed (12x12 inches)
  • 1 egg + 1 tablespoon water, whisked together

Serves: 32

Preheat your oven to 400°.

Line 2 baking sheets with parchment paper. Set aside.

Heat a medium sauté pan over medium high heat, add butter and olive oil, and add the onion and sauté until translucent. Add the mushrooms, herbs, sea salt and pepper and cook until the mushrooms are lightly browned and no liquid remains in the pan.

Stir in the flour and cook for 1 minute, add the wine and cream.

Remove from the heat, and stir in the Gruyere cheese. Chill.

Place a rolling mat on your counter, or a large piece of parchment paper. Add a little flour and lightly roll out the puff pasty, cut into 16 pieces using a pizza cutter or knife.

You should keep the puff pastry as cold as possible, if it starts to stick or becomes doughy, return it to the refrigerator for about 10 min. Keep the second piece of puff pastry in the refrigerator while you work on the first one.

Scoop about 1 t tablespoon of the cold mushroom mixture into the center of the dough (do not overfill or they will leak). Fold the over in a triangle and, using a fork, press the edges together to seal them.

Place the mini turnovers onto your prepared baking sheet, at least 1 inch apart. Place in the refrigerator for 20 minutes and prepare the second batch. Refrigerate the second batch for 20 minutes for best results.

Brush the sealed edges and tops of the turnovers with the egg mixture.

Bake each tray for about 15 minutes, or until the tops are golden brown.

Adapted from Jo-Anna, A Pretty Life in the Suburbs, courtesy of Kendall Jackson

Related Posts Plugin for WordPress, Blogger...
Leave a comment
Share
  • Pin it
  • Share
  • Tweet
  • Share
  • Email

Posts navigation

Previous Page 1 2 3 4 5 Next Page
Deb

Meet Chef Debbi

READ BIO

Join-Us Sign up for our newsletter to receive exclusive tips 'n tricks, and special offers on classes, tours, and more!

Recent Posts

  • New E-Book!
  • From the Pantry
  • Spaghettini at Home
  • Growing Corn
  • Spring IS Coming!

Categories

BookCUT

What's in Your Pantry?

How to stock your pantry to create delicious dishes.

Learn Chef Debbi's pantry essentials and how to substitute ingredients for pantry staples in her basic recipes for quick and easy meals.
BUY BOOK>

FacebookTwitterInstagramGooglepinterest


© 2014, DEB'S KITCHEN
Angie Makes Feminine WordPress Themes