Deb's Kitchen - Farm, Food, Wine & Lifestyle Adventures
  • Facebook
  • Google
  • Twitter
  • Instagram
  • Pinterest
  • Email
Menu
Skip to content
  • Home
  • Blog
  • Events
    • Classes
    • Tours & Adventures
  • Edible Gardening
  • Preserving
  • Recipes
    • Appetizers
    • Soups and Salads
    • Main Dishes
    • Side Dishes
    • Desserts
  • About
    • Whats In Your Pantry
    • Ask Debbi
    • Deb’s Kitchen Botanicals
    • Press
  • Contact

Tag Archives: party ideas

Pumpkin Blood Orange Olive Oil Cake

10 / 18 / 1511 / 20 / 15

Aquarium Event

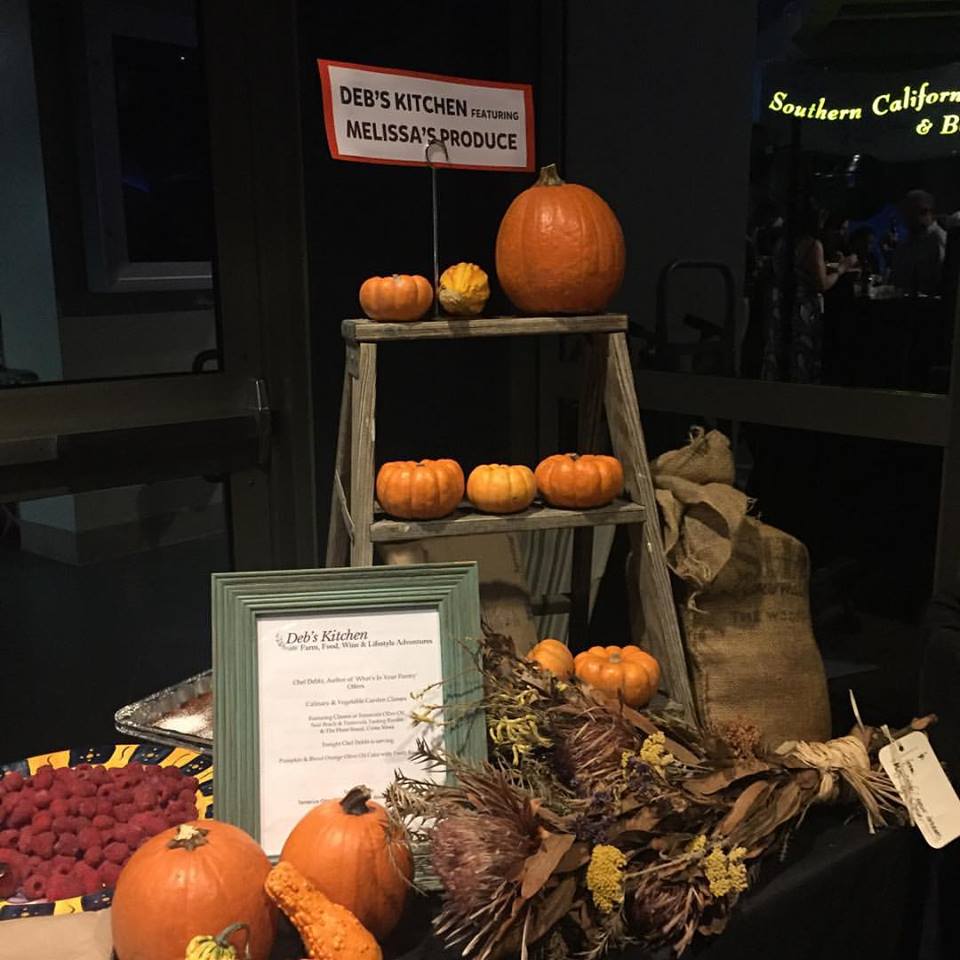
I served this last night at The Aquarium of the Pacific’s Sea Fare fund raising event and it was declared by the President of the Aquarium ‘the best food at the event’. Now that was very nice of him but there was some really tasty food there from local restaurants. It was a wonderful event with music, food and wine and lots of grateful fishes. Thanks to everyone who came out and those who stopped by my booth, I’m happy you enjoyed the cake! And you can learn how to make this cake and more at my cooking classes here in Seal Beach at Temecula Olive Oil‘s tasting room, click on Nov. for the upcoming menu!

pumpkin bundt cake

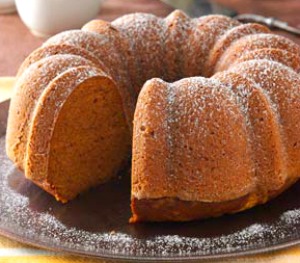
Pumpkin Olive Oil Cake

Save
Print

Try different flavored olive oils for this cake. Orange, lemon or a lightly flavored olive oil, don’t use a big heavy tasting oil as it will overpower the pumpkin and spice in the cake.
You could make this cake into a sheet cake, round cakes or even cupcakes; just remember to adjust the cooking time.

  • 3 cups all-purpose flour
  • 2 teaspoons baking soda
  • 1 teaspoon ground cinnamon
  • 1 teaspoon ground nutmeg
  • ½ teaspoon salt
  • ¼ teaspoon ground cloves
  • 1 1/2 cups sugar
  • 1 cup olive oil
  • 3 eggs
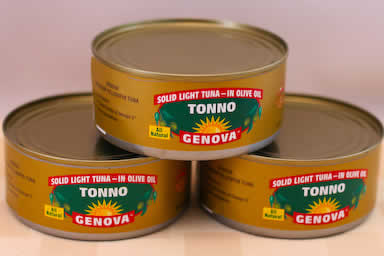
  • 1 can (15 ounces) solid-pack pumpkin (or 2 cups freshly roasted sugar pumpkin)
  • 1/4 cup powdered sugar
  • 1 package cream cheese, room temperature
  • 1 splash of vanilla, optional

Preheat oven to 350°.

In a medium-sized bowl, stir together flour, baking soda, cinnamon, nutmeg, salt and cloves.

Combine sugar and oil in a large bowl with a rubber spatula until blended.

Add eggs, one at a time, beating well after each addition.

Add flour mixture to egg mixture alternately with pumpkin in three batches, beating

well after each addition.

Transfer to a greased Bundt cake pan.

Bake 60-65 minutes or until toothpick inserted near the center comes out clean.

Cool for approximately 10-15 minutes before inverting onto a wire rack.

Remove pan carefully from cake and cool completely.

Easy Cream Cheese Frosting

Combine all ingredients in the bowl of a stand mixer fitted with a paddle attachment, and beat at low speed until sugar is incorporated.

Increase speed to medium high and beat until frosting is light and whipped, about 3 to 4 minutes. Use to top cookies, cupcakes, or cakes


Leave a comment
Share
  • Pin it
  • Share
  • Tweet
  • Share
  • Email

Cooking Class

10 / 18 / 1510 / 18 / 15

Temecula Olive Oil Co., Seal Beach

November Class

Thur. Nov. 12th
6:30-8:30 (approximately)
Braciole


Smoked Trout Canapés with Pickled Onions and Mascarpone

Pomegranate, Bacon and Brussels Sprouts Salad

Braciole

Italian Stuffed Beef Rolls

Mushroom Bolognese

Chocolate Raspberry Linzertorte


10 – 20% off on all purchases the night of the class


Class Sponsored by

1logo 2004

NOW TAKING RESERVATIONS!

Seal Beach Tasting Room By Reservation only, call: 562-296-5421

Classes are $45; Pre Paid Reservations only

Feel free to BYOB

DKB-12

Leave a comment
Share
  • Pin it
  • Share
  • Tweet
  • Share
  • Email

Artisan Bread in 5 Minutes a Day

9 / 22 / 159 / 22 / 15

Bread, wtrmk


What’s better than fresh hot bread straight from the oven? (Well besides some delicious fresh butter on it!) What’s better is that this is a NO KNEAD recipe, couldn’t be easier. The dough will keep in your refrigerator for up to 2 weeks after mixing and there is nothing to do except pinch off a big piece, let it come to room temperature and bake it. The dough makes wonderful pizza, focaccia and flatbread as well. The authors, Jeff Hertzberg and Zoe Francois, use Gold Medal Flour for their bread but I am a die hard King Arthur Flour fan. Read about flour and how to measure and then decide for yourself which to use. I use this dough for bread, flatbread, pizza and rolls, check the Artisan Bread in 5 Minutes a Day for other recipes. This is a book you must have on your shelf. Buy it now from Amazon, click here.


I like baking my bread in a Le Crueset Dutch oven and I give directions for that procedure, the Artisan Bread website will guide you in other methods. If you like using a starter for your bread, the authors also give you instructions on how to incorporate that method into your bread making.

If you learn to weigh your flour you’ll have much better results in the end product. Actually weighing ingredients for recipes is really much easier and the recipe comes together much quicker and more efficient.

Watch the video made by King Arthur Flour on how to measure flour here, 
I’m posting my edited version of the bread but you can visit the authors website and read the original recipe with updates and tips. Go here for recipe


Leave a comment
Share
  • Pin it
  • Share
  • Tweet
  • Share
  • Email

Summer Salads

6 / 29 / 156 / 29 / 15


Summer Nicoise

My summer pantry is usually a little lighter than my winter pantry as I use far more fresh ingredients, mostly from my kitchen garden. The French Nicoise Salad is one of my favorites and I like using whatever fresh veggies I find at the local farmers market or in my garden. As in most cases, the quality of ingredients that you use are directly reflected in the finished dish, therefore buy the best that you can afford. I use Italian tuna in olive oil; I love the Genova brand from Italy. Please don’t use all white tuna packed in water, as it has no flavor, better to leave it out. I drain most of the oil from the canned tuna, reserving it for use in making the salad dressing.

italiantuna_kalynskitchen

Another way to dress up the dish for a hot summer evening entree is to grill some fresh tuna or shrimp from your fishmonger. This recipe makes a beautifully plated salad for a buffet table but can be individually plated as well. Be creative and use what you have on hand.

Summer Nicoise Salad

Save
Print

This salad is great for adapting to whatever you find in your pantry and/or refrigerator. Left over vegetables from last night’s dinner work great; keep your pantry stocked with jars of olives, tuna, hearts of palm, baby corn or a myriad of other staples. Change the tuna; use bay shrimp, scallops, last nights chicken or steak. A great salad to stretch your creative talents!

  • Vinaigrette:
  • 1/4 cup red wine vinegar
  • 1 tablespoon Dijon mustard
  • 1 small shallot -- minced
  • 1 tablespoon Italian parsley -- chopped
  • Salt and pepper -- to taste
  • 3/4 cup olive oil, use drained oil from tuna and add more olive oil as needed
  • Salad:
  • 2 cans Italian tuna -- packed in olive oil, drained and flaked with a fork
  • Salt and pepper -- to taste
  • 1/4 pound haricot vert -- blanched, cooled and dried well
  • 4 new potatoes -- boiled
  • 2 medium plum tomatoes -- cut into quarters
  • 3 eggs, cooked~see recipe
  • 1/2 cup nicoise olives
  • 3 cups mixed baby greens

Make the vinaigrette:

In a large bowl make the vinaigrette by whisking together the vinegar and

Dijon mustard. Add shallot, parsley and salt and pepper. Drizzle olive oil, while whisking into vinegar mixture. Re-season if necessary.

Blanch the beans in boiling salted water, drain, and chill.

Cook the potatoes in salted water just until they are tender through, about 15 minutes. Drain. Peel them, if desired, as soon as they are cool enough to handle.

Hard boil eggs by covering eggs with cold water, bring to a boil, remove from heat, cover and time for 15 minutes, plunge into ice water and chill.

Drain tuna, leaving a small amount of oil clinging to fish, and reserving drained oil, flake tuna into a medium mixing bowl.

Toss mixed greens with enough vinaigrette to coat. Season with salt and pepper.

Plate salad by putting a mound of tuna in the center of the mixed greens and surround with remaining ingredients, drizzle a little dressing over vegetables and serve extra dressing on the side.

Save any remaining vinaigrette and store in glass jar, refrigerated for up to 4 weeks.

Leave a comment
Share
  • Pin it
  • Share
  • Tweet
  • Share
  • Email

Hawaiian Luau Feast

6 / 4 / 156 / 4 / 15

luau 002

Summer is almost here and if you can’t visit the Islands we can certainly take some of the traditional Hawaiian foods and tweak them to our recipes and summer picnics. Our next cooking class uses many of these ingredients and we show you ways to incorporate them into your backyard parties.

luau 001

While we can’t host a traditional luau in the tasting room we can enjoy a luau type picnic with foods of the Islands. In ancient Hawaii men and women ate their meals separately but in 1819 King Kamehameha removed all religious laws and taboos and men and women began eating together, creating the first luau feast.

luau_party_0

The name luau refers to a dish made with chicken wrapped in taro leaves (luau), and baked in coconut milk; it’s served with slightly salty, smoky Kalua pig (pork). Kalua means ‘the hole’ and refers to the pit (an imu oven) the pig is cooked in. Simply put, the pig is steamed over a long period of time and is similar to a smoky pulled pork dish.

Hawaiian-Luau Fun

We’ll be doing our Kalua pork in a pressure cooker but the flavors will be able to develop while we talk and prepare other side dishes that use traditional Hawaiian ingredients. We might even be able to talk Tammy into a little hula (we know she can)!

Join us in the Temecula Olive Oil Tasting Room, Seal Beach for our fun little Hawaiian party. Learn a little about Hawaiian tradition and a conversation about cooking with pressure cookers!

Click here to see full menu

Our class goes off next week! Thursday, June 11th 6:30 p.m.Make your reservation today!

Luau Sign

For Reservations Call (562) 296-5421


Leave a comment
Share
  • Pin it
  • Share
  • Tweet
  • Share
  • Email

The Chef, The Photographer and The Adventure

5 / 26 / 155 / 27 / 15

tastyfstops-April-watermarked


Meet my friend, Christina Peters, photographer, and experience adventure through her eyes and lens. Christina’s new website, tastyfstops.com, chronicles her adventures through food, farms, travel and more. She began her new adventure in my spring garden and through her lens and my recipes we’ll bring you through one (or more) harvests of my potager (vegetable) garden. Sign up for Christina’s newsletter and follow us through spring and summer into fall and winter. Enjoy.


Christina-blackberries-watermarkedIt’s berry season in the garden and my blackberries and boysenberries are off to an early start. This is one of Christina’s beautiful, succulent shots and here’s a tasty little recipe to get your summer started right! Blackberry Crumb Bars

And speaking of summer, check out the new cooking classes for June, we still have a few seats for this Thursday also. Two summery classes in June, A Summer Picnic Party and an Adult 4th of July menu. We’ll be hosting one more class in July (on the 9th) then I am off for another knee surgery and won’t see you back until the end of summer! So grab a spot while you can.

Mangia!

Debbi


Leave a comment
Share
  • Pin it
  • Share
  • Tweet
  • Share
  • Email

Mushroom and Gruyere Puff Pastries

12 / 14 / 14

Mushroom-Herb-and-Gruyere-Cheese-Mini-Turnovers6-690x400


Mushroom and Gruyere Puff Triangles

Save
Print

A wonderful easy appetizer to make ahead and freeze individually, pull out cook as many as you need.

  • 1 tablespoon olive oil
  • 1 tablespoon butter
  • 2 cups finely chopped Cremini mushrooms
  • 1 onion, chopped finely
  • 1 teaspoon dried Italian herbs, crushed
  • Sea salt & fresh ground pepper to taste
  • 2 tablespoon flour
  • ½ cup heavy cream
  • 3 tablespoons dry white wine
  • 1/3 cup shredded Gruyere cheese
  • 2 sheets of puff pastry, thawed (12x12 inches)
  • 1 egg + 1 tablespoon water, whisked together

Serves: 32

Preheat your oven to 400°.

Line 2 baking sheets with parchment paper. Set aside.

Heat a medium sauté pan over medium high heat, add butter and olive oil, and add the onion and sauté until translucent. Add the mushrooms, herbs, sea salt and pepper and cook until the mushrooms are lightly browned and no liquid remains in the pan.

Stir in the flour and cook for 1 minute, add the wine and cream.

Remove from the heat, and stir in the Gruyere cheese. Chill.

Place a rolling mat on your counter, or a large piece of parchment paper. Add a little flour and lightly roll out the puff pasty, cut into 16 pieces using a pizza cutter or knife.

You should keep the puff pastry as cold as possible, if it starts to stick or becomes doughy, return it to the refrigerator for about 10 min. Keep the second piece of puff pastry in the refrigerator while you work on the first one.

Scoop about 1 t tablespoon of the cold mushroom mixture into the center of the dough (do not overfill or they will leak). Fold the over in a triangle and, using a fork, press the edges together to seal them.

Place the mini turnovers onto your prepared baking sheet, at least 1 inch apart. Place in the refrigerator for 20 minutes and prepare the second batch. Refrigerate the second batch for 20 minutes for best results.

Brush the sealed edges and tops of the turnovers with the egg mixture.

Bake each tray for about 15 minutes, or until the tops are golden brown.

Adapted from Jo-Anna, A Pretty Life in the Suburbs, courtesy of Kendall Jackson

Leave a comment
Share
  • Pin it
  • Share
  • Tweet
  • Share
  • Email

Apple Crisp

12 / 5 / 1412 / 5 / 14

Apple Crisp

Save
Print

Such a quick, easy recipe for a seasonal dessert; can be a great breakfast treat for those with a sweet tooth! Use an apple that is best for baking such as:

Jonathans and Jonagolds, Honeycrisp, Granny Smith, Melrose, Winesap, Braeburn, Rome Beauty.

  • Serves: 8
  • 4 cups sliced or diced apples
  • 1 tablespoon flour
  • ½ cup sugar
  • ¾ cup brown sugar
  • ⅓ cup butter
  • ¾ cup oatmeal
  • ¼ teaspoon baking soda
  • ½ teaspoon salt

Preheat oven to 350°. Combine the first three ingredients and place in a greased 8×8 baking dish.

Combine the remaining ingredients and sprinkle over the top of the apple mixture.

Bake 30 minutes. Serve warm

apple crisp


Photo: All Recipes

Leave a comment
Share
  • Pin it
  • Share
  • Tweet
  • Share
  • Email

Marinated Olives

12 / 5 / 1412 / 6 / 14

Olives-Fair 2011

Marinated Olives

Save
Print

There are a million ways to adapt this recipe to your liking. Marinate the
olives for at least 24 hours and serve at room temperature. Try different
herbs, spices, fruit zest and vinegar. Look to see what’s in your pantry.
This is great served with a little Baked Goat Cheese and a baguette.

  • 1 lb. mixed olives, not pitted
  • 1 lemon rind, cut from the lemon without removing the white pith beneath the skin
  • 1 tablespoon mixed dried Italian herbs, crushed
  • pinch of salt and pepper
  • 1 clove garlic, minced
  • ¼ cup Zinfandel vinegar
  • 1 cup (or more) lemon flavored olive oil or use an extra virgin olive oil

Place the olives into a jar so they fit snug.

Chop the lemon rind into fine strips, mix with remaining ingredients and pour over the olives to cover. Add a little more oil if it doesn’t quite cover the olives. Place the lid on the jar and refrigerate overnight.

You can store these olives for several days in the refrigerator but serve at room temperature

Leave a comment
Share
  • Pin it
  • Share
  • Tweet
  • Share
  • Email

Paella for a Crowd

11 / 14 / 1412 / 14 / 14
PAELLA FOR A CROWD

Having a houseful of people for days at a time can be tough to figure out just what to feed everyone. I love quick and easy dishes that don’t require a lot of my time or attention. Once you get all the ingredients into the pan, it’s an easy go. You don’t even need a paella pan, a regular sauté pan or even a large electric skillet works beautifully.

Paella-0177

You’ll want to use Spanish rice and Spanish saffron if you can for the best flavor but any short grain rice will do nicely such as an Italian Arborio which can be found in your local supermarket. Sauté a little shallot, preferred, or onion, garlic and infuse some chicken or vegetable stock with the saffron to start. Choose some protein to mix into the rice such as chicken, shrimp, scallops, mussels or chorizo and the dish comes together quickly. Follow the recipe or be creative and enjoy your company for the weekend! Mangia~

Chicken and Shellfish Paella

1 package chicken thighs
1/4 cup extra-virgin olive oil
Sea salt and freshly ground pepper
1 shallot, minced or ½ onion, chopped
2 cloves garlic, minced
1 tablespoon flat-leaf parsley leaves, chopped, reserve some for garnish
½ cup white wine
1 (15-ounce) can whole tomatoes, drained and hand-crushed
4 cups short grain Spanish rice
6 cups stock, warmed with a generous pinch of saffron thread
1 dozen littleneck clams, scrubbed
1 pound jumbo shrimp, peeled and de-veined
1-2 pound mussels
1/2 cup sweet peas, frozen and thawed
Lemon wedges, for serving

Heat oil in a paella or sided sauté pan over medium-high heat. Add salt and freshly ground pepper to the chicken and brown skin-side down both sides. Remove from pan and reserve.

In the same pan, make a sofrito by sautéing the shallot, garlic, and parsley. Cook for 2 or 3 minutes on a medium heat. Add the wine and cook until it reduces some, about 5 minutes, stir in the rice and stir-fry to coat the grains. Add the crushed tomatoes and stock and simmer for 10 minutes, gently moving the pan around so the rice cooks evenly and absorbs the liquid. Add chicken, clams, mussels and shrimp, tucking them into the rice. Let the paella simmer, without stirring, until the rice is al dente, for about 10 minutes. During the last 5 minutes of cooking, when the rice is filling the pan add the peas.

Remove from heat and rest for 5 minutes. Garnish with parsley and lemon wedges.

Leave a comment
Share
  • Pin it
  • Share
  • Tweet
  • Share
  • Email

Lavender Shortbread Cookies

6 / 29 / 1412 / 3 / 14

Lavender Shortbread Cookies


Lavender cookies

Photo from Central Coast Lavender


Makes about 50 cookies


1          tablespoon dried lavender blossoms

1/2      cup plus 1 tablespoon granulated sugar

1          cup (2 sticks) unsalted butter, at room temperature

2 ½      cup all-purpose flour

1/4      teaspoon salt

2          tablespoons heavy cream (or 1 egg whisked with a little water)

extra lavender sugar for sprinkling on top


In a medium bowl, whisk together flour and salt. Set aside.

In a small spice grinder (I use my cleaned out coffee grinder) to grind up 1 tablespoon lavender and 1 tablespoon sugar. Grind it up! You could also use a mortar and pestle to grind the sugar and lavender together.

In the bowl of an electric stand mixer, fitted with a paddle attachment add butter, ground lavender mixture, and remaining 1/2 cup sugar. Cream on medium speed until slightly more pale and fluffy, about 5 minutes. Stop the mixer and add the flour, mix on low speed until dough comes together. The dough will be crumbly, then begin to form when it continues to mix. Dump dough mixture out onto a clean surface and form into a ball with your hands. Wrap in plastic wrap and refrigerate for at least 30 minutes.

Line cookie sheets with parchment paper. Set aside.

Divide refrigerated dough into quarters. On a lightly floured work surface, roll dough out to a 1/4-inch thickness. Use a 1 1/2-inch round cookie cutter to cut cookies, or use a pizza cutter to slice cookies into squares. Use a fork to prick cookies. Brush very lightly with cream or egg wash and sprinkle with sugar. Refrigerate cookies while oven preheats.

Place racks in the center and upper third of the oven. Preheat oven to 350° .

When oven is preheated, bake cookies for 8 to 11 minutes, until just browned around the edges. Remove from oven. Allow cooling on the cookie sheet for 10 minutes then removing to a wire rack to cool completely.

Cookies last, in an airtight container at room temperature, for up to 4 days.

adapted slightly from Party Like a Culinista

Leave a comment
Share
  • Pin it
  • Share
  • Tweet
  • Share
  • Email

Holtz Avocado Ranch

6 / 25 / 1412 / 3 / 14

California Avocados

hanging bunch

I have a love affair with California avocados, ever since I was a little girl, I could never get enough. My grandmother used to feed us mashed avocado on toast with a little salt and pepper every day during the season and it is still my favorite for breakfast! Or even a little snack.

Grove

A couple of weeks ago I went to visit an avocado farm, but not just any farm, Holtz Family Avocado Farm in Escondido. Their forest of avocado trees is just so beautiful; it’s so inspiring just to walk the grove. Growing these avocados is a three-year process from budding the growth to blooming and then a year for the fruit to ripen. You can see the baby avocados, which will be ready for next years harvest, hanging on a tree right next to the avocados that are being picked for this years harvest. Avocados like to grow up in the light and when the trees get too tall it can be dangerous picking but the farm hands are experienced and work with the family year round.

IMG_2613

The Holtz family grow mostly Hass avocados but some Reeds as well and they have a unique way of getting great avocados directly to you, they pick them at the perfect time and then ship them to you in their specially designed boxes. All avocados are hand picked and shipped the same day; the ripening comes on your end with easy step by step instructions that are enclosed in your ‘Hand Grown in California’ avocado box. Simple, easy and delicious California avocados can be ordered from their website, California Avocados Direct.
And for inspiration on recipes, stories and life on an avocado ranch visit Mimi’s blog at Mimi Avocado; tell her Chef Debbi sent you!

Use California avocados in Chef Debbi’s Gazpacho recipe! Gazpacho recipe here.

IMG_2571


Related Posts Plugin for WordPress, Blogger...
2 Comments
Share
  • Pin it
  • Share
  • Tweet
  • Share
  • Email

Posts navigation

Previous Page 1 2 3 4 Next Page
Deb

Meet Chef Debbi

READ BIO

Join-Us Sign up for our newsletter to receive exclusive tips 'n tricks, and special offers on classes, tours, and more!

Recent Posts

  • New E-Book!
  • From the Pantry
  • Spaghettini at Home
  • Growing Corn
  • Spring IS Coming!

Categories

BookCUT

What's in Your Pantry?

How to stock your pantry to create delicious dishes.

Learn Chef Debbi's pantry essentials and how to substitute ingredients for pantry staples in her basic recipes for quick and easy meals.
BUY BOOK>

FacebookTwitterInstagramGooglepinterest


© 2014, DEB'S KITCHEN
Angie Makes Feminine WordPress Themes