Deb's Kitchen - Farm, Food, Wine & Lifestyle Adventures
  • Facebook
  • Google
  • Twitter
  • Instagram
  • Pinterest
  • Email
Menu
Skip to content
  • Home
  • Blog
  • Events
    • Classes
    • Tours & Adventures
  • Edible Gardening
  • Preserving
  • Recipes
    • Appetizers
    • Soups and Salads
    • Main Dishes
    • Side Dishes
    • Desserts
  • About
    • Whats In Your Pantry
    • Ask Debbi
    • Deb’s Kitchen Botanicals
    • Press
  • Contact

Tag Archives: tomatoes

Osso Buco

1 / 7 / 22


I was in Lazy Acres meat department picking up an order when I notice the beautiful veal shanks in the case. This time of year, I love any kind of braised meat, beef, or chicken and one of my favorites is Osso Bucco. I’m not sure why you don’t see it on restaurant menu’s very often, perhaps the cost of veal would choke you, but you can also make it with beef shanks which aren’t quite as expensive.
Although this dish takes a fair amount of time to cook, hands-on cooking time is very little. Instead of cooking the dish in an oven for up to 3 hours, a slow cooker or maybe even an instant-pot would do.
A braise is a dish that used two kinds of cooking techniques, one is searing, and the other is moist heat cooking (in liquid). Wine, broth, and tomatoes are used to ‘stew’ this rather tough cut of meat into fall apart deliciousness. Typically served with Risotto Milanese but you could substitute mashed potatoes or pasta.

6          1-1/4-inch-thick veal (or beef) shanks

Sea salt and freshly ground black pepper

1/2      cup all-purpose flour for dredging

1/4      cup extra-virgin olive oil, reserve 1 tablespoon

1          tablespoon unsalted butter

1          large yellow onion, diced

2          stalks  celery, finely diced

1          medium carrot, diced

1          teaspoon dried oregano

3/4      cup dry white wine

2           tablespoon tomato paste 1

1          28-oz. can Italian plum tomatoes, drained and chopped, juices reserved

1          cup low-salt chicken broth, more if needed

1          large sprig thyme

1          bay leaf

1          Tbs. arrowroot mixed with 2 tsp. broth or water


Preheat the oven to 350°.

Wrap string around the shanks to hold them together.  Put the flour onto a paper plate, Season the shanks with salt and pepper. Dredge the shanks lightly in flour, shake off the excess.

Use a large Le Creuset or the like, one that you can fit all the shanks in laying flat.

Heat pan and add oil, when hot add ½ the shanks and brown well on both sides. Remove and repeat with remaining shanks, set aside.

Pour or scoop excess oil out of the pan leaving the browned bits on the bottom of the pan. Return the pan to medium heat and add the butter and reserved 1 Tbs. of oil.

When the butter is melted, add the onion, celery, carrot, oregano, and 1 tsp. salt. Cook the vegetables, stirring occasionally, until soft and lightly browned and translucent. Add the wine, and increase the heat to medium-high, and cook, scraping up any brown bits with a wooden spoon, until the wine is reduced to about 1/4 cup, about 3 minutes Stir in the tomato paste. Add the tomatoes with their juices, the broth, thyme, bay leaf, 1/2 tsp. salt, and a few grinds of pepper. Add the shanks back to the pan, cover and cook in the oven until tender, 1-1/2 to 2 hours, checking the liquid occasionally.

If it has cooked down, add enough broth to keep the level about halfway up the shanks. To check for doneness, pierce a shank with a fork. The meat should pull apart easily.

Strain the pan juices through a medium-mesh sieve into a saucepan, pressing hard on the solids with a spatula to extract as much sauce as you can. Bring the sauce to a simmer. Whisk in the arrowroot mixture and cook briefly to thicken.

To cook in a slow cooker, after browning the meat and deglazing the pot, add the shanks to a slow cooker and pour all the juices over them. Cover and cook on low heat for 6 to 8 hours.

Recipe edited from Fine Cooking


Leave a comment
Share
  • Pin it
  • Share
  • Tweet
  • Share
  • Email

A Simple Meal

7 / 9 / 19

Grilled Prime Ribeye Steak

Last week we had friends over and grilled a Prime Ribeye steak that I had cut off a bone in prime rib roast, the steak was about 3 lbs. and 4″ thick. I had just attended a book signing/demo at Melissa’s Produce with Jamie Purviance and his new book, Weber’s Ultimate Grilling and was eager to try some of his fabulous recipes.

When I brought this book home my husband, Frank,  promptly stole it and put it on his side of the table. After several readings he was excited to try some new ideas that he picked up from the book. He decided to set up our Weber with a ‘hot’ side and a ‘cool’ side and he also wanted to get a little smoke on the steak so to get the ‘smoke’ he placed a chunk of hardwood into a pan, filled it with water and let it soak for an hour or so. Then he placed it on the hot side of the bbq, closed the lid and let it heat up to a smoke point.

I made sure the meat was nice and dry, seasoned it with Himalayan Pink Sea Salt and freshly ground pepper. We grilled it on the hot side of the bbq for about 3 minutes, turning it a quarter turn before flipping it over to the other side and repeating the process. Frank then moved the steak to the cool side and covered the Weber with the lid; we let it smoke until the steak was about 125°, removed it and let it rest for about 10 minutes before slicing it. This ensures the meat will be rare to medium rare when we do cut it; the steak will continue to cook after it’s removed from the heat and it needs the off heat time to let the juices settle back into the meat.

We added some grilled corn and a garden fresh salad with just picked tomatoes, cucumbers & mixed greens. The prime rib was tender, juicy with just a little hint of smoke, a success all around. We’ll definitely be using this method in the future for all cuts of meat and poultry. Thanks for the informative and thoughtful book Jamie!

Leave a comment
Share
  • Pin it
  • Share
  • Tweet
  • Share
  • Email

Gazpacho Couscous Salad

9 / 7 / 17

A perfect summer salad that you can make ahead; it actually is better the next day! An easy ‘from the pantry’ salad, adjust ingredients to what you have on hand, what you find from the farmers market or your own garden, or even some of last nights grilled chicken or shrimp. Serves 6

Couscous Gazpacho Salad

Save
Print
  • Couscous ~
  • 2 1/2   cups chicken, vegetable stock or water
  • 12        ounces couscous
  • 2          tablespoons butter
  • 1          clove garlic, smashed
  • 2          green onion, minced
  • 4          tablespoons Italian parsley
  •             Salt and pepper, to taste
  • 1/4      cup toasted pine nuts, or more
  • Dijon Vinaigrette ~
  • 1/2      cup red wine vinegar
  • 1         tablespoon Dijon mustard
  • 3/4      cup vegetable or olive oil
  • 1          small shallot, minced
  • 3          grinds herb seasoning, I use Italian
  •            Salt and pepper, to taste
  • Gazpacho Salad ~
  • 1          container (pint) cherry tomatoes, halved
  • 6          small Persian cucumbers, diced
  • 1          roasted red bell pepper, diced
  • 1          small red onion, diced
  • 2          stalks celery, diced
  • 1          tablespoon basil, chopped

Couscous

In a saucepan, add the stock, butter and couscous; bring to a boil, remove from heat stir in garlic and green onion, cover and let stand for 5 minutes. Remove garlic and fluff with a fork. Set aside to cool.

Vinaigrette   

In a small bowl add vinegar, mustard and shallot, whisk together. Slowly whisk in the oil in a thin stream to emulsify. Add seasonings to taste. Can be refrigerated for 3 weeks, bring to room temperature before using.

Salad

In a large bowl, add all chopped ingredients and toss with a little of the dressing. Let stand for 5 minutes. Toss couscous and vegetables together adding a little more dressing as necessary, to taste.

Leave a comment
Share
  • Pin it
  • Share
  • Tweet
  • Share
  • Email

Tomato Overload

7 / 6 / 17

There are many ways to save your harvest and if you have more tomatoes than you know what to do with here are some ideas.


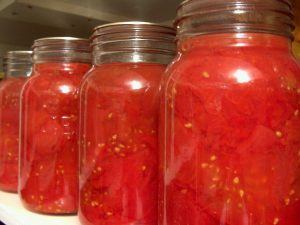
First and foremost is water bath canning, I love this because it means that I can store tomatoes on the shelf in my pantry for the year. Fairly easy to do but when it’s hot and humid out like it has been this summer FORGET IT!

As many of you already know, I like to freeze my tomatoes also so later when it’s cool I can make sauce or unfreeze and can them to make more room in the freezer for up and coming dinners. Freezing tomatoes is the fastest way to get things done, wash, and dry then freeze on a baking sheet until frozen solid, pop into a freezer bag and you are done for the day! You can remove one or four at a time, whatever you need and as they begin to defrost, which is almost right away, the skin will slip off easily.

IMG_0481

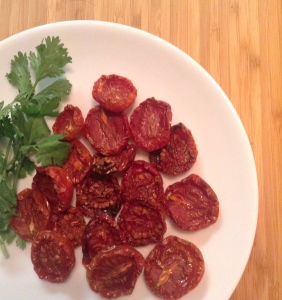
My second favorite is to make Oven Roasted Tomatoes, although it does require having the oven on for some length of time. I love to dry my cherry tomatoes and then float them in a good olive oil and store in the refrigerator for up to 3 months. Chopped in a salad, in a bruschetta or top on a pizza, they pack a flavorful punch. Fill up your baking sheet and get started right away!

Fontina & Tomato Tart

Oven Roasted Tomato Recipe

Leave a comment
Share
  • Pin it
  • Share
  • Tweet
  • Share
  • Email

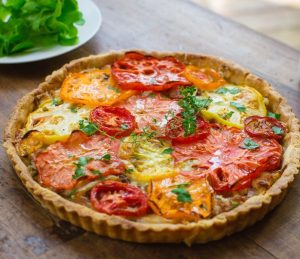
Fontina & Tomato Tart

7 / 6 / 17

Add a baby green salad tossed lightly with olive oil & vinegar for a nice summer lunch or light dinner.

Fontina & Tomato Tart

Save
Print
  • 1 sheet puff pastry, thawed in the refrigerator, keep cold until ready to use
  • 4 tablespoons Dijon mustard
  • 4 ounces grated fontina cheese
  • 3 large tomatoes, cut into 1/4" thick slices
  • 4 tablespoons grated Parmesan cheese

Preheat the oven to 425°F. Line a sheet pan with parchment paper or use with a non-stick tart pan.

Unfold one sheet of puff pastry on a lightly floured surface and roll it lightly to an 11-by-11-inch square or roll to the size of your tart pan adding ½” for the sides. I using the tart pan, fold up the pastry carefully and lay into the pan, unfold the pastry draping it over the sides of the pan. If using just the sheet pan, lay the pastry in the middle of the piece of parchment on the pan. Prick (called 'docking') the pastry with a fork leaving a 1/2" edge clear.

Spread a thin amount of mustard on the pricked part of the dough.

Sprinkle an even amount of the cheese on the mustard and top with slices of tomato. Fold a couple of inches of the dough over the filling, leaving a large part of the middle open, disregard if using the part pan. If the pastry is warm, chill for 15 minutes.

Bake for 20 to 25 minutes, until the pastry is golden brown. Garnish with a sprinkle of Parmesan cheese.

2 Comments
Share
  • Pin it
  • Share
  • Tweet
  • Share
  • Email

Buffet Party Dishes

5 / 10 / 17

Demo Cooking Class

May 18th & June 1st

6:30 – 8:30 p.m., approximately

By reservation only, see below

Smoked Salmon Cream Cheese Tart With Fresh Lemon Olives

Marinated Vegetable Salad California

Nicoise Style Sandwich

Candied Bacon Deviled Eggs

Mixed Berry Cheesecake 

For reservations call

Temecula Olive Oil

(562) 296-5421

Sponsored by

Leave a comment
Share
  • Pin it
  • Share
  • Tweet
  • Share
  • Email

Tips on Growing Tomatoes

3 / 16 / 17

How To Grow Great Tomato Plants


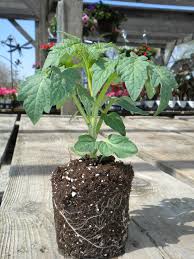
Buy transplants

Purchase healthy, stocky plants that have no flowers, fruits or buds

Choose a sunny location, rotate planting beds every year

Plant in an area where you may have grown peas or beans the previous year

Add compost to the soil and make sure the soil isn’t compacted.


Succession plant

Choose an early variety that can be planted in early spring. I like to plant my main crop in April and then another couple of plants in July for fall harvest. Check Sunset Gardening Guide for the best time in your area to plant.

Depending on how you’re going to stake or cage tomatoes, have all the equipment ready for planting day, stake the plants at the same time you transplant.


Planting

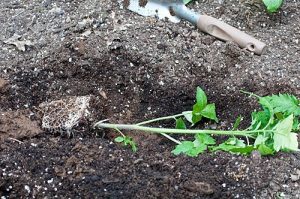
When planting remove lower leaves and plant the tomato deep, so that only about 3” are above ground. Tomato plants have the ability to grow roots from the buried stem. Water well after planting. Water well and deep but infrequently, keep your watering consistent, tomatoes need about 1” water a week.

Fertilize

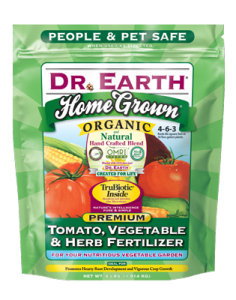
Don’t over fertilize your tomato plants. Use a high phosphorus content fertilizer such as Dr. Earth Organic Tomato/Vegetable Fertilizer, 5-7-3. A high nitrogen content will give you lots of green leaves but little fruit.

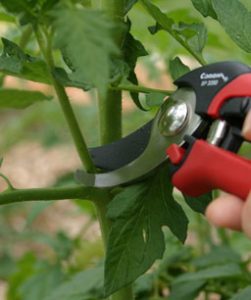
Pinch branches out

I always pinch out side shoots in the beginning to help the plant grow tall rather than gangly.

Mulch and Companion Planting

Tomatoes love carrots; basil and marigolds so plant them in the same bed and mulch the rest of the soil to keep the moisture in.


Leave a comment
Share
  • Pin it
  • Share
  • Tweet
  • Share
  • Email

Extra January Class!

1 / 16 / 171 / 16 / 17

Cooking at Temecula Olive Oil, Seal Beach

Jan 19th

6:30 – 8:30, approximately

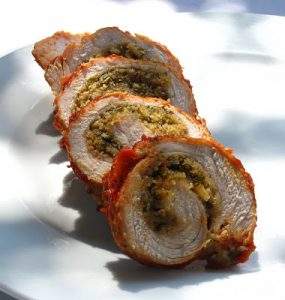
pork-braciole

Minestrone Soup with Italian Meatballs

Pork Braciola Porchetta Style

     (Stuffed pork cutlets stuffed with Italian herbs & cheese)

     Served with Mushroom Ragu

Saffron Risotto

Tangerine Panna Cotta

By Reservation Only
(562) 296-5421
148 Main Street
Seal Beach, CA 90740

SPONSORED BY

Leave a comment
Share
  • Pin it
  • Share
  • Tweet
  • Share
  • Email

New Cooking Class Venue

1 / 11 / 17

Cooking at Fullerton Arboretum

New Events!

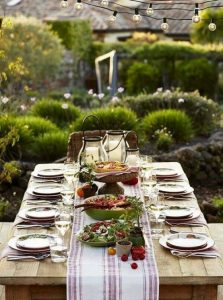
outdoor-table-setting 

Celebrating the seasons around the table with demonstration style cooking class and a specialty food tasting each month.

Join my friend Chef Louise Mellor and I in the beautiful gardens at Cal State Fullerton’s Arboretum for a meal as we celebrate the seasons.  Learn how to stock your pantry and together we’ll use garden fresh, seasonal ingredients with classic French techniques to create simple, exciting dishes for special occasions and everyday meals.

We will also be sharing how to entertain with simplicity and style.  Most importantly, we hope you will be inspired to get into the kitchen at home and share life around the table.

Full lunch servings will be offered and wine will be available if desired. Here are upcoming classes for Jan, Feb and March, take a look here for class registration and the schedule through summer! Hope to see you there~

Saturday, Jan. 21, 11 – 2
Book Signing and Demo

Soup from the pantry

Join us for a demonstration on soup basics and enjoy a hearty bowl of minestrone soup with puff pastry ‘rolls’.


February 11th, Saturday, 11 – 2
Cupid in the kitchen…
Chocolate Tasting

Roasted Spring Asparagus salad with Meyer Lemon vinaigrette

Elegant Beef Wellington Puff Pastry Tarts with Caramelized Onions, Maytag Blue Cheese, Sautéed Mushrooms

Dark chocolate hazelnut flourless cake with vanilla bean ice cream and fresh berries

March 25th Saturday, 11 – 2
I left my heart in San Francisco…
Olive oil tasting

Homemade herbed ricotta with lemon, Parmesan & blistered tomatoes served on sourdough crostini

San Franciscan style Cioppino with fresh seafood in a rich tomato white wine broth.

Blood orange olive oil cake with whipped Grand Manier marscapone


Leave a comment
Share
  • Pin it
  • Share
  • Tweet
  • Share
  • Email

Fall Vegetable Gardens

8 / 16 / 16

Fall Vegetable Gardens

Fall Vegetable Garden

Although here in Southern California there aren’t many place where we get frost, some places away from the beach will get a light frost and towards the mountains an early frost and snow. But our last frost date near the coastline is anywhere from early Nov to early Dec. and our first frost date is somewhere around Feb. It’s good to know this information so you can plan on what and when to plant.

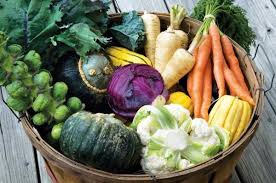
As the ground gets cold seeds will have a hard time sprouting or will not sprout at all. Planting a fall garden with vegetables that can ‘over-winter’ will see you through the cool, rainy (hoping) months. Heartier vegetables like broccoli, cauliflower and Brussels sprouts actually get a little sweeter with a touch of frost.

If you get tomatoes, beans and cucumbers in the ground now (Aug-Sept) make sure you plant early varieties that have time to fruit before the ground begins to cool. Most nurseries will still be carrying good supplies of summer vegetables for the next month.

These are some fruit and vegetables that will grow for you now.

Broccoli, Cabbage, Kale & Brussels Sprouts
Parsley & Cilantro (but if we get a hot spell between Sept & Oct they may bolt)
Beets, Carrots, Turnips (try the little white turnip, sweet tasting even raw)
Leeks, Scallions, Onions, Shallots
Peas & Potatoes
Lettuce (provide a little shade until Nov), Spinach & Mustard

Here are two nurseries in our area that I love for great vegetable plants.

H & H, Lakewood Blvd, Lakewood

http://hhnursery.com/

Rogers Gardens, Newport Beach

http://rogersgardens.com/

Almost all the seed catalogs have great sale prices too, a good time to pick up some fall and spring seeds.

Grow Organic/Peaceful Valley Farms

http://www.groworganic.com/

Baker Creek Seeds

http://www.rareseeds.com/

High Mowing Seeds

http://www.highmowingseeds.com/

Renee’s Garden

http://www.reneesgarden.com/

Seeds From Italy

http://www.growitalian.com/

Leave a comment
Share
  • Pin it
  • Share
  • Tweet
  • Share
  • Email

Grilled Pizza

7 / 6 / 167 / 6 / 16

Pizza on the grill 1

I love pizza on the grill! The first time I cooked pizza on the grill I was worried the dough would slip through the grates but it doesn’t! The grill is a perfect tool for a backyard dinner, the house stays nice and cool and you can relax with a cold drink while your pizza cooks. First you have to heat your grill to it’s hottest! Pizza likes a good 500° – 600° oven to produce a great crust.

Buy or make your crust in the morning so it’s ready to go when you are. Prep your ingredients ahead of time. Grate or slice the cheese, pepperoni or salami, slice the mushrooms (store in a small bowl with a slightly damp paper towel over them), cut or tear your herbs such as basil, thyme and/or make a pesto for your pizza. Be creative and be organized.

Once your grill is at its hottest, roll out your dough on a lightly floured surface (or if you’re into hands on-flour your hands and stretch the dough out into any shape you like). Put your dough on a pizza peel that has been lightly dusted with flour or cornmeal, make sure the dough slides around on the peel so that when you put it on the grill it will slide off easily.

Brush your grill with oil and slide the dough onto that spot. Turn down the burners if you’re using a gas grill.* Grill for 2-3 minutes or until lightly charred. Turn your pizza over, brush the cooked side with a little olive oil if you like, add your sauce and any of the toppings you’ve chosen. Close the grill lid and let the pizza cook until the bottom is nicely charred and your toppings have melted and cooked. Remove from the grill with the pizza peel, let sit for a minute or two before slicing. Enjoy with a cold beer and tossed salad! That’s how to beat the heat at my house. Have a great summer!

*If using a grill with charcoal or wood you’ll want to make a direct heat side and an indirect heat side. You’ll be cooking the pizza on the indirect side.

Here’s the recipe

No Knead Pizza Dough

Save
Print

This is Jim Lahey’s no knead recipe for pizza dough, it’s easy and so much better than store bough pizza dough. The hardest part is to remember to make it ahead of time. You can store the dough up to 3 days in the refrigerator so it’s easy to plan ahead. This recipe makes 4 balls of dough (4 pizza’s). Jim likes to weigh all the ingredients and in reality you do get a much better and more consistent product but if you insist on measuring, I’ve included his instructions for that also.

  • 500 grams all-purpose flour, 17 ½ ounces or 3 ¾ cup, plus a little extra for shaping
  • 1 gram active dry yeast, ¼ teaspoon
  • 16 grams fine sea salt, 2 teaspoons
  • 350 grams water, 1 ½ cups

In a medium bowl, thoroughly blend the flour, yeast, and salt. Add the water and, with a wooden spoon or your hands, mix thoroughly.

Cover the bowl with plastic wrap or a kitchen towel and allow it to rise at room temperature for 18 hours or until more than doubled. It will take longer in a cook room and less time in a warm one.

Flour a work surface and scrape the dough out of the bowl, divide into 4 equal parts and shape them.

For each portion, start with the right side of the dough and pull it toward the center, then do the same with the left, then the top, then the bottom. (The order doesn't actually matter; what you want is four folds.) Shape each portion into a round and turn seam side down. Mold the dough into a neat circular mound. The mounds should not be sticky; if they are, dust with more flour.

If you don't intend to use the dough right away, wrap the balls individually in plastic and refrigerate for up to 3 days. Return to room temperature by leaving them out on the counter, covered in a damp cloth, for 2 to 3 hours before needed.

Leave a comment
Share
  • Pin it
  • Share
  • Tweet
  • Share
  • Email

Hot Weather Dinner

6 / 20 / 166 / 20 / 16

A basket of sweet corn, three ears partially husked

There is nothing like summers sweet corn on the cob. The tables at the farmers market this weekend were loaded with all kinds of corn and great prices make you want to stock up but corns sweetness will turn to starch the longer it’s stored. There’s an old saying that you should start the water boiling for the corn before you pick it. But if you don’t have a corn field in your back yard here are a couple of tips to help maintain that sweetness.

One, don’t peel and husk your corn, leave it in its little corn jacket and store in the refrigerator. This won’t maintain it’s sweetness long but it will stay sweet for about a day.

Two, peel and husk your corn, freeze separately and when frozen wrap in plastic and pop into a freezer bag. Use within a few weeks for best results.

Three, (this is my favorite), peel a few leaves off the outer ear but leave the husk and some leaves still attached. Chop off the very top and the bottom. Here’s another tip for you-usually corn worms are only found in the top of the ear, just lop that part off, the corn is still good to eat and it means that the farmer didn’t dust the corn with insecticide (a good thing). Put the corn into the microwave and cook for 5 minutes, remove carefully it will be hot. Place in a colander in the sink and run some cool water over it. After it cools, refrigerate and it will hold it’s sweetness for a day or two.

Here’s one of my favorite hot weather dinner salads using sweet corn right off the cob!

Shrimp and Avocado Salad

Save
Print
  • Dressing
  • ¼ cup Pomegranate vinegar or good red wine vinegar
  • 1 teaspoon finely diced shallots
  • 1 teaspoon Dijon mustard
  • Dash of dried parsley flakes, crushed
  • ½ cup olive oil, approximately
  • Salad
  • 1 head Bibb lettuce, peel the leaves from the core, rinse with cool water and dry well
  • 1 ear fresh sweet corn, prepare the corn as directed in the notes.
  • 1 small Persian cucumber, cut in half lengthwise and then into half moons
  • 1 medium tomato, chopped into bite-sized pieces
  • 8 large shrimp, (U16), cut into bite-sized pieces
  • 1 Haas avocado cut in half; pit removed and scoop out the whole half
  • 2 rashers (slices) bacon, cooked and crumbled
  • ¼ cup crumbled blue cheese, optional

Dressing

In a jar or small bowl add vinegar, shallots, Dijon mustard and parsley flakes, add a sprinkle of salt and pepper. Slowly whisk in the olive oil to emulsify. As soon as the dressing starts to thicken stop and taste the dressing, if it needs more continue to add the olive oil while whisking. Any extra dressing may be stored in the refrigerator for up to 3 weeks.

Tear the lettuce leaves into large pieces and add to a large bowl and toss with a little of the dressing. Add the corn, cucumber, tomato and shrimp and toss again with a little dressing. Lightly mix in the avocado and place into shallow bowls or large plates, sprinkle with bacon and cheese and serve extra dressing on the side.

Makes 2 entrée salads

Notes:

Pick up fresh corn from the farmers market, not the supermarket. The sugar in corn starts to turn to starch when it’s picked so by the time it gets to the supermarket much of the sweetness will be gone. When you get the corn home here’s an easy trick to help keep the sweetness in for a day or two. Remove some of the outer leaves but not all. Cut the top and bottom off the ear and microwave for 5 minutes. It will be hot when you bring it out of the microwave so run some cool water over it and set it aside to cool completely. This method is similar to blanching and shocking your vegetables. Use right away (peel the remaining leaves and silk then slice off the cob) or store in the refrigerator for a day or two.

In the hot weather buy the shrimp already cooked for an easy meal at the end of the day. If you purchase raw shrimp to cook it simply bring a large pot of water to a boil, add a tablespoon of Old Bay Seasoning and cook at a slow boil (bubbles just break the surface) until the shrimp is done, about 5 minutes. To test the shrimp simply take one out, run cool water over it, peel, devein and eat it!

Pomegranate vinegar can be ordered from Temecula Olive Oil Co.

Related Posts Plugin for WordPress, Blogger...
2 Comments
Share
  • Pin it
  • Share
  • Tweet
  • Share
  • Email

Posts navigation

1 2 3 Next Page
Deb

Meet Chef Debbi

READ BIO

Join-Us Sign up for our newsletter to receive exclusive tips 'n tricks, and special offers on classes, tours, and more!

Recent Posts

  • New E-Book!
  • From the Pantry
  • Spaghettini at Home
  • Growing Corn
  • Spring IS Coming!

Categories

BookCUT

What's in Your Pantry?

How to stock your pantry to create delicious dishes.

Learn Chef Debbi's pantry essentials and how to substitute ingredients for pantry staples in her basic recipes for quick and easy meals.
BUY BOOK>

FacebookTwitterInstagramGooglepinterest


© 2014, DEB'S KITCHEN
Angie Makes Feminine WordPress Themes