Deb's Kitchen - Farm, Food, Wine & Lifestyle Adventures
  • Facebook
  • Google
  • Twitter
  • Instagram
  • Pinterest
  • Email
Menu
Skip to content
  • Home
  • Blog
  • Events
    • Classes
    • Tours & Adventures
  • Edible Gardening
  • Preserving
  • Recipes
    • Appetizers
    • Soups and Salads
    • Main Dishes
    • Side Dishes
    • Desserts
  • About
    • Whats In Your Pantry
    • Ask Debbi
    • Deb’s Kitchen Botanicals
    • Press
  • Contact

Author: Chef Debbi Dubbs

Growing Potatoes in Your Edible Garden

2 / 17 / 152 / 17 / 15

How To Grow Potatoes:
by Dan Lake, Peaceful Valley employee

potato-blossom-470x419

Since I was 12 years old, my family has grown about 4 or 5 different varieties of potatoes in our garden at home every year.  I would love to brag about my tater planting abilities, and with all of that experience one would think that I was a spud-growing expert, but after reflecting on what I knew, I came to a different conclusion: I devoted most of my time to harvesting and eating the delicious potatoes and have a lot to learn about the process of planting them!

Now that I have my own garden, I’ve done some research, talked to a friend who happens to be a farmer, and compiled some good tips below.

Crop Rotation: When planting potatoes from season to season, they should be kept on a 3-year rotating cycle in terms of location in your garden. This means,  3-4 suitable sites are needed if you want to grow potatoes every year, rotating the site where you plant every season.

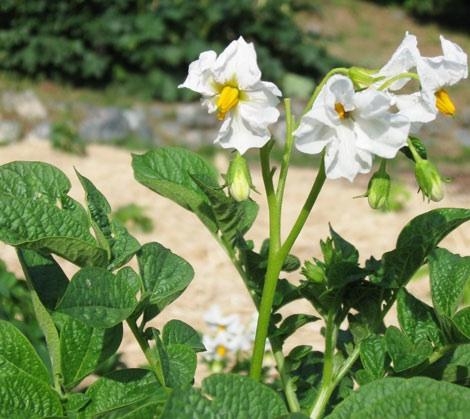
Soil & Sun: When it comes to soil, potatoes are not picky. They are adaptable and will usually produce a decent crop even when the soil conditions are less than perfect. What they do require, however, is as much sun as possible because of how aggressive their root systems are, so keep that in mind when picking your spot(s) to plant.

Preparing Seed Potatoes: When you have your seed potatoes (potatoes certified for growing), set them somewhere where they will be exposed to light and warmth (between 60 and 70F). This will help them to start sprouting. A day or two before planting, use a clean knife to slice the larger potatoes into smaller pieces that contain at least 1 or 2 “eyes” or buds. Each seed should be approximately 1 1/2-2 inches square, and the smaller potatoes may be planted whole. In the next day or so, your seed potato pieces will form thick calluses over the cuts, to help prevent it from rotting once planted.

Planting Seed Potatoes: After you have trenched a 4’” deep furrow, plant the seed potato pieces or small potatoes 4” deep in the furrow about 12” apart and cover lightly with soil. The soil should be evenly moist, but not wet or soggy. If the soil is water logged when you dig, your seed potatoes will probably rot before they even get started. Depending on how cold it gets in your area, it might be a good idea to put a layer of mulch or straw on top of the furrow for a little extra frost protection. Two to four months later, I hope you will be enjoying some of the most delicious potatoes ever!

You can also reference our Potato Planting & Growing Guide online.

Leave a comment
Share
  • Pin it
  • Share
  • Tweet
  • Share
  • Email

Chocolate Covered Strawberries

2 / 11 / 152 / 11 / 15

Chocolate_Covered_Strawberries

Most chocolate covered strawberries, if just dipped in melted chocolate, will crack when you bite into them. Here’s a recipe for Ganache Covered Strawberries that can be refrigerated and eaten without the chocolate falling off the berry. Ganache is simple and easy to make and it stores well in the refrigerator for days. Use it to frost a cake, cupcakes, dip all kinds of fruit or make delicious truffles. Send me a comment if you’d like me to post a truffle recipe! Happy Valentines Day!

Chocolate Ganache Covered Strawberries


1          # large stemmed strawberries

12        oz. (by weight) dark chocolate

1          cup heavy cream

½         tablespoon butter, unsalted (makes the chocolate shiny)

Wash and dry strawberries carefully, set aside on a towel. Line a baking sheet with parchment paper.

Chop the chocolate into small chunks using a serrated knife. You could use dark chocolate chips instead if desired.

Heat the cream slowly in the top of a double boiler, add the chocolate pieces and stir until the chocolate is nearly melted, add the butter and remove from the heat, continue to stir until the chocolate and the butter have melted.

Dip the dry strawberries into the melted chocolate (Ganache) mixture and lay on parchment lined baking sheet to dry.

You could sprinkle the berries with finely chopped nuts if desired or drizzle with a little melted white chocolate. When the chocolate is dry place strawberries into paper cups and place in a chocolate box or on a platter to serve or give as a gift.

Here’s a great gift from Melissa’s Produce, Chocolate and Strawberries!

Melissa strawberries

Leave a comment
Share
  • Pin it
  • Share
  • Tweet
  • Share
  • Email

Citrus Olive Oil Cake

1 / 6 / 151 / 6 / 15

citrus

Most fruits and vegetables have a season, a time when they are picked and rushed to the market to maintain flavor and nutrition but when one talks about citrus it can be very confusing. Citrus ‘season’ really runs all year long with different varieties ripening at different times. During the summer months we have delicious Valencia oranges and Star Ruby Grapefruit, but you’ll find most citrus in season from fall until late spring.

In the market right now you’ll find Navel, Cara Cara and Moro Oranges, delicious Meyer Lemons and my favorite produce guru, Robert Schueller of Melissa’s Produce, recommends the Cocktail Grapefruit, Key Limes and Kishu tangerines! And all of us tangerines freaks know that come March those Ojai Pixie Tangerines start coming our way! The best of the best……

IMG_1122

Other than eating juicy, sweet citrus out of hand or in a dish our friends at Temecula Olive Oil crush seasonal citrus fruit, Blood Oranges or Meyer Lemons, at the same time they press their olives. While the Blood Orange Olive Oil is available year round, Meyer Lemon Olive Oil is seasonal usually beginning in early spring. If you see it on their shelves don’t hesitate, this oil sells out every year! I’ve used both Blood Orange and Meyer Lemon Olive Oil in this cake and each one is distinct and fabulous.

For those of you who can’t conceive of using an olive oil in a cake I urge to try this recipe, not only is it easy, it’s delicious. I like serving it with a little chopped citrus on the side or a handful of fresh raspberries.

 Click here for the recipe

Leave a comment
Share
  • Pin it
  • Share
  • Tweet
  • Share
  • Email

The Plant Stand~Jan

1 / 6 / 151 / 6 / 16

the plant stand logo

Rescheduled due to rain! See us on the 23rd

January 23rd, Sat

10 a.m.

Companion Planting

Spring Garden Planning

&

Companion Planting

Join us for a little talk and a tasty treat!

The Plant Stand
2972-A Century Place
Costa Mesa, California 92626-4324

(714) 966-0797

DKB-12

Leave a comment
Share
  • Pin it
  • Share
  • Tweet
  • Share
  • Email

Citrus Olive Oil Cake

12 / 28 / 1412 / 29 / 14

citrus


Citrus Olive Oil Cake

Save
Print

You can make this cake with any flavored or un-flavored olive oil that you like. Instead of poppy seeds try adding some dried cranberries or cherries. For serving dust with powdered sugar or make a citrus glaze with orange or lemon juice mixed with some powdered sugar and drizzle over the top of the cake, I like serving this with fresh raspberries on the side and a dollop of freshly whipped cream wouldn’t hurt either!
I’ve used cake pans, bundt cake pans and small Mason jars for this cake, just be aware of your baking time, test by inserting a clean toothpick into the center of the cake and it comes out dry.

  • 2 cups flour
  • 1 ¼ cups sugar
  • 1 teaspoon baking powder
  • 1 teaspoon baking soda
  • ¼ teaspoon salt
  • 3 large eggs, beaten
  • 1 ½ cups whole milk
  • ½ cup Orange olive oil, or any flavored olive oil
  • 1 orange, zested
  • 1 teaspoon vanilla
  • ½ cup sliced almonds
  • 1 tablespoon poppy seeds, optional

Preheat the oven to 350°.

Sift together the flour, sugar, salt, baking powder and baking soda Make a well in the center of the dry ingredients and whisk in the eggs, milk, olive oil, zest and vanilla. 


Add the almonds and poppyseeds to the batter, and mix with a spatula or wooden spoon. 


Pour the batter into a greased Bundt cake pan. Bake for 55 to 60 minutes, until the cake is golden on top. Cool the cake, invert on a plate and dust with confectioners sugar if you like.

If using Mason jars, spray the inside of the jar with oil spray and fill only 2/3 of the jar with batter. Place jar on a baking sheet and when all jars are done place the sheetpan into the oven and bake accordingly. Check the cakes at 30 minutes and then every 5 minutes until a toothpick comes out clean.

2 Comments
Share
  • Pin it
  • Share
  • Tweet
  • Share
  • Email

Mushroom and Gruyere Puff Pastries

12 / 14 / 14

Mushroom-Herb-and-Gruyere-Cheese-Mini-Turnovers6-690x400


Mushroom and Gruyere Puff Triangles

Save
Print

A wonderful easy appetizer to make ahead and freeze individually, pull out cook as many as you need.

  • 1 tablespoon olive oil
  • 1 tablespoon butter
  • 2 cups finely chopped Cremini mushrooms
  • 1 onion, chopped finely
  • 1 teaspoon dried Italian herbs, crushed
  • Sea salt & fresh ground pepper to taste
  • 2 tablespoon flour
  • ½ cup heavy cream
  • 3 tablespoons dry white wine
  • 1/3 cup shredded Gruyere cheese
  • 2 sheets of puff pastry, thawed (12x12 inches)
  • 1 egg + 1 tablespoon water, whisked together

Serves: 32

Preheat your oven to 400°.

Line 2 baking sheets with parchment paper. Set aside.

Heat a medium sauté pan over medium high heat, add butter and olive oil, and add the onion and sauté until translucent. Add the mushrooms, herbs, sea salt and pepper and cook until the mushrooms are lightly browned and no liquid remains in the pan.

Stir in the flour and cook for 1 minute, add the wine and cream.

Remove from the heat, and stir in the Gruyere cheese. Chill.

Place a rolling mat on your counter, or a large piece of parchment paper. Add a little flour and lightly roll out the puff pasty, cut into 16 pieces using a pizza cutter or knife.

You should keep the puff pastry as cold as possible, if it starts to stick or becomes doughy, return it to the refrigerator for about 10 min. Keep the second piece of puff pastry in the refrigerator while you work on the first one.

Scoop about 1 t tablespoon of the cold mushroom mixture into the center of the dough (do not overfill or they will leak). Fold the over in a triangle and, using a fork, press the edges together to seal them.

Place the mini turnovers onto your prepared baking sheet, at least 1 inch apart. Place in the refrigerator for 20 minutes and prepare the second batch. Refrigerate the second batch for 20 minutes for best results.

Brush the sealed edges and tops of the turnovers with the egg mixture.

Bake each tray for about 15 minutes, or until the tops are golden brown.

Adapted from Jo-Anna, A Pretty Life in the Suburbs, courtesy of Kendall Jackson

Leave a comment
Share
  • Pin it
  • Share
  • Tweet
  • Share
  • Email

Minestrone Soup

12 / 6 / 142 / 4 / 15

minestronesoup


Save
Print

This is my favorite cold weather soup, I love it with a little squeeze of lemon juice, it brightens up all the flavors in the soup. Served with a big chunk of homemade bread, it’s a meal all of it’s own. Make a big pot, the flavors get better the second day as it all marries together.

  • 2 tablespoons olive oil, approximately
  • 1/4 pound diced pancetta*
  • 1 medium onion, diced
  • 2 carrots, minced
  • 2 stalks celery, minced
  • 2 cloves garlic, minced
  • 1 tablespoon Italian parsley, minced
  • 1 can roma tomatoes, crushed, 15 oz.
  • 2 quarts chicken stock
  • 1 tablespoon Italian seasoning, crushed or ground, or as needed
  • 2 salt and pepper, to taste
  • 2 cups cooked mixed beans, red kidney, cannelini, black and borlotti
  • ¼ pound small pasta, cooked and cooled
  • 1 cup Swiss chard or spinach, chopped
  • 1 lemon, juiced, to taste
  • ½ cup pesto sauce or
  • 2 tablespoons Chef Debbi's Romano Herb Seasoning Mix**
  • Parmigianno-Reggiano, for garnish

Serves 6

Heat a Dutch oven over medium high heat. Add 1 tablespoon of oil; when hot add pancetta and sauté until lightly browned. If needed, add another tablespoons of oil and onions, carrots, celery; sauté until the vegetables are translucent, approximately 3 - 4 minutes. Stir in garlic and parsley and then add the tomatoes and chicken stock. Season to taste with Italian seasoning, salt and pepper; bring to a boil, then turn heat down to a simmer. Cook for 20 minutes.

If using canned beans, rinse and drain them before adding to the soup. Add Swiss chard or spinach to the soup and cook until slightly wilted. Add pasta and lemon juice, stir to mix well, adjust the seasoning and ladle into bowls.

Swirl a little pesto on top or Debbi's Romano herb mix and garnish with Parmigianno-Reggiano.

*Omit for vegetarian version

**Romano Herb Seasoning Mix available www.debskitchen.com

Leave a comment
Share
  • Pin it
  • Share
  • Tweet
  • Share
  • Email

Clafoutis

12 / 5 / 1412 / 7 / 14

cherry clafoutis
Photo: Merlin Menu

Clafouti

Save
Print

I am all about easy baking and this is about as easy as it gets. This country-French dessert adapts well to almost any fruit and is topped with a batter and baked til bubbly brown. It can be served warm or room temperature.

  • Batter
  • 1 cup milk
  • 1/4 cup heavy cream
  • 2 tablespoons sugar
  • 3 eggs
  • 1 tablespoon vanilla
  • ½ teaspoon salt
  • 2/3 cup all-purpose flour
  • Fruit
  • 2 tablespoons butter, melted
  • 2 tablespoons sugar
  • 3 cups fruit, if whole, peel and chop or slice
  • Confectioners' sugar for dusting

Heat the oven to 400°F.

Beat together all the batter ingredients until smooth and frothy. Set aside to rest while preparing remaining ingredients.

Pour melted butter into a 9 or 10” shallow pan, quiche pan or cake pan and sprinkle with the 2 tablespoons of sugar spreading evenly. Place fruit over the sugar and cover with the batter.

Bake for about 30 minutes or until the clafoutis is puffed and brown on top. Dust with confectioners sugar and serve immediately.

Clafoutis will collapse quickly but will still be delicious.

Leave a comment
Share
  • Pin it
  • Share
  • Tweet
  • Share
  • Email

Cioppino

12 / 5 / 1412 / 7 / 14

Cioppino

Image: Wikipedia


Save
Print

San Francisco style cioppino will warm you up on a cold day; serve with warm crusty bread and you could even imagine you heard a foghorn. This is my adaptation of a favorite dish, don’t let the long list of ingredients dissuade you; this is quite easy to make.

  • 2 tablespoon olive oil
  • 1 tablespoon butter
  • 1 medium onion, chopped
  • 1 celery, chopped
  • 2 cloves garlic, minced
  • 2 cups dry white wine
  • 1 quart chicken stock, or fish stock
  • 1 lg. can whole plum tomatoes with juice
  • 2 tablespoons Italian seasoning, crushed
  • 1 tablespoon cilantro -- chopped
  • 1 lemon, zested and juiced
  • salt and pepper
  • 1 pound white fish, halibut, sea bass, cut into large pieces
  • 1 pound small clams, washed
  • ½ pound calamari, cleaned and sliced
  • 1 pound large shrimp, peeled and deveined
  • 1 pound Dungeness crab, cut into 3-4” pieces, shell on
  • ¼ cup chopped parsley
  • ¼ cup lemon zest
  • red pepper flakes, optional
  • Lemon wedges

Serves 6

In a large Dutch oven over medium heat, add oil and butter; when butter has melted, add onion and celery; sauté until translucent. Add garlic and stir briefly, do not brown. Add wine, stock, tomatoes with juice, herbs, lemon zest and salt and pepper; bring to a boil, then turn down to a simmer and cook for 30 minutes.

Add fish and clams to simmering broth, cover and cook 5 minutes.

Add calamari and shrimp, cook until shrimp are barely pink; then add crab and press gently to immerse in broth; cover and cook just

until hot, 2 to 3 minutes.

Ladle cioppino into wide bowls and sprinkle with parsley and lemon zest. Serve with lots of crusty bread and lemon wedges.

Leave a comment
Share
  • Pin it
  • Share
  • Tweet
  • Share
  • Email

Apple Crisp

12 / 5 / 1412 / 5 / 14

Apple Crisp

Save
Print

Such a quick, easy recipe for a seasonal dessert; can be a great breakfast treat for those with a sweet tooth! Use an apple that is best for baking such as:

Jonathans and Jonagolds, Honeycrisp, Granny Smith, Melrose, Winesap, Braeburn, Rome Beauty.

  • Serves: 8
  • 4 cups sliced or diced apples
  • 1 tablespoon flour
  • ½ cup sugar
  • ¾ cup brown sugar
  • ⅓ cup butter
  • ¾ cup oatmeal
  • ¼ teaspoon baking soda
  • ½ teaspoon salt

Preheat oven to 350°. Combine the first three ingredients and place in a greased 8×8 baking dish.

Combine the remaining ingredients and sprinkle over the top of the apple mixture.

Bake 30 minutes. Serve warm

apple crisp


Photo: All Recipes

Leave a comment
Share
  • Pin it
  • Share
  • Tweet
  • Share
  • Email

Balsamic Roasted Brussels Sprouts

12 / 5 / 1412 / 5 / 14

brussels sprouts cut

Balsamic Roasted Brussels Sprouts

Save
Print

The secret to great roasted brussels sprouts is to lightly blanch them in salted water for a few minutes before roasting. They can be blanched up to a day ahead of time and roasted at the last minute.

  • 1 pound baby Brussels sprouts – shaved or halved
  • 2 tablespoons olive oil
  • 6 tablespoons balsamic vinegar
  • Sea salt and freshly ground black pepper
  • 3 slices Applewood smoked bacon, cooked crisp
  • 3 Tablespoons sliced almonds, toasted
  • 1 dab unsalted butter, optional

Preheat oven to 400°.

Blanch brussels sprouts in boiling, salted water, drain and plunge into an ice water bath. Drain and dry.

Mix brussels sprouts with olive oil and vinegar, spread on a baking sheet lined with foil or parchment paper. Season with a sprinkling of sea salt and fresh ground pepper.

Roast for 45 minutes, or until fork tender, turning several times during cooking for even browning. Taste and adjust seasonings.

Toss with toasted almonds and bacon pieces and a dab of fresh unsalted butter if desired. Serve hot.

Leave a comment
Share
  • Pin it
  • Share
  • Tweet
  • Share
  • Email

Artichoke and Leek Filo Cups

12 / 5 / 1412 / 6 / 14

Spinch-Phyllo-Cups-Photo-by-Phyllo


Artichoke and Leek Filo Cups

Save
Print

*The filling can be prepared a day in advance and kept refrigerated until ready to use. Assemble hors d’oeuvres up to one hour ahead of time and keep refrigerated.

  • 1 jar marinated artichoke hearts, drained well (about 3 oz)
  • 1 package chopped leeks (or 1 lg. stalk chopped fine)
  • 1 clove garlic, peeled
  • 1 tablespoons fresh lemon juice
  • 1/2 cup mayonnaise
  • 1/4 cup sour cream
  • ½ cup freshly grated Parmesan cheese
  • 2 tablespoons finely chopped fresh chives
  • filo cups, can be found in the freezer section near the puff pastry

Preheat oven to 350ºF. Line baking sheet with parchment; set aside.

In a food processor fitted with metal blade, combine artichoke hearts, leeks, garlic cloves and lemon juice. Pulse several times or until ingredients are finely chopped. Add mayonnaise and sour cream; process until well combined, stir in Parmesan cheese and chives.

Fill each mini filo shell with filling and place on prepared baking sheet. Bake in preheated oven until heated through and golden brown, about 30 minutes.

Serve immediately.

Related Posts Plugin for WordPress, Blogger...
Leave a comment
Share
  • Pin it
  • Share
  • Tweet
  • Share
  • Email

Posts navigation

Previous Page 1 2 … 19 20 21 22 23 … 25 26 Next Page
Deb

Meet Chef Debbi

READ BIO

Join-Us Sign up for our newsletter to receive exclusive tips 'n tricks, and special offers on classes, tours, and more!

Recent Posts

  • New E-Book!
  • From the Pantry
  • Spaghettini at Home
  • Growing Corn
  • Spring IS Coming!

Categories

BookCUT

What's in Your Pantry?

How to stock your pantry to create delicious dishes.

Learn Chef Debbi's pantry essentials and how to substitute ingredients for pantry staples in her basic recipes for quick and easy meals.
BUY BOOK>

FacebookTwitterInstagramGooglepinterest


© 2014, DEB'S KITCHEN
Angie Makes Feminine WordPress Themes