Join me at The Plant-Stand in Costa Mesa for our last class of the year! We’ll be sharing some tips and tricks for creating great seasonal appetizers from your pantry and garden.
Sat Dec. 7th 10 a.m.
Free!
Join us for some talk and a tasty treat!
Join me at The Plant-Stand in Costa Mesa for our last class of the year! We’ll be sharing some tips and tricks for creating great seasonal appetizers from your pantry and garden.
Sat Dec. 7th 10 a.m.
Free!
Join us for some talk and a tasty treat!
There are two methods to making a smooth and easy gravy. It’s much easier if you prepare or purchase a good turkey or chicken stock a few days ahead of time. Below you’ll find a recipe for home-made chicken/turkey stock if you prefer to make your own. Make it ahead of time, refrigerate for three days or freeze for up to three months. This will also make it easier to remove any fat that has congealed on the top.
The thickening agent in an easy gravy is flour, you could use cornstarch but if you cook it too long the cornstarch will start to break down. The two methods are Beurre Manie or Roux. Both can be made ahead of time and both can be refrigerated for weeks or frozen in to ‘logs’ and then you can cut off any amount you may need for your dish.
Both methods require equal amounts of fat and flour, usually butter. Use approximately 1 tablespoon of either mixture per cup of liquid/pan drippings. Any pan drippings should be added to the stock before adding the thickener. If you’d like to defat the pan drippings, pour off liquid and put into the freezer until it begins to harden, about 10 minutes, scrape the fat off the top of the drippings and add the liquid to any stock you are using. Bring to a boil and add thickener as described.
So on to the recipes!
Beurre Manie (Kneaded Butter)
In this case the thickener is added to the hot or boiling stock.
½ cup butter, unsalted and room temperature
½ cup flour
Place butter into a small bowl and mash flour into the butter with the back of a spoon until completely incorporated. Bring your stock to a boil and add Beurre Manie while whisking until thickened.
Roux
Also equal parts butter and flour but the stock or pan drippings are added to the hot melted roux.
Per cup of stock/pan drippings:
1 – 2 tablespoons butter
1 – 2 tablespoons flour
Add butter to a sauté pan and when melted, whisk in flour at all once, keep whisking until thickened and the flour has a chance to cook a little, maybe 1 minute. Add hot liquid while whisking into the roux.
Neither of these methods will result in any clumping as the flour has already bonded with the fat and will melt smoothly into your sauce.
Here’s a good basic ‘Enhanced Chicken Stock’ recipe:
[amd-zlrecipe-recipe:12]
When I was growing up, if I was lucky enough, once in awhile we’d dine at a fine dining restaurant. They always served a relish tray when the guests were seated, it was to stimulate your taste buds and make you hungry. I miss having those relish trays but once I learned how to make pickled vegetables myself, so easy!, I keep them in the refrigerator almost year round. The vegetables change with the seasons; they can be eaten alone, with cheese and crackers or chopped finely to make a wonderful relish for all kinds of meats. Be creative!
Makes 2 - 3 quarts
Wash and drain vegetables. Sterilize jars and lids in hot water.
Bring vinegar, water, salt, sugar and pickling spice to a boil.
Pack vegetable medley into hot, sterilized jars, leaving 1/2-inch headspace. Pour hot solution over mix in jars, leaving 1/4-inch headspace. Remove air bubbles. Add liquid to bring headspace to 1/4 inch. Wipe jar rims.
Refrigerate and let stand 2 days before serving. Will last several weeks refrigerated.
For longer storage, process in boiling water bath for 20 minutes.*
*Follow jar manufacturers directions for filling and processing jars.
Moving into your first home, whether a house or an apartment, shared or alone, it can be terribly intimidating. You move your clothes, your personal belongings and whatever furniture you’ve accumulated and miscellaneous pieces that generous friends or parents have been willing to part with. Then it comes to the kitchen, again maybe you’ve collected a few pots and pans, some utensils, dishes and silverware but what about that cupboard called the pantry? What goes in there and why? Don’t have a clue; well my new book, ‘What’s In Your Pantry’, can help you from learning to stock your pantry to actually collecting the necessary items to create your own delicious dishes.
A well-stocked pantry will save you money, help you to create quick easy dishes, keep you healthy and away from those fast food stops on you’re way home from work or school. If you have roommates a communal pantry works great. Keep your pantry items fresh by purchasing items in small amounts unless you think you really can use a 20-pound bag of all-purpose flour. In my book, ‘What’s In Your Pantry’, I’ve listed items by grocery aisle to make it easy to purchase what you need from your local store.
So let’s begin. Here are some basics that I recommend for your first home or apartment.
Sea salt and pepper are a must, of course; not table salt. A good sea salt without any preservatives can be purchased for a reasonable cost, no need to get one of the extravagant sea salts from the cookware store. The reason for the no preservative salt is purely for flavor. Many salts have additives to keep it from clumping together and help make it free flowing. This can give the salt an aftertaste and therefore affect the flavor of your food. Using a small amount of sea salt can add a nice fresh taste to your food. Freshly ground pepper is so much more flavorful than ‘pre-ground’ pepper. Luckily for all of us, many of the spice companies now offer a jar of peppercorns with a grinder attached at the top. These can conveniently be purchased at your local market. Be sure to season your food as you cook, not just at the end of the preparation. In order to determine how much seasoning you need, you’ll need to taste your dish as you prepare it. Simple. Taste again before serving to make sure that the seasonings are adjusted to your taste.
Choosing olive oil can be a daunting task; if you’re lucky you’ll be able to taste a few varieties before you purchase one. Choose one in your price range that has a nice, clean flavor. Use a pure olive oil for cooking and save your more expensive extra-virgin oil for special salad dressings or to toss with your cooked vegetables.
Red wine or balsamic vinegar to create salad dressings and more are a must. A plain white vinegar is great for cleaning things like coffee makers, floors, windows and the like. A little white vinegar added to your boiling water for poached eggs would help keep them from spreading out in the pan.
Chicken or vegetable stock should be free of preservatives, MSG and high fructose corn syrup. Sometimes the ‘low salt’ versions have these added to punch up the flavor.
You can ‘doctor’ your jarred pasta sauce with a little red wine, some Italian herbs, mushrooms, olives or whatever you can imagine for a great little dinner in no time!
Jasmine rice has a nice aromatic aroma, add some leftover roast chicken, cooked veggies and dinner is served.
Dried mushrooms reconstituted in wine, chicken stock or warm water, add a considerable amount of flavor to any dish.
Canned meat can be added not only to salads and soups but stews and casserole type dishes. They’re great for sandwiches as well. Anchovies can add depth to a salad dressing or a pasta sauce.
Canned tomatoes with some chicken stock added, a can of vegetables, some mushrooms, canned beans (rinsed and drained, of course), some leftover cooked pasta, a little Parmesan cheese and voila, you’ve created a healthy satisfying soup! Add a loaf of good bread and a bottle of wine and mangia (eat)!
So be creative in your kitchen and don’t be afraid to make mistakes; that’s how great dishes are created!
Pie Crust
Filling:
Pie Crust:
 6:30 – 8:30
Temecula Olive Oil Company’s
Seal Beach Tasting Room
148 Main Street, Seal Beach
$35.00
Pre-paid reservations only, please call
(562) 296-5421
Menu
Blood Orange ‘Punch’
Ingredients
1 teaspoon Dijon mustard
Coarse salt and freshly ground pepper
1 Pinch sugar
1 1/2 tablespoons rice vinegar
3 tablespoons extra-virgin olive oil
2 ounces blue cheese — crumbled
4 cups baby mix lettuce
1 pomegranate — seeded
1 tart apple — cored and diced
Instructions
In a small bowl, whisk together mustard, large pinch of salt, large pinch
of pepper, and the sugar. Add vinegar, and whisk to combine. While
whisking, drizzle in oil. Continue whisking until emulsified. Add blue
cheese, and stir gently to combine.
In a large bowl toss lettuce with dressing and plate. Top with apple and
pomegranate seeds. Serve immediately.
Frosting:
Frosting:
As summer begins to fade away and the feel of fall comes creeping in so does some wonderful fruit, pomegranates, all kinds of citrus, apples and eventually pears. Have you ever been apple picking? With the smell of apples lightly scenting the air, it’s intoxicating. So too is the smell of apples being prepared in a myriad of recipes for the fall. Do you know which apples are best for cooking, how to choose and store them?
Here are a few guidelines and some recipe suggestions. An apple a day keeps the doctor away may be just another saying but there is some truth behind that. Apples are the ultimate fruit, low in calories with no fat, sodium or cholesterol. The pectin in apples actually helps to dissolve the cholesterol in ones blood stream. High in fiber, anti-oxidants, potassium, niacin and a variety of vitamins, apples are a near perfect fruit.
Choose organic apples as apples have topped the Environmental Working Groups ‘Dirty Dozen’ list, which identifies the most pest laden fruit and vegetables. You’ll want to eat the skin of the apple as disease-fighting pectin (fiber) lies directly under the skin.
Cooking Apples
For more information on apples or to order some types not available in your regular market check Melissa’s Produce here (click).
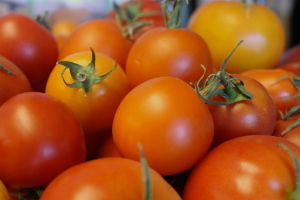
 I usually freeze my tomatoes until I have time later to make sauce, ketchup or just can some chopped tomatoes for later use. (I freeze them by washing and drying them, placing them on a baking sheet and freezing until solid. No, I do not peel or seed them as the skin comes off easily when they are defrosted. Once frozen, I place into an airtight freezer bag and return to the freezer. This allows me to defrost one or ten, however many I need at the time.)
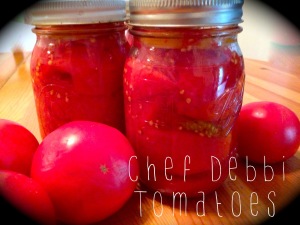
I like to do ‘small batch’ canning, which means I can do a few jars at a time. Of course when my tomatoes come in all at once, I haul out the big canner and fill it up. The basic procedure for canning small or large batches is the same only the equipment varies slightly. If I’m canning a small batch instead of the big canner, I can usually use a large stockpot, deep enough for the water to cover the jars by 2″. I use a cake rack for the bottom of the stockpot so the jars don’t sit on the bottom of the pot where they could possibly break. That’s it!
Tomatoes-I do not peel or seed my tomatoes, just pack them raw
Tomato juice (you could also use hot water)
Lemons
Sea salt
Fresh herbs, optional
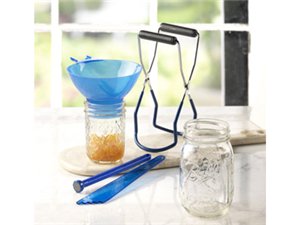
 For Processing Tomatoes You will need:
Place the rack in the bottom of your stockpot. Make sure to choose a deep enough pot so that the jars will be covered 2″ of water.
Fill the pot with water and begin to bring to a boil. Line a baking sheet with a clean tea towel.
Wash and dry the jars, lids and screw bands. Place lids into a small saucepan with hot water.
Prepare tomatoes by washing and lying out on a towel to air dry (they don’t have to be totally dry). If desired, cut tomatoes into quarters and set aside. I don’t peel or seed my tomatoes before packing as the skin comes right off when I take them out of the jar. If I don’t want to use the seeds, I simply strain them out.
Heat jars by placing them into the stockpot while you bring the water to a boil. Remove them to the cloth lined baking sheet when you are ready to fill with tomatoes. (The water in the stockpot should be boiling or very close to it).
Place one or two slices of lemon on the bottom of your jar.
Fill your jars with tomatoes, really squish them in there, and use a wooden spoon to smash them down. Add a sprinkle of sea salt and a tablespoon of lemon juice (from a real lemon). You can also add herbs such as basil, thyme or parsley. Using a plastic knife or chopstick, slide it down the side of the jar removing any air bubbles. Add tomato juice to cover the tomatoes and a slice of lemon at the top of the jar before sealing. Leave a 1/2″ headspace.
 Wipe the top of the jar, removing any debris from the screw area and the top of the jar. Place the lid and the screw top on the jar, closing only finger tight, and place on the rack in the canner or stockpot. Make sure the jars are covered by 2″ water, bring to a boil and time for 40 minutes (for pints) or 45 (for qts). The water must be boiling the entire 40 minutes or you’ll need to restart the timer from the beginning. Remove to a cloth lined baking sheet and let cool for 24 hours before moving.
After 24 hours, if the center of the lid still moves up and down the jar has not sealed properly. You can reprocess this jar once or just put it in the refrigerator and use within a few days.