Deb's Kitchen - Farm, Food, Wine & Lifestyle Adventures
  • Facebook
  • Google
  • Twitter
  • Instagram
  • Pinterest
  • Email
Menu
Skip to content
  • Home
  • Blog
  • Events
    • Classes
    • Tours & Adventures
  • Edible Gardening
  • Preserving
  • Recipes
    • Appetizers
    • Soups and Salads
    • Main Dishes
    • Side Dishes
    • Desserts
  • About
    • Whats In Your Pantry
    • Ask Debbi
    • Deb’s Kitchen Botanicals
    • Press
  • Contact

Category Archives: Desserts

Happy Valentine’s Day

2 / 9 / 232 / 10 / 23

Why fight the crowds in a restaurant? Here are a few fool-proof recipes to create on your own!

House Salad


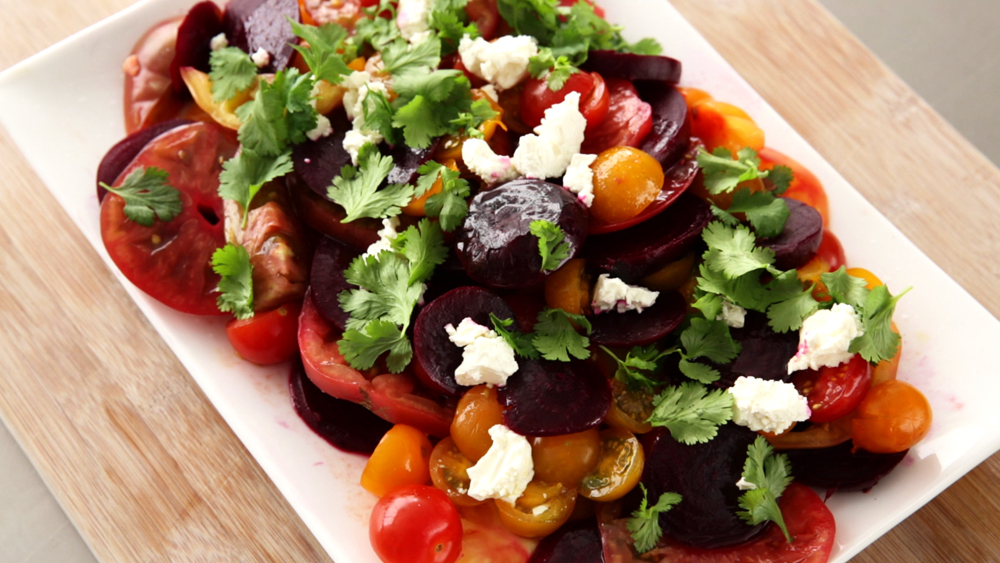
Beet Salad with Goat Cheese and Balsamic

Save
Print

I created this recipe to mimic the fabulous salad served at The Sea Chest restaurant in Cambria, Ca.

  • 2-3 baby beets, use a variety of beets (red, striped, gold)*
  • 1 cup baby greens
  • ½ cup snow peas, cut in half on the diagonal
  • 1 small carrot, sliced or grated
  • 1 small Persian cucumber, sliced
  • ¼ cup toasted walnuts
  • 1/2 cup cherry tomatoes, halved
  • 2 ounces crumbled blue cheese
  • Sea salt and fresh ground pepper
  • Balsamic Vinaigrette
  • ½ shallot, minced
  • ¼ cup good balsamic vinegar
  • 1 teaspoon Dijon mustard
  • ½ cup extra virgin olive oil
  • salt and pepper

Preheat the oven to 400°.

Wrap each beet in a piece of aluminum foil and drizzle generously with olive oil and pinches of salt and pepper.

Place the beets on a baking sheet and roast for 40 to 90 minutes, or until soft and fork-tender, the size of the beet will determine the cooking time.

While the beets are cooking, make the vinaigrette.

Mix together the minced shallot, balsamic vinegar, and Dijon mustard, shake or whisk to mix well. While still whisking slowly pour in the oil until the mixture slightly emulsifies. Set aside while you finish the beets and create the salad, shake again just before serving.

Remove the beets from the oven, loosen the foil, and set aside to cool. When they are cool to the touch, peel the skins using a paper towel and just rubbing the skin off.

Let the beets cool and chill them in the fridge until ready to use.

Slice the beets into ¼-inch-thick rounds or if they’re small, use whole or half. Assemble the salad with the greens, beets, snow peas, carrot, cucumber, walnuts, cheese, and cherry tomatoes. Drizzle with balsamic vinaigrette. Season with flaky sea salt and pepper and serve.

Baby beets may be hard to find. Trader Joe’s usually have some in a box in the produce section, they have already been cleaned & steamed so they’re easy to use. If you can’t find them, check out melissas.com, they carry them as well.


The Best Beef Stroganoff
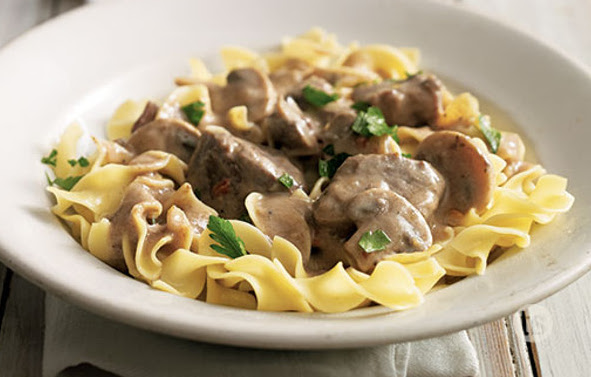
Beef Stroganoff

Save
Print
  • 2 tablespoon olive oil, or more if needed
  • 2 tablespoons unsalted butter, or more if needed
  • 1 small onion, diced
  • 1 pound crimini mushrooms, sliced
  • 3 pounds tenderloin steak, sliced into thin strips
  • ½ cup flour
  • salt and pepper
  • ¼ cup dry white wine
  • 2 tablespoons Dijon mustard
  • 2 tablespoons Worcestershire sauce
  • 1 ½ cups beef stock
  • ½ cup creme fraiche, or more to taste
  • ½ pound egg noodles, prepared according to box directions

Heat a large sauté pan and add oil and butter. Sauté onions until

translucent but not brown. Set aside. Add more oil and butter if needed;

sauté mushrooms until lightly browned and set aside with onions.

Dredge the meat in the flour seasoned with salt and pepper. Shake off

excess flour and brown the meat in small batches. Don't overcrowd the pan

or the meat will steam and not brown. Set meat aside with onions and

season with salt and pepper.

Deglaze the pan by adding the wine and scraping the bits from the bottom

of the pan, called fond. Reduce slightly and add the mustard,

Worcestershire sauce and stock. Return onions, mushrooms and steak to the

pan and simmer until slightly thickened.

Reduce heat to low and stir in the creme fraiche, re-season with salt and

pepper, heat until warmed through and serve over egg noodles.


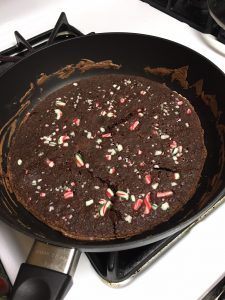
Here’s a recipe that some recipe tasters were able to enjoy recently. Make some for this Valentine’s Day!


Chocolate Amaretti Tortes

Save
Print
  • Makes 4
  • Tortes
  • 4 ounces semisweet chocolate, chopped
  • 3/4 cup sliced almonds, toasted
  • 12 1 1/2-inch-diameter amaretti cookies (Italian macaroons), about 2.6 ounces total
  • ¼ teaspoon cinnamon
  • Pinch of salt
  • 1/2 cup (1 stick) unsalted butter, room temperature
  • ½ cup sugar
  • 3 large eggs
  • Topping
  • 3/4 cup chilled whipping cream
  • 1 ½ teaspoons powdered sugar
  • 1/2 teaspoon almond extract
  • 2 amaretti cookies, crumbled

Tortes:

Position rack in center of oven and preheat to 350°F. Butter four 3/4-cup custard cups or soufflé dishes. Dust with flour; tap out excess. Line bottom of cups with parchment paper rounds. Place on rimmed baking sheet.

Stir chocolate in top of double boiler set over simmering water until melted and smooth. Using on/off turns, blend almonds, amaretti, cinnamon, and salt in processor until finely ground. Transfer to medium bowl.

Add butter, sugar, and eggs to processor; mix until blended and smooth, occasionally scraping down sides of bowl, about 3 minutes. Add cookie mixture and melted chocolate. Using on/off turns, process just until blended.

Divide batter among custard cups. Bake until tops of tortes are dry and puffed and tester inserted into centers comes out with moist crumbs attached, about 30 minutes. Transfer cups to rack; cool 15 minutes. Run small knife around edges of cups to release tortes. Turn tortes out onto rack and turn right side up; cool. (Can be made 3 days ahead. Wrap in plastic and store at room temperature.)

Topping:

Beat together cream, sugar, and almond extract in medium bowl until cream holds peaks. (Can be made 4 hours ahead; refrigerate.)

Serve

Place 1 torte on each of 4 plates. Top with dollop of whipped cream, sprinkle with crumbled amaretti, and serve.

Amaretti cookies are available in most Italian deli’s and come in two sizes. The larger ones (used in this recipe) are bundled in pairs in colorful wrappers, while slightly smaller ones are packaged and unwrapped in sealed plastic bags. If using the smaller cookies, measure by weight (2.6 ounces total), not count.

Leave a comment
Share
  • Pin it
  • Share
  • Tweet
  • Share
  • Email

How To Use Meyer Lemons

2 / 8 / 232 / 9 / 23

picking-lemons-490x326


The bright star of the season, Meyer Lemons are the sweetest lemons to use in cooking. Thin-skinned, juicy and brightly colored you can use every part of the lemon, well, except maybe the seeds! In season now you can find them in all markets and at your local farmers market. If you have your own tree about now you might be wondering what to do with all those lemons. If you have trouble finding them you can call our friends at Melissa’s Produce and they can fill up your pantry!

Below you’ll find a few of my favorite recipes.


Meyer lemons

 How to choose, store and use beautiful Meyer

Lemons

Meyer Lemon Season (Commercial) Nov-May

Home Tree will fruit late Summer-April/May

Choose, Store and Use Meyer Lemons:

Pick lemons that have a smooth, yellow skin with no signs of bruises or cuts. Lemons that are heavy will have more juice in

them; unfortunately, Meyer lemons also contain many seeds. Easily seeded if cut in half, most of the seeds are centered in the middle of the fruit.

Store lemons in a bowl on the counter in a cool place with no direct contact with the sun. If the lemons begin to become soft, refrigerate and use within a few days. If using refrigerated lemons, let them come to room temperature if possible. Roll all lemons around on the counter to help free up the juice.

Extra lemon juice can be poured into ice cube trays, frozen and then placed into a freezer bag and used within 6 months.

Grow:Citrus_lemon

Meyer lemon trees grow well in pots in So. California, use a fast draining soil. They are hungry fellows so feed with an organic citrus fertilizer according to directions. They love the So. California sunshine but not so much our sometimes-windy weather. Meyer lemons like to be moist but not wet, deep infrequent watering and don’t let water sit in the liner or pot. If the weather threatens to freeze, water well and cover with a blanket or row cover at night, be very careful not to know off the fruit or flowers on the tree. Feed with an organic citrus food as directed and keep a close watch for citrus pests. Fruit will hold a long time on the tree, make sure they are nice and yellow before picking and after fruiting a little light pruning, if necessary will keep them compact and tidy.


Lemon Roasted Chicken

Save
Print
  • Serves 4
  • 1 whole chicken -- rinsed, drained and dried
  • 1 medium onion -- peeled and chopped
  • 3 baby carrots -- peeled and chopped
  • 3 celery stalks -- cut into chunks
  • 1 lemon -- zested and juiced; preferably Meyer lemon
  • 1 bunch Italian flat leaf parsley -- minced
  • 1 bunch fresh sage -- minced
  • 1/2 bunch fresh thyme -- minced
  • 2 tablespoons butter -- room temperature
  • 1 tablespoon lemon olive oil, butter or regular olive oil
  • Salt and pepper
  • 1 cup white wine
  • 1 cup chicken stock
  • 2 tablespoons chicken demi glace -- optional for sauce

Preheat oven to 400°.

Wash and dry chicken inside and out then dry well. Fit chicken into a roasting pan (you want no more than 1" of space on any side of the chicken otherwise the juices will burn).

Mix together onion, carrot, celery, lemon zest, and 1/2 of the minced herbs. Loosely stuff cavity with some of the ingredients, place the remainder on the bottom of the roasting pan and place chicken on top of the aromatic vegetables.

Mix remaining minced herbs with butter. Gently separate the chicken skin from the breast meat and carefully rub herb butter on breast under the skin.

Rub the chicken with lemon olive oil and season with salt and pepper. Squeeze lemon over chicken and place rind into cavity. Insert probe thermometer into thigh and set for 165 degrees. Pour half of the wine and chicken stock in the bottom of the pan and place, uncovered in hot oven.

Baste after 1/2 hour, if you don't have enough juice in pan use some chicken stock. Do not cover bird until browned and then loosely place foil over breast. If wings start to brown to early wrap with foil.

Remove chicken to a warm plate and loosely cover with foil. Let rest for 10 minutes before carving.

Remove some of the fat in the pan by using a paper towel or ice cubes. (Dredge the paper towel through the juices to pull out some of the fat or pour off the juices into a heat proof measuring cup. Add a few ice cubes; the fat will stick to the cold cube, discard cube. You may have to do this several times).

Put the roasting pan on top of the stove over medium-high heat and bring a boil, add remaining wine and stock scraping the fond (the yummy pieces stuck to the pan) from the bottom of the pan. Reduce by half, add demi-glace if using and serve with chicken.

Photo: Annabelle Breakey; Styling: Dan Becker

French Yogurt Cake

Save
Print

I love this bright lemony cake so much I adapted it slightly from Dorie Greenspan by adding these super sweet little strawberries, Alpine strawberries.

  • 1 1/2   cup all-purpose flour
  • 2         teaspoons baking powder
  •            Pinch of salt
  • 1         cup sugar
  • 1         lemon, grated and zest
  • 1/2      cup plain yogurt
  • 3         eggs
  • 1/4      teaspoon pure vanilla extract
  • 1/2      cup citrus olive oil
  • 1         cup Alpine strawberries, whole or halved

Center a rack in the oven and preheat the oven to 350 degrees F. Generously butter an 8 1/2-x-41/2-inch loaf pan and place the pan on a baking sheet.

Whisk together the flour, baking powder and salt.

Put the sugar and zest in a medium bowl and, with your fingertips, rub the zest into the sugar until the sugar is moist and aromatic.

Add the yogurt, eggs and vanilla and whisking vigorously until the mixture is very well blended.

Still whisking, add the dry ingredients, then switch to a large rubber spatula and fold in the oil and then the strawberries. You'll have a thick, smooth batter with a slight sheen. Scrape the batter into the pan and smooth the top.

Bake for 50 to 55 minutes, or until the cake begins to come away from the sides of the pan; it should be golden brown and a thin knife inserted into the center will come out clean. Transfer the pan to a rack and cool for 5 minutes, then run a blunt knife between the cake and the sides of the pan. Unmold, and cool to room temperature right side up on the rack.

Glaze (optional)

½ cup lemon marmalade mixed with 1 teaspoon water

To Make the Glaze:

Put the marmalade in a small saucepan or in a microwave-safe bowl, stir in the teaspoon of the water and heat until the jelly is hot and liquefied. Using a pastry brush, gently brush the cake with the glaze.

Citrus Olive Oil Cake

Save
Print

You can make this cake with any flavored or un-flavored olive oil that you like. Instead of poppy seeds try adding some dried cranberries or cherries. For serving dust with powdered sugar or make a citrus glaze with orange or lemon juice mixed with some powdered sugar and drizzle over the top of the cake, I like serving this with fresh raspberries on the side and a dollop of freshly whipped cream wouldn’t hurt either!
I’ve used cake pans, bundt cake pans and small Mason jars for this cake, just be aware of your baking time, test by inserting a clean toothpick into the center of the cake and it comes out dry.

  • 2 cups flour
  • 1 ¼ cups sugar
  • 1 teaspoon baking powder
  • 1 teaspoon baking soda
  • ¼ teaspoon salt
  • 3 large eggs, beaten
  • 1 ½ cups whole milk
  • ½ cup Orange olive oil, or any flavored olive oil
  • 1 orange, zested
  • 1 teaspoon vanilla
  • ½ cup sliced almonds
  • 1 tablespoon poppy seeds, optional

Preheat the oven to 350°.

Sift together the flour, sugar, salt, baking powder and baking soda Make a well in the center of the dry ingredients and whisk in the eggs, milk, olive oil, zest and vanilla. 


Add the almonds and poppyseeds to the batter, and mix with a spatula or wooden spoon. 


Pour the batter into a greased Bundt cake pan. Bake for 55 to 60 minutes, until the cake is golden on top. Cool the cake, invert on a plate and dust with confectioners sugar if you like.

If using Mason jars, spray the inside of the jar with oil spray and fill only 2/3 of the jar with batter. Place jar on a baking sheet and when all jars are done place the sheetpan into the oven and bake accordingly. Check the cakes at 30 minutes and then every 5 minutes until a toothpick comes out clean.

2 Comments
Share
  • Pin it
  • Share
  • Tweet
  • Share
  • Email

Late Summer/Early Fall Menu’s

9 / 21 / 20

While it’s still pretty hot out in So. California it’s hard to go into the kitchen to cook. Here are some light recipes that are quick and easy to prepare. Mangia!

Spinach Salad, Traditional

Save
Print

Serves 2

  • 6 ounces baby spinach, washed and dried well
  • 1/4 small or medium shallot, minced
  • 2 pieces thick-sliced bacon, finely diced
  • ¼ cup Champagne Vinegar, or Red Wine Vinegar
  • 1/2 teaspoon smooth Dijon mustard
  • Sea salt and freshly ground black pepper, to taste
  • 4 large white mushrooms, thinly sliced
  • 2 large egg, hard-boiled, chilled, peeled and thinly sliced

Remove any stems from the spinach and place in a salad serving bowl.

In a heated sauté pan add bacon and cook until crisp, drain on paper towels. Remove all but 2 Tb. of bacon grease and add vinegar, whisk in Dijon mustard and taste for seasoning. Pour over salad and toss quickly, scatter with mushrooms and eggs.

Serve while still warm.

Roasted Tomato & Goat Cheese Flatbread with Artichoke Pesto

Save
Print
  • 1 jar artichoke hearts, 12 oz., drained
  • 1 cup walnuts, toasted
  • 1/4 cup grated Parmesan cheese
  • 2 cloves garlic, peeled
  • 1/3 cup lemon juice, to taste
  • 1/2 cup olive oil, to taste
  • 1/4 cup minced fresh parsley
  • Salt and pepper, to taste
  • 1 pizza dough
  • 1 large heirloom tomatoes or ½ basket cherry tomatoes, cut in half
  • 4 ounces soft goat cheese

Drain the artichoke hearts. If they are marinated in oil, you can omit draining the hearts and adjust the oil measure downwards appropriately.

Add the artichoke to the food processor with the nuts, cheese, and garlic and pulse until you have a paste. Add in the lemon juice and with the motor running, drizzle in the olive oil. Scrape down the sides of the processor as needed and pulse until you have a uniform paste-like consistency.

Taste and season with salt, pepper, oil, and lemon juice to taste.

Heat oven to 450°. Roll pizza dough out to desired shape, place onto parchment lined baking pan. Brush 1” of the edge of the pizza dough with olive oil, spoon on the artichoke dip to the remaining dough, top with tomatoes, goat cheese and bake for 12 – 15 minutes.

Spinach Bacon Cheese Puffs

Save
Print

Baked pastry puffs stuffed with a cream cheese, feta, bacon and spinach filling. These are great appetizers that you can put together ahead of time and bake off as needed.

Yield: 10 puffs

  • 4 ounces cream cheese, softened
  • 1 large egg
  • 1 tablespoon olive oil
  • 1/2 teaspoon dried dill
  • 2 packed cups chopped fresh spinach
  • 3/4 cup crumbled feta
  • 3 slices crispy cooked bacon, crumbled
  • Sea salt and fresh ground black pepper
  • 1 sheet frozen puff pastry, thawed and cut into 10 squares (cut on a floured board), Keep the pastry cold until ready to use.
  • 1 tablespoon butter, melted

Preheat oven to 400°. Grease round or square muffin pan.

Place the cream cheese into a food processor, add egg, oil and dill and pulse until combined.

In a separate bowl mix the spinach, feta and bacon. Pour the cream cheese mixture over top, season it with salt and pepper and stir until combined.

Line the muffin pan with the pastry squares, stretching them out a little if needed; press them into the bottom of the cups. Divide the spinach among the cups as evenly as possible. Bring the 4 points together over the filling and press them together.

Lightly brush with the melted butter.

Bake about 25 minute until golden brown and puffy. Allow to cool in pan on wire rack 10 minutes then run a knife around the edges to loosen them and help pop them out.

Bird's Nest Pesto With Stuffed Tomatoes

Save
Print
  • Pesto
  • 1/2 cup pine nut -- lightly toasted; plus, some for garnish
  • 1 clove garlic -- peeled
  • 2 cups basil leaf -- loosely packed
  • 1/2 cup Parmesan cheese -- grated
  • Salt and pepper
  • Tomatoes
  • 11 ounces goat cheese -- room temperature
  • 1/4 cup heavy cream
  • Salt and pepper
  • 6 small tomatoes -- plum
  • Olive oil
  • 1 pound spaghetti -- or angel hair pasta

Pesto

In a food processor, rough chop pine nuts and garlic. Add basil and process using pulse until the leaves start to break down. Add the cheese and blend until you have a rough paste. With machine running add olive oil to emulsify. Season with salt and pepper.

Preheat oven to 425° and put a pot of water on to boil for the pasta.

Mix the goat and Boursin cheese with enough cream to make it soft and spreadable. Season with salt and pepper.

Cut the tops off of the tomatoes and scoop out the insides. Lightly salt and place, cut side down, on paper towels to drain for 20 min. Spread a little pesto on the inside of the tomato and fill to the top with the goat cheese mixture. Place in a lightly oiled baking dish. Drizzle a little olive oil over each one and bake until they start to shrivel, and the cheese is lightly browned, about 20 min.

Cook the pasta until al dente, reserving about 1 cup of the cooking water.

Transfer to a large serving bowl and toss with the pesto, adding a bit of the pasta water if necessary, to loosen the pesto. Plate the pasta and add a tomato in the center. Top with a sprinkling of toasted pine nuts.

Sea Bass Provençal

Save
Print
  • Olive oil
  • 1 small leek, cut in half and then into half moons
  • 1 clove garlic
  • 1 small can whole tomatoes, drained and chopped or 2 large fresh garden tomatoes
  • ¼ cup dry white wine
  • 2 teaspoons fresh thyme
  • ¼ cup Greek olives, halved
  • 1 teaspoon capers, drained
  • 4 4 ounce Sea Bass fillets, or any white fish

Heat a medium sauté or saucepan. Add enough oil to coat the bottom of the pan, add onion and sauté until lightly translucent. Add garlic and stir for about a minute. Crush or squish tomatoes and add tomatoes and remaining ingredients except the fish then simmer about 10 minutes. Set aside and keep warm.

Heat a large sauté pan over medium heat; add enough oil to coat the bottom of the pan. When oil is hot carefully place dried fish fillets into oil, it should start to simmer right away. Cook about 3-4 minutes and turn carefully for another 4 minutes.

Serve with sauce.

French Apple Cake

Save
Print
  • 1 cup all-purpose flour, spooned into measuring cup and leveled-off
  • 1 teaspoon baking powder
  • 1/4 teaspoon salt
  • 1 stick (1/2 cup) unsalted butter, at room temperature
  • 2/3 cup granulated sugar, plus more for sprinkling over cake
  • 2 large eggs
  • 1 teaspoon vanilla extract
  • 3 tablespoons dark rum
  • 2 baking apples, peeled, cored and cut into 1/2-inch cubes (I like Honeycrisp, Fuji or Granny Smith)
  • Confectioners' sugar (optional), for decorating cake

Preheat the oven to 350°F. Grease a 9-inch springform or regular cake pan with butter or nonstick cooking spray. If using a regular cake pan, line the bottom of the pan with parchment paper and grease again.

In a small bowl, whisk together the flour, baking powder and salt.

Using a handheld mixer with beaters or a stand mixer with the paddle attachment, cream the butter and granulated sugar until light and fluffy, about 3 minutes. Add the eggs, one at a time, beating well and scraping down the sides of the bowl after each addition. Beat in the vanilla and rum. Don't worry if the batter looks grainy at this point; that's okay. Add the flour mixture and mix on low speed until just combined. Using a rubber spatula, fold in the chopped apples.

Scrape the batter into the prepared pan and even the top. Sprinkle evenly with 1 tablespoon of granulated sugar. Bake for about 40 minutes, or until the cake is golden and a toothpick inserted into the center comes out clean. Allow the cake to cool on a rack. Run a blunt knife around the edges of the cake. If using a springform pan, remove the sides. If using a regular cake pan, carefully invert the cake onto the rack, remove the parchment paper, then gently flip the cake over and place right-side-up on a platter. Using a fine sieve, dust with Confectioners' sugar (if using). Cake can be served warm or room temperature, plain or with lightly sweetened whipped cream or vanilla ice cream.

Freezer Friendly Instructions: The cake can be frozen for up to 3 months. After it is completely cooled, cover it tightly with aluminum foil or freezer wrap. Thaw overnight on the countertop before serving.


Leave a comment
Share
  • Pin it
  • Share
  • Tweet
  • Share
  • Email

All Fruit Crisp

6 / 21 / 20


Any Fruit Crisp

Save
Print

Recipe from The Kitchn

  • For the filling:
  • ½ cup granulated sugar
  • 2 tablespoons cornstarch
  • 6 cups sliced fresh or thawed frozen fruit
  • 1 tablespoon freshly squeezed lemon juice
  • For the topping:
  • 1 ½ cups old-fashioned rolled oats
  • 1 cup all-purpose flour
  • ½ cup packed light brown sugar
  • 1/2 teaspoon salt
  • 12 tablespoons unsalted butter, melted and cooled, plus more for buttering the baking dish
  • 1 teaspoon vanilla extract

Arrange a rack in the middle of the oven and heat to 350°F. Coat a 9x9-inch or 11x7-inch glass baking dish with butter; set aside.

Whisk together the sugar and cornstarch in a medium mixing bowl until lump-free. Add the fruit and lemon juice and toss gently to coat. Transfer to the baking dish.

Topping: Combine the oats, flour, sugar, and salt in a large bowl and stir until combined. Drizzle the butter and vanilla over the oat mixture and stir to combine. Set aside or store in the freezer in a zip-top freezer bag for later use.

Scatter the crisp topping evenly over the fruit mixture, leaving large clumps intact. Bake until the fruit juices are bubbling around the edges of the baking dish and the topping is golden and firm to the touch, 30 to 35 minutes.

Let the crisp cool on a wire rack for at least 15 minutes before serving. If transporting to a picnic or party, let the crisp cool completely to give the fruit filling time to set. Crisps will keep, covered and refrigerated, for up to 1 week. Serve cold, room temperature, or re-warmed in a low oven for 20 minutes.

Notes:

Make ahead: Crisp topping can be made and frozen up to 3 months in advance.

Storage: Cover and refrigerate leftover crisp for up to 3 days. Enjoy cold for breakfast or gently rewarm in a low oven for 20 minutes before serving.

Leave a comment
Share
  • Pin it
  • Share
  • Tweet
  • Share
  • Email

Easter Preview

4 / 6 / 20


Easter was always a time spent with lots of family,  lots of food and other things. This year will be hard on most people, not being able to get together, search for colored eggs or we always loved to play croquet in the big backyard. Whatever you do I’ve added some of my favorite recipes for you to enjoy.

Deviled Eggs

Save
Print
  • 1 dozen large eggs, two weeks old
  • 1/3 cup mayonnaise, approximately
  • 1-2 teaspoon yellow mustard
  • 2 teaspoon red wine or sherry vinegar
  • ½ teaspoon finely chopped shallots
  • ½ teaspoon finely snipped chives, reserve some for the garnish
  • Sea salt and freshly ground pepper
  • Paprika or Smoked Pimenton (Spanish Paprika), optional

The shell of fresh eggs is tightly attached to the egg itself whereas older eggs the white inside has started to pull away from the shell, making them easier to peel. When peeling begin at the large end; with an older egg there will be a little air pocket there making it easier to get away from the white.

To hard boil, arrange eggs into a saucepan and cover with cool water. Over high heat bring to a boil and immediately turn the heat off and cover the eggs for 15 minutes.

Prepare an ice bath, a large bowl that will hold all the eggs, fill with ice and when eggs have finished cooking drain off the hot water and place eggs into the ice, cracking a bit of the shell as you do. Cover with cool water and let stand until completely cooled, 20 minutes or so. This step can be done a day ahead of time, after eggs have cooled refrigerate until ready to use.

Cut eggs in half lengthwise with a chef’s knife, not a serrated knife. Pop out the yolks into a mixing bowl. If you don’t have a plate for deviled eggs you can shred some radicchio or dark red lettuce onto a serving plate. If using the lettuce, slice a tiny piece from the round end of the egg so it doesn’t roll. Arrange egg whites cut side up on the lettuce.

Mash yolks with fork then stir in mayonnaise, mustard, and vinegar. Mix ingredients together well. Add sea salt and pepper, to taste. If the yolks aren’t creamy enough add a little more mayonnaise. You can also adjust the mustard and vinegar to taste.

Place the mixture into a pastry bag or a plastic storage bag, snip a diagonal piece from the bottom corner of the storage bag and use as a piping bag. Pipe the yolk mixture or spoon into each egg white half, dividing evenly as possible between the eggs.

Sprinkle eggs with paprika and/or minced chives if desired. Serve immediately or refrigerate until ready to serve. If refrigerating, you’ll want to cover with plastic wrap; place toothpicks into egg whites around the outer edge of the plate and in the center to make a ‘tent’ with the plastic wrap so it doesn’t touch the egg yolks.


Oven Roasted Dijon Chicken

Save
Print

4 servings

  • 2 teaspoons plus 3 tablespoons unsalted butter, at room temperature
  • ¼ cup panko
  • ½ cup toasted breadcrumbs
  • ½ cup Dijon mustard
  • 8 bone-in, skin-on chicken thighs
  • Sea salt and freshly ground black pepper

Preheat the oven to 425 ° and line a sheet pan, that will hold all the chicken pieces without touching each other, with aluminum foil.

Melt the 2 teaspoons of butter in a small skillet over medium heat. Stir in the panko and breadcrumbs, toast for a few minutes, stirring occasionally, until golden brown. Remove from the heat.

Mash in the remaining 3 tablespoons of butter into the mixture.

Season the chicken lightly with salt and pepper, then brush or slather the mustard mixture all over, then roll the entire piece of chicken into the breadcrumb mixture. Place the chicken on the baking sheet.

Roast for 25 minutes, or until the chicken is cooked through; an instant-read thermometer inserted into the thickest part of the chicken should register 165 degrees. Depending on the size of the chicken pieces it may take less or more time to cook.


Honey Baked Ham

Save
Print
  • 1 cup honey
  • ½ cup packed brown sugar
  • ½ cup apricot preserves
  • ¼ cup apple cider vinegar
  • 2 tablespoons Dijon mustard
  • 1 ½ tablespoon allspice
  • ½ teaspoon ground ginger
  • ½ teaspoon onion powder
  • 8-10 pound bone-in spiral cut ham fully cooked

Remove ham from refrigerator and let sit at room temperature for 2-3 hours.

Preheat oven to 325°.

Adjust oven rack to lowest position.

Whisk together honey, brown sugar, apricot preserves, apple dicer vinegar, mustard and spices in a medium saucepan. Bring to a simmer, stirring often, for about 1-2 minutes. Set aside.

Cut 2 pieces of foil that will wrap around the ham, Lay them in a baking pan crossing in the middle, one lengthwise and one crosswise, like a cross. Place ham on foil and brush ham all over with approximately 1/3 of the glaze, including in between slices. Tightly wrap ham and bake ham for approximately 10-13 minutes per pound.

Remove ham from oven and increase oven temperature to 400°.

Carefully unwrap ham from foil and spoon any juices from the bottom of the pan into the saucepan with the glaze, rewarm over low to medium heat then brush ham all over and in between slices with 1/3 glaze.

Leave ham uncovered and bake until the ham reaches an internal temperature of around 130°, approximately 10-20 minutes, spooning juices over ham every 10 minutes.

Remove ham from oven and spoon juices from bottom of pan again all over ham and brush with the last of the glaze, including in between slices.

Remove ham and loosely cover with foil. Let rest for 15 minutes before serving. Serve warm or at room temperature.


Potato Gratin

Save
Print

This rich, creamy gratin gets a note of smokiness from the bacon between the layers of tender potatoes.
by Molly Stevens from Fine Cooking
Serves 8

  • 2-1/2 lb. Yukon Gold potatoes, peeled & sliced into 1/8-inch thick rounds
  • 2-1/2 cups heavy or light cream
  • Sea salt & fresh ground pepper, to taste
  • 4 oz. bacon
  • 3 medium leeks, white and light-green parts only, thinly sliced
  • 6 oz. grated Gruyère
  • 2 to 3 tsp. chopped fresh thyme
  • 1/4 tsp. freshly grated nutmeg
  • 1/2 cup fresh breadcrumbs
  • 1/4 cup finely grated Parmigiano-Reggiano
  • 2 tablespoons unsalted butter, melted

Position a rack in the center of the oven and heat the oven to 400°F. Butter or oil a 3-quart gratin dish; set aside.

Put the potatoes, cream , 1/2 tsp. salt, and a few grinds of pepper in a 12-inch skillet. Simmer, partially covered, over medium to medium-low heat, stirring occasionally and gently with a rubber spatula until the potatoes are barely tender when pierced with a fork or skewer, 8 to 12 minutes.

In a medium skillet, cook the bacon until browned and fully cooked. Set aside to cool, reserving 2 tablespoons of the fat in the skillet. Heat the reserved fat over medium-high heat and sauté leeks until tender, fragrant, and lightly browned. Season to taste with salt and pepper. When the bacon is cool, crumble it into small pieces.

Using a slotted spoon, transfer half the potatoes to the prepared gratin dish, spreading them evenly. Layer on the leeks, bacon, Gruyère, thyme, and nutmeg. Top with the remaining potatoes spreading them evenly, and pour over any liquid remaining in the pan.

In a small bowl, combine the breadcrumbs, Parmigiano-Reggiano, and melted butter.

Evenly scatter the topping mixture over the potatoes. Bake the gratin until it’s bubbly, the top is brown, and the potatoes are completely tender when poked with a fork or a skewer, 25 to 30 minutes. Let the gratin sit for at least 10 and up to 30 minutes before serving so the liquid is fully absorbed and the layers are cohesive.


French Apple Cake

Save
Print

With chunks of sweet apples nestled in a tender and buttery rum cake, this French apple cake is the essence of simplicity.

Jenn Segal, Once Upon a Chef
Servings: 6-8

  • 1 cup all-purpose flour, spooned into measuring cup and leveled-off
  • 1 teaspoon baking powder
  • 1/4 teaspoon salt
  • 1 stick (1/2 cup) unsalted butter, at room temperature
  • 2/3 cup granulated sugar, plus more for sprinkling over cake
  • 2 large eggs
  • 1 teaspoon vanilla extract
  • 3 tablespoons dark rum
  • 2 baking apples, peeled, cored and cut into 1/2-inch cubes (I like Honeycrisp, Fuji or Granny Smith)
  • Confectioners' sugar (optional), for decorating cake

Preheat the oven to 350°F. Grease a 9-inch springform or regular cake pan with butter or nonstick cooking spray. If using a regular cake pan, line the bottom of the pan with parchment paper and grease again.

In a small bowl, whisk together the flour, baking powder and salt.

Using a handheld mixer with beaters or a stand mixer with the paddle attachment, cream the butter and granulated sugar until light and fluffy, about 3 minutes. Add the eggs, one at a time, beating well and scraping down the sides of the bowl after each addition. Beat in the vanilla and rum. Don't worry if the batter looks grainy at this point; that's okay.

Add the flour mixture and mix on low speed until just combined. Using a rubber spatula, fold in the chopped apples.

Scrape the batter into the prepared pan and even the top. Sprinkle evenly with 1 tablespoon of granulated sugar. Bake for about 40 minutes, or until the cake is golden and a toothpick inserted into the center comes out clean. Allow the cake to cool on a rack. Run a blunt knife around the edges of the cake.

If using a springform pan, remove the sides. If using a regular cake pan, carefully invert the cake onto the rack, remove the parchment paper, then gently flip the cake over and place right-side-up on a platter. Using a fine sieve, dust with Confectioners' sugar (if using). Cake can be served warm or room temperature, plain or with lightly sweetened whipped cream or vanilla ice cream.

Freezer Friendly Instructions: The cake can be frozen for up to 3 months. After it is completely cooled, cover it tightly with aluminum foil or freezer wrap. Thaw overnight on the countertop before serving.


Leave a comment
Share
  • Pin it
  • Share
  • Tweet
  • Share
  • Email

Strawberry Season

4 / 8 / 19


There’s almost nothing better in spring than fresh strawberries (except for maybe asparagus, artichokes and morel mushrooms!

Look for strawberries that are red all the way to the top, those will be tasty, ripe strawberries. Pick organic if possible as strawberries are the number one fruit on the ‘Dirty Dozen’ list to retain pesticides. Pesticides do not wash off, ever. Besides the pesticide residue left on the fruit, the ground is prepared by pumping fumigants into it to sterilize the soil, killing every living creature that lives in the soil. You can read more on EWG’s website.

To prepare your strawberries, do not wash until you are ready to use or eat them. Water is their enemy. I like to slice them up and add a little sugar, macerate or squash them down a little and let them sit for awhile while the flavor develops. I sometimes will add a little Grand Marnier to the mix for an added dose of flavor. Spread them on a biscuit, slice of angel food cake, over ice cream or just eat them out of a bowl. Enjoy your strawberries while the sun is shining. Here’s a little individual cheesecake recipe for you to enjoy.

Mini Strawberry Cheesecake

Save
Print
  • Crust:
  • 1 1/4 cups graham cracker crumbs
  • 3 tablespoons brown sugar
  • 5 tablespoons unsalted butter, melted
  • 8 ounces cream cheese, room temperature
  • 1 large egg, room temperature
  • 1/4 cup granulated sugar
  • 1/4 cup sour cream, room temperature
  • 1 teaspoon vanilla extract

Preheat oven to 350°F. Line a 12-cup muffin pan with cupcake liners or oil the inside of small jam jars.

Make the graham cracker crust:

Stir together graham cracker crumbs, sugar, and melted butter. Press about 2-2 1/2 tablespoons of the mixture into the bottom of each muffin liner and press to compact.

Beat room temperature cream cheese with a hand mixer until fluffy. Beat in room temperature sour cream. Beat in egg, sugar, and vanilla extract. (Room temperature ingredients are a must to avoid lumps!)

Evenly divide (about 2-2 1/2 tablespoons each) cheesecake among crusts. Bake for 18-20 minutes, until they just begin to brown. Cool completely and refrigerate for at least 3 hours or overnight.

Serve plain or topped with whipped cream and berries.

Leave a comment
Share
  • Pin it
  • Share
  • Tweet
  • Share
  • Email

Applesauce Cake

10 / 17 / 18

A quick and easy cake for fall, don’t expect many leftovers! See the list here for which kind of apples are great for baking.

Applesauce Cake

Save
Print
  • Cake:
  • 2 cups all-purpose flour
  • 2 teaspoons baking powder
  • ½ teaspoon baking soda
  • ½ teaspoon salt
  • 1 teaspoon cinnamon
  • ½ teaspoon ground ginger
  • 1 stick unsalted butter, softened
  • 1 cup packed light brown sugar
  • 1 teaspoon pure vanilla extract
  • 2 large eggs
  • 1 ½ cups cinnamon applesauce
  • ½ cup walnuts chopped walnuts
  • Frosting:
  • 5 oz cream cheese softened
  • 3 tablespoons unsalted butter, softened
  • ¼ teaspoon pure vanilla extract
  • 1 cup confectioners sugar
  • ½ teaspoon cinnamon

Preheat oven to 350°F with rack in middle. Butter a baking dish.

Cake:

Whisk together flour, baking powder, baking soda, salt, and spices.

Beat butter, brown sugar, and vanilla with an electric mixer at high speed until pale and fluffy, 2 to 3 minutes. Add eggs 1 at a time, beating well after each addition, then beat in applesauce. At low speed, mix in flour mixture until just combined, then stir in walnuts.

Spread batter evenly in pan and bake until golden-brown and a wooden pick inserted into center comes out clean, 40 to 45 minutes. Cool in pan 15 minutes. Run a knife around edge of cake to loosen, then invert onto a plate. Reinvert cake onto a rack to cool completely.

Frosting:

Beat cream cheese, butter, and vanilla with an electric mixer at high speed until fluffy. Sift confectioners sugar and cinnamon over cream cheese mixture, then beat at medium speed until incorporated.

Spread frosting over top of cooled cake.

Leave a comment
Share
  • Pin it
  • Share
  • Tweet
  • Share
  • Email

How to Choose Baking Apples

10 / 17 / 18

THE BEST APPLES FOR BAKING


The Farmer’s Almanac

Name Best Uses Flavor Characteristics, Appearance
Braeburn Applesauce Tart, sweet, aromatic, tall shape, bright color
Cortland Pies, Applesauce, Fruit Salad Tart, crisp, larger than ‘McIntosh’
Fuji Baking Sweet and juicy, firm, red skin
Gala Dried, Cider Mild, sweet, juicy, crisp, yellow-orange skin with red striping (resembles a peach)
Granny Smith Baking Moderately sweet, crisp flesh, green skin
Jonagold Pie, Applesauce Tangy-sweet, Yellow top, red bottom
Jonathan Applesauce Tart flesh, crisp, juicy, bright red on yellow skin
McIntosh Applesauce Juicy, sweet, pinkish-white flesh, red skin
Newtown Pippin Pie, Applesauce, Cider Sweet-tart flesh, crisp, greenish-yellow skin
Rhode Island Greening Pie Very tart, distinctively flavored, grass-green skin, tending toward yellow/orange
Rome Beauty Baking, Cider Mildly tart, crisp, greenish-white flesh, thick skin
Winesap Applesauce, Pie, Cider Very juicy, sweet-sour flavor, winey, aromatic, sturdy, red skin


Leave a comment
Share
  • Pin it
  • Share
  • Tweet
  • Share
  • Email

Pumpkin Olive Oil Cake

10 / 2 / 1810 / 2 / 18


Pumpkin Olive Oil Cake

Save
Print
  • 3 cups all-purpose flour
  • 2 teaspoons baking soda
  • 1 teaspoon ground cinnamon
  • 1 teaspoon ground nutmeg
  • ½ teaspoon salt
  • ¼ teaspoon ground cloves
  • 1 1/2 cups sugar
  • 1 cup olive oil*
  • 3 eggs
  • 1 can (15 ounces) solid-pack pumpkin (or 2 cups freshly roasted sugar pumpkin)
  • Powdered sugar
  • 1 package cream cheese, room temperature

Preheat oven to 350°.

In a medium-sized bowl, stir together flour, baking soda, cinnamon, nutmeg, salt and cloves.

Combine sugar and oil in a large bowl with a rubber spatula until blended.

Add eggs, one at a time, beating well after each addition.

Add flour mixture to egg mixture alternately with pumpkin in three batches, beating

well after each addition.

Transfer to a greased Bundt cake pan.

Bake 60-65 minutes or until toothpick inserted near the center comes out clean.

Cool for approximately 10-15 minutes before inverting onto a wire rack.

Remove pan carefully from cake and cool completely.

Easy Cream Cheese Frosting

Combine all ingredients in the bowl of a stand mixer fitted with a paddle attachment, and beat at low speed until sugar is incorporated.

Increase speed to medium high and beat until frosting is light and whipped, about 3 to 4 minutes. Use to top cookies, cupcakes, or cakes

I like to use an orange flavored olive oil for this cake.

Leave a comment
Share
  • Pin it
  • Share
  • Tweet
  • Share
  • Email

Cherry Clafoutis

5 / 11 / 18

Class French dessert, great for brunch or breakfast with coffee.

Cherry Clafoutis

Save
Print
  • Batter
  • 1 cup milk
  • 1/4 cup heavy cream
  • 2 tablespoons sugar
  • 3 eggs
  • 1 tablespoon vanilla
  • ½ teaspoon salt
  • 2/3 cup all-purpose flour
  • Cherries
  • 2 tablespoons butter, melted
  • 2 tablespoons sugar
  • 1 pound fresh cherries, stemmed, pitted and cut in half or rough chopped
  • Confectioners' sugar for dusting

Heat the oven to 400°F.

Beat together all the batter ingredients until smooth and frothy. Set aside to rest while preparing remaining ingredients.

Pour melted butter into a 9 or 10” shallow pan, quiche pan or cake pan and sprinkle with the 2 tablespoons of sugar spreading evenly. Sprinkle cherries over the sugar and cover with the batter.

Bake for about 30 minutes or until the clafoutis is puffed and brown on top. Dust with confectioners sugar and serve immediately.

Clafoutis will collapse quickly but will still be delicious.

Leave a comment
Share
  • Pin it
  • Share
  • Tweet
  • Share
  • Email

Fudgy Peppermint Brownies

12 / 21 / 17

If you google how to bake brownies in a skillet you will find recipes that actually cook in the oven in a skillet rather than a recipe you can cook in a skillet on the stove top. Why bother unless you’re going to serve the brownies to your guests in the pan? I’m talking about actually BAKING them in a skillet on the stove top. This makes them super fudgy but a little difficult to get out of the pan so be sure to use a good nonstick skillet. Here are two recipes, one traditional and one cooked in a skillet (a cheater recipe as I used a box mix-yes a box!) You decide which one works for you!

Fudgy Peppermint Skillet Brownies

Save
Print

This recipe yields 2 pans of yummy, fudgy brownies using an 11″ skillet (w/lid) or sauté pan.

  • 1 box brownie mix, plus ingredients on box
  • ¼- ½ teaspoon peppermint extract
  • peppermint candies, crushed

Mix brownies according to package directions, adding peppermint extract.

Add ½ of the batter to skillet and stir it around over low to medium heat while it ‘bakes’ and solidifies. Cover and cook over low heat for approximately 10 minutes or until the sides start to crisp. Add candies to the top of the brownies, turn off heat and let the pan sit for about 5 minutes before cutting.

Fudgy Brownies

Save
Print
  • 1 cup flour
  • ¾ cup Dutch cocoa powder
  • 2 cups sugar
  • ¼ teaspoon salt
  • ¼ teaspoon baking powder
  • 3 lg. eggs
  • ½ cup butter, melted (8 Tb)
  • ¼ cup oil, vegetable, olive or flavored olive oil
  • 2 teaspoons vanilla, substitute any flavored extract
  • ¼ cup chopped nuts, chocolate chips, peppermint pieces etc.

Preheat the oven to 375° and lightly grease a 9x13 pan.

Add all the ingredients to a large bowl in the order they are listed. Stir together and beat until the mixture is smooth. Mix in nuts, chips etc. that you’d like to use.

Spoon into the prepared pan and bake 25-30 minutes, or until just barely beginning to pull away from the sides of the pan, remove from oven and let cool.

Leave a comment
Share
  • Pin it
  • Share
  • Tweet
  • Share
  • Email

Cooking From The Pantry

11 / 9 / 1711 / 9 / 17

Easier than pie recipe for seasonal sweets. Great on the buffet table, to take to a pot luck or just for an afternoon snack.

Pumpkin-Cranberry Bars

Save
Print

My aunt-in-law gave me this great recipe and I’ve adapted it by adding cranberries and powdered sugar frosting; although the bars a great without a frosting too!

  • 1 cup flour
  • 1 teaspoon baking powder
  • ½ teaspoon baking soda
  • 1 teaspoon baking spice (nutmeg, cinnamon, cloves etc.)
  • ½ teaspoon salt
  • 1 cup dried cranberries or other dried fruit
  • 2 eggs
  • ¾ cups sugar
  • ½ cup canola oil
  • 1 cup pumpkin puree
  • Frosting:
  • 1 cup powdered sugar
  • ½ teaspoon vanilla
  • 1 tablespoon milk

Preheat oven to 350 °.

Sift together flour, baking powder, baking soda, baking spice and salt. Stir in cranberries; set aside.

Using an electric mixer beat together eggs, sugar and oil; add pumpkin puree and mix until just blended. Add dry ingredients and mix until combined.

Spread mixture into a 9 x 11” pan and bake for 15 to 20 minutes.

Frosting:

In a small bowl, add powdered sugar and vanilla. Drizzle in milk, stirring until you have a smooth mixture.

Cut the bars and place them on a cooling rack over a piece of parchment paper. Drizzle with the powdered sugar frosting and let set for a few minutes.

You can purchase a baking spice from Penzeys, you won’t regret it. Replace all your ingredients, nutmeg, cinnamon etc. with the baking spice for an extra special flavor!

Related Posts Plugin for WordPress, Blogger...
Leave a comment
Share
  • Pin it
  • Share
  • Tweet
  • Share
  • Email

Posts navigation

1 2 3 4 Next Page
Deb

Meet Chef Debbi

READ BIO

Join-Us Sign up for our newsletter to receive exclusive tips 'n tricks, and special offers on classes, tours, and more!

Recent Posts

  • New E-Book!
  • From the Pantry
  • Spaghettini at Home
  • Growing Corn
  • Spring IS Coming!

Categories

BookCUT

What's in Your Pantry?

How to stock your pantry to create delicious dishes.

Learn Chef Debbi's pantry essentials and how to substitute ingredients for pantry staples in her basic recipes for quick and easy meals.
BUY BOOK>

FacebookTwitterInstagramGooglepinterest


© 2014, DEB'S KITCHEN
Angie Makes Feminine WordPress Themes