Deb's Kitchen - Farm, Food, Wine & Lifestyle Adventures
  • Facebook
  • Google
  • Twitter
  • Instagram
  • Pinterest
  • Email
Menu
Skip to content
  • Home
  • Blog
  • Events
    • Classes
    • Tours & Adventures
  • Edible Gardening
  • Preserving
  • Recipes
    • Appetizers
    • Soups and Salads
    • Main Dishes
    • Side Dishes
    • Desserts
  • About
    • Whats In Your Pantry
    • Ask Debbi
    • Deb’s Kitchen Botanicals
    • Press
  • Contact

Tag Archives: farmers market

Extra January Class!

1 / 16 / 171 / 16 / 17

Cooking at Temecula Olive Oil, Seal Beach

Jan 19th

6:30 – 8:30, approximately

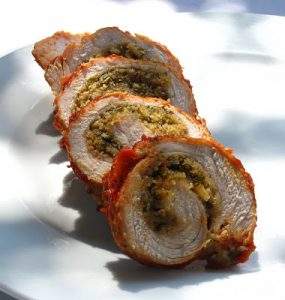
pork-braciole

Minestrone Soup with Italian Meatballs

Pork Braciola Porchetta Style

     (Stuffed pork cutlets stuffed with Italian herbs & cheese)

     Served with Mushroom Ragu

Saffron Risotto

Tangerine Panna Cotta

By Reservation Only
(562) 296-5421
148 Main Street
Seal Beach, CA 90740

SPONSORED BY

Leave a comment
Share
  • Pin it
  • Share
  • Tweet
  • Share
  • Email

New Cooking Class Venue

1 / 11 / 17

Cooking at Fullerton Arboretum

New Events!

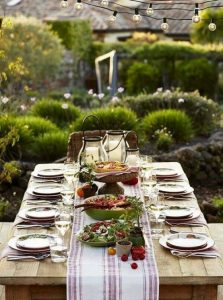
outdoor-table-setting 

Celebrating the seasons around the table with demonstration style cooking class and a specialty food tasting each month.

Join my friend Chef Louise Mellor and I in the beautiful gardens at Cal State Fullerton’s Arboretum for a meal as we celebrate the seasons.  Learn how to stock your pantry and together we’ll use garden fresh, seasonal ingredients with classic French techniques to create simple, exciting dishes for special occasions and everyday meals.

We will also be sharing how to entertain with simplicity and style.  Most importantly, we hope you will be inspired to get into the kitchen at home and share life around the table.

Full lunch servings will be offered and wine will be available if desired. Here are upcoming classes for Jan, Feb and March, take a look here for class registration and the schedule through summer! Hope to see you there~

Saturday, Jan. 21, 11 – 2
Book Signing and Demo

Soup from the pantry

Join us for a demonstration on soup basics and enjoy a hearty bowl of minestrone soup with puff pastry ‘rolls’.


February 11th, Saturday, 11 – 2
Cupid in the kitchen…
Chocolate Tasting

Roasted Spring Asparagus salad with Meyer Lemon vinaigrette

Elegant Beef Wellington Puff Pastry Tarts with Caramelized Onions, Maytag Blue Cheese, Sautéed Mushrooms

Dark chocolate hazelnut flourless cake with vanilla bean ice cream and fresh berries

March 25th Saturday, 11 – 2
I left my heart in San Francisco…
Olive oil tasting

Homemade herbed ricotta with lemon, Parmesan & blistered tomatoes served on sourdough crostini

San Franciscan style Cioppino with fresh seafood in a rich tomato white wine broth.

Blood orange olive oil cake with whipped Grand Manier marscapone


Leave a comment
Share
  • Pin it
  • Share
  • Tweet
  • Share
  • Email

Hot Weather Dinner

6 / 20 / 166 / 20 / 16

A basket of sweet corn, three ears partially husked

There is nothing like summers sweet corn on the cob. The tables at the farmers market this weekend were loaded with all kinds of corn and great prices make you want to stock up but corns sweetness will turn to starch the longer it’s stored. There’s an old saying that you should start the water boiling for the corn before you pick it. But if you don’t have a corn field in your back yard here are a couple of tips to help maintain that sweetness.

One, don’t peel and husk your corn, leave it in its little corn jacket and store in the refrigerator. This won’t maintain it’s sweetness long but it will stay sweet for about a day.

Two, peel and husk your corn, freeze separately and when frozen wrap in plastic and pop into a freezer bag. Use within a few weeks for best results.

Three, (this is my favorite), peel a few leaves off the outer ear but leave the husk and some leaves still attached. Chop off the very top and the bottom. Here’s another tip for you-usually corn worms are only found in the top of the ear, just lop that part off, the corn is still good to eat and it means that the farmer didn’t dust the corn with insecticide (a good thing). Put the corn into the microwave and cook for 5 minutes, remove carefully it will be hot. Place in a colander in the sink and run some cool water over it. After it cools, refrigerate and it will hold it’s sweetness for a day or two.

Here’s one of my favorite hot weather dinner salads using sweet corn right off the cob!

Shrimp and Avocado Salad

Save
Print
  • Dressing
  • ¼ cup Pomegranate vinegar or good red wine vinegar
  • 1 teaspoon finely diced shallots
  • 1 teaspoon Dijon mustard
  • Dash of dried parsley flakes, crushed
  • ½ cup olive oil, approximately
  • Salad
  • 1 head Bibb lettuce, peel the leaves from the core, rinse with cool water and dry well
  • 1 ear fresh sweet corn, prepare the corn as directed in the notes.
  • 1 small Persian cucumber, cut in half lengthwise and then into half moons
  • 1 medium tomato, chopped into bite-sized pieces
  • 8 large shrimp, (U16), cut into bite-sized pieces
  • 1 Haas avocado cut in half; pit removed and scoop out the whole half
  • 2 rashers (slices) bacon, cooked and crumbled
  • ¼ cup crumbled blue cheese, optional

Dressing

In a jar or small bowl add vinegar, shallots, Dijon mustard and parsley flakes, add a sprinkle of salt and pepper. Slowly whisk in the olive oil to emulsify. As soon as the dressing starts to thicken stop and taste the dressing, if it needs more continue to add the olive oil while whisking. Any extra dressing may be stored in the refrigerator for up to 3 weeks.

Tear the lettuce leaves into large pieces and add to a large bowl and toss with a little of the dressing. Add the corn, cucumber, tomato and shrimp and toss again with a little dressing. Lightly mix in the avocado and place into shallow bowls or large plates, sprinkle with bacon and cheese and serve extra dressing on the side.

Makes 2 entrée salads

Notes:

Pick up fresh corn from the farmers market, not the supermarket. The sugar in corn starts to turn to starch when it’s picked so by the time it gets to the supermarket much of the sweetness will be gone. When you get the corn home here’s an easy trick to help keep the sweetness in for a day or two. Remove some of the outer leaves but not all. Cut the top and bottom off the ear and microwave for 5 minutes. It will be hot when you bring it out of the microwave so run some cool water over it and set it aside to cool completely. This method is similar to blanching and shocking your vegetables. Use right away (peel the remaining leaves and silk then slice off the cob) or store in the refrigerator for a day or two.

In the hot weather buy the shrimp already cooked for an easy meal at the end of the day. If you purchase raw shrimp to cook it simply bring a large pot of water to a boil, add a tablespoon of Old Bay Seasoning and cook at a slow boil (bubbles just break the surface) until the shrimp is done, about 5 minutes. To test the shrimp simply take one out, run cool water over it, peel, devein and eat it!

Pomegranate vinegar can be ordered from Temecula Olive Oil Co.

2 Comments
Share
  • Pin it
  • Share
  • Tweet
  • Share
  • Email

Chestnut-Apple Dressing

11 / 24 / 1511 / 24 / 15

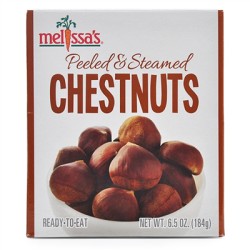
Love the taste of chestnuts in your dressing? It’s easy with Peeled & Steamed Chestnuts! I find them at Gelsons, Bristol Farms, Lazy Acres or you can order them direct from Melissas. Here’s my favorite recipe…

chestnuts

Chestnut-Apple Dressing

Save
Print
  • 1 loaf artisan bread -- cut into cubes, toasted until lightly browned
  • 1 box cornbread mix -- baked and cut into pieces (Trader Joes has an excellent brand)
  • 1 onion -- diced
  • 4 ribs celery -- diced
  • 3 tablespoons minced fresh sage leaves
  • 2 tablespoons minced fresh thyme leaves
  • 1 stick unsalted butter -- (1/2 cup)
  • 1 pound fresh chestnuts -- shelled and peeled, chopped coarse, or 1pkg. vacuum-packed whole chestnuts, chopped
  • 2 small apples (organic) -- golden delicious, cut into 1" pieces with skin
  • 1/2 cup finely chopped fresh parsley leaves
  • 1 egg -- lightly beaten
  • 1 cup turkey stock -- or chicken stock, as needed

Fresh chestnuts in shell:

With a sharp knife cut an X on the round side of each chestnut. Spread the chestnuts in one layer on a baking sheet and bake the chestnuts in a preheated 450 oven for 10 minutes, or until the shells open. Remove the chestnuts, a handful at a time, and shell and peel them while they are still hot.

Preheat the oven to 350°

For dressing:

In a large pan, sauté the onions, celery, sage, thyme in the butter over moderately low heat, stirring, until the vegetables are softened, add apples and the chestnuts, and cook the mixture, stirring, for 1 minute. Add the vegetable mixture to the bread pieces, tossing the mixture well, stir in the parsley and salt and pepper to taste, and let the stuffing cool completely. Add the egg and enough of the stock to just bring the dressing together.

Bake for 20 minutes covered; uncover and continue baking 15 minutes or until lightly toasted on top.

Leave a comment
Share
  • Pin it
  • Share
  • Tweet
  • Share
  • Email

Summer Salads

6 / 29 / 156 / 29 / 15


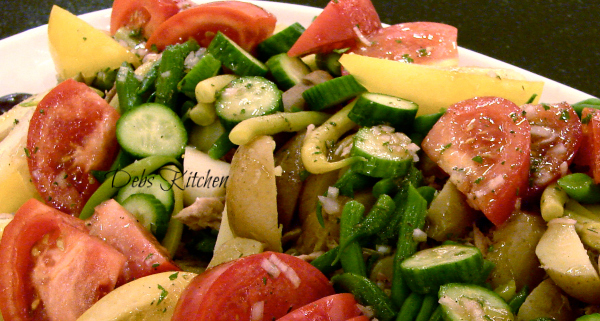
Summer Nicoise

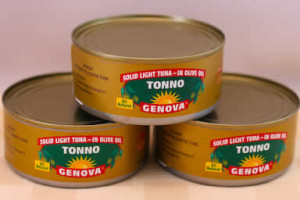
My summer pantry is usually a little lighter than my winter pantry as I use far more fresh ingredients, mostly from my kitchen garden. The French Nicoise Salad is one of my favorites and I like using whatever fresh veggies I find at the local farmers market or in my garden. As in most cases, the quality of ingredients that you use are directly reflected in the finished dish, therefore buy the best that you can afford. I use Italian tuna in olive oil; I love the Genova brand from Italy. Please don’t use all white tuna packed in water, as it has no flavor, better to leave it out. I drain most of the oil from the canned tuna, reserving it for use in making the salad dressing.

italiantuna_kalynskitchen

Another way to dress up the dish for a hot summer evening entree is to grill some fresh tuna or shrimp from your fishmonger. This recipe makes a beautifully plated salad for a buffet table but can be individually plated as well. Be creative and use what you have on hand.

Summer Nicoise Salad

Save
Print

This salad is great for adapting to whatever you find in your pantry and/or refrigerator. Left over vegetables from last night’s dinner work great; keep your pantry stocked with jars of olives, tuna, hearts of palm, baby corn or a myriad of other staples. Change the tuna; use bay shrimp, scallops, last nights chicken or steak. A great salad to stretch your creative talents!

  • Vinaigrette:
  • 1/4 cup red wine vinegar
  • 1 tablespoon Dijon mustard
  • 1 small shallot -- minced
  • 1 tablespoon Italian parsley -- chopped
  • Salt and pepper -- to taste
  • 3/4 cup olive oil, use drained oil from tuna and add more olive oil as needed
  • Salad:
  • 2 cans Italian tuna -- packed in olive oil, drained and flaked with a fork
  • Salt and pepper -- to taste
  • 1/4 pound haricot vert -- blanched, cooled and dried well
  • 4 new potatoes -- boiled
  • 2 medium plum tomatoes -- cut into quarters
  • 3 eggs, cooked~see recipe
  • 1/2 cup nicoise olives
  • 3 cups mixed baby greens

Make the vinaigrette:

In a large bowl make the vinaigrette by whisking together the vinegar and

Dijon mustard. Add shallot, parsley and salt and pepper. Drizzle olive oil, while whisking into vinegar mixture. Re-season if necessary.

Blanch the beans in boiling salted water, drain, and chill.

Cook the potatoes in salted water just until they are tender through, about 15 minutes. Drain. Peel them, if desired, as soon as they are cool enough to handle.

Hard boil eggs by covering eggs with cold water, bring to a boil, remove from heat, cover and time for 15 minutes, plunge into ice water and chill.

Drain tuna, leaving a small amount of oil clinging to fish, and reserving drained oil, flake tuna into a medium mixing bowl.

Toss mixed greens with enough vinaigrette to coat. Season with salt and pepper.

Plate salad by putting a mound of tuna in the center of the mixed greens and surround with remaining ingredients, drizzle a little dressing over vegetables and serve extra dressing on the side.

Save any remaining vinaigrette and store in glass jar, refrigerated for up to 4 weeks.

Leave a comment
Share
  • Pin it
  • Share
  • Tweet
  • Share
  • Email

So. Coast Plaza Garden Show Recipes

4 / 25 / 154 / 29 / 15

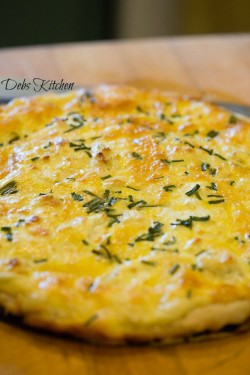
Windrose Farms Oct 2014-Herb & Cheese Tart w.


Spring Herb Tart

Save
Print
  • 1 recipe pate Brisée recipe, with
  • 1 Tb. chopped fresh thyme, add thyme to flour and stir well
  • ½ pound fontina cheese, grated (or more-to your taste)
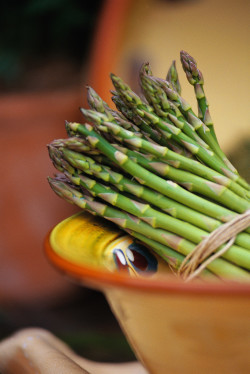
  • 1/2 pound fresh asparagus, trimmed and cut into ¼” pieces
  • 1 tablespoon Parmigiano-Reggiano
  • Salt and pepper, to taste

Preheat the oven to 400°. Pre-bake the shell according to directions in Pate Brisée recipe. Let cool to room temperature or cool overnight. Sprinkle with the cooled crust with fontina cheese. Arrange the asparagus pieces around the bottom of the shell, season with salt and pepper; sprinkle with Parmigiano-Reggiano. Bake until the cheese is melted, about 15 minutes. Garnish with fresh herb sprigs. Serve room temperature or slightly warmed. Can be served along with a light salad tossed with vinaigrette dressing.

Serves 6

If you wanted to turn this into a quiche mix together 4 eggs & one cup of cream, half and half or milk. Pour it over the cheese and asparagus and bake approximately 40 minutes. You may have to cover the edge of the crust with foil to prevent it from burning.

Adapted from 'What's In Your Pantry' by Debbi Dubbs

Pate Brisée (Pie Crust)

Save
Print

From ‘What’s In Your Pantry’

www.debskitchen.com
[email protected]

  • Pâte Brisée (Pie Dough)
  • 2 ½ cups flour, (10 ¾ oz.)
  • 1 teaspoon salt
  • 2 sticks butter, cut into pieces
  • 3-5 tablespoons ice water
  • 1 tablespoon sugar (for Pâte Sucrée, sweet pie dough)

Add flour and salt (sugar also if making Pâte Sucrée) into the bowl of a food processor; pulse a few times to incorporate all the ingredients.

Add the butter and process until the mixture is crumbly and the butter is pea size.

Place the mixture into a wide bowl and add water 1 tablespoon at a time until the mixture comes together. Don’t overwork the dough or it will be tough, not flaky. Once the dough comes together in a ball, divide it into two pieces, flatten into disks, wrap in plastic wrap and refrigerate for 30 minutes.

Dough can be wrapped well at this point and frozen for up to three months. Let the dough defrost overnight in the refrigerator before using.

Roll one chilled disk out on a floured counter or rolling mat, lifting and moving the dough every few rolls to help prevent sticking. Add only enough flour to the counter to keep the dough from sticking.

Place your pan on top of the dough to make sure it is the correct size, it should be slightly larger than the pan, then roll the dough onto your rolling pin and unroll over your pan. Gently lift and lay the dough to fit the pan, never pull the dough to stretch it. Lightly press the dough into the pan, roll your rolling pin over the top edge of the tart or pie pan and remove excess pastry.

Cover and refrigerate for 30 minutes. Preheat your oven to 400°.

To blind bake:

Blind baking is baking the dough without filling.

Prick the bottom and sides of the dough; cut a piece of foil large enough to cover the bottom and sides of the dough, butter the dull side and lay the buttered side on the bottom of the dough and press into the sides. Line with pie weights or dried beans and bake in the center of the oven for 20-25 minutes or until lightly browned. Remove the weights and foil and let cool before filling

Makes 2 - 10” crusts

Berry Salad with Pomegranate Vinaigrette

Save
Print
  • ½ shallot, minced
  • 2 teaspoon Dijon mustard
  • ½ cup Pomegranate vinegar, another light vinegar could be used as well
  • ¾ cup extra virgin olive oil, approximately
  • 6 cups baby greens, washed and dried well
  • 2 small Persian cucumbers, sliced
  • 2 cups croutons
  • 1 container each of strawberries, blueberries and raspberries (strawberries sliced)
  • 2 avocados, diced, optional

In a small bowl mix together the shallot, Dijon mustard and vinegar. Add a pinch of sea salt and a little grind of pepper. While whisking slowly pour the oil in until the dressing starts to thicken a little and emulsify. Stop and taste the dressing before adding the remaining oil. You may not need all of the oil depending on the flavor of the vinegar. Add more as necessary.

In a large salad bowl toss together the lettuce, cucumbers and croutons with a little of the dressing. Just until the greens have a shimmer of dressing on them. Season with sea salt and pepper, toss again, taste and adjust dressing and seasonings. Add berries and avocados and drizzle with a little of the dressing.

Serves 6

Leave a comment
Share
  • Pin it
  • Share
  • Tweet
  • Share
  • Email

What to do in your Spring Garden

3 / 31 / 15

April in the Garden

Coming Soon....

Chef Debbi will be presenting a seminar, ‘Al Fresco Mothers Day Brunch’, at the South Coast Plaza Garden Show on Sat. April 25th, 12:30 in the Mitchell Gold & Bob Williams home store. Chef will be talking about spring vegetables, edible flowers and demonstrating a ‘Microgreen and Baby Lettuce Salad with Spring Vegetables, Edible Flowers and a Pomegranate Vinaigrette’ and serving that along with a Seasonal Asparagus and Goat Cheese Tart

The seminar is free but seating is limited.

What To Do in The Spring Garden in So. California

Last Chances:

You can get another crop of spring vegetables, peas (in cooler climates), asparagus, spinach, lettuce and last chance to plant artichokes from seedlings.

Spring Potatoes
Plant from certified organic ‘seeds’.

Spring and Early Summer

Tomatoes
Plant early season, cherry, heirloom & indeterminate varieties
Choose plants that are stocky with a thick stem, about the size of a pencil. Don’t choose plants with flowers or fruit on it, your tomato plant needs to develop strong, deep roots before starting to flower. Remove lower leaves and plant the seedling up to the first two set of leaves. All those furry little things on the side of the stem will turn into roots for you.
Companion plants to tomatoes are carrots, basil, lettuce and parsley.

Beans
All kinds of beans! Bush, pole and dried beans for winter soups and stews.
Companion plants to beans are corn, potatoes, radish and carrots.
Corn
Plant pole beans at the base of the corn and squash around the beans.

Beets, Turnips, Carrots and Radish
All grow underground in loose soil and can be grown in less sunny areas of the garden.

Peppers
All kinds of peppers can go in the ground, planting companions are spinach, basil and tomatoes.

Zucchini
Early squash can be planted but hold off on pumpkins until June if you want them for the fall holidays.

Herbs
Cilantro, Basil, Thyme, Dill, Fennel, Chives and most herbs will do well now.

Watch out for runners and re-seeders such as mint, oregano, borage, lemon verbena and pineapple sage for a few.

Now is a good time to amend your soil for the long summer growing season.

Bon Appetit!

Seminar is sponsored by 1logo 2004
Leave a comment
Share
  • Pin it
  • Share
  • Tweet
  • Share
  • Email

Fall Tour 2014

12 / 4 / 1412 / 4 / 14

Farm Tour Fall 2014

Farmers Market-0041Farmers Market-0045Finger Lime-0030Halter Ranch-0441Jack Creek Farms-0760Rangeland-0338Windrose Farms Oct 2014-0484Windrose Farms Oct 2014-0549Windrose Farms Oct 2014-0554Windrose Farms Oct 2014-0665Windrose Farms Oct 2014-0726Cambria Tour-4848Cheesecakes-0099fall grapevines Halter Ranch 2011

Leave a comment
Share
  • Pin it
  • Share
  • Tweet
  • Share
  • Email

What To Do with all those Luscious Summer Peaches!

7 / 30 / 1412 / 4 / 14

IMAG0215

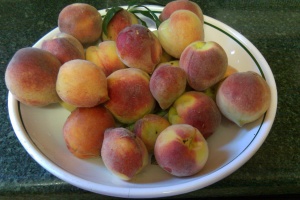
Oh all those beautiful rosy peaches from the farmers market! They smell like summer and I don’t know about you but I wait all year for them to show up!
I have a peach tree but that in no way yields enough peaches to satisfy my sweet tooth. Seasonal peaches are available in California from June to Sept.. Peaches from other parts of the world are usually picked hard and mostly premature and will never develop that sweet summer flavor.

The following is part of the prologue to David Mas Masumoto’s book ‘Epitaph for a Peach’, he is talking about the Sun Crest peach but I think it reflects all good peaches. “Sun Crest is one of the last remaining truly juicy peaches. When you wash that treasure under a stream of cooling water, your fingertips instinctively search for the gushy side of the fruit. Your mouth waters in anticipation. You lean over the sink to make sure you don’t drip on yourself. Then you sink your teeth into the flesh and the juices trickle down your cheeks and dangle on your chin. This is a real bite, a primal act, a magical sensory celebration announcing that summer has arrived. “ That sounds like a juicy summer peach to me, what about you?

Choose peaches that yield slightly to pressure, hard fruit isn’t ripe and though it will get softer, it won’t get tastier. Peaches need to develop flavor and sweetness while still hanging on the tree, color will vary with peach varieties but avoid peaches that show any sign of green. Smell the peach for sweetness and you’ll be fine.

Peaches should be kept at room temperature until soft and then refrigerated but don’t wait too long to eat them or they’ll over ripen.

I find it pretty easy to peel a ripe peach with a sharp paring knife or you can blanch in boiling water for a few seconds, don’t over do or you’ll start to cook the fruit flesh.

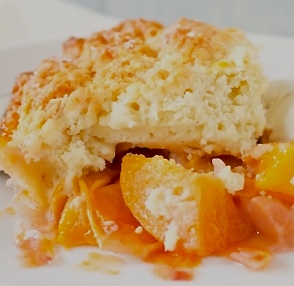
Here’s my favorite cobbler recipe that I pieced together from two different recipes that I love. One from my favorite boysenberry pie and the cobbler batter from Marcy Masumoto’s ‘French Peach Cobbler’ recipe in the Masumoto Families new book,  The Perfect Peach: Recipes and Stories from The Masumoto Family Farm.


Peach Cobbler

peach-cobbler-2

Filling

4          cups peeled, chopped fresh peaches
1           cup sugar, approximately
¼        cup cornstarch
pinch sea salt
1          teaspoon cinnamon
1/3      cup Grand Marnier
1          tablespoon fresh lemon juice

Batter

½        cup unbleached all-purpose flour
1/3      cup sugar
½        teaspoon baking powder
¼        teaspoon sea salt
2          tablespoons unsalted butter, room temperature
1          egg, lightly beaten


Preheat the oven to 375°. Butter a 9” square baking pan and set aside.

Filling:

Add peaches to a medium sized bowl and toss gently with sugar. Depending on how sweet the peaches are, add more or less sugar.

In a small bowl, mix together the cornstarch, sea salt, cinnamon and Grand Marnier. Toss the peaches with the cornstarch mixture and lemon juice.

Add the filling to the prepared pan.

Batter:

Combine the flour, sugar, baking powder and sea salt, mix well. Add the butter and egg, stir together until the batter is smooth.

Drop the batter by spoonfuls onto the fruit mixture and bake 40 – 45 minutes or until bubbly and golden.

Remove from oven and cool before serving.


Leave a comment
Share
  • Pin it
  • Share
  • Tweet
  • Share
  • Email

Growing Asparagus

1 / 14 / 1412 / 14 / 14

Coming Soon....
Growing Asparagus

Asparagus is a very hardy, cool-season perennial vegetable, which can produce a spring harvest for 10-20 years! Therefore, it must be planted in a “dedicated bed”. It can be grown from seed, but most often is grown from 1-2 year old “crowns” (rhizomes), which is offered in January.

For 6 crowns, you will need a dedicated area measuring 6’ wide x 6’ long.
For 13 crowns, you will need a dedicated area measuring 6’ wide x 10’ long.

Crowns are dormant and must be planted within one week; you may keep them in the refrigerator, so they don’t break dormancy, until you can plant out.

Asparagus requires rich, fertile, well-drained soil, with a pH of 7.0 – 7.2.
Mix in lots of compost. If gophers are a problem for you, install wire barriers down in the bed before planting. Be sure the bed is as weed-free as possible. They prefer full sun.

Be sure the soil is at least 50 degrees. Dig a trench 12-15” deep (roughly twice the length of the roots), and allow 3-4’ between rows. Mound up soil inside the trench to create a cone 6” tall; cones should be 1’ apart. If you are trenching down into regular soil, prepare the bed by the “double dig” method, adding in compost to assure a well-draining soil.

Over each cone, drape the roots of one asparagus crown. Begin filling the trench with soil, up to just 1” above the crowns, to start. Firm the plants in well. As the plants grow and shoots emerge, begin covering the crowns with more soil until the trench becomes level with the soil surface. Water well each time.

asparagus bed planting


Asparagus takes a few years to fully mature. Do not harvest any shoots the first year; after they emerge, let them leaf out so the foliage can nourish the growing roots and rhizome for future production. Remember that good things come to those who wait!

You can begin to harvest lightly the shoots in the second year for about a month. The fleshy roots still need to develop and support perennial growth in future seasons. Plants that are harvested too much, too soon will become spindly and weak, and perhaps not recover. To harvest, simply cut or snap the spears 1-2” below the soil and at least 2” above the crown.

Subsequent harvests generally last for 8-12 weeks. Be sure to harvest daily during the season; either use or refrigerate immediately in a plastic bag. 6-8” is the optimum size. Don’t leave them to become tall and woody.

If you want blanched asparagus, which is a gourmet treat, mound soil around them (or otherwise exclude light from them so they do not form chlorophyll.)

At the end of the harvest, let the spears leaf out and become ferny. It can make a nice tall border. When the foliage yellows, cut it down to 2” stubs and add a 4-6” mulch of compost or leaves, which will help control weeds and feed the soil with organic matter and nutrients. If you live in an area with lots of frost, you can help protect your plants (which are hardy down to zone 4) by adding a thick layer of compost and straw to the bed.

Next Spring, be sure to weed the bed thoroughly, but pull the weeds instead of hoeing them to prevent damaging the plants, which are spreading out underground. The 6 or 13 plants you’ve planted will eventually fill out the entire bed, and you will enjoy this fantastic veggie for many, many years!

Written by Jo Ann Trigo of Two Dog Nursery. Jo Ann and Alex have many other growing guides on their site under Helpful Guides, visit them soon.
Leave a comment
Share
  • Pin it
  • Share
  • Tweet
  • Share
  • Email

Peaches

6 / 4 / 1312 / 4 / 14

peach-cobbler-2

Oh all those beautiful rosy peaches from the farmers market! They smell like summer and I don’t know about you but I wait all year for them to show up!
I have a peach tree but that in no way yields enough peaches to satisfy my sweet tooth. Seasonal peaches are available in California from June to Sept. Peaches from other parts of the world are usually picked hard and mostly premature and will never develop that sweet summer flavor.

The following is part of the prologue to David Mas Masumoto’s book ‘Epitaph for a Peach’, he is talking about the Sun Crest peach but I think it reflects all good peaches. “Sun Crest is one of the last remaining truly juicy peaches. When you wash that treasure under a stream of cooling water, your fingertips instinctively search for the gushy side of the fruit. Your mouth waters in anticipation. You lean over the sink to make sure you don’t drip on yourself. Then you sink your teeth into the flesh and the juices trickle down your cheeks and dangle on your chin. This is a real bite, a primal act, a magical sensory celebration announcing that summer has arrived. “

Choose peaches that yield slightly to pressure, hard fruit isn’t ripe and though it will get softer, it won’t get tastier. Peaches need to develop flavor and sweetness while still hanging on the tree, color will vary with peach varieties but avoid and peaches that show any sign of green. Smell the peach for sweetness and you’ll be fine.

Peaches should be kept at room temperature until soft and then refrigerated but don’t wait too long to eat them or they’ll over ripen.

I find it pretty easy to peel a ripe peach with a sharp paring knife or you can blanch in boiling water for a few seconds, don’t over do or you’ll start to cook the fruit flesh.

Here’s my favorite cobbler recipe that I pieced together from two different recipes that I use. One from my favorite boysenberry pie and the cobbler batter from Marcy Masumoto’s ‘French Peach Cobbler’ recipe from The Perfect Peach: Recipes and Stories from The Masumoto Family Farm.

Debbi’s Peach Cobbler recipe

Related Posts Plugin for WordPress, Blogger...
Leave a comment
Share
  • Pin it
  • Share
  • Tweet
  • Share
  • Email

Posts navigation

Previous Page 1 2 3
Deb

Meet Chef Debbi

READ BIO

Join-Us Sign up for our newsletter to receive exclusive tips 'n tricks, and special offers on classes, tours, and more!

Recent Posts

  • New E-Book!
  • From the Pantry
  • Spaghettini at Home
  • Growing Corn
  • Spring IS Coming!

Categories

BookCUT

What's in Your Pantry?

How to stock your pantry to create delicious dishes.

Learn Chef Debbi's pantry essentials and how to substitute ingredients for pantry staples in her basic recipes for quick and easy meals.
BUY BOOK>

FacebookTwitterInstagramGooglepinterest


© 2014, DEB'S KITCHEN
Angie Makes Feminine WordPress Themes