Deb's Kitchen - Farm, Food, Wine & Lifestyle Adventures
  • Facebook
  • Google
  • Twitter
  • Instagram
  • Pinterest
  • Email
Menu
Skip to content
  • Home
  • Blog
  • Events
    • Classes
    • Tours & Adventures
  • Edible Gardening
  • Preserving
  • Recipes
    • Appetizers
    • Soups and Salads
    • Main Dishes
    • Side Dishes
    • Desserts
  • About
    • Whats In Your Pantry
    • Ask Debbi
    • Deb’s Kitchen Botanicals
    • Press
  • Contact

Tag Archives: Foodies

Cooking Class

10 / 18 / 1510 / 18 / 15

Temecula Olive Oil Co., Seal Beach

November Class

Thur. Nov. 12th
6:30-8:30 (approximately)
Braciole


Smoked Trout Canapés with Pickled Onions and Mascarpone

Pomegranate, Bacon and Brussels Sprouts Salad

Braciole

Italian Stuffed Beef Rolls

Mushroom Bolognese

Chocolate Raspberry Linzertorte


10 – 20% off on all purchases the night of the class


Class Sponsored by

1logo 2004

NOW TAKING RESERVATIONS!

Seal Beach Tasting Room By Reservation only, call: 562-296-5421

Classes are $45; Pre Paid Reservations only

Feel free to BYOB

DKB-12

Leave a comment
Share
  • Pin it
  • Share
  • Tweet
  • Share
  • Email

Apple Recipes

10 / 6 / 1510 / 6 / 15

Apple, Pomegranate & Gorgonzola Salad

Save
Print
  • 1/4 cup white balsamic vinegar
  • 1/2 cup Extra Virgin Olive Oil
  • salt and pepper to taste
  • 1 apple, tart
  • 1/4 cup toasted pine nuts
  • 2 ounces Gorgonzola cheese
  • Pomegranate seeds
  • Salad greens

Whisk the vinegar, olive oil and salt and pepper in a small bowl.

Slice the apple into matchsticks.

Crumble the Gorgonzola cheese into small pieces.

Place your salad greens in a large bowl and toss with the seeds, pine nuts, cheese and apples, reserving a few of all the add-ins. Adjust the seasoning to your liking. Drizzle a little of the dressing onto the greens and toss gently. Drizzle just enough dressing onto the salad to lightly coat the leaves - not too much. Add additional salt and pepper if you like and scatter the reserved toppings over the salad.

Applesauce

Save
Print
  • 3 pounds apples, Gala, Honeycrisp or Jonagold
  • 2/3 cup apple juice, orange juice or water
  • 8 tablespoons sugar
  • 3 teaspoons cinnamon
  • 1/4 teaspoon nutmeg

Core, peel and cut the apples into medium sized pieces. Place all ingredients into a saucepan with lid and simmer over low heat until apples are very tender, about 45 minutes. Put through a food mill to create a soft creamy applesauce or use a potato masher and serve chunky, best served warm.

Leave a comment
Share
  • Pin it
  • Share
  • Tweet
  • Share
  • Email

Artisan Bread in 5 Minutes a Day

9 / 22 / 159 / 22 / 15

Bread, wtrmk


What’s better than fresh hot bread straight from the oven? (Well besides some delicious fresh butter on it!) What’s better is that this is a NO KNEAD recipe, couldn’t be easier. The dough will keep in your refrigerator for up to 2 weeks after mixing and there is nothing to do except pinch off a big piece, let it come to room temperature and bake it. The dough makes wonderful pizza, focaccia and flatbread as well. The authors, Jeff Hertzberg and Zoe Francois, use Gold Medal Flour for their bread but I am a die hard King Arthur Flour fan. Read about flour and how to measure and then decide for yourself which to use. I use this dough for bread, flatbread, pizza and rolls, check the Artisan Bread in 5 Minutes a Day for other recipes. This is a book you must have on your shelf. Buy it now from Amazon, click here.


I like baking my bread in a Le Crueset Dutch oven and I give directions for that procedure, the Artisan Bread website will guide you in other methods. If you like using a starter for your bread, the authors also give you instructions on how to incorporate that method into your bread making.

If you learn to weigh your flour you’ll have much better results in the end product. Actually weighing ingredients for recipes is really much easier and the recipe comes together much quicker and more efficient.

Watch the video made by King Arthur Flour on how to measure flour here, 
I’m posting my edited version of the bread but you can visit the authors website and read the original recipe with updates and tips. Go here for recipe


Leave a comment
Share
  • Pin it
  • Share
  • Tweet
  • Share
  • Email

Easy Artisan Bread

9 / 22 / 159 / 22 / 15

Bread, wtrmk


Debbi's Artisan Bread

Save
Print
  • 3 cups lukewarm water
  • 1½ tablespoons granulated yeast (2 packets)
  • 1½ tablespoons kosher or other coarse salt
  • 6½ cups unsifted, unbleached, all-purpose white flour

Add yeast and salt to the water in a 5-quart bowl or, preferably, in a resealable, lidded (not airtight) plastic food container or food-grade bucket

Mix in the flour—kneading is unnecessary: Add all of the flour at once.

Mix with a wooden spoon, a high-capacity food processor (14 cups or larger) fitted with the dough attachment, or a heavy-duty stand mixer fitted with the dough hook until the mixture is uniform. If you’re hand-mixing and it becomes too difficult to incorporate all the flour with the spoon, you can reach into your mixing vessel with very wet hands and press the mixture together. Don’t knead! It isn’t necessary. You’re finished when everything is uniformly moist, without dry patches. This step is in a matter of minutes, and will yield a dough that is wet and loose enough to conform to the shape of its container.

(I placed dough onto parchment paper and baked it on parchment in a Dutch oven.)

Cover with a lid (not airtight) or a towel. Do not use screw-topped bottles or Mason jars, which could explode from the trapped gases. Lidded plastic buckets designed for dough storage are readily available. Allow the mixture to rise at room temperature until it begins to collapse (or at least flattens on the top), approximately 2 hours. Longer rising times, up to about 5 hours, will not harm the result. You can use a portion of the dough any time after this period. Fully refrigerated wet dough is less sticky and is easier to work with than dough at room temperature. So, the first time you try our method, it’s best to refrigerate the dough overnight (or at least 3 hours), before shaping a loaf.

BAKING

Cut a piece of parchment paper a little bigger than a notebook size of paper, dust with a little flour.

Dust the surface of your refrigerated dough with flour. Pull up and cut off a 1-pound (grapefruit-size) piece of dough, using a serrated knife. Hold the mass of dough in your hands and add a little more flour as needed so it won’t stick to your hands. It will be very sticky. Gently stretch the surface of the dough around to the bottom on all four sides, rotating the ball a quarter-turn as you go. Most of the dusting flour will fall off; it’s not intended to be incorporated into the dough. The bottom of the loaf may appear to be a collection of bunched ends, but it will flatten out and adhere during resting and baking. The correctly shaped final product will be smooth and cohesive. The entire process should take no more than 30 to 60 seconds.

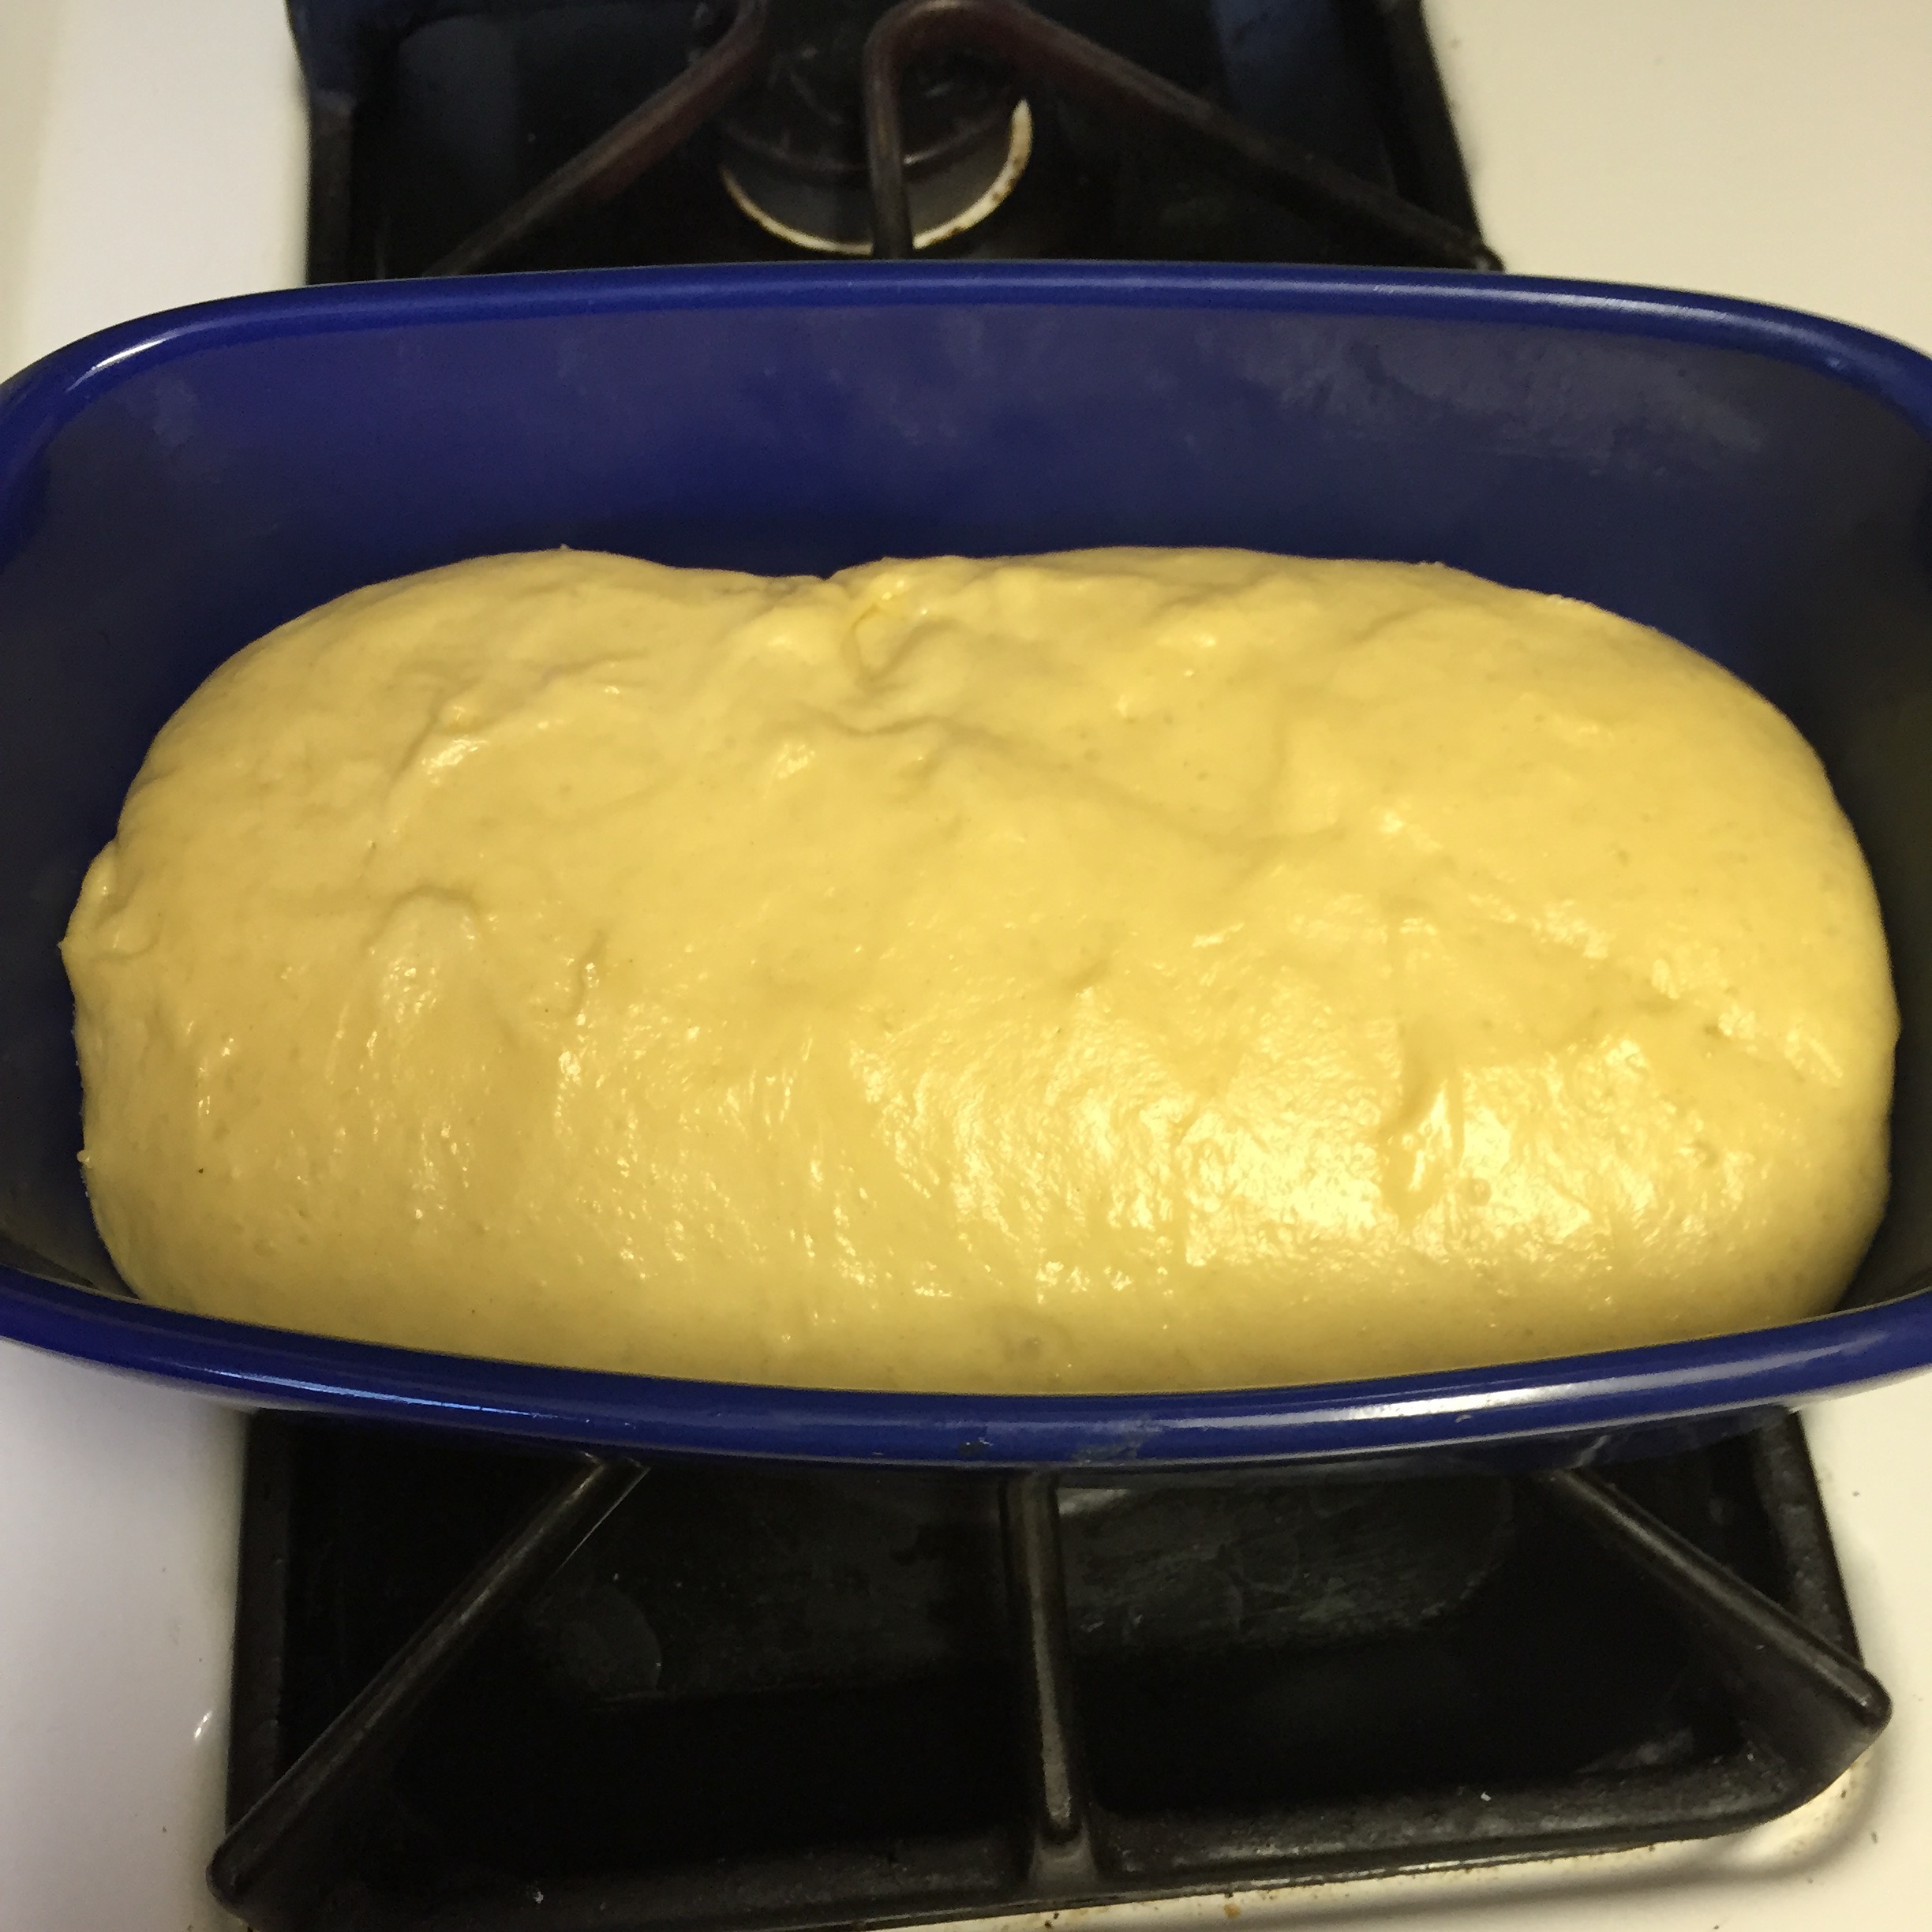
Rest the loaf and let it rise on the parchment. Allow the loaf to rest for about 40 minutes (it doesn’t need to be covered during. the rest period). Depending on the age of the dough, you may not see much rise during this period; more rising will occur during baking (“oven spring”).

Twenty minutes before baking, preheat the oven to 450°F, with a baking stone placed on the middle rack. Place an empty broiler tray for holding water on any other shelf that won’t interfere with the rising bread.

Debbi's notes: I take a 2 qt. Le Crueset (or any stone-ware or cast iron) Dutch oven and put it in the oven with the lid (make sure if the knob on the lid top is plastic to wrap it in tin foil so it doesn't melt). Let it preheat with the oven. When the oven is hot and the dough is ready pick up the parchment paper and plop it into the hot Dutch oven pan, Put the lid back on and carefully slide it into the oven. Alternatively you could slide the dough, still on the parchment paper, onto a pizza or baking stone that you heated with the oven.

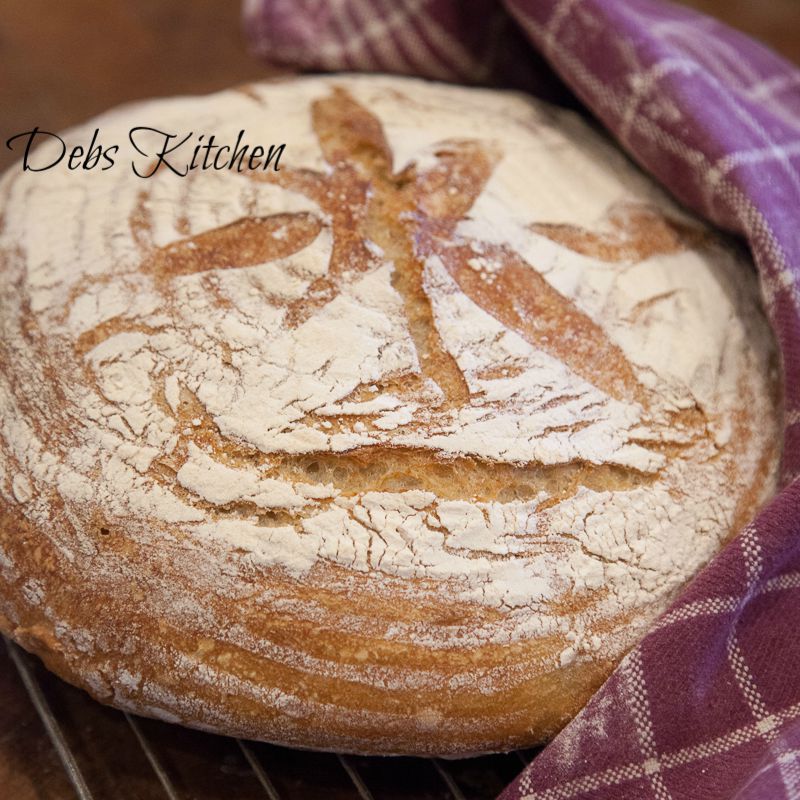
Dust and slash: Unless otherwise indicated in a specific recipe, dust the top of the loaf liberally with flour, which will allow the slashing knife to pass without sticking. Slash a ¼-inch-deep cross, “scallop,” or tic-tac toe pattern into the top, using a serrated bread knife.

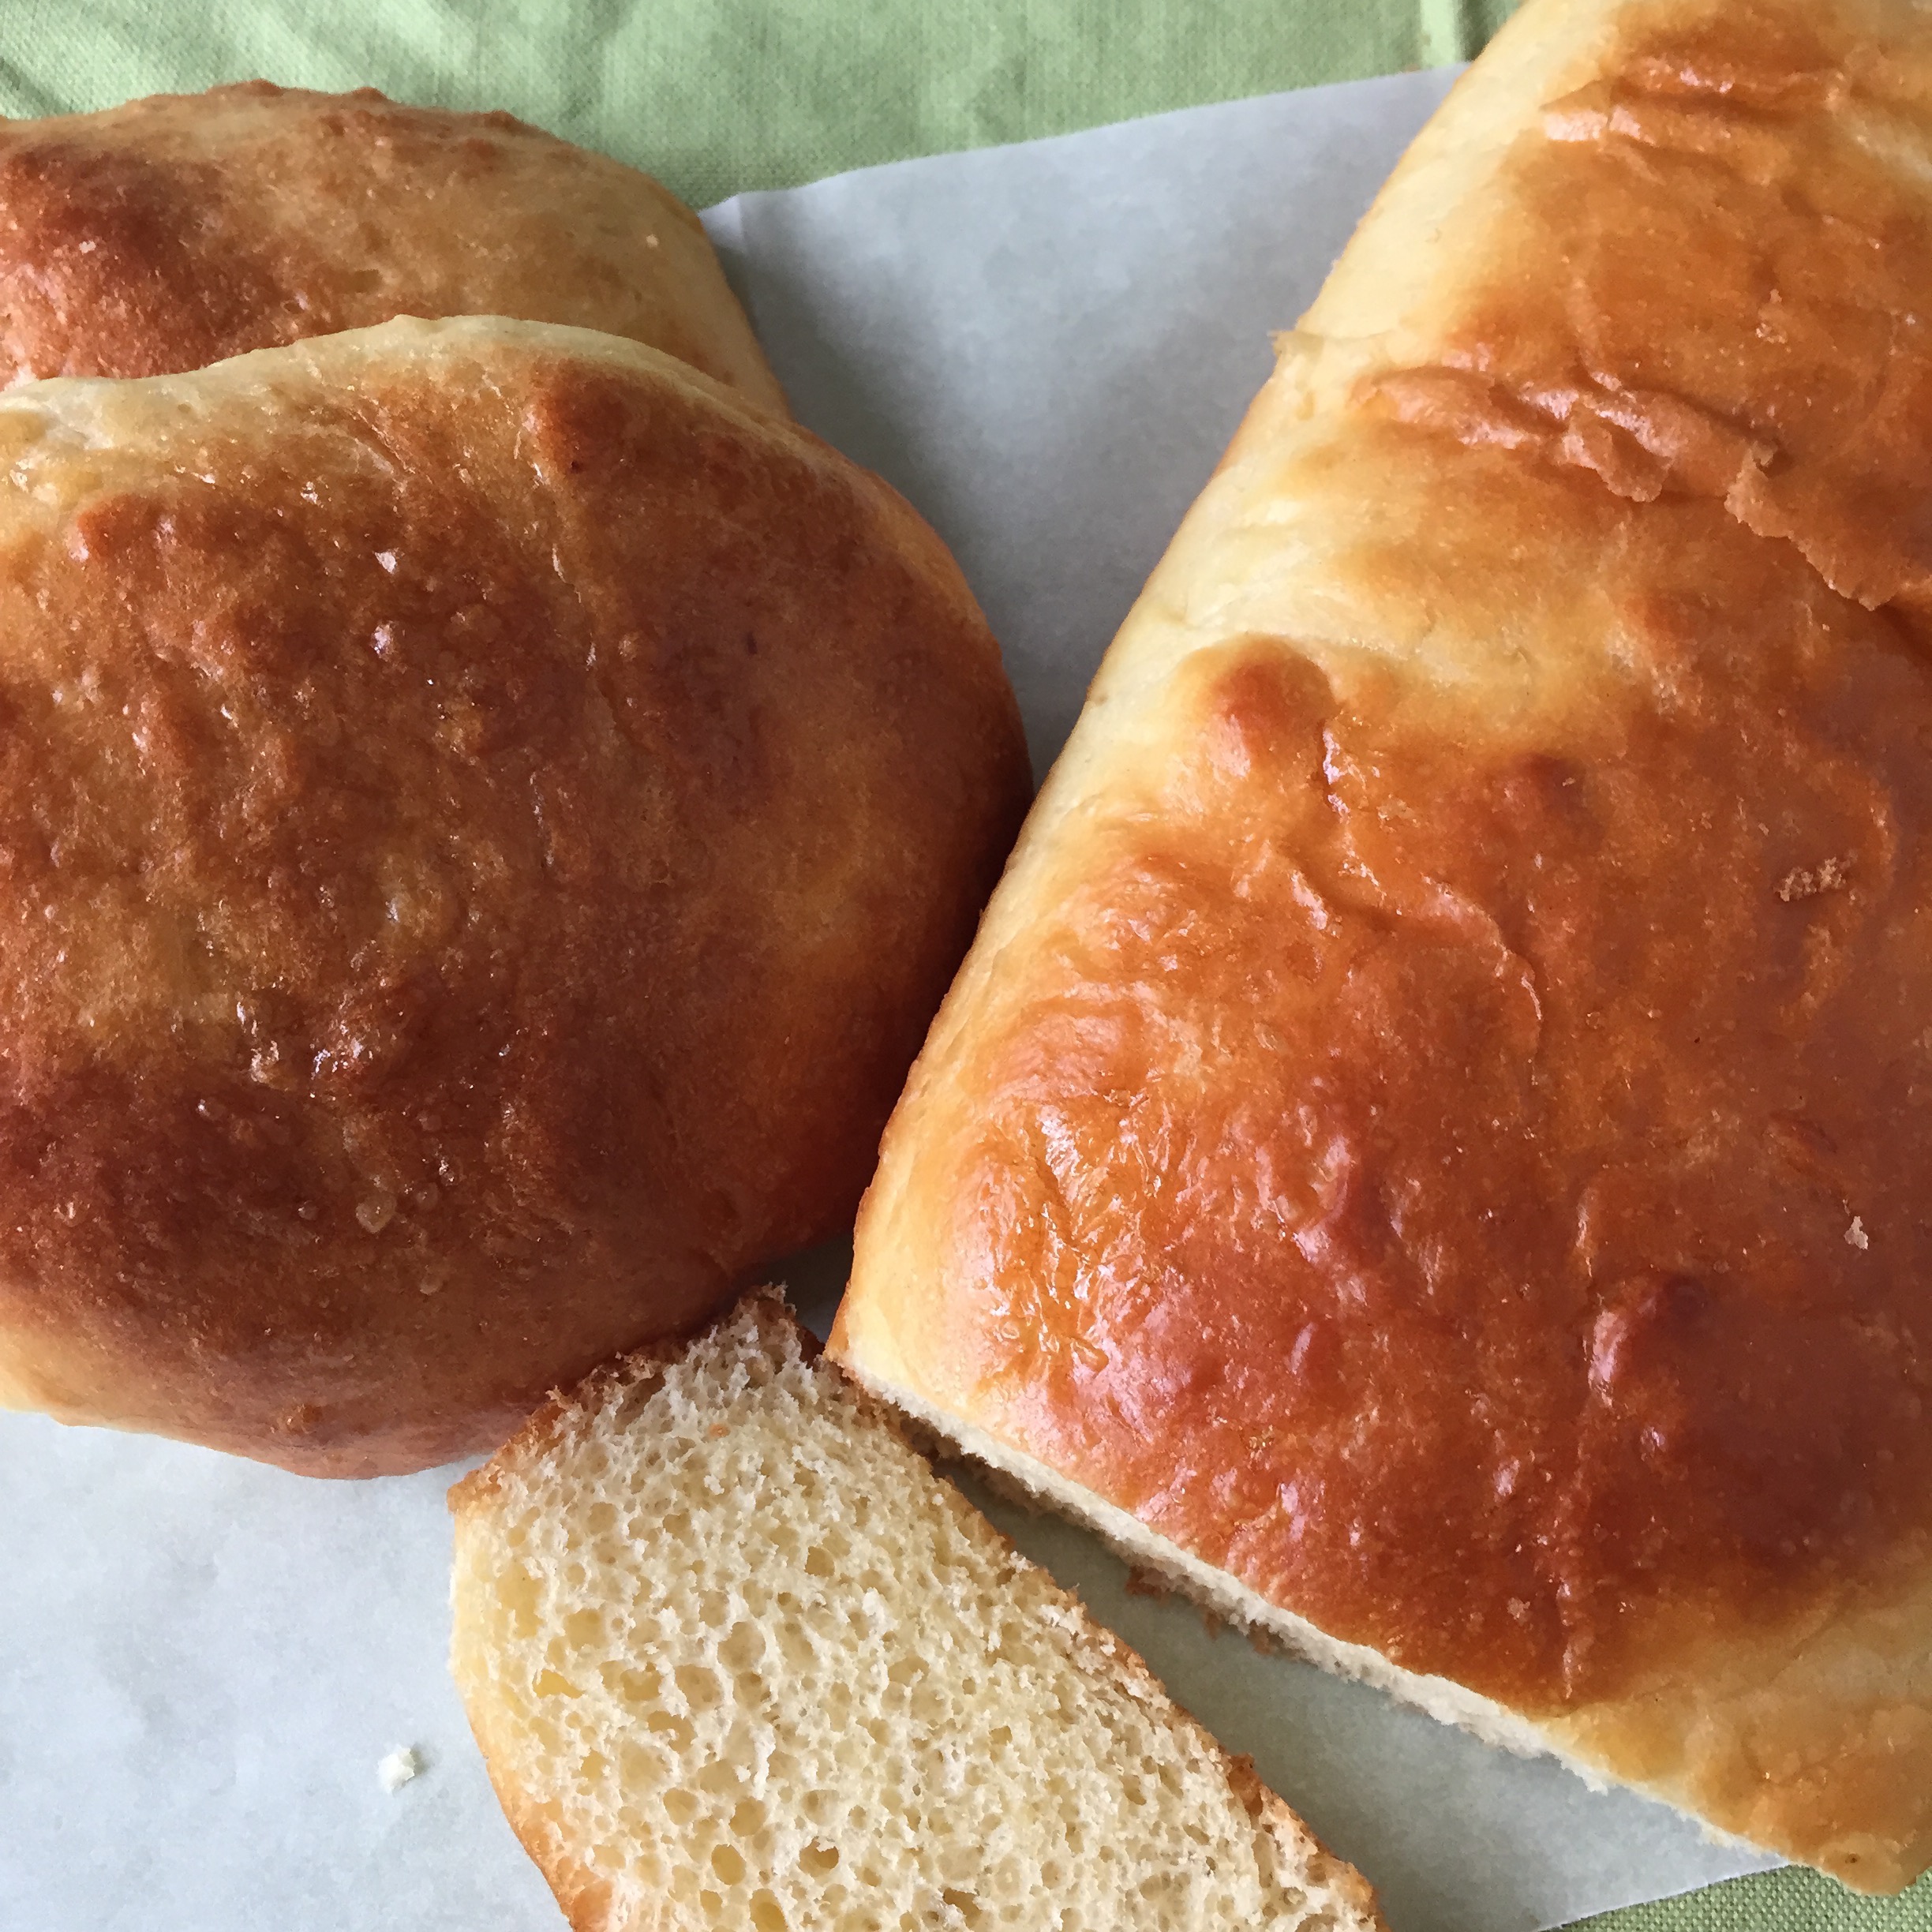
Bake for about 30 minutes, or until the crust is nicely browned and firm to the touch. Because you’ve used wet dough, there is little risk of drying out the interior, despite the dark crust. When you remove the loaf from the oven, it will audibly crackle, or “sing,” when initially exposed to room-temperature air. Allow to cool completely, preferably on a wire cooling rack, for best flavor, texture, and slicing. The perfect crust may initially soften, but will firm up again when cooled.

I found that it may take more than 30 minutes to bake, up to 40 to completely bake the inside. If you can use a hot pad and turn the bread over in your hand, tap the bottom of the loaf with your finger, it should make a hollow sound. If it's still a little soft, return it to the oven for a few minutes.

Store the remaining dough in the refrigerator in your lidded (not airtight) container and use it over the next 14 days: You’ll find that even one day’s storage improves the flavor and texture of your bread. This maturation continues over the 14-day storage period. Refrigerate unused dough in a lidded storage container (again, not airtight). If you mixed your dough in this container, you’ve avoided some cleanup. Cut off and shape more loaves as you need them. We often have several types of dough storing in the refrigerator at once. The dough can also be frozen in 1-pound portions in an airtight container and defrosted overnight in the refrigerator prior to baking day.

FOR PIZZA:

Pinch off a palm sized piece of dough, shape into a round, rectangular or square shape. Dough is sticky so keep some extra flour nearby, dust your hands as necessary to shape the dough. If the dough starts to snap back you should let it rest for a few minutes and then resume shaping.

Place onto parchment paper, a dusted pizza peel or the bottom of a dusted baking sheet. You can use anything you want providing the pizza can slip right off onto the rack.

If you are baking in an oven, preheat your oven to 500° or as high as it will go. Top the dough with anything you like, slid it into the hot oven and bake for 12-14 minutes.

If you are grilling dough, preheat bbq to high. Slide dough onto rack and cook 5-10 minutes on one side. Remove from grill, top the cooked side and return to the grill. Close the lid so the toppings will cook evenly.

Francois, Zoe; Hertzberg, Jeff , MD (2007-11-13). Artisan Bread in Five Minutes a Day: The Discovery That Revolutionizes Home Baking (pp. 26-27). Macmillan. Kindle Edition.


Leave a comment
Share
  • Pin it
  • Share
  • Tweet
  • Share
  • Email

Harvesting Tomatoes

9 / 7 / 159 / 8 / 15

This was a great year for tomatoes! My early tomatoes are giving it one last push before they succumb and my late (heirloom) tomato bushes are full with big beautiful green tomatoes. What we haven’t been able to eat (and share) I’ve been freezing for later use. Remember I told you how to freeze them? Just plop the whole or cut up tomato on a baking sheet and put in the freezer until frozen solid, then put them into a freezer bag or other container and put back in the freezer. This allows you to pick out however many tomatoes you need at a time and no need to peel before freezing. As they defrost the skin will slip right off and if you want to remove the seeds just cut in half as usual and squeeze out the seeds.

Here are some beautiful photos that my friend Christina Peters shot of my tomatoes this year and a beautiful Tomato Sauce from Marcella Hazan.


Debs Garden-4591Heirloom Tomatoes Growing-5461Heirloom Tomatoes-5529Heirloom-Tomatoes-6086

2 Comments
Share
  • Pin it
  • Share
  • Tweet
  • Share
  • Email

Marcella Hazan’s Tomato Sauce

9 / 7 / 15

Heirloom-Tomatoes-6086


Marcella Hazan’s Tomato Sauce

Save
Print

Serves 6, enough to sauce 1 to 1 1/2 pounds pasta

  • 2 pounds tomatoes, or 2 cups canned imported Italian tomatoes, cut up, with juice
  • 5 tablespoons butter
  • 1 medium onion, peeled and cut in half
  • Salt to taste

Combine the tomatoes and juice in a saucepan, add the butter, onion, and a pinch of salt.

Place over medium heat and bring to a simmer. Cook, uncovered, for about 45 minutes. Stir occasionally, mashing any large pieces of tomato with a spoon. Add salt as needed.

Discard the onion before tossing the sauce with pasta. Serve with freshly grated Parmigiano-Reggiano cheese for the table.

Leave a comment
Share
  • Pin it
  • Share
  • Tweet
  • Share
  • Email

Simple Cold Pasta Salad

8 / 18 / 15

On these dog days of summer, even here at the beach, this is one of my favorite go-to recipes. It’s quick and easy, you don’t have to turn on any heat, even to cook the pasta, and you can use bits and pieces of left overs from your refrigerator pantry.

Some of my typical summer refrigerator pantry items are, cheese, olives, tomatoes (home grown, of course), cucumbers, peppers and the like. Most often there will be some lemon chicken left over as well. All are perfect additions to this salad. First the pasta, no need to boil a big pot of water, we’ll use the microwave!

Summer Pasta Salad

Pour your dry pasta, something curly is best to hold all the wonderful dressing in it’s little nooks, into a microwave safe bowl. Cover with cool water by 1″, make sure the container is big enough that the water and pasta won’t boil over. You’ll want to cook your pasta for about 5 minutes longer than the directions guide you on the box. Test the pasta for doneness and cook a little longer if necessary. Drain well and rinse quickly with cool water. Do not add dressing to the warm pasta as it will just soak it all up and be mushy. Stir the pasta occasionally as it cools to keep it from sticking together. You could cook the pasta ahead of time and chill it before you  make the salad. If this is the case, toss the cooled pasta with a little olive oil before refrigerating. Now you’re ready to proceed with the salad.

In actuality, from this point on you could chop and dice almost anything you find in you refrigerator but here’s my stand by recipe.

Summer Pasta Salad

Save
Print
  • 1/4 cup red wine vinegar
  • 1 teaspoon Dijon mustard
  • 1/2 cup olive oil, approximately
  • Salt and pepper
  • 1 teaspoon garlic powder
  • 2 teaspoon fresh basil, torn
  • 1/2 cup diced cucumber
  • 1 pint cherry tomatoes, halved or quartered
  • 1/2 cup diced red bell pepper
  • 1/3 cup thinly sliced green onions
  • 1/4 cup sliced black olives
  • 1/2 cup crumbled or diced cheese, mozzarella, chedderella, goat cheese or any you prefer
  • 1 ½ cup cooked pasta

For dressing, mix together vinegar, Dijon, salt, pepper, and garlic powder and whisk until it comes together. While continually whisking slowly add olive oil to taste. Set aside.

Mix together remaining ingredients and toss with dressing. Serve cold.

Leave a comment
Share
  • Pin it
  • Share
  • Tweet
  • Share
  • Email

Pan-Seared Scallops with Champagne Grapes and Almonds

7 / 28 / 15

Champagne grapes and scallops

Save
Print
  • 16 large sea scallops, side muscles removed
  • 5 Tablespoons unsalted butter, divided
  • 1-1/2 Tablespoons minced shallots
  • 2/3 cup Champagne grapes (4 ounces) or black grapes, halved
  • 1-1/2 Tablespoons fresh lemon juice
  • 1/3 cup slivered or sliced almonds, toasted
  • 1-1/2 Tablespoons chopped fresh Italian (flat-leaf) parsley
  • Salt and pepper

Melt 3 Tablespoons unsalted butter in a large skillet over medium-high heat. Cook the butter until it is browned, about 2 minutes. Salt and pepper your scallops before adding them to the pan. Cook 2 minutes on each side and transfer to a dish, covering to keep warm.

Melt the remaining 2 Tablespoons of unsalted butter in the same skillet over medium-high heat. Add shallots and grapes; sauce until the shallots are golden brown, about one minute. Stir in fresh lemon juice and any accumulated scallop juice from the plate of cooked scallops. Bring to a boil and season with salt and pepper. Stir in almonds and parsley.

Place scallops on individual plates and spoon the sauce over them. Serve immediately

Leave a comment
Share
  • Pin it
  • Share
  • Tweet
  • Share
  • Email

Champagne Grapes

7 / 28 / 15


GRAPES_Melissas


Champagne grapes are not the grapes that vintners make champagne with but are called such because they look like the little bubbles that float in a lovely glass of champagne.

Champagne grapes are rather a grape variety called ‘Corinth’, small, seedless little pops of pure grape juice are also used dried. As a dried grape they can be known as Zante currants or simply currants but are not true currants.

Look for dark grapes which indicates a state of ripeness and sweetness when shopping for Champagne grapes. Grapes that look wrinkled have passed their prime and won’t be as sweet. Store in the refrigerator and wash before use. Champagne grapes look elegant as a garnish to any dish and will sit perfectly well on a fruit and cheese platter but are easily versatile in cooking. Here is a wonderful recipe from our friends at Noble Pig Winery, originally adapted from Bon Appetit magazine.

Can’t find Champagne Grapes? Call click to find our friends at Melissa’s Produce and they will send some out to you right away!

Pan-Seared Scallops with Champagne Grapes and Almonds

Leave a comment
Share
  • Pin it
  • Share
  • Tweet
  • Share
  • Email

Brioche-Hurry Up & Wait

7 / 6 / 15

IMG_2507Homemade brioche is really pretty easy with most of the work being done by the dough. Plan ahead as it needs an overnight rise in the refrigerator. This recipe is from King Arthur Flour and they say (correctly I might add) that this recipe should be done only in a stand mixer. The dough is quite wet and sticky and it took 20 minutes to come together using my stand mixer. That was the hard part, well not really, the hard part was waiting overnight before I could bake it but the resulting French Toast was well worth the wait.

French Toast-BriocheAfter the overnight rise, I cut the dough in half and made 1 small loaf and 3 good sized buns (for burgers). Then you have to play the waiting game again for a few hours before you can bake them. The long overnight rise and the room temperature rise before baking results in a beautiful crumb and delicate taste. The aroma while baking, of course, will drive you wild. The bread turns a rich golden color (don’t be afraid to cover them while baking if they start to brown too quickly) and is a very soft, light bread when it’s finally ready for you to eat.

Brioche Baked

I’m going to freeze the buns for a future use and perhaps part of the bread for toast and French toast in the near future. I did make a test batch of French Toast with a little butter and real maple syrup and woofed it down. It would have been delightful with some summer fruit but the last of the farmers market fruit was eaten yesterday in a peach-blackberry cobbler.

This is great recipe to try over the weekend. Mangia!

Brioche

Save
Print

From King Arthur Flour:
The inspiration for this recipe comes from our bakery, where brioche buns are among the wide variety of rolls and buns King Arthur Flour bakers produce daily. These particular buns are rich, tender, and pillow-like, similar to our bakery’s, and are the perfect vessel for a big, juicy burger.

  • 2 3/4 cups King Arthur Unbleached All-Purpose Flour
  • ¼ cup Baker's Special Dry Milk or nonfat dry milk
  • 2 tablespoons sugar
  • 1 1/4 teaspoons salt
  • 1 tablespoon instant yeast
  • 3 large eggs + 1 large egg yolk, white reserved for wash (below)
  • 1/4 cup lukewarm water
  • 10 tablespoons unsalted butter
  • Egg Wash
  • 1 large egg white, lightly beaten with 1 tablespoon cold water
  • seeds of your choice, optional

Mix and knead the dough ingredients — in a mixer or bread machine — to make a smooth, shiny dough. It starts out sticky, and takes 15 to 20 minutes of kneading in a stand mixer to develop, so we don't recommend kneading this by hand.

Form the dough into a ball, place it in a greased bowl, cover, and let it rise for 1 hour.

Refrigerate the covered dough overnight, to slow its rise and make it easier to shape.

The next day, remove the dough from the refrigerator, and divide it into six pieces.

Shape each piece into a flattened ball, and place into the lightly greased cups of an individual pie and burger bun pan. Or place the buns on a lightly greased or parchment-lined baking sheet, leaving about 2" to 3" between them.

Cover the buns, and let them rise until they're quite puffy. This may take as little as 1 hour; or up to 2 to 3 hours, depending on how warm your rising environment, and how cold the dough. Towards the end of the rising time, preheat the oven to 375°F.

Brush the buns with egg wash, and bake on the middle rack of the oven for 14 to 18 minutes, tenting with foil after 10 minutes if they appear to be browning too quickly. The finished buns will register at least 190°F on a digital thermometer inserted into the center.

Remove the buns from the oven, and cool on a rack.

Yield: 6 buns or 2 small loaves

King Arthur Flour

Leave a comment
Share
  • Pin it
  • Share
  • Tweet
  • Share
  • Email

Summer Salads

6 / 29 / 156 / 29 / 15


Summer Nicoise

My summer pantry is usually a little lighter than my winter pantry as I use far more fresh ingredients, mostly from my kitchen garden. The French Nicoise Salad is one of my favorites and I like using whatever fresh veggies I find at the local farmers market or in my garden. As in most cases, the quality of ingredients that you use are directly reflected in the finished dish, therefore buy the best that you can afford. I use Italian tuna in olive oil; I love the Genova brand from Italy. Please don’t use all white tuna packed in water, as it has no flavor, better to leave it out. I drain most of the oil from the canned tuna, reserving it for use in making the salad dressing.

italiantuna_kalynskitchen

Another way to dress up the dish for a hot summer evening entree is to grill some fresh tuna or shrimp from your fishmonger. This recipe makes a beautifully plated salad for a buffet table but can be individually plated as well. Be creative and use what you have on hand.

Summer Nicoise Salad

Save
Print

This salad is great for adapting to whatever you find in your pantry and/or refrigerator. Left over vegetables from last night’s dinner work great; keep your pantry stocked with jars of olives, tuna, hearts of palm, baby corn or a myriad of other staples. Change the tuna; use bay shrimp, scallops, last nights chicken or steak. A great salad to stretch your creative talents!

  • Vinaigrette:
  • 1/4 cup red wine vinegar
  • 1 tablespoon Dijon mustard
  • 1 small shallot -- minced
  • 1 tablespoon Italian parsley -- chopped
  • Salt and pepper -- to taste
  • 3/4 cup olive oil, use drained oil from tuna and add more olive oil as needed
  • Salad:
  • 2 cans Italian tuna -- packed in olive oil, drained and flaked with a fork
  • Salt and pepper -- to taste
  • 1/4 pound haricot vert -- blanched, cooled and dried well
  • 4 new potatoes -- boiled
  • 2 medium plum tomatoes -- cut into quarters
  • 3 eggs, cooked~see recipe
  • 1/2 cup nicoise olives
  • 3 cups mixed baby greens

Make the vinaigrette:

In a large bowl make the vinaigrette by whisking together the vinegar and

Dijon mustard. Add shallot, parsley and salt and pepper. Drizzle olive oil, while whisking into vinegar mixture. Re-season if necessary.

Blanch the beans in boiling salted water, drain, and chill.

Cook the potatoes in salted water just until they are tender through, about 15 minutes. Drain. Peel them, if desired, as soon as they are cool enough to handle.

Hard boil eggs by covering eggs with cold water, bring to a boil, remove from heat, cover and time for 15 minutes, plunge into ice water and chill.

Drain tuna, leaving a small amount of oil clinging to fish, and reserving drained oil, flake tuna into a medium mixing bowl.

Toss mixed greens with enough vinaigrette to coat. Season with salt and pepper.

Plate salad by putting a mound of tuna in the center of the mixed greens and surround with remaining ingredients, drizzle a little dressing over vegetables and serve extra dressing on the side.

Save any remaining vinaigrette and store in glass jar, refrigerated for up to 4 weeks.

Leave a comment
Share
  • Pin it
  • Share
  • Tweet
  • Share
  • Email

Hawaiian Luau Feast

6 / 4 / 156 / 4 / 15

luau 002

Summer is almost here and if you can’t visit the Islands we can certainly take some of the traditional Hawaiian foods and tweak them to our recipes and summer picnics. Our next cooking class uses many of these ingredients and we show you ways to incorporate them into your backyard parties.

luau 001

While we can’t host a traditional luau in the tasting room we can enjoy a luau type picnic with foods of the Islands. In ancient Hawaii men and women ate their meals separately but in 1819 King Kamehameha removed all religious laws and taboos and men and women began eating together, creating the first luau feast.

luau_party_0

The name luau refers to a dish made with chicken wrapped in taro leaves (luau), and baked in coconut milk; it’s served with slightly salty, smoky Kalua pig (pork). Kalua means ‘the hole’ and refers to the pit (an imu oven) the pig is cooked in. Simply put, the pig is steamed over a long period of time and is similar to a smoky pulled pork dish.

Hawaiian-Luau Fun

We’ll be doing our Kalua pork in a pressure cooker but the flavors will be able to develop while we talk and prepare other side dishes that use traditional Hawaiian ingredients. We might even be able to talk Tammy into a little hula (we know she can)!

Join us in the Temecula Olive Oil Tasting Room, Seal Beach for our fun little Hawaiian party. Learn a little about Hawaiian tradition and a conversation about cooking with pressure cookers!

Click here to see full menu

Our class goes off next week! Thursday, June 11th 6:30 p.m.Make your reservation today!

Luau Sign

For Reservations Call (562) 296-5421


Related Posts Plugin for WordPress, Blogger...
Leave a comment
Share
  • Pin it
  • Share
  • Tweet
  • Share
  • Email

Posts navigation

Previous Page 1 2 … 11 12 13 14 15 16 Next Page
Deb

Meet Chef Debbi

READ BIO

Join-Us Sign up for our newsletter to receive exclusive tips 'n tricks, and special offers on classes, tours, and more!

Recent Posts

  • New E-Book!
  • From the Pantry
  • Spaghettini at Home
  • Growing Corn
  • Spring IS Coming!

Categories

BookCUT

What's in Your Pantry?

How to stock your pantry to create delicious dishes.

Learn Chef Debbi's pantry essentials and how to substitute ingredients for pantry staples in her basic recipes for quick and easy meals.
BUY BOOK>

FacebookTwitterInstagramGooglepinterest


© 2014, DEB'S KITCHEN
Angie Makes Feminine WordPress Themes