Deb's Kitchen - Farm, Food, Wine & Lifestyle Adventures
  • Facebook
  • Google
  • Twitter
  • Instagram
  • Pinterest
  • Email
Menu
Skip to content
  • Home
  • Blog
  • Events
    • Classes
    • Tours & Adventures
  • Edible Gardening
  • Preserving
  • Recipes
    • Appetizers
    • Soups and Salads
    • Main Dishes
    • Side Dishes
    • Desserts
  • About
    • Whats In Your Pantry
    • Ask Debbi
    • Deb’s Kitchen Botanicals
    • Press
  • Contact

Tag Archives: Melissa’s Produce

Spaghettini at Home

6 / 29 / 23

Where’s Chef Debbi?


My latest project has been working with Chef Victor and the great team at Spaghettini Restaurant as recipe editor for their new ‘cookbook’, ‘Spaghettini at Home’. It’s actually more than a cookbook, it’s loaded with 35 years of Spaghettini classic recipes. ‘Spaghettini at Home’ also showcases the best of the best jazz artists. Each artist picks their favorite food, cocktails, wine and more. Read the stories from each artist and click on the QR code to download their music. Why not host your own ‘Spaghettini at Home’ dinner party? Invite your friends and loved ones to cook your favorite Spaghettini recipes and combine with great cocktails, wine and music.
Spaghettini at Home is available at Spaghettini Restaurant in Seal Beach or order from their website, Spaghettini.

Photography:
Eric Hameister, Hameister Photo
Spaghettini At Home
Art direction and design:
Dave Gath, Gath Design
Leave a comment
Share
  • Pin it
  • Share
  • Tweet
  • Share
  • Email

Growing Corn

5 / 26 / 23

It’s time to start late spring and summer flowers & veggie’s


Photo: Farmers Almanac


Corn can be fickle, it likes warm weather and the bugs and four-legged critters may eat all of yours before you can get to it. Native Americans planted corn with beans and once the beans sprout they planted squash at the base of the corn. The beans will use the corn stalk as a trellis and the squash leaves will protect the base of the corn which grows very shallow. This is called The Three Sisters or Companion Planting.
Plant corn directly in the garden where it will receive at least 6 hours of sun, water well and help the pollen to reach the tassels. Each tassel that gets pollinated turns into a kernel. To make sure the plant is getting pollinated, shake the tassels so the pollen falls onto them, nature will take it from there. 
The ears are ready to harvest when the silks turn from light yellow to dark brown.

To cook, grill, steam or pop in the microwave. Leave the husk on the corn if you microwave and cook on high for 3 minutes (for two ears), add an extra minute with more ears. Let them slightly cool and peel the husk and silk off the corn.

NOW Booking for Vegetable & Flower Garden consult & Design

[email protected]
Leave a comment
Share
  • Pin it
  • Share
  • Tweet
  • Share
  • Email

Spring IS Coming!

3 / 7 / 23

It’s time to start late winter/early spring flowers & veggie’s

You still have time in zones 9/10 to get another round of onions, carrots, potatoes, beets, turnips, and radish in. Don’t forget to plant more lettuce, kale etc. Need a salad garden design? Email me

[email protected]

Plant your early spring flowering seeds and bulbs, Dahlias (tubers or seeds), sweet peas, tulips, narcissus, & ranunculus,
visit the bulb shop at your local nursery.

Even though you can pick up some tomato plants I’m waiting a week or two to start mine, it’s pretty cold out there right now, even if they go in later this month or next they’ll easily catch up to plants that go in now.

When the soil is too cool the roots just sit there until they get warmer weather.

If you’re shopping for tomato plants remember to choose plants that have thick stalks (like the size of a pencil) with no fruit or flowers. When you first plant them you want the roots to grow and grow to get big & strong to support heavy loads of super juicy fruit! Be sure to stake or tie up early.

More Organic Edible Gardening & Flower Classes coming in 2023
Starting tomatoes from seed soon

For vegetables and fruits to plant now and mid-month visit

Debs Kitchen
and for more reading click below
Edible Gardening

NOW Booking for Vegetable & Flower Garden consult & Design

[email protected]

Ojai Pixie Tangerines

For now,  citrus picking has been going strong when it dries out for a little while. They won’t pick when the trees are wet and can’t get into the muddy fields. Our tangerine  favorites this time of year are the Ojai Pixie tangerines and the trees are loaded with fruit & should be readily available at your supermarket or from Melissa’s Produce! New crop just picked.

Leave a comment
Share
  • Pin it
  • Share
  • Tweet
  • Share
  • Email

Farm, Food & Wine Tour 2023

2 / 10 / 232 / 28 / 23

Farm, Food & Wine Tours are Back!!


Join us for a long weekend of farm tours, wine tasting, vinegar tasting, a guided tour of olive oils and more.

Fri, Oct 27 – Sun, Oct 29

Stay at the beautiful Cambria Pines Lodge

Friday Night Dinner Party with Chef Debbi & The Debettes

Sat. travel with Coy from

The Wine Wrangler to Hambley Farms Lavender Fields,

Owner led farm tour, lavender picking (if lavender is still in bloom)

Picnic lunch.

Next we’ll visit a bio-dynamic farm and winery,
AmByth Winery 
Owner led vineyard, winery tour & tasting

Sunday

We’ll visit the lovely ladies at

The Groves on 41

for an olive oil immersion from education to tasting, with a walk in the groves

Picnic Lunch

Sponsored by

Melissa’s Produce


Limited Reservations  (12 people)

Full Price $949.00

Deposit $400

Final Payment due Aug 1 $549.00


Tour


/p>

Leave a comment
Share
  • Pin it
  • Share
  • Tweet
  • Share
  • Email

Happy Valentine’s Day

2 / 9 / 232 / 10 / 23

Why fight the crowds in a restaurant? Here are a few fool-proof recipes to create on your own!

House Salad


Beet Salad with Goat Cheese and Balsamic

Save
Print

I created this recipe to mimic the fabulous salad served at The Sea Chest restaurant in Cambria, Ca.

  • 2-3 baby beets, use a variety of beets (red, striped, gold)*
  • 1 cup baby greens
  • ½ cup snow peas, cut in half on the diagonal
  • 1 small carrot, sliced or grated
  • 1 small Persian cucumber, sliced
  • ¼ cup toasted walnuts
  • 1/2 cup cherry tomatoes, halved
  • 2 ounces crumbled blue cheese
  • Sea salt and fresh ground pepper
  • Balsamic Vinaigrette
  • ½ shallot, minced
  • ¼ cup good balsamic vinegar
  • 1 teaspoon Dijon mustard
  • ½ cup extra virgin olive oil
  • salt and pepper

Preheat the oven to 400°.

Wrap each beet in a piece of aluminum foil and drizzle generously with olive oil and pinches of salt and pepper.

Place the beets on a baking sheet and roast for 40 to 90 minutes, or until soft and fork-tender, the size of the beet will determine the cooking time.

While the beets are cooking, make the vinaigrette.

Mix together the minced shallot, balsamic vinegar, and Dijon mustard, shake or whisk to mix well. While still whisking slowly pour in the oil until the mixture slightly emulsifies. Set aside while you finish the beets and create the salad, shake again just before serving.

Remove the beets from the oven, loosen the foil, and set aside to cool. When they are cool to the touch, peel the skins using a paper towel and just rubbing the skin off.

Let the beets cool and chill them in the fridge until ready to use.

Slice the beets into ¼-inch-thick rounds or if they’re small, use whole or half. Assemble the salad with the greens, beets, snow peas, carrot, cucumber, walnuts, cheese, and cherry tomatoes. Drizzle with balsamic vinaigrette. Season with flaky sea salt and pepper and serve.

Baby beets may be hard to find. Trader Joe’s usually have some in a box in the produce section, they have already been cleaned & steamed so they’re easy to use. If you can’t find them, check out melissas.com, they carry them as well.


The Best Beef Stroganoff

Beef Stroganoff

Save
Print
  • 2 tablespoon olive oil, or more if needed
  • 2 tablespoons unsalted butter, or more if needed
  • 1 small onion, diced
  • 1 pound crimini mushrooms, sliced
  • 3 pounds tenderloin steak, sliced into thin strips
  • ½ cup flour
  • salt and pepper
  • ¼ cup dry white wine
  • 2 tablespoons Dijon mustard
  • 2 tablespoons Worcestershire sauce
  • 1 ½ cups beef stock
  • ½ cup creme fraiche, or more to taste
  • ½ pound egg noodles, prepared according to box directions

Heat a large sauté pan and add oil and butter. Sauté onions until

translucent but not brown. Set aside. Add more oil and butter if needed;

sauté mushrooms until lightly browned and set aside with onions.

Dredge the meat in the flour seasoned with salt and pepper. Shake off

excess flour and brown the meat in small batches. Don't overcrowd the pan

or the meat will steam and not brown. Set meat aside with onions and

season with salt and pepper.

Deglaze the pan by adding the wine and scraping the bits from the bottom

of the pan, called fond. Reduce slightly and add the mustard,

Worcestershire sauce and stock. Return onions, mushrooms and steak to the

pan and simmer until slightly thickened.

Reduce heat to low and stir in the creme fraiche, re-season with salt and

pepper, heat until warmed through and serve over egg noodles.


Here’s a recipe that some recipe tasters were able to enjoy recently. Make some for this Valentine’s Day!


Chocolate Amaretti Tortes

Save
Print
  • Makes 4
  • Tortes
  • 4 ounces semisweet chocolate, chopped
  • 3/4 cup sliced almonds, toasted
  • 12 1 1/2-inch-diameter amaretti cookies (Italian macaroons), about 2.6 ounces total
  • ¼ teaspoon cinnamon
  • Pinch of salt
  • 1/2 cup (1 stick) unsalted butter, room temperature
  • ½ cup sugar
  • 3 large eggs
  • Topping
  • 3/4 cup chilled whipping cream
  • 1 ½ teaspoons powdered sugar
  • 1/2 teaspoon almond extract
  • 2 amaretti cookies, crumbled

Tortes:

Position rack in center of oven and preheat to 350°F. Butter four 3/4-cup custard cups or soufflé dishes. Dust with flour; tap out excess. Line bottom of cups with parchment paper rounds. Place on rimmed baking sheet.

Stir chocolate in top of double boiler set over simmering water until melted and smooth. Using on/off turns, blend almonds, amaretti, cinnamon, and salt in processor until finely ground. Transfer to medium bowl.

Add butter, sugar, and eggs to processor; mix until blended and smooth, occasionally scraping down sides of bowl, about 3 minutes. Add cookie mixture and melted chocolate. Using on/off turns, process just until blended.

Divide batter among custard cups. Bake until tops of tortes are dry and puffed and tester inserted into centers comes out with moist crumbs attached, about 30 minutes. Transfer cups to rack; cool 15 minutes. Run small knife around edges of cups to release tortes. Turn tortes out onto rack and turn right side up; cool. (Can be made 3 days ahead. Wrap in plastic and store at room temperature.)

Topping:

Beat together cream, sugar, and almond extract in medium bowl until cream holds peaks. (Can be made 4 hours ahead; refrigerate.)

Serve

Place 1 torte on each of 4 plates. Top with dollop of whipped cream, sprinkle with crumbled amaretti, and serve.

Amaretti cookies are available in most Italian deli’s and come in two sizes. The larger ones (used in this recipe) are bundled in pairs in colorful wrappers, while slightly smaller ones are packaged and unwrapped in sealed plastic bags. If using the smaller cookies, measure by weight (2.6 ounces total), not count.

Leave a comment
Share
  • Pin it
  • Share
  • Tweet
  • Share
  • Email

Superbowl Sunday Party

2 / 8 / 232 / 9 / 23

Here are some recipes to help you through the day!

Pigs in a Blanket with Everything Bagel Topping

Save
Print
  • 1 package puff pastry
  • 1 package of little smokies or cocktail sausages
  • 1 large egg, beaten with a little water
  • 2 tablespoons everything bagel seasoning

Preheat oven to 400°. Line a baking sheet with parchment paper, or a silpat.

Defrost puff pastry as directed on box. Sprinkle a cutting board with a dusting of flour, place one puff pastry sheet at a time on the cutting board and lightly roll out.

Cut puff pastry into equally sized rectangles for the number of sausages you have. Cut the pastry as wide as you like, leave a little bit of the sausage uncovered or cover the entire sausage.

Roll the sausage in the puff pastry. Place seam side down onto the baking sheet at least once inch apart.

Brush beaten egg/water mixture over the top of each pig in the blanket. Then sprinkle each pig in a blanket with a bit of the everything bagel seasoning blend.

Bake the pigs in a blanket in the preheated oven for about 25 minutes, or until pastry is puffed and golden brown.


Boursin Cheese Dip with Roasted Grapes Crostini

Save
Print
  • 1 ½ cups grapes, approximately (cut in ½)
  • Olive oil
  • Sea salt
  • 2 fresh thyme sprigs
  • Boursin cheese dip
  • 6 oz. Boursin cheese
  • 2 tablespoons heavy cream or milk
  • Good rustic bread, sliced into 1/2-inch thick pieces
  • Olive oil

Preheat oven to 450ºF. Spread grapes onto a sheet pan. Drizzle with olive oil. Sprinkle with salt. Lay thyme leaves over top. Toss all together gently with your hands. Place pan in the oven for 7 to 9 minutes or until grapes just begin to burst.

Mix the Boursin cheese with enough cream to make it slightly soft and runny, set aside.

Meanwhile, heat a grill or grill pan to medium-high. Brush the bread with olive oil. Grill until nice and toasty.

Assemble the open-faced sandwiches: Spread Boursin mix over bread. Top with roasted grapes. Discard thyme sprigs.

Artichoke Bruschetta

Save
Print
  • ½ large jar marinated artichoke hearts -- drained, patted dry, chopped
  • ¼ cup Romano cheese grated
  • ½ shallot -- minced
  • 2 ½ tablespoons mayonnaise
  • ½ clove garlic
  • ½ loaf ciabatta

Place first 3 ingredients in bowl. Mix in enough mayonnaise to form thick

spread.

Preheat broiler. Slice bread in half lengthwise and rub garlic onto bread,

cut into slices. Toast lightly, spread artichoke mixture on bread and

broil until mixture is heated through and begins to brown, about 2

minutes.

Instant Pot Baby Back Ribs

Save
Print
  • 1 rack baby back ribs*
  • 1 onion, rough chopped
  • 1 carrot, rough chopped
  • 1 celery, rough chopped
  • 1 cup broth or water
  • barbecue sauce

Dry the ribs with a paper towel, then remove the thin membrane from the back of the ribs.

Cut ribs cut into 3 bone pieces. Add rough chopped vegetables to the pot and place rack in the bottom of the Instant Pot. Add broth or water and set ribs upright on the rack.

Close lid and select manual pressure and set the timer for 23 minutes. Let the Instant Pot vent for 5 minutes and release the rest of the pressure. Take care of the steam, don’t burn yourself.

Brush with barbecue sauce and broil or grill until slightly charred.

I like to have the butcher cut the ribs down the center to create ‘riblets’.

Crab Stuffed Mushrooms

Save
Print
  • 16 large white mushrooms, brushed with stems and gills removed*
  • Olive oil
  • 8 oz. cooked crab or lobster meat
  • 1/2 cup Panko breadcrumbs, divided
  • 1/3 cup freshly grated parmesan cheese
  • 1/3 cup mayonnaise
  • 4 oz. whipped cream cheese, softened
  • 2 green onions, chopped
  • ¼ cup minced celery
  • 1 tablespoon finely chopped Italian parsley
  • ¼ teaspoon dried oregano
  • Sea salt and fresh ground pepper
  • ½ teaspoon garlic powder
  • ½ tablespoon lemon olive oil

Preheat the oven to 400°. Place a piece of parchment paper on a baking sheet and set aside.

Brush the outside of the mushrooms with a little olive oil and arrange on baking sheet.

In a large bowl combine crab meat, 1/3 cup Panko crumbs, parmesan, mayonnaise, cream cheese, green onions, celery, herbs, salt and pepper.

Stuff each mushroom cap generously with the crab mixture.

Combine oil and remaining Panko crumbs until evenly coated. Sprinkle the panko mixture over the tops of the mushrooms.

Bake until the mushrooms begin to brown, approximately 15 minutes then broil for 2 minutes until golden all over with crispy tops.

Serve immediately.

Choose mushrooms about the size of a half dollar.

Crispy Chicken Wings

Save
Print
  • 4 pounds free-range chicken wings cut into pieces
  • 2-4 Tablespoon sunflower or other oil*
  • Blue Cheese Dip
  • 1 cup crumbled blue cheese softened
  • 1/4 cup sour cream
  • 1/3 cup mayonnaise
  • 1 Tablespoon lemon juice
  • Sea salt and ground black pepper

Preheat oven to 450°.

Line a baking sheet with parchment paper or tin foil and set a heat-proof wire rack on top.

Dry the chicken wings well and transfer them to a large bowl. Toss with a little oil and season with salt and pepper. Place on rack and bake for 30 minutes, turn the wings over and bake until crisp, 20 -30 minutes.

Bake for 30 minutes; flip and continue to cook until crisp and golden brown, (about 20-30 minutes longer), until golden browned and crispy.

Serve wings immediately.

*Note:

You could toss the wings with a little BBQ sauce instead of the oil if you want them with more flavor or spiciness.

Leave a comment
Share
  • Pin it
  • Share
  • Tweet
  • Share
  • Email

Thanksgiving Feast

11 / 20 / 2211 / 20 / 22

These are my family favorites for the Thanksgiving Holiday, these recipes will serve 6-8 people. Many of the recipes can be made ahead of time making it easier to pull together the entire meal on one day. Make ahead the stock, gravy (add pan drippings later), mashed potatoes, dressing (I don’t stuff my turkey any longer and because I don’t I can cook a large bird in about 2 hours), green beans and of course the apple pie! I hope you enjoy and have a safe and tasty holiday!

Debbi & The Debettes (Sue & Barbara)

Watch my YouTube videos with Christina Peters on making Turkey/Chicken Stock and how to make successful gravy! Click here to watch!


Both recipes can also be found in my book, ‘What’s In Your Pantry’ pages 43, 44 and in the video’s.

Order my book here, next day shipping!


Click here to order

Citrus Cranberry Sauce, Instant Pot

Save
Print
  • 2 (12-ounce) packages fresh cranberries
  • 1/2 cup sugar
  • 1/2 cup brown sugar
  • 1 medium orange, zester and juiced
  • 1 small cinnamon stick

Place cranberries, sugars, orange juice, orange zest, cinnamon and cloves into a 6-qt Instant Pot®. Stir until well combined.

Select manual setting; adjust pressure to high, and set time for 4 minutes. When finished cooking, naturally release pressure according to manufacturer’s directions, about 20-30 minutes.

Remove orange zest and cinnamon. Using a potato masher, mash cranberry mixture until desired consistency is reached.

Let cool completely.

My Best Dressing for Thanksgiving

Save
Print

Old fashioned stuffing recipe but I cook it as a ‘dressing’ rather than stuffing a turkey. For one reason it’s safer (temperature-wise) and the turkey cooks faster if it’s not stuffed. If you stuff a turkey the stuffing needs to reach 165° to kill any bacteria, but that means the turkey is well past 185°, overcooked and dry. The spice that makes this dressing the bomb is Penzy’s Poultry seasoning, penzys.com, it’s definitely my go to herb blend!

  • 1 loaf (1 pound) day-old crusty sourdough bread
  • 1 ½ sticks unsalted butter
  • 2 leeks, halved, thinly sliced, and rinsed well
  • 1 small shallot, finely minced
  • 4 celery stalks, diced (I like to use the celery hearts for this)
  • ¾ teaspoon sea salt
  • ½ teaspoon freshly ground black pepper
  • 1 ½ Tablespoons poultry seasoning
  • ¼ cup chopped parsley
  • 1½ chicken stock, maybe up to 2 cups
  • 2 eggs, lightly beaten

The day before you make the dressing tear the bread into 1-inch pieces and place on a baking sheet, set atop your stove for the bread to dry out slightly.

Preheat the oven to 350°F and grease a 9x13-inch baking dish.

Melt the butter in a large skillet over medium heat. Add the leeks, shallots, celery, salt, and pepper, and sauté until tender and translucent.

Place the bread into a large bowl and pour the vegetable mixture onto the bread cubes, add the poultry seasoning and parsley and toss lightly until coated. Add 1 cup of the chicken stock & toss again, the bread cubes should be fairly wet, if not add more stock and mix well until it is wet.

Before you add the eggs, taste the dressing, and adjust any seasoning. Then add the eggs and mix in well. *For a heartier dressing add Melissa's Steamed and Peeled Chestnuts (chop them into bite sized pieces and mix in). See link below.

Transfer to the prepared baking dish and bake, covered, for 30 minutes, uncover the dish and bake for 5 to 10 more minutes to crisp the top a bit.

Dried Herbs or ‘Poultry Seasoning’ from Penzy’s Spices

Melissa’s Steamed & Peeled Chestnuts

*Recipe for Chestnut Dressing can be found on page 120 in ‘What’s In Your Pantry’

Green Beans with Smoked Bacon & Caramelized Shallots

Save
Print

These are similar to my Grandmother’s Famous Green Beans but I replace her garlic with Caramelized Shallots.

  • 2 pounds haricots verts (thin green beans), trimmed, blanched and dried well*
  • ½ pound applewood smoked bacon
  • 3 large shallots, quartered
  • 2 tablespoon olive oil
  • 2 tablespoons red wine or balsamic vinegar
  • Sea salt & freshly ground black pepper

Cook bacon until crisp. Remove with a slotted spoon, and drain on paper towels, reserving 2 Tbsp. drippings in skillet.

Add olive oil to the pan with the bacon drippings then add the quartered shallots and sauté until browned. Add the vinegar, stir well, then add the green beans and toss until coated with oil, cook for another minute then season with salt and pepper and toss with bacon, serve hot.

To blanch green beans: Fill a large bowl with ice and cold water leaving room for green beans. Bring a large saucepan full of water to a boil and add green beans and a good helping of salt, cook for 1-2 minutes, drain the beans and plunge them into the bowl of ice water. Let them cool, drain and dry well.

Do Ahead Mashed Potatoes

Save
Print
  • 3 lb. medium Melissa’s Dutch Yellow Potato*, scrubbed and cut in half
  • Kosher salt
  • ½ cup heavy cream
  • ½ cup whole milk
  • 1 stick unsalted butter, cut into pieces, room temperature
  • ¼ cup sour cream
  • Sea salt and fresh ground pepper

Cut the potatoes into like sized pieces so they all cook at the same rate. Cook the potatoes in large pot of boiling salted water until they are tender, about 20 to 30 minutes.

Drain the potatoes and return to the dry pot. Shake over low heat for about 1 minute. This helps make the potatoes fluffy as it whisks off excess moisture.

Mash the potatoes until there are no lumps

Heat cream, milk and butter in a small saucepan over medium until just about to simmer. Reduce heat to low and keep warm until ready to add to potatoes.

(If you have a potato ricer or mill, pass the potatoes through into a bowl. If you don’t have a food mill you can mash the potatoes with a potato masher), slowly add cream mixture while tossing gently, season with sea salt and pepper and mix in sour cream.

Take the potatoes out of the refrigerator about 3 1/2 hours before serving time. Stir the potato mixture well. Remove the potatoes from the dish and place it in a 4- or 5-quart crockpot. Cover and cook on low heat for 3 to 4 hours, stirring once or twice.

add more melted butter, sour cream or milk if you want a softer consistency. The potatoes can be held in the slow cooker an additional 30 minutes or more on low. Or turn the crockpot to "keep warm" for another hour or two.

*Melissa’s Dutch Yellow Potatoes can be found at Gelsons, Bristol Farms and Lazy Acres or order from their website (link below).

Herb Roasted Turkey

Save
Print
  • 10 -12pounds free range or organic turkey, Diestal is my favorite and available at Gelsons
  • 2 medium onion, quartered with peel on
  • 6 carrots, peeled and roughly chopped
  • 6 celery stalks, roughly chopped
  • 1 bunch Italian flat leaf parsley
  • 1 bunch fresh sage
  • 1 whole bay leaf
  • ½ bunch fresh thyme
  • 2 Meyer lemon
  • ¼ cup butter, room temperature
  • Sea salt and pepper
  • 1 cup dry white wine, Sauvignon Blanc is my go to
  • 1 cup chicken or turkey stock

Preheat oven to 425°

Remove turkey from refrigerator and let rest for 1 hour before cooking. Carefully rinse and dry turkey inside and out, dry well. Select a roasting pan where the turkey will fit snugly but doesn’t hang over the side. Place ½ of the herbs into the pan as a bed for the turkey, roughly chop the remainder of the herbs and stuff inside the turkey. Squeeze the lemons over the turkey and place the rinds into the pan with the herbs.

Place the turkey inside the pan and rub with butter, season with sea salt and pepper.

Insert probe thermometer and set for 165°. The turkey will cook for approximately 2 hours. Pour wine and chicken stock in the bottom of the pan and place, uncovered in hot oven.

Baste after 1/2 hour, if you don't have enough juice in pan use some stock. Do not cover bird until browned and then loosely place foil over breast. If wings start to brown to early wrap with foil. If the breast starts to brown too much, loosely cover with foil and turn oven down to 400°.

Let turkey rest for 15 minutes before carving.

*Pick up a probe digital thermometer here

To make sure your oven is the correct temperature use an oven thermometer

Dutch Apple Pie

Save
Print
  • Pâte Brisée, (Pie Crust)
  • 1 ¼ cups flour
  • ½ teaspoon salt
  • 1 stick cold butter, cut into pieces
  • 2-4 tablespoons ice water
  • 1 tablespoon sugar, optional (for Pâte Sucrée, sweet pie dough)
  • For the Dutch Apple Pie:
  • 1 pie crust
  • 2 ¼ pounds of baking apples, about 6 medium
  • 1 teaspoon cinnamon
  • 8 tablespoons unsalted butter, 1 stick)
  • 3 tablespoon flour
  • 1/4 cup water
  • 1 cup sugar
  • For the Crumb Topping:
  • 1 cup all-purpose flour
  • 1/4 cup packed brown sugar
  • 2 tablespoon sugar
  • 1/4 teaspoon cinnamon*
  • 1/4 teaspoon sea salt
  • 8 tablespoon unsalted butter, room temperature

Add flour and salt (sugar also if making Pâte Sucrée) into the bowl of a food processor; pulse a few times to incorporate all the ingredients.

Add the butter and process until the mixture is crumbly and the butter is pea size.

Place the mixture into a wide bowl and add water 1 tablespoon at a time until the mixture comes together. Don’t overwork the dough or it will be tough, not flaky. Once the dough comes together in a ball flatten into a disk, wrap in plastic wrap and refrigerate for 30 minutes.

Dough can be wrapped well at this point and frozen for up to three months. Let the dough defrost overnight in the refrigerator before using.

Roll chilled disk out on a floured counter or rolling mat, lifting and moving the dough every few rolls to help prevent sticking. Add only enough flour to the counter to keep the dough from sticking.

Place your pan on top of the dough to make sure it is the correct size, it should be slightly larger than the pan, then roll the dough onto your rolling pin and unroll over your pan. Gently lift and lay the dough to fit the pan, never pull the dough to stretch it. Lightly press the dough into the pan, roll your rolling pin over the top edge of the tart or pie pan and remove excess pastry, or pinch the edges to your liking.

Cover and refrigerate for 30 minutes or while you prepare filling.

Your pie crust should be rolled out into the pie pan and be resting in the refrigerator.

Preheat oven to 375˚F. Place your rack in the center of the oven.

Peel, core, and thinly slice apples to about 1/4” thickness. You should have 7 cups of sliced apples. Place them in a mixing bowl and stir in 1 teaspoon cinnamon.

Melt butter in a medium saucepan over medium heat. Whisk in flour then simmer for 1 minute, whisking constantly. Whisk in water and sugar and bring to a boil. Reduce heat and continue simmering for 3 minutes, whisking frequently. Pour the sauce over the apples and stir to coat the apple slices. Pour apples over bottom crust.

To Make the Crumb Topping, stir together dry ingredients: flour, sugars, cinnamon, and salt. Add butter and work it into the mixture with our hands until pea-size crumbs form throughout the mixture. Spread the crumb topping evenly over your apples, place pie onto a baking sheet and bake uncovered for 50-60 minutes or until the center of the pie registers 175˚F. If topping is browning too much, cover with a sheet of foil. Remove from oven and cool 1 hour to allow the filling to set so it’s easier to slice.

*Cinnamon, I like using Penzey’s Spices ‘Baking Spices’ instead of just cinnamon.

Leave a comment
Share
  • Pin it
  • Share
  • Tweet
  • Share
  • Email

Clean and Husk (strings and all) Corn on the Cob

9 / 4 / 21


Here’s a simple trick to cleaning up corn on the cob while not quite cooking it all the way. I love corn on the grill but husking it before hand can be a pain trying to get all the strings off.

Cut off the bottom of the cob just above first row of kernels. Place on microwave-safe plate, cover with a damp paper towel and microwave on full power for 30 to 60 seconds. (If you want to fully cook the corn, microwave for 4 min. per cob)

Remove from microwave and using a hot pad or cloth pinch and squeeze the top of the husk to push out the whole corn. It should slip out fairly easy.

Proceed to cooking it in the manner you like.


Leave a comment
Share
  • Pin it
  • Share
  • Tweet
  • Share
  • Email

Marinated Cucumber and Tomato Salad

9 / 2 / 21


Marinated Cucumber and Tomato Salad

Save
Print
  • 3 medium cucumbers, peeled and sliced ¼ inch thick
  • 1-2 large tomatoes, cut into wedges
  • 1 medium red onion, sliced and separated into rings, optional
  • ½ cup red wine or pomegranate vinegar
  • ¼ cup sugar
  • 1 cup water
  • ¼ cup oil
  • Sea salt and fresh ground pepper

Combine ingredients in a large bowl and mix well. Refrigerate at least 2 hours before serving so the flavors have a chance to blend.

Leave a comment
Share
  • Pin it
  • Share
  • Tweet
  • Share
  • Email

Hatch Chile Roast

8 / 1 / 218 / 1 / 21

Hatch Chile Time!

 
New Mexico Hatch Chiles are here in Southern California and we’ve been waiting all year to replenish our supplies! These chiles are only here for a short month or so before being gone again until next season. A favorite Southwestern chile, the Hatch chiles are grown in Hatch, New Mexico where everyone celebrates their harvest. Roasters are going hot on every street corner and people are buying them by the case. 
 
Here in So. California, Melissa’s Produce brings us these gorgeous chiles in mild and hot, buy both! Melissa’s has teamed up with several local grocery stores to provide roasting your chiles by the case. Click on the Hatch Chile Roasting link and it will take you to a list of roastings by Melissa’s Produce.
 
Try Hatch Chile’s in all your dishes, from omelets to soups, stews, Chile Verde and even maybe a Hatch Chile Sorbet, mmmmm. Click here for one of my favorite recipes.The list is endless! 
Click here for local Hatch Chile Roasting with Melissa’s Produce
Leave a comment
Share
  • Pin it
  • Share
  • Tweet
  • Share
  • Email

It’s Asparagus & Artichoke Season

4 / 24 / 21


A few things to know about asparagus now that it’s in season. Buy organic, fresh, California grown asparagus for the most nutritious and best tasting.

Asparagus is dioecious, meaning that it has separate male and female plants. The female plants make berries, containing seeds. The male plants just make flowers, containing pollen. But both of them produce spears.

Scott Walker, president of the world’s biggest asparagus seed company (Walker Brothers, of Pittsgrove, N.J.), says that he’s heard that on really hot days, asparagus can grow an inch per hour. But he’s never actually measured them. During harvest season, farmers struggle to stay ahead of the growing spears. Each field has to be harvested every day, and sometimes even twice a day.

After about six or eight weeks, farmers stop harvesting and let them grow wild. The plant needs to grow into a fern to capture energy from the sun and store it in the root for the next growing season.

After harvest, asparagus loses quality very rapidly––the sugar content declines and the amount of fibrous material increases. Use spears with compact heads; those with loose heads are fibrous and do not keep well.

There are 3 types of asparagus, green, white (which is blanched by covering the stalks with straw or mulch to keep it from turning green) and there is a purple variety.

Green asparagus is a bit grassy in flavor, while white asparagus is mild and slightly bitter. Purple asparagus is a bit nuttier and sweeter because it has about 20 percent more sugar in its stalks. Purple asparagus is a bit nuttier and sweeter because it has about 20 percent more sugar in its stalks. While the stalks are purple on the outside, the interior is the same green spear. The outside may appear a little purple-greenish when cooked. Blanch this and use it in salads.

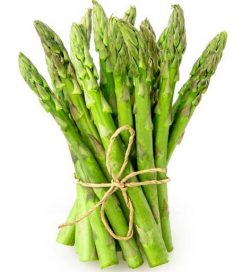
How to buy asparagus; look for bright, green, evenly colored spears with tight buds. You can store asparagus standing up in a glass with a little water in the refrigerator, I like to use them within a few days. If the stalks are a little thick you might want to peel them down up a bit so they’re not so fibrous.

Cook asparagus by blanching, steaming, roasting or grilling. Here are a few of my favorite ways to serve asparagus.

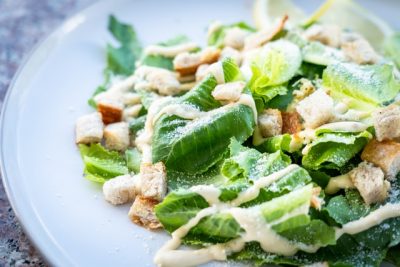
Asparagus Casear Salad recipe

Asparagus Gratin recipe

Spring Artichokes

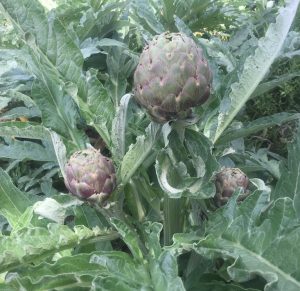
Read all about artichokes, how to choose and store them.

Artichoke Info & Recipes, click here


Leave a comment
Share
  • Pin it
  • Share
  • Tweet
  • Share
  • Email

Caesar Salad with Spring Asparagus

4 / 23 / 21


Caesar Salad with Spring Asparagus

Save
Print
  • 2 bunches pencil-thin asparagus, trimmed and chopped into 1/2-inch pieces
  • 1 tablespoon mayonnaise
  • 1 ½ tablespoons red wine vinegar
  • 2 tablespoons freshly squeezed lemon juice
  • 1 garlic clove, minced
  • 1 teaspoon Dijon mustard
  • 1 teaspoon Worcestershire sauce
  • 1 teaspoon anchovy paste (or 1 anchovy filet)
  • 6 tablespoons extra virgin olive oil
  • Sea salt and freshly ground black pepper
  • 1/2 cup freshly grated Parmigiano-Reggiano
  • 1 head romaine hearts, chopped

Prepare a large bowl with ice and cold water, set aside to blanch the asparagus.

Bring a saucepan big enough to hold the asparagus to a boil, add a heaping tablespoon of salt and plunge the asparagus into the water, boil for 2 minutes. Drain the asparagus and put into the water bath until cooled, drain and set aside on a baking sheet covered with paper towels.

Combine mayonnaise, vinegar, lemon juice, garlic, Dijon mustard, Worcestershire sauce, and anchovy paste in a medium bowl and whisk until combined. While whisking constantly, add the olive oil in a thin, steady stream until incorporated. Season to taste with salt and pepper.

Toss the romaine with a little of the dressing. Transfer to a serving platter and top with asparagus and the grated Parmigiano-Reggiano. Serve extra dressing on the side.

Related Posts Plugin for WordPress, Blogger...
Leave a comment
Share
  • Pin it
  • Share
  • Tweet
  • Share
  • Email

Posts navigation

1 2 3 … 11 12 Next Page
Deb

Meet Chef Debbi

READ BIO

Join-Us Sign up for our newsletter to receive exclusive tips 'n tricks, and special offers on classes, tours, and more!

Recent Posts

  • New E-Book!
  • From the Pantry
  • Spaghettini at Home
  • Growing Corn
  • Spring IS Coming!

Categories

BookCUT

What's in Your Pantry?

How to stock your pantry to create delicious dishes.

Learn Chef Debbi's pantry essentials and how to substitute ingredients for pantry staples in her basic recipes for quick and easy meals.
BUY BOOK>

FacebookTwitterInstagramGooglepinterest


© 2014, DEB'S KITCHEN
Angie Makes Feminine WordPress Themes