Deb's Kitchen - Farm, Food, Wine & Lifestyle Adventures
  • Facebook
  • Google
  • Twitter
  • Instagram
  • Pinterest
  • Email
Menu
Skip to content
  • Home
  • Blog
  • Events
    • Classes
    • Tours & Adventures
  • Edible Gardening
  • Preserving
  • Recipes
    • Appetizers
    • Soups and Salads
    • Main Dishes
    • Side Dishes
    • Desserts
  • About
    • Whats In Your Pantry
    • Ask Debbi
    • Deb’s Kitchen Botanicals
    • Press
  • Contact

Tag Archives: Melissa’s Produce

Champagne Grapes

7 / 28 / 15


GRAPES_Melissas


Champagne grapes are not the grapes that vintners make champagne with but are called such because they look like the little bubbles that float in a lovely glass of champagne.

Champagne grapes are rather a grape variety called ‘Corinth’, small, seedless little pops of pure grape juice are also used dried. As a dried grape they can be known as Zante currants or simply currants but are not true currants.

Look for dark grapes which indicates a state of ripeness and sweetness when shopping for Champagne grapes. Grapes that look wrinkled have passed their prime and won’t be as sweet. Store in the refrigerator and wash before use. Champagne grapes look elegant as a garnish to any dish and will sit perfectly well on a fruit and cheese platter but are easily versatile in cooking. Here is a wonderful recipe from our friends at Noble Pig Winery, originally adapted from Bon Appetit magazine.

Can’t find Champagne Grapes? Call click to find our friends at Melissa’s Produce and they will send some out to you right away!

Pan-Seared Scallops with Champagne Grapes and Almonds

Leave a comment
Share
  • Pin it
  • Share
  • Tweet
  • Share
  • Email

Summer Salads

6 / 29 / 156 / 29 / 15


Summer Nicoise

My summer pantry is usually a little lighter than my winter pantry as I use far more fresh ingredients, mostly from my kitchen garden. The French Nicoise Salad is one of my favorites and I like using whatever fresh veggies I find at the local farmers market or in my garden. As in most cases, the quality of ingredients that you use are directly reflected in the finished dish, therefore buy the best that you can afford. I use Italian tuna in olive oil; I love the Genova brand from Italy. Please don’t use all white tuna packed in water, as it has no flavor, better to leave it out. I drain most of the oil from the canned tuna, reserving it for use in making the salad dressing.

italiantuna_kalynskitchen

Another way to dress up the dish for a hot summer evening entree is to grill some fresh tuna or shrimp from your fishmonger. This recipe makes a beautifully plated salad for a buffet table but can be individually plated as well. Be creative and use what you have on hand.

Summer Nicoise Salad

Save
Print

This salad is great for adapting to whatever you find in your pantry and/or refrigerator. Left over vegetables from last night’s dinner work great; keep your pantry stocked with jars of olives, tuna, hearts of palm, baby corn or a myriad of other staples. Change the tuna; use bay shrimp, scallops, last nights chicken or steak. A great salad to stretch your creative talents!

  • Vinaigrette:
  • 1/4 cup red wine vinegar
  • 1 tablespoon Dijon mustard
  • 1 small shallot -- minced
  • 1 tablespoon Italian parsley -- chopped
  • Salt and pepper -- to taste
  • 3/4 cup olive oil, use drained oil from tuna and add more olive oil as needed
  • Salad:
  • 2 cans Italian tuna -- packed in olive oil, drained and flaked with a fork
  • Salt and pepper -- to taste
  • 1/4 pound haricot vert -- blanched, cooled and dried well
  • 4 new potatoes -- boiled
  • 2 medium plum tomatoes -- cut into quarters
  • 3 eggs, cooked~see recipe
  • 1/2 cup nicoise olives
  • 3 cups mixed baby greens

Make the vinaigrette:

In a large bowl make the vinaigrette by whisking together the vinegar and

Dijon mustard. Add shallot, parsley and salt and pepper. Drizzle olive oil, while whisking into vinegar mixture. Re-season if necessary.

Blanch the beans in boiling salted water, drain, and chill.

Cook the potatoes in salted water just until they are tender through, about 15 minutes. Drain. Peel them, if desired, as soon as they are cool enough to handle.

Hard boil eggs by covering eggs with cold water, bring to a boil, remove from heat, cover and time for 15 minutes, plunge into ice water and chill.

Drain tuna, leaving a small amount of oil clinging to fish, and reserving drained oil, flake tuna into a medium mixing bowl.

Toss mixed greens with enough vinaigrette to coat. Season with salt and pepper.

Plate salad by putting a mound of tuna in the center of the mixed greens and surround with remaining ingredients, drizzle a little dressing over vegetables and serve extra dressing on the side.

Save any remaining vinaigrette and store in glass jar, refrigerated for up to 4 weeks.

Leave a comment
Share
  • Pin it
  • Share
  • Tweet
  • Share
  • Email

Hawaiian Luau Feast

6 / 4 / 156 / 4 / 15

luau 002

Summer is almost here and if you can’t visit the Islands we can certainly take some of the traditional Hawaiian foods and tweak them to our recipes and summer picnics. Our next cooking class uses many of these ingredients and we show you ways to incorporate them into your backyard parties.

luau 001

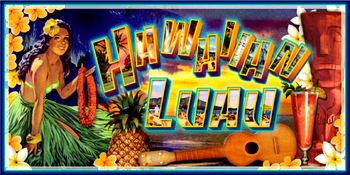
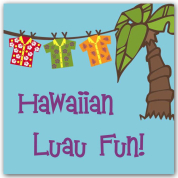
While we can’t host a traditional luau in the tasting room we can enjoy a luau type picnic with foods of the Islands. In ancient Hawaii men and women ate their meals separately but in 1819 King Kamehameha removed all religious laws and taboos and men and women began eating together, creating the first luau feast.

luau_party_0

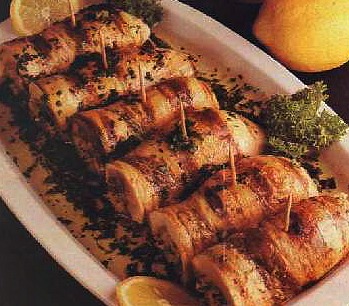
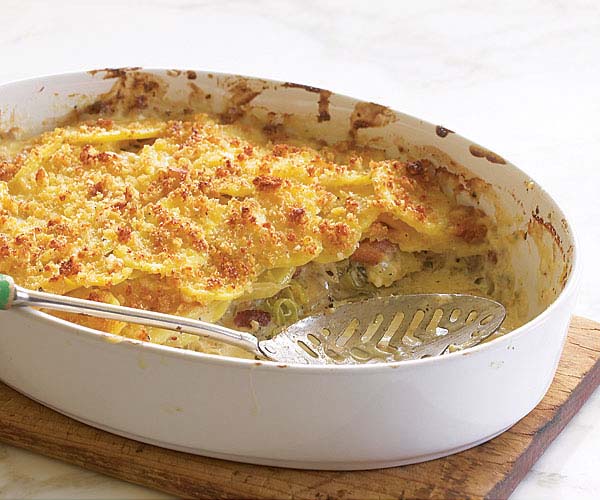
The name luau refers to a dish made with chicken wrapped in taro leaves (luau), and baked in coconut milk; it’s served with slightly salty, smoky Kalua pig (pork). Kalua means ‘the hole’ and refers to the pit (an imu oven) the pig is cooked in. Simply put, the pig is steamed over a long period of time and is similar to a smoky pulled pork dish.

Hawaiian-Luau Fun

We’ll be doing our Kalua pork in a pressure cooker but the flavors will be able to develop while we talk and prepare other side dishes that use traditional Hawaiian ingredients. We might even be able to talk Tammy into a little hula (we know she can)!

Join us in the Temecula Olive Oil Tasting Room, Seal Beach for our fun little Hawaiian party. Learn a little about Hawaiian tradition and a conversation about cooking with pressure cookers!

Click here to see full menu

Our class goes off next week! Thursday, June 11th 6:30 p.m.Make your reservation today!

Luau Sign

For Reservations Call (562) 296-5421


Leave a comment
Share
  • Pin it
  • Share
  • Tweet
  • Share
  • Email

Lemon & Lavender Butter Cookies

5 / 5 / 155 / 8 / 15

Lemon & Lavender Butter Cookies

Save
Print

3 dozen cookies

  • 1 teaspoon dried lavender buds
  • 1 ½ cups all purpose flour
  • 1 tablespoon lemon zest
  • ¼ teaspoon salt
  • ¾ cup butter, softened
  • 1 cup powdered sugar

Preheat oven to 350°.

Line 2 baking sheets with parchment or baking liners.

Grind lavender buds in a clean coffee grinder or mortar and pestle. Set aside.

In a medium bowl, combine flour, ground lavender buds, lemon zest, and salt.

In a large mixing bowl beat the butter with an electric mixer on medium to high speed for 30 seconds. Add powdered sugar. Beat until combined. Beat in as much of the flour mixture as you can with the mixer. Stir in any remaining flour mixture.

On a lightly floured surface, roll dough into a 10-inch-long log. Wrap log in plastic wrap or waxed paper. Chill for 2 to 24 hours or until firm.

On a lightly floured surface, cut roll into 1/4-inch slices. Place slices 2 inches apart on prepared sheet pan.

Bake about 10 minutes or until edges are lightly browned. Transfer cookies to a wire rack and let cool.

Adapted from Better Homes & Gardens

Leave a comment
Share
  • Pin it
  • Share
  • Tweet
  • Share
  • Email

So. Coast Plaza Garden Show Recipes

4 / 25 / 154 / 29 / 15

Windrose Farms Oct 2014-Herb & Cheese Tart w.


Spring Herb Tart

Save
Print
  • 1 recipe pate Brisée recipe, with
  • 1 Tb. chopped fresh thyme, add thyme to flour and stir well
  • ½ pound fontina cheese, grated (or more-to your taste)
  • 1/2 pound fresh asparagus, trimmed and cut into ¼” pieces
  • 1 tablespoon Parmigiano-Reggiano
  • Salt and pepper, to taste

Preheat the oven to 400°. Pre-bake the shell according to directions in Pate Brisée recipe. Let cool to room temperature or cool overnight. Sprinkle with the cooled crust with fontina cheese. Arrange the asparagus pieces around the bottom of the shell, season with salt and pepper; sprinkle with Parmigiano-Reggiano. Bake until the cheese is melted, about 15 minutes. Garnish with fresh herb sprigs. Serve room temperature or slightly warmed. Can be served along with a light salad tossed with vinaigrette dressing.

Serves 6

If you wanted to turn this into a quiche mix together 4 eggs & one cup of cream, half and half or milk. Pour it over the cheese and asparagus and bake approximately 40 minutes. You may have to cover the edge of the crust with foil to prevent it from burning.

Adapted from 'What's In Your Pantry' by Debbi Dubbs

Pate Brisée (Pie Crust)

Save
Print

From ‘What’s In Your Pantry’

www.debskitchen.com
info@debskitchen.com

  • Pâte Brisée (Pie Dough)
  • 2 ½ cups flour, (10 ¾ oz.)
  • 1 teaspoon salt
  • 2 sticks butter, cut into pieces
  • 3-5 tablespoons ice water
  • 1 tablespoon sugar (for Pâte Sucrée, sweet pie dough)

Add flour and salt (sugar also if making Pâte Sucrée) into the bowl of a food processor; pulse a few times to incorporate all the ingredients.

Add the butter and process until the mixture is crumbly and the butter is pea size.

Place the mixture into a wide bowl and add water 1 tablespoon at a time until the mixture comes together. Don’t overwork the dough or it will be tough, not flaky. Once the dough comes together in a ball, divide it into two pieces, flatten into disks, wrap in plastic wrap and refrigerate for 30 minutes.

Dough can be wrapped well at this point and frozen for up to three months. Let the dough defrost overnight in the refrigerator before using.

Roll one chilled disk out on a floured counter or rolling mat, lifting and moving the dough every few rolls to help prevent sticking. Add only enough flour to the counter to keep the dough from sticking.

Place your pan on top of the dough to make sure it is the correct size, it should be slightly larger than the pan, then roll the dough onto your rolling pin and unroll over your pan. Gently lift and lay the dough to fit the pan, never pull the dough to stretch it. Lightly press the dough into the pan, roll your rolling pin over the top edge of the tart or pie pan and remove excess pastry.

Cover and refrigerate for 30 minutes. Preheat your oven to 400°.

To blind bake:

Blind baking is baking the dough without filling.

Prick the bottom and sides of the dough; cut a piece of foil large enough to cover the bottom and sides of the dough, butter the dull side and lay the buttered side on the bottom of the dough and press into the sides. Line with pie weights or dried beans and bake in the center of the oven for 20-25 minutes or until lightly browned. Remove the weights and foil and let cool before filling

Makes 2 - 10” crusts

Berry Salad with Pomegranate Vinaigrette

Save
Print
  • ½ shallot, minced
  • 2 teaspoon Dijon mustard
  • ½ cup Pomegranate vinegar, another light vinegar could be used as well
  • ¾ cup extra virgin olive oil, approximately
  • 6 cups baby greens, washed and dried well
  • 2 small Persian cucumbers, sliced
  • 2 cups croutons
  • 1 container each of strawberries, blueberries and raspberries (strawberries sliced)
  • 2 avocados, diced, optional

In a small bowl mix together the shallot, Dijon mustard and vinegar. Add a pinch of sea salt and a little grind of pepper. While whisking slowly pour the oil in until the dressing starts to thicken a little and emulsify. Stop and taste the dressing before adding the remaining oil. You may not need all of the oil depending on the flavor of the vinegar. Add more as necessary.

In a large salad bowl toss together the lettuce, cucumbers and croutons with a little of the dressing. Just until the greens have a shimmer of dressing on them. Season with sea salt and pepper, toss again, taste and adjust dressing and seasonings. Add berries and avocados and drizzle with a little of the dressing.

Serves 6

Leave a comment
Share
  • Pin it
  • Share
  • Tweet
  • Share
  • Email

Easter Potatoes

3 / 31 / 154 / 1 / 15

potato gratin-molly stevens

Potato Gratin

Save
Print

This rich, creamy gratin gets a note of smokiness from the bacon between the layers of tender potatoes.
by Molly Stevens from Fine Cooking

  • 2-1/2 lb. Yukon Gold potatoes, peeled & sliced into 1/8-inch thick rounds
  • 2-1/2 cups heavy or light cream
  • Sea salt & fresh ground pepper, to taste
  • 4 oz. bacon
  • 3 medium leeks, white and light-green parts only, thinly sliced
  • 6 oz. grated Gruyère
  • 2 to 3 tsp. chopped fresh thyme
  • 1/4 tsp. freshly grated nutmeg
  • 1/2 cup fresh breadcrumbs
  • 1/4 cup finely grated Parmigiano-Reggiano
  • 2 tablespoons unsalted butter, melted

Serves 8

Position a rack in the center of the oven and heat the oven to 400°F. Butter or oil a 3-quart gratin dish; set aside.

Put the potatoes, cream , 1/2 tsp. salt, and a few grinds of pepper in a 12-inch skillet. Simmer, partially covered, over medium to medium-low heat, stirring occasionally and gently with a rubber spatula until the potatoes are barely tender when pierced with a fork or skewer, 8 to 12 minutes.

In a medium skillet, cook the bacon until browned and fully cooked. Set aside to cool, reserving 2 tablespoons of the fat in the skillet. Heat the reserved fat over medium-high heat and sauté leeks until tender, fragrant, and lightly browned. Season to taste with salt and pepper. When the bacon is cool, crumble it into small pieces.

Using a slotted spoon, transfer half the potatoes to the prepared gratin dish, spreading them evenly. Layer on the leeks, bacon, Gruyère, thyme, and nutmeg. Top with the remaining potatoes spreading them evenly, and pour over any liquid remaining in the pan.

In a small bowl, combine the breadcrumbs, Parmigiano-Reggiano, and melted butter.

Evenly scatter the topping mixture over the potatoes. Bake the gratin until it’s bubbly, the top is brown, and the potatoes are completely tender when poked with a fork or a skewer, 25 to 30 minutes. Let the gratin sit for at least 10 and up to 30 minutes before serving so the liquid is fully absorbed and the layers are cohesive.


Leave a comment
Share
  • Pin it
  • Share
  • Tweet
  • Share
  • Email

Artichoke Dip

3 / 5 / 153 / 28 / 15


artichokes Melissas

Walt's Wharf Artichoke Dip

Save
Print

Adapted slightly from Walt’s Wharf recipe.

  • 1/4 cup sesame oil
  • 1/4 cup olive oil
  • 3 tablespoons local honey
  • 2 tablespoons lemon juice
  • 2 teaspoons sea salt
  • 4 tablespoons Lea & Perrins Worcestershire Sauce
  • 1 cup mayo

Mix all ingredients together until well blended. Taste for seasoning and adjust as necessary for your taste. Refrigerate until ready to use.


Chef Debbi

Leave a comment
Share
  • Pin it
  • Share
  • Tweet
  • Share
  • Email

Citrus Olive Oil Cake

1 / 6 / 151 / 6 / 15

citrus

Most fruits and vegetables have a season, a time when they are picked and rushed to the market to maintain flavor and nutrition but when one talks about citrus it can be very confusing. Citrus ‘season’ really runs all year long with different varieties ripening at different times. During the summer months we have delicious Valencia oranges and Star Ruby Grapefruit, but you’ll find most citrus in season from fall until late spring.

In the market right now you’ll find Navel, Cara Cara and Moro Oranges, delicious Meyer Lemons and my favorite produce guru, Robert Schueller of Melissa’s Produce, recommends the Cocktail Grapefruit, Key Limes and Kishu tangerines! And all of us tangerines freaks know that come March those Ojai Pixie Tangerines start coming our way! The best of the best……

IMG_1122

Other than eating juicy, sweet citrus out of hand or in a dish our friends at Temecula Olive Oil crush seasonal citrus fruit, Blood Oranges or Meyer Lemons, at the same time they press their olives. While the Blood Orange Olive Oil is available year round, Meyer Lemon Olive Oil is seasonal usually beginning in early spring. If you see it on their shelves don’t hesitate, this oil sells out every year! I’ve used both Blood Orange and Meyer Lemon Olive Oil in this cake and each one is distinct and fabulous.

For those of you who can’t conceive of using an olive oil in a cake I urge to try this recipe, not only is it easy, it’s delicious. I like serving it with a little chopped citrus on the side or a handful of fresh raspberries.

 Click here for the recipe

Leave a comment
Share
  • Pin it
  • Share
  • Tweet
  • Share
  • Email

Clafoutis

12 / 5 / 1412 / 7 / 14

cherry clafoutis
Photo: Merlin Menu

Clafouti

Save
Print

I am all about easy baking and this is about as easy as it gets. This country-French dessert adapts well to almost any fruit and is topped with a batter and baked til bubbly brown. It can be served warm or room temperature.

  • Batter
  • 1 cup milk
  • 1/4 cup heavy cream
  • 2 tablespoons sugar
  • 3 eggs
  • 1 tablespoon vanilla
  • ½ teaspoon salt
  • 2/3 cup all-purpose flour
  • Fruit
  • 2 tablespoons butter, melted
  • 2 tablespoons sugar
  • 3 cups fruit, if whole, peel and chop or slice
  • Confectioners' sugar for dusting

Heat the oven to 400°F.

Beat together all the batter ingredients until smooth and frothy. Set aside to rest while preparing remaining ingredients.

Pour melted butter into a 9 or 10” shallow pan, quiche pan or cake pan and sprinkle with the 2 tablespoons of sugar spreading evenly. Place fruit over the sugar and cover with the batter.

Bake for about 30 minutes or until the clafoutis is puffed and brown on top. Dust with confectioners sugar and serve immediately.

Clafoutis will collapse quickly but will still be delicious.

Leave a comment
Share
  • Pin it
  • Share
  • Tweet
  • Share
  • Email

Apple Crisp

12 / 5 / 1412 / 5 / 14

Apple Crisp

Save
Print

Such a quick, easy recipe for a seasonal dessert; can be a great breakfast treat for those with a sweet tooth! Use an apple that is best for baking such as:

Jonathans and Jonagolds, Honeycrisp, Granny Smith, Melrose, Winesap, Braeburn, Rome Beauty.

  • Serves: 8
  • 4 cups sliced or diced apples
  • 1 tablespoon flour
  • ½ cup sugar
  • ¾ cup brown sugar
  • ⅓ cup butter
  • ¾ cup oatmeal
  • ¼ teaspoon baking soda
  • ½ teaspoon salt

Preheat oven to 350°. Combine the first three ingredients and place in a greased 8×8 baking dish.

Combine the remaining ingredients and sprinkle over the top of the apple mixture.

Bake 30 minutes. Serve warm

apple crisp


Photo: All Recipes

Leave a comment
Share
  • Pin it
  • Share
  • Tweet
  • Share
  • Email

Great Pepper Cookbook

8 / 4 / 1412 / 4 / 14

Shishito Crab Cakes lg
Do you know how to cook with peppers? Would you like to learn more about peppers? When you think about peppers do you automatically think peppers are hot? Depending on where a person grew up you’ve either had experience with peppers or you didn’t, I didn’t. I just found the right book to learn about how to incorporate peppers into my dishes. “The Great Pepper Cookbook: The Ultimate Guide to Choosing and Cooking with Peppers,” from the team at Melissa’s Produce and it is filled with all kinds of great information.

Seasonally inspiring and timed just right for the upcoming summer pepper season the book offers insight into how and when to use fresh or dried peppers or how to exchange the two. What the heck is The Scoville Scale (it determines the heat unit of a pepper) and is loaded with tasty recipes for any palate. From breakfast to dessert and drinks, you can learn to appreciate peppers in a new light.


melissa pepper book

One of my favorite dishes from the book are the Crab Cake Sandwiches using the flavorful Shishito pepper which is kind of new on the food scene. A sweet and mild small pepper that’s perfect to throw on the grill as a side with steak or chicken also. The book is filled with pictures and information on a large variety of peppers and if you’d like to get your hands on a copy or learn more from the Melissa Team they will be doing a demonstration and book signing this summer at Rancho los Alamitos in Long Beach. Sign up for this event before it sells out and come by to try some of the Melissa Teams tasty recipes. If you miss out on tickets to this event, you can always pick up a book on Melissa’s website, www.melissas.com
For information on the Rancho Los Alamitos event follow this link, http://rancholosalamitos.com/events/2014_pepper_workshop/index.html

Leave a comment
Share
  • Pin it
  • Share
  • Tweet
  • Share
  • Email

Ojai Pixie Tangerines

3 / 4 / 1412 / 4 / 14

tangerines

There is nothing as sweet and juicy as an Ojai Pixie Tangerine! Unfortunately they are in season for such a short time, you’ll find them available only until the end of April, if you’re lucky!
Sometimes Pixie tangerines can be difficult to find but you can order direct from Melissa’s Produce website (click here).

Here is a great winter salad featuring the best of the Ojai Pixie’s, enjoy during this short season.

Blue Cheese Tangerine-Apple Walnut Salad with
Dried Cranberries

Serves 4
¼ cup pomegranate vinegar
1 teaspoon Dijon mustard
3 tablespoons extra-virgin olive oil
Sea salt and pepper, to taste

1 bunch baby spinach leaves
1 apple, peeled, cored and diced into large chunks
2 tablespoons dried cranberries
2 tablespoons toasted walnuts
3 tangerines — peeled and sectioned

For the dressing:
In a small bowl, whisk together the vinegar, mustard and olive oil; season with salt and pepper to taste.

Lightly toss the spinach with enough dressing to coat leaves; place onto individual plates or a platter. Garnish with apples, cranberries, nuts and tangerine sections. Serve extra dressing on the side.


Related Posts Plugin for WordPress, Blogger...
Leave a comment
Share
  • Pin it
  • Share
  • Tweet
  • Share
  • Email

Posts navigation

Previous Page 1 2 … 9 10 11
Deb

Meet Chef Debbi

READ BIO

Join-Us Sign up for our newsletter to receive exclusive tips 'n tricks, and special offers on classes, tours, and more!

Recent Posts

  • Farm, Food & Wine Tour 2022
  • Osso Buco
  • New Classes 2022
  • Debs Kitchen Class Registration
  • Clean and Husk (strings and all) Corn on the Cob

Categories

BookCUT

What's in Your Pantry?

How to stock your pantry to create delicious dishes.

Learn Chef Debbi's pantry essentials and how to substitute ingredients for pantry staples in her basic recipes for quick and easy meals.
BUY BOOK>

FacebookTwitterInstagramGooglepinterest


© 2014, DEB'S KITCHEN
Angie Makes Feminine WordPress Themes