Deb's Kitchen - Farm, Food, Wine & Lifestyle Adventures
  • Facebook
  • Google
  • Twitter
  • Instagram
  • Pinterest
  • Email
Menu
Skip to content
  • Home
  • Blog
  • Events
    • Classes
    • Tours & Adventures
  • Edible Gardening
  • Preserving
  • Recipes
    • Appetizers
    • Soups and Salads
    • Main Dishes
    • Side Dishes
    • Desserts
  • About
    • Whats In Your Pantry
    • Ask Debbi
    • Deb’s Kitchen Botanicals
    • Press
  • Contact

Tag Archives: Melissa’s Produce

April Demo Cooking Class

3 / 1 / 18


Join us on

Thur.  April 12 or 26

6:30 – 8:30, approximately

Endive Spears with Blue Cheese, Pear, Candied Pepitas and Orange-Shallot Vinaigrette

Grilled Salmon with Citrus Salsa & Spring Micro Greens

Roasted Asparagus with Lemon Gremolata and Parmesan

Balsamic Strawberries in Meringue Nests with Crème Fraiche

$45.00

For reservations call

Temecula Olive Oil, 148 Main St. Seal Beach

(562) 296-5421

Sponsored by


Leave a comment
Share
  • Pin it
  • Share
  • Tweet
  • Share
  • Email

Alpine Strawberries

1 / 24 / 18

You’ll never have enough Alpine Strawberries, also called fraises des bois, to make a pie but they are so delicious with a scoop of vanilla ice cream or with a creamy panna cotta. I love them with my cereal in the morning fresh from the garden. Best grown in containers, in my opinion, they are small plants that will do well in partial shade or full sun. Mostly without runners I grow from transplants instead of seeds. I just never had any luck starting the tiny seeds. Alpine strawberries are related to wood (wild) strawberries and can be red or white with delicate white flowers. I think the red taste like perfume and the white are reminiscent of pineapple.

They like well-drained soil, rich in organic matter so that they drain well.  I amend my soil every fall and feed regularly with an organic fertilizer. Be careful not to cover the crown of the plant and keep the leaves off the soil. You can plant these much closer together than a bigger strawberry as the plants are small and grow slowly. Here in So. California my alpine strawberries start fruiting in Jan and finish up late fall. They do stop producing in summer if it gets too hot and sometimes I’ll move the pots to partial shade where they get morning sun. Other than protecting the delicate fruit from the birds, alpine strawberries are easy to grow and are pretty little plants in pots near my front door.

French Yogurt Cake

Save
Print

I love this bright lemony cake so much I adapted it slightly from Dorie Greenspan by adding these super sweet little strawberries, Alpine strawberries.

  • 1 1/2   cup all-purpose flour
  • 2         teaspoons baking powder
  •            Pinch of salt
  • 1         cup sugar
  • 1         lemon, grated and zest
  • 1/2      cup plain yogurt
  • 3         eggs
  • 1/4      teaspoon pure vanilla extract
  • 1/2      cup citrus olive oil
  • 1         cup Alpine strawberries, whole or halved

Center a rack in the oven and preheat the oven to 350 degrees F. Generously butter an 8 1/2-x-41/2-inch loaf pan and place the pan on a baking sheet.

Whisk together the flour, baking powder and salt.

Put the sugar and zest in a medium bowl and, with your fingertips, rub the zest into the sugar until the sugar is moist and aromatic.

Add the yogurt, eggs and vanilla and whisking vigorously until the mixture is very well blended.

Still whisking, add the dry ingredients, then switch to a large rubber spatula and fold in the oil and then the strawberries. You'll have a thick, smooth batter with a slight sheen. Scrape the batter into the pan and smooth the top.

Bake for 50 to 55 minutes, or until the cake begins to come away from the sides of the pan; it should be golden brown and a thin knife inserted into the center will come out clean. Transfer the pan to a rack and cool for 5 minutes, then run a blunt knife between the cake and the sides of the pan. Unmold, and cool to room temperature right side up on the rack.

Glaze (optional)

½ cup lemon marmalade mixed with 1 teaspoon water

To Make the Glaze:

Put the marmalade in a small saucepan or in a microwave-safe bowl, stir in the teaspoon of the water and heat until the jelly is hot and liquefied. Using a pastry brush, gently brush the cake with the glaze.

Leave a comment
Share
  • Pin it
  • Share
  • Tweet
  • Share
  • Email

Feb 2018 Cooking Demo

1 / 6 / 18

Join us on

Thur. Feb 8th or 22nd

6:30 – 8:30, approximately


Menu

Crab Imperial Stuffed Mushrooms

Baby Spinach Apple Salad with Pecans & Dried Cherries

Skirt Steak with Shallot Pan Sauce

Roasted Smashed Potatoes

Chocolate-Orange Panna Cotta w/Fresh Berries

$45.00

For reservations call

Temecula Olive Oil, 148 Main St. Seal Beach

(562) 296-5421

Sponsored by


Leave a comment
Share
  • Pin it
  • Share
  • Tweet
  • Share
  • Email

Cranberry, Apple & Pear Relish

12 / 13 / 17

Cranberry, Apple and Pear Relish

Save
Print

A perfect relish or conserve for fall and winter use. Serve it with chicken, beef, duck or other game meat; it also makes a great spread or dip mixed with cream cheese.

  • 2 cups peeled and chopped apples
  • 2 cups peeled and chopped pears
  • 12 oz. fresh cranberries
  • 2 1/2 cups sugar
  • 1 1/2 cups water
  • 2 orange, zested and juiced
  • 1/4 teaspoon nutmeg
  • 6 - 8 whole cinnamon sticks
  • 1 cup chopped walnuts

Makes 6 pints, approximately

In a large pot combine apples, pears, cranberries, sugar, water and orange juice.

Simmer, stirring frequently, for 15 minutes.

Stir in the nutmeg and walnuts, and then cook for 5 more minutes.

Use fresh or can for future use. To process follow these instructions.

Place a whole cinnamon stick in each sterilized jar, then ladle the hot relish into jars leaving 1/4″ headspace.

Process for 15 minutes in a boiling water canner.

Adapted from Farmers Daughter

Leave a comment
Share
  • Pin it
  • Share
  • Tweet
  • Share
  • Email

December Cooking Demo

11 / 7 / 17


Last Class of the Year

Festive Family Dinner

Thursday December 7th

6:30 – 8:30, approximately

Menu

Artichoke Bruschetta

Tomato Bisque with Gruyere & French Ham Croutons

 Italian Roasted Beef in Barolo Wine Sauce

Balsamic Butternut Squash, Brussels Sprouts & Pecans

Stuffed Shells with Homemade Ricotta

Cranberry-Orange Olive Oil Cake

$45.00

For reservations call  Temecula Olive Oil, Seal Beach

(562) 296-5421

Sponsored by

Leave a comment
Share
  • Pin it
  • Share
  • Tweet
  • Share
  • Email

Nov. Cooking Demo

10 / 18 / 17

Join us for our next cooking demo

Entertaining Menu’s

Thursday, 6:30-8:30, approximately

Nov 9th & 16th


Menu

Smoked Trout Canapés

Spinach Bacon Salad with Pine Nuts & Croutons

Roast Duck Breast with Blackberry-Orange Sauce

Pumpkin Risotto with Pomegranate Arils & Shaved Parmesan

Haricot Vert (French style Green Beans) with Bacon & Pearl Onions

Mini Pumpkin Cheesecakes

$45.00

For reservations call  Temecula Olive Oil, Seal Beach

(562) 296-5421

Sponsored by

Leave a comment
Share
  • Pin it
  • Share
  • Tweet
  • Share
  • Email

Chicken Stew Cassoulet

10 / 3 / 17


Chicken Stew Cassoulet

Save
Print
  • 8 chicken thighs
  • Sea Salt and pepper to taste
  • 2 tablespoons butter
  • 2 tablespoons canola oil
  • 1 small to medium onion, finely chopped
  • 4 carrots, cut in half and then sliced into half-moons about ¼” thick
  • 3 celery, sliced 1/4" thick
  • 3-4 cups chicken broth
  • 2 bay leaves
  • 1 tablespoon dried thyme, crushed
  • 1 lg. can whole tomatoes
  • 2 cups white beans
  • 1 cup bread crumbs, large pieces not fine

Rinse and pat dry the chicken. Trim any excess skin and fat.

Preheat oven to 375°.

Heat a large Dutch oven, add the butter and oil. Season the chicken with sea salt and pepper, place the chicken pieces skin side down in the pan and brown well on both sides. Don’t crowd the chicken in the pan, do this in 2 steps if needed.

Set aside and pour off most of the drippings leaving about 2 Tablespoons in the pan. Sauté the onions, carrots and celery, return the chicken to the

pan and add chicken broth, bay leaves, thyme, tomatoes, white beans and a little salt

and pepper. Cover and place into oven and cook 30 minutes.

Check to make sure that chicken is nearly cooked.

Add bread crumbs and return to the oven, uncovered. Cook until crumbs are

lightly browned, about 15 minutes.

Leave a comment
Share
  • Pin it
  • Share
  • Tweet
  • Share
  • Email

Soup Season

10 / 3 / 17

Photo: Christina Peters

I love fall and winter and I love to cook hearty stews and warming soups. One of the most important ingredients is stock or broth for your dish and homemade is the best. Most of the time spent making stock is hands off, it needs to simmer for a good 4 hours so prep time in the kitchen can be limited to about 1/2 hour. Cut most of that time in half by making the stock in your pressure cooker but I like the results better just simmered slowly on the back of the stove. (Besides it makes your house smell wonderful!) I’ve included a list of descriptives for stock, broth, stew, soup etc. And my recipe for a perfect stock; stock is made with bones and broth is made with pieces of meat and vegetables and is a little less hearty than stock. Keep some stock in your freezer for quick meals during the winter season. Recipe below but here are some descriptives of soups, stews etc.

Bisque:           a rich, thick usually smooth soup. Thickened either by pureeing or adding                         cream and usually made with some kind of seafood.

Chowder:      a thick, chunky soup

Stock:             clear savory liquid made from vegetables or meat on the bone

Broth:             similar to stock but made with just meat or vegetables, not a hearty as stock

Gazpacho:     a cold vegetable soup usually with tomatoes as main ingredient

Gumbo:         thick broth with creole seasonings and chunks of meat & vegetables

Stew:              thick soup with chunks of vegetables and/or meat

Soup:              thinner than a stew with less chunks

Guides for making stocks

Use mild flavored vegetables, onions, celery, carrots, potatoes, tomatoes

No oily fish such as salmon

Beef bones with marrow will have more flavor

Use chicken feet for great taste and lots of natural gelatin

Do not season stock with salt until after it’s cooked

For making soups or stews

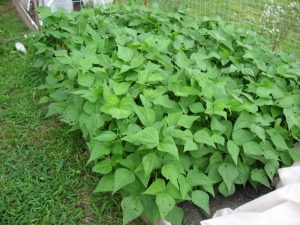
                        Any fresh or frozen veggie can be used. Do not defrost vegetable before      using,  just toss it into the stock.

                        Onion, peas, broccoli florets, celery, carrots, potatoes (will help to thicken soup also), corn, zucchini, peppers

                        Herbs

                        Basil, oregano, thyme, Italian parsley, crushed red peppers, Italian seasoning

                        Beans

                        Keep canned or frozen beans such as kidney, navy, white beans, pinto, black                    beans

Grains (pre-cook and freeze) Add at the end of cooking time

                        Farro, barley, rice, pasta, quinoa, beans

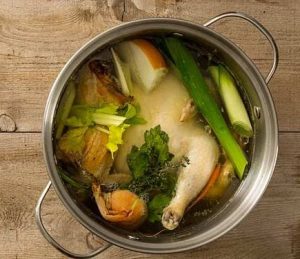
Chicken or Turkey Stock aka Bone Broth

Save
Print
  • 1 whole organic chicken, about 4 lbs., rinsed well, or
  • 3 # chicken pieces, backs, necks, wings, feet; these pieces will render a lot of gelatin (flavor) to your stock. Do not use livers but gizzards and heart are okay
  • 2 bay leaves
  • 3 sprigs of fresh flat-leaf parsley
  • 2 sprigs fresh thyme
  • 2 tablespoons cider vinegar, optional for bone broth
  • 1 large onion, quartered, leave skin intact but wash off any dirt from the root
  • 1 large carrot cut into thirds
  • 2 celery stalks cut into thirds, include some top leaves
  • 1 large leek, cut in half lengthwise and washed well between the leaves, cut into thirds
  • 6-9 whole black peppercorns

Place the chicken into a large stockpot and cover with cold water. Bring to a boil over high heat; reduce to a simmer and skim any foam that rises to the surface. This should take about 15 minutes.

After removing any foam add the cider vinegar (for bone broth), vegetables and herbs, bring back to a boil, turn heat to a simmer and cook 2 – 2 ½ hrs.

Remove from the heat and let the stock sit for 10 to 15 minutes, remove large chicken pieces and strain remaining stock through a cheesecloth-lined strainer. Cool by placing the container of strained stock in an ice water bath in the sink and then refrigerate overnight.

The next day, remove the fat from the stock by skimming with a ladle. The stock will keep for 3 days in the refrigerator or 3 months in the freezer. Be sure to label and date before freezing.

To adapt the recipe for Turkey Stock, roast a turkey back, neck, 2 wings and 1 package of chicken feet (yes, chicken feet have tons of flavor!) in the same manner as above.

For a deep rich flavor you can brown all your chicken pieces and vegetables, if desired, before making stock.

*Pressure Cooker or Instant Pot Directions

Place all pieces into the pot along with herbs, vegetables etc. Add 10 cups of cool water, cover and cook on high for 1 hour in your electric cooker. Let pressure cooker release naturally, strain and cool as above.


Leave a comment
Share
  • Pin it
  • Share
  • Tweet
  • Share
  • Email

Oct. Cooking Demo

9 / 30 / 1710 / 18 / 17

Join us for our next cooking demo

Thurs. October 12th & 19th

6:30 – 8:30, approximately

Reservations required (see below)

Oktoberfest in Seal Beach

Roasted Grape Focaccia with Goat Cheese

Pear Salad w/Cranberries & Caramelized Walnuts

Pork Tenderloin with Yukon Gold Potatoes, Apples & Shallots 

Caramelized Brussels Sprouts with Pancetta

       Chocolate Pumpkin Cupcakes


$45.00

For reservations call

Temecula Olive Oil

(562) 296-5421

Sponsored by

Photo: Hector Sanchez

Leave a comment
Share
  • Pin it
  • Share
  • Tweet
  • Share
  • Email

Gazpacho Couscous Salad

9 / 7 / 17

A perfect summer salad that you can make ahead; it actually is better the next day! An easy ‘from the pantry’ salad, adjust ingredients to what you have on hand, what you find from the farmers market or your own garden, or even some of last nights grilled chicken or shrimp. Serves 6

Couscous Gazpacho Salad

Save
Print
  • Couscous ~
  • 2 1/2   cups chicken, vegetable stock or water
  • 12        ounces couscous
  • 2          tablespoons butter
  • 1          clove garlic, smashed
  • 2          green onion, minced
  • 4          tablespoons Italian parsley
  •             Salt and pepper, to taste
  • 1/4      cup toasted pine nuts, or more
  • Dijon Vinaigrette ~
  • 1/2      cup red wine vinegar
  • 1         tablespoon Dijon mustard
  • 3/4      cup vegetable or olive oil
  • 1          small shallot, minced
  • 3          grinds herb seasoning, I use Italian
  •            Salt and pepper, to taste
  • Gazpacho Salad ~
  • 1          container (pint) cherry tomatoes, halved
  • 6          small Persian cucumbers, diced
  • 1          roasted red bell pepper, diced
  • 1          small red onion, diced
  • 2          stalks celery, diced
  • 1          tablespoon basil, chopped

Couscous

In a saucepan, add the stock, butter and couscous; bring to a boil, remove from heat stir in garlic and green onion, cover and let stand for 5 minutes. Remove garlic and fluff with a fork. Set aside to cool.

Vinaigrette   

In a small bowl add vinegar, mustard and shallot, whisk together. Slowly whisk in the oil in a thin stream to emulsify. Add seasonings to taste. Can be refrigerated for 3 weeks, bring to room temperature before using.

Salad

In a large bowl, add all chopped ingredients and toss with a little of the dressing. Let stand for 5 minutes. Toss couscous and vegetables together adding a little more dressing as necessary, to taste.

Leave a comment
Share
  • Pin it
  • Share
  • Tweet
  • Share
  • Email

September Cooking Demo ~ Instant Pot

8 / 23 / 17


Weeknight dinner ideas using Instant Pot (Pressure Cooker), Slow Cooker or a good old oven!

Instant Pot at Sur la Table

Did you just get an Instant Pot? One of the hottest new pieces of equipment in the kitchen. Here are some recipes to get you started. We’ll discuss how to adapt regular recipes to the Instant Pot and how to create your own. Even if you don’t own an Instant Pot all these recipes will have directions for regular cooking methods.

Menu

Tarragon & Sherry Deviled Eggs

Bib Lettuce Salad with Apples, Pecans, Pomegranate Seeds & Blue Cheese Sprinkles

Sesame Teriyaki Chicken with Rice & Green Onion

Glazed Baby Back Riblets with Baked Beans

Deconstructed Black Forest Cake

Food & Wine Magazine

Class held at Temecula Olive Oil Tasting Room, Seal Beach, Thur. Sept 14 & 28

6:30 – 8:30, approximately

Reservations required

$45.00

For reservations call

Temecula Olive Oil

(562) 296-5421

Sponsored by

Don’t have an Instant Pot? The link below will take you to Amazon.

Leave a comment
Share
  • Pin it
  • Share
  • Tweet
  • Share
  • Email

Green Beans, Bacon and Caramelized Shallots

8 / 22 / 178 / 23 / 17

Grow a Second Crop of Green Beans

In Southern California we are lucky enough to grow a fall crop of beans. With warm days still ahead the beans will sprout and grow quickly. Bush beans are your best bet, with shorter days to harvest than pole beans you should be able to harvest in just 45-50 days. Check your seed packet for harvesting information.

There are three types of bush beans, snap beans (eat the pod & all), shelling beans (eat the beans inside the pod like peas) or dried beans. Dried beans you’ll want to leave on the plant until everything has dried up, pick the dried pods and put into a grocery bag. You can knock the bag around to remove the shell or pull the dried pod away from the beans. I like to freeze the beans for 24 hours to kill any pests that may have hitched a ride. Then store in a glass jar or other container in your pantry, away from heat and light. When you’re ready to use them, treat them like any other dried bean (that’s another story….)

Most bush beans don’t need to be trellised, and they produce most of their crop all at once. For a great harvest and good use of space, plant Square Foot Gardening style, 9 plants to a square foot.

To get the best crop inoculate your bean seeds before planting. Beans, peas and all legumes ‘fix’ nitrogen into the soil. The inoculant, Rhizobium leguminosarum,  is a nitrogen fixing bacteria. These bacteria “infect” the legumes growing in the soil and cause the legumes to form the nitrogen fixing nodules that make peas and beans bombshells.
You should be able to find the inoculant at any garden center or nursery. It can also be ordered from www.groworganic.com (Peaceful Valley Farm Supply).

While you are digging the holes for the seed, soak the seeds in water for about ½ hour. Dig your hole and sprinkle a generous helping of inoculant into the hole. Water and then plant your seeds. They’ll take up to 10 days to sprout, don’t overwater while you are waiting for them to poke up from the ground, overwatering can cause the seed to rot before it sprouts. Watch out for birds as well, they love seeds! I like to cover my bed with a floating row cover until the seeds are up and have several sets of leaves.

Give the plants 2 – 3” of water a week and you can side dress with a little compost. I mulch my beds with straw to help keep water evaporation down and to keep weeds from sprouting.

Plant companion plants near beans for the best growing bed, they like to grow near beets, cucumber, nasturtiums, peas and radish.

Watch for pests such as a cucumber beetle, bean beetle or weevil. I planted my beans near basil which is usually a good pest deterrent but this year those white butterflies (which are really cabbage moths) laid eggs on the basil and the little worms devoured my newly sprouted beans. So I planted a new round because I love green beans, especially in the fall. I freeze some for soups when winter comes and hopefully have enough until next spring when I can get some more in the ground.

Here’s an easy side dish recipe for you to try.

Green Beans with Smoked Bacon & Caramelized Shallots

Save
Print

Serves 6
* To blanch green beans: Fill a large bowl with ice and cold water leaving room for green beans. Bring a large saucepan full of water to a boil and add green beans and a good helping of salt, cook for 1-2 minutes, drain the beans and plunge them into the bowl of ice water. Let them cool, drain and dry well.

  • 2 pounds haricots verts (thin green beans), trimmed, blanched and dried well*
  • ½ pound applewood smoked bacon
  • 3 large shallots, quartered
  • 2 tablespoon olive oil
  • 2 tablespoons red wine or balsamic vinegar
  • Sea salt & freshly ground black pepper

Cook bacon until crisp. Remove with a slotted spoon, and drain on paper towels, reserving 2 Tbsp. drippings in skillet.

Add olive oil to the pan with the bacon drippings then add the quartered shallots and sauté until browned. Add the vinegar, stir well, then add the green beans and toss until coated with oil, cook for another minute then season with salt and pepper and toss with bacon, serve hot.

Related Posts Plugin for WordPress, Blogger...
Leave a comment
Share
  • Pin it
  • Share
  • Tweet
  • Share
  • Email

Posts navigation

Previous Page 1 2 … 4 5 6 7 8 … 11 12 Next Page
Deb

Meet Chef Debbi

READ BIO

Join-Us Sign up for our newsletter to receive exclusive tips 'n tricks, and special offers on classes, tours, and more!

Recent Posts

  • New E-Book!
  • From the Pantry
  • Spaghettini at Home
  • Growing Corn
  • Spring IS Coming!

Categories

BookCUT

What's in Your Pantry?

How to stock your pantry to create delicious dishes.

Learn Chef Debbi's pantry essentials and how to substitute ingredients for pantry staples in her basic recipes for quick and easy meals.
BUY BOOK>

FacebookTwitterInstagramGooglepinterest


© 2014, DEB'S KITCHEN
Angie Makes Feminine WordPress Themes