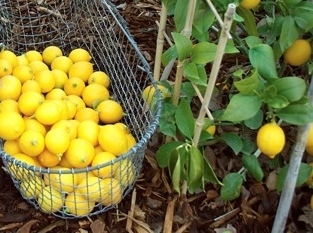
The bright star of the season, Meyer Lemons are the sweetest lemons to use in cooking. Thin-skinned, juicy and brightly colored you can use every part of the lemon, well, except maybe the seeds! In season now you can find them in all markets and at your local farmers market. If you have your own tree about now you might be wondering what to do with all those lemons. If you have trouble finding them you can call our friends at Melissa’s Produce and they can fill up your pantry!
Below you’ll find a few of my favorite recipes.
How to choose, store and use beautiful Meyer
Lemons
Meyer Lemon Season (Commercial) Nov-May
Home Tree will fruit late Summer-April/May
Choose, Store and Use Meyer Lemons:
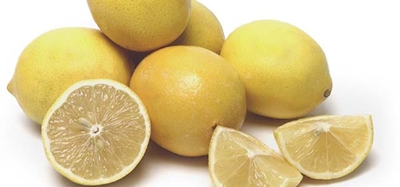
Pick lemons that have a smooth, yellow skin with no signs of bruises or cuts. Lemons that are heavy will have more juice in
them; unfortunately, Meyer lemons also contain many seeds. Easily seeded if cut in half, most of the seeds are centered in the middle of the fruit.
Store lemons in a bowl on the counter in a cool place with no direct contact with the sun. If the lemons begin to become soft, refrigerate and use within a few days. If using refrigerated lemons, let them come to room temperature if possible. Roll all lemons around on the counter to help free up the juice.
Extra lemon juice can be poured into ice cube trays, frozen and then placed into a freezer bag and used within 6 months.
Grow:
Meyer lemon trees grow well in pots in So. California, use a fast draining soil. They are hungry fellows so feed with an organic citrus fertilizer according to directions. They love the So. California sunshine but not so much our sometimes-windy weather. Meyer lemons like to be moist but not wet, deep infrequent watering and don’t let water sit in the liner or pot. If the weather threatens to freeze, water well and cover with a blanket or row cover at night, be very careful not to know off the fruit or flowers on the tree. Feed with an organic citrus food as directed and keep a close watch for citrus pests. Fruit will hold a long time on the tree, make sure they are nice and yellow before picking and after fruiting a little light pruning, if necessary will keep them compact and tidy.
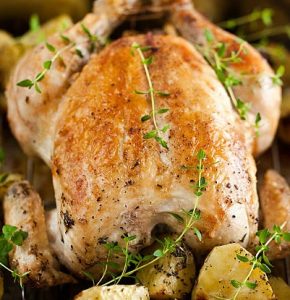
Lemon Roasted Chicken
- Serves 4
- 1 whole chicken -- rinsed, drained and dried
- 1 medium onion -- peeled and chopped
- 3 baby carrots -- peeled and chopped
- 3 celery stalks -- cut into chunks
- 1 lemon -- zested and juiced; preferably Meyer lemon
- 1 bunch Italian flat leaf parsley -- minced
- 1 bunch fresh sage -- minced
- 1/2 bunch fresh thyme -- minced
- 2 tablespoons butter -- room temperature
- 1 tablespoon lemon olive oil, butter or regular olive oil
- Salt and pepper
- 1 cup white wine
- 1 cup chicken stock
- 2 tablespoons chicken demi glace -- optional for sauce
Preheat oven to 400°.
Wash and dry chicken inside and out then dry well. Fit chicken into a roasting pan (you want no more than 1" of space on any side of the chicken otherwise the juices will burn).
Mix together onion, carrot, celery, lemon zest, and 1/2 of the minced herbs. Loosely stuff cavity with some of the ingredients, place the remainder on the bottom of the roasting pan and place chicken on top of the aromatic vegetables.
Mix remaining minced herbs with butter. Gently separate the chicken skin from the breast meat and carefully rub herb butter on breast under the skin.
Rub the chicken with lemon olive oil and season with salt and pepper. Squeeze lemon over chicken and place rind into cavity. Insert probe thermometer into thigh and set for 165 degrees. Pour half of the wine and chicken stock in the bottom of the pan and place, uncovered in hot oven.
Baste after 1/2 hour, if you don't have enough juice in pan use some chicken stock. Do not cover bird until browned and then loosely place foil over breast. If wings start to brown to early wrap with foil.
Remove chicken to a warm plate and loosely cover with foil. Let rest for 10 minutes before carving.
Remove some of the fat in the pan by using a paper towel or ice cubes. (Dredge the paper towel through the juices to pull out some of the fat or pour off the juices into a heat proof measuring cup. Add a few ice cubes; the fat will stick to the cold cube, discard cube. You may have to do this several times).
Put the roasting pan on top of the stove over medium-high heat and bring a boil, add remaining wine and stock scraping the fond (the yummy pieces stuck to the pan) from the bottom of the pan. Reduce by half, add demi-glace if using and serve with chicken.
Photo: Annabelle Breakey; Styling: Dan Becker
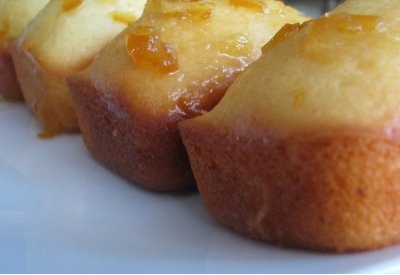
French Yogurt Cake
I love this bright lemony cake so much I adapted it slightly from Dorie Greenspan by adding these super sweet little strawberries, Alpine strawberries.
- 1 1/2 cup all-purpose flour
- 2 teaspoons baking powder
- Pinch of salt
- 1 cup sugar
- 1 lemon, grated and zest
- 1/2 cup plain yogurt
- 3 eggs
- 1/4 teaspoon pure vanilla extract
- 1/2 cup citrus olive oil
- 1 cup Alpine strawberries, whole or halved
Center a rack in the oven and preheat the oven to 350 degrees F. Generously butter an 8 1/2-x-41/2-inch loaf pan and place the pan on a baking sheet.
Whisk together the flour, baking powder and salt.
Put the sugar and zest in a medium bowl and, with your fingertips, rub the zest into the sugar until the sugar is moist and aromatic.
Add the yogurt, eggs and vanilla and whisking vigorously until the mixture is very well blended.
Still whisking, add the dry ingredients, then switch to a large rubber spatula and fold in the oil and then the strawberries. You'll have a thick, smooth batter with a slight sheen. Scrape the batter into the pan and smooth the top.
Bake for 50 to 55 minutes, or until the cake begins to come away from the sides of the pan; it should be golden brown and a thin knife inserted into the center will come out clean. Transfer the pan to a rack and cool for 5 minutes, then run a blunt knife between the cake and the sides of the pan. Unmold, and cool to room temperature right side up on the rack.
Glaze (optional)
½ cup lemon marmalade mixed with 1 teaspoon water
To Make the Glaze:
Put the marmalade in a small saucepan or in a microwave-safe bowl, stir in the teaspoon of the water and heat until the jelly is hot and liquefied. Using a pastry brush, gently brush the cake with the glaze.
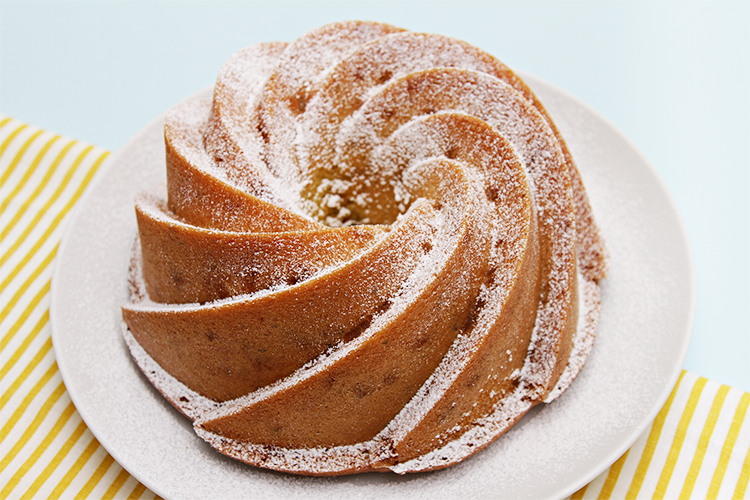
Citrus Olive Oil Cake
You can make this cake with any flavored or un-flavored olive oil that you like. Instead of poppy seeds try adding some dried cranberries or cherries. For serving dust with powdered sugar or make a citrus glaze with orange or lemon juice mixed with some powdered sugar and drizzle over the top of the cake, I like serving this with fresh raspberries on the side and a dollop of freshly whipped cream wouldn’t hurt either!
I’ve used cake pans, bundt cake pans and small Mason jars for this cake, just be aware of your baking time, test by inserting a clean toothpick into the center of the cake and it comes out dry.
- 2 cups flour
- 1 ¼ cups sugar
- 1 teaspoon baking powder
- 1 teaspoon baking soda
- ¼ teaspoon salt
- 3 large eggs, beaten
- 1 ½ cups whole milk
- ½ cup Orange olive oil, or any flavored olive oil
- 1 orange, zested
- 1 teaspoon vanilla
- ½ cup sliced almonds
- 1 tablespoon poppy seeds, optional
Preheat the oven to 350°.
Sift together the flour, sugar, salt, baking powder and baking soda Make a well in the center of the dry ingredients and whisk in the eggs, milk, olive oil, zest and vanilla.
Add the almonds and poppyseeds to the batter, and mix with a spatula or wooden spoon.
Pour the batter into a greased Bundt cake pan. Bake for 55 to 60 minutes, until the cake is golden on top. Cool the cake, invert on a plate and dust with confectioners sugar if you like.
If using Mason jars, spray the inside of the jar with oil spray and fill only 2/3 of the jar with batter. Place jar on a baking sheet and when all jars are done place the sheetpan into the oven and bake accordingly. Check the cakes at 30 minutes and then every 5 minutes until a toothpick comes out clean.