Deb's Kitchen - Farm, Food, Wine & Lifestyle Adventures
  • Facebook
  • Google
  • Twitter
  • Instagram
  • Pinterest
  • Email
Menu
Skip to content
  • Home
  • Blog
  • Events
    • Classes
    • Tours & Adventures
  • Edible Gardening
  • Preserving
  • Recipes
    • Appetizers
    • Soups and Salads
    • Main Dishes
    • Side Dishes
    • Desserts
  • About
    • Whats In Your Pantry
    • Ask Debbi
    • Deb’s Kitchen Botanicals
    • Press
  • Contact

Tag Archives: recipes

Beef & Barley Soup

1 / 7 / 161 / 19 / 16

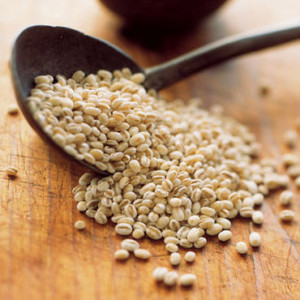
Barley

Beef Barley Soup

Save
Print

The flavor of this soup relies on using a good and flavorful beef stock. Read the label to make sure it’s not over salted. Or you could try making a batch of your own!

  • 1 tablespoon olive oil
  • 1 tablespoon unsalted butter
  • 1 pound beef stew meat or
  • 1 ½ cups leftover beef, chopped or shredded
  • Sea Salt and ground pepper
  • 1 cup pearl barley, cooked*
  • 1 small leek, diced
  • 1 large carrot, peeled and diced into bite sized pieces
  • 1 medium stalk celery, peeled and diced as you did the carrots
  • 1 medium onion, diced similar size to carrot and celery
  • 4 cups good beef stock

Heat the olive oil and butter in a Dutch oven or pressure cooker**.

Season the meat with salt and pepper and brown in batches, don’t crowd the meat or it will steam and not brown. Remove the meat and set aside. If using already cooked meat skip this step and jump ahead.

Add a little more olive oil to the pan if necessary, add the vegetables and cook over medium heat, stirring occasionally, until the vegetables soften, about 5 minutes.

Add the stock and bring to a boil. Lower the heat to a simmer and cook for 1 hour.

Add the barley and the reserved meat; simmer the soup for another 15 or 20 minutes, until the barley is tender. Season with a little salt and pepper if needed and enjoy.

To cook barley, bring 4 cups of water to a boil and add the barley. Simmer uncovered for 30 minutes, drain, and set aside.

**To pressure cook the soup: After browning the meat, add the stock and barley to the pan, place the lid on the pressure cooker, bring to full pressure and cook for 10 min. I let the pressure cooker naturally release pressure before continuing.

Add vegetables and return to pressure over high heat. Cook 15 minutes and let pressure release. Season to taste with salt and pepper.

Barley photo credit, Fine Cooking.  To read about barley follow this link, Fine Cooking-Barley


2 Comments
Share
  • Pin it
  • Share
  • Tweet
  • Share
  • Email

How To Make Perfect Gravy

12 / 15 / 15

Christina Peters, The Food Shooter, and I decided we needed to make a second video using the Perfect Stock recipe and this is what we offer you today. You will have Perfect Gravy for your holiday, just follow our simple tips!

Leave a comment
Share
  • Pin it
  • Share
  • Tweet
  • Share
  • Email

Braised Short Ribs

12 / 1 / 1512 / 1 / 15

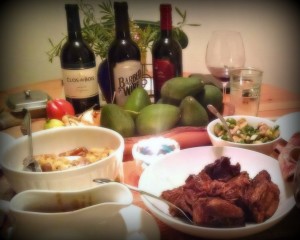
short ribs-debskitchen


Easy Braised Short Ribs

Save
Print

Braising a tough cut of meat over a long period of time makes the meat deep, rich and delicious. With a small amount of preparation and a long cooking time these are easy to make and warms you up on those cold winter days. Make extra! You’ll want them for leftovers, you can make a ragu out of them, a pot pie or even a Shepherds pie for quick weeknight dinners. You’ll get more flavor out of the short ribs if they are on the bone, they will fall right off the bone after their long slow cooking so they’ll be easy to remove.

Serves 4

  • Olive oil
  • 1/3 cup flour (or more as needed)
  • 2 teaspoons sea salt
  • 1 teaspoon ground pepper
  • 4 pounds short ribs on the bone
  • 1 brown onion, chopped
  • 1 medium carrot, roughly chopped
  • 2 stalks celery, roughly chopped
  • 1 tablespoon tomato paste (double concentrate from a tube-found in the ‘Italian’ section
  • 2 tablespoons flour
  • ¼ cup dry red wine
  • 1 qt. beef stock, may use chicken stock
  • 1 bouquet garni (1 bay leaf, 1 sprig thyme, 2 sprigs Italian parsley tied together in cheesecloth

Heat oven to 350°.

Mix flour, salt and pepper together in a shallow bowl or on a plate.

Heat a large Dutch oven over medium high heat; add enough oil to coat the bottom of the pan.

Dry short ribs well and dredge in the flour mixture, shake off the excess and place the meaty side into the hot oil. Do not crowd the meat in the pan or it will not brown properly. This is the most important step in braising so take your time. Remove the ribs, set aside and continue until all ribs are browned.

In the same pan, add more oil as necessary, add onions, carrots, celery to the pan and sauté until lightly browned.

Add tomato paste and stir to coat all the vegetables and cook the paste a little, about 2 minutes.

Add flour and stirring constantly cook for another 5 minutes without burning. The flour may turn a little dark but that’s fine.

Add the dry red wine to the pan and scrape the bits that have stuck to the bottom of the pan. Let reduce and thicken slightly. Remove from the heat.

Return the ribs to the pan, cover with stock and add the bouquet garni. Put the lid on the Dutch oven and bake for 3 hours. Remove bouquet garni.

Juices may be thickened into gravy with a beurre maníe, roux or cornstarch slurry.

Beurre Manie, Roux, Cornstarch Slurry

Save
Print

Beurre Manie

Mix together equal parts softened butter and flour until it looks like thick butter and all the flour is incorporated.

Roux

Melt 2 Tb. butter in a pan, add 2 Tb. flour, whisk together and cook until lightly browned

Cornstarch Slurry

2 parts cold water mixed with 1 part cornstarch

Whisk any of these into your hot liquid, stirring until thickened. Don't over-cook the cornstarch slurry or it will start to break down and become thin again.

Leave a comment
Share
  • Pin it
  • Share
  • Tweet
  • Share
  • Email

Book Signing & Wine Tasting

11 / 17 / 1511 / 17 / 15

Saturday & Sunday, Nov. 21 ~ 22 Events!

logo-2

DON’T MISS THIS WEEKEND
IN TEMECULA!

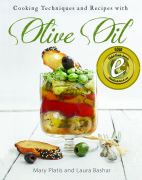
Mary Platis, Author of Cooking Techniques & Recipes with Olive Oil &
Chef Debbi, Author of ‘What’s In Your Pantry’
are teaming up to bring you
Cooking From The Pantry Series!

Book Covercover-award

First stop
Temecula Olive Oil Co.
Temecula tasting Room
Cooking Class Demo-Wine Tasting & Book Signing
Sat. Nov. 21st
12 – 2 $45.00

Menu
Mediterranean Vegetables in Olive Oil
Fresh Tomato Risotto
Baby Beets and Brussels sprouts Salad
Turkey Rollatini with White Wine, Porcini Mushroom Pan Sauce
Pumpkin Olive Oil Cake with Vanilla & Fig Balsamic Compote

For Temecula Reservations please call:
951-693-0607

Second stop

Sunday, Nov 22nd
Book Signing and Wine Tasting 12 ~ 2

Sponsored by

Leave a comment
Share
  • Pin it
  • Share
  • Tweet
  • Share
  • Email

Pie Crust

11 / 17 / 1511 / 17 / 15

Nothing beats a great pie, perfectly balanced filling and a tender, flaky piecrust. Piecrusts are easy to do, don’t let them intimidate you! My Grandmother taught me her secrets to a good crust, use good butter (unsalted), keep all of your ingredients very cold and work quickly. So there’s a little more to it than that but remember those three things and you’ll be fine.

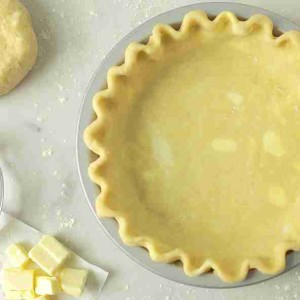
pie-crust-guide

This recipe calls for shortening which creates a tender, flaky crust, my Grandmother used lard and if it’s available to you it may be a better choice than shortening (which is another discussion). If you’d rather not use lard or shortening you could use all butter and the pie will be just as delicious.

Another trick that I picked up from King Arthur Flour is instead of just cutting your piecrust in half; cut it in 2/3 and 1/3 discs. The bottom of the pie will take more crust because it will hold the entire filling and the top crust only needs to cover all the ingredients. Well, duh…..why we never thought of that before! (See this is probably why I don’t bake much).

If you’d like to pre-make your pie crust you could freeze it two ways; one freeze the disc or roll the crust out, fit it into the pan and freeze, defrost overnight in the refrigerator and then continue with the recipe.

I cut the butter into the dry ingredients in the food processor, it takes less time, and just pulse it a few times until it looks like peas and you’ll be fine. I like to put the flour/butter ingredients into a bowl and incorporate the ice water using my fingers and tossing the dough until it comes together, that way I make sure I’m not adding too much liquid. I turn it out onto a rolling mat while it’s still very crumbly and bring it all together quickly by rolling and kneading lightly. I add only enough flour to the rolling mat as needed to keep the dough from sticking to the mat; I use a bench or dough scraper to actually fold it all together. Once the water hits the dough you begin developing gluten, which can make the dough tough so work it as little as possible at this stage. Press the dough into discs and refrigerate for at least an hour and then roll out and blind bake as described in the recipe. Blind baking helps keep the crust light and flaky, especially with a wet filling. Protect the edges of the crust if they start to brown by using a pie shield or cover with the edges with foil. Bake up some pies today~ Happy Holidays!

Perfectly Flaky Pie Crust Recipe

Talisman Designs Adjustable Pie Crust Shield, BPA-free Silcone, Red, Fits 8.5″ – 11.5″ Rimmed Dish

Leave a comment
Share
  • Pin it
  • Share
  • Tweet
  • Share
  • Email

Holiday Gifts to Make

11 / 5 / 15
Sat. Nov. 7th
10 – 11 a.m. Free

How to Make Gifts from the Garden

Chef Debbi will also have some seasonal spices and holiday botanicals
Pick up a copy of ‘What’s In Your Pantry’ for holiday gift giving
A great hostess gift!

Join us for some conversation and a tasty bite!

The Plant Stand 
2972-A Century Place
(In the back)
Costa Mesa, Ca
(714) 966-0797

Leave a comment
Share
  • Pin it
  • Share
  • Tweet
  • Share
  • Email

How to Choose and Sharpen Kitchen Knives

11 / 3 / 1511 / 3 / 15

One of the most important tasks you can do to get ready for any event or holiday is to make sure that your knives are sharp. It’s so much easier to cut yourself with a dull knife (really), and a sharp knife makes chopping a dream. Sharpen your knives when the time changes, this makes it easier to remember to drop your knives at the cutlery store or with the farmers market knife specialist. There are electric knife sharpeners galore or you can learn the old fashioned way with a whetstone and mineral oil. I should also mention here that a knife ‘steel’ does not sharpen your knife. (The steel is the long piece that comes with the knife block that you don’t really need-the knife block, not the steel.) The steel is designed to hone the edge of your knife between sharpening and should be used prior to any use of the knife. Be sure to wipe the edge of the blade carefully after honing.

Here is an excerpt from my book, ‘What’s In Your Pantry‘ about knives.
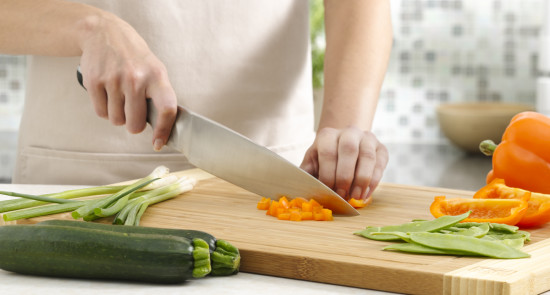
knife chopping

Photo: chowhound

Forged construction. A forged knife is one that’s been squeezed in a die (a type of mold) with tons of force. This strengthens the knife by aligning the steel molecules, like wood grain, and also makes the steel’s edge more consistent so it will both take and hold a better edge.

Stamped construction. Provided they’re made from good-quality steel, stamped knives (which have been punched from sheet steel, like how you use a cookie cutter) are a good low-cost alternative to forged knives. But given the easy availability of affordable forged knives, I’d say you should bypass stamped knives altogether.

Full-tang designs. A full tang knife is one in which the blade’s steel extends into the handle for its entire length. The myth is that this is necessary for strength. In the kitchen, a full tang is not necessary, although a full tang can help balance a knife.

Hollow-ground designs. It’s become quite fashionable to have little hollows, known as grantons, ground into the sides of the blade. In theory, they minimize blade-to-food friction and prevent sliced foods from sticking to the blade. I’ve found this is true about 10 percent of the time.

Knives

Chef’s Knife:

This is the most important knife in your arsenal, the one you’ll reach for 95 percent of the time. No matter how tight your budget, get yourself a great chef’s knife. If you need to save money, do it with the other knives.

Santoku

This has become a tremendously popular blade style, and for many cooks the Santoku has supplanted the traditional French chef’s knife as their go-to blade. It’s offset, like a French chef’s knife, but tends to be shorter (less versatile). And many have essentially straight cutting edges, without the smooth curve that helps promote a rocking/paper-cutter motion useful for mincing and chopping.

Paring

The paring knife is going to be your second-most-used blade for fine detail work like trimming meats and vegetables, or peeling and de-seeding fruits.

Bread/Serrated Knife

Serrated blades rip through food, so sharpness isn’t that essential. Quality steel is less important than blade length—longer is better (I like 10 inches, don’t settle for less than 8 inches). Offset blades are preferred—otherwise you have to cut near the edge of the cutting board to stop your knuckles from hitting the surface.

Slicing/Carving Knife

Look for a knife that’s not too tall, so it’ll be easier to make curving slices (handy when circumnavigating a turkey rib cage, or the bone in a roast). And be sure it’s at least 10 inches long, so you can slice through with the fewest number of strokes for a smooth surface and clean presentation.

Boning/Filleting Knife

This is a very special-purpose knife, and in this once instance it’s actually preferable to have a stamped blade. Forged blades are stiffer, and a flexible blade follows bones more closely for better yield. Be sure you choose a knife with a textured grip—boning and filleting is a greasy, messy operation, and you don’t one that knife to slip.

Here’s a little Winter Soup recipe for you to practice your knife skills,

Minestrone Soup with Pesto

Buy the Book

Book Cover

Leave a comment
Share
  • Pin it
  • Share
  • Tweet
  • Share
  • Email

Pumpkin Blood Orange Olive Oil Cake

10 / 18 / 1511 / 20 / 15

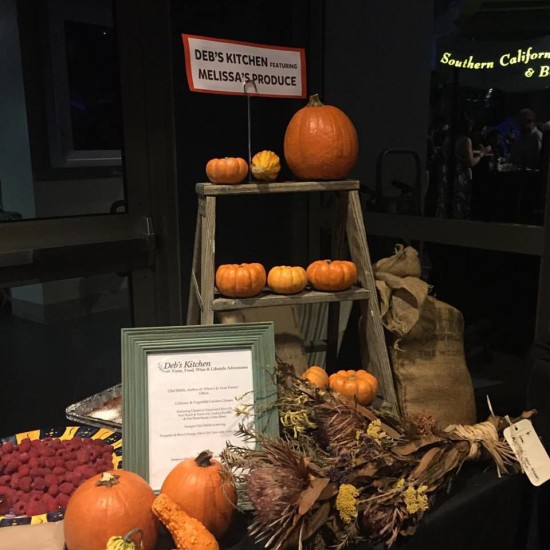
Aquarium Event

I served this last night at The Aquarium of the Pacific’s Sea Fare fund raising event and it was declared by the President of the Aquarium ‘the best food at the event’. Now that was very nice of him but there was some really tasty food there from local restaurants. It was a wonderful event with music, food and wine and lots of grateful fishes. Thanks to everyone who came out and those who stopped by my booth, I’m happy you enjoyed the cake! And you can learn how to make this cake and more at my cooking classes here in Seal Beach at Temecula Olive Oil‘s tasting room, click on Nov. for the upcoming menu!

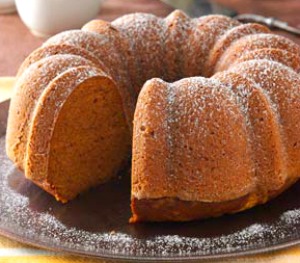
pumpkin bundt cake

Pumpkin Olive Oil Cake

Save
Print

Try different flavored olive oils for this cake. Orange, lemon or a lightly flavored olive oil, don’t use a big heavy tasting oil as it will overpower the pumpkin and spice in the cake.
You could make this cake into a sheet cake, round cakes or even cupcakes; just remember to adjust the cooking time.

  • 3 cups all-purpose flour
  • 2 teaspoons baking soda
  • 1 teaspoon ground cinnamon
  • 1 teaspoon ground nutmeg
  • ½ teaspoon salt
  • ¼ teaspoon ground cloves
  • 1 1/2 cups sugar
  • 1 cup olive oil
  • 3 eggs
  • 1 can (15 ounces) solid-pack pumpkin (or 2 cups freshly roasted sugar pumpkin)
  • 1/4 cup powdered sugar
  • 1 package cream cheese, room temperature
  • 1 splash of vanilla, optional

Preheat oven to 350°.

In a medium-sized bowl, stir together flour, baking soda, cinnamon, nutmeg, salt and cloves.

Combine sugar and oil in a large bowl with a rubber spatula until blended.

Add eggs, one at a time, beating well after each addition.

Add flour mixture to egg mixture alternately with pumpkin in three batches, beating

well after each addition.

Transfer to a greased Bundt cake pan.

Bake 60-65 minutes or until toothpick inserted near the center comes out clean.

Cool for approximately 10-15 minutes before inverting onto a wire rack.

Remove pan carefully from cake and cool completely.

Easy Cream Cheese Frosting

Combine all ingredients in the bowl of a stand mixer fitted with a paddle attachment, and beat at low speed until sugar is incorporated.

Increase speed to medium high and beat until frosting is light and whipped, about 3 to 4 minutes. Use to top cookies, cupcakes, or cakes


Leave a comment
Share
  • Pin it
  • Share
  • Tweet
  • Share
  • Email

Cooking Class

10 / 18 / 1510 / 18 / 15

Temecula Olive Oil Co., Seal Beach

November Class

Thur. Nov. 12th
6:30-8:30 (approximately)
Braciole


Smoked Trout Canapés with Pickled Onions and Mascarpone

Pomegranate, Bacon and Brussels Sprouts Salad

Braciole

Italian Stuffed Beef Rolls

Mushroom Bolognese

Chocolate Raspberry Linzertorte


10 – 20% off on all purchases the night of the class


Class Sponsored by

1logo 2004

NOW TAKING RESERVATIONS!

Seal Beach Tasting Room By Reservation only, call: 562-296-5421

Classes are $45; Pre Paid Reservations only

Feel free to BYOB

DKB-12

Leave a comment
Share
  • Pin it
  • Share
  • Tweet
  • Share
  • Email

Apple Recipes

10 / 6 / 1510 / 6 / 15

Apple, Pomegranate & Gorgonzola Salad

Save
Print
  • 1/4 cup white balsamic vinegar
  • 1/2 cup Extra Virgin Olive Oil
  • salt and pepper to taste
  • 1 apple, tart
  • 1/4 cup toasted pine nuts
  • 2 ounces Gorgonzola cheese
  • Pomegranate seeds
  • Salad greens

Whisk the vinegar, olive oil and salt and pepper in a small bowl.

Slice the apple into matchsticks.

Crumble the Gorgonzola cheese into small pieces.

Place your salad greens in a large bowl and toss with the seeds, pine nuts, cheese and apples, reserving a few of all the add-ins. Adjust the seasoning to your liking. Drizzle a little of the dressing onto the greens and toss gently. Drizzle just enough dressing onto the salad to lightly coat the leaves - not too much. Add additional salt and pepper if you like and scatter the reserved toppings over the salad.

Applesauce

Save
Print
  • 3 pounds apples, Gala, Honeycrisp or Jonagold
  • 2/3 cup apple juice, orange juice or water
  • 8 tablespoons sugar
  • 3 teaspoons cinnamon
  • 1/4 teaspoon nutmeg

Core, peel and cut the apples into medium sized pieces. Place all ingredients into a saucepan with lid and simmer over low heat until apples are very tender, about 45 minutes. Put through a food mill to create a soft creamy applesauce or use a potato masher and serve chunky, best served warm.

Leave a comment
Share
  • Pin it
  • Share
  • Tweet
  • Share
  • Email

Harvesting Tomatoes

9 / 7 / 159 / 8 / 15

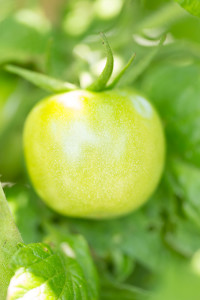
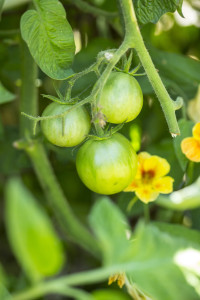
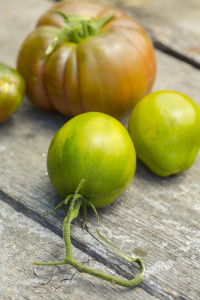
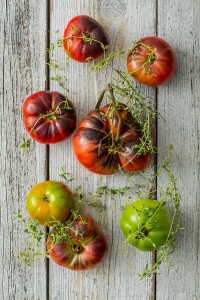
This was a great year for tomatoes! My early tomatoes are giving it one last push before they succumb and my late (heirloom) tomato bushes are full with big beautiful green tomatoes. What we haven’t been able to eat (and share) I’ve been freezing for later use. Remember I told you how to freeze them? Just plop the whole or cut up tomato on a baking sheet and put in the freezer until frozen solid, then put them into a freezer bag or other container and put back in the freezer. This allows you to pick out however many tomatoes you need at a time and no need to peel before freezing. As they defrost the skin will slip right off and if you want to remove the seeds just cut in half as usual and squeeze out the seeds.

Here are some beautiful photos that my friend Christina Peters shot of my tomatoes this year and a beautiful Tomato Sauce from Marcella Hazan.


Debs Garden-4591Heirloom Tomatoes Growing-5461Heirloom Tomatoes-5529Heirloom-Tomatoes-6086

2 Comments
Share
  • Pin it
  • Share
  • Tweet
  • Share
  • Email

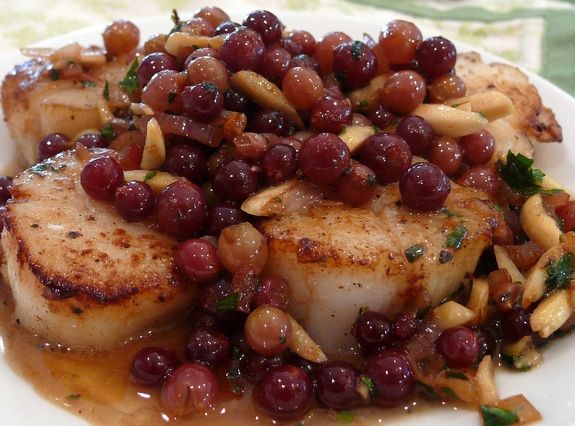
Pan-Seared Scallops with Champagne Grapes and Almonds

7 / 28 / 15

Champagne grapes and scallops

Save
Print
  • 16 large sea scallops, side muscles removed
  • 5 Tablespoons unsalted butter, divided
  • 1-1/2 Tablespoons minced shallots
  • 2/3 cup Champagne grapes (4 ounces) or black grapes, halved
  • 1-1/2 Tablespoons fresh lemon juice
  • 1/3 cup slivered or sliced almonds, toasted
  • 1-1/2 Tablespoons chopped fresh Italian (flat-leaf) parsley
  • Salt and pepper

Melt 3 Tablespoons unsalted butter in a large skillet over medium-high heat. Cook the butter until it is browned, about 2 minutes. Salt and pepper your scallops before adding them to the pan. Cook 2 minutes on each side and transfer to a dish, covering to keep warm.

Melt the remaining 2 Tablespoons of unsalted butter in the same skillet over medium-high heat. Add shallots and grapes; sauce until the shallots are golden brown, about one minute. Stir in fresh lemon juice and any accumulated scallop juice from the plate of cooked scallops. Bring to a boil and season with salt and pepper. Stir in almonds and parsley.

Place scallops on individual plates and spoon the sauce over them. Serve immediately

Related Posts Plugin for WordPress, Blogger...
Leave a comment
Share
  • Pin it
  • Share
  • Tweet
  • Share
  • Email

Posts navigation

Previous Page 1 2 … 8 9 10 11 12 13 Next Page
Deb

Meet Chef Debbi

READ BIO

Join-Us Sign up for our newsletter to receive exclusive tips 'n tricks, and special offers on classes, tours, and more!

Recent Posts

  • New E-Book!
  • From the Pantry
  • Spaghettini at Home
  • Growing Corn
  • Spring IS Coming!

Categories

BookCUT

What's in Your Pantry?

How to stock your pantry to create delicious dishes.

Learn Chef Debbi's pantry essentials and how to substitute ingredients for pantry staples in her basic recipes for quick and easy meals.
BUY BOOK>

FacebookTwitterInstagramGooglepinterest


© 2014, DEB'S KITCHEN
Angie Makes Feminine WordPress Themes