Deb's Kitchen - Farm, Food, Wine & Lifestyle Adventures
  • Facebook
  • Google
  • Twitter
  • Instagram
  • Pinterest
  • Email
Menu
Skip to content
  • Home
  • Blog
  • Events
    • Classes
    • Tours & Adventures
  • Edible Gardening
  • Preserving
  • Recipes
    • Appetizers
    • Soups and Salads
    • Main Dishes
    • Side Dishes
    • Desserts
  • About
    • Whats In Your Pantry
    • Ask Debbi
    • Deb’s Kitchen Botanicals
    • Press
  • Contact

Category Archives: Desserts

Hatch Chile Brownies

7 / 25 / 17

Fudgy, chewy, mild or hot…..a delicious treat!


Hatch Chile Brownies

Save
Print
  • 1 cup flour
  • ¾ cup Dutch cocoa powder
  • 2 cups sugar
  • ¼ teaspoon salt, use ½ teaspoon if using unsalted butter
  • 2 teaspoons Hatch chile powder
  • ¼ teaspoon baking powder
  • 3 lg. eggs
  • ½ cup butter, melted (8 Tb)
  • ¼ cup olive oil
  • 2 teaspoons vanilla

Preheat the oven to 375° and lightly grease a 9x13 pan.

Add all the ingredients to a large bowl in the order they are listed. Stir together and beat until the mixture is smooth.

Spoon into the prepared pan and bake 25-30 minutes, or until just barely beginning to pull away from the sides of the pan, remove from oven and let cool.

Leave a comment
Share
  • Pin it
  • Share
  • Tweet
  • Share
  • Email

Guinness Cupcakes with Bailey’s Cream Cheese Frosting

3 / 16 / 17


Guinness Cupcakes with Bailey’s Cream Cheese Frosting

Save
Print

Easily made into a Bundt cake as well.

  • 1 bottle Guinness
  • 1 cup (2 sticks) unsalted butter
  • 3/4 cup unsweetened cocoa powder
  • 2 cups all purpose flour
  • 2 cups sugar
  • 1 1/2 teaspoons baking soda
  • 3/4 teaspoon salt
  • 2 large eggs
  • 2/3 cup sour cream
  • Baileys Cream Cheese Frosting
  • 4 oz. cream cheese, room temperature
  • ½ cup butter, room temperature
  • 2½ cups powdered sugar
  • 3 tablespoons Baileys Irish Cream
  • Green nonpareils for garnish

Preheat oven to 350°. In a large bowl, combine flour, sugar, baking soda, and salt. Set aside.

Bring Guinness and butter to a simmer in large saucepan over medium heat. Add cocoa powder and whisk until mixture is smooth. Cool slightly.

In the bowl of a stand mixer, beat eggs and sour cream. With the mixer running on low slowly add Guinness-chocolate mixture to egg mixture and beat until just combined. Add flour mixture and beat on medium-low speed until combined.

Divide batter among cupcake liners, filling them 2/3 to 3/4 of the way. Bake cake until toothpick inserted into center comes out clean, rotating them once front to back if your oven bakes unevenly, about 17 minutes. Cool cupcakes on a rack completely before frosting.

As a Bundt cake, oil the pan well and bake for 40 minutes. Stick a toothpick into the center to make sure the cake is done, cool before taking out of the pan.

In a mixing bowl, add in the cream cheese and butter. Mix until light and fluffy. This will take about 2 minutes.

Add in the powdered sugar and Baileys and mix until incorporated. Turn the mixer on high and beat for another 2 minutes until the frosting is fluffy.

Add the frosting into a piping bag with a straight tip and pipe swirls on the cooled cupcakes.

Add the nonpareils to the frosting.

Photo: Cookie Dough & Oven Mitt

Leave a comment
Share
  • Pin it
  • Share
  • Tweet
  • Share
  • Email

Apple

10 / 5 / 16

apple-tree9


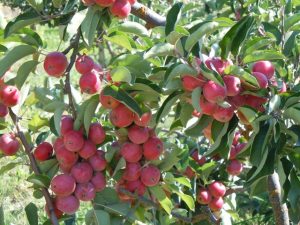
Fall isn’t quite here yet but when you see fresh apples in the farmers markets you know it’s coming quickly! Apples starting coming into the market in August actually.

Home made applesauce is so easy and oh so tasty, not like that runny stuff you get from a jar. It’s pretty much hands off cooking so try making your own today!

Here’s a quick little guide to choosing apples

Choose organic apples as apples have topped the Environmental Working Groups ‘Dirty Dozen’ list, which identifies the most pest laden fruit and vegetables. You’ll want to eat the skin of the apple as disease-fighting pectin (fiber) lies directly under the skin

Select firm fruit with no bruises or scars and treat them gently.

Don’t wash your apples until you’re ready to use them.

Keep them in a cool place, your fruit drawer of the refrigerator is fine but don’t store with other fruit. Apples give off a gas, which will ripen you’re other fruit faster. Some apples will keep weeks in the refrigerator. They will keep a few days on the counter.

Apples are the ultimate fruit, low in calories with no fat, sodium or cholesterol. The pectin in apples actually helps to dissolve the cholesterol in ones blood stream. High in fiber, anti-oxidants, potassium, niacin and a variety of vitamins, apples are a near perfect fruit.


Apple Variety Guide

Cooking

Ambrosia, Braeburn, Cameo, Golden Delicious, Honeycrisp, Jazz, Jonagold, Jonalicious, Jonathon, McIntosh, Pink Lady, Red Delicious

Fresh Eating
Ambrosia, Envy, Fuji, Gala, Golden Delicious, Honeycrisp, Jazz, Kiku, Opal, Pink Lady, Sweetie
Apple Recipes
Applesauce
Apple Crisp
Apple Cake
Melissa’s Apple Fritters
Leave a comment
Share
  • Pin it
  • Share
  • Tweet
  • Share
  • Email

Apple Cake

10 / 5 / 16


apple-cake-in-a-jar

Apple Cake in a Jar

Save
Print

Serves 12

  • 3 1/3 cups all purpose flour
  • 1/2 teaspoon baking powder
  • 11/2 teaspoons salt
  • 1/2 teaspoon nutmeg
  • 1/2 teaspoon allspice
  • 2 teaspoons ground cinnamon
  • 2 teaspoons baking soda
  • 2/3 cups vegetable shortening or olive oil
  • 2 1/3 cups sugar
  • 4 eggs
  • 2 cups applesauce
  • 1 cup chopped walnuts

Preheat oven to 350°. Grease 12 (2 1/2-inch) wide-mouth canning jars with a paper towel dipped in oil.

Sift flour, baking powder, salt, nutmeg, allspice, cinnamon, and baking soda into a large bowl.

Using the electric mixer and a medium mixing bowl, cream together the shortening and sugar on low speed, then increase to medium mixing speed to mix well. While the mixer is running, add the eggs, one at a time. Stop the mixer and scrape down the sides.

Remove the bowl from the mixer and stir in the applesauce. With a large spoon, stir in the sifted flour mixture and the walnuts.

Pour the batter into a measuring cup with a spout; pour the batter neatly into greased jars. Fill the jars halfway full. Place the filled jars on the sheet tray and bake on the center rack of the oven for 45 minutes. When done, the top of the cake will spring back when pressed with a finger, and the sides will have come away from the jar.

Remove from oven and let cool 5 minutes. Poke holes in the cake with a toothpick and pour salted caramel over the top. Serve with whipped cream.

Adapted from Riki Senn at Greenbriar

Leave a comment
Share
  • Pin it
  • Share
  • Tweet
  • Share
  • Email

Chocolate Cherry Cookies

9 / 16 / 16

In honor of my friends birthday I made him these cookies and I had some leftover (this recipe makes about 4 dozen cookies). I took them to last nights cooking class and everybody seemed to love them. They’re not too sweet but just the right size for a nice little bite and they pair well with any red wine (what doesn’t?).

During the holidays I replace the cherries with crushed peppermint candies and add peppermint extract instead of the vanilla. So I hope you enjoy them!

chocolate-peppermint-crinkle-cookies

Chocolate Cherry Cookies

Save
Print
  • 1 1/2 cups all-purpose flour
  • 1/2 cup unsweetened cocoa powder
  • 2 teaspoons baking powder
  • ½ teaspoon salt
  • ¼ cup chopped walnut pieces, optional
  • 1/2 cup chopped dried cherries
  • 8 tablespoons (1 stick) unsalted butter, softened
  • 1 cup packed light brown sugar
  • 2 large eggs
  • 8 ounces bittersweet chocolate, melted and cooled*
  • 1 teaspoon vanilla extract
  • 1/2 cup granulated sugar
  • 1 cup powdered sugar

In a medium bowl, whisk together the flour, cocoa powder, baking powder, and salt. Add the chopped walnuts and peppermint chips, stir to distribute well.

In the bowl of a stand mixer, fitted with the paddle attachment, or in a large mixing bowl, cream the butter and brown sugar until light and fluffy, about 3 minutes.

Add the eggs and vanilla, and beat until completely incorporated. Add the melted chocolate and beat until completely incorporated. Gradually fold in the flour mixture until just combined.

Chill the dough for at least 2 hours until firm, or up to overnight.

Remove the dough from the refrigerator. Preheat the oven to 350°F. Line a baking sheet with parchment paper or a silicone baking mat.

Place the granulated and powdered sugar in separate small bowls. Scoop 1 tablespoon of the dough, form into a ball, and place on a plate. Repeat with the remaining dough.

Roll each ball in granulated sugar and then in powdered sugar to coat. Place on the baking sheet 2 inches apart. Bake for 10 to 12 minutes, until the cookies begin to spread and the tops split. Remove from the oven and cool for a few minutes on the baking sheet, then transfer the cookies to wire cooling racks. Let the baking sheet cool, and repeat with the remaining dough.

Cookies will keep in an airtight container for about one week.

*To melt the chocolate, place in a microwave safe bowl and heat for 30 seconds, stir, and heat at 10 second intervals until melted, stir occasionally.

Optional:

For Peppermint Cookies add 1/4 cup crushed peppermint candies and use peppermint extract instead of the vanilla.

*To crush peppermint pieces, place several candy canes or peppermint candies into a freezer type bag and crush with a meat pounder or rolling pin.

Leave a comment
Share
  • Pin it
  • Share
  • Tweet
  • Share
  • Email

Galette, Crostata or Tart

6 / 24 / 16

Galettes, Crostata and Tarts are similar in nature, they all can be sweet or savory and they all have a tasty butter crust. Really the only difference is Galettes (French) and Crostata’s (Italian) are free form on a baking sheet lined with a piece of parchment. A tart is always cooked inside a ring or a tart pan so the sides are nice and neat and usually scalloped. There, that’s it!

Galette marked

Whatever you call them this is the best time of year to make them with all the wonderful fresh fruit at the farmers market. You can use any kind of fruit which makes this recipe so versatile and the crust is easy to make. Make some dough ahead of time, wrap it well in plastic wrap and store in the freezer for up to 2 months, defrost overnight in the refrigerator. Please don’t buy frozen pie dough from the market, you’ll be disappointed in the finished product. Most of them have no butter in them which is what makes this crust so flaky and tasty. It’s easy to do in a food processor, try it this weekend.

Rustic Fruit Galette

Save
Print

Notes:
Flour can absorb water from the air so on hot dry days the flour may take more water to come together than on a humid day. Always fluff your flour by swiping a knife through it to lighten it, flour compacts as it sits. Unless you weigh your flour this is the best method to ensure you get an even product every time you bake.
The dough can be refrigerated up to 2 days or frozen up to 2 months.

  • 1 cup sugar, divided
  • 2 cups all-purpose flour
  • ¼ teaspoon. salt
  • 2 sticks cold butter, cut into small pieces
  • 4 tbsp. ice water
  • 1-1½ cups berries or any fruit mixture
  • 1 large egg yolk, lightly beaten with 1 tbsp. milk or cream

Place ½ cup of the sugar, all the flour and salt into the bowl of a food processor, pulse to mix briefly, add the butter and pulse until butter is the size of peas. Pour the mixture into a bowl and begin to add the ice water one tablespoon at a time until the dough comes together in a ball. Divide into two and form a disc, wrap tightly in plastic wrap or parchment and chill for 1 hour.

Cut any pieces of large fruit into pieces and mix together in a bowl with ½ the remaining sugar (1/4 cup). Refrigerate until ready to bake tarts.

Preheat the oven to 450°.

Line a baking sheet with parchment paper and set aside. Take the dough out of the refrigerator one disc at a time. Roll into a round ¼” thick on a rol mat or floured surface and place on the parchment, repeat with the other disc. Use as little flour as possible to roll out the dough.

Split the berry mixture into the center of each round leaving a 1 ½” border around the edge. Fold up the edges pleating or folding to cover most of the fruit. Brush the dough with the egg wash and sprinkle the remaining sugar over the dough.

Bake for 12 minutes or until the crust is lightly browned, cool and serve with ice cream or whipped cream.

Leave a comment
Share
  • Pin it
  • Share
  • Tweet
  • Share
  • Email

Strawberry Brownie Bites

2 / 23 / 16

This is a recipe that we prepared in our Feb. classes and I’ve updated the brownie recipe to a new one that I really prefer. The recipe is from King Arthur Flour Co. If you’ve never been to their website, you should really treat yourself! Enjoy!

strawberries & brownies debskitchen

Save
Print
  • 1 cup unsalted butter
  • 2 1/4 cups sugar
  • 1 1/4 cups Double-Dutch Dark Cocoa or Dutch-process cocoa
  • 1 tablespoon espresso powder
  • 1 teaspoon salt
  • 1 teaspoon baking powder
  • 1 tablespoon vanilla extract
  • 4 large eggs
  • 1 1/2 cups King Arthur Unbleached All-Purpose Flour
  • 2 cups chocolate chips
  • 1 cup chopped nuts, optional
  • Cheesecake filling
  • 12 oz. cream cheese, room temperature
  • ¼ - ½ cups powdered sugar
  • ¼ cup strawberry jam
  • 1 pint strawberries, halved

Preheat the oven to 350°F. Lightly grease a 10" x 15" jelly roll pan or a 9" x 13" pan. For guaranteed easy removal of the brownies, line the greased pan with parchment, and grease the parchment.

In a saucepan set over low heat, melt the butter. Add the sugar, stirring to combine. Remove from heat.

Stir in the cocoa, espresso powder, salt, baking powder, and vanilla.

Whisk in the eggs, stirring until smooth.

Add the flour, chips, and optional nuts, again stirring until smooth.

Spoon the batter into the prepared pan.

Bake the brownies for 28 to 34 minutes, until a cake tester inserted into the center comes out clean. The brownies should feel set on the edges, and barely set in the center.

Remove the brownies from the oven, and cool for at least 1 hour before cutting.

Use a 1 1/2" round cutter to cut as many circles as possible (about 46) out of the brownies in a 10" x 15" pan. You'll get about 38 from a 9" x 13" pan. Wrap well; enjoy the leftover scraps.

Filling

Combine the cream cheese, powdered sugar and strawberry puree until smooth.

Once the brownies have cooled, pipe the cheesecake filling into the center and top with the strawberry. Top with the halved strawberries, serve immediately. For a great topping marinated the strawberries in some quality balsamic vinegar for about ½ hour!

Store all ingredients separately if serving at a later time.

Adapted from King Arthur Flour

Leave a comment
Share
  • Pin it
  • Share
  • Tweet
  • Share
  • Email

Quick Puff Pastry

12 / 31 / 15

puff pastry fold

Use this delicious puff pastry to make these quick and easy

Smoky Ham & Gruyere Cheese Empanadas. 

ham and cheese empanadas

Save
Print

I learned this recipe from Nick Malgieri, it takes about 15 minutes to make once you learn the technique. Keep it in your freezer for easy access to sweet and savory dishes.

  • 1 1/4 stick of cold unsalted butter
  • 1/4 cup ice water
  • 1/2 teaspoons salt
  • 1 cup flour*

Cut 1 stick of butter into ½ - to ¼ “ dices, place on a plate and refrigerate.

Measure the water and stir in the salt to dissolve. Set aside.

Coarsely dice the remaining ¼ stick of butter. Place the flour in the work bowl of a food processor fitted with a metal blade. Add the ¼ stick of butter and pulse until the butter is absorbed—about ten to twelve 1-second pulses.

Add the chilled butter and pulse once or twice to distribute. Add water and salt mixture and pulse repeatedly, until the dough forms a rough ball—do not over process. (I have found with this method the dough doesn’t form much of a ball, do not add extra water, just continue with the recipe and it will come together easily).

Invert the mixture onto a floured work surface or rolpat. Remove the blade and press the dough into a rough rectangle.

Flour the dough and press (don’t roll) it with a rolling pin to flatten. Move the dough, making sure there is still flour under it to prevent it from sticking, and give the dough a 90° turn. Press again.

Again making sure that the surface and the dough are adequately floured, roll the dough until it forms a rectangle about 15 x 24”.

Fold the top long edge over the middle section, and then fold the bottom edge over that to make 3 equal layers. Roll the dough up like a jelly roll from one of the short edges. Use the palm of your hand to flatter the dough into a rectangular shape, about 6 x 10” and about 1” thick.

Refrigerate for at least 1 hour before using or the dough can be stored in the refrigerator up to 2 or 3 days or freeze up to 3 months.

*4 - 1/4 ounces if using King Arthur Flour, which I prefer, or use the scoop & sweep method.

Leave a comment
Share
  • Pin it
  • Share
  • Tweet
  • Share
  • Email

Pumpkin Blood Orange Olive Oil Cake

10 / 18 / 1511 / 20 / 15

Aquarium Event

I served this last night at The Aquarium of the Pacific’s Sea Fare fund raising event and it was declared by the President of the Aquarium ‘the best food at the event’. Now that was very nice of him but there was some really tasty food there from local restaurants. It was a wonderful event with music, food and wine and lots of grateful fishes. Thanks to everyone who came out and those who stopped by my booth, I’m happy you enjoyed the cake! And you can learn how to make this cake and more at my cooking classes here in Seal Beach at Temecula Olive Oil‘s tasting room, click on Nov. for the upcoming menu!

pumpkin bundt cake

Pumpkin Olive Oil Cake

Save
Print

Try different flavored olive oils for this cake. Orange, lemon or a lightly flavored olive oil, don’t use a big heavy tasting oil as it will overpower the pumpkin and spice in the cake.
You could make this cake into a sheet cake, round cakes or even cupcakes; just remember to adjust the cooking time.

  • 3 cups all-purpose flour
  • 2 teaspoons baking soda
  • 1 teaspoon ground cinnamon
  • 1 teaspoon ground nutmeg
  • ½ teaspoon salt
  • ¼ teaspoon ground cloves
  • 1 1/2 cups sugar
  • 1 cup olive oil
  • 3 eggs
  • 1 can (15 ounces) solid-pack pumpkin (or 2 cups freshly roasted sugar pumpkin)
  • 1/4 cup powdered sugar
  • 1 package cream cheese, room temperature
  • 1 splash of vanilla, optional

Preheat oven to 350°.

In a medium-sized bowl, stir together flour, baking soda, cinnamon, nutmeg, salt and cloves.

Combine sugar and oil in a large bowl with a rubber spatula until blended.

Add eggs, one at a time, beating well after each addition.

Add flour mixture to egg mixture alternately with pumpkin in three batches, beating

well after each addition.

Transfer to a greased Bundt cake pan.

Bake 60-65 minutes or until toothpick inserted near the center comes out clean.

Cool for approximately 10-15 minutes before inverting onto a wire rack.

Remove pan carefully from cake and cool completely.

Easy Cream Cheese Frosting

Combine all ingredients in the bowl of a stand mixer fitted with a paddle attachment, and beat at low speed until sugar is incorporated.

Increase speed to medium high and beat until frosting is light and whipped, about 3 to 4 minutes. Use to top cookies, cupcakes, or cakes


Leave a comment
Share
  • Pin it
  • Share
  • Tweet
  • Share
  • Email

Blackberry Crumb Bars

5 / 26 / 155 / 26 / 15

blackberry crumb bar-smitten kitchen

Blackberry Crumb Bar

Save
Print
  • 6 tablespoons unsalted butter melted, and
  • 1/2 cup (1 stick), room temperature, plus more for pan
  • 1 3/4 cups all-purpose flour (spooned and leveled), plus more for pan
  • 1/2 cup packed light-brown sugar
  • 1/2 teaspoon salt
  • 1/2 teaspoon baking powder
  • 1 cup confectioners' sugar
  • 1/2 teaspoon Grand Marnier or pure vanilla extract
  • 2 large eggs
  • 10 ounces blackberries

Preheat oven to 350°. Butter an 8-inch square-baking pan. Line bottom with parchment paper, leaving an overhang on two sides; butter and flour paper, tapping out excess.

Make topping:

In a medium bowl, whisk together melted butter, brown sugar, and 1/4 teaspoon salt; add 1 cup flour, and mix with a fork until large moist crumbs form. Refrigerate topping until ready to use.

In a medium bowl, whisk together remaining 3/4 cup flour, baking powder, and remaining 1/4 teaspoon salt; set aside.

In a large bowl, using an electric mixer, beat room-temperature butter, confectioners' sugar, and vanilla until light and fluffy, add eggs, one at a time, beating well after each addition. Reduce speed to low; mix in flour mixture. Spread batter evenly in pan; sprinkle with blackberries, then chilled topping.

Bake until golden and a toothpick inserted in center comes out with moist crumbs attached, 40 to 45. Cool completely in pan. Using paper overhang, lift cake onto a work surface and cut into 16 squares.

Adapted lightly from Martha Stewart

Photo: Smitten Kitchen

Leave a comment
Share
  • Pin it
  • Share
  • Tweet
  • Share
  • Email

French Yogurt Cake

5 / 9 / 155 / 9 / 15

French Yogurt Cakes

French Yogurt Cake

Save
Print
  • 1 1/2 cup all-purpose flour
  • 2 teaspoons baking powder
  • Pinch of salt
  • 1 cup sugar
  • 1 lemon, grated and zest
  • 1/2 cup plain yogurt
  • 3 eggs
  • 1/4 teaspoon pure vanilla extract
  • 1/2 cup citrus olive oil

Center a rack in the oven and preheat the oven to 350°. Generously butter an 8 1/2-x-41/2-inch loaf pan and place the pan on a baking sheet. A cake pan, Bundt cake pan or any other pan may be used; you made need to adjust the cooking time.

Whisk together the flour, baking powder and salt.

Put the sugar and zest in a medium bowl and, with your fingertips, rub the zest into the sugar until the sugar is moist and aromatic.

Add the yogurt, eggs and vanilla and whisking vigorously until the mixture is very well blended.

Still whisking, add the dry ingredients, then switch to a large rubber spatula and fold in the oil. You’ll have a thick, smooth batter with a slight sheen. Scrape the batter into the pan and smooth the top.

Bake for 50 to 55 minutes, or until the cake begins to come away from the sides of the pan; it should be golden brown and a thin knife inserted into the center will come out clean. Transfer the pan to a rack and cool for 5 minutes, then run a blunt knife between the cake and the sides of the pan. Unmold, and cool to room temperature right side up on the rack.

Glaze (optional)

½ cup lemon marmalade mixed with 1 teaspoon water

To Make the Glaze:

Put the marmalade in a small saucepan or in a microwave-safe bowl, stir in the teaspoon of the water and heat until the jelly is hot and liquefied. Using a pastry brush, gently brush the cake with the glaze.

Adapted from Dorie Greenspan

Leave a comment
Share
  • Pin it
  • Share
  • Tweet
  • Share
  • Email

Lemon & Lavender Butter Cookies

5 / 5 / 155 / 8 / 15

Lemon & Lavender Butter Cookies

Save
Print

3 dozen cookies

  • 1 teaspoon dried lavender buds
  • 1 ½ cups all purpose flour
  • 1 tablespoon lemon zest
  • ¼ teaspoon salt
  • ¾ cup butter, softened
  • 1 cup powdered sugar

Preheat oven to 350°.

Line 2 baking sheets with parchment or baking liners.

Grind lavender buds in a clean coffee grinder or mortar and pestle. Set aside.

In a medium bowl, combine flour, ground lavender buds, lemon zest, and salt.

In a large mixing bowl beat the butter with an electric mixer on medium to high speed for 30 seconds. Add powdered sugar. Beat until combined. Beat in as much of the flour mixture as you can with the mixer. Stir in any remaining flour mixture.

On a lightly floured surface, roll dough into a 10-inch-long log. Wrap log in plastic wrap or waxed paper. Chill for 2 to 24 hours or until firm.

On a lightly floured surface, cut roll into 1/4-inch slices. Place slices 2 inches apart on prepared sheet pan.

Bake about 10 minutes or until edges are lightly browned. Transfer cookies to a wire rack and let cool.

Adapted from Better Homes & Gardens

Related Posts Plugin for WordPress, Blogger...
Leave a comment
Share
  • Pin it
  • Share
  • Tweet
  • Share
  • Email

Posts navigation

Previous Page 1 2 3 4 Next Page
Deb

Meet Chef Debbi

READ BIO

Join-Us Sign up for our newsletter to receive exclusive tips 'n tricks, and special offers on classes, tours, and more!

Recent Posts

  • New E-Book!
  • From the Pantry
  • Spaghettini at Home
  • Growing Corn
  • Spring IS Coming!

Categories

BookCUT

What's in Your Pantry?

How to stock your pantry to create delicious dishes.

Learn Chef Debbi's pantry essentials and how to substitute ingredients for pantry staples in her basic recipes for quick and easy meals.
BUY BOOK>

FacebookTwitterInstagramGooglepinterest


© 2014, DEB'S KITCHEN
Angie Makes Feminine WordPress Themes