Deb's Kitchen - Farm, Food, Wine & Lifestyle Adventures
  • Facebook
  • Google
  • Twitter
  • Instagram
  • Pinterest
  • Email
Menu
Skip to content
  • Home
  • Blog
  • Events
    • Classes
    • Tours & Adventures
  • Edible Gardening
  • Preserving
  • Recipes
    • Appetizers
    • Soups and Salads
    • Main Dishes
    • Side Dishes
    • Desserts
  • About
    • Whats In Your Pantry
    • Ask Debbi
    • Deb’s Kitchen Botanicals
    • Press
  • Contact

Category Archives: Summer Recipes

Cherry Clafoutis

5 / 11 / 18

Class French dessert, great for brunch or breakfast with coffee.
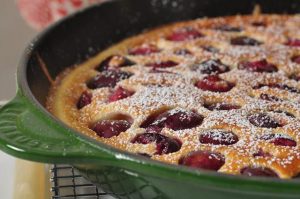
Cherry Clafoutis

Save
Print
  • Batter
  • 1 cup milk
  • 1/4 cup heavy cream
  • 2 tablespoons sugar
  • 3 eggs
  • 1 tablespoon vanilla
  • ½ teaspoon salt
  • 2/3 cup all-purpose flour
  • Cherries
  • 2 tablespoons butter, melted
  • 2 tablespoons sugar
  • 1 pound fresh cherries, stemmed, pitted and cut in half or rough chopped
  • Confectioners' sugar for dusting

Heat the oven to 400°F.

Beat together all the batter ingredients until smooth and frothy. Set aside to rest while preparing remaining ingredients.

Pour melted butter into a 9 or 10” shallow pan, quiche pan or cake pan and sprinkle with the 2 tablespoons of sugar spreading evenly. Sprinkle cherries over the sugar and cover with the batter.

Bake for about 30 minutes or until the clafoutis is puffed and brown on top. Dust with confectioners sugar and serve immediately.

Clafoutis will collapse quickly but will still be delicious.

Leave a comment
Share
  • Pin it
  • Share
  • Tweet
  • Share
  • Email

Hatch Chile Brownies

7 / 25 / 17

Fudgy, chewy, mild or hot…..a delicious treat!


Hatch Chile Brownies

Save
Print
  • 1 cup flour
  • ¾ cup Dutch cocoa powder
  • 2 cups sugar
  • ¼ teaspoon salt, use ½ teaspoon if using unsalted butter
  • 2 teaspoons Hatch chile powder
  • ¼ teaspoon baking powder
  • 3 lg. eggs
  • ½ cup butter, melted (8 Tb)
  • ¼ cup olive oil
  • 2 teaspoons vanilla

Preheat the oven to 375° and lightly grease a 9x13 pan.

Add all the ingredients to a large bowl in the order they are listed. Stir together and beat until the mixture is smooth.

Spoon into the prepared pan and bake 25-30 minutes, or until just barely beginning to pull away from the sides of the pan, remove from oven and let cool.

Leave a comment
Share
  • Pin it
  • Share
  • Tweet
  • Share
  • Email

Hatch Chile & Potato Rajas

7 / 25 / 177 / 25 / 17


Hatch Chile & Potato Rajas

Save
Print
  • 1 large potato, peeled and cut into ½ inch dice, cooked
  • 2 tablespoons vegetable or canola oil
  • 1 small onion, cut into small strips
  • 4 mild Hatch chiles, roasted, peeled, seeded, and julienned *
  • ½ cup cream
  • ½ cup shredded Monterey Jack cheese
  • 12 corn tortillas

Heat a large sauté pan over medium heat. Add oil; add onions, season with salt and pepper and sauté until lightly browned.

Add chiles, and cream, bring to a boil and reduce to a simmer and cook 4 minutes.

Add cheese and potatoes, stirring occasionally, until just heated through. Remove from heat.

Wrap tortillas in plastic wrap or paper towel and heat in microwave on low until warm.

Leave a comment
Share
  • Pin it
  • Share
  • Tweet
  • Share
  • Email

Fontina & Tomato Tart

7 / 6 / 17

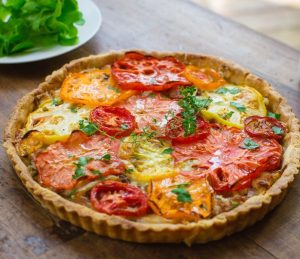
Add a baby green salad tossed lightly with olive oil & vinegar for a nice summer lunch or light dinner.

Fontina & Tomato Tart

Save
Print
  • 1 sheet puff pastry, thawed in the refrigerator, keep cold until ready to use
  • 4 tablespoons Dijon mustard
  • 4 ounces grated fontina cheese
  • 3 large tomatoes, cut into 1/4" thick slices
  • 4 tablespoons grated Parmesan cheese

Preheat the oven to 425°F. Line a sheet pan with parchment paper or use with a non-stick tart pan.

Unfold one sheet of puff pastry on a lightly floured surface and roll it lightly to an 11-by-11-inch square or roll to the size of your tart pan adding ½” for the sides. I using the tart pan, fold up the pastry carefully and lay into the pan, unfold the pastry draping it over the sides of the pan. If using just the sheet pan, lay the pastry in the middle of the piece of parchment on the pan. Prick (called 'docking') the pastry with a fork leaving a 1/2" edge clear.

Spread a thin amount of mustard on the pricked part of the dough.

Sprinkle an even amount of the cheese on the mustard and top with slices of tomato. Fold a couple of inches of the dough over the filling, leaving a large part of the middle open, disregard if using the part pan. If the pastry is warm, chill for 15 minutes.

Bake for 20 to 25 minutes, until the pastry is golden brown. Garnish with a sprinkle of Parmesan cheese.

2 Comments
Share
  • Pin it
  • Share
  • Tweet
  • Share
  • Email

Zucchini Blossom Quesadilla

6 / 26 / 17


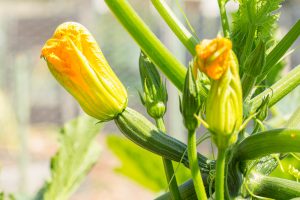
 I first tasted these at The Santa Monica Farmers Market about 15 years ago when The Two Hot Tamale girls were doing a demo for their restaurant, Border Grill (now closed, sadly). It’s a perfect little snack for an early summer day, zucchini plants are going wild with flowers and are daring to be picked & stuffed. Make sure you pick all male blossoms rather than female blossoms or you won’t have any fruit. To tell the difference look at the bottom of the flower, you’ll see a round little nub or small zucchini attached, this is a female blossom….move on. The male blossoms are attached just by them stem with no nub at the bottom, you’ll be able to tell. Open the flowers gently as there may be a bee inside collecting pollen, he will fly away when you open the petals, be gentle. If you want to wash them use cool water and dry well but do this just before you’re ready to prepare the dish. Or you can buy them at your local farmers market, the blossoms are delicate and will last no more than a day so pick right before you’re going to make the quesadillas.

Squash Blossom Quesadilla

Save
Print
  • 4-6 squash blossoms, stems and stamens removed, chopped
  • 4 roasted red peppers, drained and chopped
  • 2 ears of corn, roasted, cut off the cob
  • 4 tablespoons cilantro, chopped
  • 1-2 cups Monterrey Jack cheese, grated
  • 8 flour tortillas
  • Salt and pepper to taste
  • Tomatillo Salsa
  • 1/2 pound tomatillos, husked, rinsed, and quartered

  • 1/2 - 1 jalapeño pepper, chopped
(depending on how much heat you want)
  • 1 clove garlic, peeled and chopped

  • 1/2 cup packed cilantro leaves

  • 1/2 teaspoon salt,
or more to taste,
  • squeeze of fresh lime juice

Mix together all ingredients together seasoning with salt and pepper, to taste.

Heat a grill pan or griddle, add 1 Tb. butter. Add a tortilla and cook it on one side until it puffs (about 30 seconds).

Flip tortilla over and sprinkle over entire surface 1/4 cup of squash blossom filling.

Top with another tortilla, and after cheese has melted and the two tortillas stick together (a couple of minutes), flip quesadilla and cook for a couple of minutes more.

Repeat for the remainder of the filling and tortillas.

For the Tomatillo Salsa

Place all ingredients in a blender or food processor and pulse to combine. Blend on low speed until a coarse puree is formed.

Pour into a bowl, taste and add more salt or lime if desired. Salsa can be thinned with a bit of water if desired.

2 Comments
Share
  • Pin it
  • Share
  • Tweet
  • Share
  • Email

Seafood Grill Packets

5 / 26 / 17


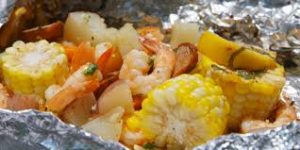
Seafood Grill Packets

12        littlenecks or cherrystones clams

12        uncooked medium shrimp in shells

12        sea scallops

4          ears fresh sweet corn, husks removed, cleaned, cut into fourths

2          medium lobster tails

8          small red or Yukon Gold potatoes, cut in half

            Sea Salt and fresh ground pepper

            Old Bay seasoning

4          lemons cut in half

4          tablespoons butter


Preheat your grill, gas or coals.

Cut 4 large sheets of heavy-duty foil into about 12”.

Place 3 clams, 3 shrimp, 3 scallops, 2 pieces of corn, ½ lobster tail and 4 pieces of potato into the center of the foil and sprinkle with a little salt, a grind of pepper and a pinch or two of Old Bay Seasoning. Squeeze ½ lemon over the seafood and add 1 tablespoon of butter to the top.

Fold all edges together tightly leaving a little room inside the foil for expansion.

Place on grill over medium heat, cover and cook about 10 minutes, check to see if the clams are open and the shrimp and lobster are cooked. If not cook another 5 minutes and serve with extra lemon wedges and melted butter.


2 Comments
Share
  • Pin it
  • Share
  • Tweet
  • Share
  • Email

It’s Hatch Chile Time!

8 / 15 / 16


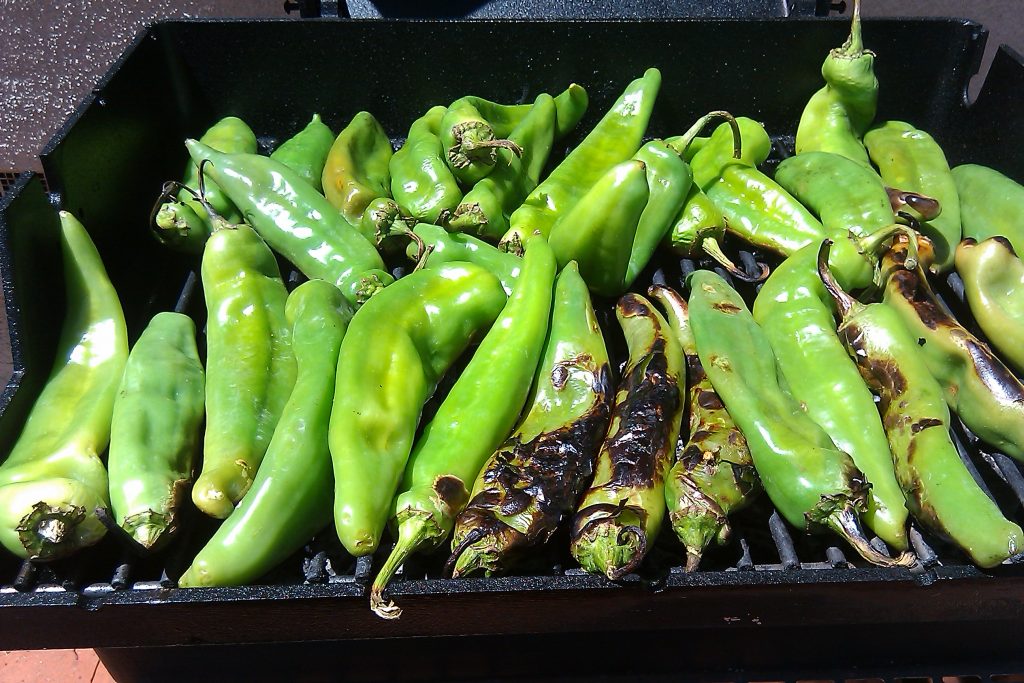
IMAG0020

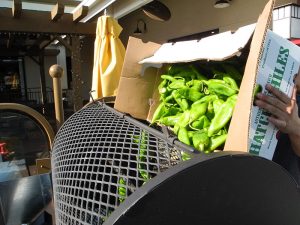
Get out your BBQ’s or roasters, it’s time for Hatch Chile’s! You’ll want to stock up on these fabulous, versatile chiles while they are in season. Melissa’s Produce brings these chiles from Hatch, New Mexico to Southern California and hosts roastings all over the southland (actually all over the US). You could order raw ones from Melissa’s website, melissas.com , or you could pop into a roasting (check out roasting dates, times & stores here) and they will roast them up for you on-site. Inside the store you’ll find all kinds of Hatch chile treats as well as things to cook up like Hatch Salmon Burgers or Hatch Chile Crab Cakes and Hatch chile sausage. Baked goods, cheese with Hatch chile’s, salsa and sauces. The list is endless!

Here is a perfect chicken wing recipe for football season, we grilled it up for the LA Rams first pre-season football game last weekend.

Tangerine Hatch Chile Chicken Wings and Cucumber-Yogurt Sauce

Save
Print

Serve the wings with the Cucumber-Yogurt Sauce and sliced veggies and LOTS of napkins.

  • 3 small Persian cucumbers or large English cucumber, diced
  • 1 tablespoon salt
  • 2 cups Greek yogurt*
  • 1 tablespoon lemon juice
  • 1 garlic clove, minced
  • 1 tablespoon fresh dill
  • 1 tablespoon olive oil
  • Salt & freshly ground black pepper, to taste
  • 1 package chicken wings
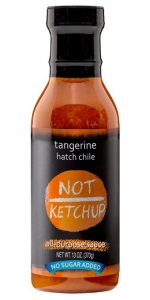
  • 1 bottle of Not Ketchup Sugar Free Tangerine Hatch Chile Sauce*

Toss a bunch of chicken wings with Tangerine Hatch Chile Sauce and grill over hot coals until the chicken wings are blackened and tender.

Cucumber Yogurt Sauce

Peel cucumbers and dice, if using English cucumber you can remove the seeds. Put them in a colander and sprinkle with the tablespoon of salt to draw out some of the water, let drain for about 30 min. Place the cucumbers into a piece of cheesecloth or kitchen towel and twist the towel to get out any remaining liquid.

Add everything to the food processor and blend until you get the consistency you want (chunky or creamy). Season with salt and pepper and refrigerate before serving, best if made a few hours before you’re going to serve it.

*If the yogurt is a little runny you can drain it through cheesecloth for several hours or overnight.

tnagerine hatch chile sauce

*You can find the Sugar-Free Tangerine Hatch Chile ‘Not Ketchup’ here

Leave a comment
Share
  • Pin it
  • Share
  • Tweet
  • Share
  • Email

Ceviche with Avocado and Tomato Broth

7 / 20 / 167 / 20 / 16


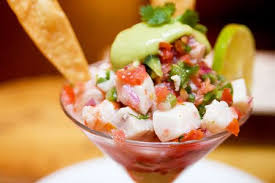
ceviche tomato


Ceviche with Avocado and Tomato Broth

Save
Print
  • 1 pound white fish halibut, red snapper, sole,
  • 2 teaspoons mild or hot pepper
  • 2 tablespoons cilantro, minced
  • 1 tablespoon shallot, minced
  • 1 large rib celery, cut into a small dice
  • 1 medium tomato, cut into the same size as the fish, squeeze out the seeds
  • 1/2 cup freshly squeezed lime juice, or enough to cover ingredients
  • 1 splash olive oil
  • Tomato Broth
  • 1 slice white bread
  • 1 can whole tomatoes, with juice
  • 1 cucumber, peeled, rough chopped
  • 1 small shallot, rough chopped
  • 1 cup tomato juice
  • 1 tablespoon red wine vinegar
  • 1 tablespoon olive oil
  • 1 pinch garlic powder
  • Salt and pepper
  • 1 pinch sugar
  • 2 Haas avocadoes, peeled, cut in half, pit removed
  • 1 lemon or lime zested
  • cilantro sprigs, for garnish

Ceviche:

Chop the white fish into small dice, add to a mixing bowl and set aside.

Clean the pepper of stems, seeds and ribs and mince into a fine dice. You may want to wear glove to do this.

Mix all ingredients together well; making sure it’s all covered by the lime juice and olive oil. Refrigerate for at least 3 hours.

Tomato Broth:

Place the bread into the bowl of a food processor and process until you have coarse crumbs. Add remaining ingredient and process until pureed. Chill for 30 minutes before serving.

Ladle some tomato broth into a cup or bowl. Place avocado into center of bowl, place ceviche into the center and top with lemon zest and a sprig of cilantro.


Leave a comment
Share
  • Pin it
  • Share
  • Tweet
  • Share
  • Email

Grilled Pizza

7 / 6 / 167 / 6 / 16

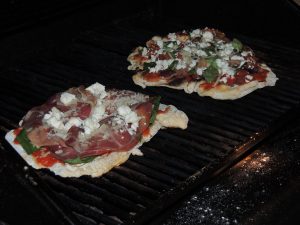
Pizza on the grill 1

I love pizza on the grill! The first time I cooked pizza on the grill I was worried the dough would slip through the grates but it doesn’t! The grill is a perfect tool for a backyard dinner, the house stays nice and cool and you can relax with a cold drink while your pizza cooks. First you have to heat your grill to it’s hottest! Pizza likes a good 500° – 600° oven to produce a great crust.

Buy or make your crust in the morning so it’s ready to go when you are. Prep your ingredients ahead of time. Grate or slice the cheese, pepperoni or salami, slice the mushrooms (store in a small bowl with a slightly damp paper towel over them), cut or tear your herbs such as basil, thyme and/or make a pesto for your pizza. Be creative and be organized.

Once your grill is at its hottest, roll out your dough on a lightly floured surface (or if you’re into hands on-flour your hands and stretch the dough out into any shape you like). Put your dough on a pizza peel that has been lightly dusted with flour or cornmeal, make sure the dough slides around on the peel so that when you put it on the grill it will slide off easily.

Brush your grill with oil and slide the dough onto that spot. Turn down the burners if you’re using a gas grill.* Grill for 2-3 minutes or until lightly charred. Turn your pizza over, brush the cooked side with a little olive oil if you like, add your sauce and any of the toppings you’ve chosen. Close the grill lid and let the pizza cook until the bottom is nicely charred and your toppings have melted and cooked. Remove from the grill with the pizza peel, let sit for a minute or two before slicing. Enjoy with a cold beer and tossed salad! That’s how to beat the heat at my house. Have a great summer!

*If using a grill with charcoal or wood you’ll want to make a direct heat side and an indirect heat side. You’ll be cooking the pizza on the indirect side.

Here’s the recipe

No Knead Pizza Dough

Save
Print

This is Jim Lahey’s no knead recipe for pizza dough, it’s easy and so much better than store bough pizza dough. The hardest part is to remember to make it ahead of time. You can store the dough up to 3 days in the refrigerator so it’s easy to plan ahead. This recipe makes 4 balls of dough (4 pizza’s). Jim likes to weigh all the ingredients and in reality you do get a much better and more consistent product but if you insist on measuring, I’ve included his instructions for that also.

  • 500 grams all-purpose flour, 17 ½ ounces or 3 ¾ cup, plus a little extra for shaping
  • 1 gram active dry yeast, ¼ teaspoon
  • 16 grams fine sea salt, 2 teaspoons
  • 350 grams water, 1 ½ cups

In a medium bowl, thoroughly blend the flour, yeast, and salt. Add the water and, with a wooden spoon or your hands, mix thoroughly.

Cover the bowl with plastic wrap or a kitchen towel and allow it to rise at room temperature for 18 hours or until more than doubled. It will take longer in a cook room and less time in a warm one.

Flour a work surface and scrape the dough out of the bowl, divide into 4 equal parts and shape them.

For each portion, start with the right side of the dough and pull it toward the center, then do the same with the left, then the top, then the bottom. (The order doesn't actually matter; what you want is four folds.) Shape each portion into a round and turn seam side down. Mold the dough into a neat circular mound. The mounds should not be sticky; if they are, dust with more flour.

If you don't intend to use the dough right away, wrap the balls individually in plastic and refrigerate for up to 3 days. Return to room temperature by leaving them out on the counter, covered in a damp cloth, for 2 to 3 hours before needed.

Leave a comment
Share
  • Pin it
  • Share
  • Tweet
  • Share
  • Email

Galette, Crostata or Tart

6 / 24 / 16

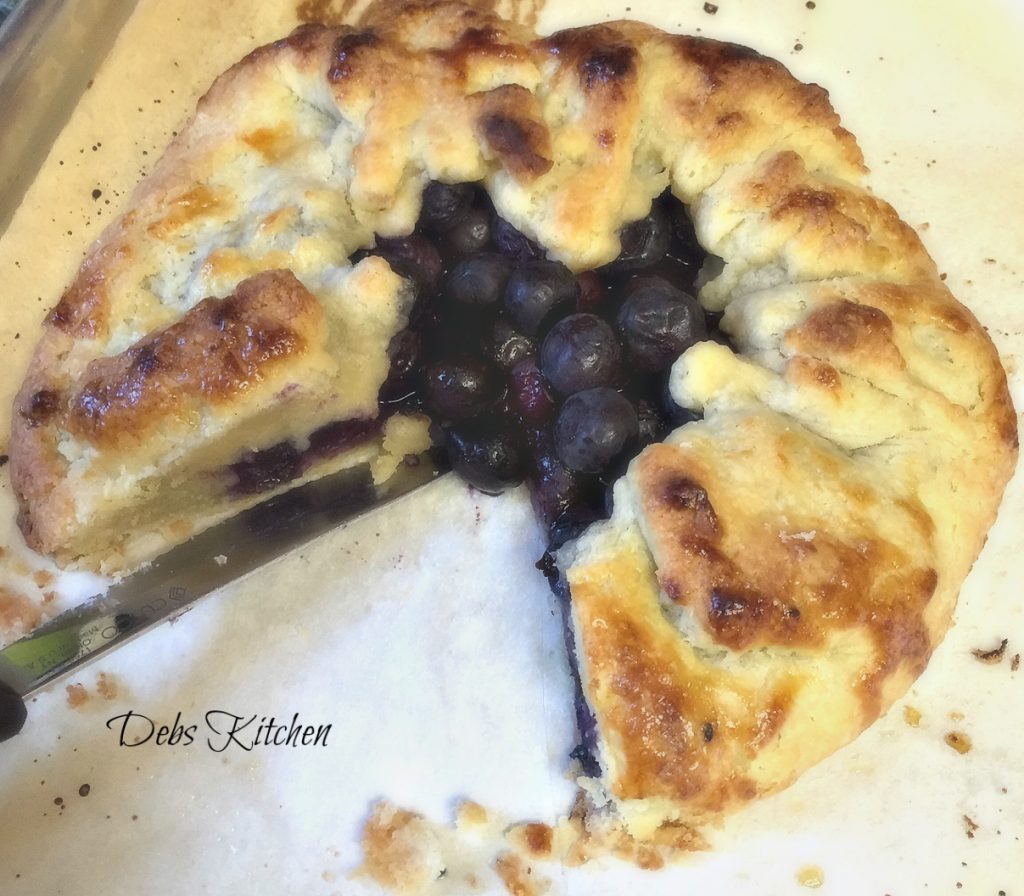
Galettes, Crostata and Tarts are similar in nature, they all can be sweet or savory and they all have a tasty butter crust. Really the only difference is Galettes (French) and Crostata’s (Italian) are free form on a baking sheet lined with a piece of parchment. A tart is always cooked inside a ring or a tart pan so the sides are nice and neat and usually scalloped. There, that’s it!

Galette marked

Whatever you call them this is the best time of year to make them with all the wonderful fresh fruit at the farmers market. You can use any kind of fruit which makes this recipe so versatile and the crust is easy to make. Make some dough ahead of time, wrap it well in plastic wrap and store in the freezer for up to 2 months, defrost overnight in the refrigerator. Please don’t buy frozen pie dough from the market, you’ll be disappointed in the finished product. Most of them have no butter in them which is what makes this crust so flaky and tasty. It’s easy to do in a food processor, try it this weekend.

Rustic Fruit Galette

Save
Print

Notes:
Flour can absorb water from the air so on hot dry days the flour may take more water to come together than on a humid day. Always fluff your flour by swiping a knife through it to lighten it, flour compacts as it sits. Unless you weigh your flour this is the best method to ensure you get an even product every time you bake.
The dough can be refrigerated up to 2 days or frozen up to 2 months.

  • 1 cup sugar, divided
  • 2 cups all-purpose flour
  • ¼ teaspoon. salt
  • 2 sticks cold butter, cut into small pieces
  • 4 tbsp. ice water
  • 1-1½ cups berries or any fruit mixture
  • 1 large egg yolk, lightly beaten with 1 tbsp. milk or cream

Place ½ cup of the sugar, all the flour and salt into the bowl of a food processor, pulse to mix briefly, add the butter and pulse until butter is the size of peas. Pour the mixture into a bowl and begin to add the ice water one tablespoon at a time until the dough comes together in a ball. Divide into two and form a disc, wrap tightly in plastic wrap or parchment and chill for 1 hour.

Cut any pieces of large fruit into pieces and mix together in a bowl with ½ the remaining sugar (1/4 cup). Refrigerate until ready to bake tarts.

Preheat the oven to 450°.

Line a baking sheet with parchment paper and set aside. Take the dough out of the refrigerator one disc at a time. Roll into a round ¼” thick on a rol mat or floured surface and place on the parchment, repeat with the other disc. Use as little flour as possible to roll out the dough.

Split the berry mixture into the center of each round leaving a 1 ½” border around the edge. Fold up the edges pleating or folding to cover most of the fruit. Brush the dough with the egg wash and sprinkle the remaining sugar over the dough.

Bake for 12 minutes or until the crust is lightly browned, cool and serve with ice cream or whipped cream.

Leave a comment
Share
  • Pin it
  • Share
  • Tweet
  • Share
  • Email

Tomato Confit

6 / 11 / 166 / 12 / 16

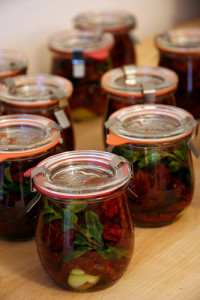
Is your garden overflowing with tomatoes? I always grow too many and one of my favorite ways to make them go a little farther is to oven dry them. Much like sun dried, these concentrated gems pack a powerful punch and can be used in any dish where you’d use tomatoes. Especially nice on a cheese plate with some creamy goat cheese nearby.

tomatoconfit-chez pim 2006


To preserve them I turn them into a tomato confit and keep in my ‘pantry’ refrigerator. They can’t be water bath canned because of the oil, but they will keep for about 6 months in the refrigerator, if they last that long. The refrigeration will also help to preserve the oil and keep it from going rancid quicker. Use only fresh organic herbs and make sure you wash and dry them very well, you don’t want any water going into your beautiful confit.

Mangia (Eat!)

Save
Print
  • 1 pound tomatoes, cut in half lengthwise
  • Sea salt and freshly ground black pepper
  • 1/4 cup olive oil, approximately
  • 1 tablespoon basil, chiffonade
  • 2 teaspoon fresh thyme
  • 1 clove garlic -- minced

Preheat the oven to 350°.

Arrange the tomato halves cut side up and close together on a baking sheet, season with salt and pepper.

In a bowl, combine olive oil, garlic, and herbs. Drizzle over tomatoes and bake until the tomatoes are soft and shriveled but still retain some moisture, 1-2 hours or more.

Let cool completely. Tomatoes can be stored in a glass jar, cover tomatoes with olive oil, add a fresh sprig of thyme, seal and refrigerate.

Photo: Chez Pim

Leave a comment
Share
  • Pin it
  • Share
  • Tweet
  • Share
  • Email

Summer Salads

6 / 29 / 156 / 29 / 15


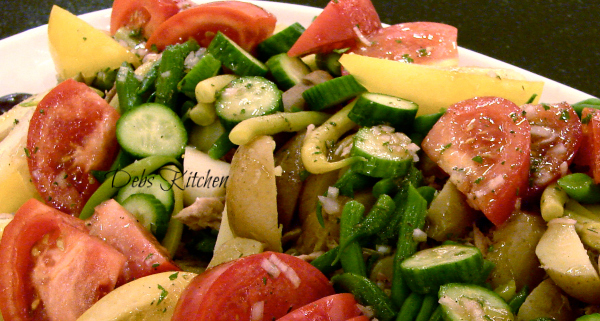
Summer Nicoise

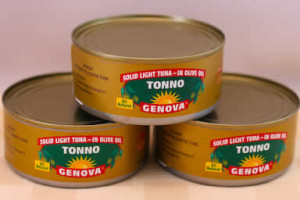
My summer pantry is usually a little lighter than my winter pantry as I use far more fresh ingredients, mostly from my kitchen garden. The French Nicoise Salad is one of my favorites and I like using whatever fresh veggies I find at the local farmers market or in my garden. As in most cases, the quality of ingredients that you use are directly reflected in the finished dish, therefore buy the best that you can afford. I use Italian tuna in olive oil; I love the Genova brand from Italy. Please don’t use all white tuna packed in water, as it has no flavor, better to leave it out. I drain most of the oil from the canned tuna, reserving it for use in making the salad dressing.

italiantuna_kalynskitchen

Another way to dress up the dish for a hot summer evening entree is to grill some fresh tuna or shrimp from your fishmonger. This recipe makes a beautifully plated salad for a buffet table but can be individually plated as well. Be creative and use what you have on hand.

Summer Nicoise Salad

Save
Print

This salad is great for adapting to whatever you find in your pantry and/or refrigerator. Left over vegetables from last night’s dinner work great; keep your pantry stocked with jars of olives, tuna, hearts of palm, baby corn or a myriad of other staples. Change the tuna; use bay shrimp, scallops, last nights chicken or steak. A great salad to stretch your creative talents!

  • Vinaigrette:
  • 1/4 cup red wine vinegar
  • 1 tablespoon Dijon mustard
  • 1 small shallot -- minced
  • 1 tablespoon Italian parsley -- chopped
  • Salt and pepper -- to taste
  • 3/4 cup olive oil, use drained oil from tuna and add more olive oil as needed
  • Salad:
  • 2 cans Italian tuna -- packed in olive oil, drained and flaked with a fork
  • Salt and pepper -- to taste
  • 1/4 pound haricot vert -- blanched, cooled and dried well
  • 4 new potatoes -- boiled
  • 2 medium plum tomatoes -- cut into quarters
  • 3 eggs, cooked~see recipe
  • 1/2 cup nicoise olives
  • 3 cups mixed baby greens

Make the vinaigrette:

In a large bowl make the vinaigrette by whisking together the vinegar and

Dijon mustard. Add shallot, parsley and salt and pepper. Drizzle olive oil, while whisking into vinegar mixture. Re-season if necessary.

Blanch the beans in boiling salted water, drain, and chill.

Cook the potatoes in salted water just until they are tender through, about 15 minutes. Drain. Peel them, if desired, as soon as they are cool enough to handle.

Hard boil eggs by covering eggs with cold water, bring to a boil, remove from heat, cover and time for 15 minutes, plunge into ice water and chill.

Drain tuna, leaving a small amount of oil clinging to fish, and reserving drained oil, flake tuna into a medium mixing bowl.

Toss mixed greens with enough vinaigrette to coat. Season with salt and pepper.

Plate salad by putting a mound of tuna in the center of the mixed greens and surround with remaining ingredients, drizzle a little dressing over vegetables and serve extra dressing on the side.

Save any remaining vinaigrette and store in glass jar, refrigerated for up to 4 weeks.

Related Posts Plugin for WordPress, Blogger...
Leave a comment
Share
  • Pin it
  • Share
  • Tweet
  • Share
  • Email

Posts navigation

Previous Page 1 2 3 Next Page
Deb

Meet Chef Debbi

READ BIO

Join-Us Sign up for our newsletter to receive exclusive tips 'n tricks, and special offers on classes, tours, and more!

Recent Posts

  • New E-Book!
  • From the Pantry
  • Spaghettini at Home
  • Growing Corn
  • Spring IS Coming!

Categories

BookCUT

What's in Your Pantry?

How to stock your pantry to create delicious dishes.

Learn Chef Debbi's pantry essentials and how to substitute ingredients for pantry staples in her basic recipes for quick and easy meals.
BUY BOOK>

FacebookTwitterInstagramGooglepinterest


© 2014, DEB'S KITCHEN
Angie Makes Feminine WordPress Themes