Grow a Second Crop of Green Beans
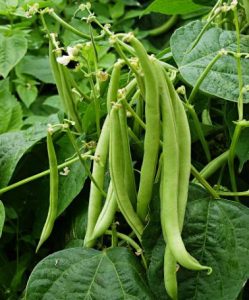
In Southern California we are lucky enough to grow a fall crop of beans. With warm days still ahead the beans will sprout and grow quickly. Bush beans are your best bet, with shorter days to harvest than pole beans you should be able to harvest in just 45-50 days. Check your seed packet for harvesting information.

There are three types of bush beans, snap beans (eat the pod & all), shelling beans (eat the beans inside the pod like peas) or dried beans. Dried beans you’ll want to leave on the plant until everything has dried up, pick the dried pods and put into a grocery bag. You can knock the bag around to remove the shell or pull the dried pod away from the beans. I like to freeze the beans for 24 hours to kill any pests that may have hitched a ride. Then store in a glass jar or other container in your pantry, away from heat and light. When you’re ready to use them, treat them like any other dried bean (that’s another story….)
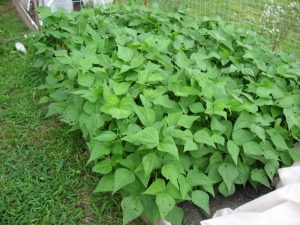
Most bush beans don’t need to be trellised, and they produce most of their crop all at once. For a great harvest and good use of space, plant Square Foot Gardening style, 9 plants to a square foot.

To get the best crop inoculate your bean seeds before planting. Beans, peas and all legumes ‘fix’ nitrogen into the soil. The inoculant, Rhizobium leguminosarum, is a nitrogen fixing bacteria. These bacteria “infect” the legumes growing in the soil and cause the legumes to form the nitrogen fixing nodules that make peas and beans bombshells.
You should be able to find the inoculant at any garden center or nursery. It can also be ordered from www.groworganic.com (Peaceful Valley Farm Supply).
While you are digging the holes for the seed, soak the seeds in water for about ½ hour. Dig your hole and sprinkle a generous helping of inoculant into the hole. Water and then plant your seeds. They’ll take up to 10 days to sprout, don’t overwater while you are waiting for them to poke up from the ground, overwatering can cause the seed to rot before it sprouts. Watch out for birds as well, they love seeds! I like to cover my bed with a floating row cover until the seeds are up and have several sets of leaves.
Give the plants 2 – 3” of water a week and you can side dress with a little compost. I mulch my beds with straw to help keep water evaporation down and to keep weeds from sprouting.
Plant companion plants near beans for the best growing bed, they like to grow near beets, cucumber, nasturtiums, peas and radish.
Watch for pests such as a cucumber beetle, bean beetle or weevil. I planted my beans near basil which is usually a good pest deterrent but this year those white butterflies (which are really cabbage moths) laid eggs on the basil and the little worms devoured my newly sprouted beans. So I planted a new round because I love green beans, especially in the fall. I freeze some for soups when winter comes and hopefully have enough until next spring when I can get some more in the ground.
Here’s an easy side dish recipe for you to try.

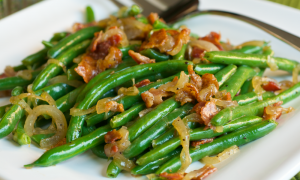
Green Beans with Smoked Bacon & Caramelized Shallots
Serves 6
* To blanch green beans: Fill a large bowl with ice and cold water leaving room for green beans. Bring a large saucepan full of water to a boil and add green beans and a good helping of salt, cook for 1-2 minutes, drain the beans and plunge them into the bowl of ice water. Let them cool, drain and dry well.
- 2 pounds haricots verts (thin green beans), trimmed, blanched and dried well*
- ½ pound applewood smoked bacon
- 3 large shallots, quartered
- 2 tablespoon olive oil
- 2 tablespoons red wine or balsamic vinegar
- Sea salt & freshly ground black pepper
Cook bacon until crisp. Remove with a slotted spoon, and drain on paper towels, reserving 2 Tbsp. drippings in skillet.
Add olive oil to the pan with the bacon drippings then add the quartered shallots and sauté until browned. Add the vinegar, stir well, then add the green beans and toss until coated with oil, cook for another minute then season with salt and pepper and toss with bacon, serve hot.
