Deb's Kitchen - Farm, Food, Wine & Lifestyle Adventures
  • Facebook
  • Google
  • Twitter
  • Instagram
  • Pinterest
  • Email
Menu
Skip to content
  • Home
  • Blog
  • Events
    • Classes
    • Tours & Adventures
  • Edible Gardening
  • Preserving
  • Recipes
    • Appetizers
    • Soups and Salads
    • Main Dishes
    • Side Dishes
    • Desserts
  • About
    • Whats In Your Pantry
    • Ask Debbi
    • Deb’s Kitchen Botanicals
    • Press
  • Contact

Tag Archives: appetizer

Artichoke Dip

3 / 5 / 153 / 28 / 15


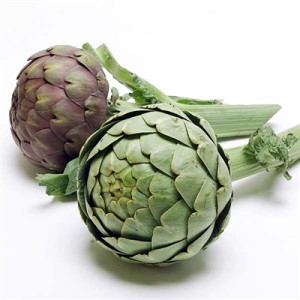
artichokes Melissas

Walt's Wharf Artichoke Dip

Save
Print

Adapted slightly from Walt’s Wharf recipe.

  • 1/4 cup sesame oil
  • 1/4 cup olive oil
  • 3 tablespoons local honey
  • 2 tablespoons lemon juice
  • 2 teaspoons sea salt
  • 4 tablespoons Lea & Perrins Worcestershire Sauce
  • 1 cup mayo

Mix all ingredients together until well blended. Taste for seasoning and adjust as necessary for your taste. Refrigerate until ready to use.


Chef Debbi

Leave a comment
Share
  • Pin it
  • Share
  • Tweet
  • Share
  • Email

Mushroom and Gruyere Puff Pastries

12 / 14 / 14

Mushroom-Herb-and-Gruyere-Cheese-Mini-Turnovers6-690x400


Mushroom and Gruyere Puff Triangles

Save
Print

A wonderful easy appetizer to make ahead and freeze individually, pull out cook as many as you need.

  • 1 tablespoon olive oil
  • 1 tablespoon butter
  • 2 cups finely chopped Cremini mushrooms
  • 1 onion, chopped finely
  • 1 teaspoon dried Italian herbs, crushed
  • Sea salt & fresh ground pepper to taste
  • 2 tablespoon flour
  • ½ cup heavy cream
  • 3 tablespoons dry white wine
  • 1/3 cup shredded Gruyere cheese
  • 2 sheets of puff pastry, thawed (12x12 inches)
  • 1 egg + 1 tablespoon water, whisked together

Serves: 32

Preheat your oven to 400°.

Line 2 baking sheets with parchment paper. Set aside.

Heat a medium sauté pan over medium high heat, add butter and olive oil, and add the onion and sauté until translucent. Add the mushrooms, herbs, sea salt and pepper and cook until the mushrooms are lightly browned and no liquid remains in the pan.

Stir in the flour and cook for 1 minute, add the wine and cream.

Remove from the heat, and stir in the Gruyere cheese. Chill.

Place a rolling mat on your counter, or a large piece of parchment paper. Add a little flour and lightly roll out the puff pasty, cut into 16 pieces using a pizza cutter or knife.

You should keep the puff pastry as cold as possible, if it starts to stick or becomes doughy, return it to the refrigerator for about 10 min. Keep the second piece of puff pastry in the refrigerator while you work on the first one.

Scoop about 1 t tablespoon of the cold mushroom mixture into the center of the dough (do not overfill or they will leak). Fold the over in a triangle and, using a fork, press the edges together to seal them.

Place the mini turnovers onto your prepared baking sheet, at least 1 inch apart. Place in the refrigerator for 20 minutes and prepare the second batch. Refrigerate the second batch for 20 minutes for best results.

Brush the sealed edges and tops of the turnovers with the egg mixture.

Bake each tray for about 15 minutes, or until the tops are golden brown.

Adapted from Jo-Anna, A Pretty Life in the Suburbs, courtesy of Kendall Jackson

Leave a comment
Share
  • Pin it
  • Share
  • Tweet
  • Share
  • Email

Artichoke and Leek Filo Cups

12 / 5 / 1412 / 6 / 14

Spinch-Phyllo-Cups-Photo-by-Phyllo


Artichoke and Leek Filo Cups

Save
Print

*The filling can be prepared a day in advance and kept refrigerated until ready to use. Assemble hors d’oeuvres up to one hour ahead of time and keep refrigerated.

  • 1 jar marinated artichoke hearts, drained well (about 3 oz)
  • 1 package chopped leeks (or 1 lg. stalk chopped fine)
  • 1 clove garlic, peeled
  • 1 tablespoons fresh lemon juice
  • 1/2 cup mayonnaise
  • 1/4 cup sour cream
  • ½ cup freshly grated Parmesan cheese
  • 2 tablespoons finely chopped fresh chives
  • filo cups, can be found in the freezer section near the puff pastry

Preheat oven to 350ºF. Line baking sheet with parchment; set aside.

In a food processor fitted with metal blade, combine artichoke hearts, leeks, garlic cloves and lemon juice. Pulse several times or until ingredients are finely chopped. Add mayonnaise and sour cream; process until well combined, stir in Parmesan cheese and chives.

Fill each mini filo shell with filling and place on prepared baking sheet. Bake in preheated oven until heated through and golden brown, about 30 minutes.

Serve immediately.

Leave a comment
Share
  • Pin it
  • Share
  • Tweet
  • Share
  • Email

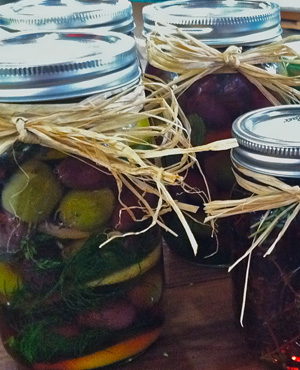
Marinated Olives

12 / 5 / 1412 / 6 / 14

Olives-Fair 2011

Marinated Olives

Save
Print

There are a million ways to adapt this recipe to your liking. Marinate the
olives for at least 24 hours and serve at room temperature. Try different
herbs, spices, fruit zest and vinegar. Look to see what’s in your pantry.
This is great served with a little Baked Goat Cheese and a baguette.

  • 1 lb. mixed olives, not pitted
  • 1 lemon rind, cut from the lemon without removing the white pith beneath the skin
  • 1 tablespoon mixed dried Italian herbs, crushed
  • pinch of salt and pepper
  • 1 clove garlic, minced
  • ¼ cup Zinfandel vinegar
  • 1 cup (or more) lemon flavored olive oil or use an extra virgin olive oil

Place the olives into a jar so they fit snug.

Chop the lemon rind into fine strips, mix with remaining ingredients and pour over the olives to cover. Add a little more oil if it doesn’t quite cover the olives. Place the lid on the jar and refrigerate overnight.

You can store these olives for several days in the refrigerator but serve at room temperature

Leave a comment
Share
  • Pin it
  • Share
  • Tweet
  • Share
  • Email

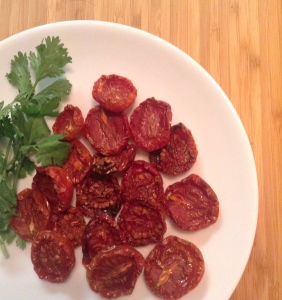
Oven Roasted Tomatoes

8 / 19 / 1412 / 3 / 14

IMG_0481


Store these tomatoes in a jar covered with olive oil, use a lemon olive oil if desired. For a quick appetizer see below.


1         pound Roma tomatoes, halved lengthwise

Sea salt and freshly ground black pepper

¼       cup olive oil

1         tablespoon basil, chiffonade

1          teaspoon thyme

1         clove garlic, minced

Preheat the oven to 350∫F. Arrange the tomato halves cut side up and close together on a baking sheet. Season with salt and pepper.

In a bowl, combine olive oil, garlic, and herb. Drizzle over tomatoes and bake until the tomatoes are soft and shriveled but still retain some moisture, about one hour.

Let cool completely. Tomatoes can be stored in a glass jar, cover tomatoes with olive oil, seal and refrigerate.

For sauce: Process in a food processor and warm in a large saute pan.


For a quick appetizer, stuff roasted tomato halves with the following.

Mix together 1 log of goat cheese, 2 Tb. fresh chopped herbs and 1 -2 Tb. of heavy cream.

Mix until goat cheese is soft but not runny.

Spoon or pipe herbed goat cheese onto dried tomato, serve with a drizzle of aged balsamic vinegar.

Leave a comment
Share
  • Pin it
  • Share
  • Tweet
  • Share
  • Email

Holtz Avocado Ranch

6 / 25 / 1412 / 3 / 14

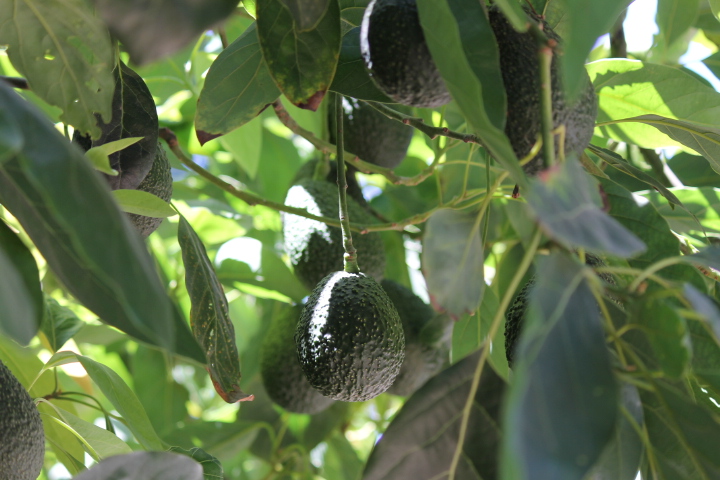
California Avocados

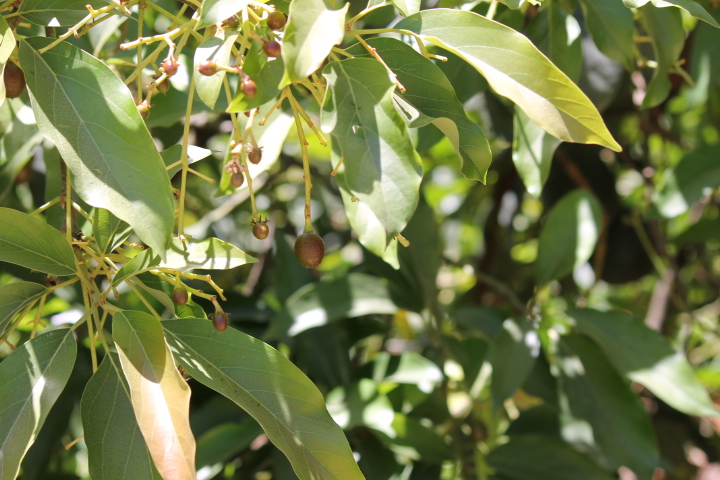
hanging bunch

I have a love affair with California avocados, ever since I was a little girl, I could never get enough. My grandmother used to feed us mashed avocado on toast with a little salt and pepper every day during the season and it is still my favorite for breakfast! Or even a little snack.

Grove

A couple of weeks ago I went to visit an avocado farm, but not just any farm, Holtz Family Avocado Farm in Escondido. Their forest of avocado trees is just so beautiful; it’s so inspiring just to walk the grove. Growing these avocados is a three-year process from budding the growth to blooming and then a year for the fruit to ripen. You can see the baby avocados, which will be ready for next years harvest, hanging on a tree right next to the avocados that are being picked for this years harvest. Avocados like to grow up in the light and when the trees get too tall it can be dangerous picking but the farm hands are experienced and work with the family year round.

IMG_2613

The Holtz family grow mostly Hass avocados but some Reeds as well and they have a unique way of getting great avocados directly to you, they pick them at the perfect time and then ship them to you in their specially designed boxes. All avocados are hand picked and shipped the same day; the ripening comes on your end with easy step by step instructions that are enclosed in your ‘Hand Grown in California’ avocado box. Simple, easy and delicious California avocados can be ordered from their website, California Avocados Direct.
And for inspiration on recipes, stories and life on an avocado ranch visit Mimi’s blog at Mimi Avocado; tell her Chef Debbi sent you!

Use California avocados in Chef Debbi’s Gazpacho recipe! Gazpacho recipe here.

IMG_2571


2 Comments
Share
  • Pin it
  • Share
  • Tweet
  • Share
  • Email

Gazpacho with Avocado

6 / 25 / 1412 / 3 / 14

gazpacho-shooters

Gazpacho

Serves 2-4

1 small red onion
2 small cucumbers
2 ribs celery
1 small jalapeno, optional
1 roasted red bell pepper
6 medium tomatoes
1 cup French bread, cut into cubes and soaked in a little water
1/4 cup red wine vinegar
1/4 cup olive oil
Sea salt and freshly ground pepper
1 lemon, zested
1 Tablespoon lemon juice, to taste
1 teaspoon Worcestershire sauce
½ Hass avocado, chopped

Rough chop the vegetables and add to a blender, for a chunkier texture process in a food processor instead of a blender.

Squeeze the water from the French bread cubes and add to a blender along with the vegetables. Add olive oil and vinegar and blend to a puree. Season with salt, pepper (if needed), lemon juice, zest and Worcestershire sauce. Refrigerate over night for best flavor.

To serve, check for seasoning again before pouring into a bowl. Garnish the top of the soup with the chopped avocado.

Goes very well with a nicely toasted slice of cheesy garlic bread.


2 Comments
Share
  • Pin it
  • Share
  • Tweet
  • Share
  • Email

Potato and Ham Quiche

2 / 22 / 14

Ingredients

Crust

1 1⁄4 cups flour

1 teaspoon salt

1 stick butter, cut into pieces

2 – 3 tablespoons ice water

Filling

1⁄4 cup finely diced ham

2 -3 Yukon Gold potatoes

1 1⁄2 cup shredded cheese, such as Chedderella

4 large eggs

1 1⁄2 cups heavy cream or half and half

1 – 2 tablespoons olive oil

Salt and pepper

Preparation

Crust

Add flour and salt into the bowl of a food processor; pulse a few times to incorporate all the ingredients.

Add the butter and process until the mixture is crumbly and the butter is pea size.

Place the mixture into a wide bowl and add water 1 tablespoon at a time until the mixture comes together. Don’t overwork the dough or it will be tough, not flaky. Once the dough comes together in a ball, divide it into two pieces, flatten into disks, wrap in plastic wrap and refrigerate for 30 minutes. Preheat oven to 400° while the dough is chilling.

Dough can be wrapped well at this point and frozen for up to three months. Let the dough defrost overnight in the refrigerator before using.

Roll one chilled disk out on a floured counter or rolling mat, lifting and moving the dough every few rolls to help prevent sticking. Add only enough flour to the counter to keep the dough from sticking.

Cut a piece of parchment paper to fit the bottom of the tart pan.

Place your pan on top of the dough to make sure it is the correct size, it should be slightly larger than the pan, then roll the dough onto your rolling pin and unroll over your pan. Gently lift and lay the dough to fit the pan, never pull the dough to stretch it.

Lightly press the dough into the pan, roll your rolling pin over the top edge of the tart or pie pan and remove excess pastry. Prick the dough well with a fork.

Cut a piece of foil a little larger than the tart pan, butter the shiny side and place butter side down onto the dough. Press so the foil lays against the dough snugly, add another piece of foil if it doesn’t cover the entire crust.

Bake the crust for 20 minutes, remove beans and foil, bake another 5 minutes. Remove from oven and cool before filling. (Leave oven on).

Filling

Boil potatoes until knife tender (when a knife can slip into the potato effortlessly with a little resistance). Drain and let cool until you’re able to handle them. Slice into disks or chop into a medium dice.

Heat a medium sauté pan, add oil until it covers the bottom of the pan, add potatoes and season with a pinch of salt and grind of pepper. Sauté potatoes until lightly browned, add ham and cook for about 2 minutes or until browned. Add potato mixture to the bottom of the cooled crust. Add cheese on top of the potato mixture.

Whisk together the eggs and cream, add a little seasoning of salt and pepper, pour over potato and cheese mixture, bake for 30 minutes or until puffed and lightly browned.

Let cool before serving.

Leave a comment
Share
  • Pin it
  • Share
  • Tweet
  • Share
  • Email

Potatoes, Onions and Tomatoes – Plant Stand

2 / 21 / 14


Grow Your Own

Potatoes, Onions, Tomatoes!


  Sat. Feb 22nd
Free ~ 10 a.m. 
Onion Flower
Join us for a little conversation and a tasty treat!
The Plant Stand
2972-A Century Place
Costa Mesa, California 92626-4324
Toll Free: (800) 698-1077
Local: (714) 966-0797  


Leave a comment
Share
  • Pin it
  • Share
  • Tweet
  • Share
  • Email

Giardiniera or Pickled Vegetables

11 / 11 / 1312 / 5 / 14

Giardinaria

Save
Print

When I was growing up, if I was lucky enough, once in awhile we’d dine at a fine dining restaurant. They always served a relish tray when the guests were seated, it was to stimulate your taste buds and make you hungry. I miss having those relish trays but once I learned how to make pickled vegetables myself, so easy!, I keep them in the refrigerator almost year round. The vegetables change with the seasons; they can be eaten alone, with cheese and crackers or chopped finely to make a wonderful relish for all kinds of meats. Be creative!

  • 2 pounds, approximately mixed vegetables, whole or cut into pieces
  • 2 cups cider vinegar
  • 1 cup white vinegar
  • 1/2 cup water
  • 1/2 tablespoon pickling salt
  • 1 tablespoons sugar, if desired
  • 2 tablespoon pickling spice

Makes 2 - 3 quarts

Wash and drain vegetables. Sterilize jars and lids in hot water.

Bring vinegar, water, salt, sugar and pickling spice to a boil.

Pack vegetable medley into hot, sterilized jars, leaving 1/2-inch headspace. Pour hot solution over mix in jars, leaving 1/4-inch headspace. Remove air bubbles. Add liquid to bring headspace to 1/4 inch. Wipe jar rims.

Refrigerate and let stand 2 days before serving. Will last several weeks refrigerated.

For longer storage, process in boiling water bath for 20 minutes.*

*Follow jar manufacturers directions for filling and processing jars.

Related Posts Plugin for WordPress, Blogger...
2 Comments
Share
  • Pin it
  • Share
  • Tweet
  • Share
  • Email

Posts navigation

Previous Page 1 2 3 4 5
Deb

Meet Chef Debbi

READ BIO

Join-Us Sign up for our newsletter to receive exclusive tips 'n tricks, and special offers on classes, tours, and more!

Recent Posts

  • New E-Book!
  • From the Pantry
  • Spaghettini at Home
  • Growing Corn
  • Spring IS Coming!

Categories

BookCUT

What's in Your Pantry?

How to stock your pantry to create delicious dishes.

Learn Chef Debbi's pantry essentials and how to substitute ingredients for pantry staples in her basic recipes for quick and easy meals.
BUY BOOK>

FacebookTwitterInstagramGooglepinterest


© 2014, DEB'S KITCHEN
Angie Makes Feminine WordPress Themes